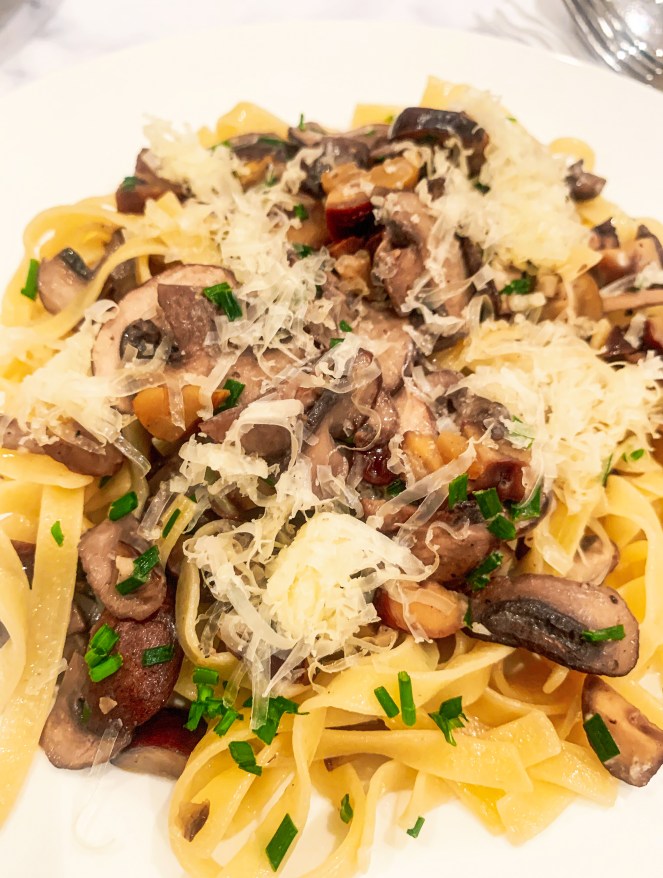
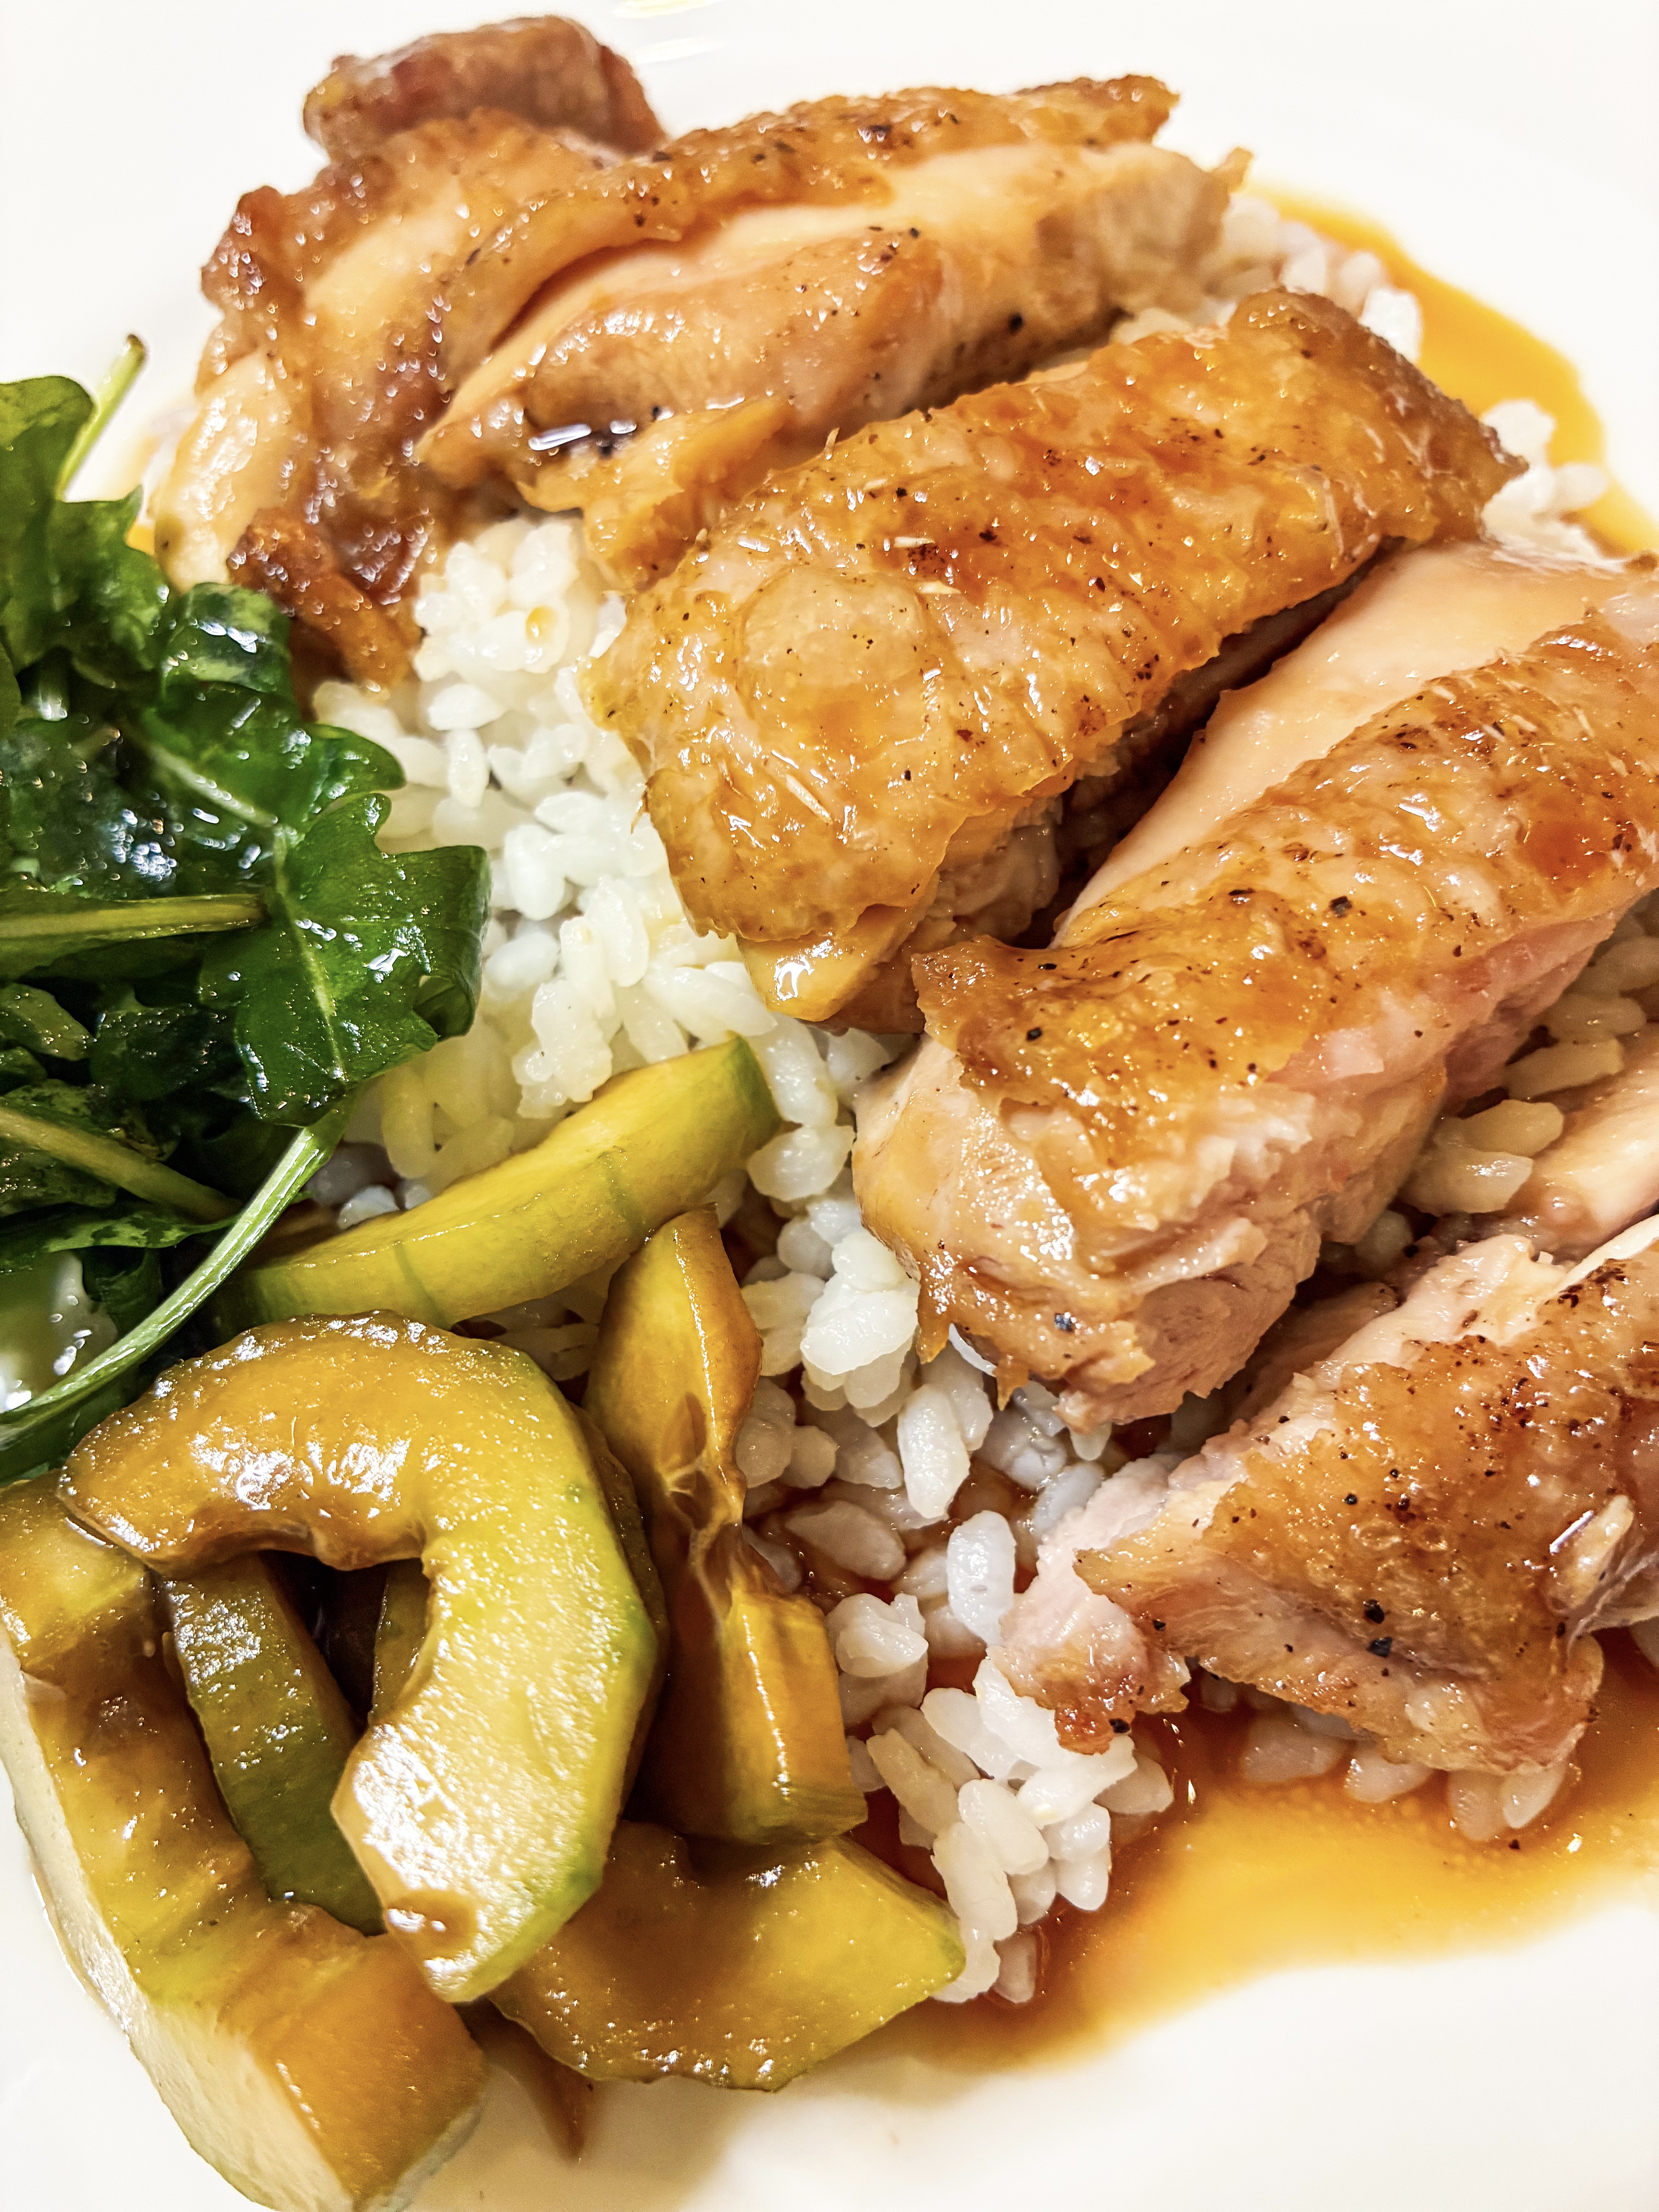
I’m looking forward to a ‘foodie’ adventure at the end of this month. I’m going to Japan. This is a destination which has been on my bucket list for years, so I’m extremely excited to be going there. For me, travelling goes hand in hand with food. Whether I’m going away in the UK or further afield, one of the first things I do after booking a trip is to research the restaurant scene. When time is of the essence, there is nothing worse than wasting a precious hour or two eating in a miserable restaurant that lacks both flavour and atmosphere. Therefore, I’ve been spending a lot of time researching restaurants in Japan. The choice is phenomenal; sushi, ramen, yakitori, katsu, shabu-shabu, gyu-don, onigiri, okonomiyaki… and the list goes on… and on. I’m not going to lie, whilst feeling very excited, I’m a little apprehensive; just recently, I visited Morocco, where I picked up ‘travellers tummy’, so that rather dampened my appetite for adventure! I’m hoping, though, that I’ll return from my trip both healthy and inspired to cook more Japanese dishes at home. To date, I haven’t had much success with the recipes from the few Japanese cookbooks I own. However, I have found that one can’t go wrong with Teriyaki dishes, so this month, in celebration of my Japanese adventure, I’m sharing a classic recipe for ‘Teriyaki Chicken’. It’s a fool-proof recipe that I often cook at home and one that is instantly gratifying with its sweet, salty flavour. I like to serve it with ‘Cucumber Pickle’ and ‘Rocket & Radish Salad with Japanese Dressing’. These two side dishes are recipes that I posted a few years back when I shared a different Terikayi recipe, which was for salmon (recipe here).
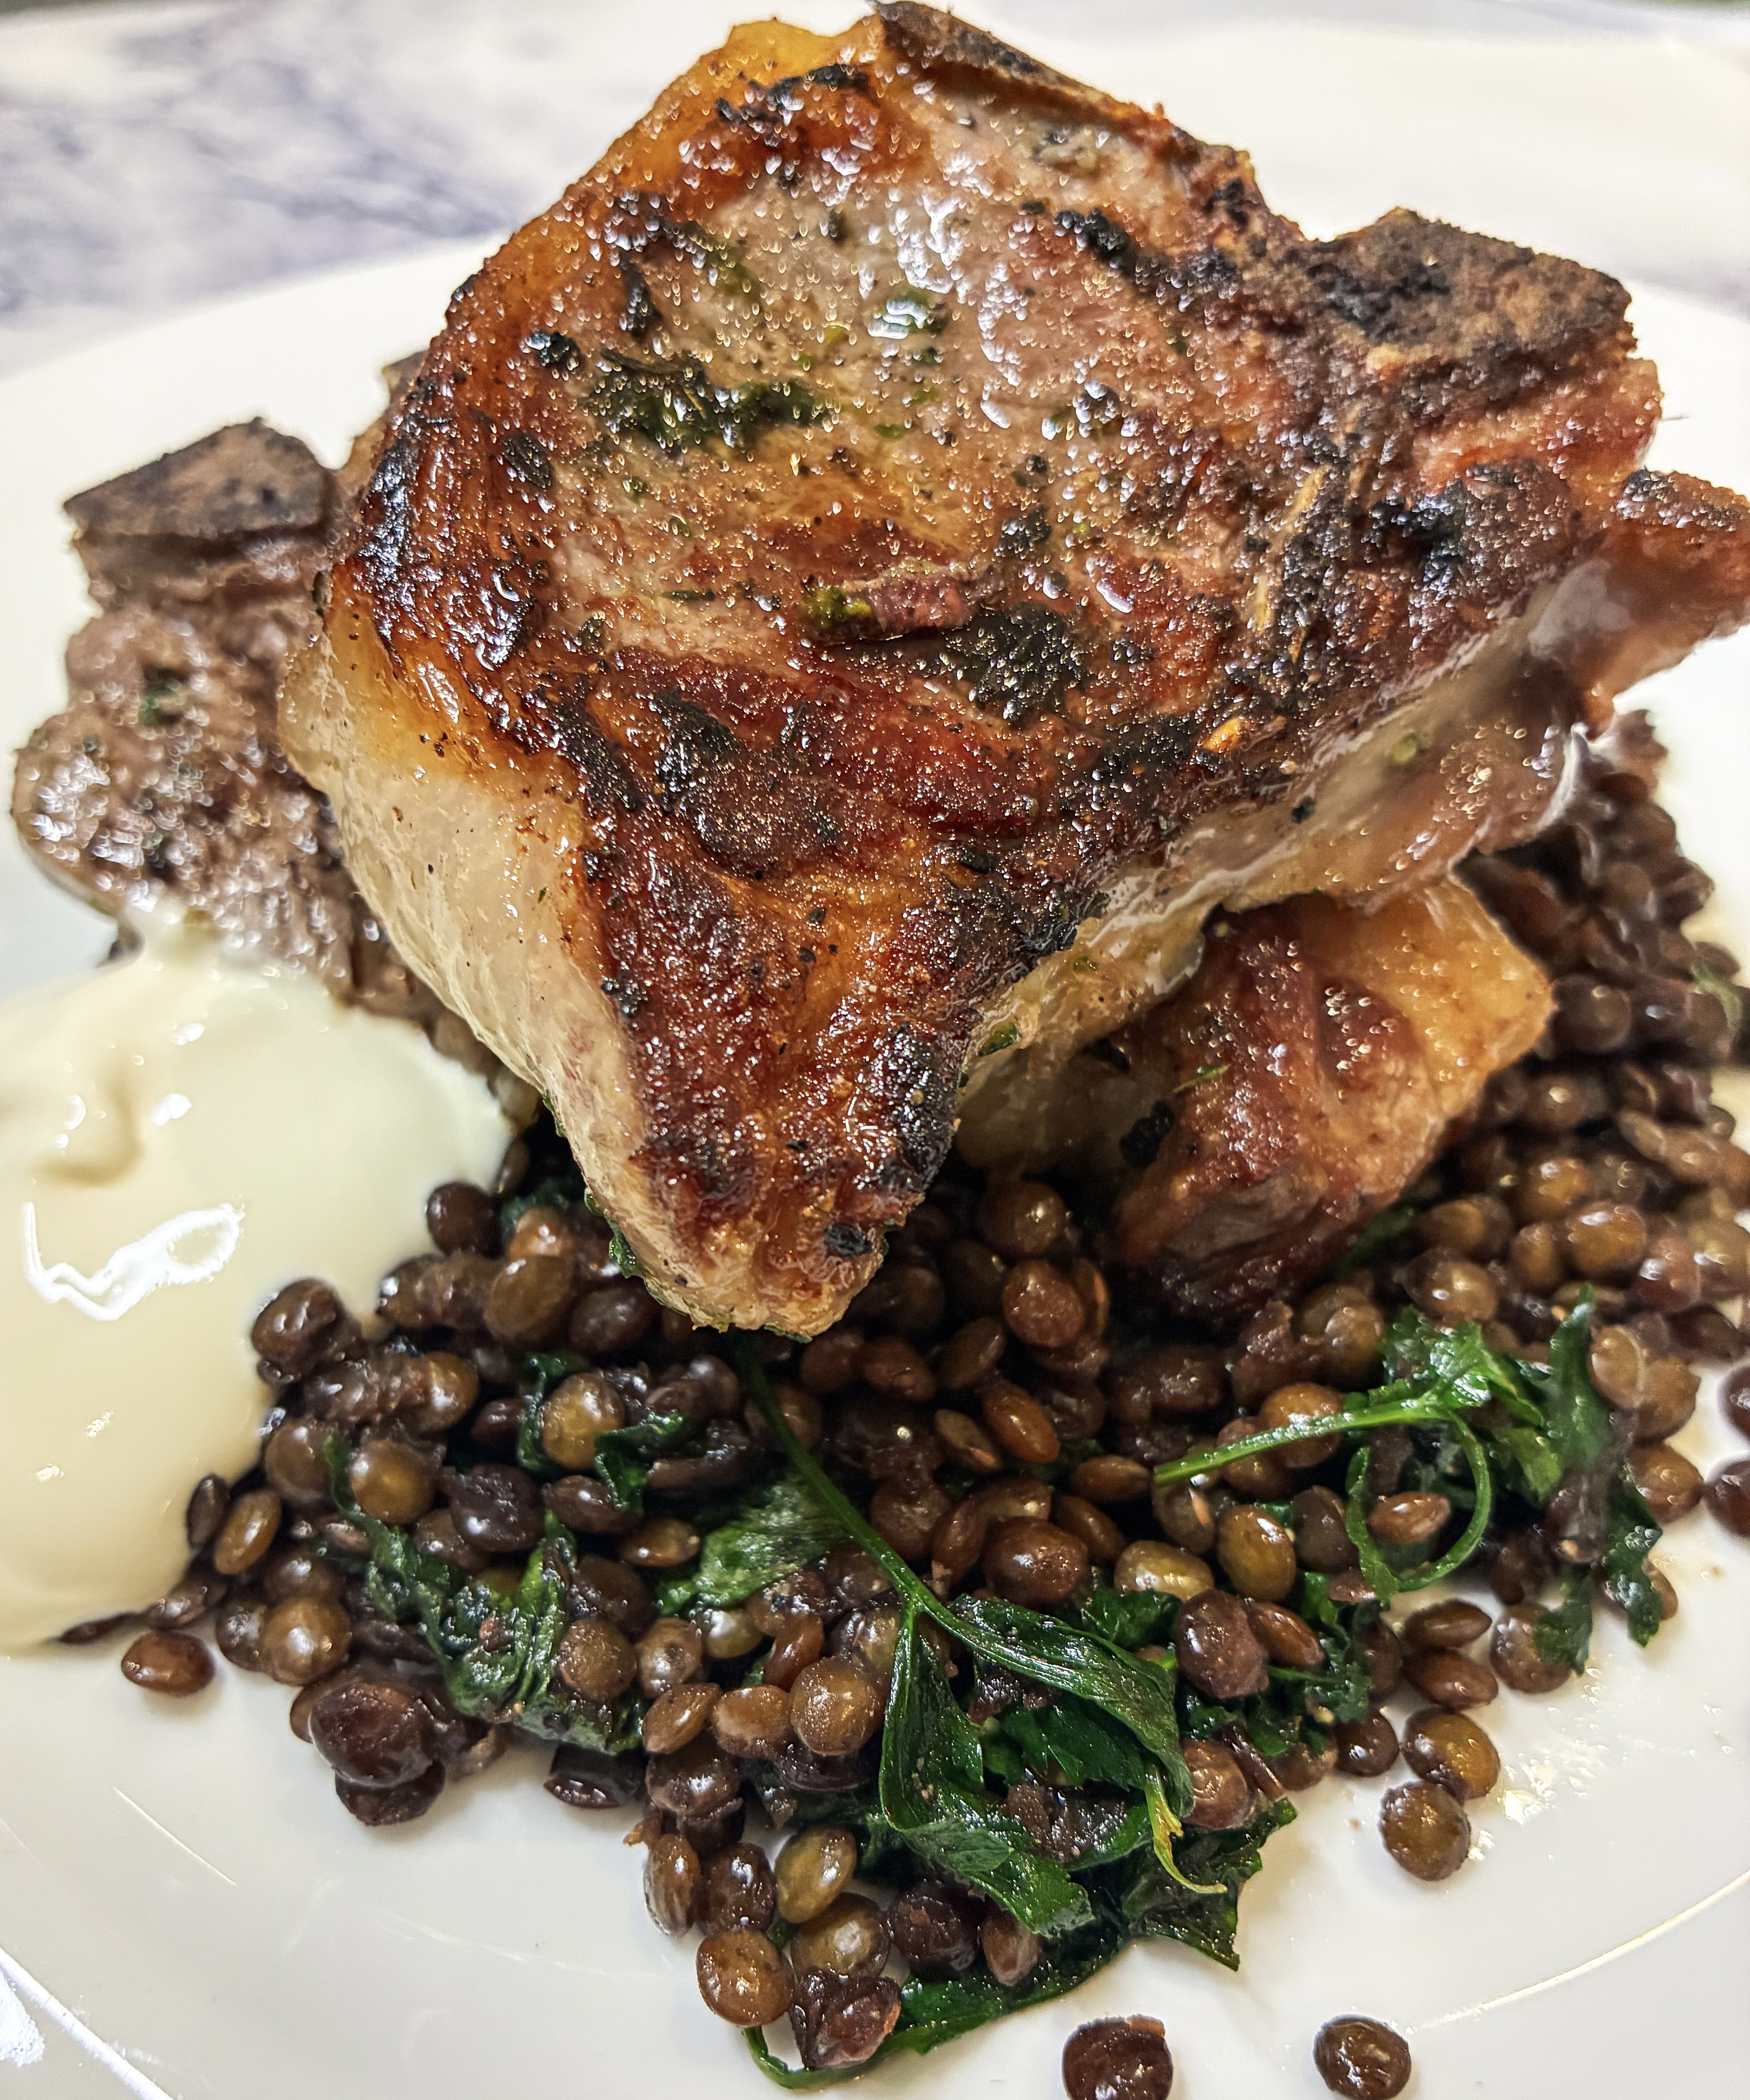
Whilst Menu One, ‘Teriyaki Chicken’, is a classic Japanese recipe, this month’s Menu Two has roots closer to home. ‘Lamb Chops with Balsamic Puy Lentils, Herbs & Crème Fraiche’ is a great recipe to have at hand when the new spring lamb enters our butchers in April, but to be honest, it’s a recipe that’s tasty whatever the month. I found it in one of Jamie Oliver’s older cookbooks, ‘Jamie’s Kitchen’; the balsamic lentils are a game-changer!
Hopefully you’ll be inspired to try these recipes. See you next week for my Tuesday Treat!..
Menu One
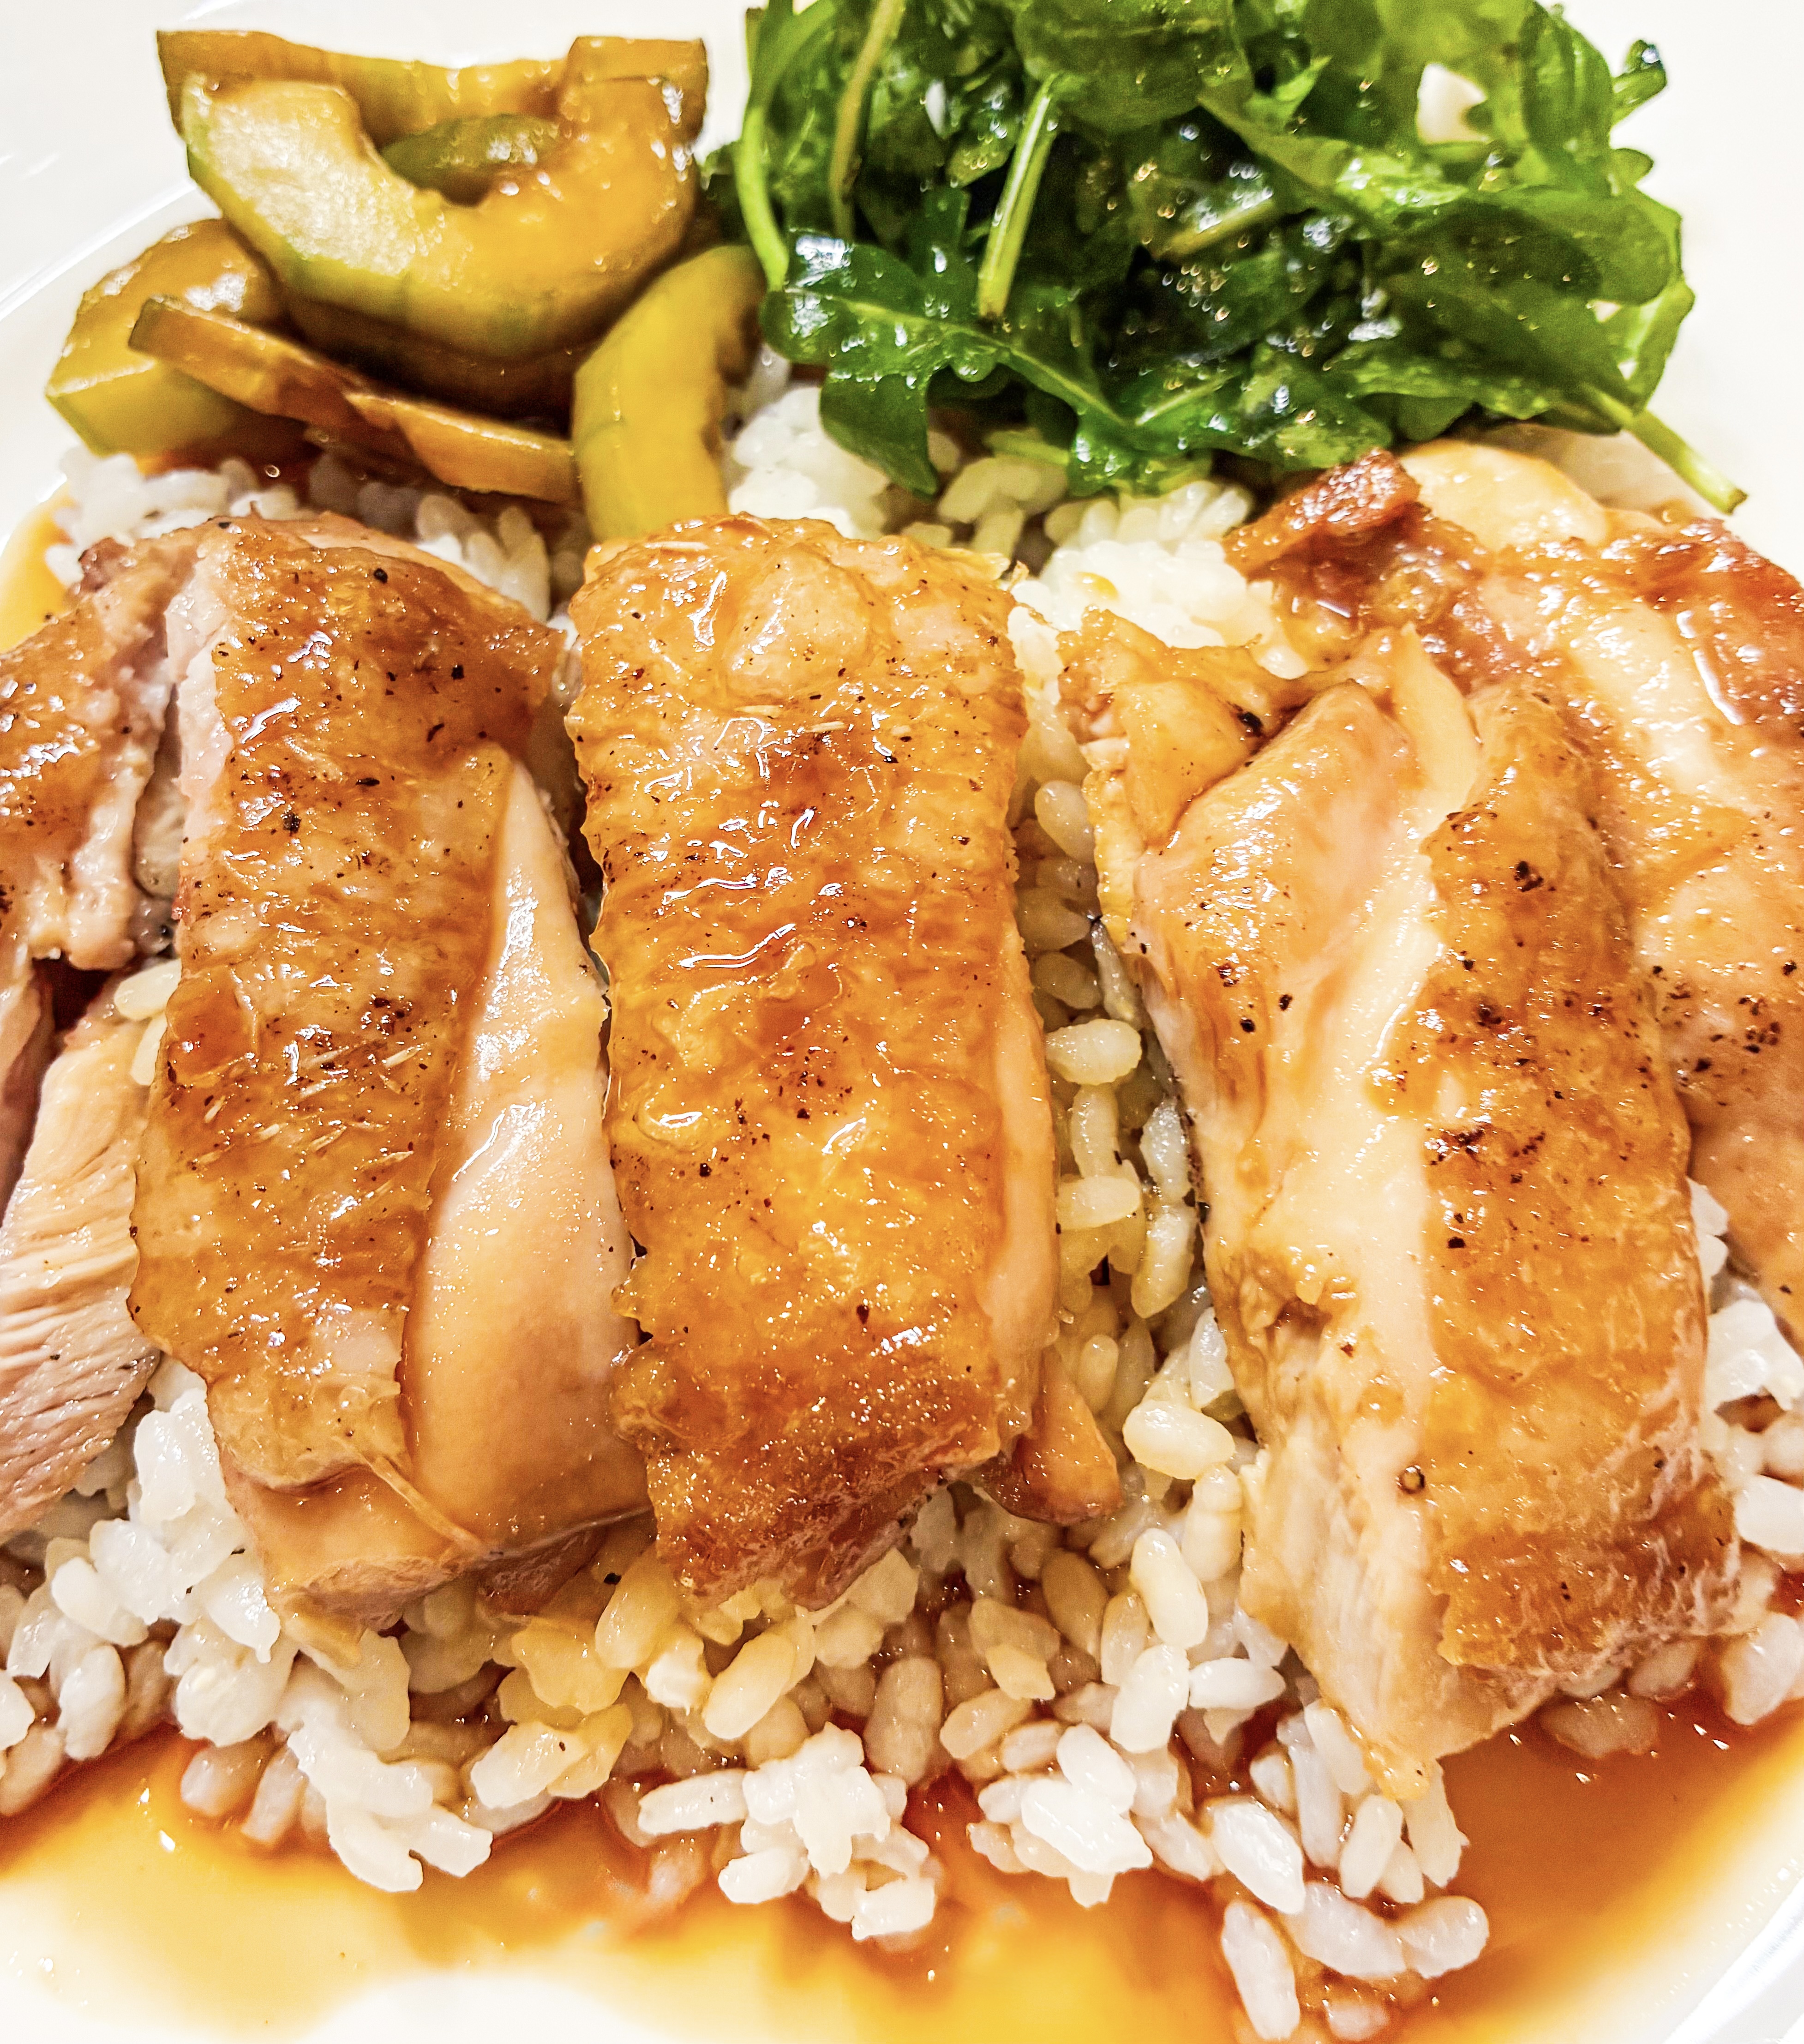
Chicken Teriyaki (Serves 4)
This is a wonderfully quick and easy supper dish. And extremely tasty! Serve with ‘Cucumber Pickle’ and ‘Rocket & Radish Salad’ (recipes below) plus some sticky rice. I particularly like it with skin-on chicken thighs; the skin keeps the meat juicy and helps the delicious sauce adhere to the chicken. However, if you prefer, you can use skinless thighs.
4 large boneless, skin-on chicken thighs
Sea salt and black pepper
Groundnut oil
For the Teriyaki sauce:
8 tablespoons soy sauce (gluten-free if required0
8 tablespoons mirin
8 tablespoons sake
4 tablespoons caster sugar
- First of all, make the sauce. Put all the ingredients in a small saucepan and gently heat until the sauce is hot and the sugar is dissolved. Set aside.
- Place the chicken thighs on a chopping board, skin side down. Now, gently cut slits into the meat, without slicing all the way through, by doing this you can flatten the meat with your hands so that the thighs are an even thickness. Lightly season the meat with salt and pepper.
- Heat a large frying pan over a medium-high heat and add a little groundnut oil. When the oil is hot add the chicken thighs, skin side down. Cook for 5 minutes, then press down the chicken with a spatula for 5-10 seconds to give the skin a nice sear. Then flip the chicken over and immediately, again, press down with the spatula for 5-10 seconds.
- Turn the heat to low, then cover the pan with a lid and steam the chicken for 3 minutes.
- Remove the lid and use a paper towel to wipe up the excess grease from the pan (this helps create a cleaner, transparent sauce).
- Now, increase the heat to medium and add the sauce. Tilt the pan and spoon the sauce over the chicken, continuing until the chicken is well coated and cooked through.
- Remove the chicken from the pan and continue to cook the sauce until it’s thick enough to your liking.
- Slice the chicken into slices (if you like, you can use a blow-torch to give a crispier sear to the skin).
- Serve on a plate, drizzled with the Teriyaki sauce.
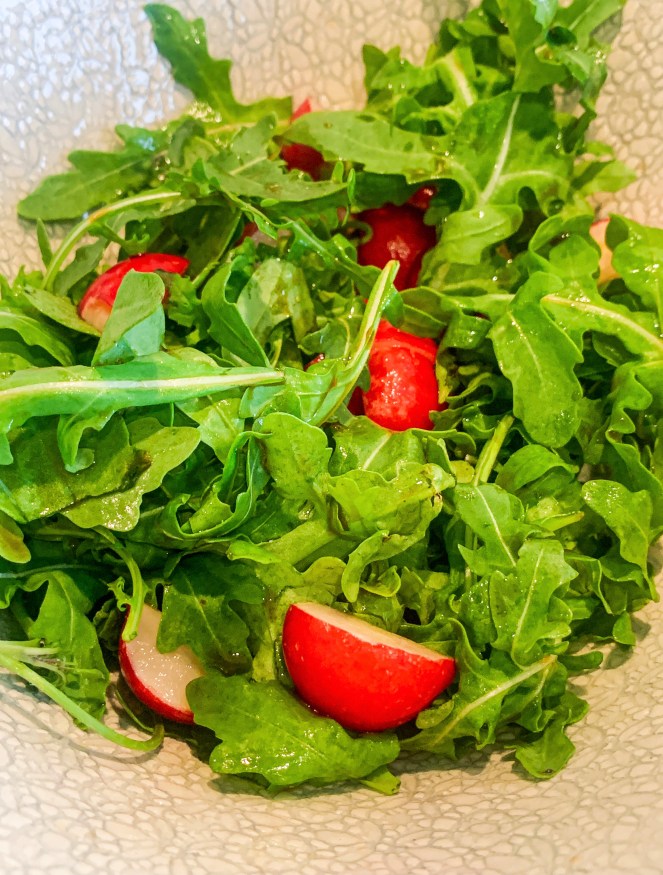
Rocket & Radish Salad with Japanese Dressing
100g rocket
150g radishes, halved
1 tablespoon rice vinegar
1 tablespoon soy sauce (gluten free if required)
1 tablespoon toasted sesame oil
- Place the rocket and radishes in a serving bowl.
- Whisk the rice vinegar, soy sauce and toasted sesame oil together and, just before serving, pour over the salad and toss to combine.
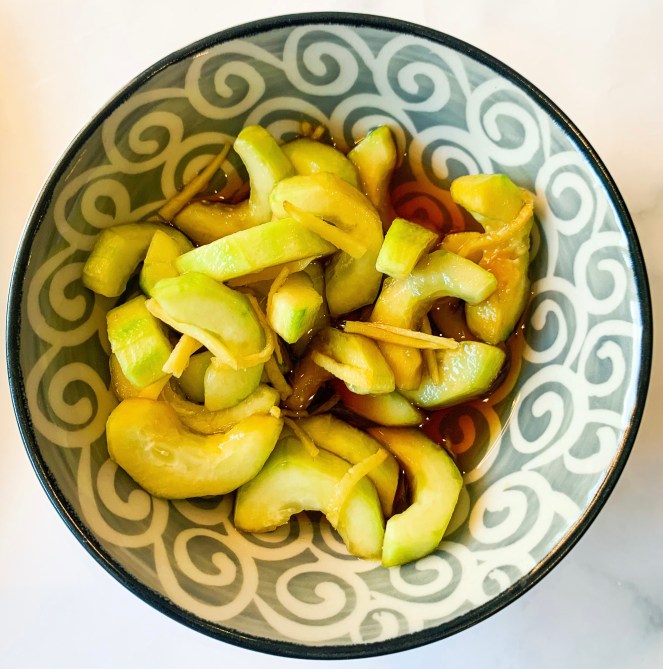
Cucumber Pickle
1 cucumber, peeled, halved and seeds scraped out
2 tablespoons soy sauce (gluten free if required)
2 tablespoons rice vinegar
1-2 teaspoons sugar
3cm knob ginger, peeled and cut into thin matchsticks
Sea salt
- Slice the cucumber into half-moon slices, toss together with a large pinch of salt.
- Mix the other ingredients together and add the cucumber. Leave to marinate for half an hour before serving.
Menu Two
Pan-Fried Lamb Chops with Balsamic Puy Lentils, Herbs and Crème Fraiche (Serves 4)
This is a Jamie Oliver recipe from one of his older cookbooks, ‘Jamie’s Kitchen’. It’s’ loaded’ (as Jamie would say!) with flavour; the balsamic vinegar offers a subtle sweetness rather than overpowering the dish.
150g Puy lentils
1 small handful of fresh thyme leaves, picked
1 clove of garlic, peeled and finely sliced
Extra virgin olive oil
12 lamb chops
Sea salt and black pepper
4 tablespoons balsamic vinegar
1 handful of fresh parsley, leaves picked
1 handful of fresh basil, leaves picked
4 tablespoons crème fraiche
- First of all, put the lentils in a saucepan, then cover with water. Bring to the boil and cook gently for around 25-30 minutes (or according to the packet instructions), until the lentils are tender but still holding their shape. Drain and set aside.
- Bash up the thyme and garlic in a pestle and mortar. Add a good glug of olive oil and then rub this over both sides of the lamb chops. Season with salt and pepper, then place them between two pieces of cling film and use the bottom of a small saucepan to flatten them out to about 1 cm thick.
- Heat a frying pan, add a couple of tablespoons of olive oil and fry the chops for about 2 minutes on each side (depending on thickness), until golden. When the chops are cooked to your liking, remove them to a plate and rest whilst finishing the lentils
- Wipe the pan to remove any fat. Add the balsamic vinegar, bring to the boil, scraping up all the goodness from the bottom of the pan. Add the lentils, parsley and basil. Heat through until the herbs have wilted. Season to taste with salt and pepper and a drizzle of extra virgin olive oil.
- Divide the lentils between 4 plates and place the lamb on top, with any resting juices poured on top. Serve with a dollop of crème fraiche.