
(All Recipes have Gluten-Free Options)
Coffee Semifreddo with Salted Caramel Pistachios
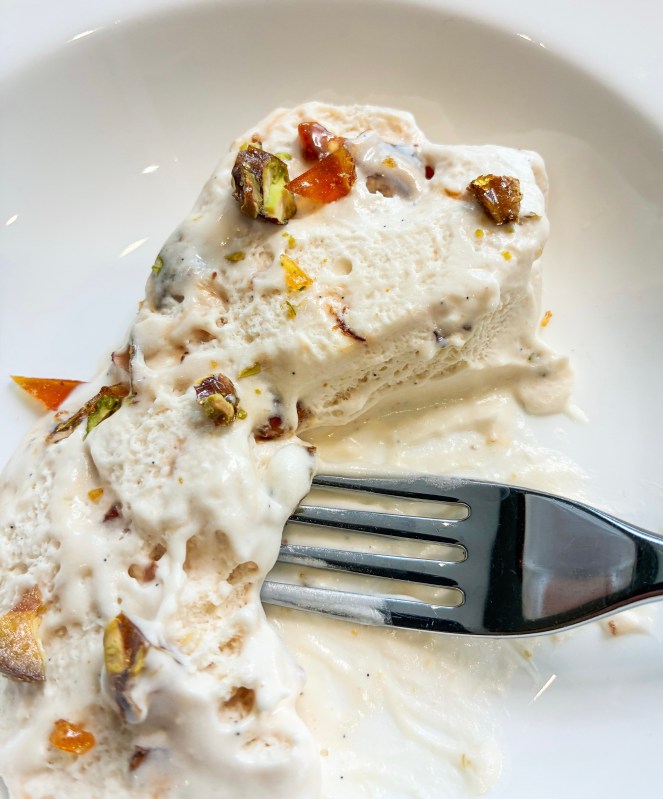
This is one of those recipes which you will want to make time and time again. Not only is it delicious, but it’s super easy to make (despite the long recipe!), plus you can store it in the freezer for a ‘sweet-boost’ after a long day! I adore the caramelised pistachios; I usually double the quantity, so I have one portion to mix into the semifreddo and another for sprinkling over. They’re also great as a sweet treat with an espresso!
For the caramelised pistachios:
*(if you like, double quantities for sprinkling or snacking(!) – see note above)
100g pistachios (shelled)
100g caster sugar
A good pinch of flaky sea salt
For the semifreddo:
5 egg whites
200g caster sugar
1 vanilla pod
300ml double cream
30ml cold, strong espresso coffee
*You will need a terrine dish or bread tin, roughly 25cm x 10cm, lined with two or three sheets of cling film – this is vital for getting the semifreddo out later on (leave an excess of cling film for folding over the semifreddo).
- Place the nuts on a baking sheet lined with baking parchment. Place in a preheated oven, 180’c (fan), for 10 minutes – put on a timer as they burn easily!
- Meanwhile, place the 100g sugar into a wide pan, ideally silver-coloured so that you can see the colour of the caramel as it changes. Shake the sugar about so that it spreads out evenly and place the pan over medium-high heat. Leave the sugar to melt; Do Not be tempted to stir it to help it melt evenly, if you do it will crystallise. You can give it a gentle shake, just no stirring. Watch the colour – you want it to caramelise to a reddish colour.
- As soon as the caramel is ready, turn off the heat and pour in the nuts while they’re still hot. Having the nuts hot gives you time to quickly stir them through the caramel without it setting too quickly. Add a generous pinch of sea salt, stirring to coat the nuts completely, then quickly pour on to a lined tray and leave to cool. When set, bash with a rolling pin to break apart the caramelised nuts, you don’t want big clumps but instead individual nuts and halves.
- Now you can make the semifreddo. Simply place the egg whites in a bowl and whisk until they are foamy and just forming stiff peaks – be careful not to over whisk. Gradually add the sugar, whisking to create a light meringue.
- In a separate bowl, scrape out the vanilla pod and add to the double cream. Whip until it thickens and just begins to leave little ribbons behind the whisk.
- Carefully fold in the cold espresso and the pistachios into the cream (If you have doubled the quantities of pistachios, only add half!). Then, gradually fold in the meringue, little by little, trying to retain as much air as possible. Pour the mixture into your prepared dish, fold over the cling film and place in the freezer until it sets (6-8 hours).
- To serve, simply turn the semifreddo out of the mould, peel off the cling film and thickly slice on a bread board. Quickly wrap up any leftovers and place in the freezer for a treat at a later date!
Apple & Coconut Cake
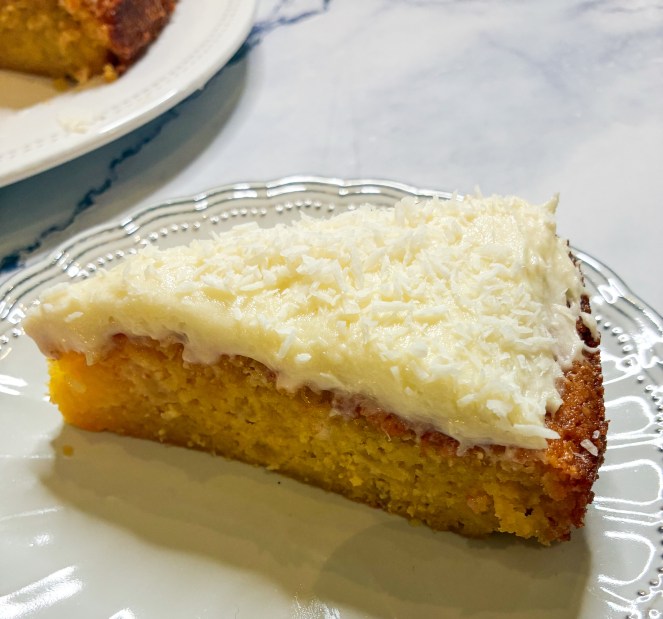
This is a delicious, flourless cake from the queen of baking, Mary Berry. I often find that apple cakes can be too moist and stodgy, but this is not the case with this recipe. The coconut helps to keep the ‘dampness’ of the apple under control, however, it’s flavour is by no means overpowering. In addition, the icing really is the ‘icing-on-the-cake’, making this cake a truly special one!
2 eating apples, peeled, cored and finely diced
Finely grated zest of 1 lemon
Juice of ½ lemon
225g caster sugar
225g butter, softened
200g ground almonds
6 eggs, beaten
½ teaspoon vanilla extract
1 teaspoon baking powder (gluten-free)
2 tablespoons desiccated coconut (plus extra to decorate)
For the icing:
100g butter, softened
200g icing sugar, sifted
3 tablespoons full-fat coconut milk
*You will need a 23cm round, loose-bottomed cake tin with deep sides, greased with butter and the base lined with baking paper.
- Put the diced apples in a saucepan, add the lemon-zest and juice and cook, stirring regularly, over a medium heat for 4-5 minutes. Cover with a lid, reduce the heat and simmer for about 15 minutes or until soft. Set aside to cool.
- Measure the caster sugar and butter into a bowl and cream together, then add the almonds, eggs, vanilla extract and baking powder, and beat together with an electric hand whisk to combine.
- Carefully fold in the cold apple mixture and 2 tablespoons of the desiccated coconut. Spoon into the prepared tin, levelling the top, and bake in a pre-heated oven, 160’c fan, for 45 minutes until golden.
- Take out of the oven and set aside to cool down completely before removing from the tin.
- To make the icing, measure the butter and icing sugar into a bowl. Mix to combine, gradually adding the coconut milk and a tablespoon at a time and mixing carefully (if it starts to separate add an extra tablespoon of icing sugar).
- Spread the icing over the top of the cold cake and sprinkle with desiccated coconut.
Orange & Cream Cake
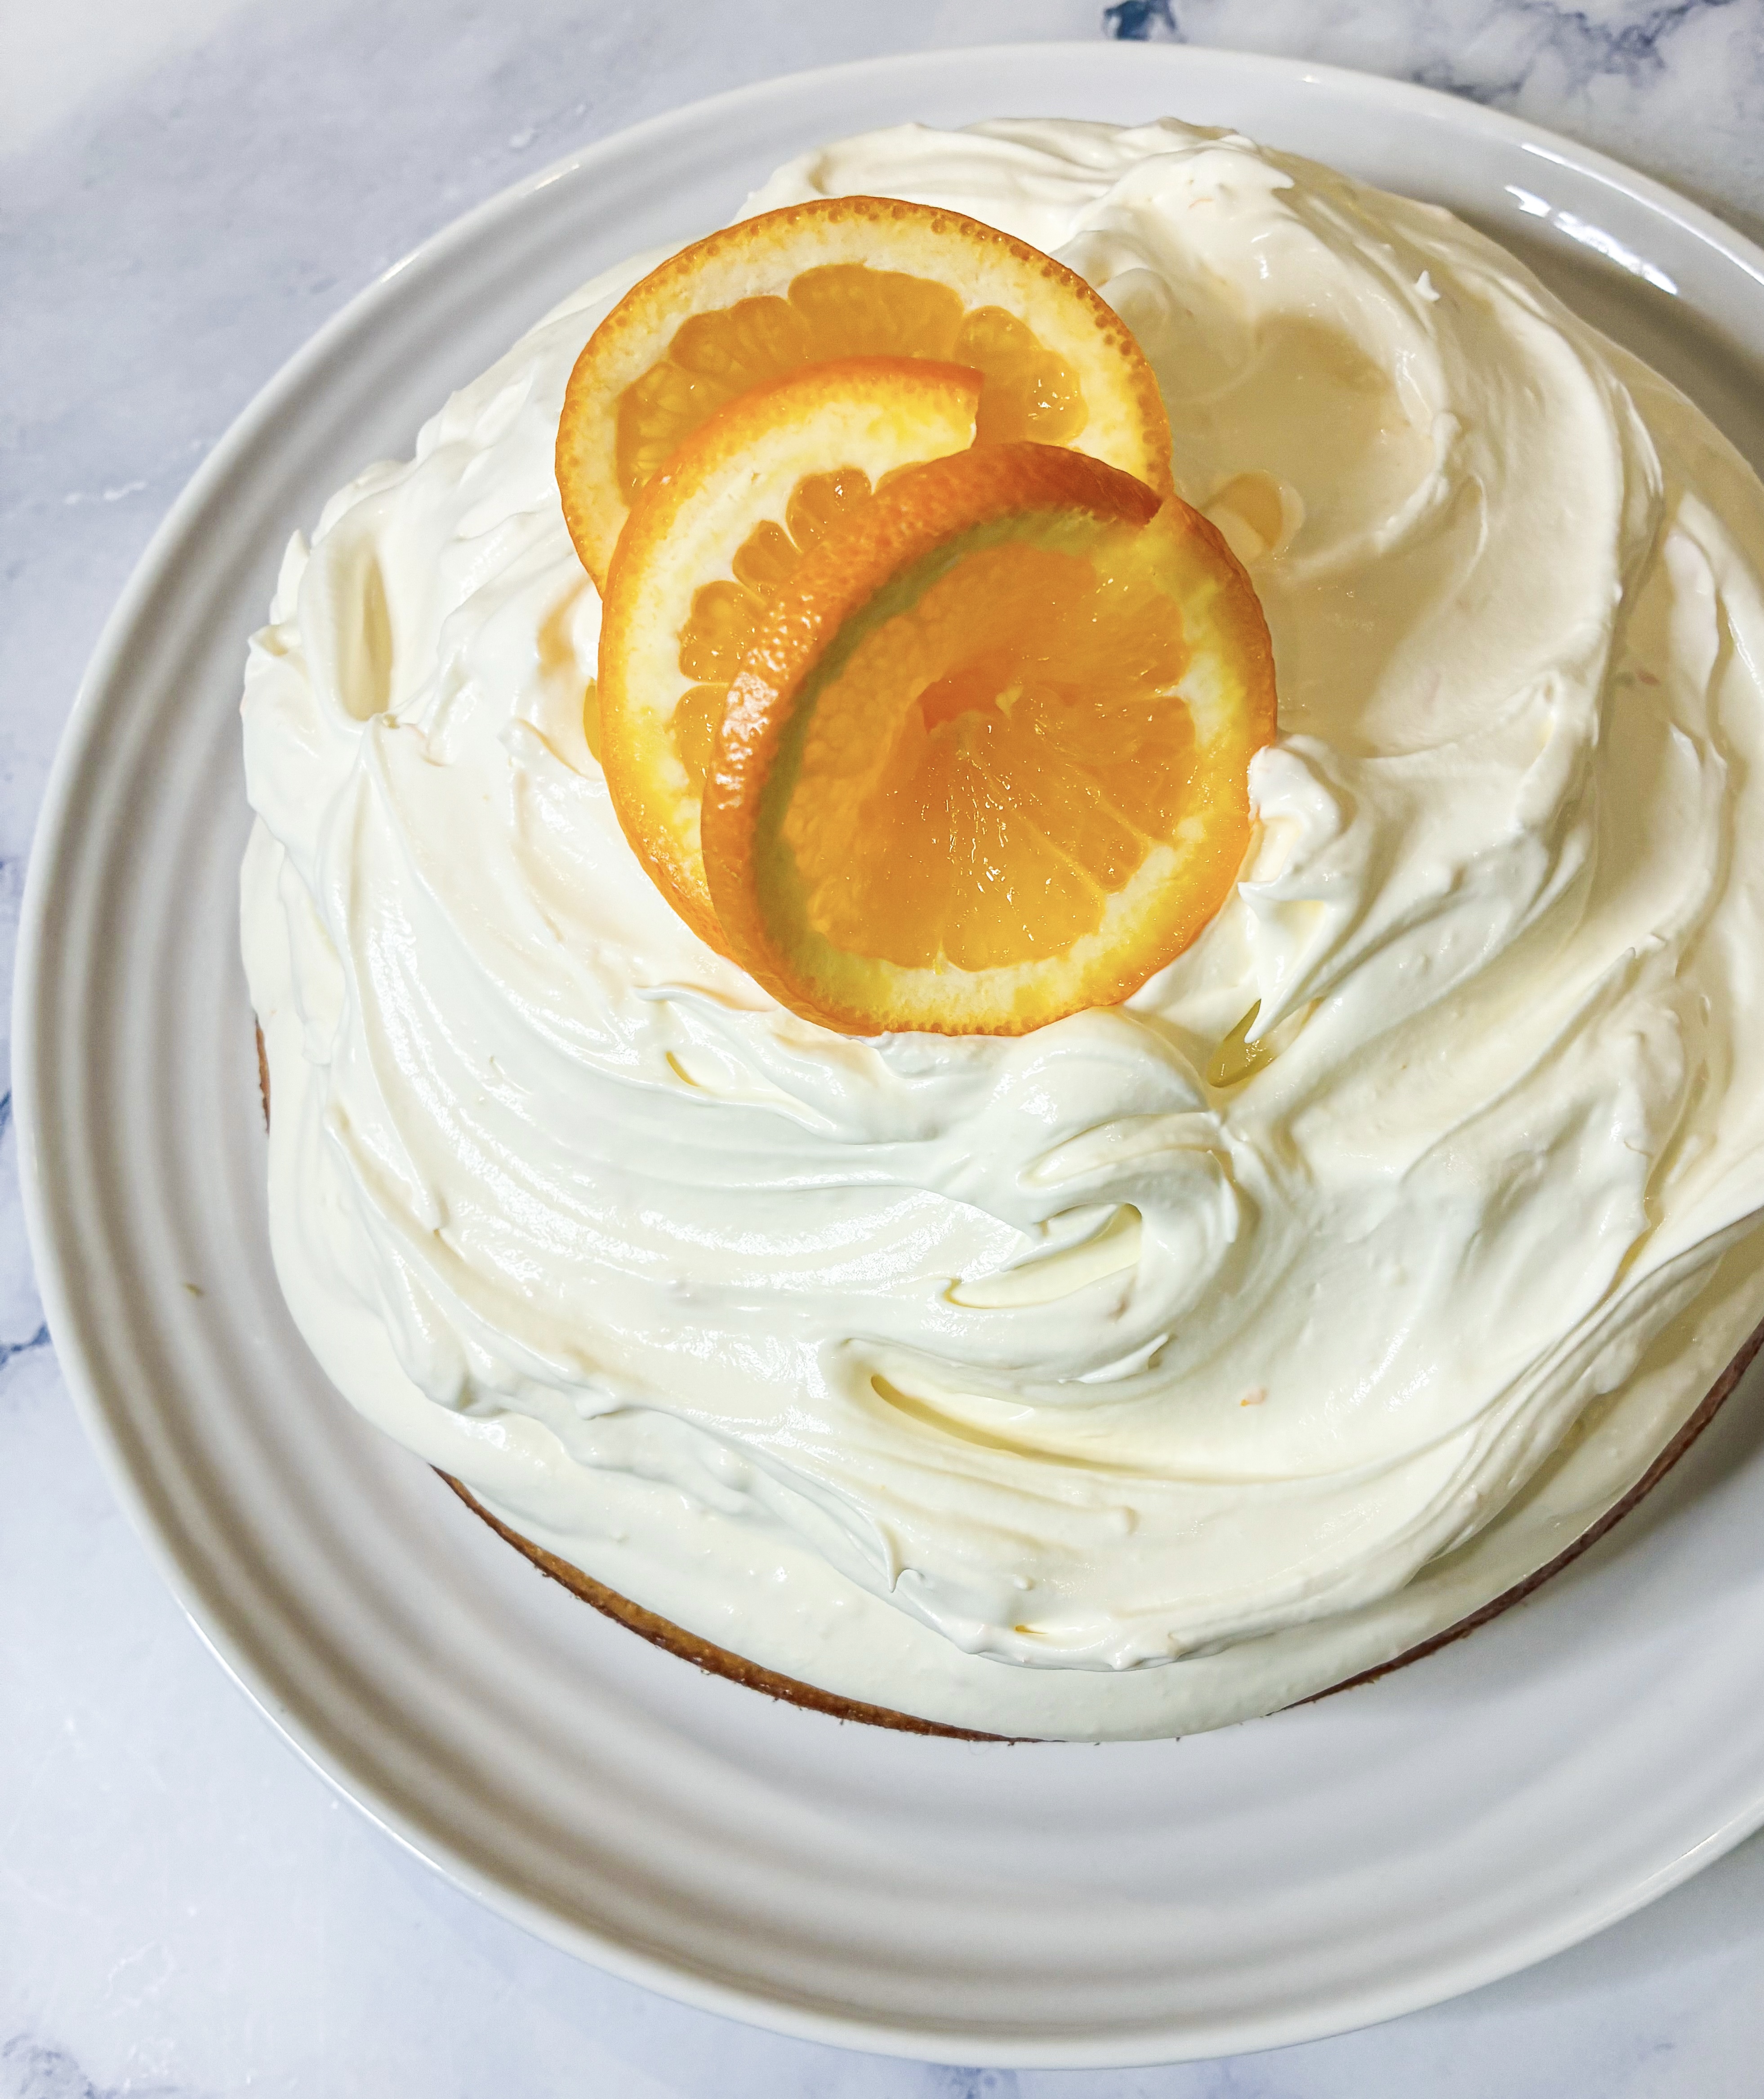
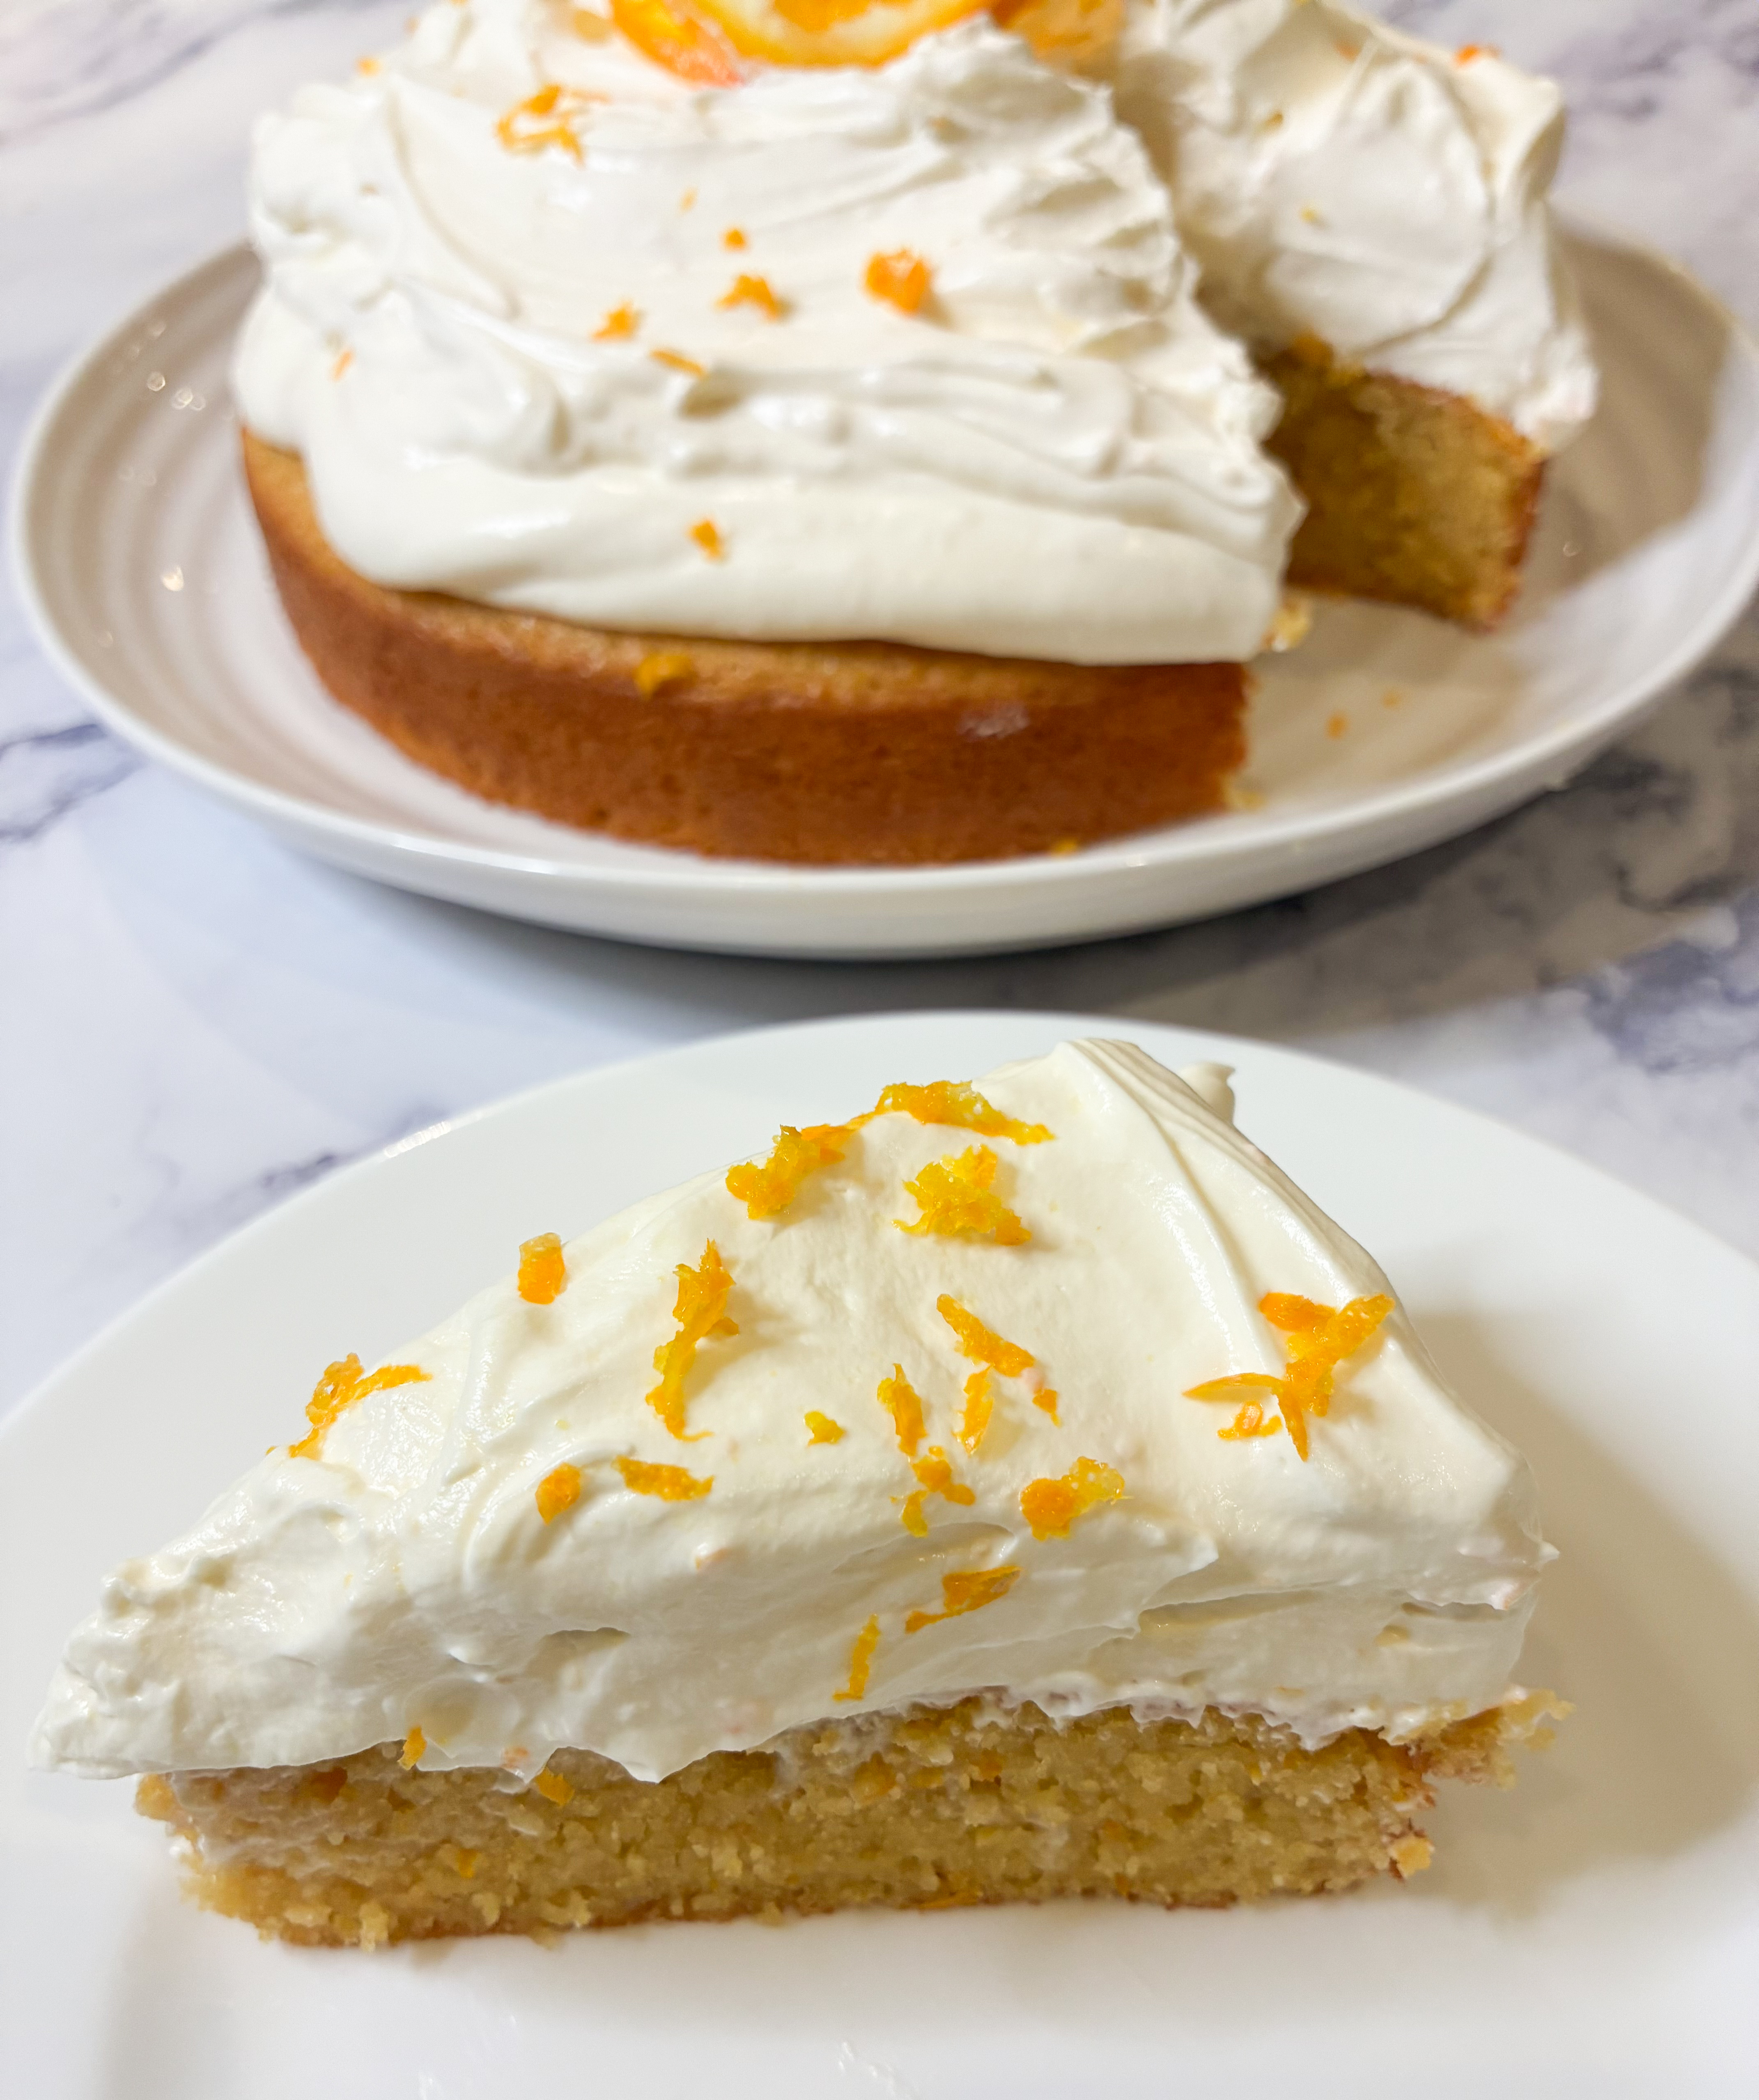
This must be the ultimate orange cake. Not only is the sponge moist and full of fresh orange flavour, but it’s topped with the most delicious citrusy whipped cream. And, the real ‘icing-on-the-cake’ is that it’s naturally gluten-free. What’s not to like?!..
260g ground almonds
1 teaspoon baking powder
¼ teaspoon fine sea salt
4 large eggs
120g caster sugar
60ml extra virgin olive oil
Zest of 2 oranges
1 tablespoon freshly squeezed orange juice
1 teaspoon pure orange extract
For the topping:
480ml double cream
70g icing sugar
1 teaspoon pure orange extract
Zest of 1 orange (plus more to decorate)
Orange slices to decorate (optional)
*You will need a 20cm round cake tin, greased and base lined with greaseproof paper.
- Whisk together the almond flour, baking powder and salt. Set aside.
- In a separate large bowl, whisk together the eggs and then whisk in the sugar, oil, orange zest, orange juice and orange extract.
- Add the dry ingredients to the wet mixture and stir together until the dry ingredients are incorporated. Be careful not to over mix.
- Pour the batter into the prepared tin and use a spatula to spread it out evenly.
- Bake in a preheated oven, 180’c fan, for 25-30 minutes, or until a toothpick inserted in the middle comes out clean. The edges of the cake should be golden brown and pulled away from the sides of the tin slightly.
- Let cool in the tin for 10 minutes before turning out onto a wire rack to cool completely.
- Meanwhile make the cream topping, add the double cream, icing sugar and orange extract to a bowl and beat together until stiff peaks form.
- Once fully whipped, stir in the orange zest.
- Top the cooled cake with the whipped cream and decorate with more orange zest and/or fresh orange slices.
Espresso, Chocolate & Chilli Cake with Coffee Cream
Chocolate and coffee – say no more!.. Yes, this is a recipe for keeps. The cake is wonderfully moist; it will sink a little as it cools, so don’t expect a pretty-looking cake, however, all is forgiven with your first, delicious bite! Don’t be put off by the mention of chilli, it’s not a spicy cake, the chilli just gives the chocolate flavour more depth. The addition of the coffee cream makes this cake exceptional (you may want to double the quantity of the cream!). Have I sold it to you?!..
3 tablespoons plain flour (gluten-free if required), plus extra for the tin
250g dark chocolate (I use Lindt Excellence 70% Cocoa Dark Chocolate)
250g salted butter, softened and chopped, plus extra for greasing
1 tablespoon instant espresso powder
2 red birds-eye chillies, deseeded and finely chopped
¼ teaspoon chilli powder
6 medium eggs
4 tablespoons brown sugar
175g caster sugar
½ teaspoon cream of tartar
4 tablespoons ground almonds
Cocoa powder to serve
For the Coffee Cream:
300ml double cream
1 tablespoon instant espresso powder
- Grease a 22cm springform cake tin with soft butter and line the bottom with baking parchment. Shake a little flour around the buttered edges.
- Melt the chocolate and butter together over a pan of simmering water. Once melted, whisk together until smooth and add the espresso powder, chillies and chilli powder.
- Whisk the egg yolks with the brown sugar and caster sugar, either in an electric mixer or with an electric hand whisk, for 5-10 mins until thick and pale.
- In a separate bowl, using a clean whisk, beat the egg whites and cream of tartar until soft rounded peaks form.
- Pour the chocolate mixture onto the beaten yolks and sugar, and gently mix until smooth. Add the almonds and flour and mix again. Spoon the egg whites into the chocolate mixture and gently fold together. Pour the batter into the prepared tin and bake in a preheated oven, 160’c fan, for 40-45 mins until the cake is set but with a slight jiggle in the centre. (If the cake is starting to brown too quickly, cover with a piece of baking parchment.
- Leave to cool in the tin – it will sink a little as it cools.
- Meanwhile, whisk the cream and espresso powder until soft peaks form.
- Remove the cake from the tin, slice and serve with a generous dollop of coffee cream and a dusting of cocoa powder.
Chocolate, Sour Cherry & Hazelnut Brownies
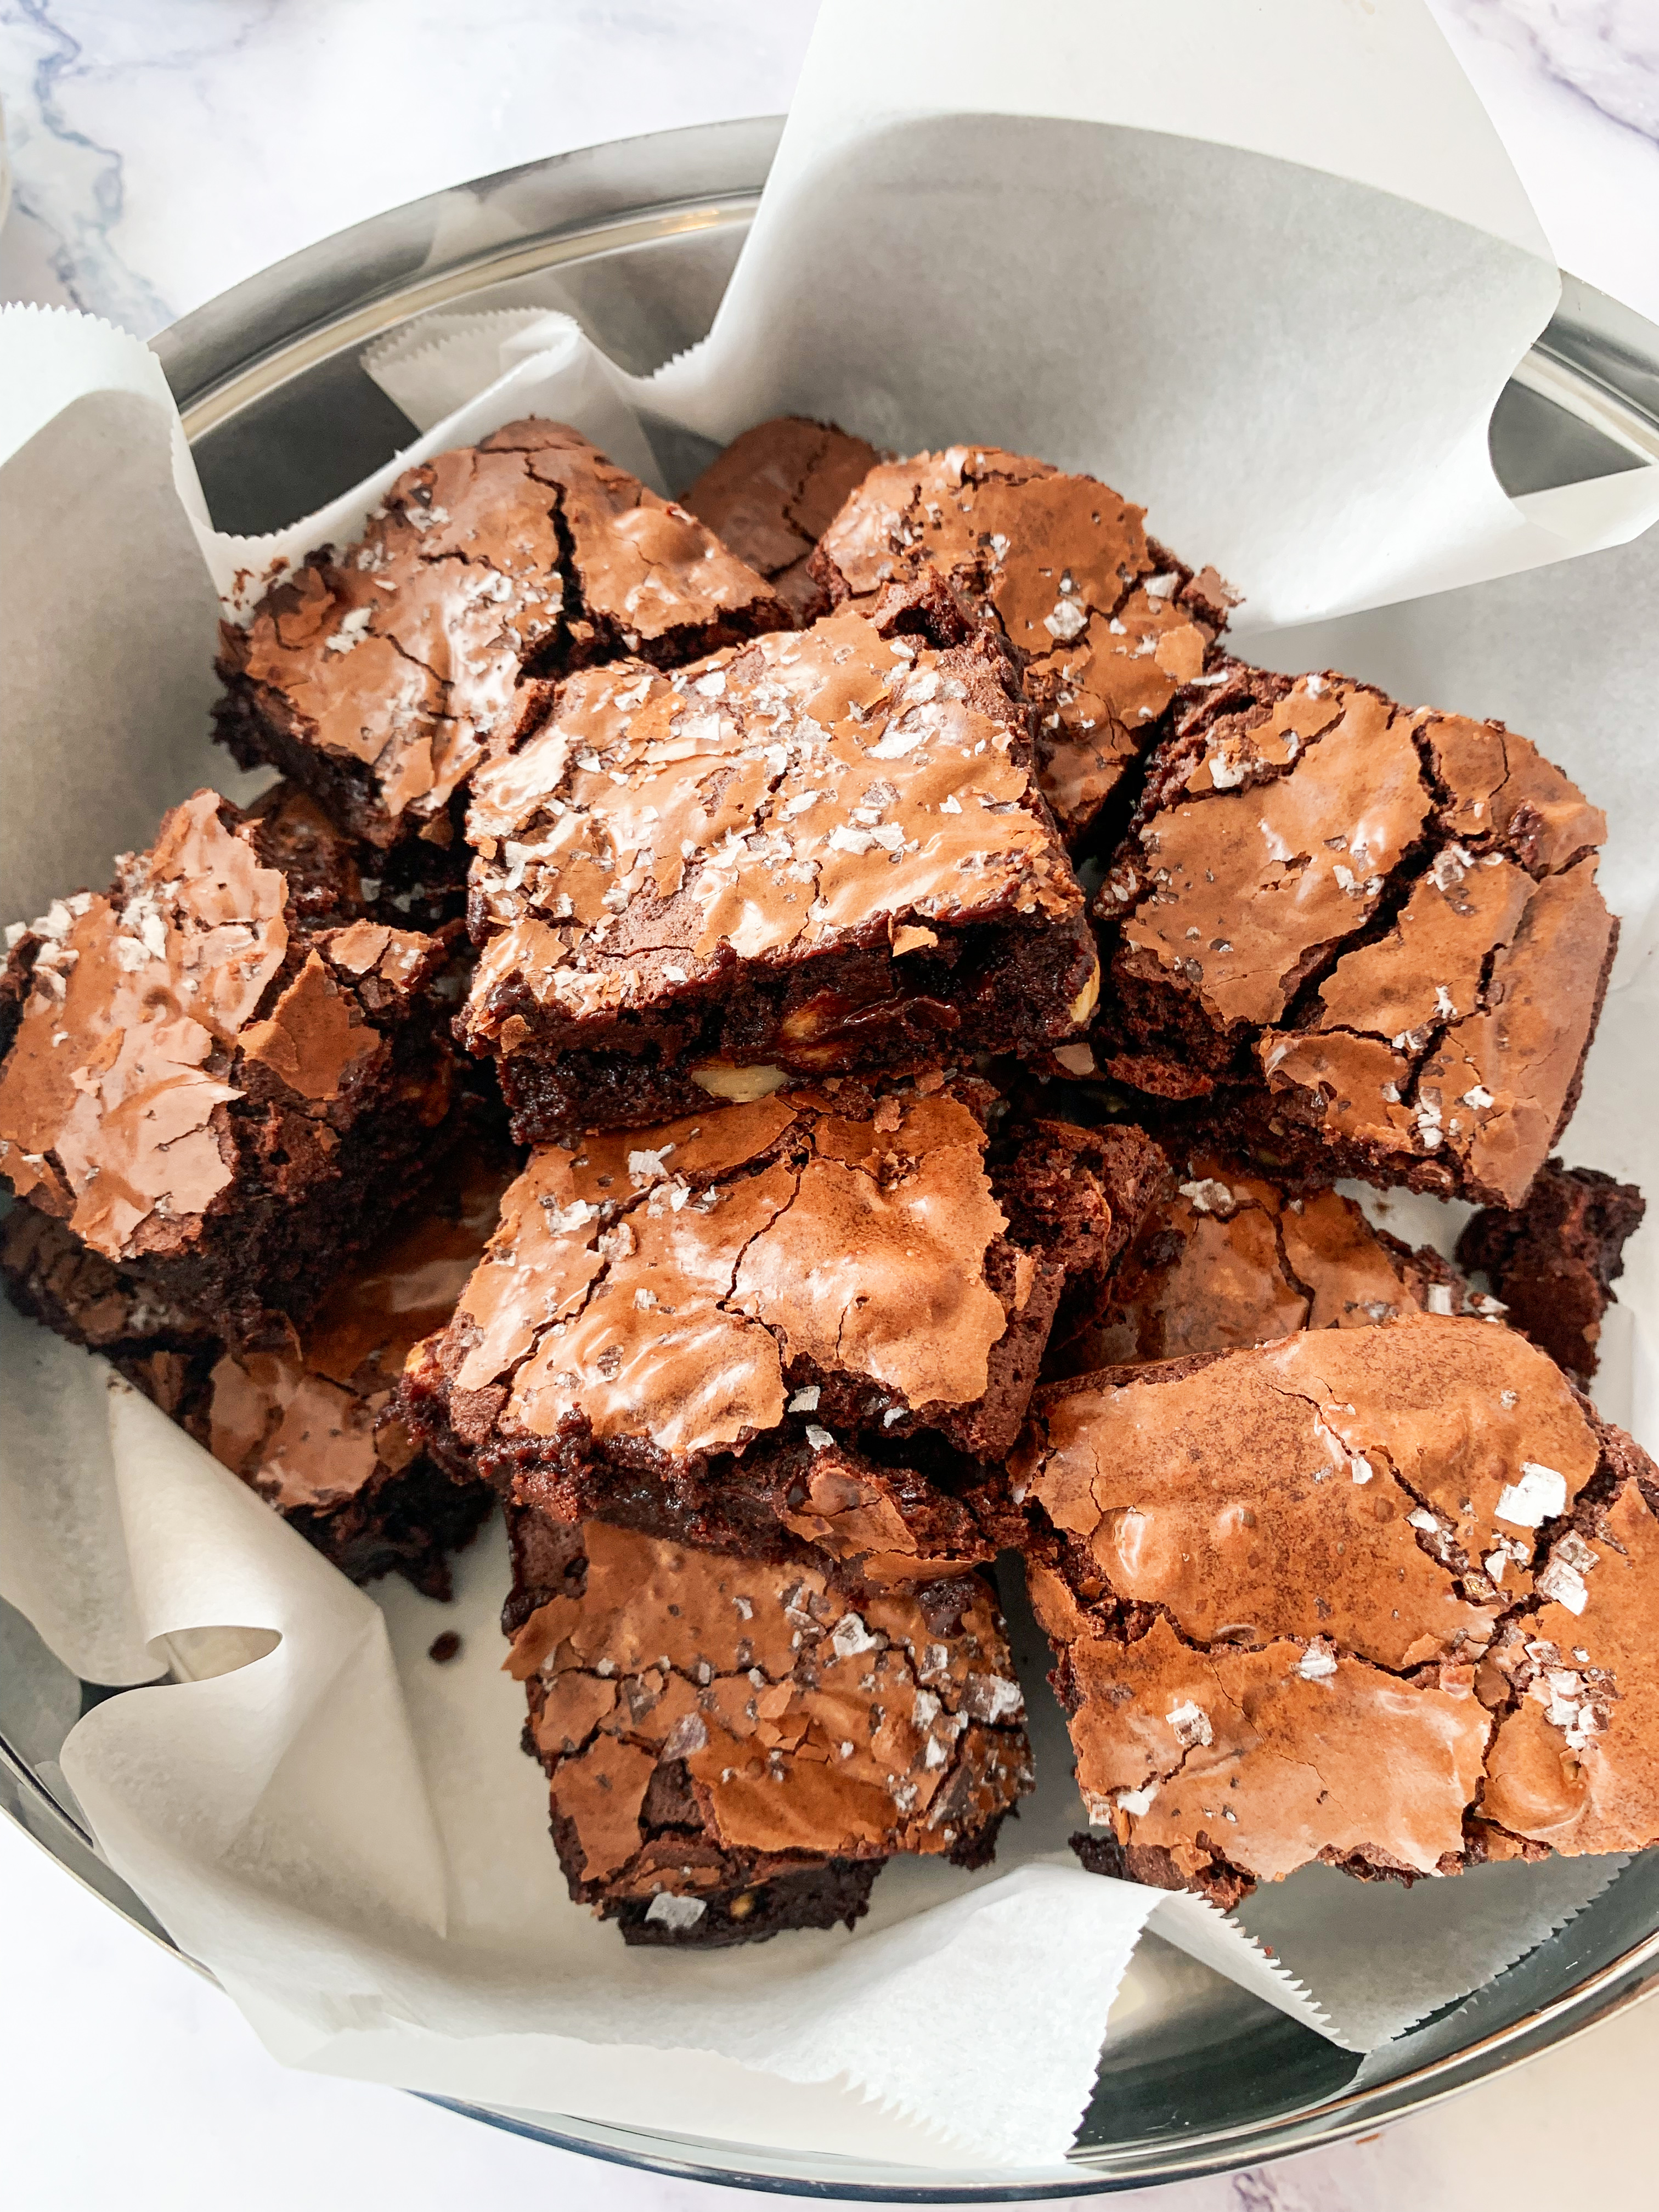
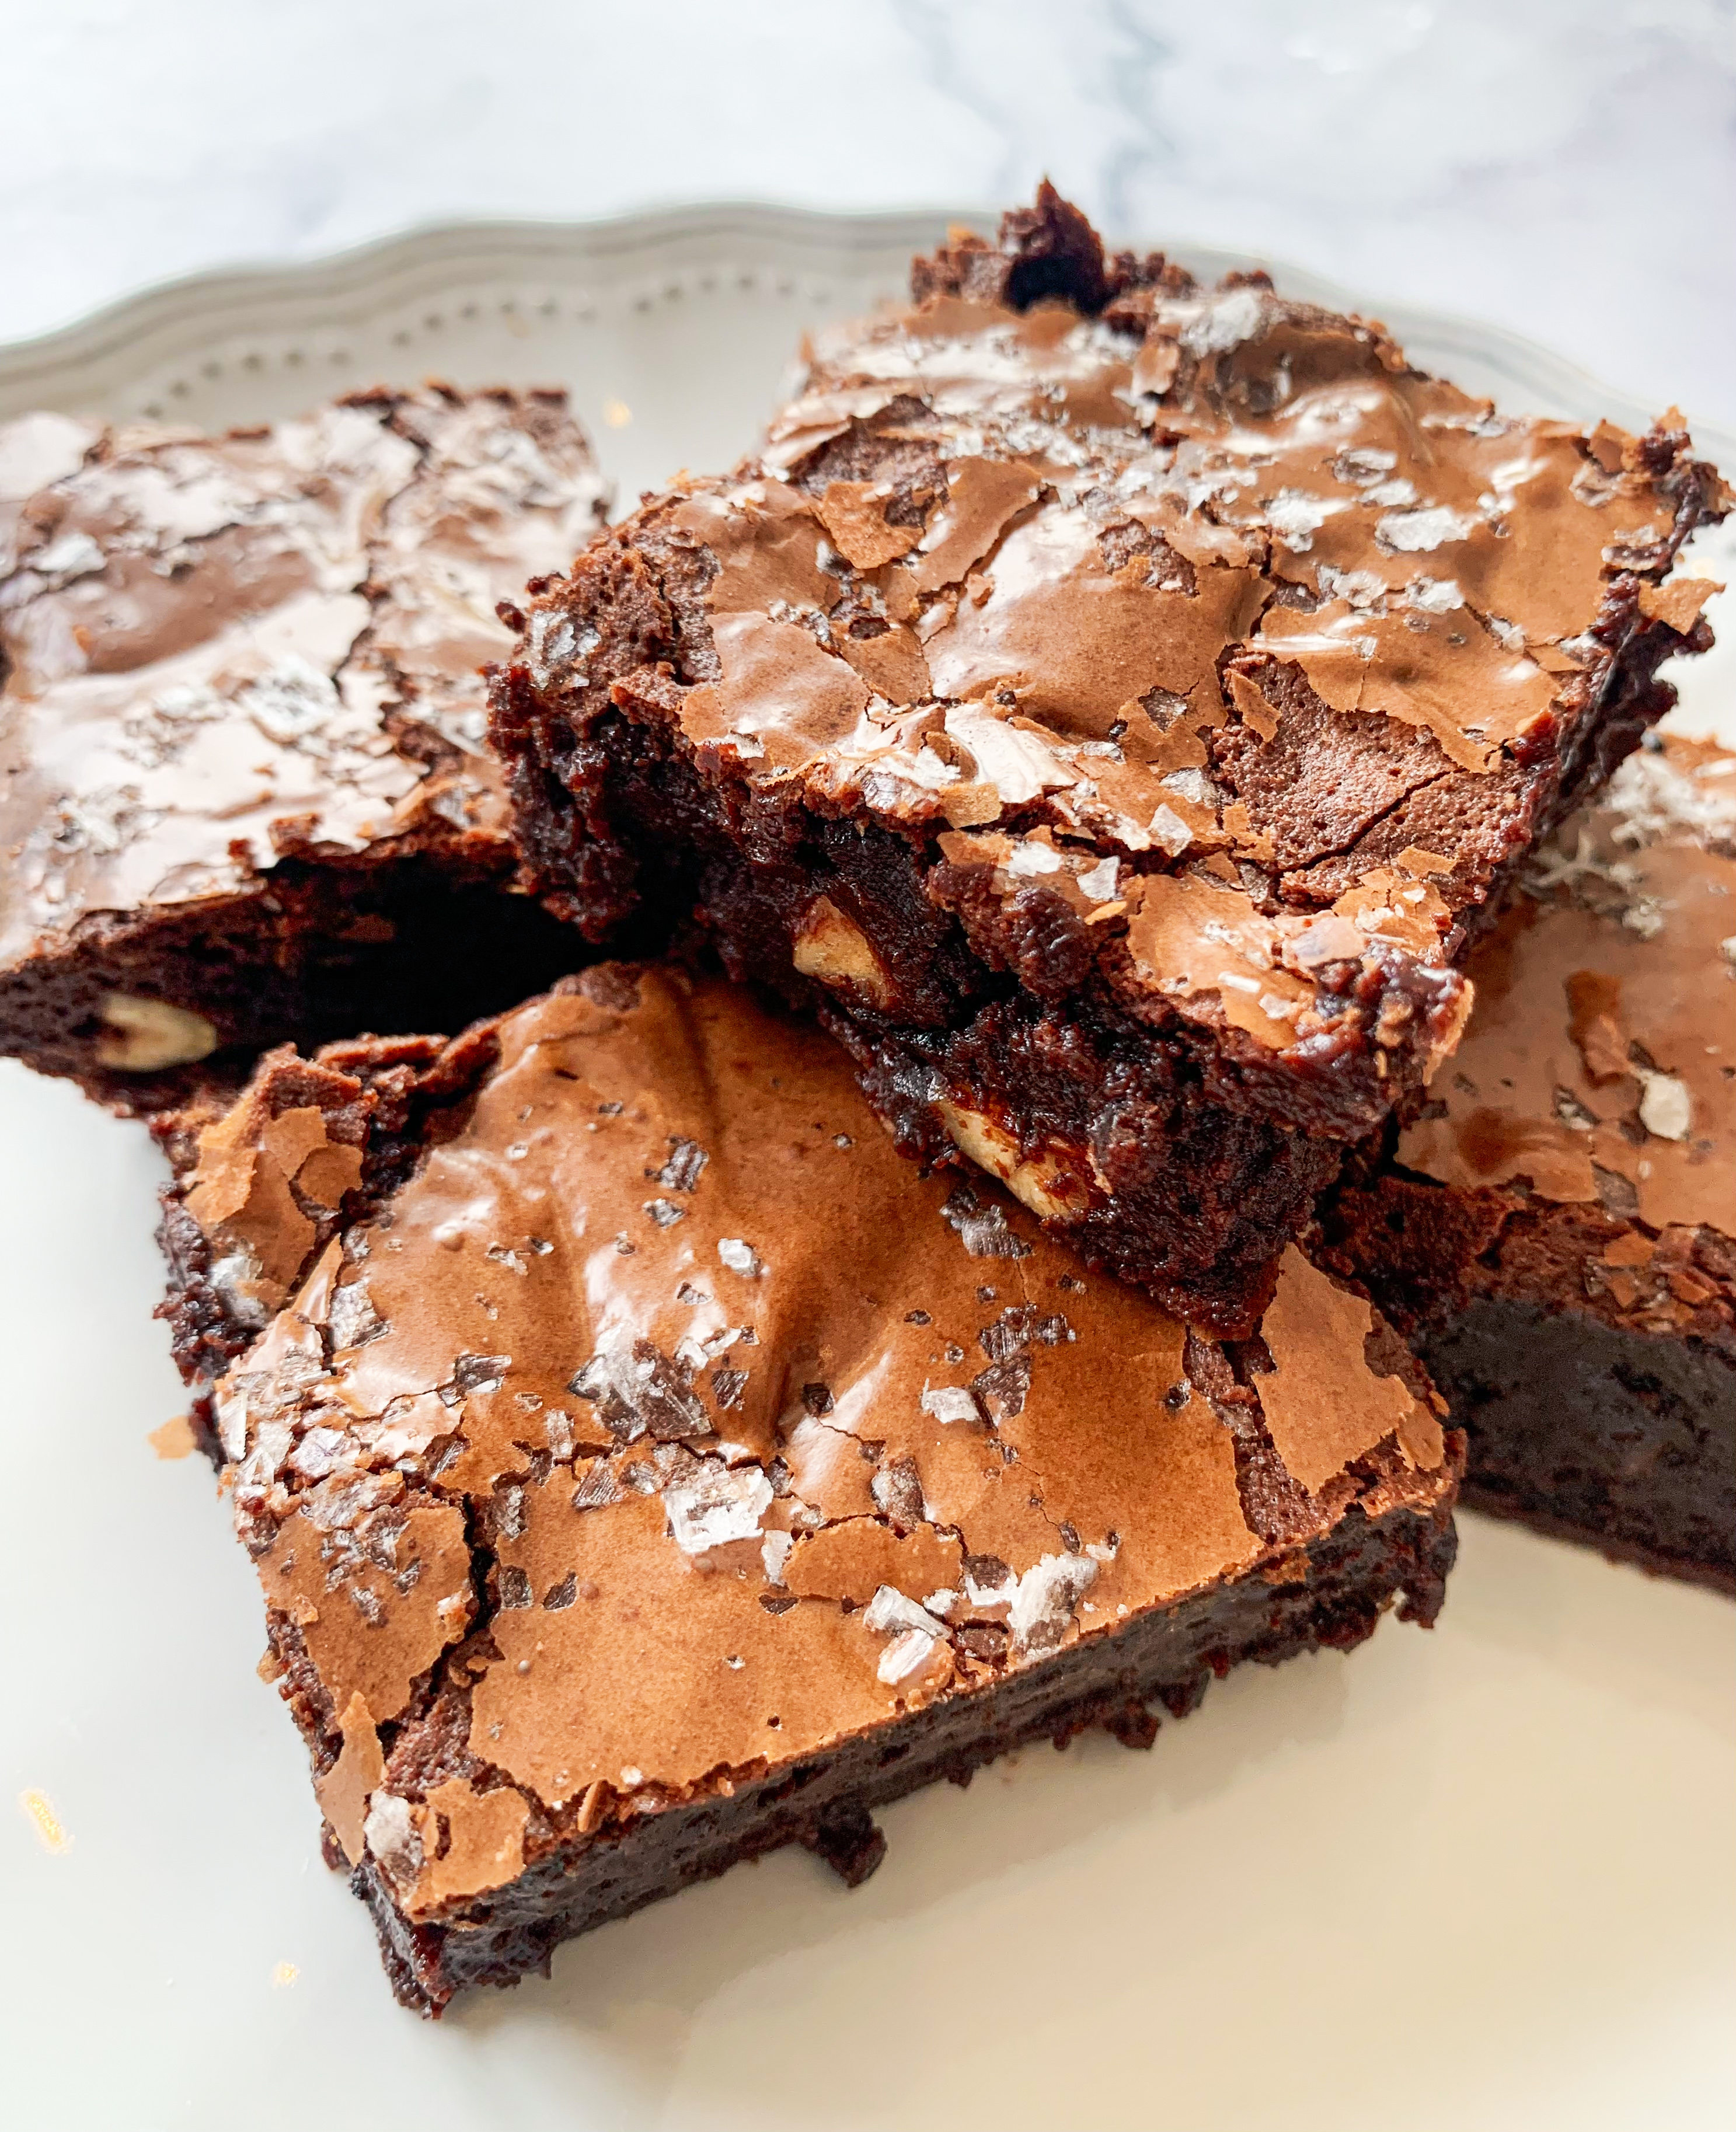
These are by no means your ‘bog-standard’ brownie – the sour cherries take them to an altogether higher level. They’re seriously good! The recipe is from Anna Hedworth’s wonderful cookbook, Service. You can serve them at room temperature, or they’re also delicious cold and fudgy from the fridge.
*You will need a 20x30cm baking tray lined with baking paper
360g dark chocolate (I use Lindt Excellence 70% Cocoa Dark Chocolate), snapped into small pieces
200g salted butter
3 eggs
300g caster sugar
65g plain flour (gluten-free if required)
60g hazelnuts
60g sour cherries, stoned and chopped
Sea salt flakes
- First of all, lay the hazelnuts on a baking tray and place in a preheated oven, 200’c fan, for 5 minutes. Then immediately wrap in a clean tea towel and allow to steam for a minute or two, then vigorously rub in the towel to remove their skin. Discard the skins and chop the nuts. Set aside.
- Weigh off 60g of the chocolate pieces, roughly chop and set aside.
- Gently melt the remaining chocolate with the butter in a heavy-bottomed pan over a very low heat – stir frequently until melted. Remove from heat and allow to cool for a couple of minutes
- Meanwhile, whisk together the eggs and sugar in a large bowl. Then fold in the chocolate mixture followed by the flour, a pinch of salt, the chopped hazelnuts, cherries and reserved chocolate pieces.
- Pour the brownie mixture into the lined tray and scatter the sea salt flakes over the top. Bake in a preheated oven, 170’c fan, for 35minutes. The top will have cracked, and it should still have a slight wobble. Leave to cool in the tin before cutting into 12 slices. Serve at room temperature or chilled from the fridge.
Carrot Cake with Tahini Orange Frosting
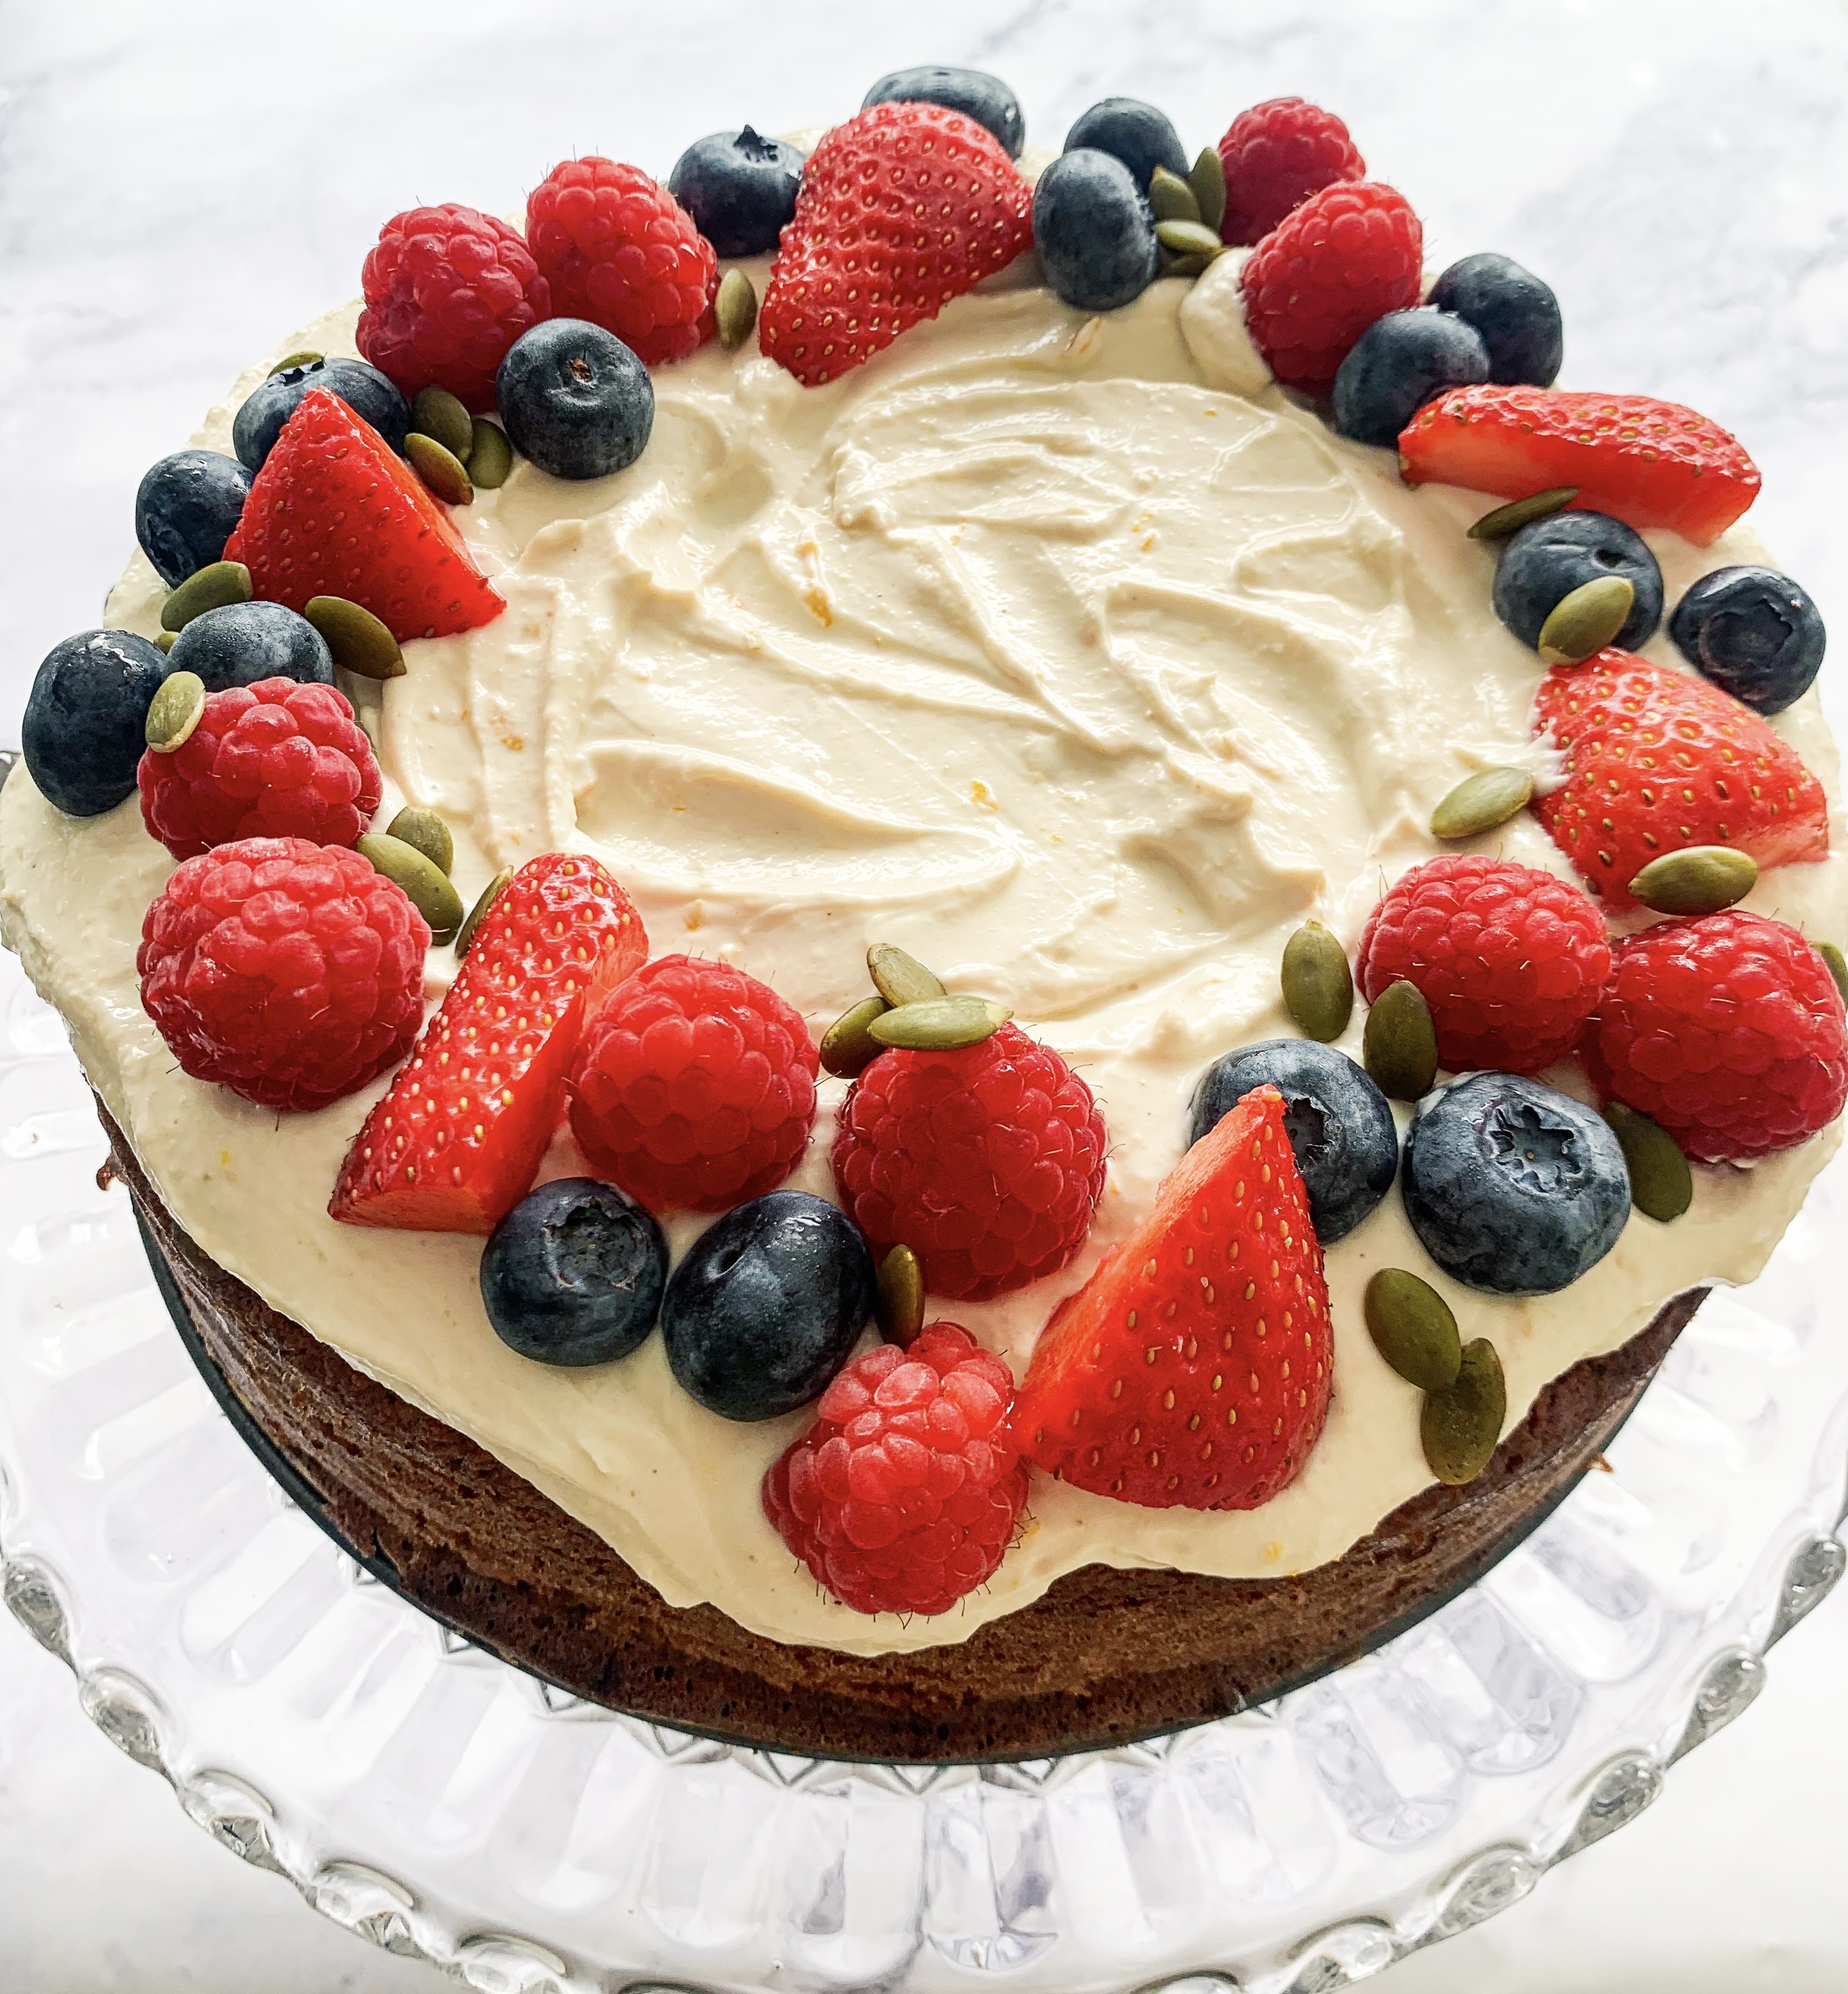
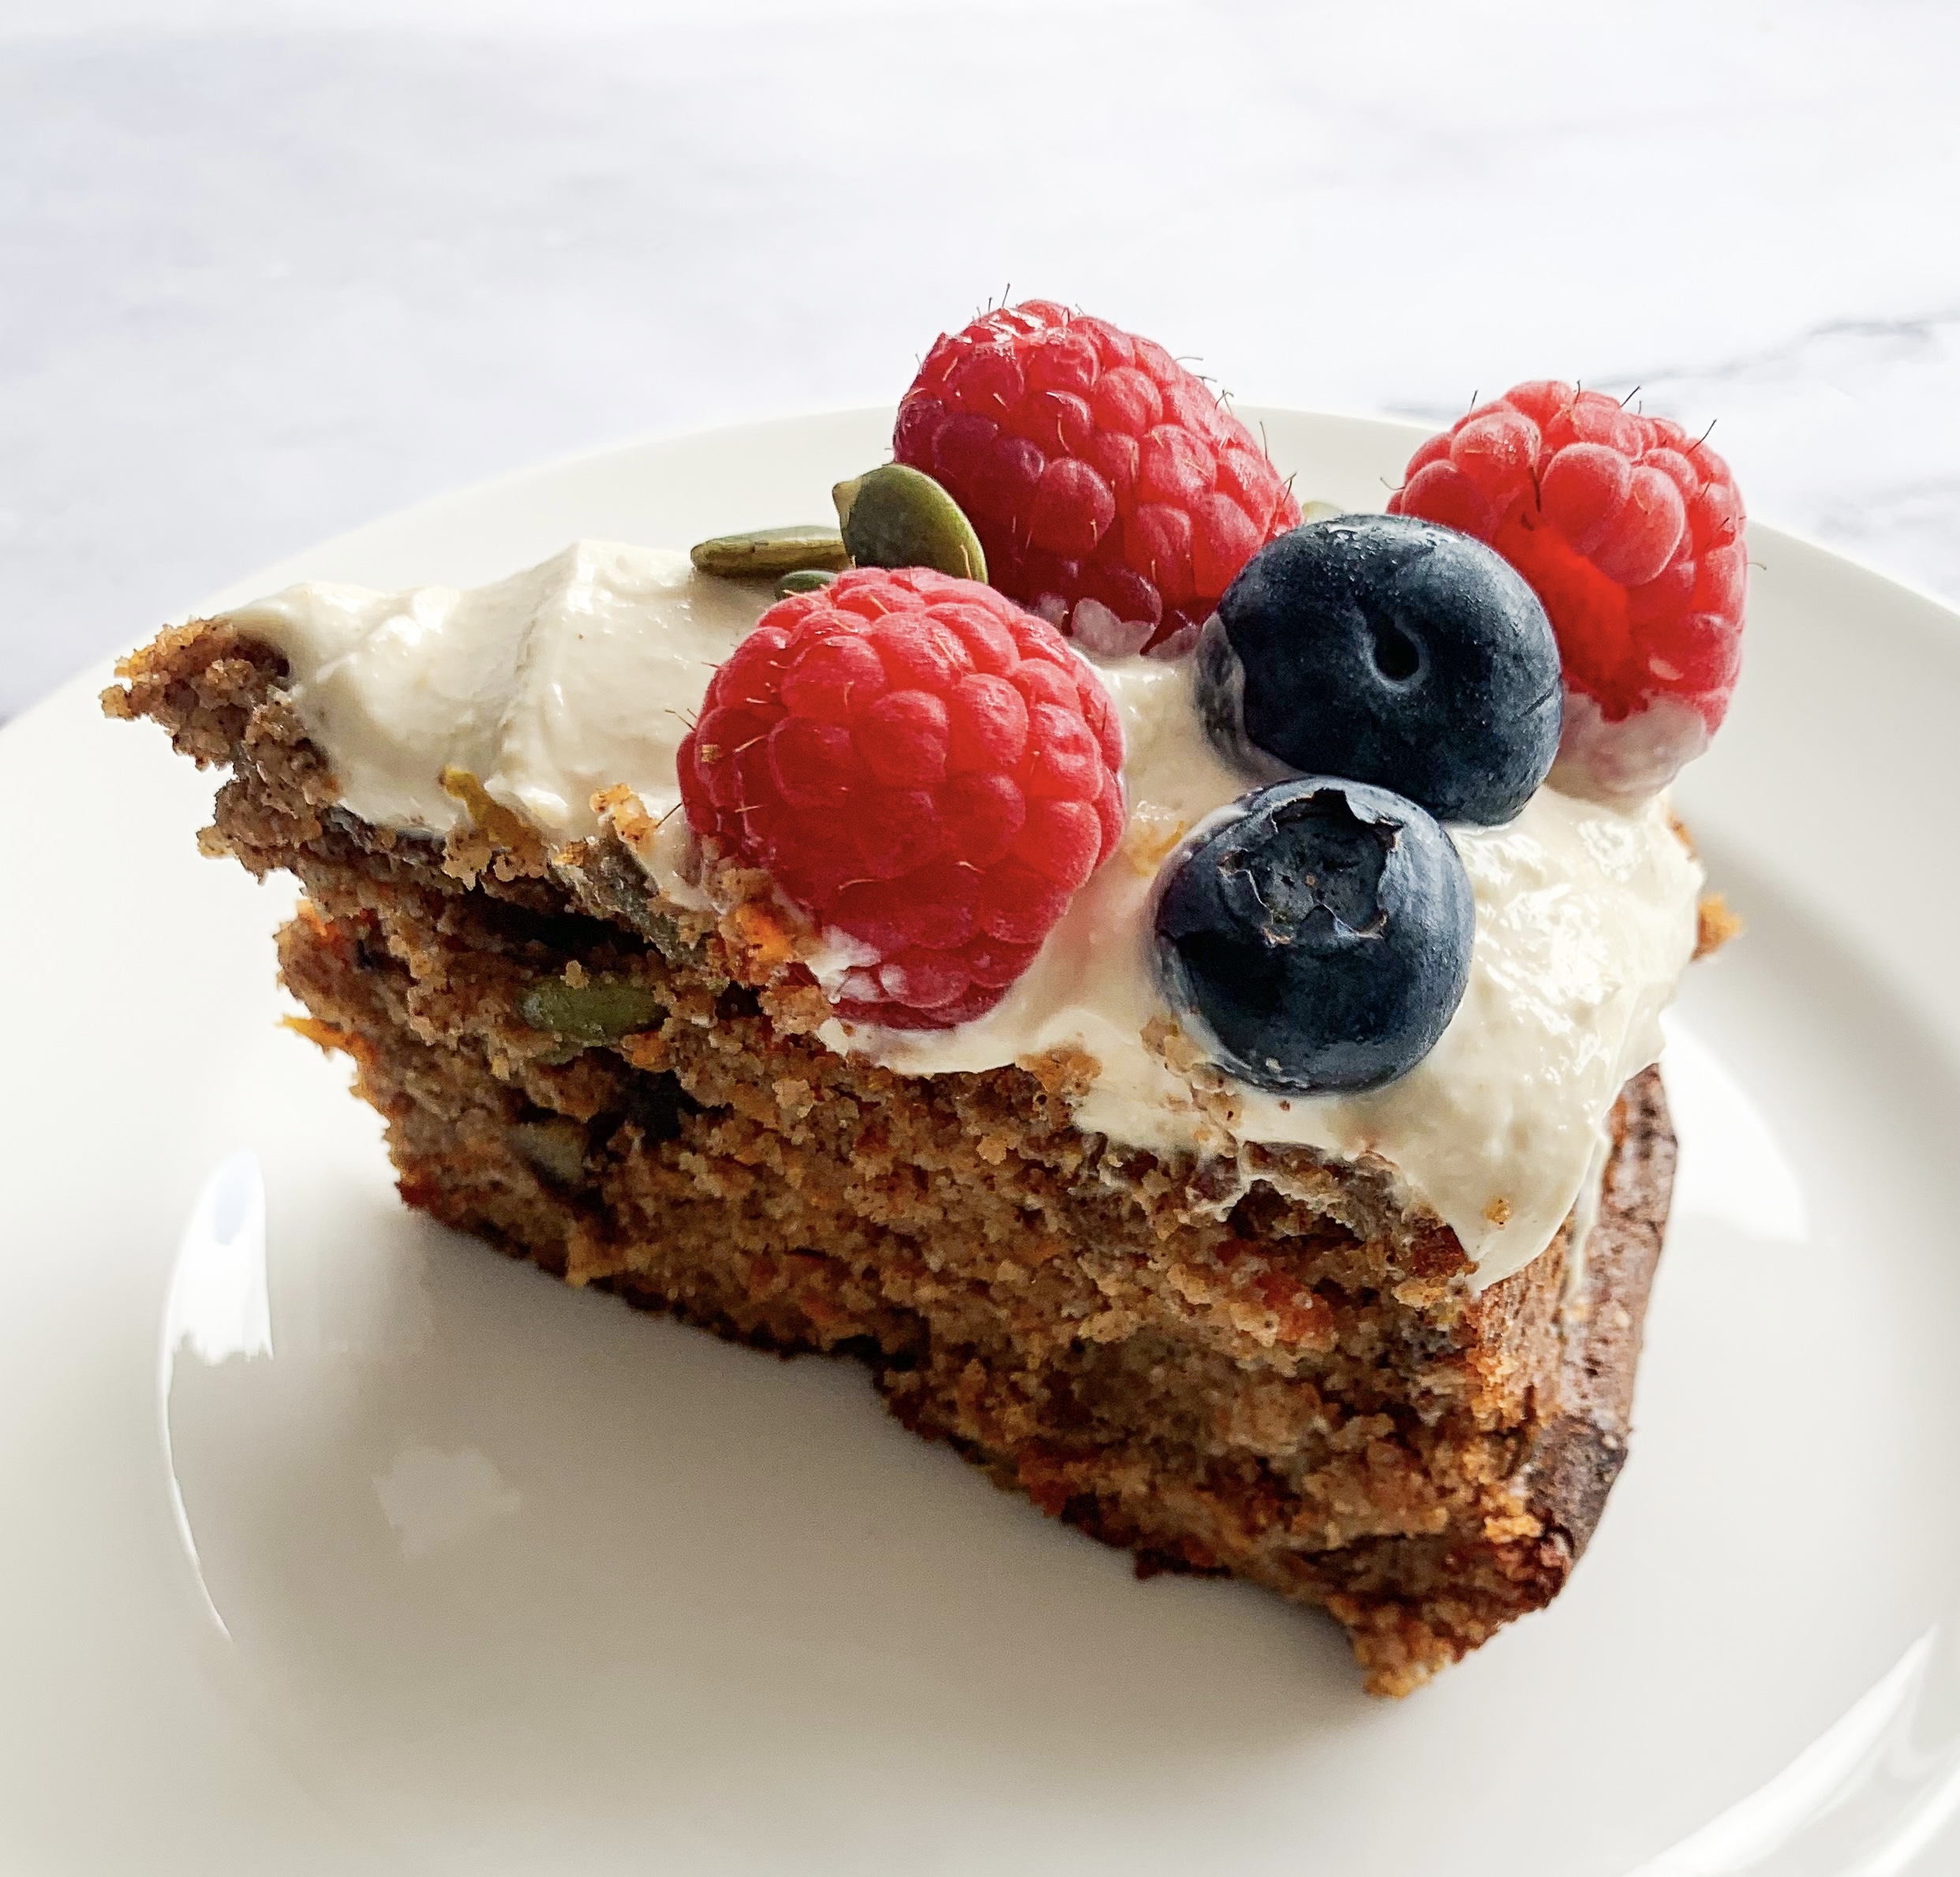
Can a cake be healthy? Well, this one’s certainly healthier than most!.. It’s from ‘The Food For Life Cookbook’ by Tim Spector (of ‘Zoe’ fame). He claims that the added benefit of the Greek yoghurt frosting is that the protein and fat will help slow the absorption of sugar into your bloodstream from the cake… so it’s definitely worth a try!.. And it’s delicious; the aforementioned frosting gives a wonderful tartness that cuts the sweetness of the carrot cake. A friend introduced me to this recipe when she served the cake at a luncheon; we were all very impressed and felt rather smug at being so healthy – thanks, Sarah!
85ml extra virgin olive oil, plus extra for greasing
100ml kefir
3 eggs
4 tablespoons honey
85g soft light brown sugar
285g ground almonds
2 tablespoons ground cinnamon
4 tablespoons pumpkin seeds
50g walnuts, roughly chopped
2 teaspoons baking powder (gluten-free if required)
1 teaspoon bicarbonate of soda
Pinch of salt
200g carrots, grated
For the topping:
185g Greek yoghurt
2 tablespoons tahini
1 teaspoon vanilla extract
1 teaspoon honey
Zest of ½ orange
2 tablespoons pumpkin seeds
Fresh berries
*You will need a 20cm round springform cake tin, greased and lined.
- Put the olive oil, kefir, eggs, honey and sugar in a bowl and mix to combine. Add the ground almonds, cinnamon, pumpkin seeds, walnuts, baking powder, bicarbonate of soda and salt and mix everything until thoroughly combined.
- Fold in the carrots and then transfer the mixture to the lined tin. Flatten with a spatula and bake in a preheated oven, 160’c fan, for 45-50 minutes until a metal skewer inserted in the middle comes out clean. Allow to cool completely before removing from the tin.
- Meanwhile, make the topping. Mix the Greek yoghurt, tahini, vanilla extract, honey and orange zest in a bowl – it will thicken slightly. Spread all over the cooled cake and decorate with fresh berries and a sprinkling of pumpkin seeds. (Store in the fridge covered for up to 5 days).
Raspberry & Pomegranate Roulade
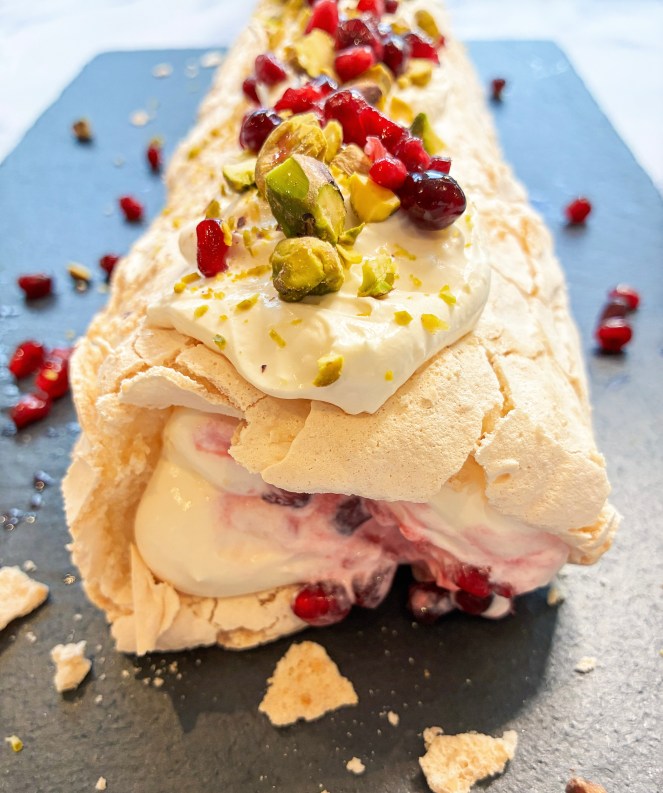
Any roulade is a favourite dessert of mine, however, this one is particularly good! The cream filling is cut with Greek yoghurt, in addition there’s the fresh zing from lemon zest and the tartness of raspberries and pomegranate seeds. With added ground almonds, the meringue roulade is slightly more cake-like but still very light. Like all roulades this is best eaten fresh! (Thank you to Yasmin Khan and her cookbook ‘Ripe Figs’ for this recipe!).
4 large egg whites
225g caster sugar
50g ground almonds
1 teaspoon lemon juice
1 teaspoon cornflour
For the filling:
350ml double cream
160g strained full-fat Greek-style yogurt
Finely grated zest of 1 unwaxed lemon
2 teaspoons lemon juice
1 teaspoon vanilla extract
2 tablespoons icing sugar, plus more to dust
100g raspberries
130g pomegranate seeds
For the topping:
1-2 tablespoons shelled, unsalted pistachios, roughly chopped
*You will need a 30x20cm Swiss roll tin, lined with baking parchment (alternatively you could draw a rectangle, 30x20cm, on piece of baking parchment placed on a baking tray).
- Place the egg whites in a large bowl and whisk to soft peaks. Slowly add the sugar, whisking in a few tablespoons at a time until it has all been used up and you have stiff, glossy meringue. Gently fold in the almonds lemon juice and cornflour.
- Spoon the meringue into the prepared tin and use a spatula to smooth out.
- Bake in a preheated oven, 150’c fan, for 30 minutes, until firm on top and slightly golden.
- Meanwhile tear off another piece of baking parchment of the same size and lay it on a clean work surface – you’ll need this to roll the meringue when it’s cooked.
- Whisk the cream, yogurt, lemon zest, lemon juice, vanilla extract and icing sugar in a bowl to a thick cream. Place half the berries in a bowl and use a fork to mash, to create pools of juice.
- When the meringue is cooked, turn it out onto the fresh piece of baking parchment you prepared earlier. Gently peel off the parchment from the base of the meringue and leave to completely cool (this will take about 10 minutes).
- When the meringue is cold, spoon the cream over it, reserving a couple of tablespoons for decoration. Sprinkle over most of the pomegranate seeds, reserving 2 spoonfuls for decoration, and scatter over the whole raspberries and crushed berries, swirling the juices with the end of the spoon so that you have bright pink streaks running through it.
Chocolate Cremeux (with Olive Oil & Sea Salt) Serves 6-8
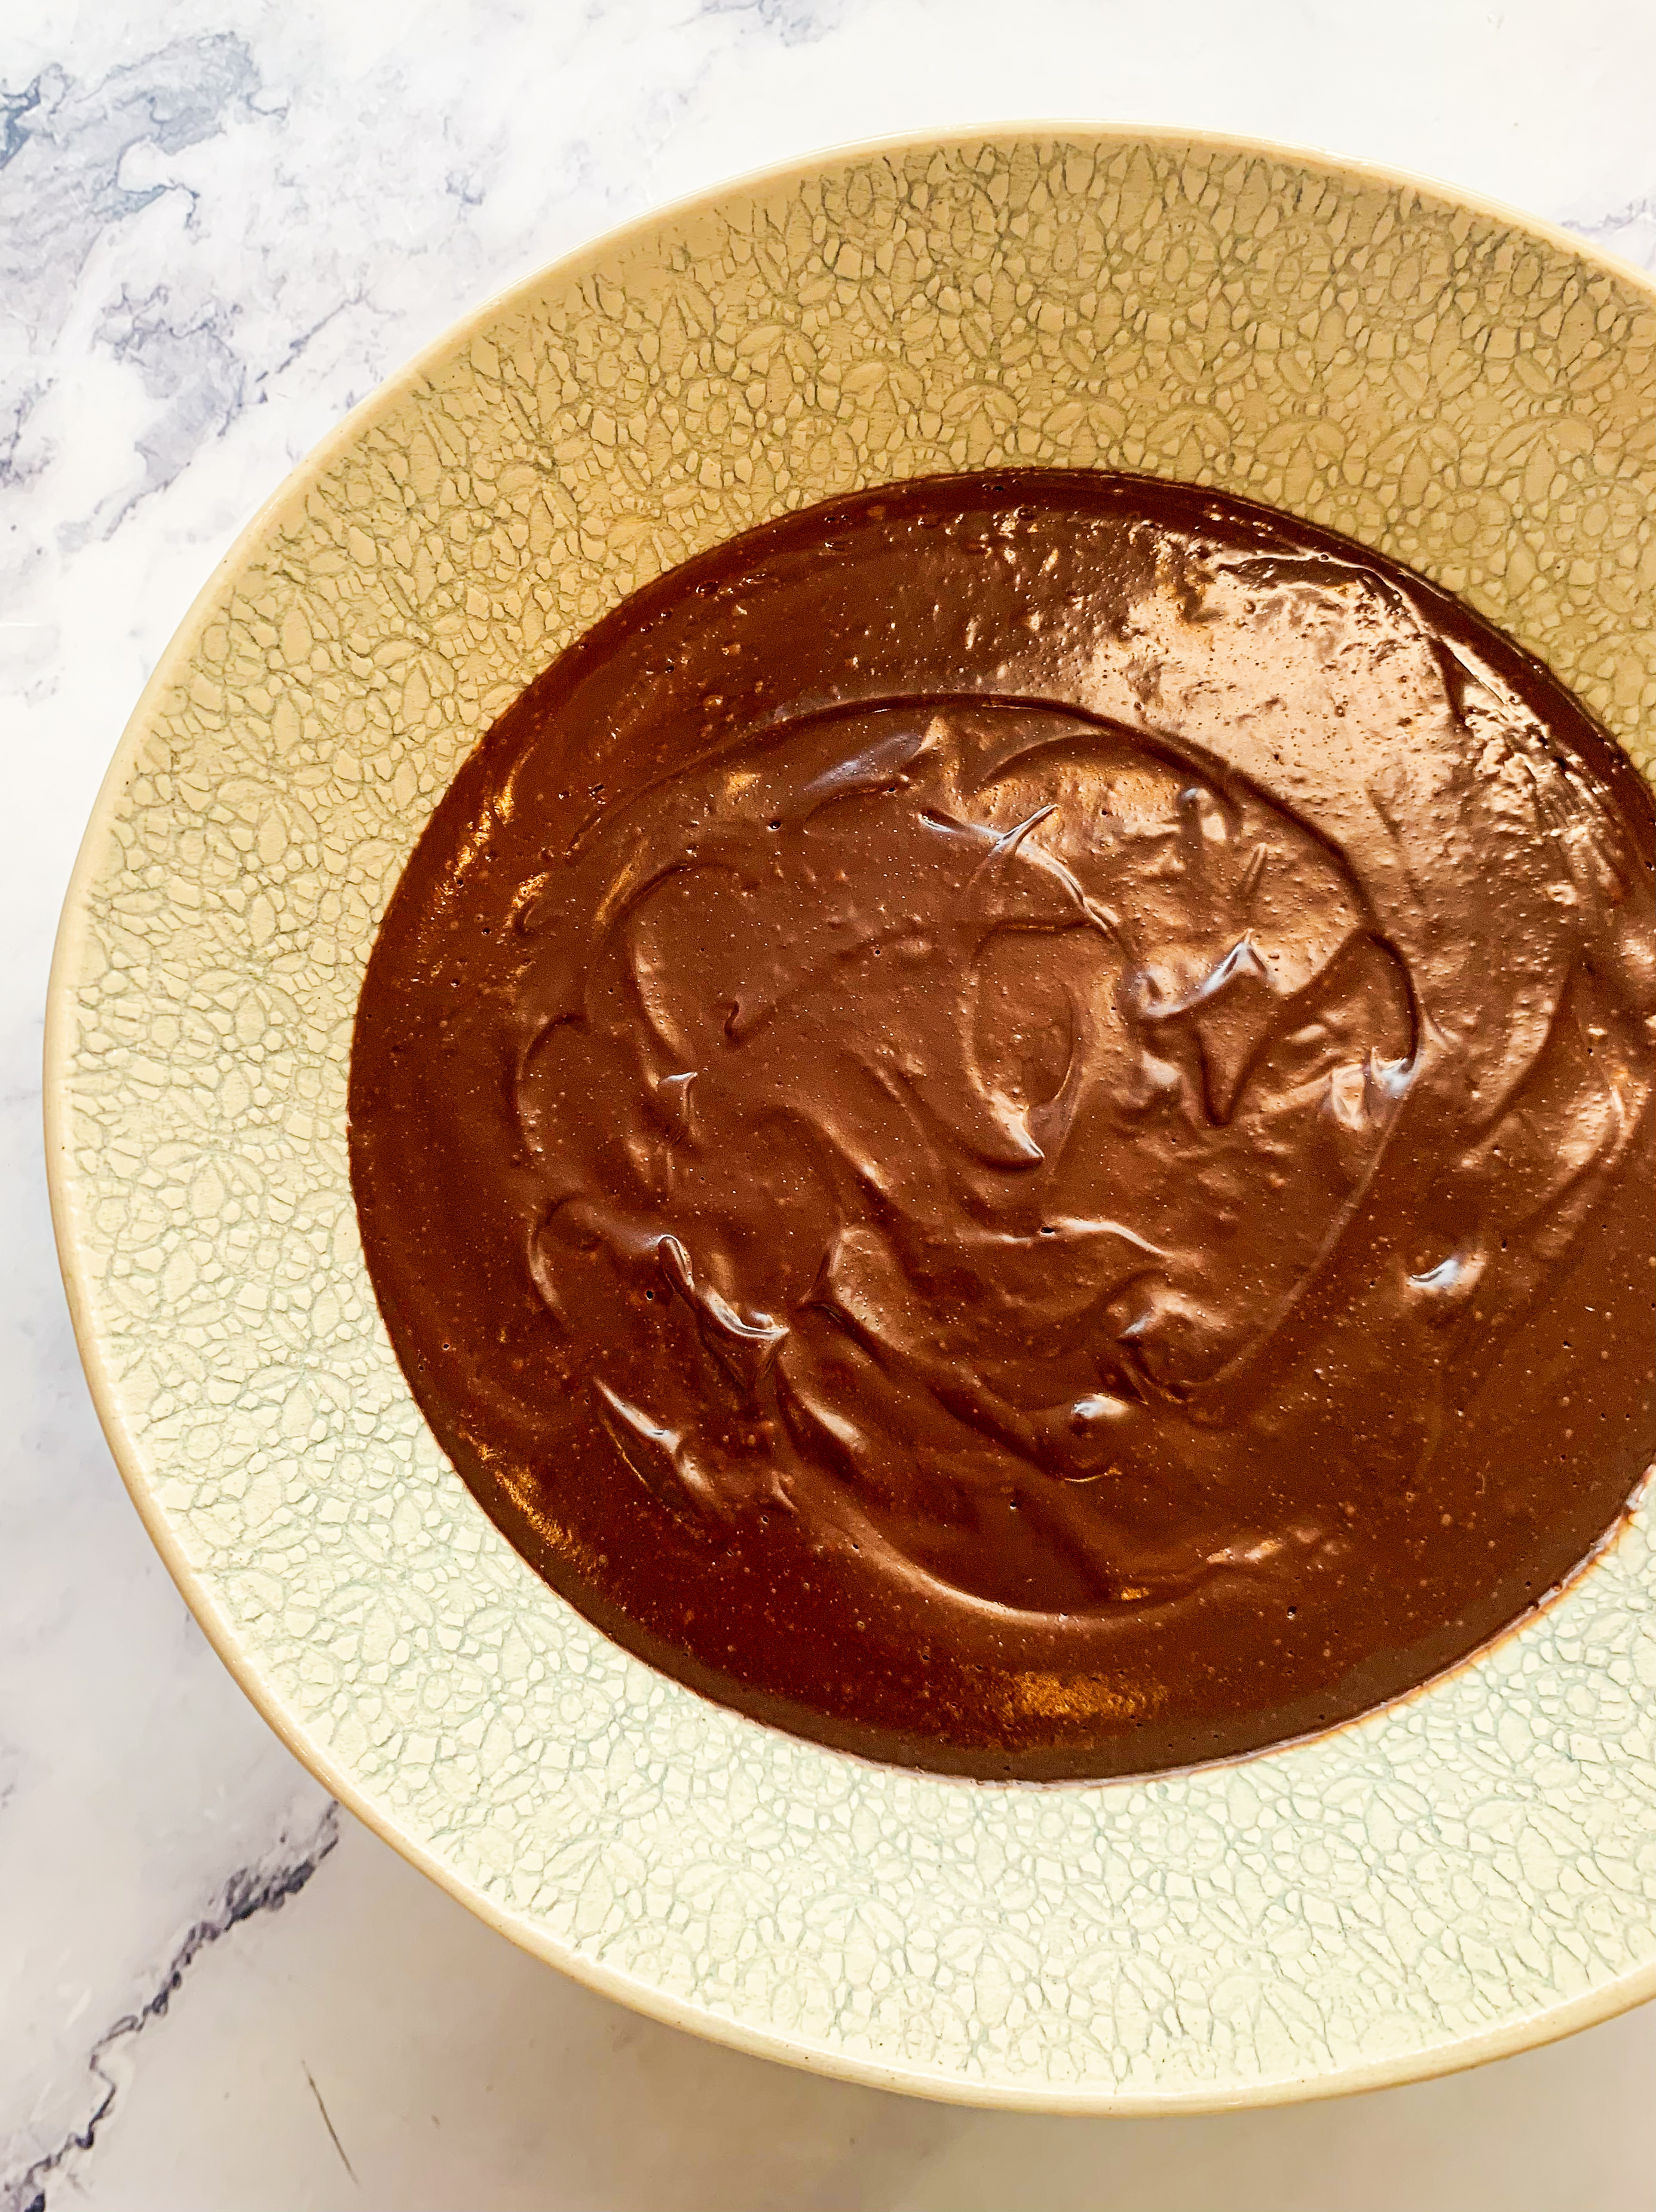
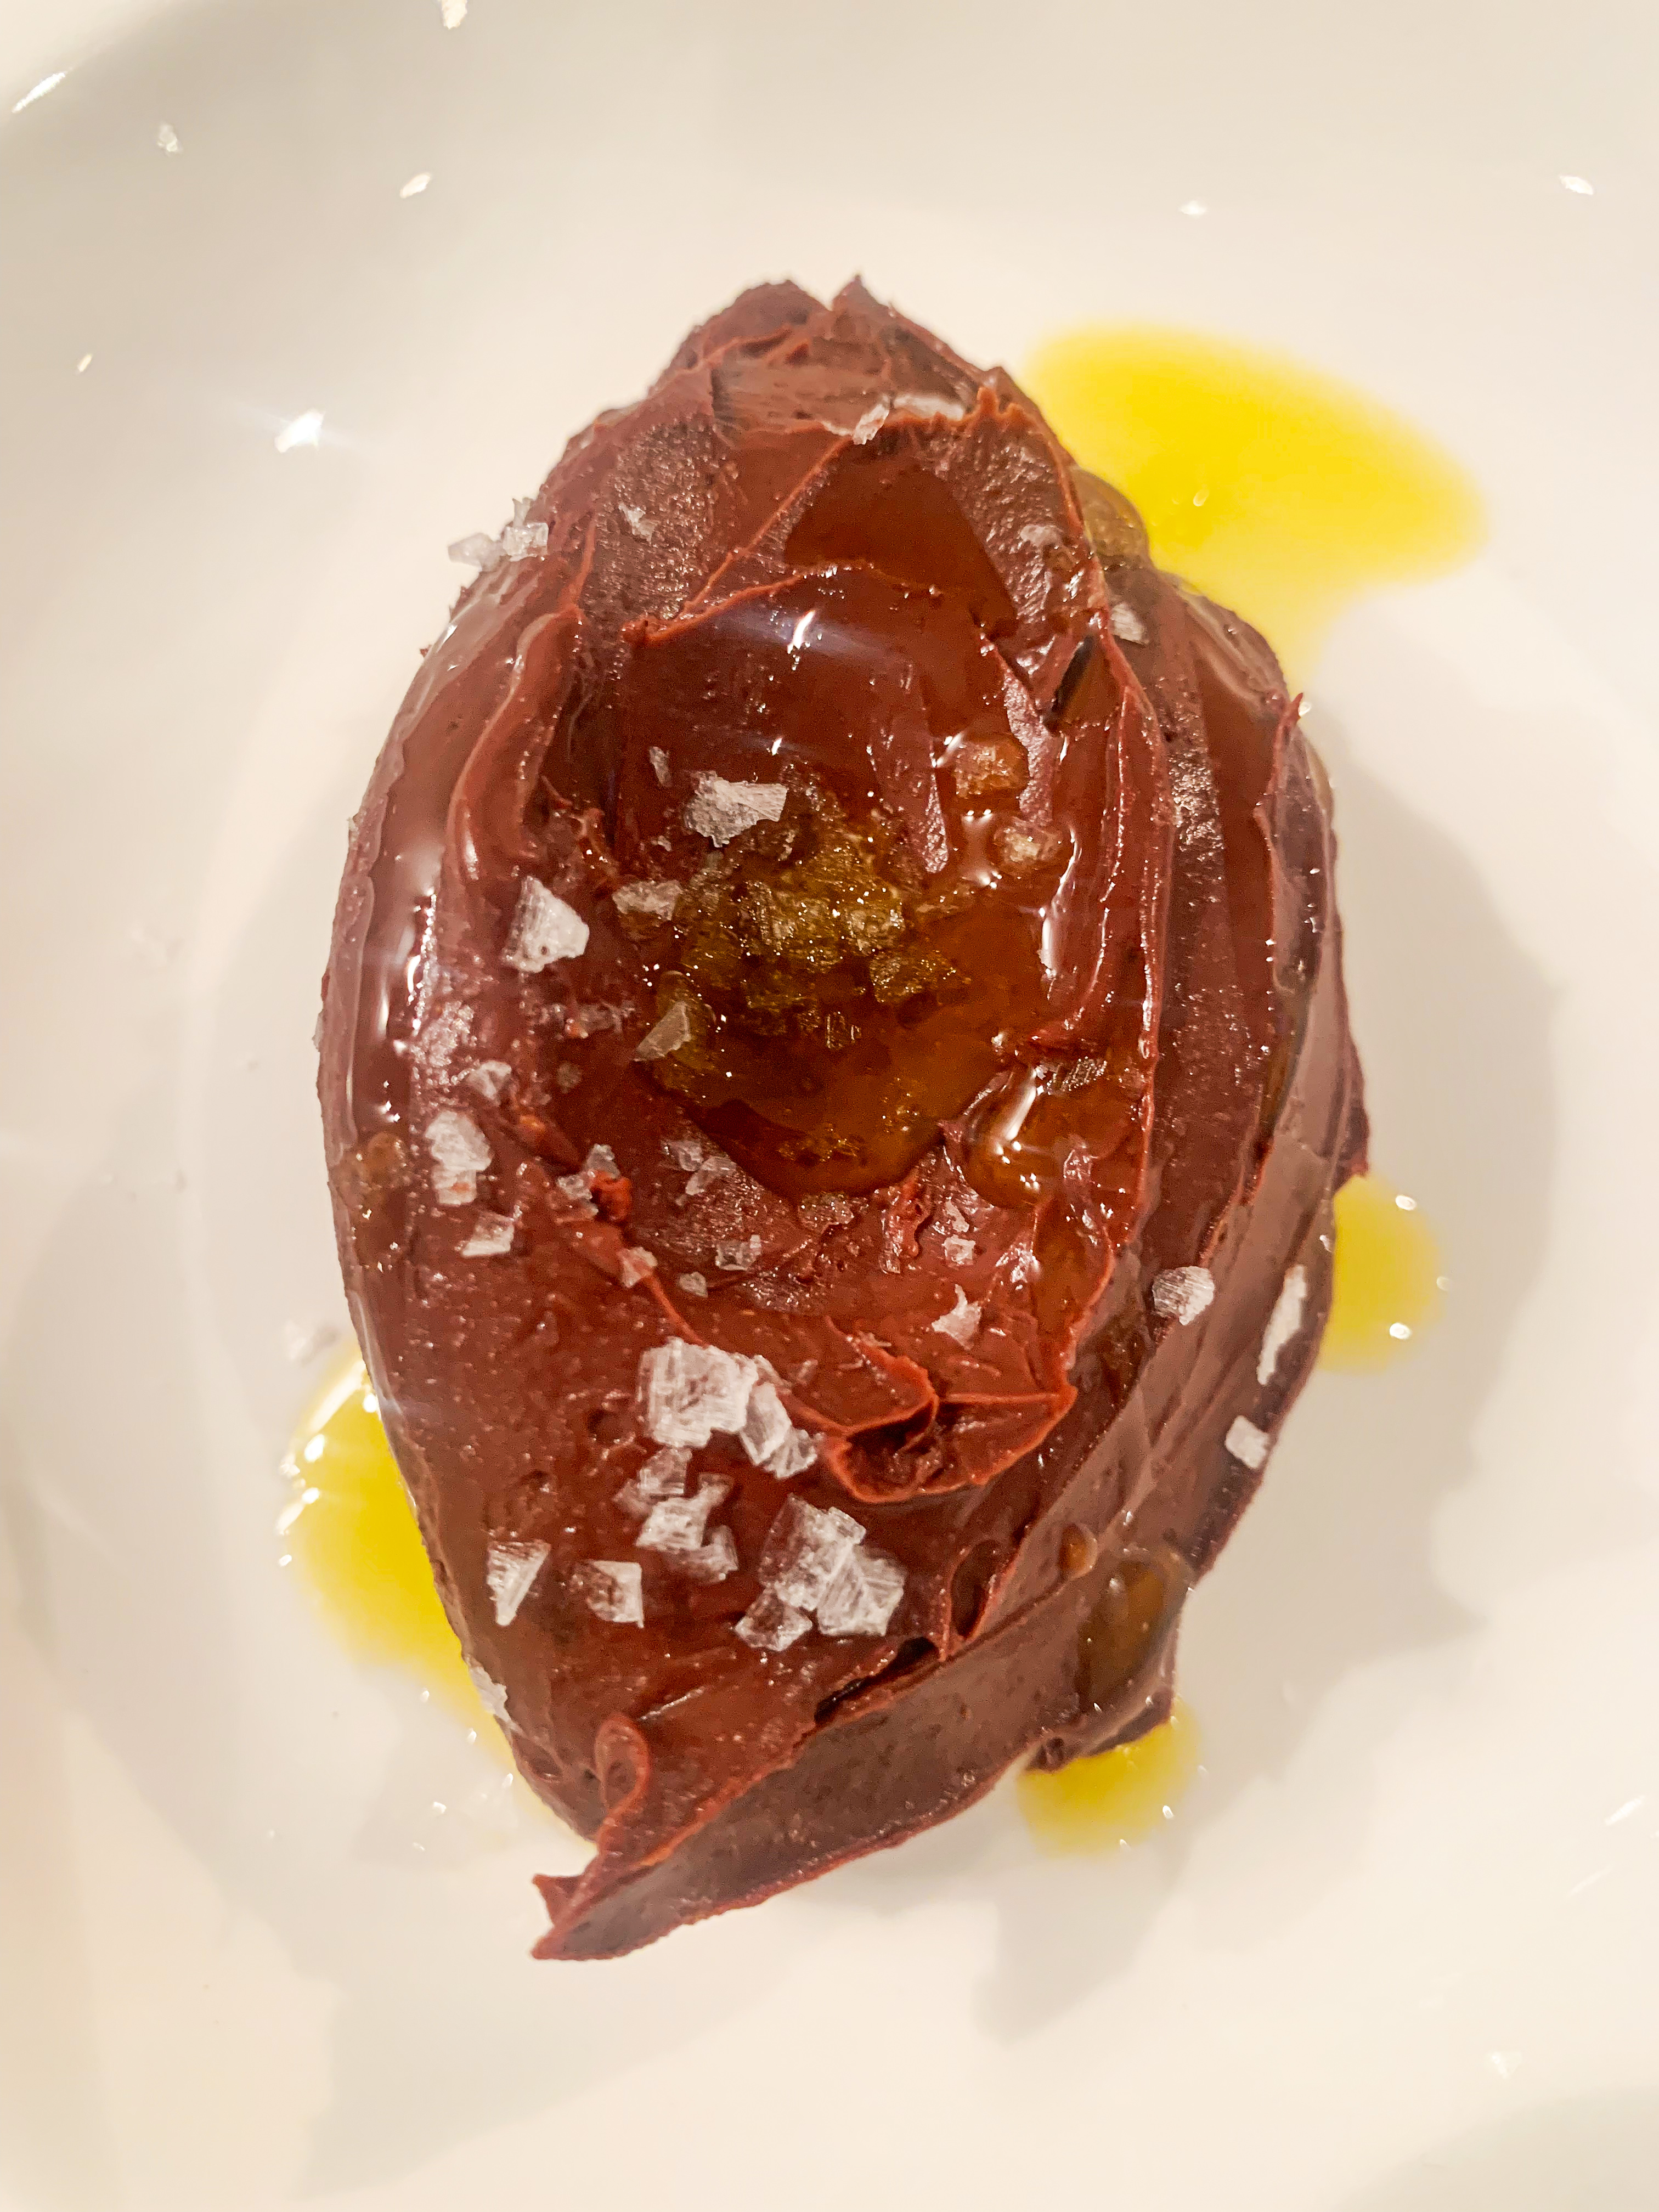
This recipe is a contemporary twist on a chocolate mousse. It’s more creamy and dense and is divine with a sprinkling of salt and a drizzle of olive oil. It’s a well known fact that salt and chocolate are perfect partners but more surprisingly so are olive oil and chocolate. Only your very best extra-virgin olive oil will do; you just need a drizzle, but it can be a game-changer – try it! You’ll either love it or hate it, but either way this cremeux with a sprinkling of salt will be your go-to chocolate dessert! The recipe is from the book ‘Service’ by chef Anna Headworth, apparently this dessert is a favourite in her restaurant…
250ml whole milk
250ml double cream
100g caster sugar
55g egg yolks (about 3)
290g plain dark chocolate (I use Lindt Excellence 70% Cocoa Dark Chocolate), roughly broken up
To Serve:
Best quality extra virgin olive oil
Maldon sea salt
- Put the milk and cream in a pan and bring to the boil. Mix the sugar and yolks together in a bowl. Pour the hot cream over the yolks and mix. Pour everything into the pan and gently heat until it reads 90’c on a temperature probe.
- Put the chocolate in a large bowl and pour the cream mix over the chocolate, leave to stand for 2 minutes, then whisk together until smooth. Pour into a serving bowl to set overnight in the fridge.
- You can serve in a large bowl or scoop out into individual portions, drizzle with a splash of extra-virgin olive oil and add a sprinkle of Maldon sea salt.
Torta Sabbiosa with Rum Cream
I found this recipe in an old file of my late mother-in-law’s, Deitha. I’ve no idea whether she actually ever made it, but it caught my eye as it’s a naturally gluten-free, plus there was the mention of rum cream! Torta Sabbiosa is a traditional Italian cake from the Veneto region. Its name translates to ‘sandy cake’, referring to its sandy texture. However, fortunately, rather than dry and grainy sand, it’s the soft and moist kind! The key ingredient is potato starch which gives the cake its distinctive dense yet fluffy sponge. It’s quite a plain cake but then there’s the all-important addition of the rum cream which lifts it’s simplicity to higher realms.
*I used ‘Penin Pero’ Potato starch available from Amazon
*You will need a round 20cm tin, greased and base lined with greaseproof paper.
For the Cake:
200g icing sugar, plus extra for dusting
200g unsalted butter, softened
2 eggs
200g potato starch (fecola di patate – see above)
1 teaspoon baking powder
50ml cognac
For the Rum Cream:
250ml mascarpone
50ml single cream
40-50ml dark rum (to taste)
50g icing sugar
- Place the icing sugar and soft butter in a bowl and use an electric whisk to mix at a high speed for at least five minutes until the mixture is ‘peaky’ rather like thick cream.
- Gently stir in each egg by hand. Then sift the potato starch and baking powder, and fold through the mixture. Finally, fold in the cognac.
- Pour the mixture into the prepared cake tin and bake in a preheated oven, 160’c fan, for 15 minutes, then increase the temperature to 180’c and bake for 20 minutes. Finally, switch off the heat and leave the cake in the oven for a further 20 minutes.
- Meanwhile make the rum cream. Combine all the ingredients together and put to one side.
- Remove the cake from the tin, leave to rest for half an hour until cool. Dust with icing sugar. Slice the cake and serve on plates with the rum cream spooned over.
Nectarine & Raspberry Crisp (serves 6-8)
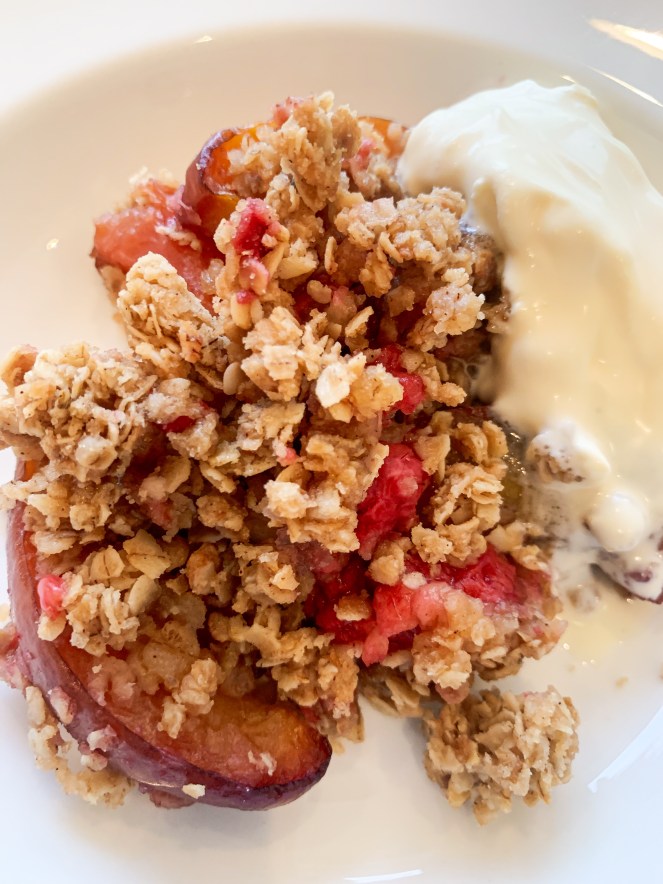
This is a recipe which I’ve been making for years. It’s from Darina Allen’s cookbook, ‘A Year at Ballymaloe’. These days, nectarines are available year-round, and although when they’re out of season they tend to be hard and underripe, they’re great for cooking with. This dessert will give you a taste of summer in the deepest, darkest days of winter. Depending on the ripeness of the nectarines, when cooked they will either retain an ‘al dente’ bite or will be softly stewed; either way, they will taste wonderful with the raspberries, which will have melted down to give a syrupy sauce. It’s a delicious dessert, especially with a large dollop of whipped cream!..
115g plain white flour (gluten-free if required)
230g soft brown sugar
340g porridge oats
¼ teaspoon freshly ground nutmeg
⅓ teaspoon ground cinnamon
225g butter, melted
900g nectarines
340g raspberries
1 tablespoon cornflour
Whipped cream, to serve
*You will need a Lasagne-type dish approx. 30x25cm
- Put all the dry ingredients into a bowl, add the melted butter and mix until crumbly.
- Slice the nectarines into the oven proof dish. Add the raspberries, sprinkle over the cornflour and mix well. Top with the crumble mixture.
- Bake in a preheated oven, 180’c fan, for about 40mins or until the topping is crisp and golden and the fruit is tender (see note above).
- Serve with softly whipped cream!
Lemon & Honey Clotted Cream Ice Cream with Flapjack Crumble (No Churn)
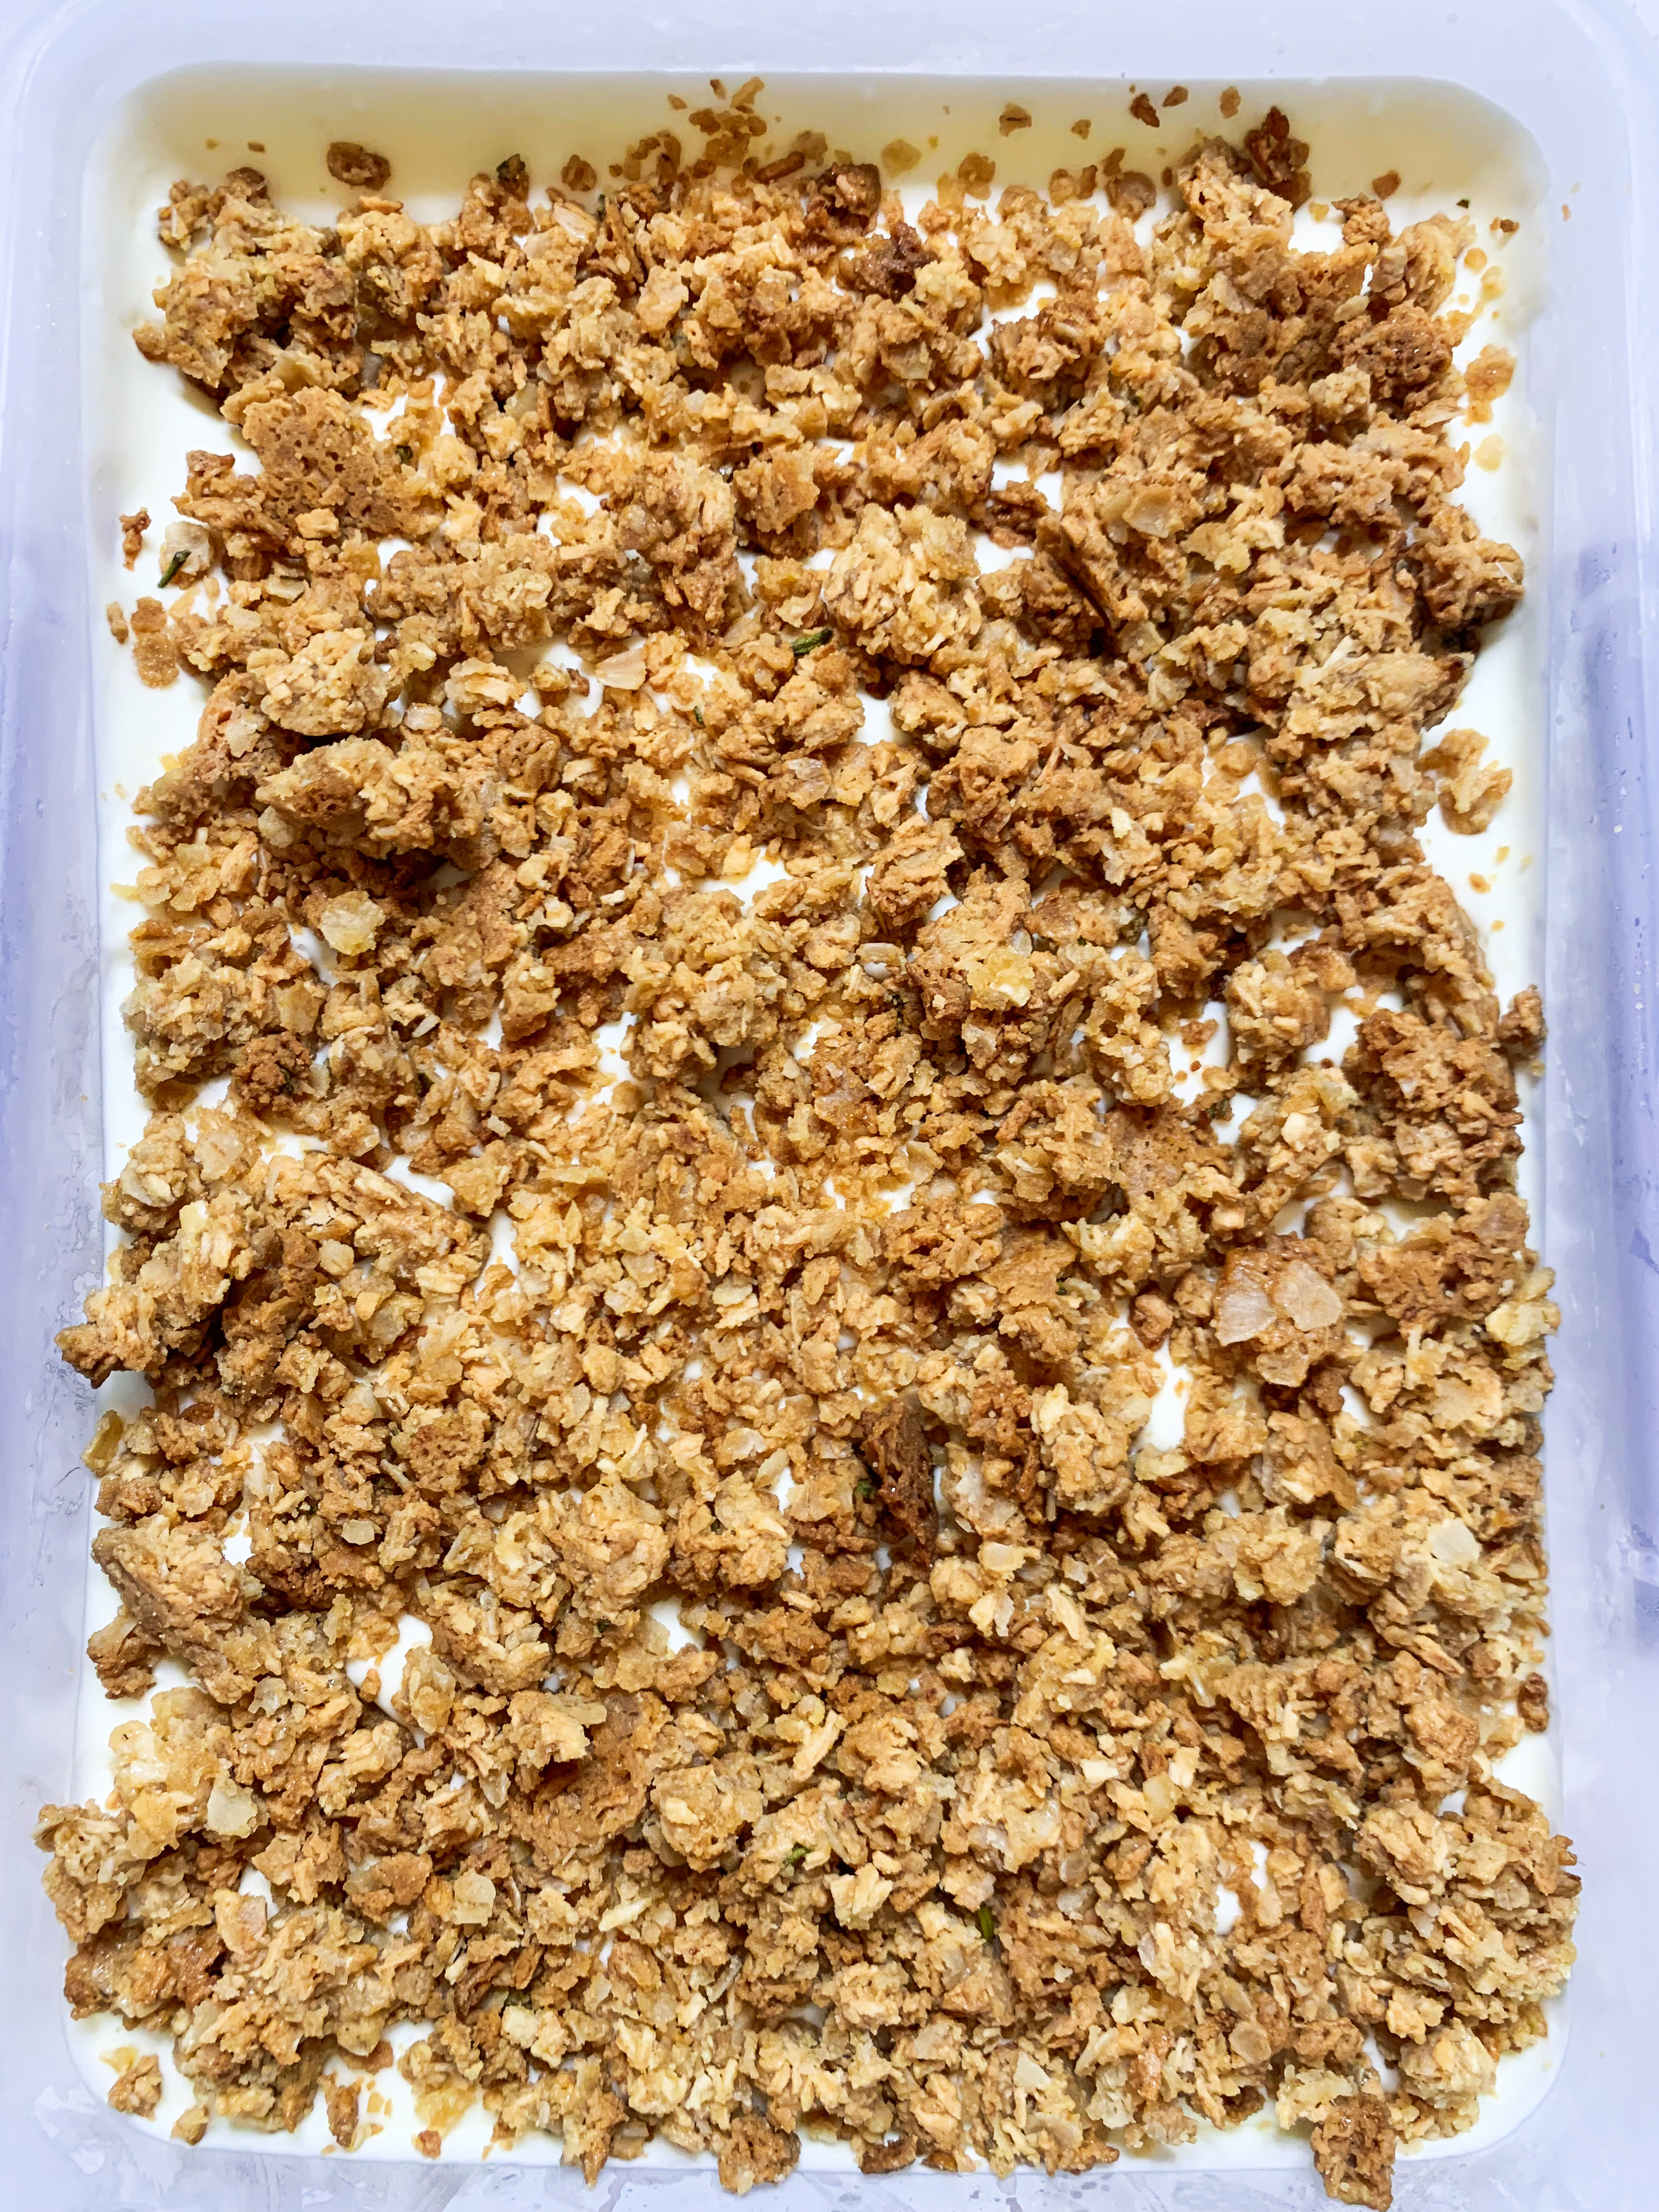
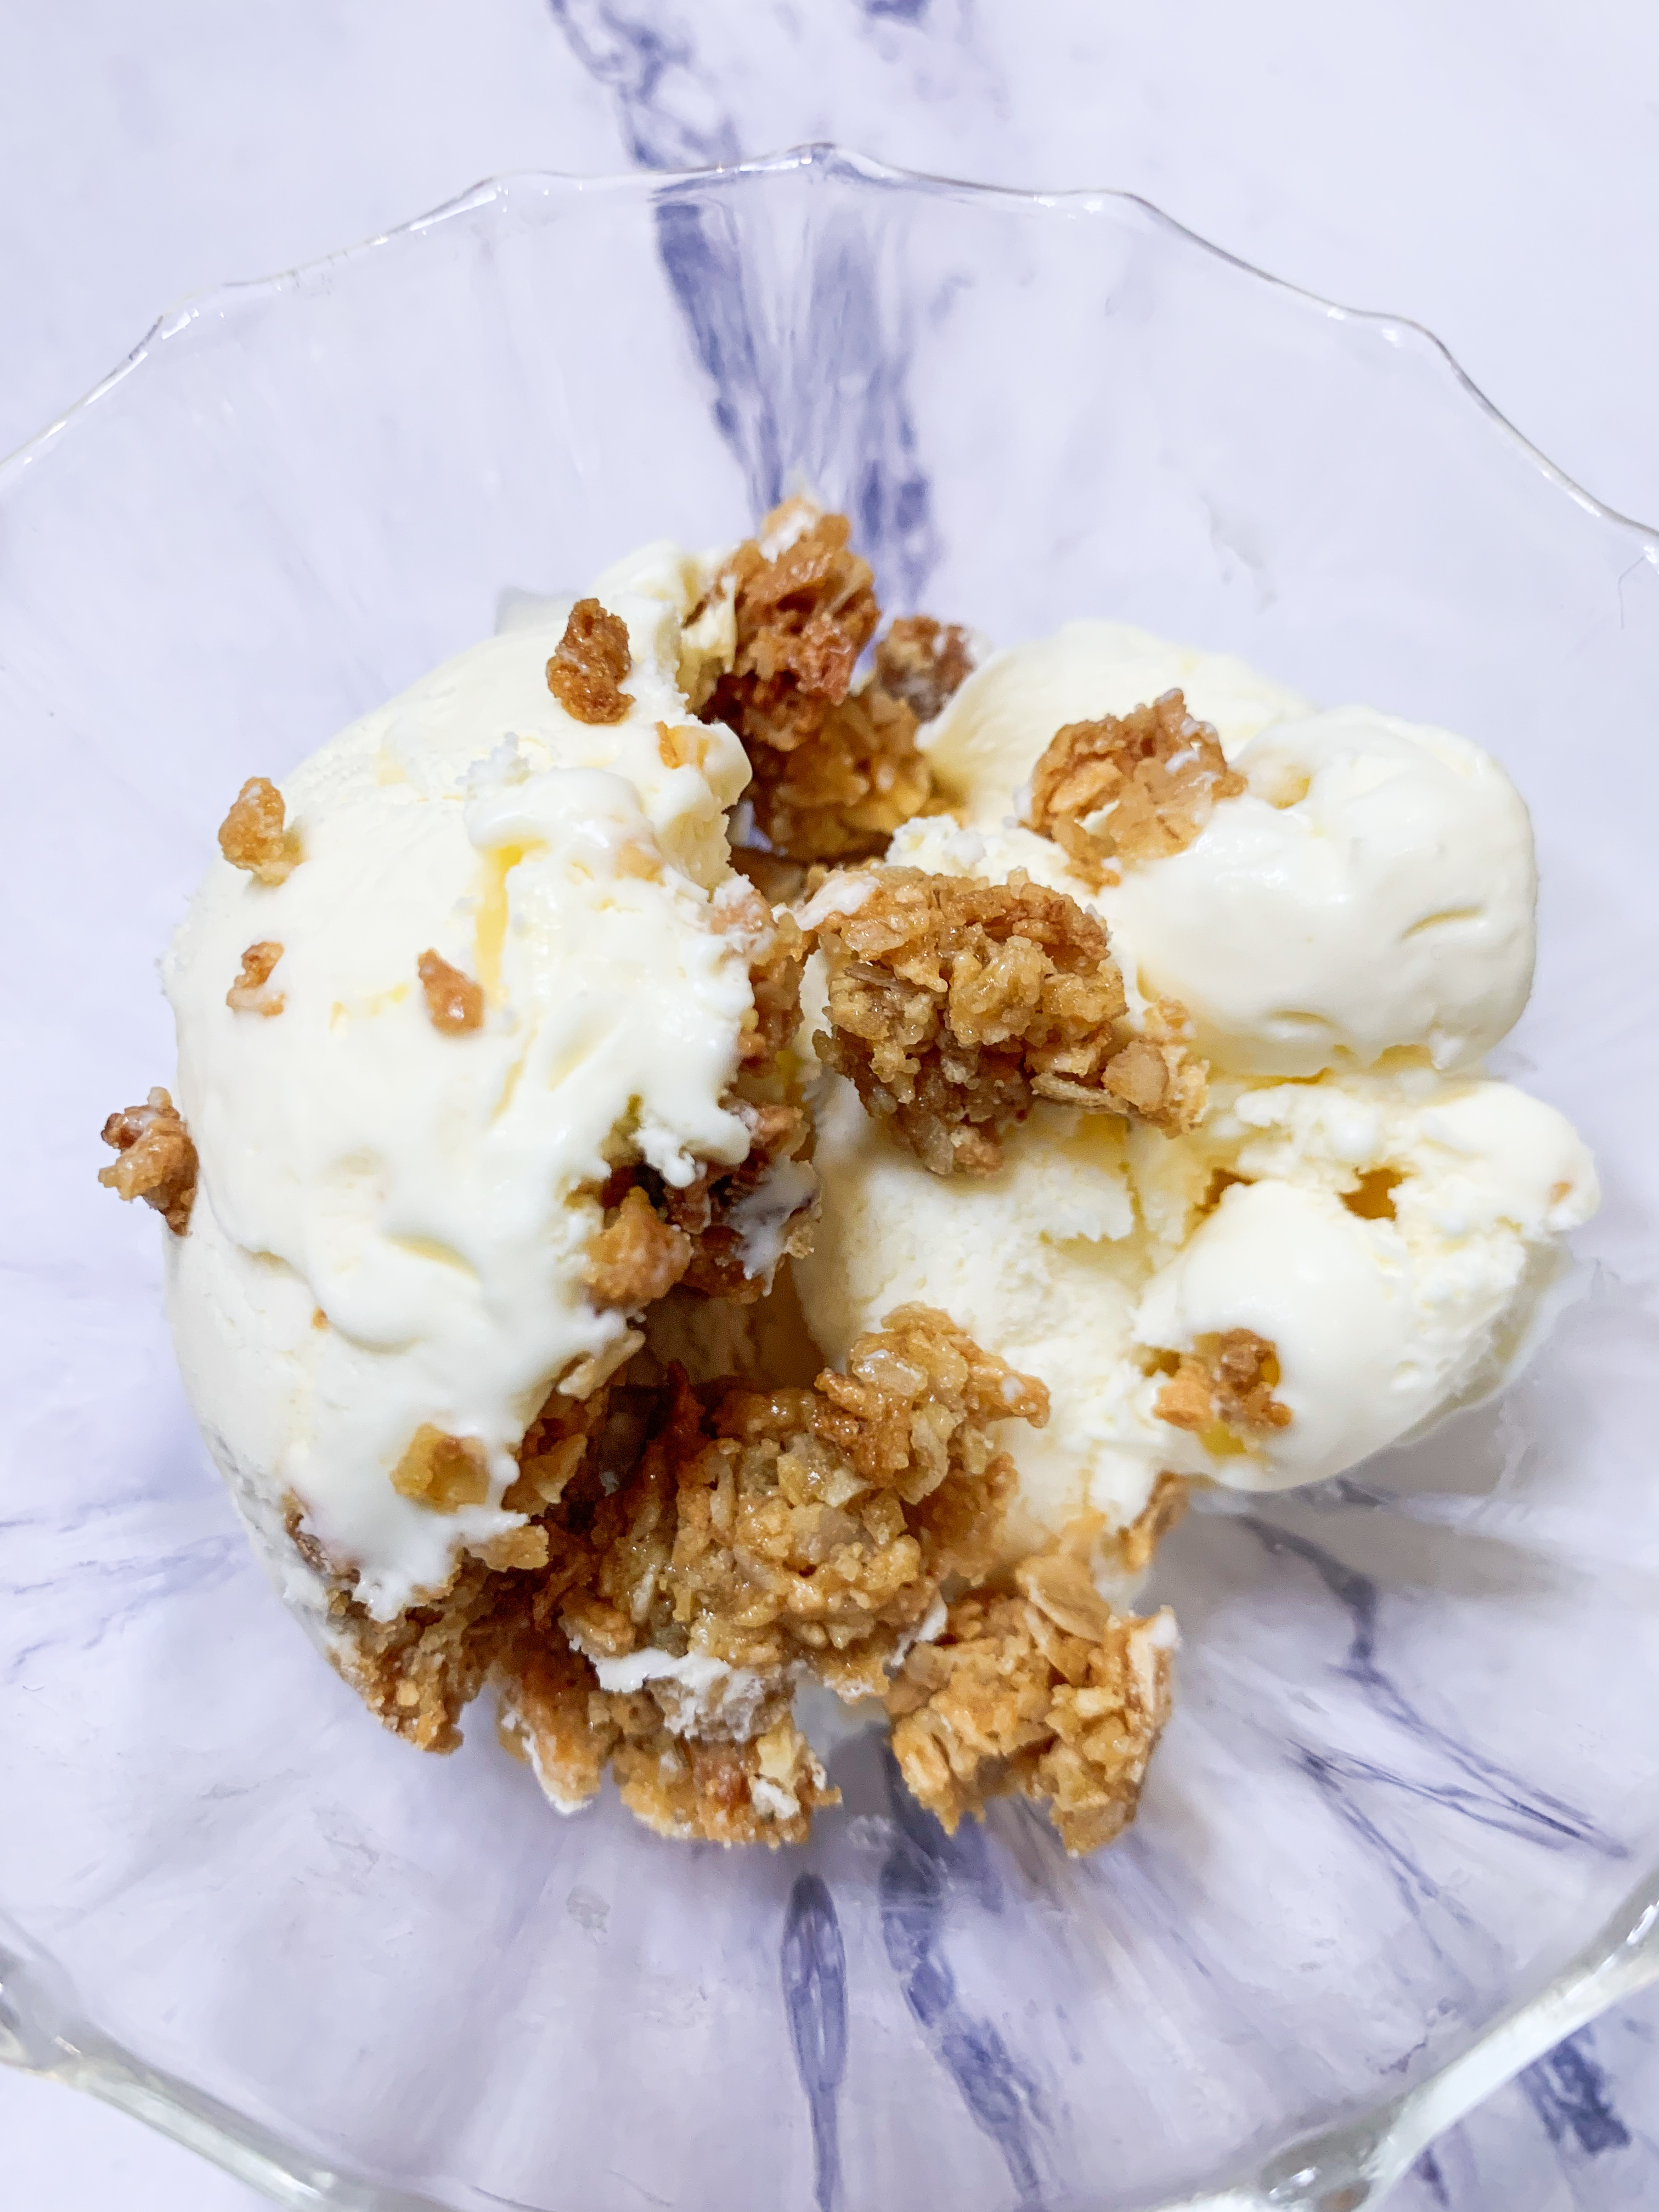
This is my new favourite ice cream. Thanks to the clotted cream it’s particularly creamy whilst the hint of honey and lemon makes it very moreish plus of course there’s the subtle crunch from the flapjack crumble. It’s an all-round winner, suitably sophisticated for adults and sweet enough for kids!..
300ml double cream
225ml clotted cream
1 x 397g tin of condensed milk
Zest of one lemon
Juice of half a lemon
3 tablespoons runny honey
5 tablespoons cut comb honey, crumbled into chunks
For the Flapjack Crumble:
3 tablespoons plain flour (gluten-free if required)
30g rolled oats
25g desiccated coconut
3 tablespoons golden syrup
3 tablespoons butter, melted
¼ teaspoon chopped fresh rosemary (optional)
Pinch of salt
- First of all make the crumble. Mix the ingredients together in a bowl then spread roughly onto a lined baking sheet. Cook in a preheated oven, 180’c fan, for 10 minutes then stir and bake for a further 5-10 minutes until golden. Let cool.
- Meanwhile, Whisk the cream until stiff peaks begin to form (take care not to over whip as you want the texture to be smooth).
- Fold the condensed milk into the cream, then add the clotted cream, lemon juice, zest and honey and fold all the ingredients together. Finally, gently mix in the honey comb.
- Pour the mixture into a freezer-safe container and cover with a lid. Place in a freezer for 20 minutes then sprinkle over the flapjack crumble and leave to firm up in the freezer overnight.
- Scoop to serve straight from the freezer.
Vanilla Pavlova with Passion Fruit Cream, Pineapple and Mint Salsa (Serves 8)
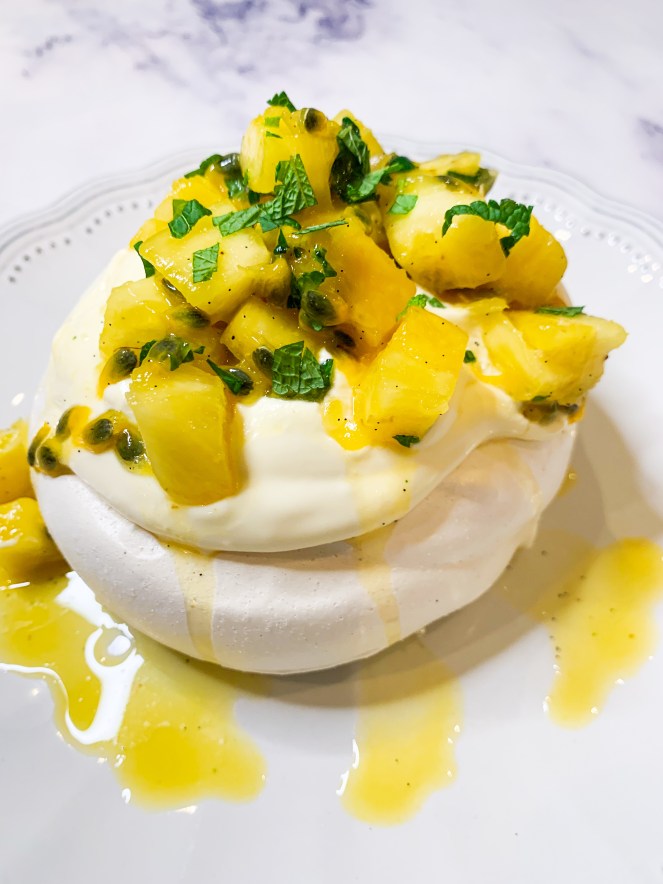
This is a real show-stopping dessert. The combination of the fresh pineapple and passion fruit alongside the whipped cream and marshmallow-like texture of the meringue is sublime – plus there’s the fresh tang from the mint! This glorious recipe is from Paul Ainsworth’s cookbook ‘For the Food I Love’.
6 egg whites
1 teaspoon vanilla bean paste
330g caster sugar
1½ tablespoon cornflour
2 teaspoons lemon juice
Zest of 1 lime
For the Pineapple and Mint Salsa:
1 ripe pineapple, peeled, cored and diced
1 pod of vanilla, seeds removed
4 passion fruit
12 mint leaves
For the Passion Fruit Cream:
125g crème fraiche
20g icing sugar
150ml double cream
- First, make the meringue. Whisk the egg whites and vanilla paste together until light and fluffy. Now slowly start to whisk in the sugar, 1 tablespoon at a time, until fully incorporated. Continue to whisk until the meringue forms soft peaks. Sift the cornflour and using a spatula fold it through the fluffy egg white. Finally, fold through the lemon juice.
- Onto a baking sheet lined with baking paper, spoon (or pipe) the meringue, forming 8 domed circles (approx. 10cm). Bake in a preheated oven, 110’c fan for 55 minutes, then turn off the oven and leave the pavlovas in the oven to cool and dry.
- To make the pineapple and mint salsa, take a bowl and add the pineapple and vanilla seeds (from the pod). Cut the passion fruit in half and scrape out the fruit into a sieve over a small bowl to collect the juice. Keep back 1 tablespoon of juice for the fruit cream (see below) and add the rest to the salsa, along with the passion fruit seeds. Chop up some of the mint but reserve a few leaves for decoration. Now give the salsa a good stir.
- Next make the passion fruit cream. Take a mixing bowl and add the crème fraiche, icing sugar and reserved 1 tablespoon of passion fruit juice, whisk together to combine. In a separate bowl, whisk the double cream until you have soft peaks. Fold the whipped double cream through the passion fruit mixture and whip until stiff. Chill in the fridge until ready to serve.
- To serve, place the pavlovas onto a large platter or individual plates. Divide the passion fruit cream between the pavlovas in neat dollops, then spoon over the pineapple and mint salsa. Finish with lime zest and reserved mint leaves.
Banana Soufflés with Caramel Sauce (Serves 6)

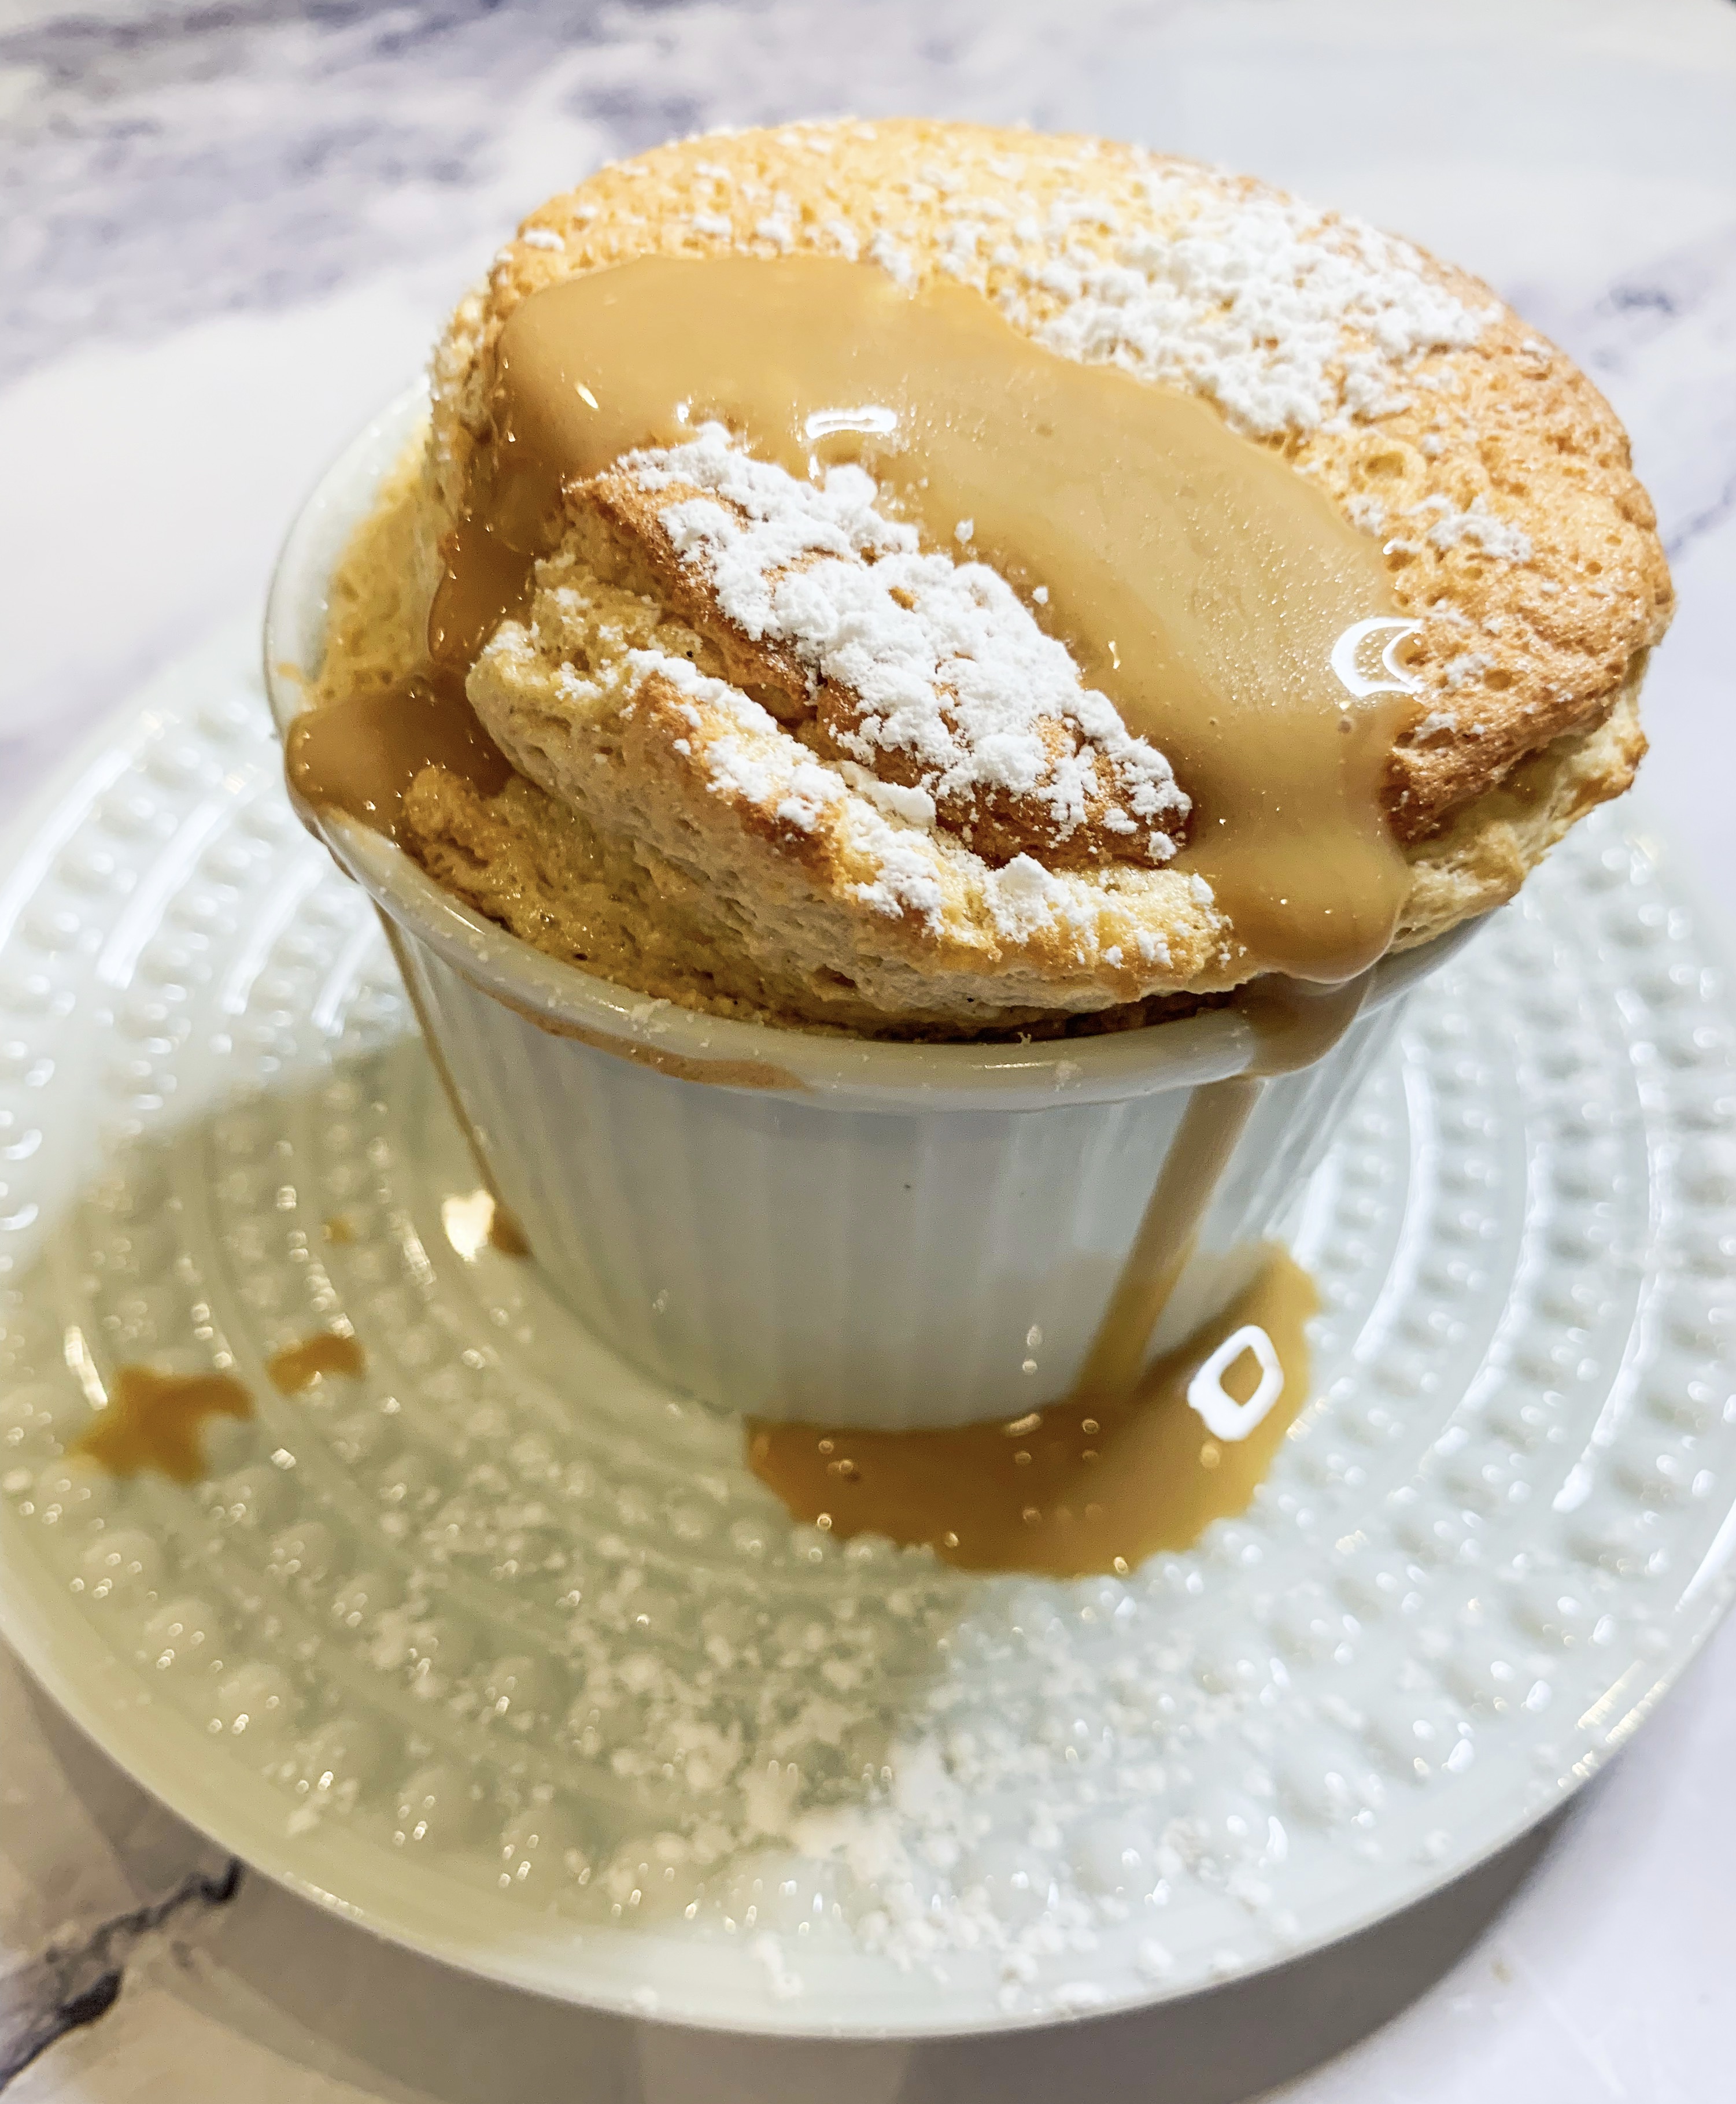
Oh my, these are good!.. They are soft, fluffy and fruity; a super light dessert which will impress everyone. Soufflés have a reputation for being difficult to make, but believe me when I say that these are super easy. The soufflé mix can be made up to two hours in advance, just keep chilled in the ramekins and bake straight from the fridge. Meanwhile, the caramel sauce can be made up to 2 days in advance; keep chilled and reheat gently to serve.
*It’s important to get the size of the ramekins right to make sure that they rise up – I used ramekins with a 200ml capacity (9cm diameter) and they rose up perfectly.
20g butter, softened for coating the ramekins
100g caster sugar, plus extra for coating
75ml whole milk
2 large eggs, separated
2 tablespoons cornflour
1 large ripe banana, about 100g
1 teaspoon vanilla bean paste
Icing sugar, for dusting
For the caramel sauce:
20g dark muscovado sugar
1 tablespoon golden syrup
25g butter
150ml double cream
- Preheat the oven to 180’c fan and put a baking tray in the oven.
- Grease 6 ramekins (see note above) with butter and evenly coat the base and sides with a little sugar.
- Heat the milk until it’s just at a simmer then remove from the heat. Using an electric whisk, beat the egg yolks and 50g of the caster sugar together until pale, then whisk in the cornflour. Now, gradually whisk in the warm milk.
- Place the banana and vanilla bean paste in a food processor or blender and whizz until very smooth. Stir into the milk mixture.
- Using clean beaters, whisk the 2 egg whites until stiff, then gradually add the remaining sugar, whisking until shiny.
- Use a metal spoon to fold the banana mixture into the egg whites, a quarter at a time, until blended and mousse-like.
- Spoon the mixture into the prepared ramekins. Place on the hot baking tray and bake in the preheated oven, 180’c fan, for 12-15 minutes until risen and golden brown.
- Meanwhile, make the caramel sauce. Place the sugar, butter and syrup in a pan and heat gently, stirring, until smooth. Bring to a simmer then stir in the cream and cook gently for a further 2 minutes.
- Remove the soufflés from the oven dust with icing sugar and serve immediately with the warm sauce – it’s a good idea to make sure your guests are seated at the table so you can serve them the moment they come out of the oven so that everyone can appreciate them in their full ‘risen’ glory!
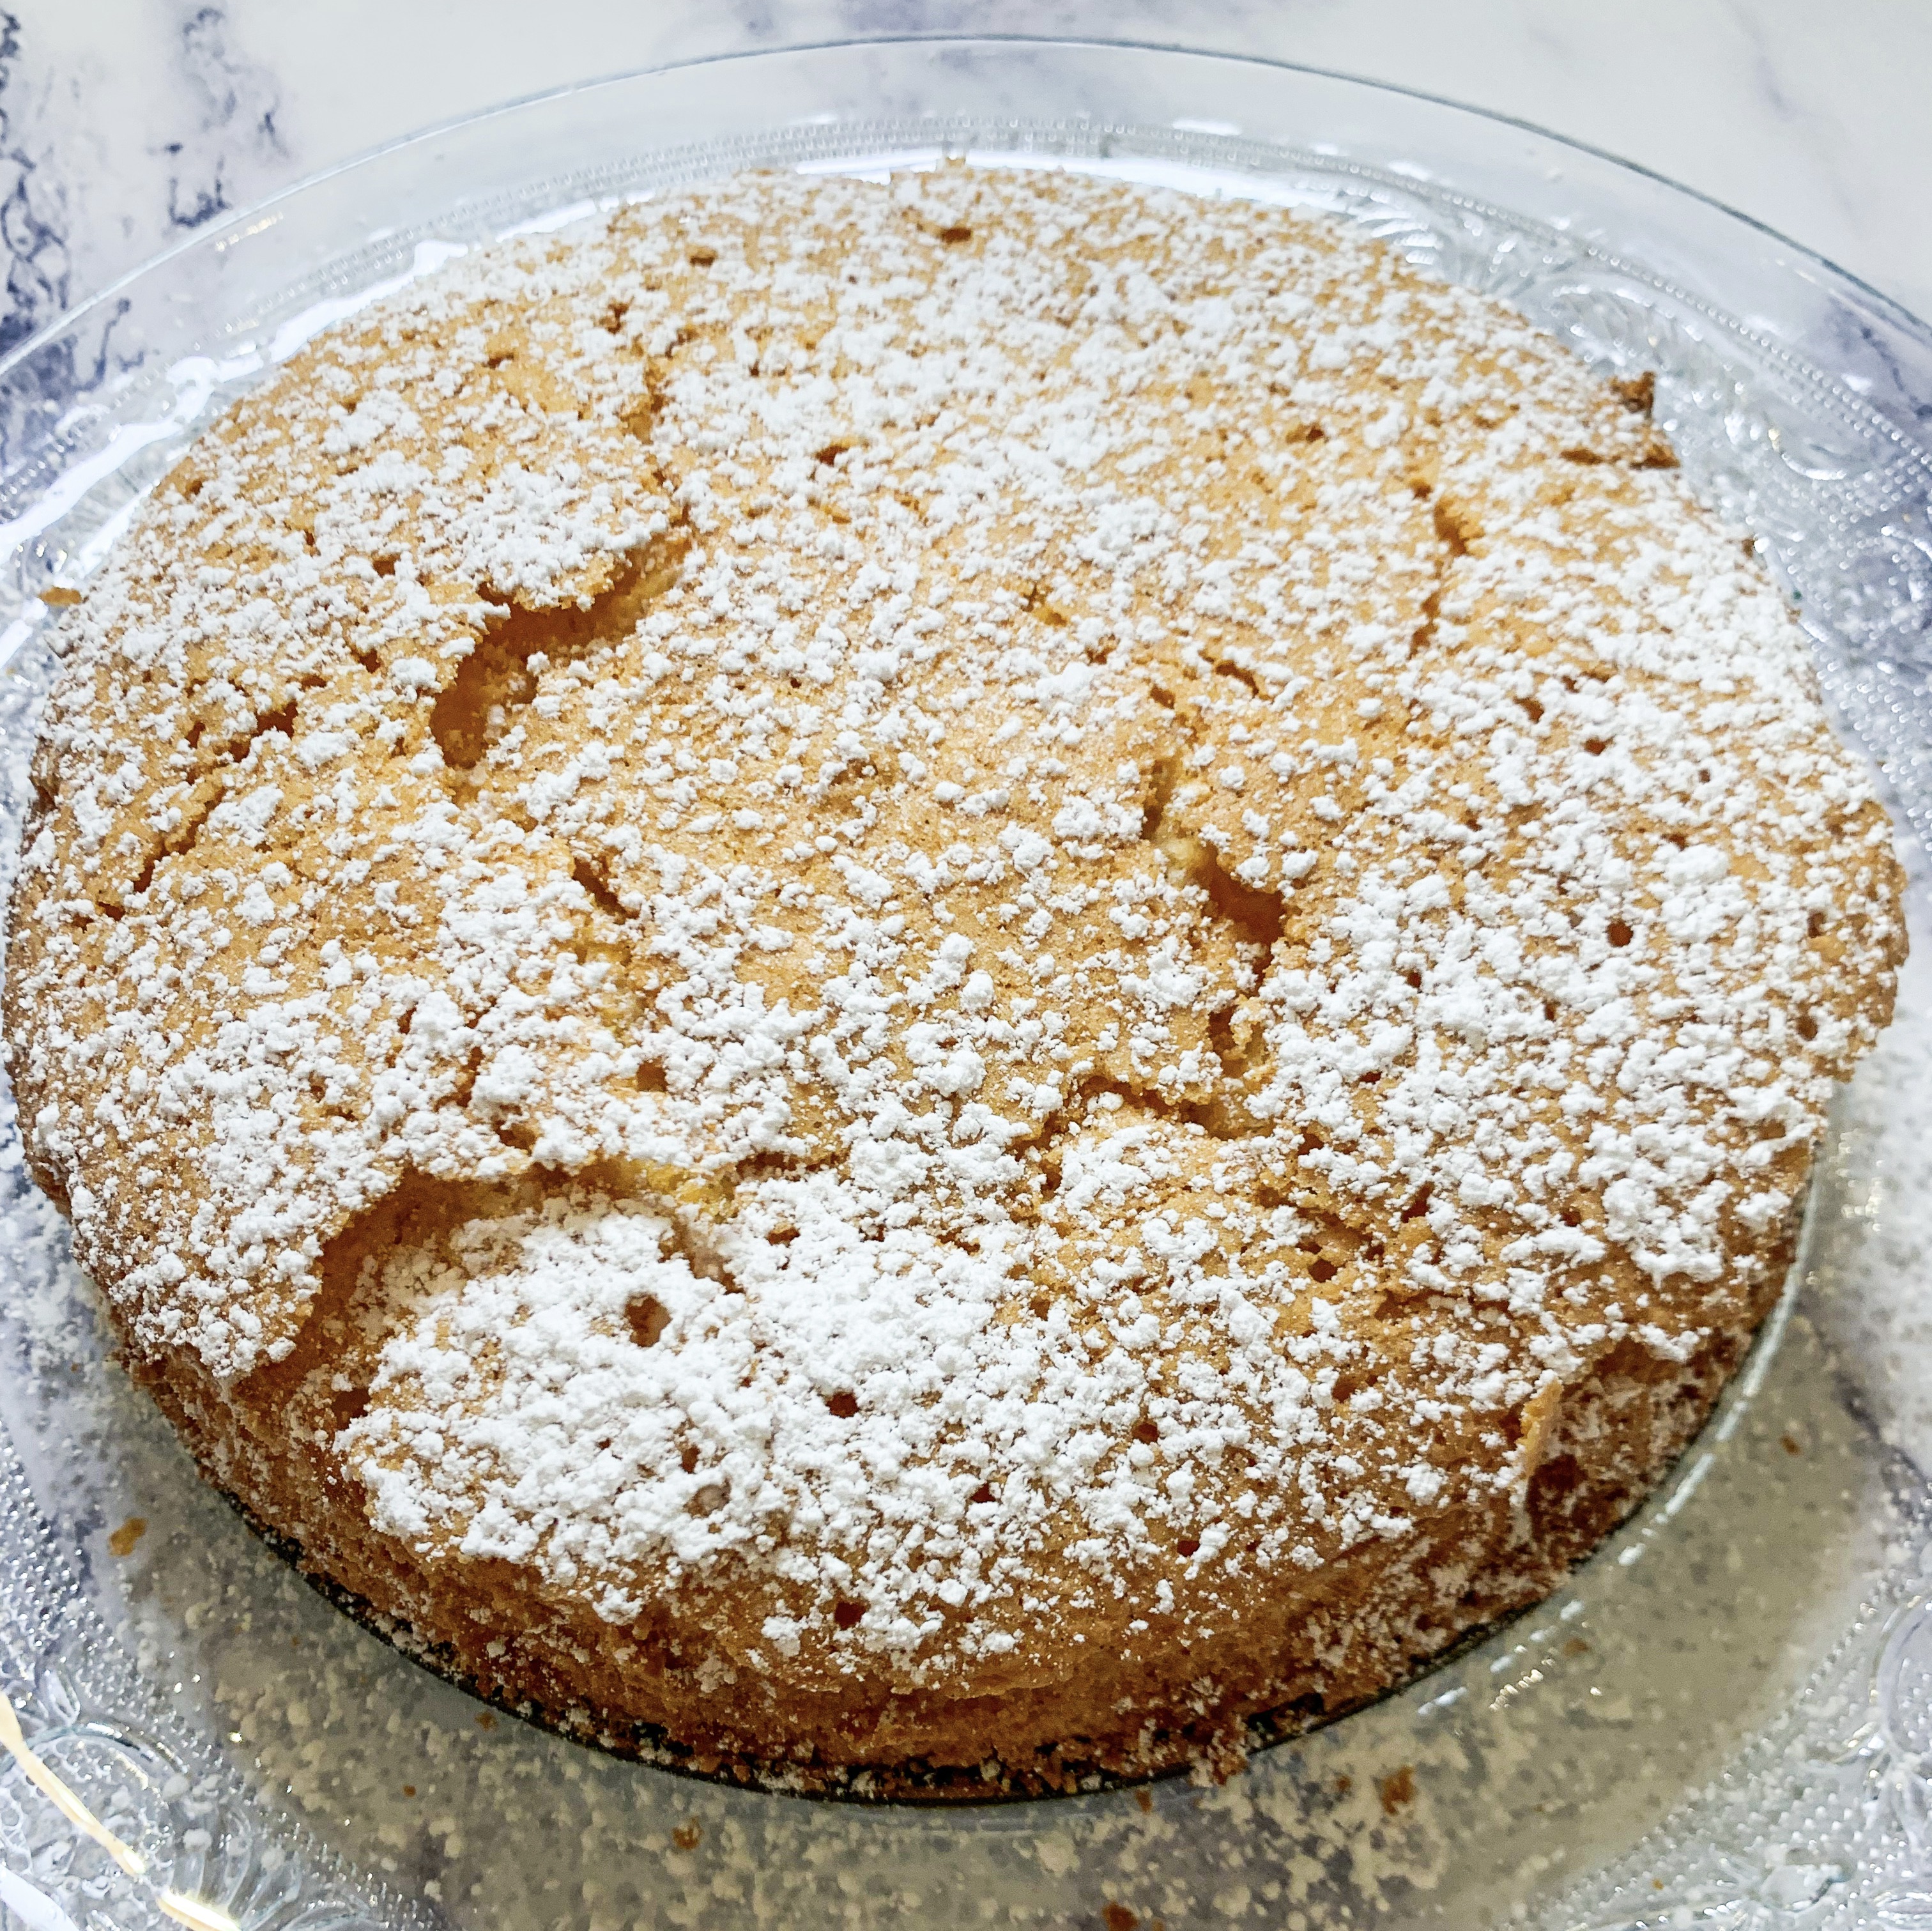
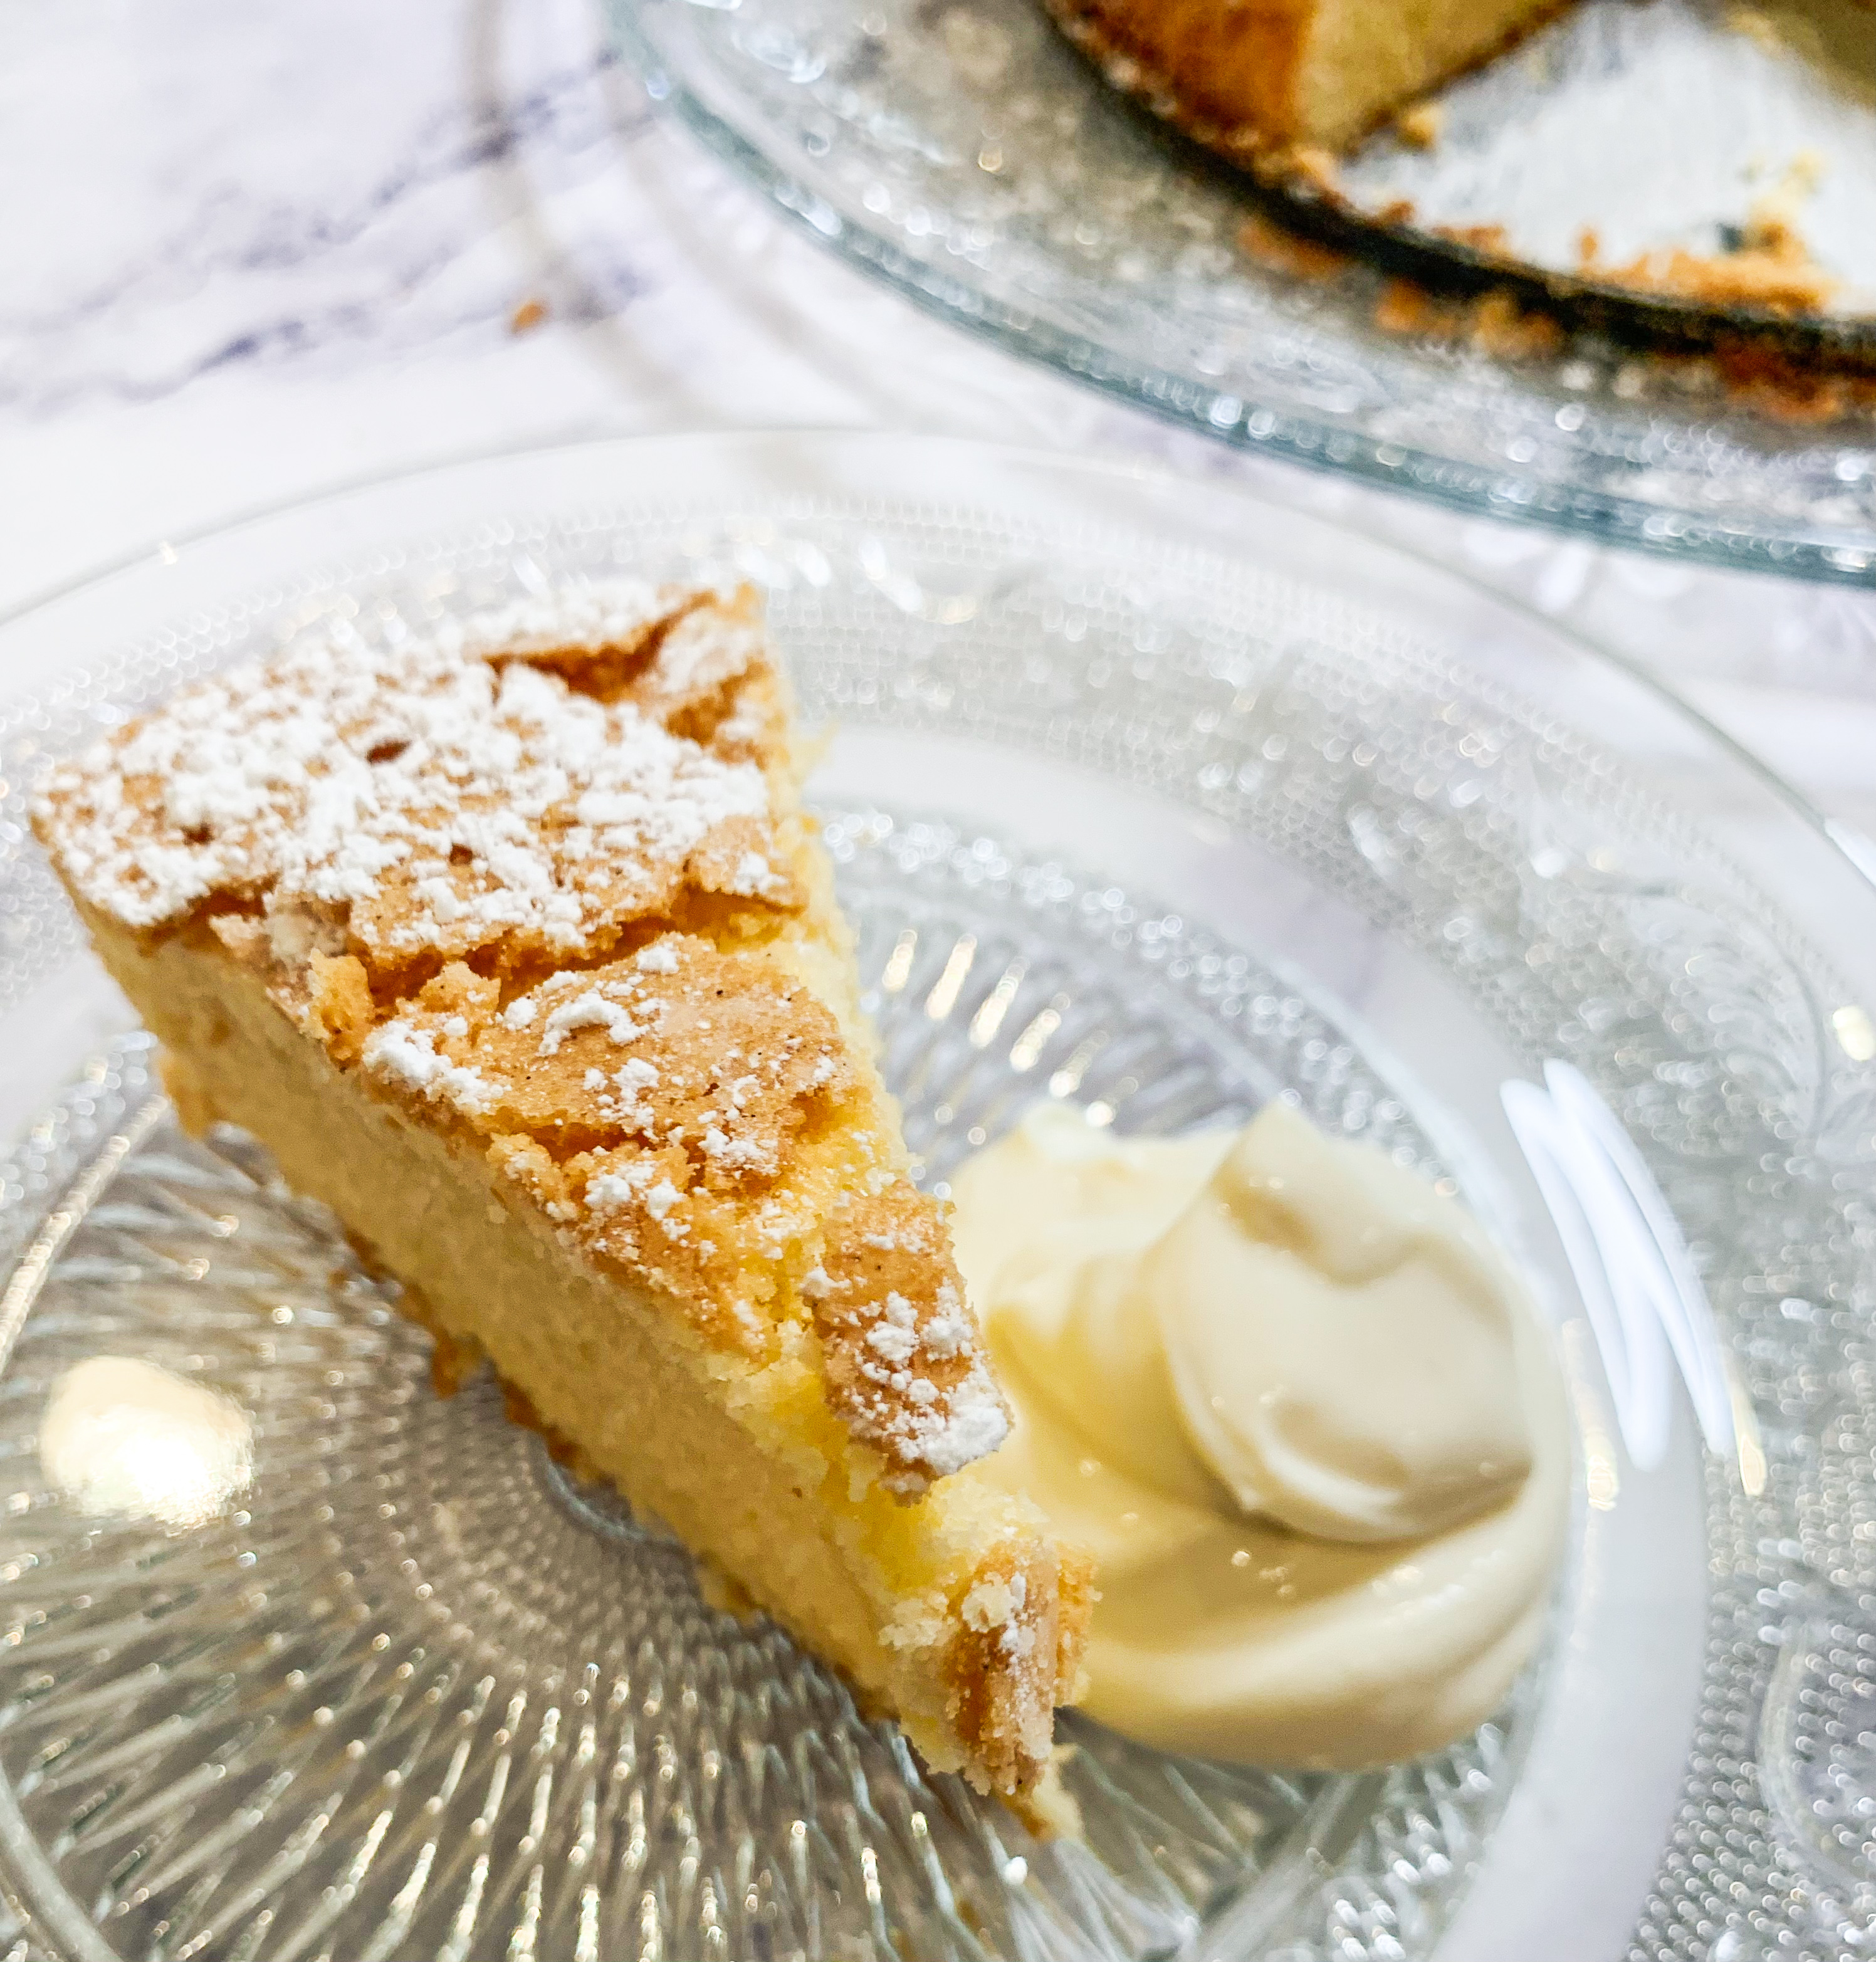
Italian Apple Tart
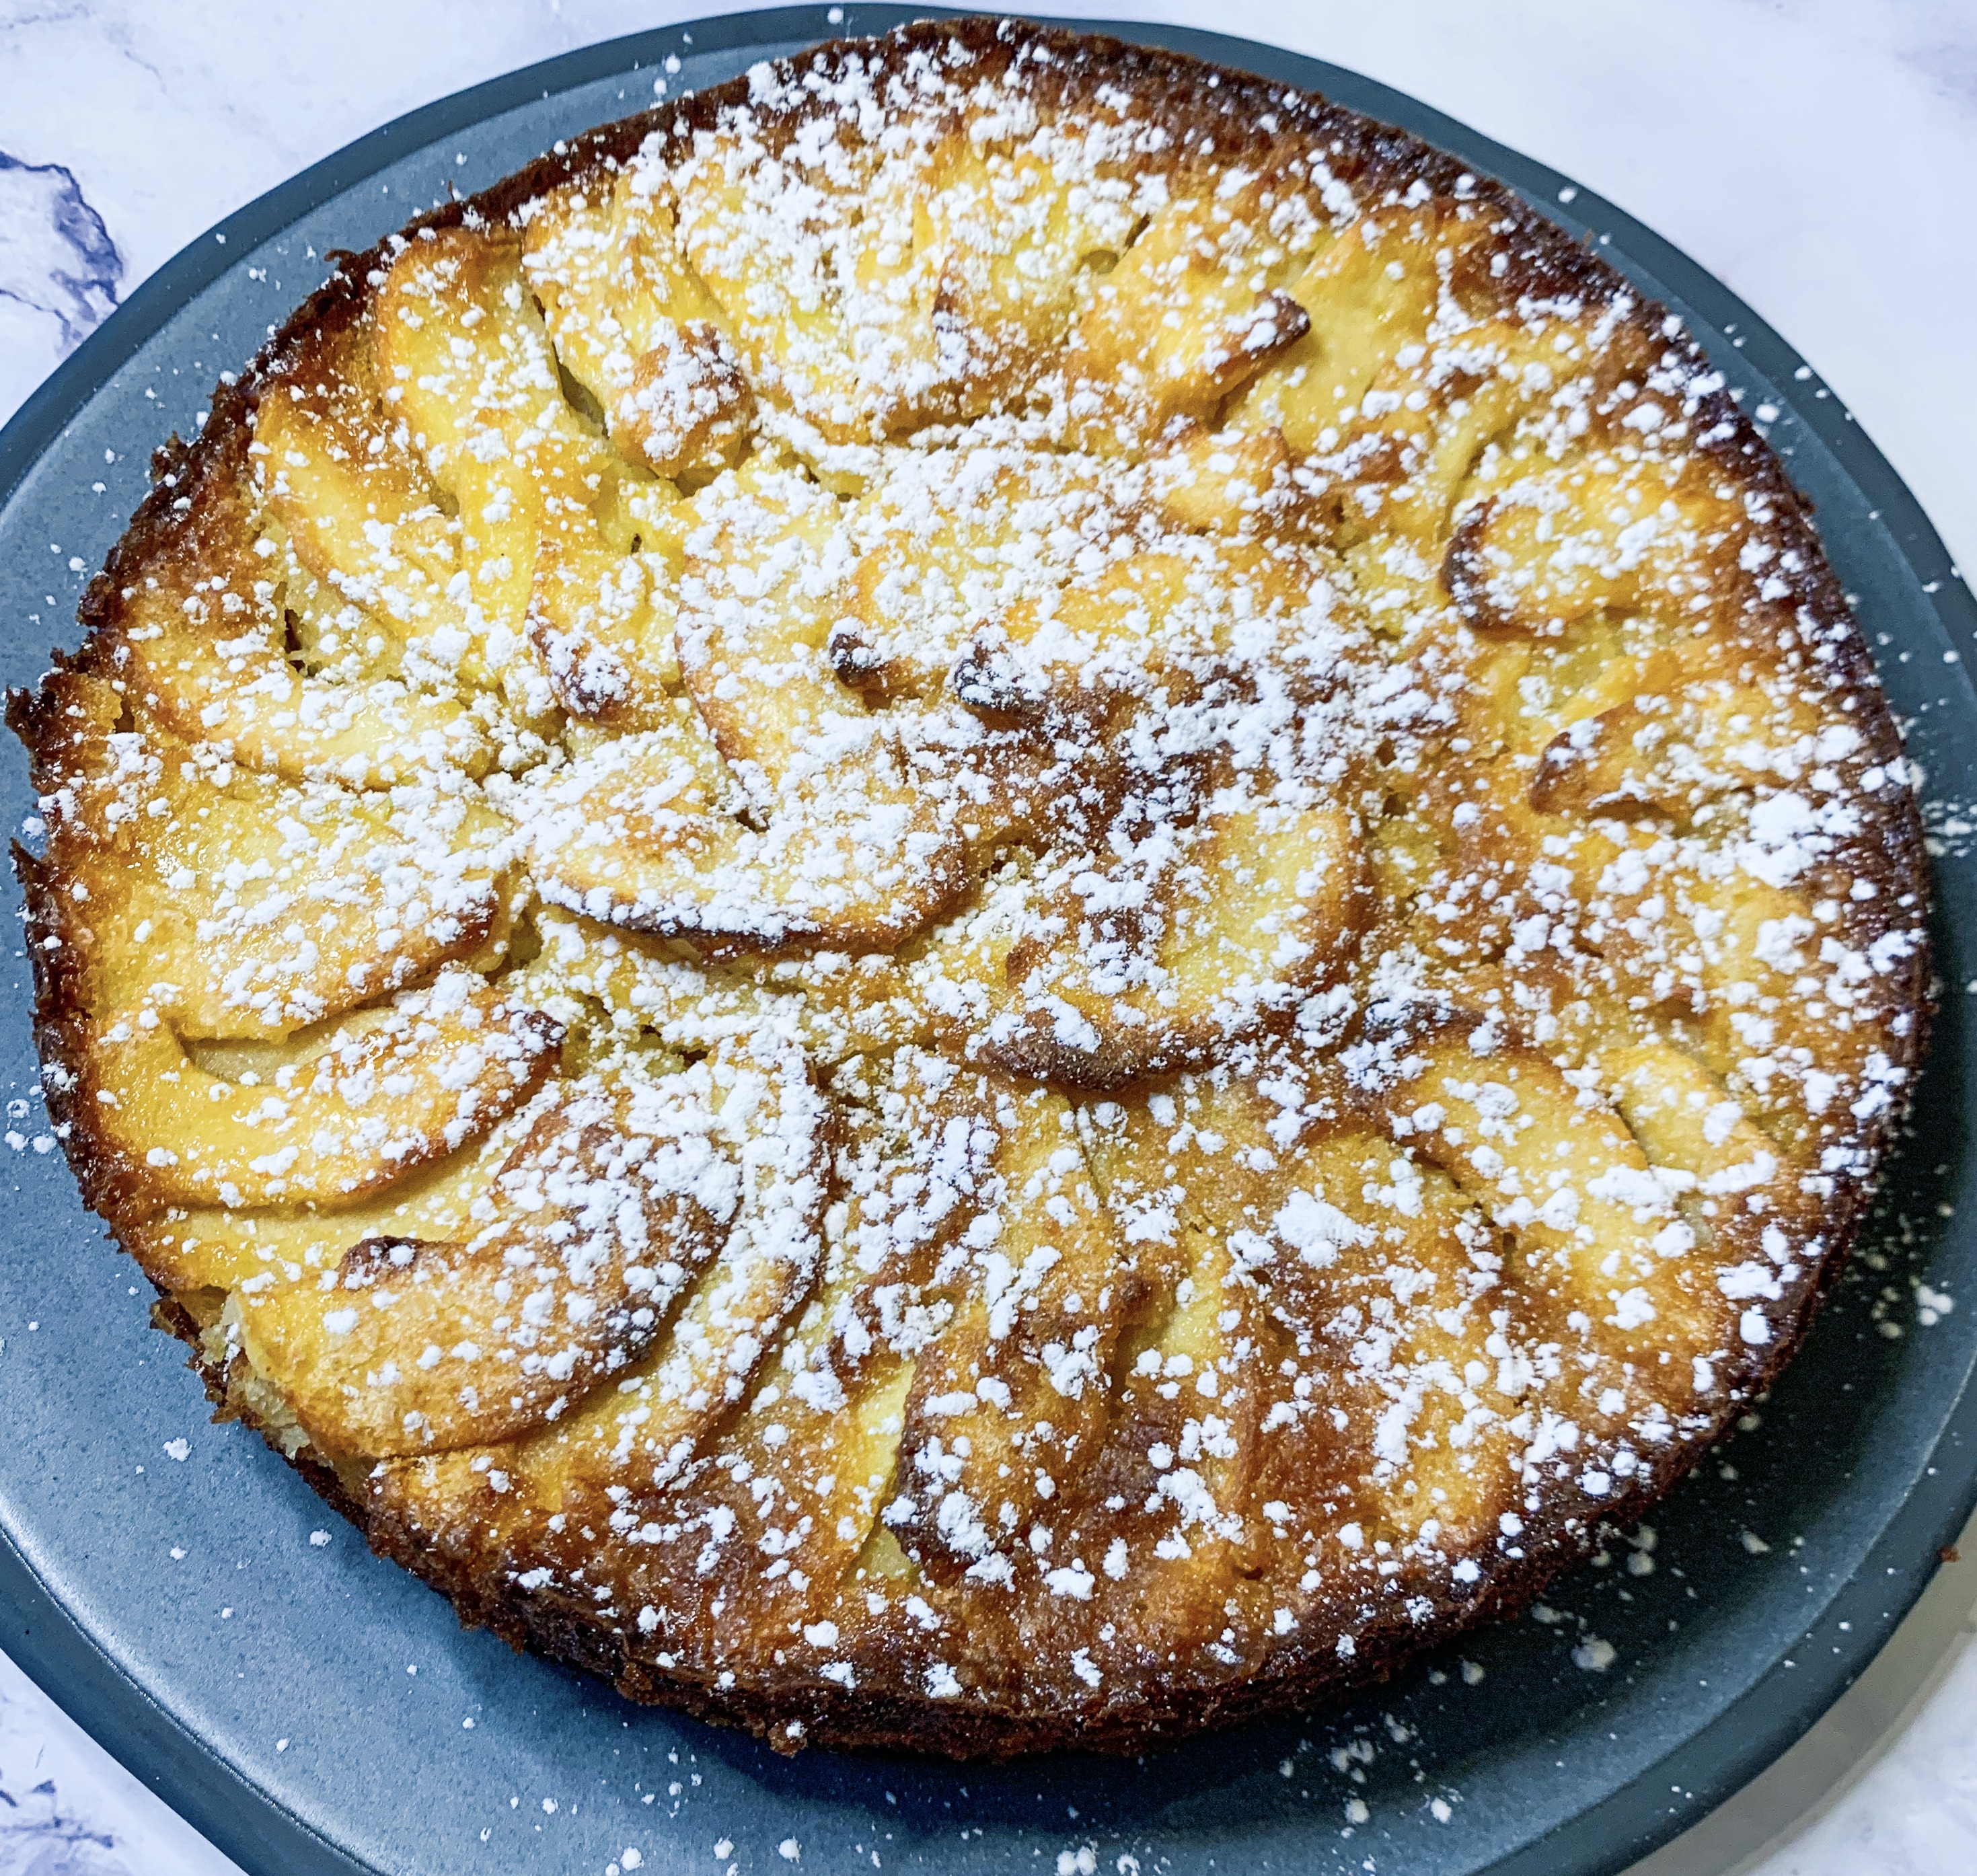
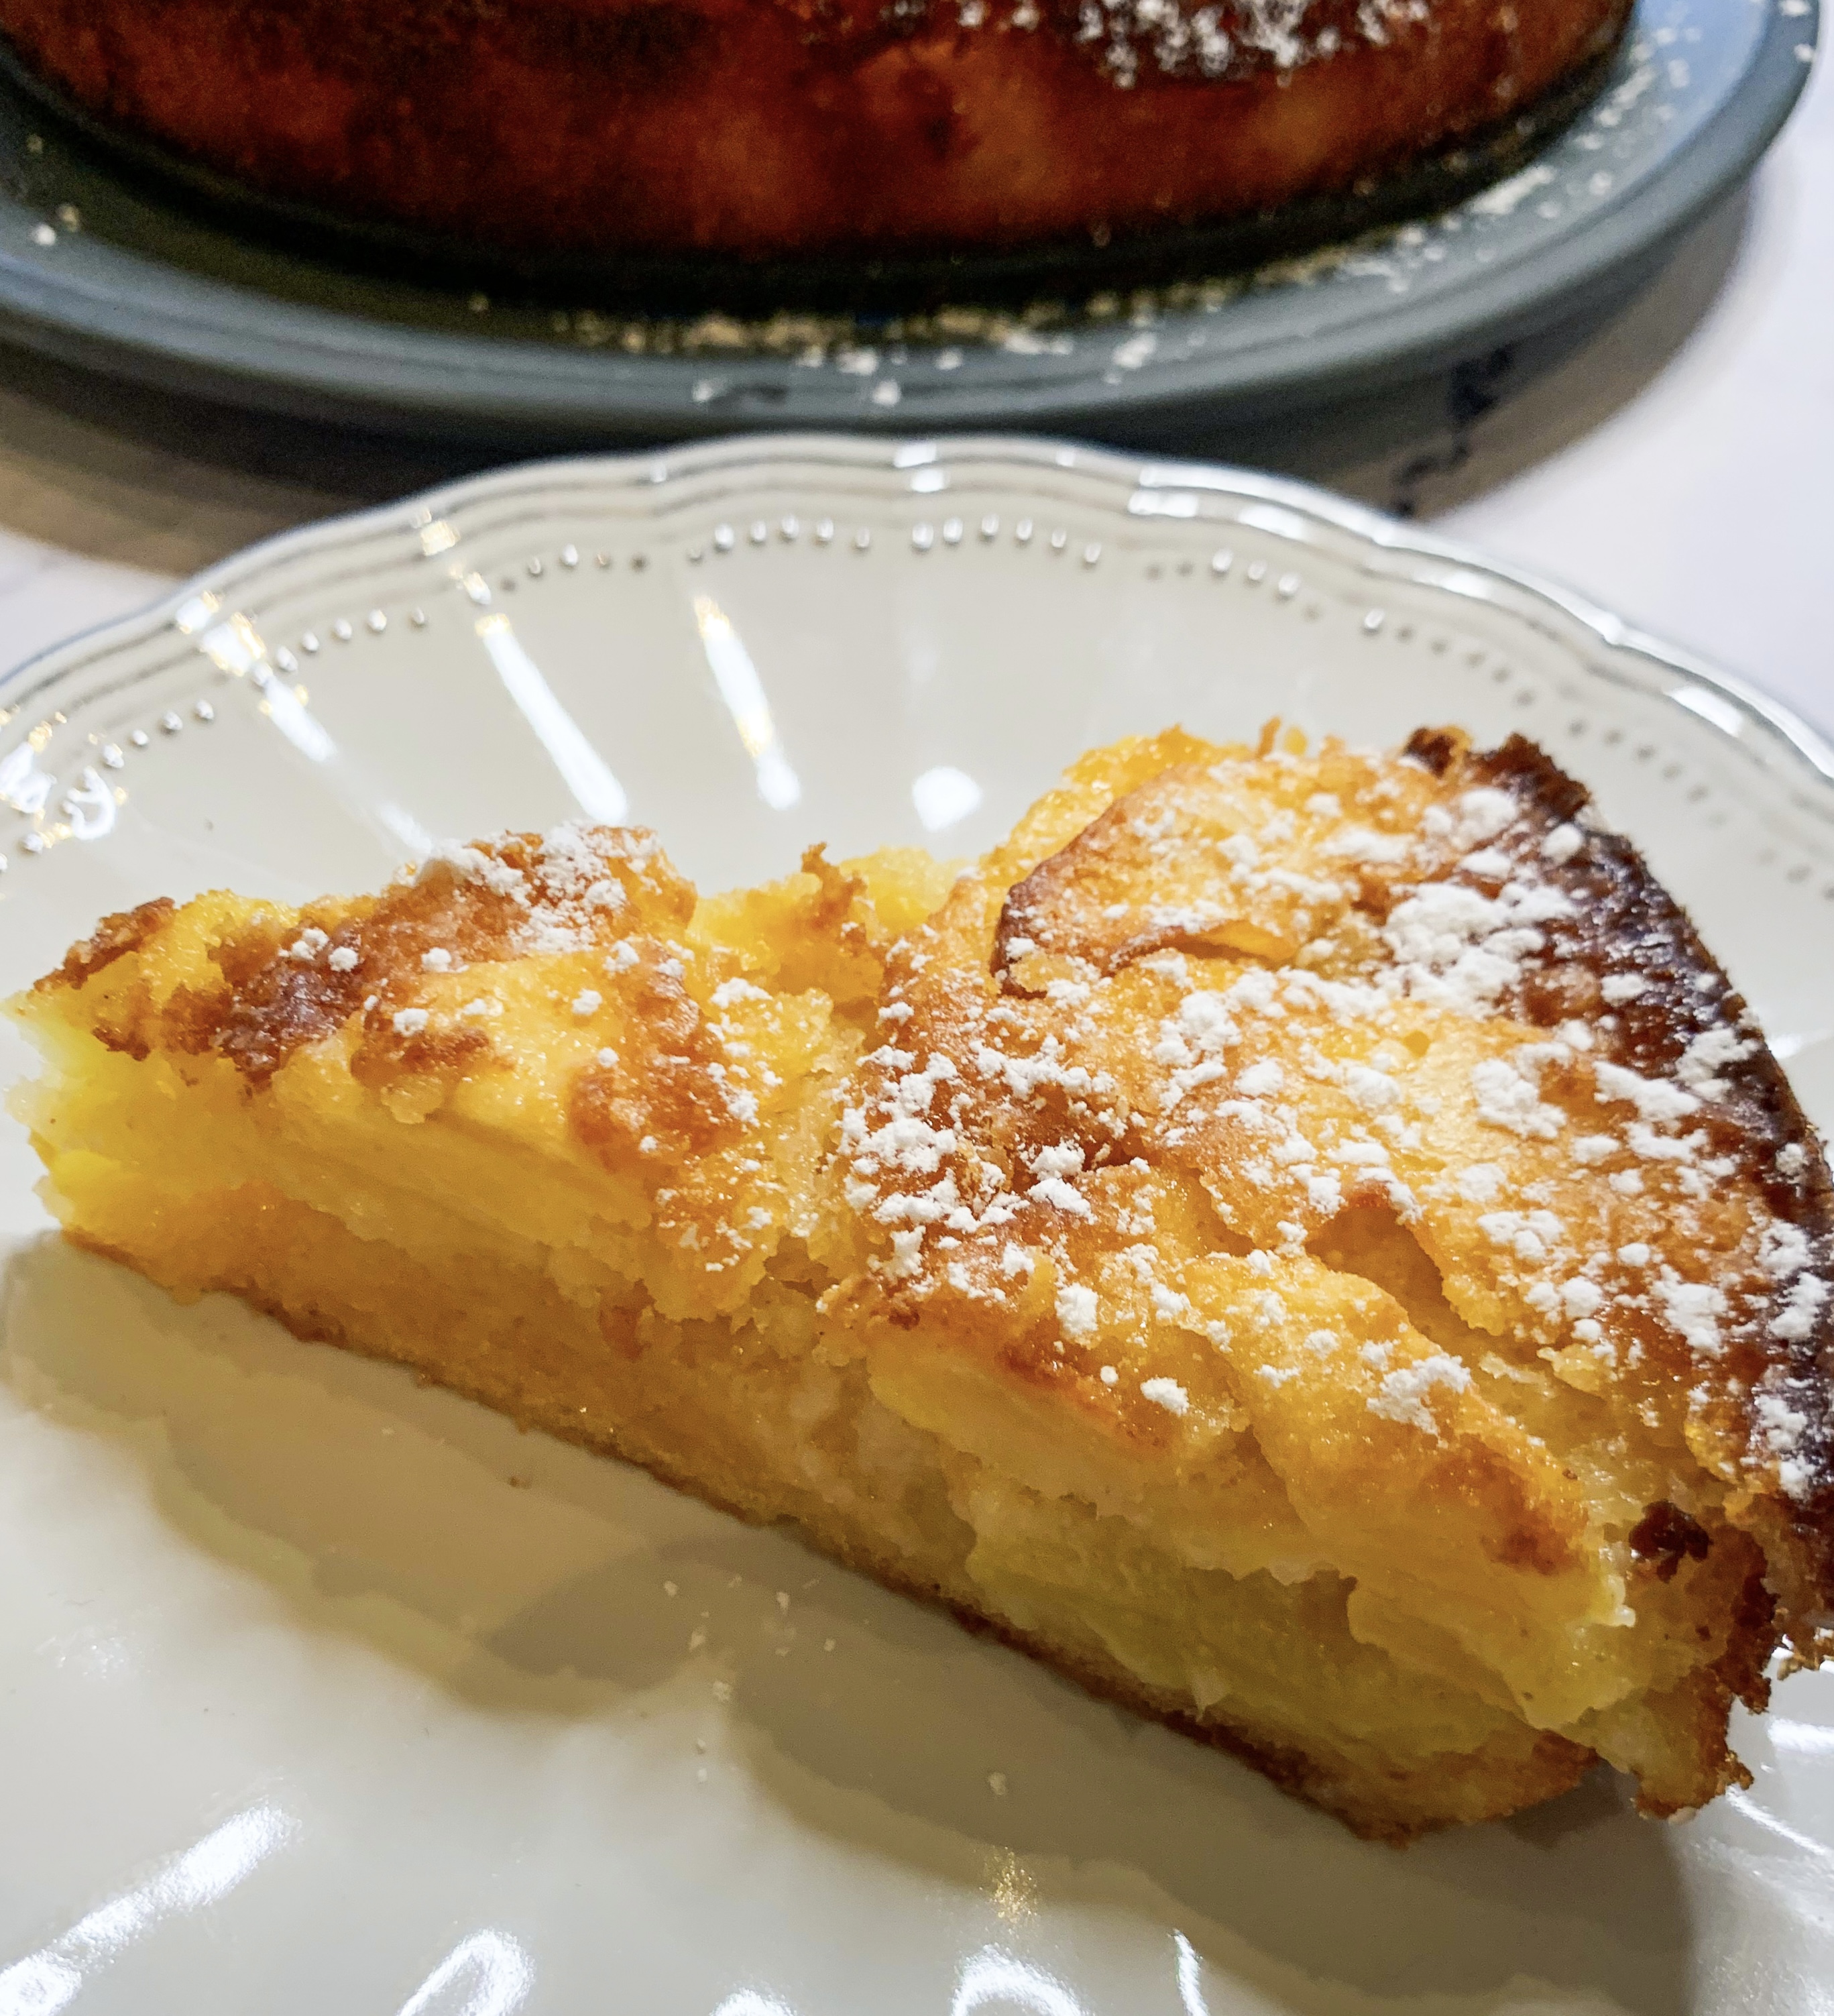
This recipe for apple tart doesn’t use pastry which makes it one of the lightest apple tarts you’re likely to taste. This decidedly fruity tart is from the cookbook ‘Brutto’. It’s delicious for breakfast, tea and/ or dinner… it’s wonderful!
4 apples, any sweet, crisp variety
2 large eggs
200g caster sugar
1 teaspoon vanilla extract
70g plain flour (gluten-free if required)
1 heaped teaspoon baking powder
A pinch of salt
65ml milk
100g butter, very soft, plus a small knob for lining
1 tablespoon icing sugar, for dusting
- Butter a 20cm cake tin and line with greaseproof paper. Peel and core the apples, halve and slice thinly.
- Put the eggs, sugar and vanilla extract into a large bowl and whisk until doubled in size. Add the flour, baking powder and salt and combine together. While still whisking, pour in the milk and add the softened butter until smooth and consistent.
- Put the sliced apples into the mix and carefully coat them all over. Layer the apples flat in circles, starting from the edge and working inwards. Pour a thin layer of the remaining mixture on top.
- Place in a preheated oven, 200’c fan and cook for 10 minutes, then turn the temperature down to 180’c for 40 minutes. Remove the golden brown tart and allow to cool in the tin for at least 30 minutes before transferring to a serving plate. Dust the top with icing sugar.
- Serve at room temperature in slices, perhaps with a scoop of vanilla ice cream or a drizzle of cream, but to be honest is delicious simply on its own!
Ice-Cream with Mars Bar Sauce (serves 4)
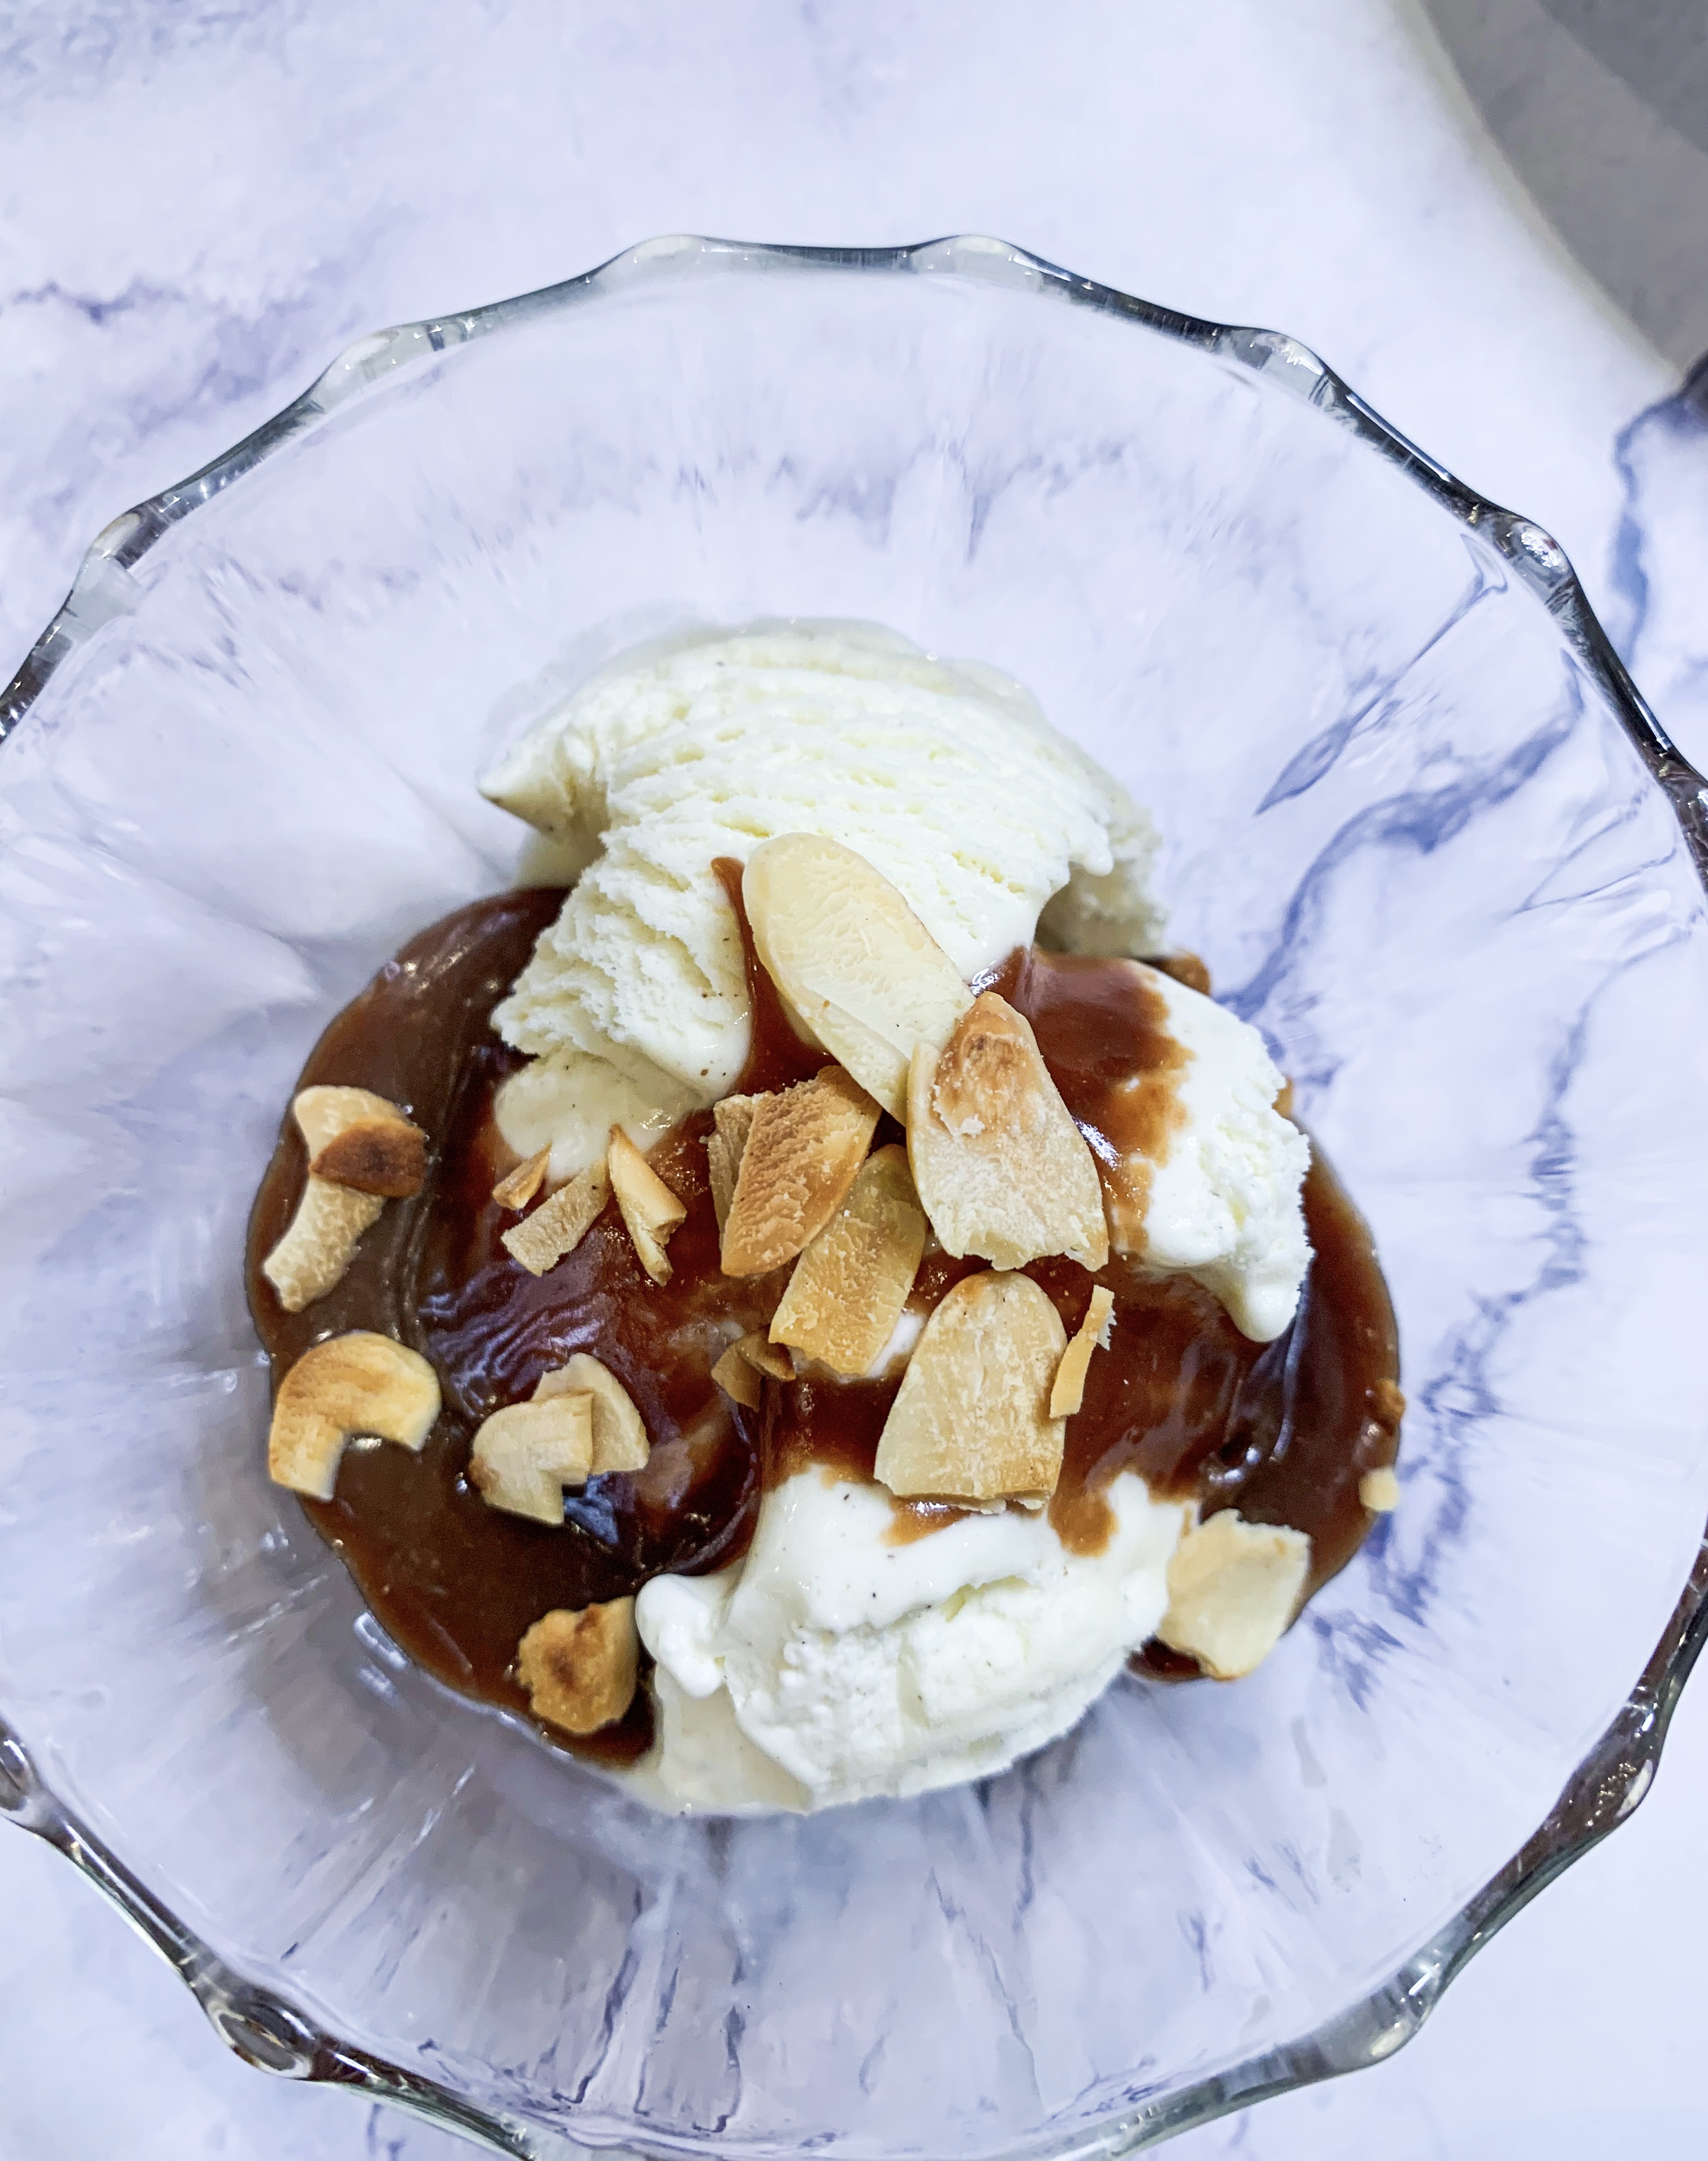
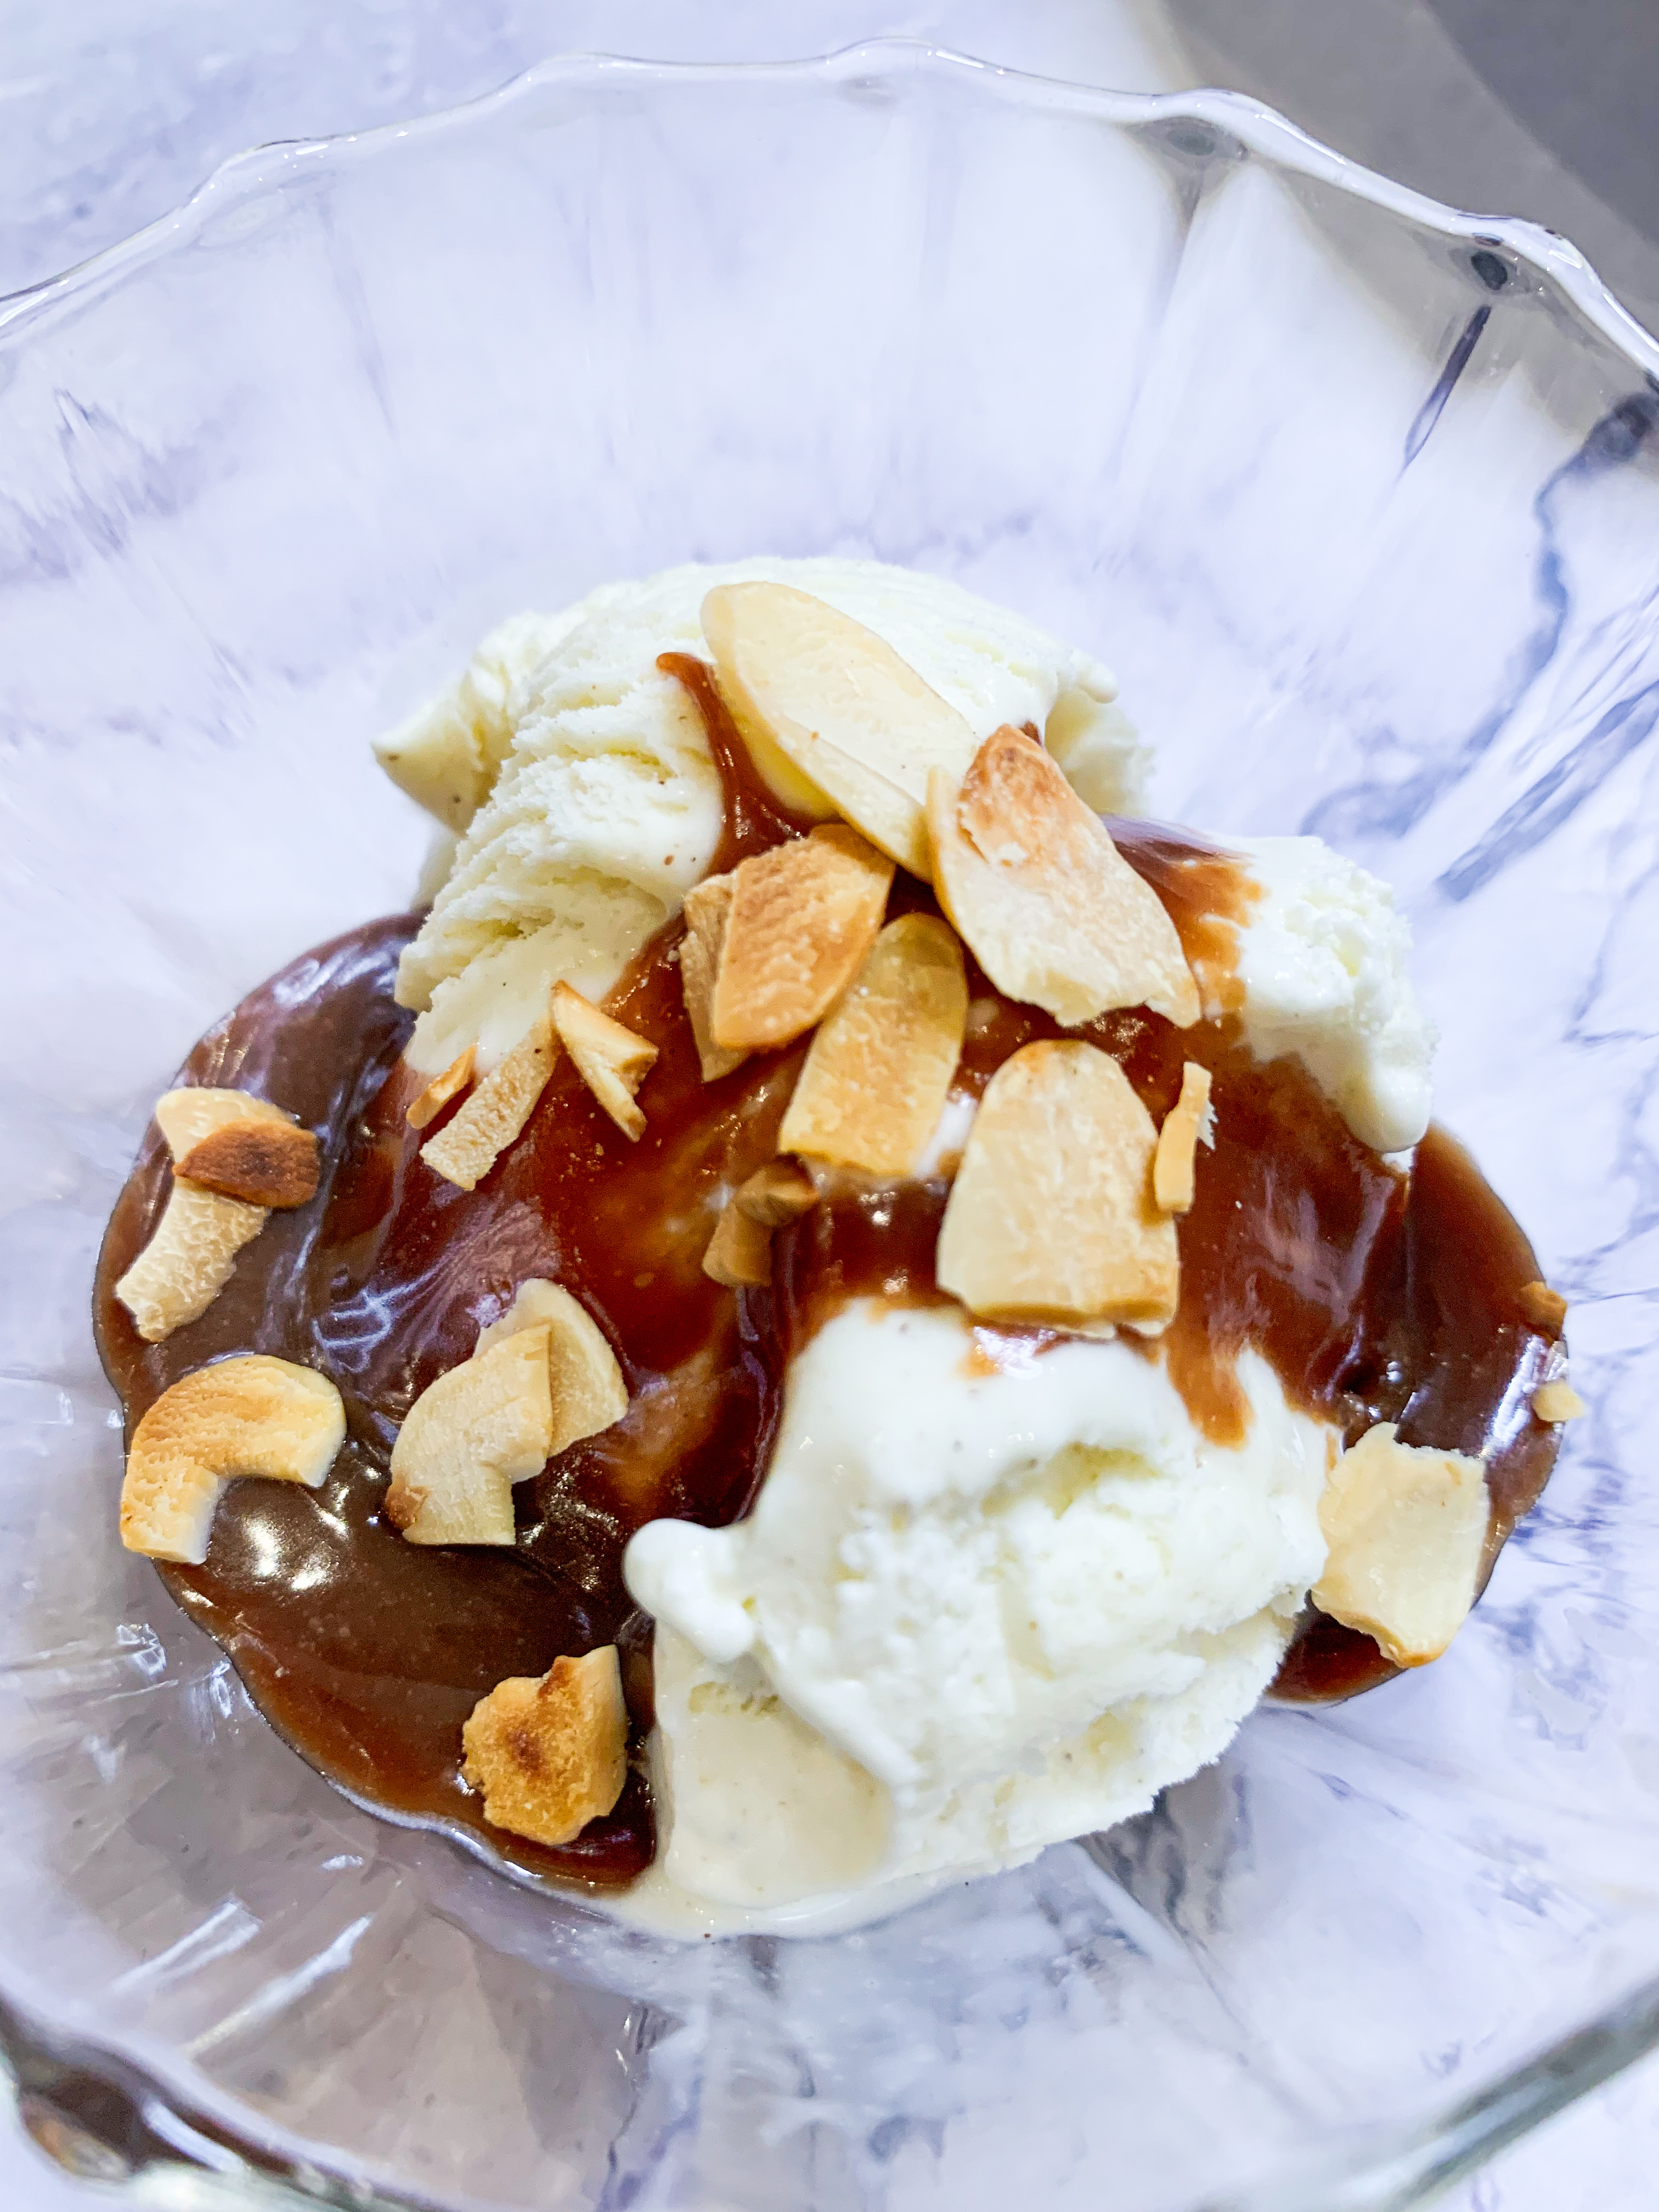
This is the simplest dessert to whip up; a proper ‘cheats’ recipe… As Skye McAlpine, the creator of this recipe, says in her cookbook, ‘A Table Full of Love’… “There is nothing that is sophisticated and absolutely everything that is utterly delicious about this pudding”…
100g Mars bar (about 2), chopped
8 tablespoons double cream
Vanilla ice-cream
Sea salt flakes
3-4 tablespoons flaked almonds, lightly toasted in a dry frying pan (optional)
- Put the chopped Mars bar in a small saucepan. Pour in the cream and warm gently over a low heat, stirring constantly until the chocolate is completely melted. This should take about 3-4 minutes. Add a couple of generous pinches of salt to taste.
- Scoop the ice-cream into bowls. Pour over the hot chocolate sauce and, if using, sprinkle over the almonds. Serve immediately!
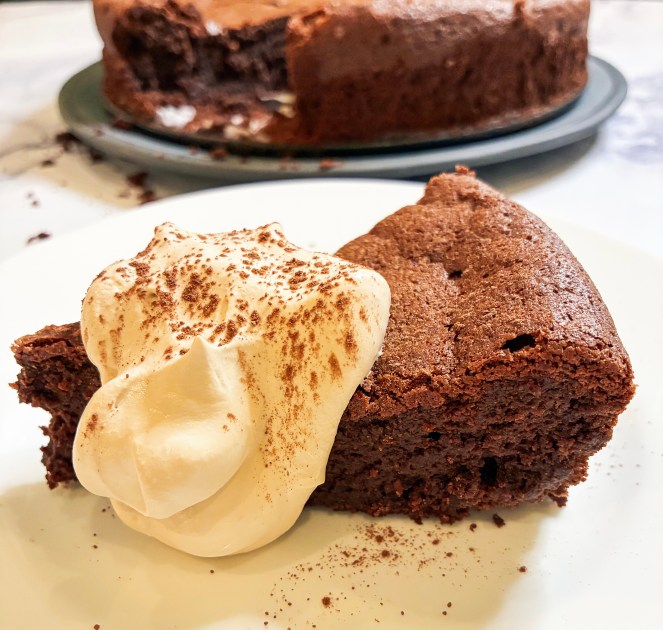
Flourless Sour Cherry and Chocolate Cake
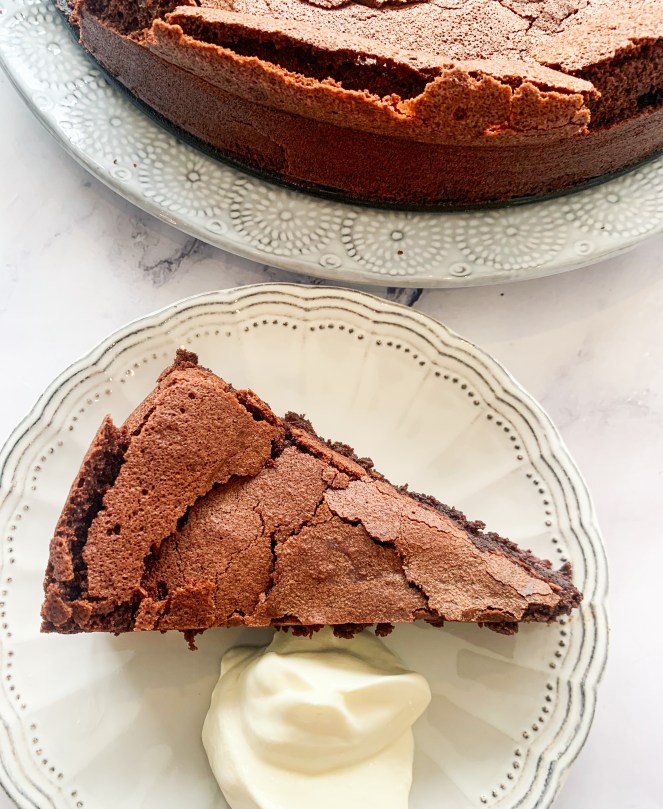
Growing up in the seventies the ‘Black Forest Gateaux’ was my dream dessert. So when I came across this recipe I couldn’t resist! It’s a modern take on my childhood dream and all the better for it; it’s rich with a gooey middle and there’s a hint of sourness from the cherries. However, because it doesn’t contain flour it has a lightness. You can choose to serve it with crème fraiche or in true ‘Black Forest’ style with a good dollop of whipped cream. Thanks to cookbook writer, Ravneet Gill, for this wonderful recipe.
300g 70% dark chocolate (I use Lindt), broken up
225g unsalted butter
5 eggs, plus 1 yolk
4g sea salt
200g golden caster sugar
200g pitted sour cherries, frozen or jarred
Crème Fraiche or whipped cream to serve
*You will need a 25cm round cake tine, greased and base lined with greaseproof paper.
- Melt the chocolate and butter in a bowl set over a pan of simmering water – make sure that the water doesn’t touch the bowl. Once melted take off the heat.
- In a bowl, beat the eggs (and extra yolk), salt and sugar until the mixture has tripled in volume, then carefully fold in the chocolate mixture, followed by the cherries.
- Pour the cake mixture into the prepared tin and bake in a preheated oven, 160’c fan, for 45 minutes or until it has started to set on top.
- Leave to cool, then turn out, slice and serve with crème fraiche or a dollop of whipped cream.
Sticky Toffee Pudding (with Gluten-Free Option)
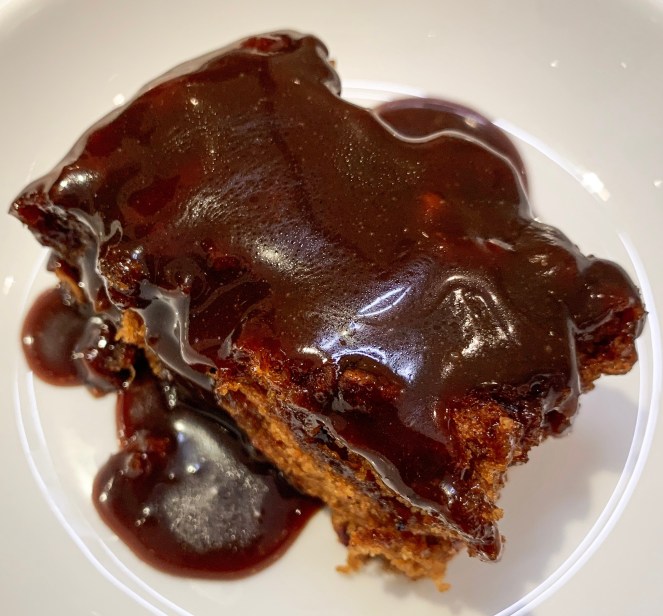
Until recently I’d been struggling to find a recipe for a ‘Sticky Toffee Pudding’ which could be made gluten-free; I found that a lot of recipes were heavy on flour so couldn’t be adjusted easily. Then, having dinner at a friend’s, I was served this Sticky Toffee Pudding from Nigella Lawson – how could I have overlooked the ‘domestic goddess’ of cooking?!.. By adding just half a teaspoon of xanthan gum to gluten-free flour, my friend, Leon, discovered that Nigella’s recipe works fantastically well. Whether you need to make this dessert with the gluten-free option or not, it’s one of the best Sticky Toffee Puddings I’ve tasted!..
200g soft dried pitted dates (roughly chopped)
1 teaspoon bicarbonate of soda
75g soft unsalted butter (plus more for greasing)
2 x 15ml tablespoons black treacle
50g dark muscovado sugar
2 large eggs (at room temperature)
150g plain flour (gluten-free flour if required plus ½ teaspoon Xanthan Gum *see note above)
2 teaspoons baking powder
For the sauce:
150g soft unsalted butter
300g dark muscovado sugar
1 x 15ml tablespoon black treacle
200ml double cream (plus more to serve)
*You will need a two litre baking dish (approx), lightly greased
- Put the chopped dates in a bowl with 200ml of boiling water and the bicarbonate of soda, give it stir and leave for 10 minutes.
- Cream the butter and black treacle until well mixed, then add the sugar and mix again, beating our any lumps. Beat in an egg and keep beating until fully incorporated, then do likewise with the other egg. Beating more gently, add the flour (and xanthan gum if gluten free) and the baking powder until you have a smooth batter.
- Using a fork, stir the soaked dates, squishing them a bit, then pour the dates and their liquid into the batter and beat gently to mix in.
- Pour the batter into your prepared dish and bake in a preheated oven, 160’ fan, for 30-35 minutes, or until a skewer comes out clean.
- While the pudding is in the oven make the sauce. Melt the butter, muscovado sugar and treacle over a very low heat in a pan. Stir gently until everything has melted. Now stir in the cream, then turn up the heat and when it’s bubbling and hot, remove from the heat.
- As soon as the pudding is out of the oven, prick the cooked sponge all over with a cocktail stick and pour about a quarter of the warm sauce over, easing it to the edges with a spatula so that the sponge is entirely topped with a thick sticky glaze. Put a lid on the remaining sauce and keep warm in the pan.
- Leave the pudding for 20-30 minutes, or up to an hour is fine, then take to the table with the rest of the sauce in a jug, and cream to serve.
Baileys and Praline Roulade
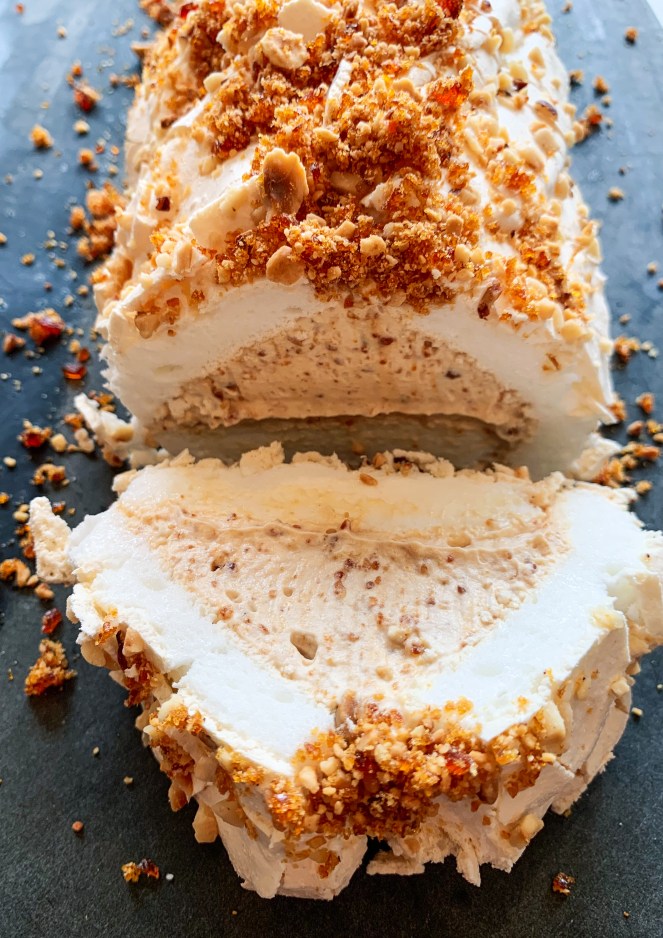
Baileys is one of those liqueurs which is synonymous with the festive period so you’re bound to have a bottle lying around somewhere to use for this dessert. It’s, obviously, delicious anytime of the year but more importantly easier to make than it looks. Yes, it does tend to crack when you roll it but honestly, that adds to its charm!..
For the praline:
50g blanched hazelnuts
120g caster sugar
For the roulade:
190g egg whites (approx. 5 large eggs)
275g caster sugar
1 teaspoon cornflour
3 tablespoons roasted chopped hazelnuts
For the filling:
300ml double cream
1 teaspoon icing sugar
70ml Baileys Irish Cream
- Preheat the oven to 180’c fan. Add the blanched hazelnuts to a baking tray lined with baking paper and roast for 10 minutes until they’ve started to brown. Remove from the oven and set aside. Reduce the oven temperature to 150’c, fan.
- Add the sugar for the praline to a saucepan and heat gently for 4-5 minutes. The sugar will melt around the edges before turning clear. Give the pan a swirl every now and then to ensure it melts evenly, but do not stir it. Once the sugar turns a deep amber colour remove it from the heat and carefully pour it over the nuts on the tray. The sugar will be extremely hot so don’t touch it. Leave the praline to cool and harden.
- To make the roulade line a baking tray (approx. 25x35cm) with baking paper making sure it comes up the sides. Add the egg whites to a bowl. Using an electric whisk, start to whisk them slowly, gradually increasing the speed to high until the egg whites are stiff. Gradually add the caster sugar a little at a time, continuing to whisk on a high speed until thick and glossy. Now add the cornflour and whisk for another 30 seconds until combined.
- Spoon the meringue onto the lined tray, smooth the top and scatter over the chopped hazelnuts. Bake in the preheated oven, 150’c fan, for 25-30 minutes until the meringue looks firm on top. Let it cool for a few minutes before turning it out, hazelnut side down onto a clean sheet of baking paper. Carefully peel off the baking paper from the top of the meringue then leave to cool completely.
- To make the filling, blitz the set praline in a food processor until fine (or chop with a sharp knife), reserve a little to decorate. Whip the cream, icing sugar and Baileys until thickened, just before it reaches stiff peaks. Fold in the blitzed praline and spread the mixture evenly onto the cooled meringue.
- Starting from a long side, roll up the meringue using the baking paper underneath to help you. Then carefully lift onto a serving platter. Finally, decorate with the reserved praline. Cut into slices and serve, or if you prefer a cold dessert chill in the fridge for a few hours first.
‘Italian’ Christmas Chocolate Cake
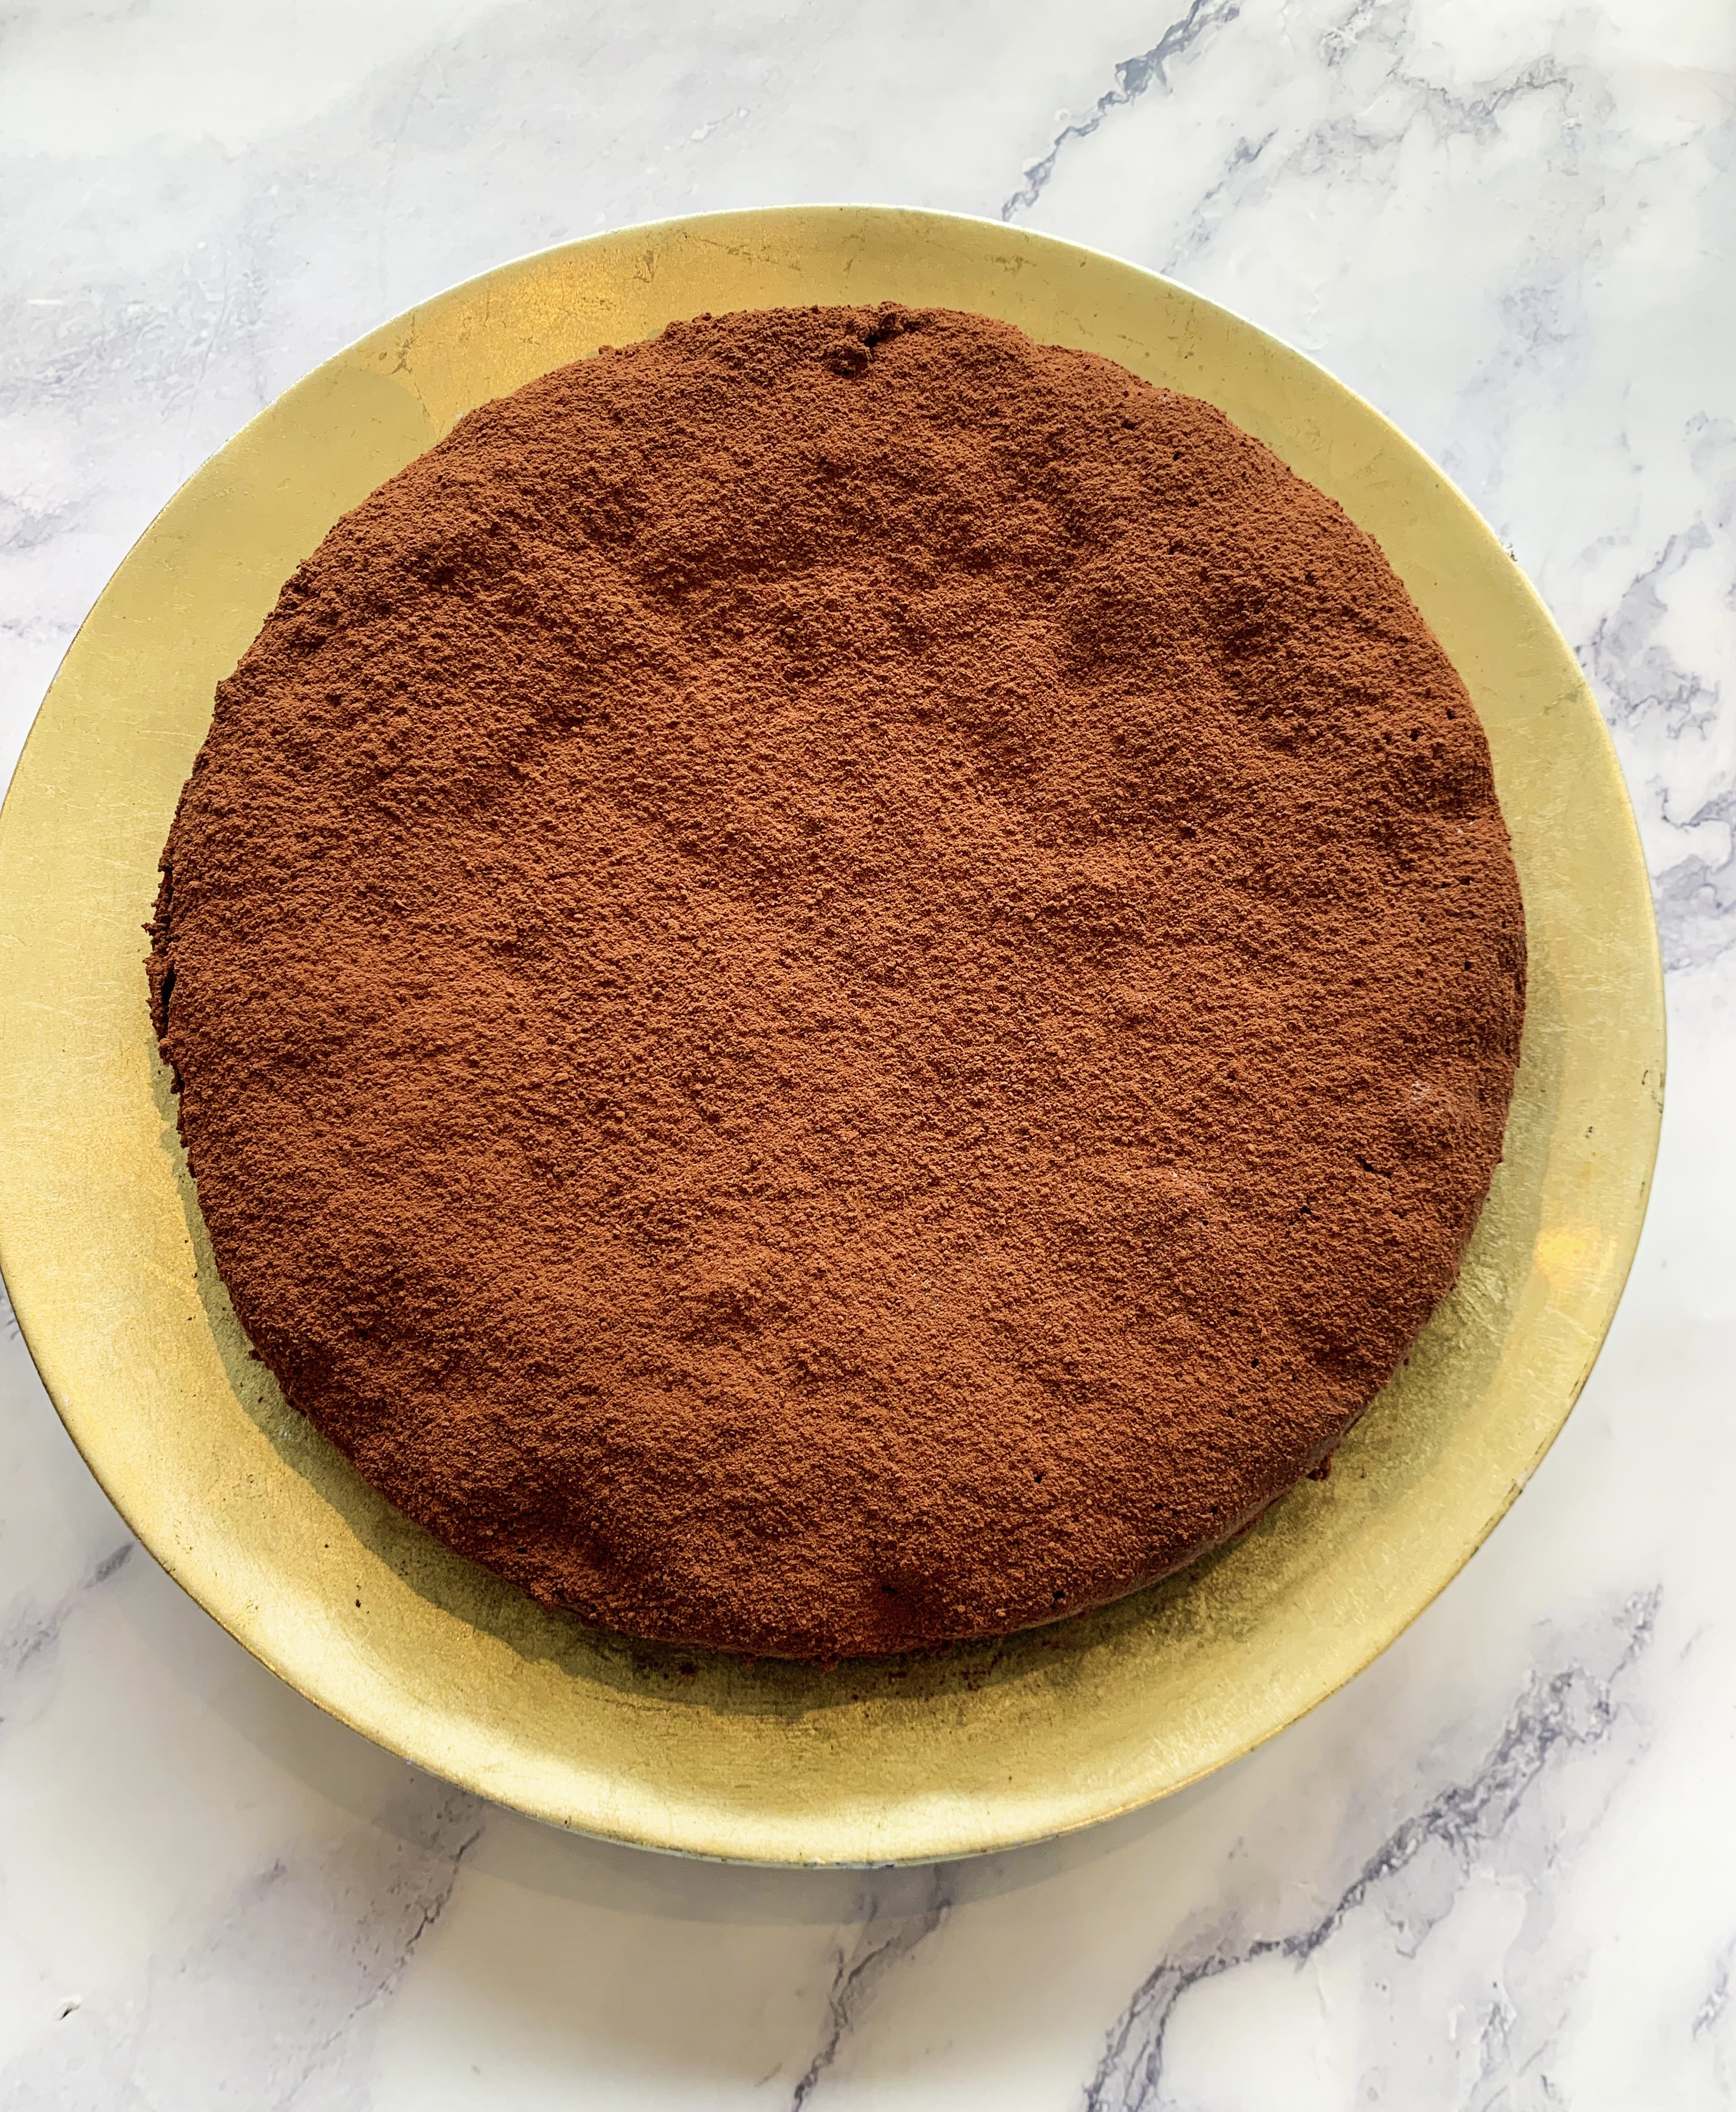
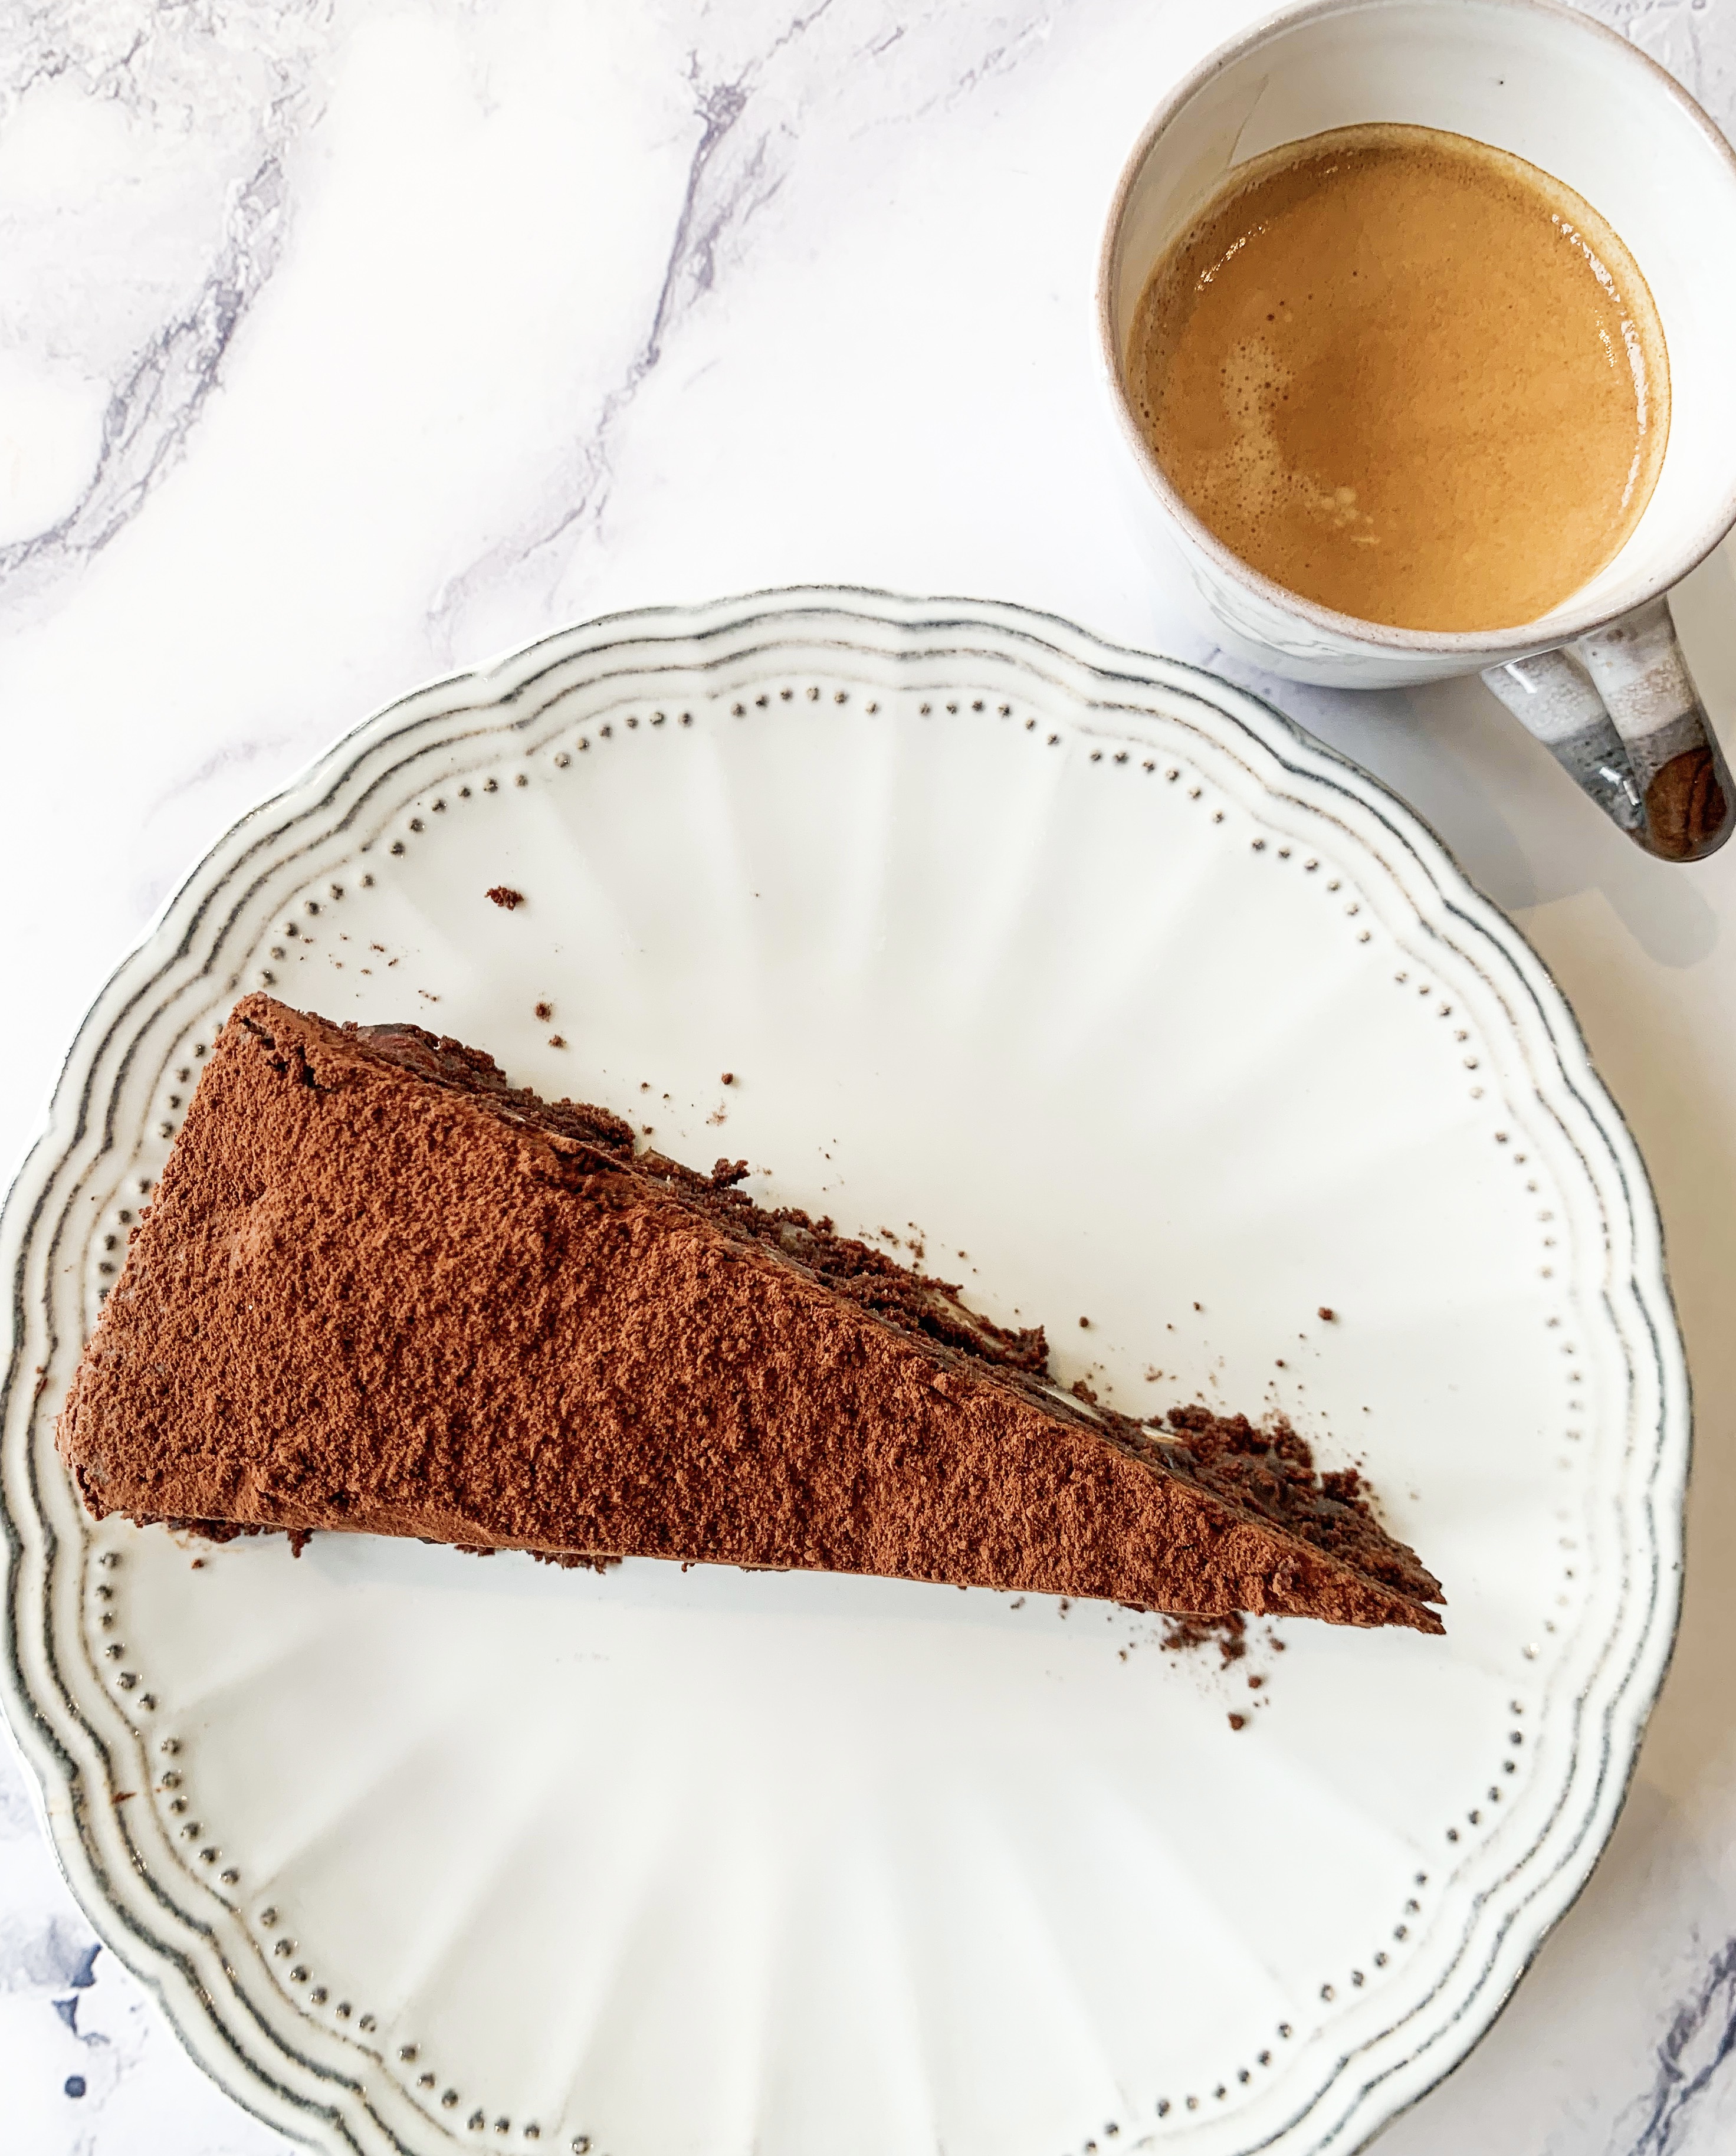
With Christmas on the horizon I thought that I’d share this recipe… These days no festive table can be without an Italian-inspired sweet treat; from Panettone to chocolate figs there is something for all taste buds! My personal favourite is the Tuscan treat, Panforte. Last year when I came upon this recipe from Diana Henry, which is inspired by the flavours of Panforte, I couldn’t resist trying it. It’s wonderful. With nuts, spices, dried fruit and citrus it shouts ‘Christmas!’ and should definitely be on your ‘seasonal to-do list’… (it’s fantastic with an espresso).
100g mixed dried vine fruits
75ml Marsala, sweet or dry
75g unsalted butter
175g golden caster sugar
325g good-quality dark chocolate, broken into pieces
75g walnut halves
75g blanched hazelnuts
50g blanched almonds
5 large eggs, separated
finely grated zest of 1 large orange
½ tsp ground cinnamon
generous grating of nutmeg
small pinch of ground cloves
25g chopped candied peel
50g ground almonds
icing sugar or cocoa powder for dusting
- Put the dried fruit into a small saucepan with the Marsala. Bring to the boil and then immediately remove from the heat. Leave the fruit to plump up for at least 30 minutes, by which time almost all of the liquid will have been absorbed.
- Melt the butter and sugar in a bowl set over a pan of barely simmering water (the bowl should not touch the water). Add the chocolate, stirring to help it melt. Remove the bowl and allow it to cool a little.
- Toast the nuts in a dry pan over a medium heat, then chop very roughly (you want some good big bits in the cake).
- Add the egg yolks to the chocolate along with the orange zest, spices, candied peel, dried fruit (and any soaking liquid) and chopped nuts,
- Whisk the egg whites until stiff but not dry. Add a big tablespoon to the chocolate mixture to loosen it, then fold in the rest along with the ground almonds. Mix lightly so that you don’t knock all the air out of the egg whites.
- Pour into a buttered and base-lined 23cm springform cake tin and bake in a preheated oven, 160’c fan, for 45 minutes. The cake will feel set in the middle but the skewer test doesn’t really work because it stays very moist in the centre until it has cooled.
- Remove from the oven and leave to cool in the tin for about 20 minutes before carefully removing the surround. When it has cooled completely remove the base from the cake – it will be fragile in the middle so be careful. Finally, dust with cocoa powder.
Banana Maple Friands
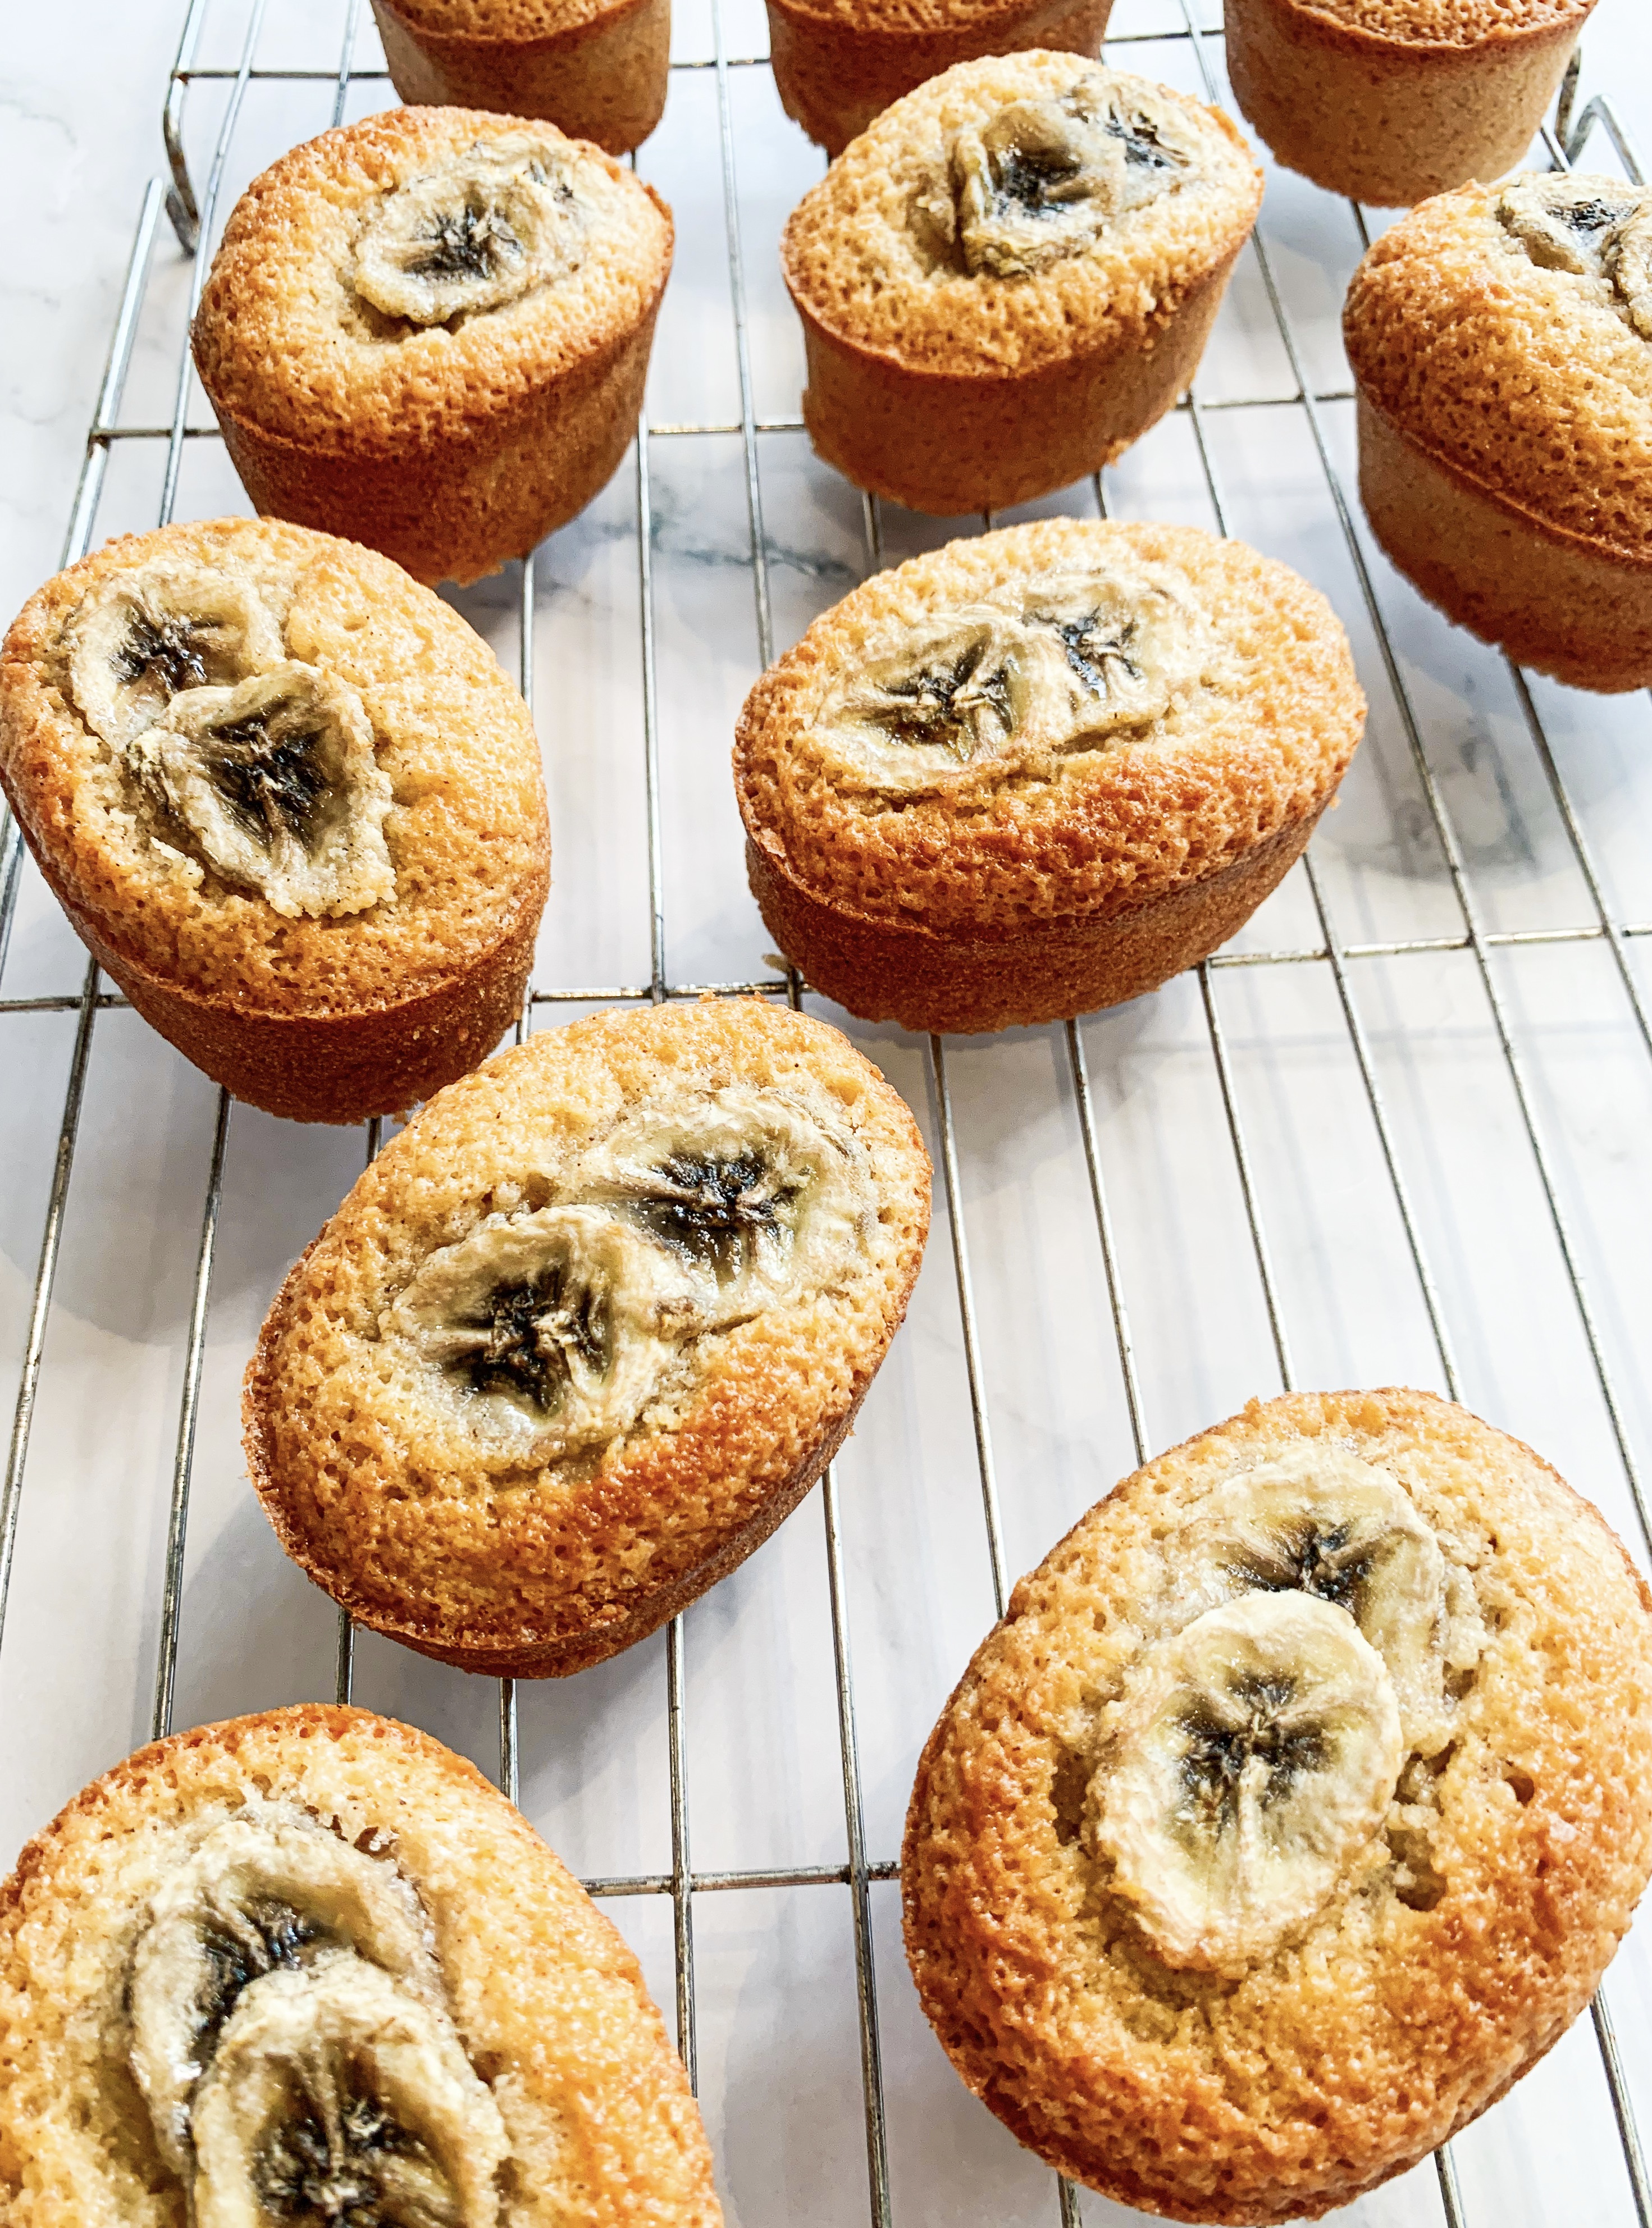
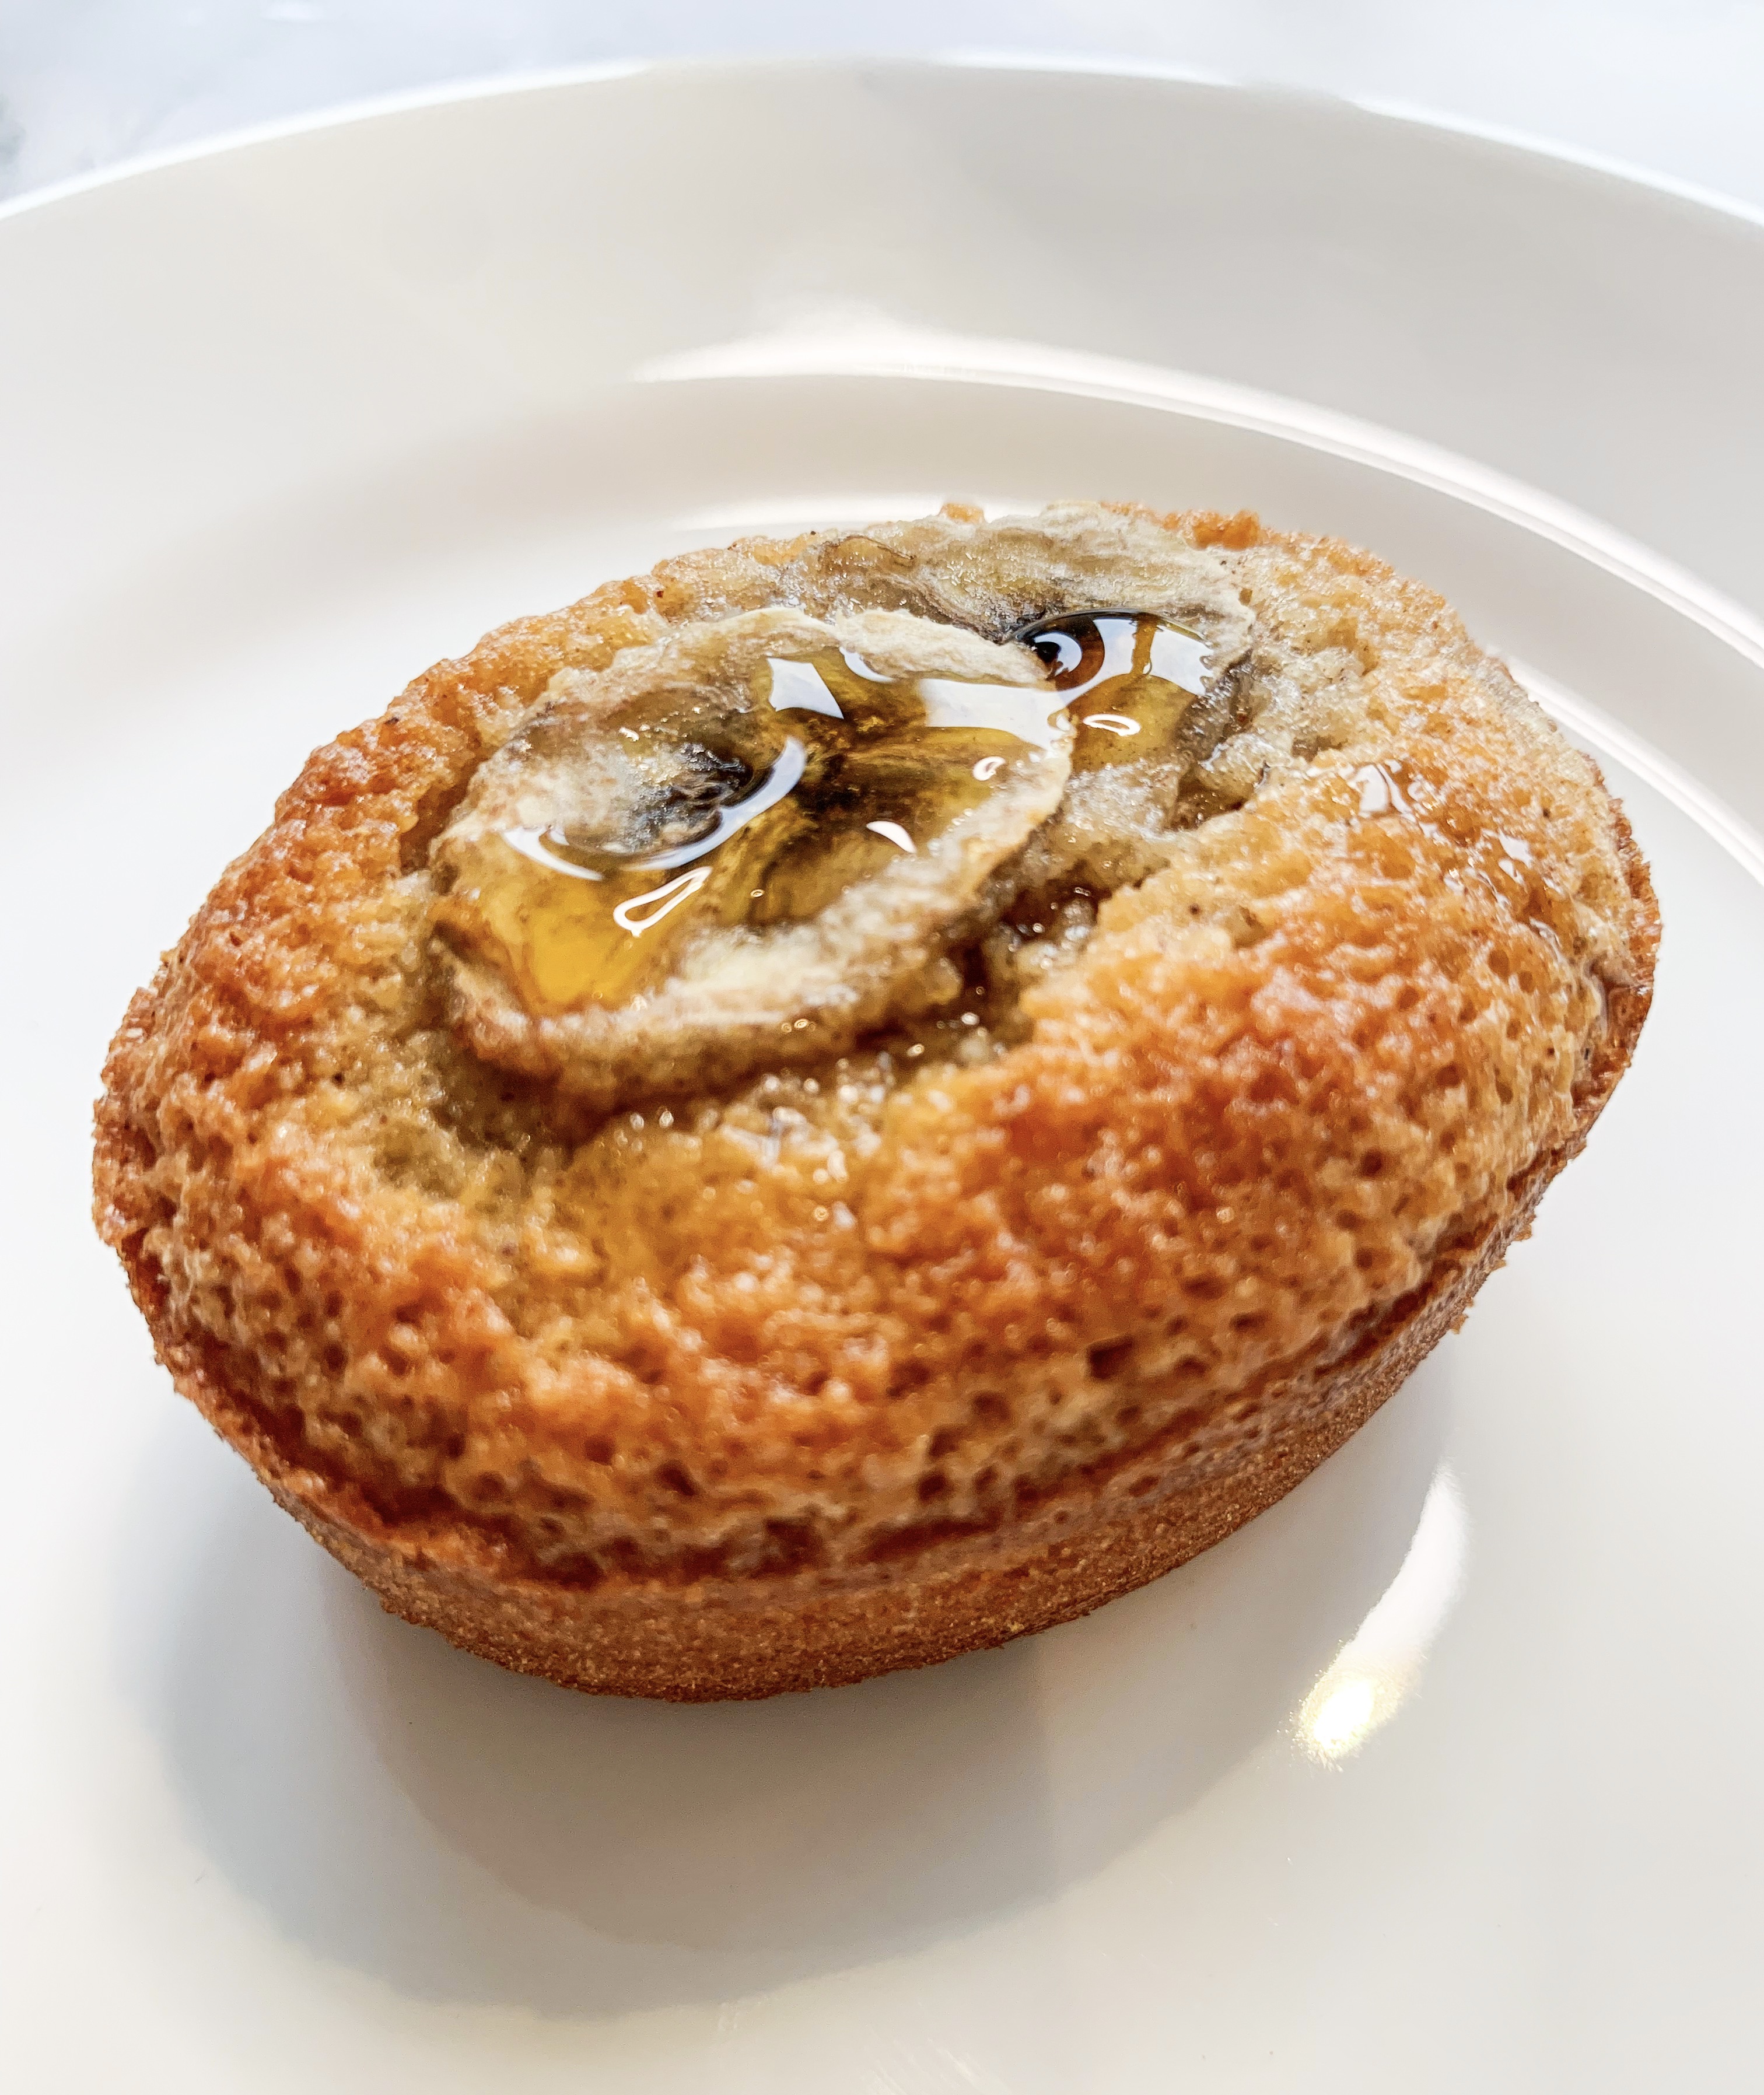
Oh, joy of joys, your very own, individual banana cake!.. These little friands are wonderfully moist, with a slightly sticky, chewy crust. They’re great served alone or for an indulgent edge, add a dollop of whipped cream!..
140g ground almonds
2 ripe bananas
6 egg whites, lightly whisked
180g unsalted butter, melted, cooled
240g caster sugar
75g plain flour (gluten-free if required, I use Doves)
2 tablespoons maple syrup, plus extra to drizzle
1 teaspoon ground cinnamon
*You will need a 12-hole friand tin, greased.
- Mash one banana in a bowl and add to the ground almonds along with the whisked egg white, melted butter, sugar, flour, maple syrup and cinnamon. Mix well
- Spoon the banana mixture evenly between the friand tin. Thinly slice the remaining banana and arrange 2 slices on top of each friand.
- Bake in a preheated oven, 160’c fan, for 30-35 minutes until golden and a skewer inserted into the centre comes out clean. Cool in the tin for 5 minutes before using a knife to gently lever each friand out and allow to cool on a wire rack to cool. To serve drizzle with a drop of maple syrup.
(They are best eaten on the same day when their crust is most chewy – but they will keep in an air tight container for 3-4 days)
Shortbread Biscuits with Elderflower Buttercream
(The Best Shortbread ‘Ever’ – and it’s gluten-free!)
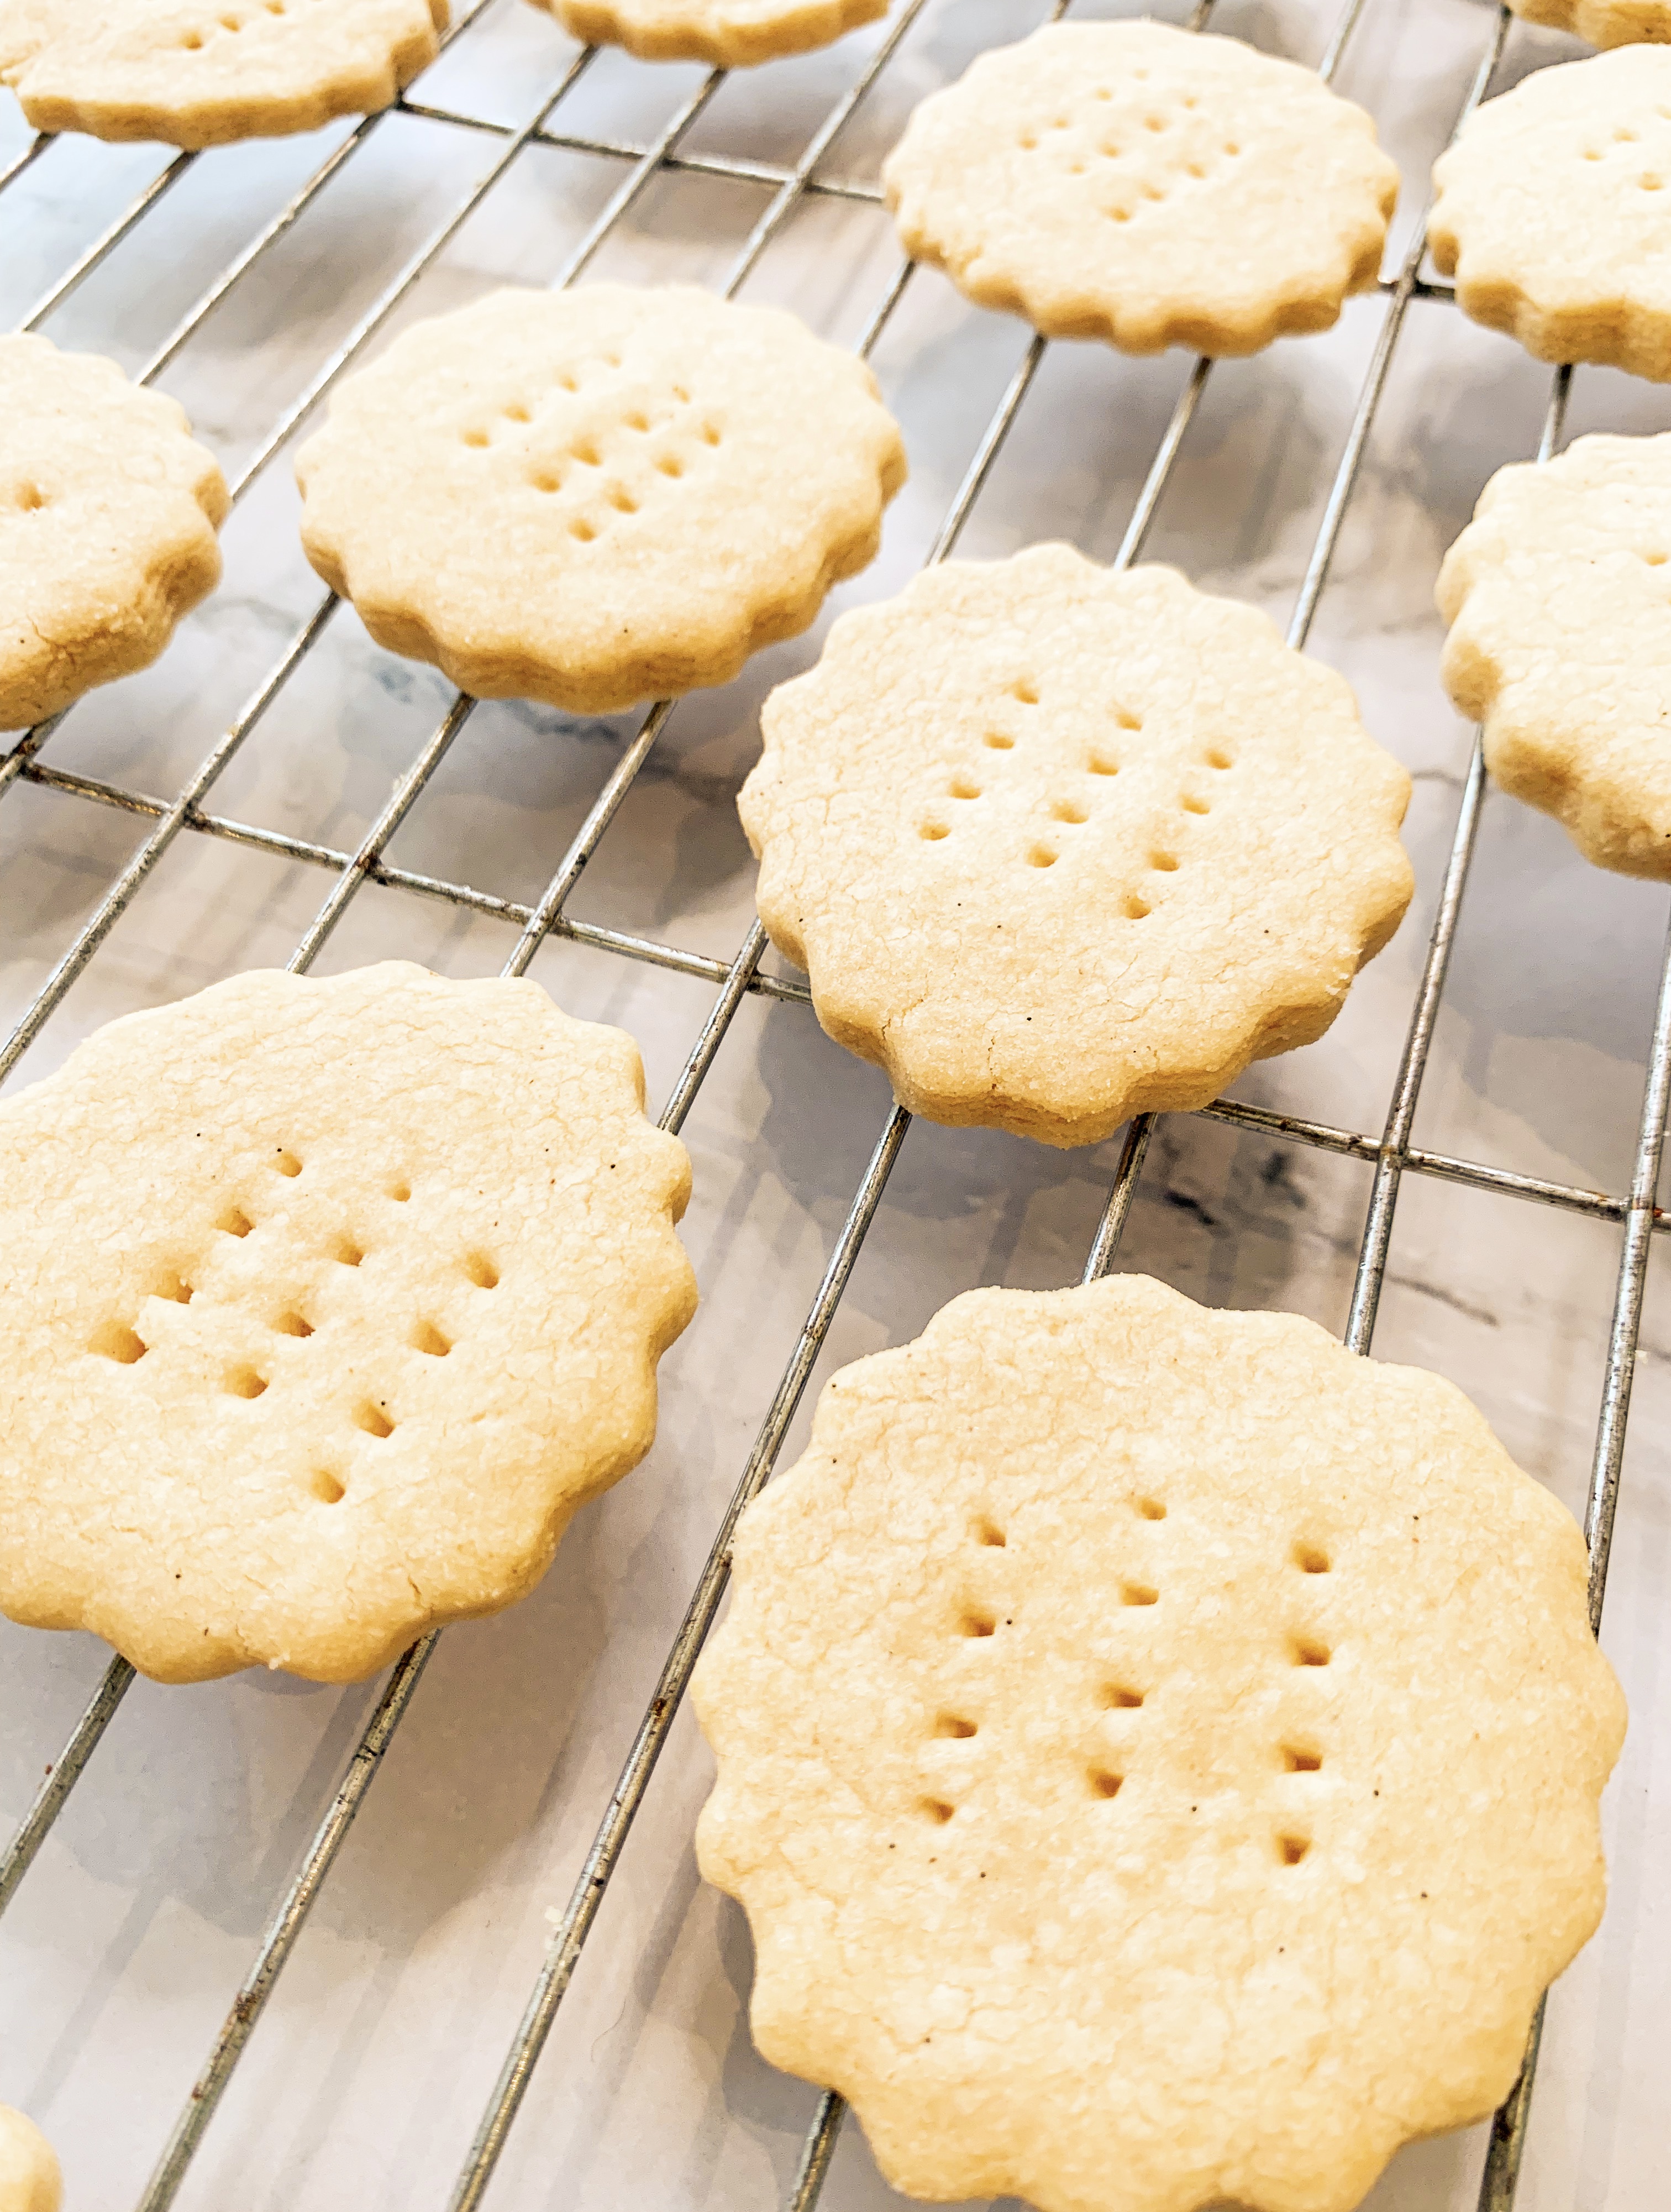
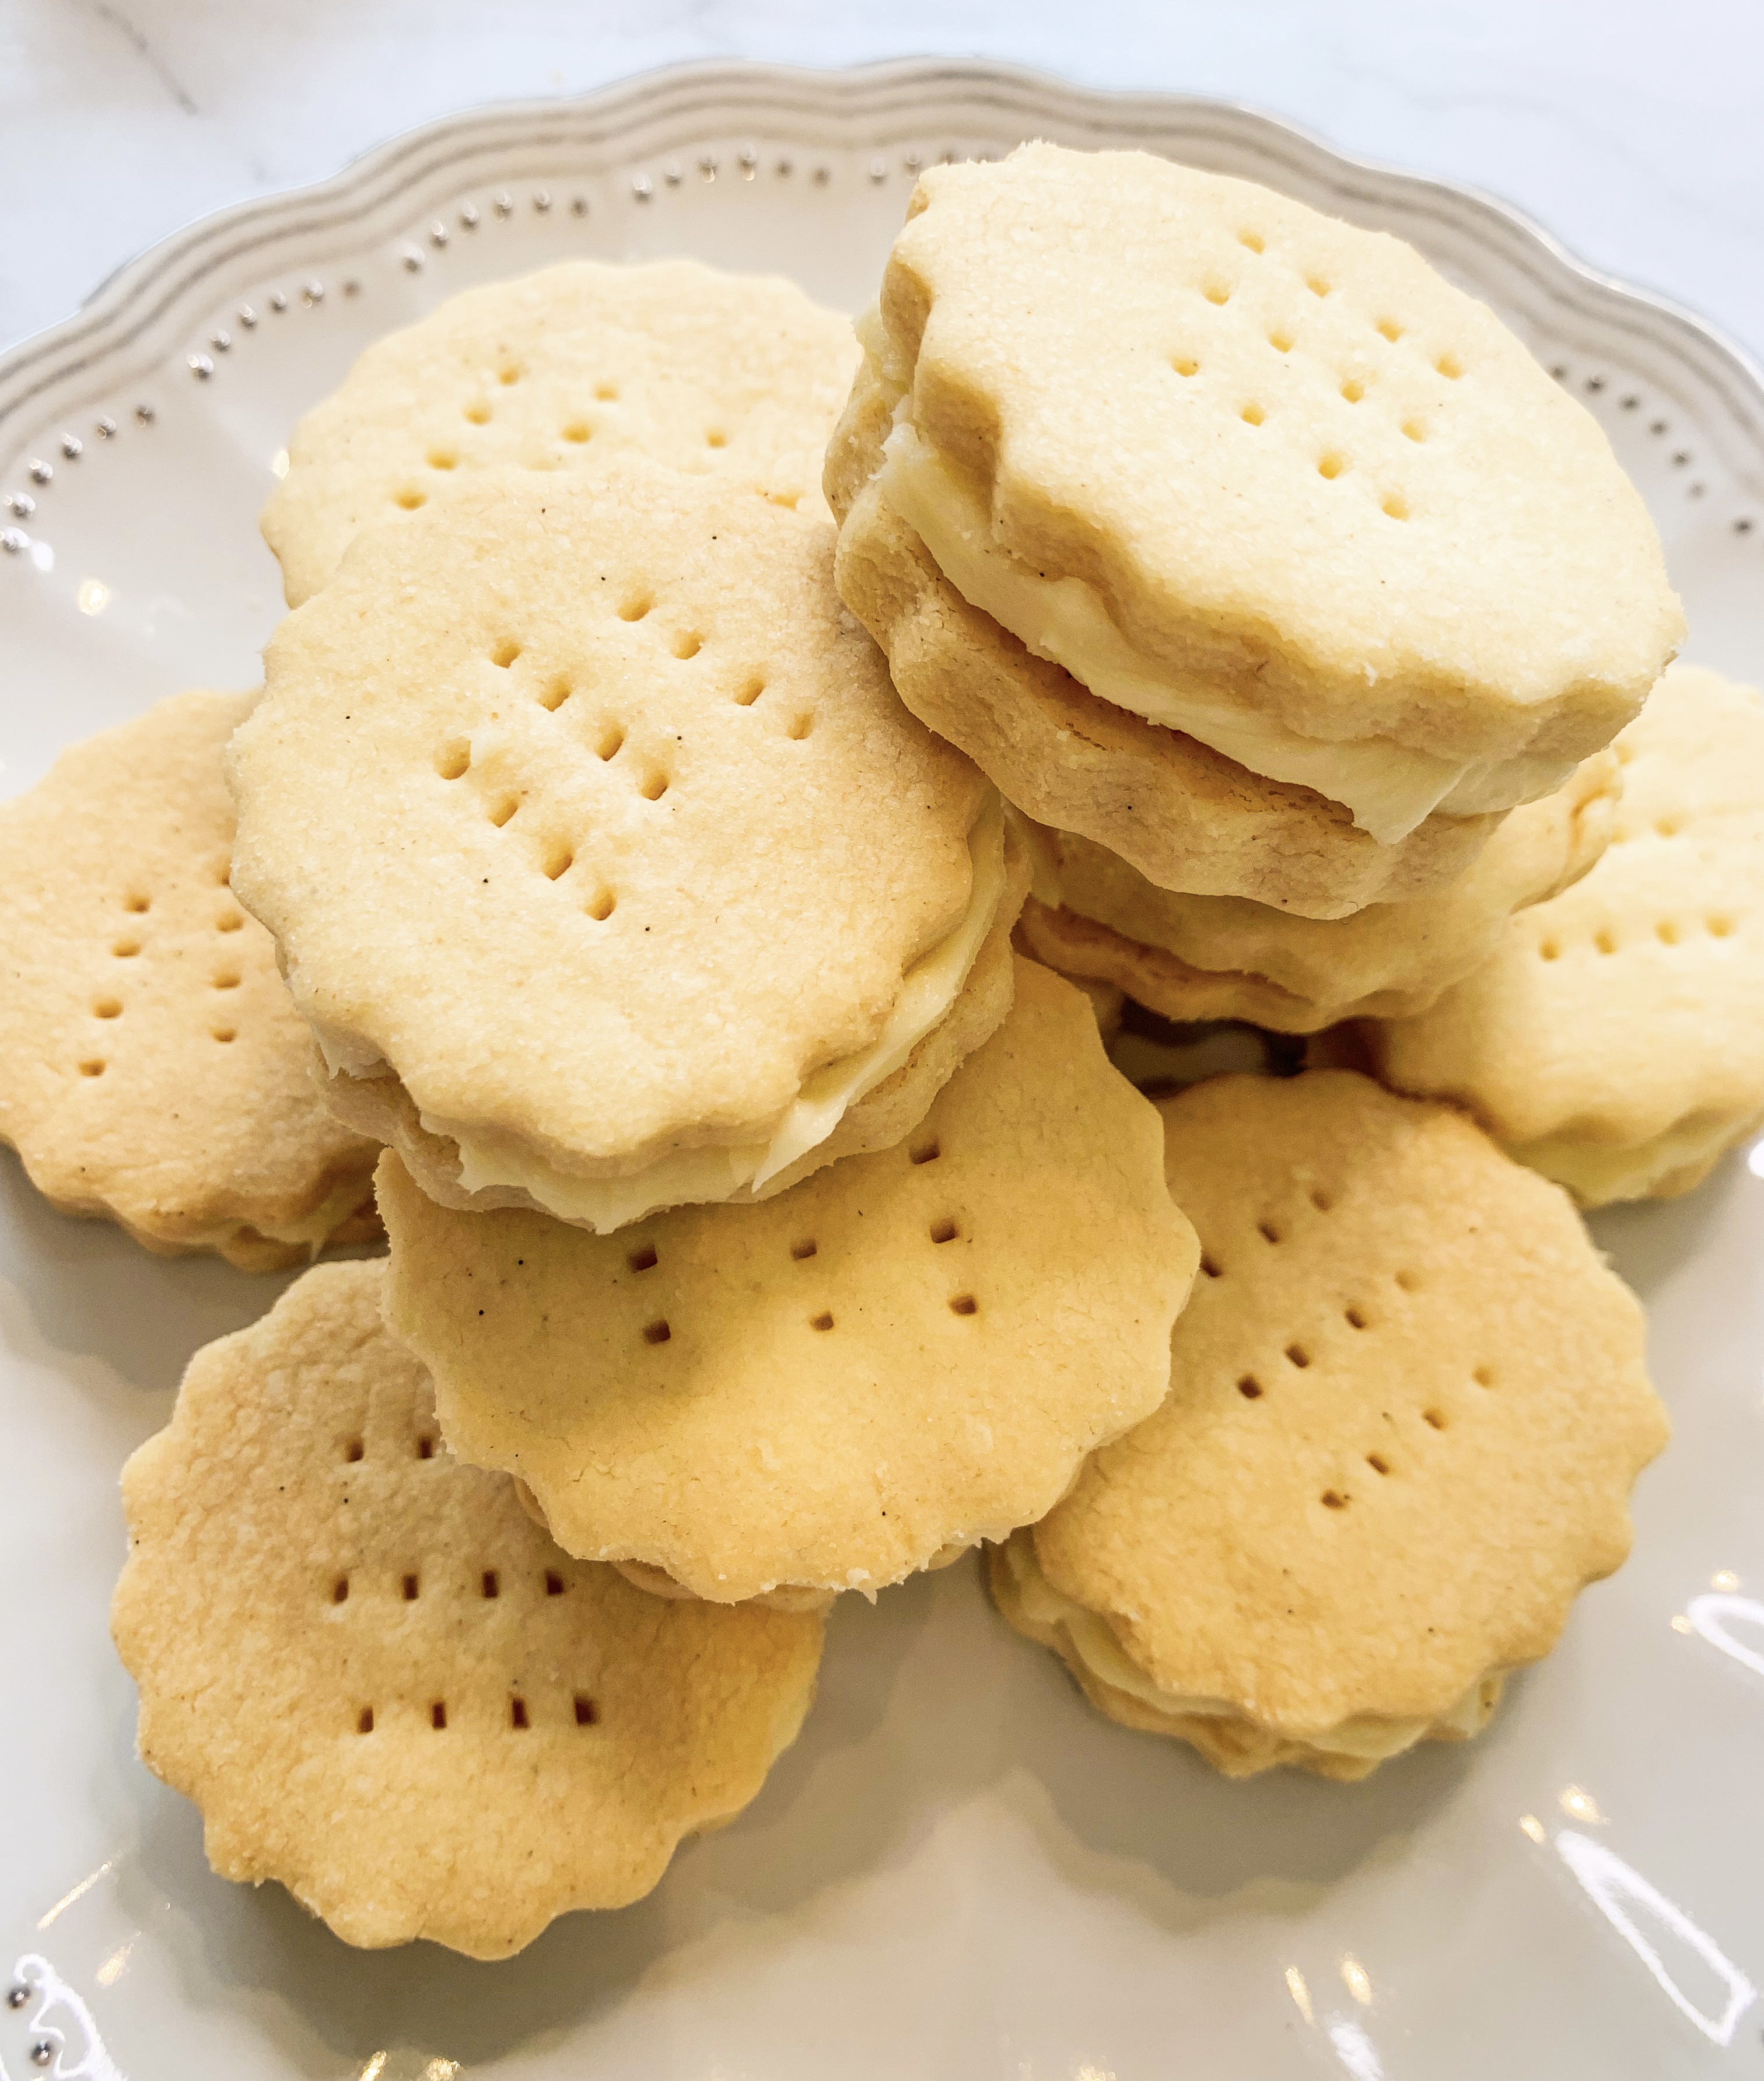
I first tasted this shortbread when I stayed at Nathan Outlaw’s guest house in Port Isaac (review here!). Outlaw’s is very much a family affair and Nathan’s daughter, Jessie, bakes the most wonderful afternoon tea treats for the guests. During our stay she baked these, they’re the lightest shortbread biscuits I’ve ever tasted – and they’re gluten-free! When I returned home armed with the recipe, I knew I would have to pass it on to you!.. You can of course enjoy them without the elderflower buttercream but you really should try them with it at some point as they are even more delicious! Apparently Jessie found the recipe for the shortbread in ‘Baked to Perfection’ by Katarina Cermelj whilst the buttercream was her own (inspired) addition!
Shortbread:
150g unsalted butter, softened
75g caster sugar, plus extra for sprinkling
1 teaspoon vanilla bean paste
255g gluten-free plain flour (I use Dove’s)
60g cornflour
¾ teaspoon xanthan gum
½ teaspoon salt
Elderflower Buttercream:
150g unsalted butter, softened
170g icing sugar
40g elderflower cordial
- In a bowl, use a wooden spoon to mix together the butter, sugar and vanilla paste until smooth.
- Sift in the gluten-free plain flour, cornflour, xanthan gum and salt. Mix with the spoon and then knead by hand until the dough forms a ball (don’t worry if it seems very crumbly at first as it will suddenly come together!)
- Compress the dough into a disc between two sheets of clingfilm and then roll out until about 1cm thick.
- Use a 5cm round biscuit cutter to cut out the shortbread , prick each biscuit with a fork and sprinkle with caster sugar then place on a baking tray. Any leftover dough can be re-rolled and cut, until used up.
- Bake in a preheated oven, 160’c fan, for 20-22 minutes until very light golden around the edges. Allow to cool on the baking sheet before transferring to a wire cooling rack.
- To make the elderflower buttercream simply cream together the butter, icing sugar and elderflower cordial until pale and fluffy.
- To serve, sandwich two shortbread biscuits together with a generous spread of buttercream – delicious!
Lavender Cupcakes
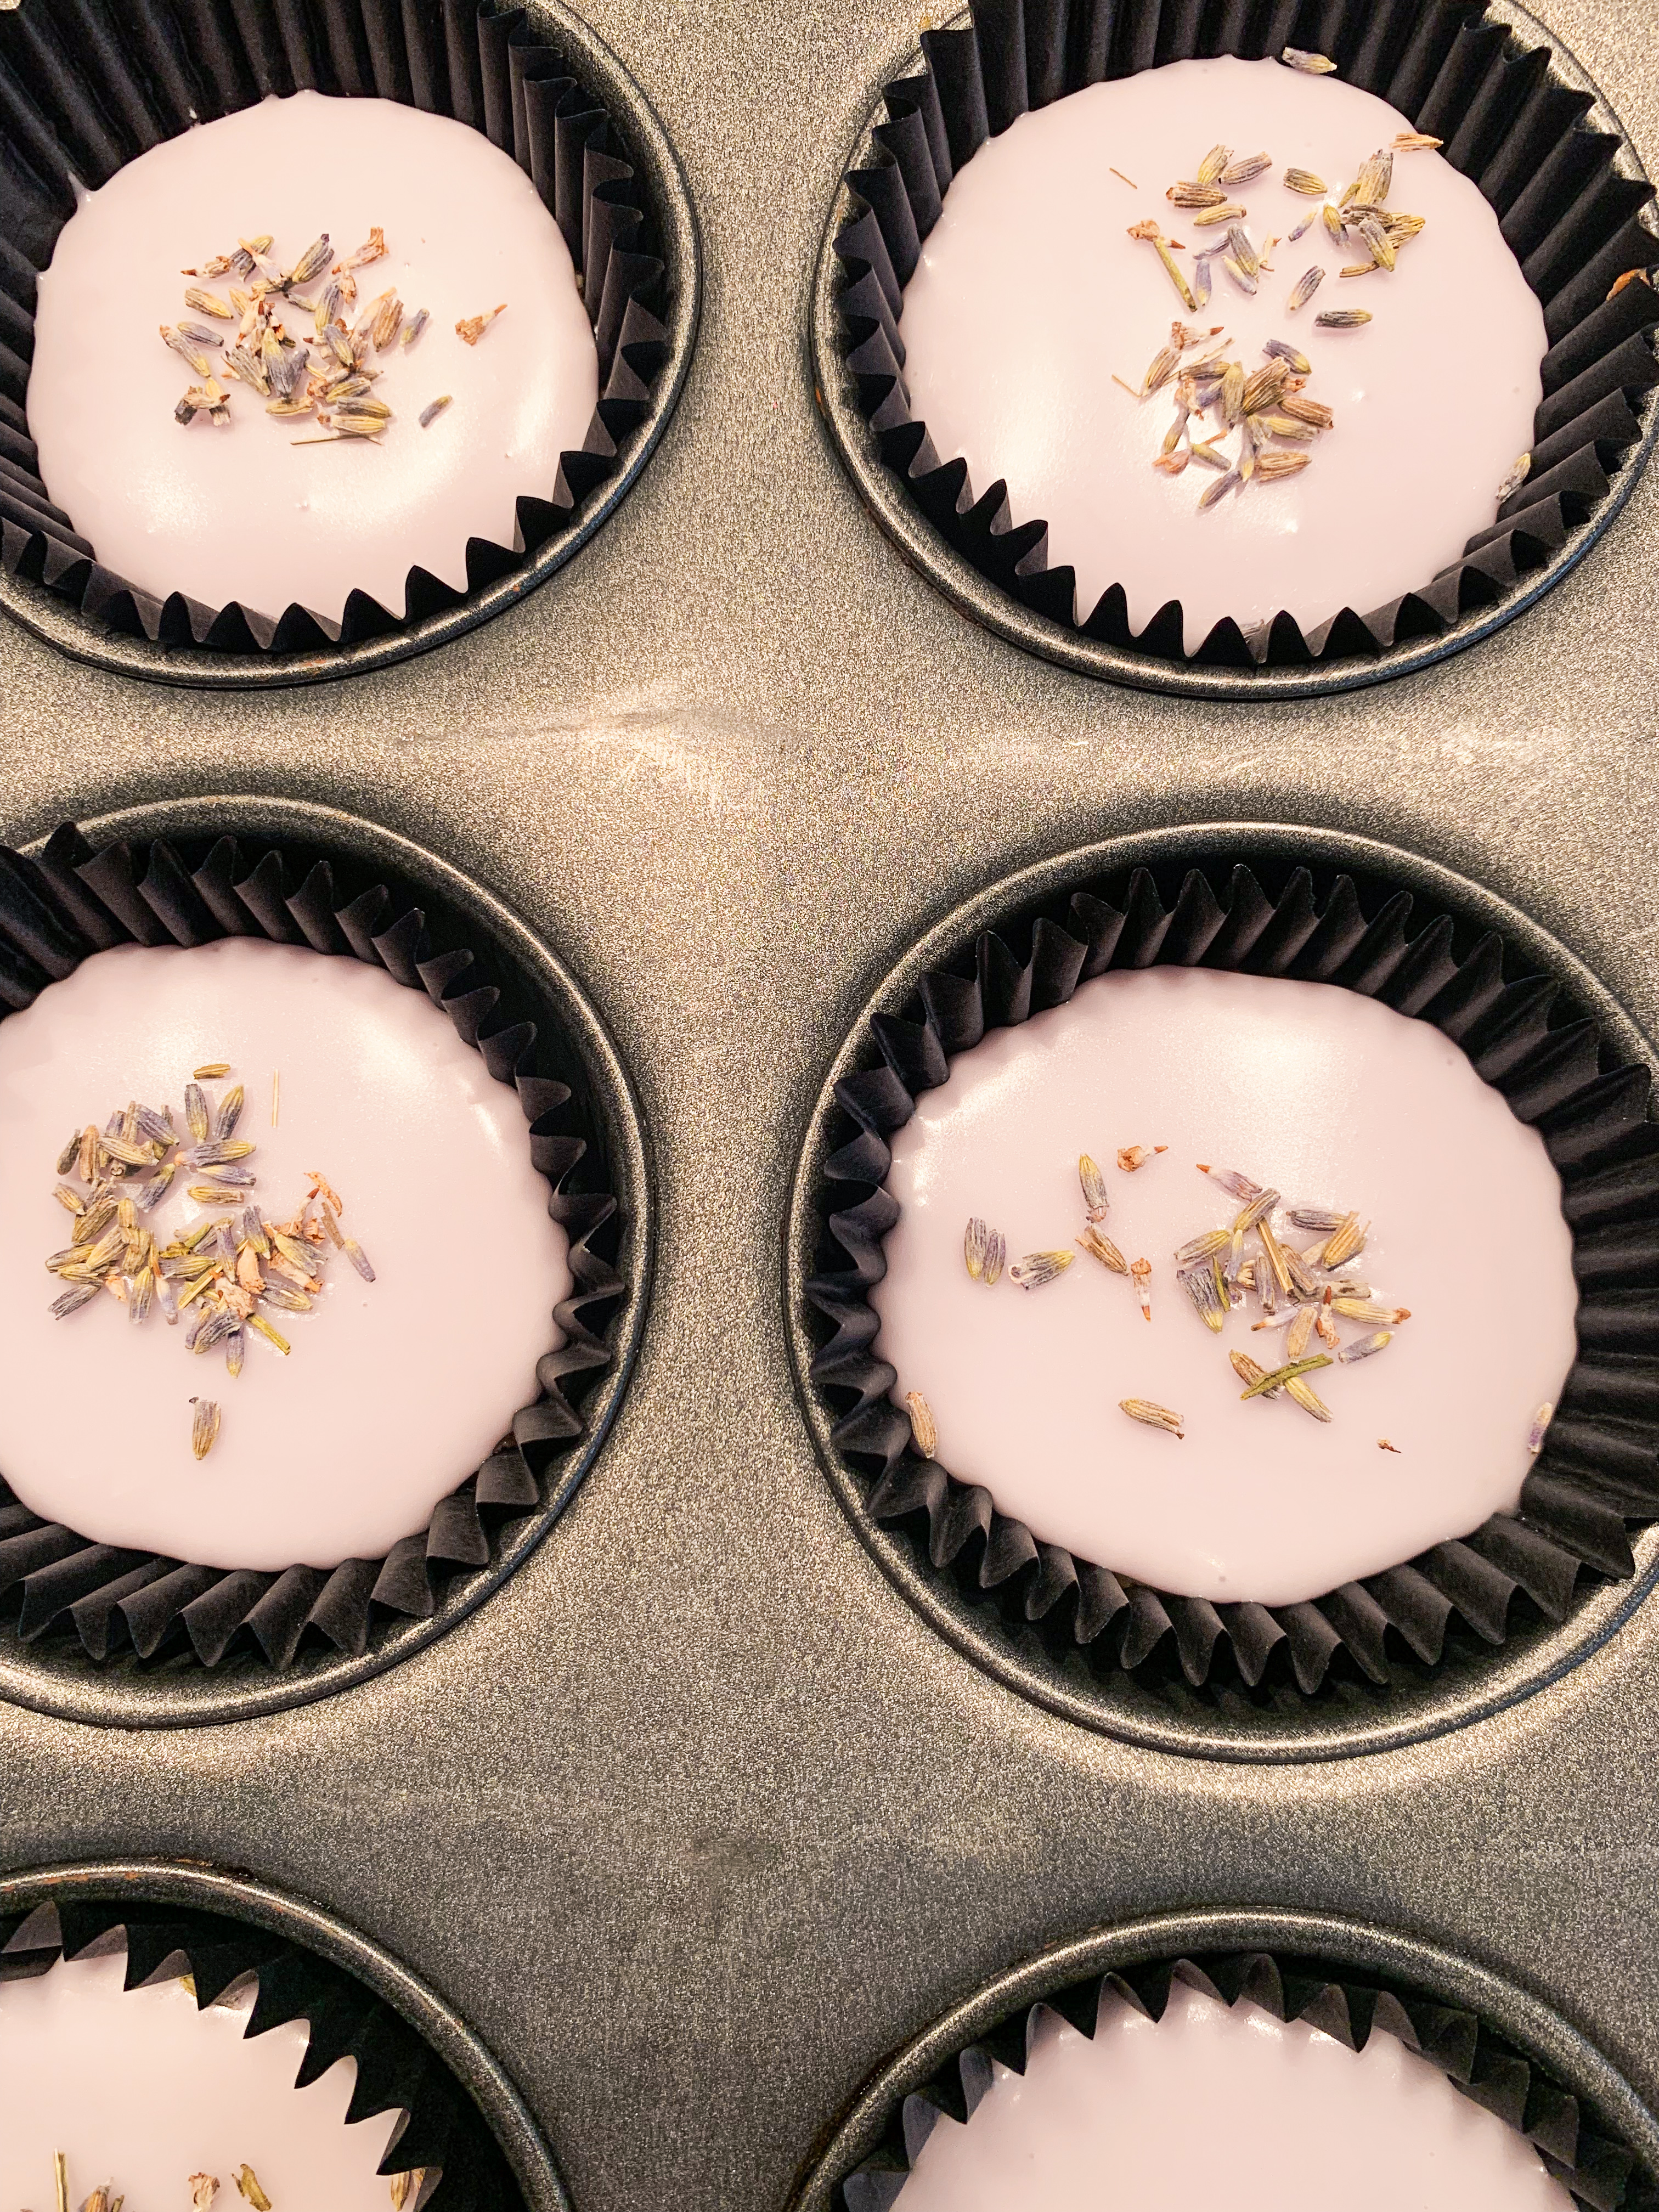
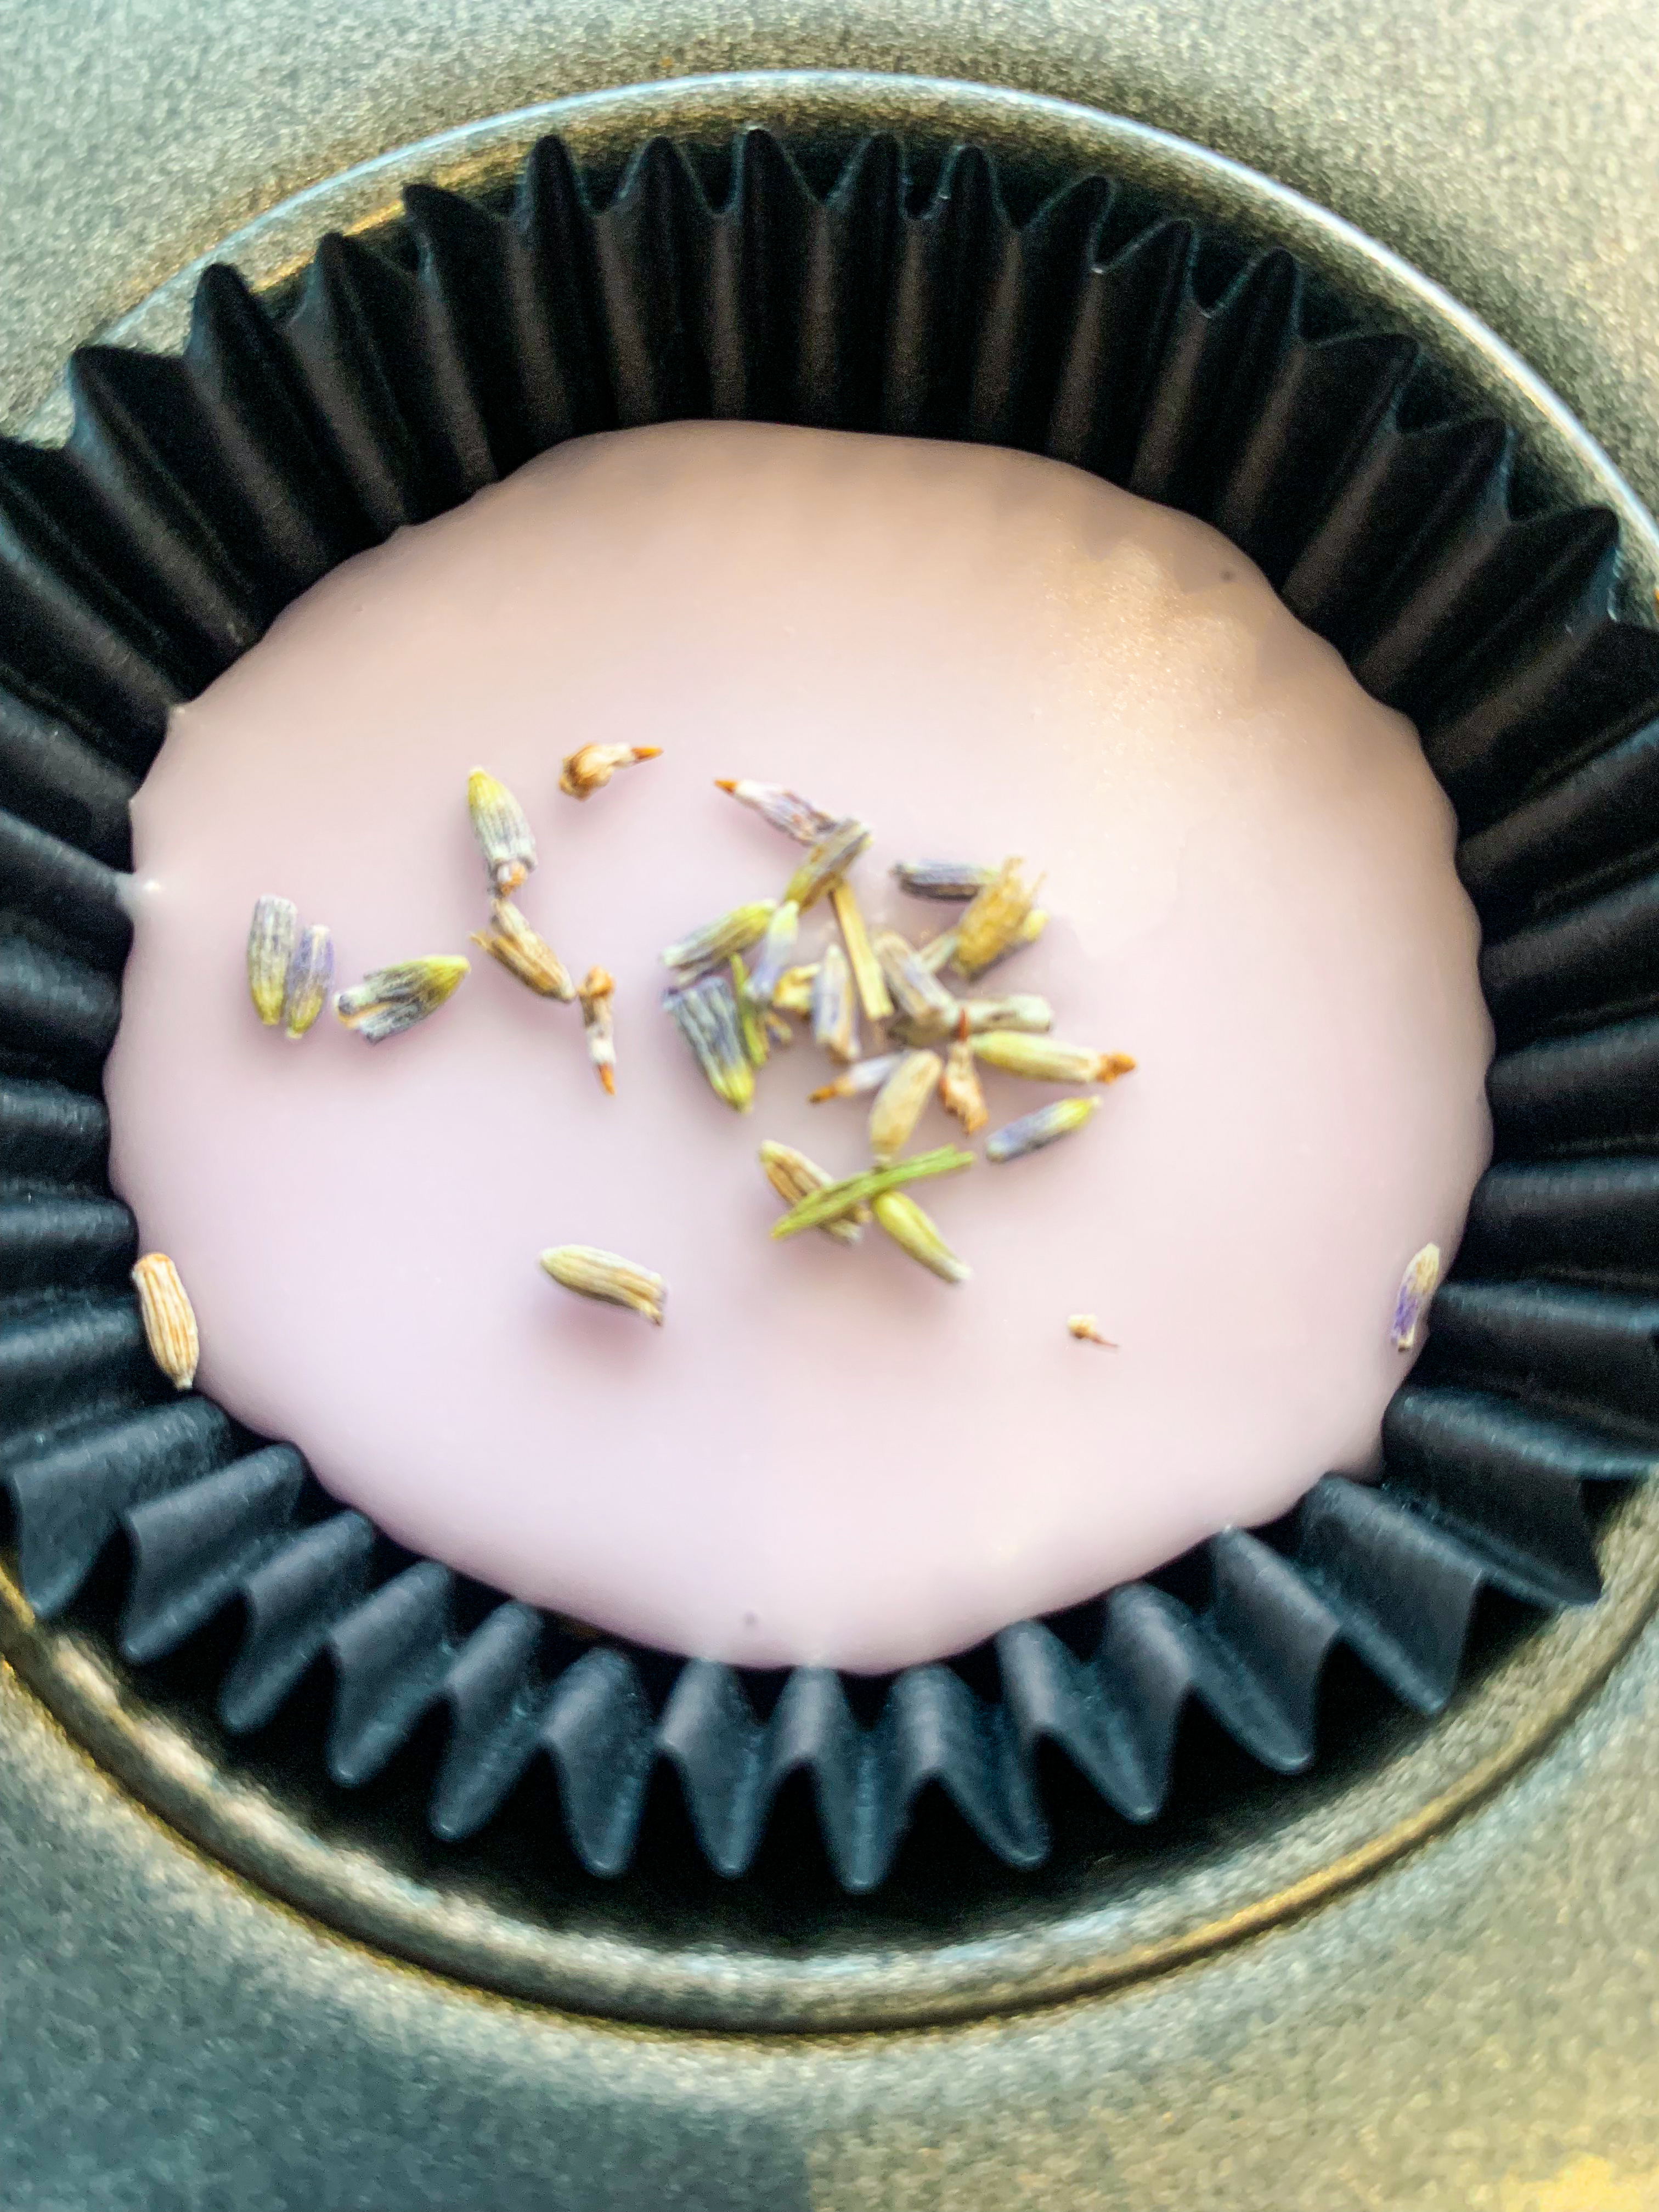
I’m normally not a ‘cupcake’ sort of person, I prefer ‘proper sliced’ cake. I find cupcakes with their icing a little too twee, childlike and fussy. However, when I came across this recipe from Rukmini Iyer’s ‘The Sweet Roasting Tin’, I couldn’t resist. I adore the flavour of Lavender, I don’t particularly like its aroma in perfumes but when it comes to food I find it hard to say no. The addition of lavender makes these little cupcakes a very grown up affair. They’re beautifully light and floral; perfect for a summers day!.. (…and they can easily be made gluten-free by using gluten-free flour and a little milk)
115g softened unsalted butter
115g caster sugar
2 heaped teaspoons of crushed edible lavender
2 eggs
115g self-raising flour (if using gluten-free you will also need the addition of 40ml milk)
1 teaspoon baking powder
Icing:
200g icing sugar
30ml water
A dash or two of violet food colouring
Sprigs of lavender to decorate
*You will need a muffin cake tin lined with 12 paper cases.
- Whisk the butter and sugar together with the crushed lavender until pale and fluffy, then beat in the eggs, one at a time.
- Gently fold in the flour and baking powder (plus 40ml of milk if using gluten-free flour).
- Divide the batter between the paper cases.
- Bake in a preheated oven, 180’c fan, for about 15 minutes, until a skewer inserted comes out clean (they will probably still look pale but they will be iced!). Leave to cool.
- For the icing, mix the sugar and water with a dash of violet food colouring, adding more colour as desired. Ice each cake with 2 teaspoons of icing, placing a lavender sprig or dried lavender buds on each for decoration. Let the icing set completely before serving.
‘La Torta della Anna’ Lemon & White Chocolate Cake
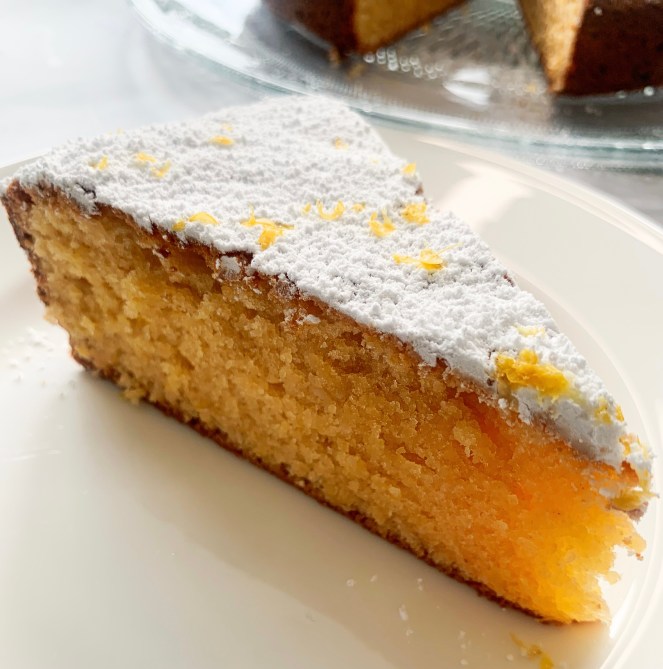
This is one of those special recipes that you don’t often come across…
When visiting Lecce with my Italian Class I had the pleasure of eating at ’63 Osteria Contemporanea’. The wonderful chef Anna originates from Puglia and serves her traditional family recipes with a contemporary edge. She served us some wonderful dishes including this beautifully light ‘Lemon and White Chocolate Cake’, not only was it absolutely delicious but it also happened to be gluten-free. I was completely smitten and begged her for the recipe! I couldn’t wait to return to my kitchen in the UK to try it – it’s fast become a family favourite. Thank you Anna for generously sharing this fantastic recipe!..
*There’s a lot of white chocolate to grate in this recipe so I find that it’s best to grind it in a processor!
200g ground almonds
180g white chocolate, grated (*see note above)
50g potato starch (‘ficole di patate’)
5g baking powder
Grated peel of 3 lemons
125g butter, melted
1 teaspoon pure vanilla essence
5 eggs, separated
180g caster sugar (separated 90/90g)
To serve, Icing sugar and extra grated lemon zest
*You will need a 23cm round cake tin, greased with butter, base lined with greaseproof paper.
- In a bowl mix together the ground almonds, grated white chocolate, potato starch, baking powder and grated lemon peel. Then mix in the melted butter and vanilla essence stirring well.
- In a separate bowl whisk together the egg yolks with 90g of the sugar, until thick, pale and creamy. Then fold into the ground almond mixture.
- In another bowl whisk the egg whites until they form soft peaks then gradually whisk in the remaining 90g of sugar to form glossy stiff peaks.
- Finally, gently fold in the whisked egg whites to the cake mixture.
- Pour the mixture into the prepared cake tin and place in the preheated oven, 180’c fan. Bake for 35-40 minutes.
- To serve, sprinkle over with icing sugar and extra grated lemon peel
Rhubarb Almond Pudding
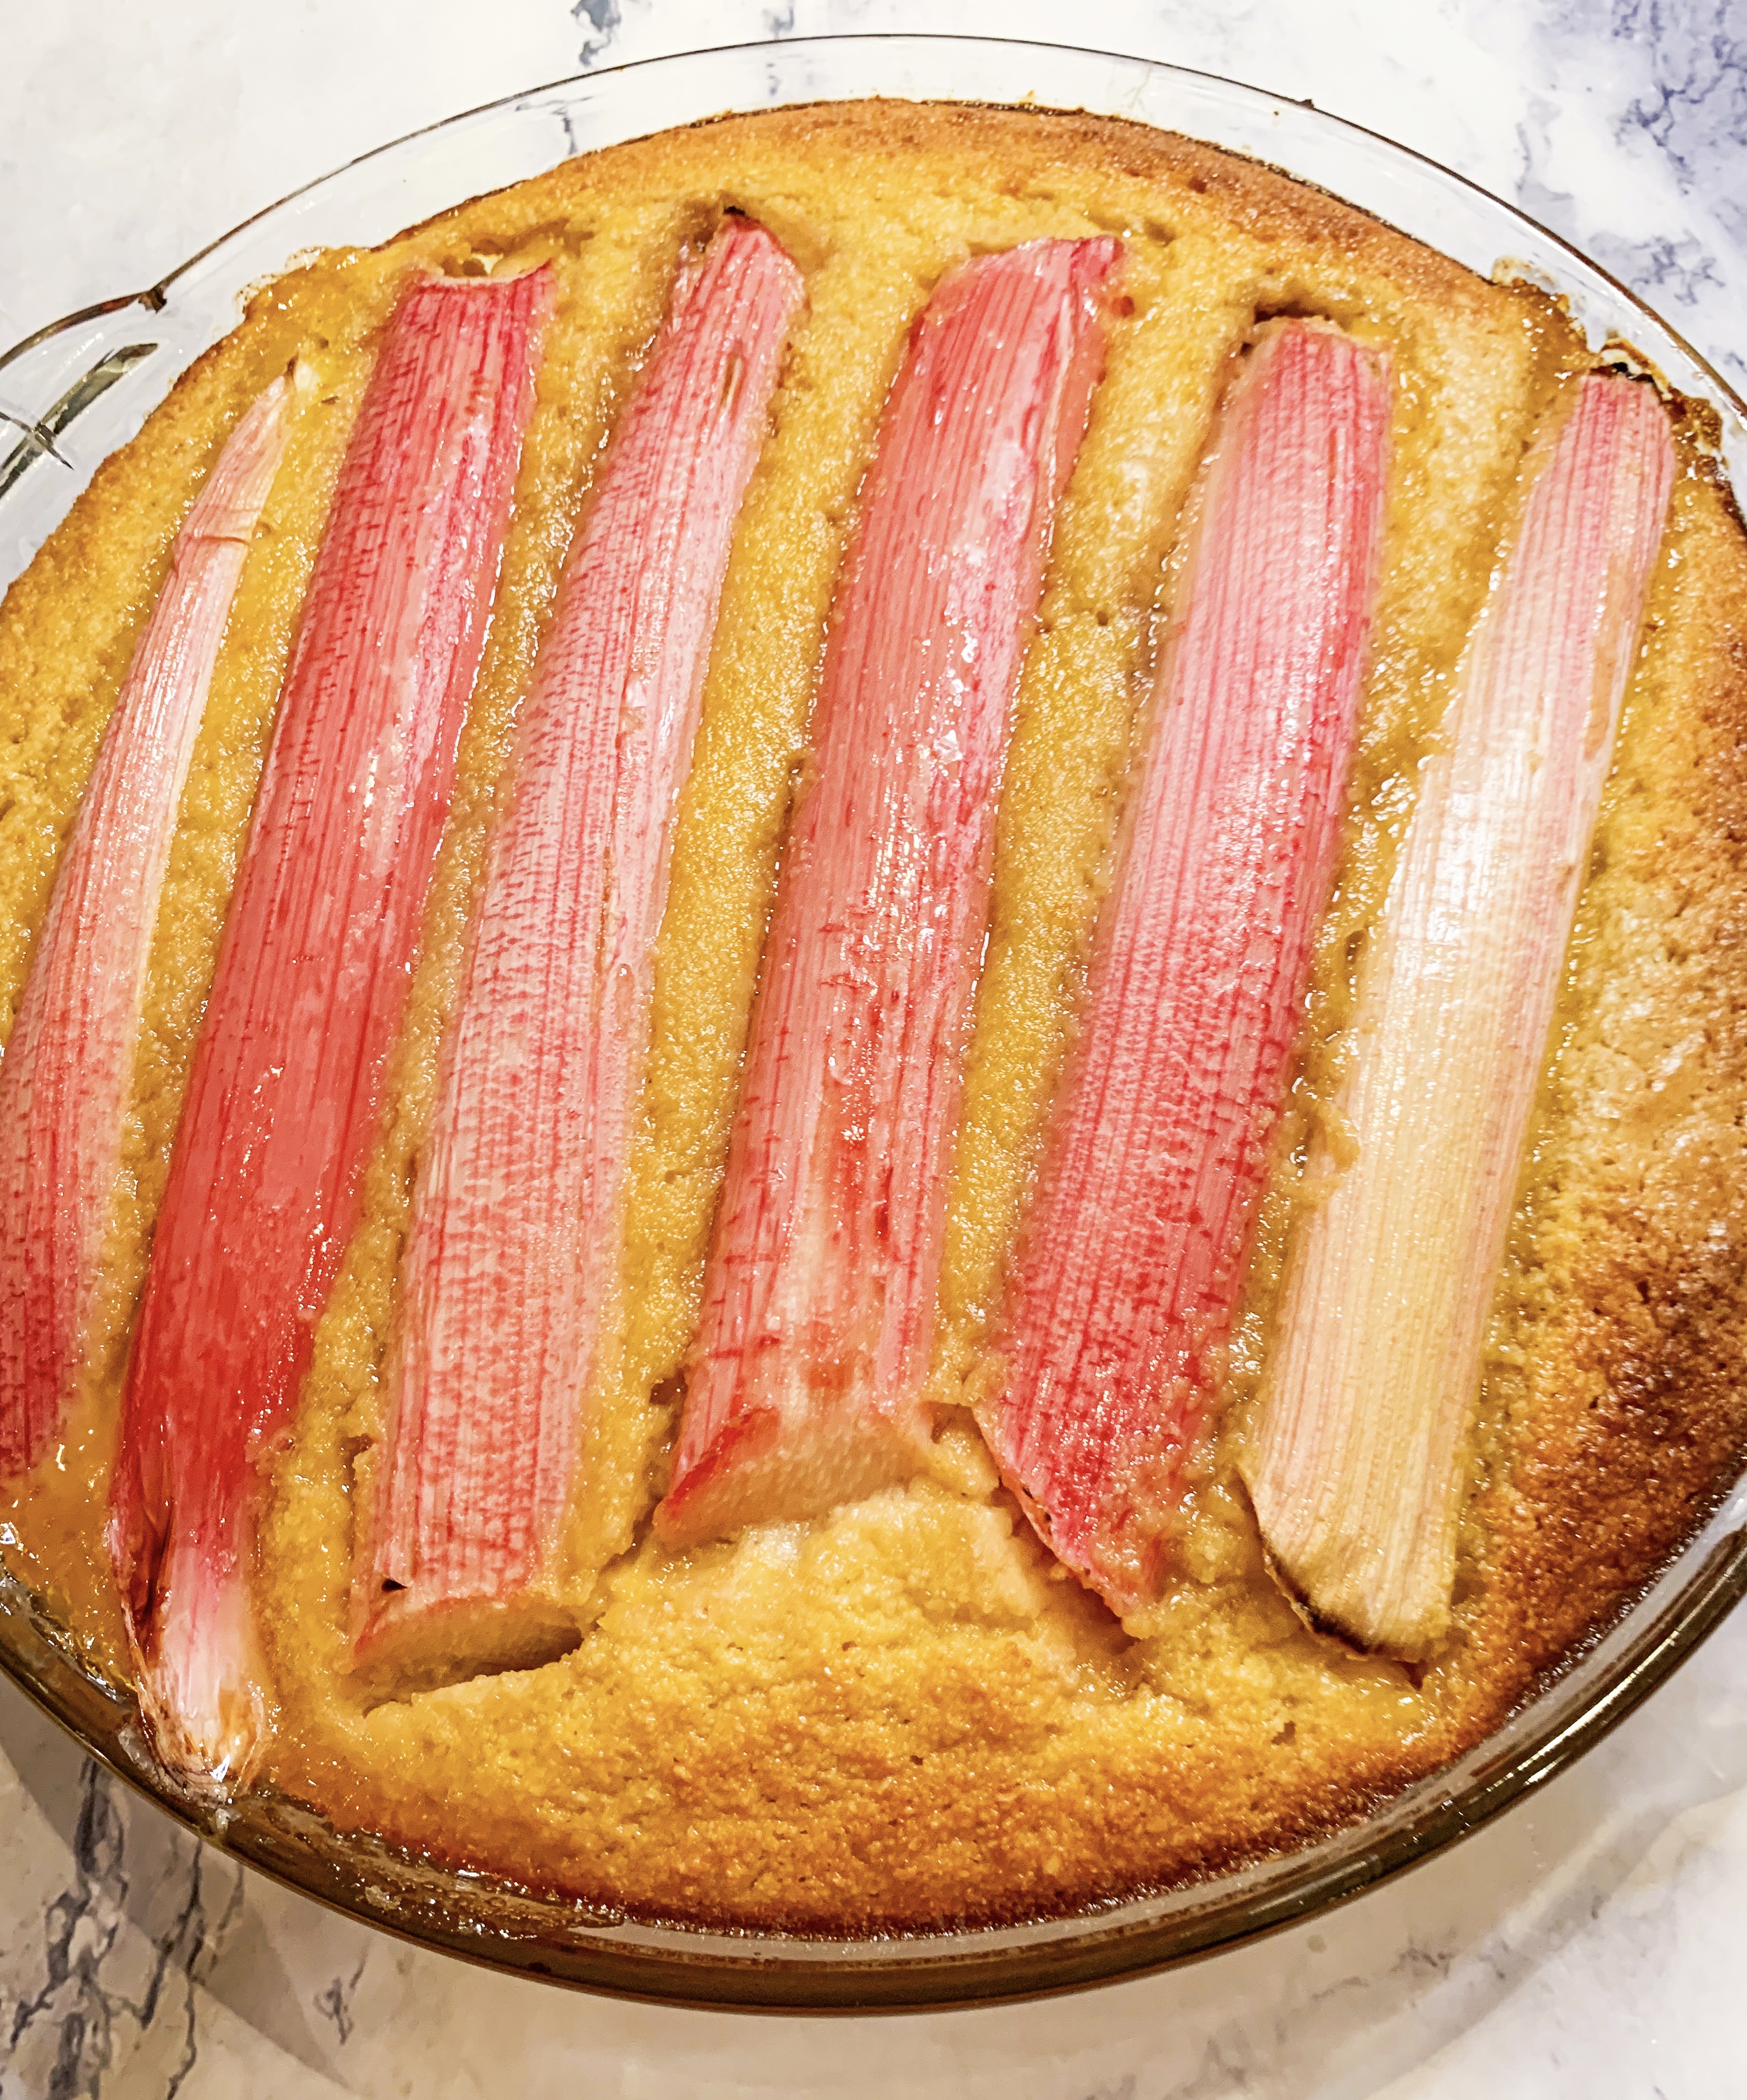
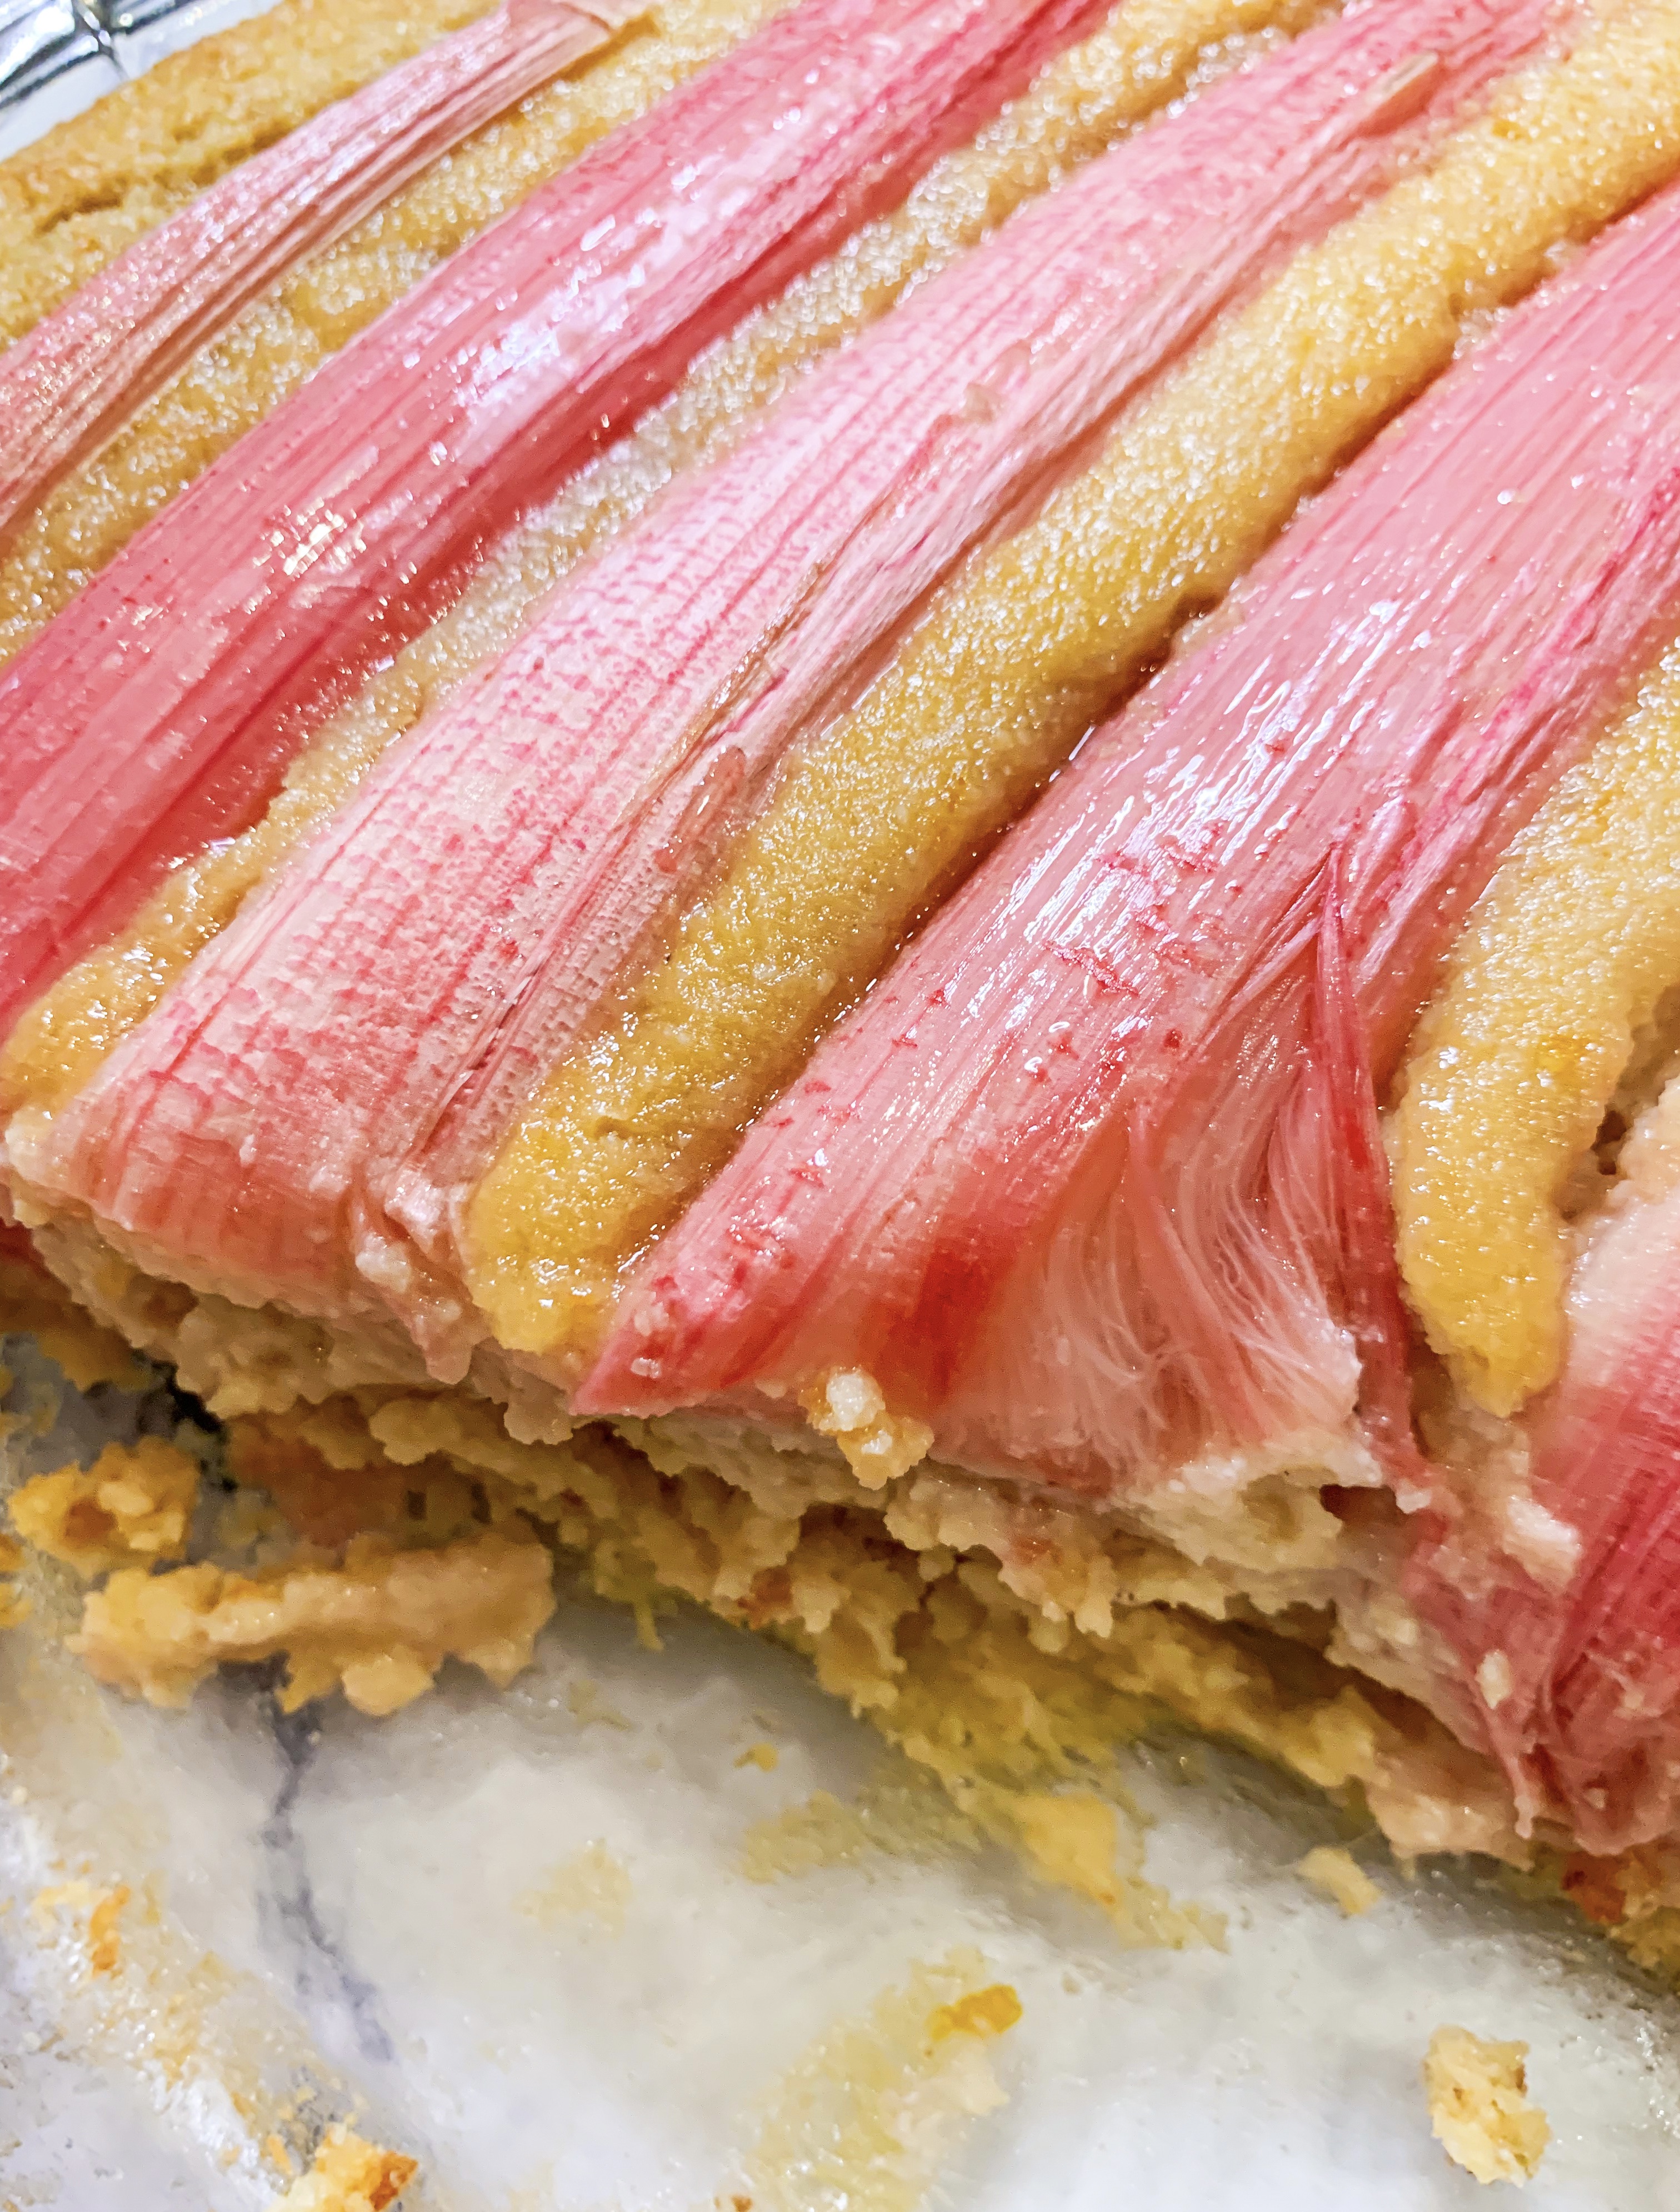
I adore the tart flavour of rhubarb, so much so that as soon as I see it in the shops – either the forced variety which is available at the beginning of the year or the field grown from April to September – I’m keen to find a recipe to enjoy it with. This is one of those recipes which fits the bill perfectly. It’s simple and easy to throw together, even on a weekday evening, and gives instant pleasure. It’s not a particularly refined dessert; it’s quite a heavy, almost ‘stodgy’ pudding but the wonderful flavour of the rhubarb makes it an all-round pleaser. The recipe is from Donna Hay’s cookbook, ‘One Pan Perfect’ – and it absolutely is!
4 eggs
1 teaspoon vanilla extract
1 teaspoon rosewater
360ml buttermilk
1 tablespoon finely grated orange rind
300g ground almonds
2 tablespoons cornflour
165g unrefined caster sugar, plus extra
3 – 5 stalks rhubarb (depending on the size), halved and trimmed to fit the dish
1 tablespoon pure maple syrup
- Place the eggs, vanilla, rosewater, buttermilk and orange rind into a jug and whisk together.
- Place the ground almonds, cornflour and sugar into a bowl and stir. Then add the buttermilk mixture and mix to combine.
- Pour the mixture into a deep 25cm round baking dish (capacity 1.5 litres). Top with the rhubarb then brush well with the maple syrup and sprinkle with a little extra sugar.
- Bake in a preheated oven, 180’c fan, for 40 minutes or until firm and the rhubarb is soft. Serve with double cream or fresh custard!
Chocolate Meringues with Chantilly Cream (Serves 6)
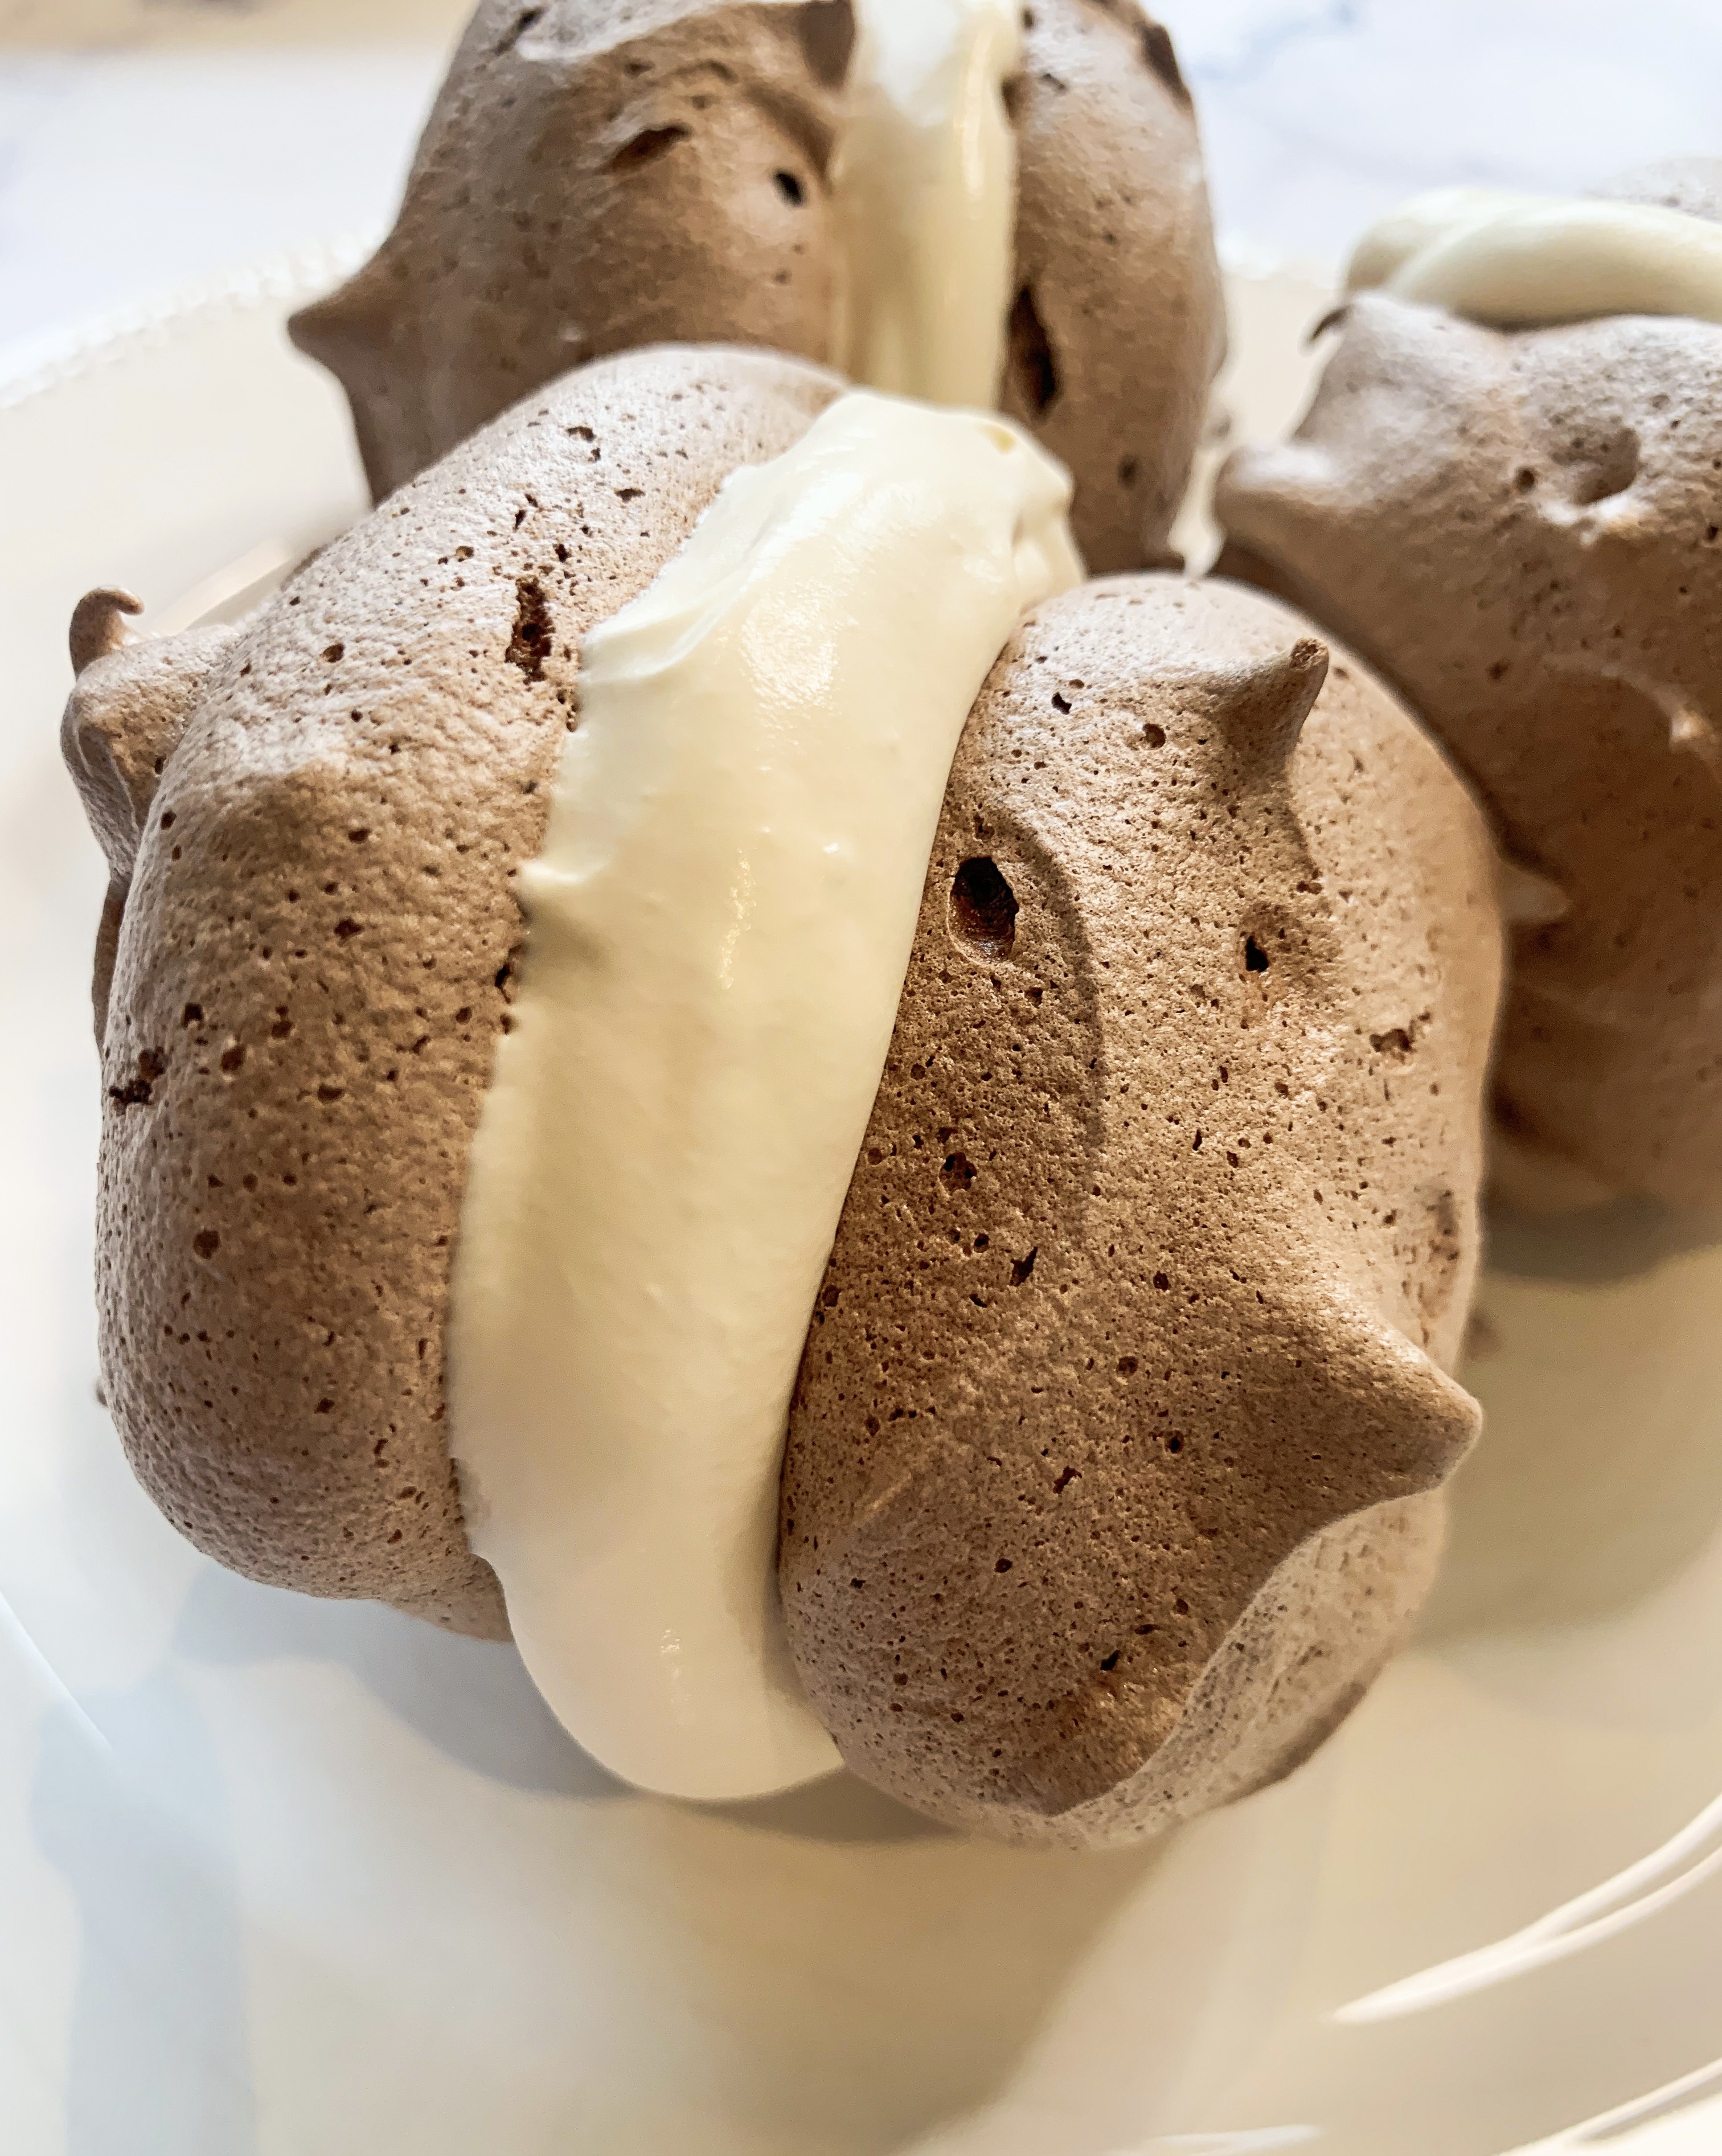
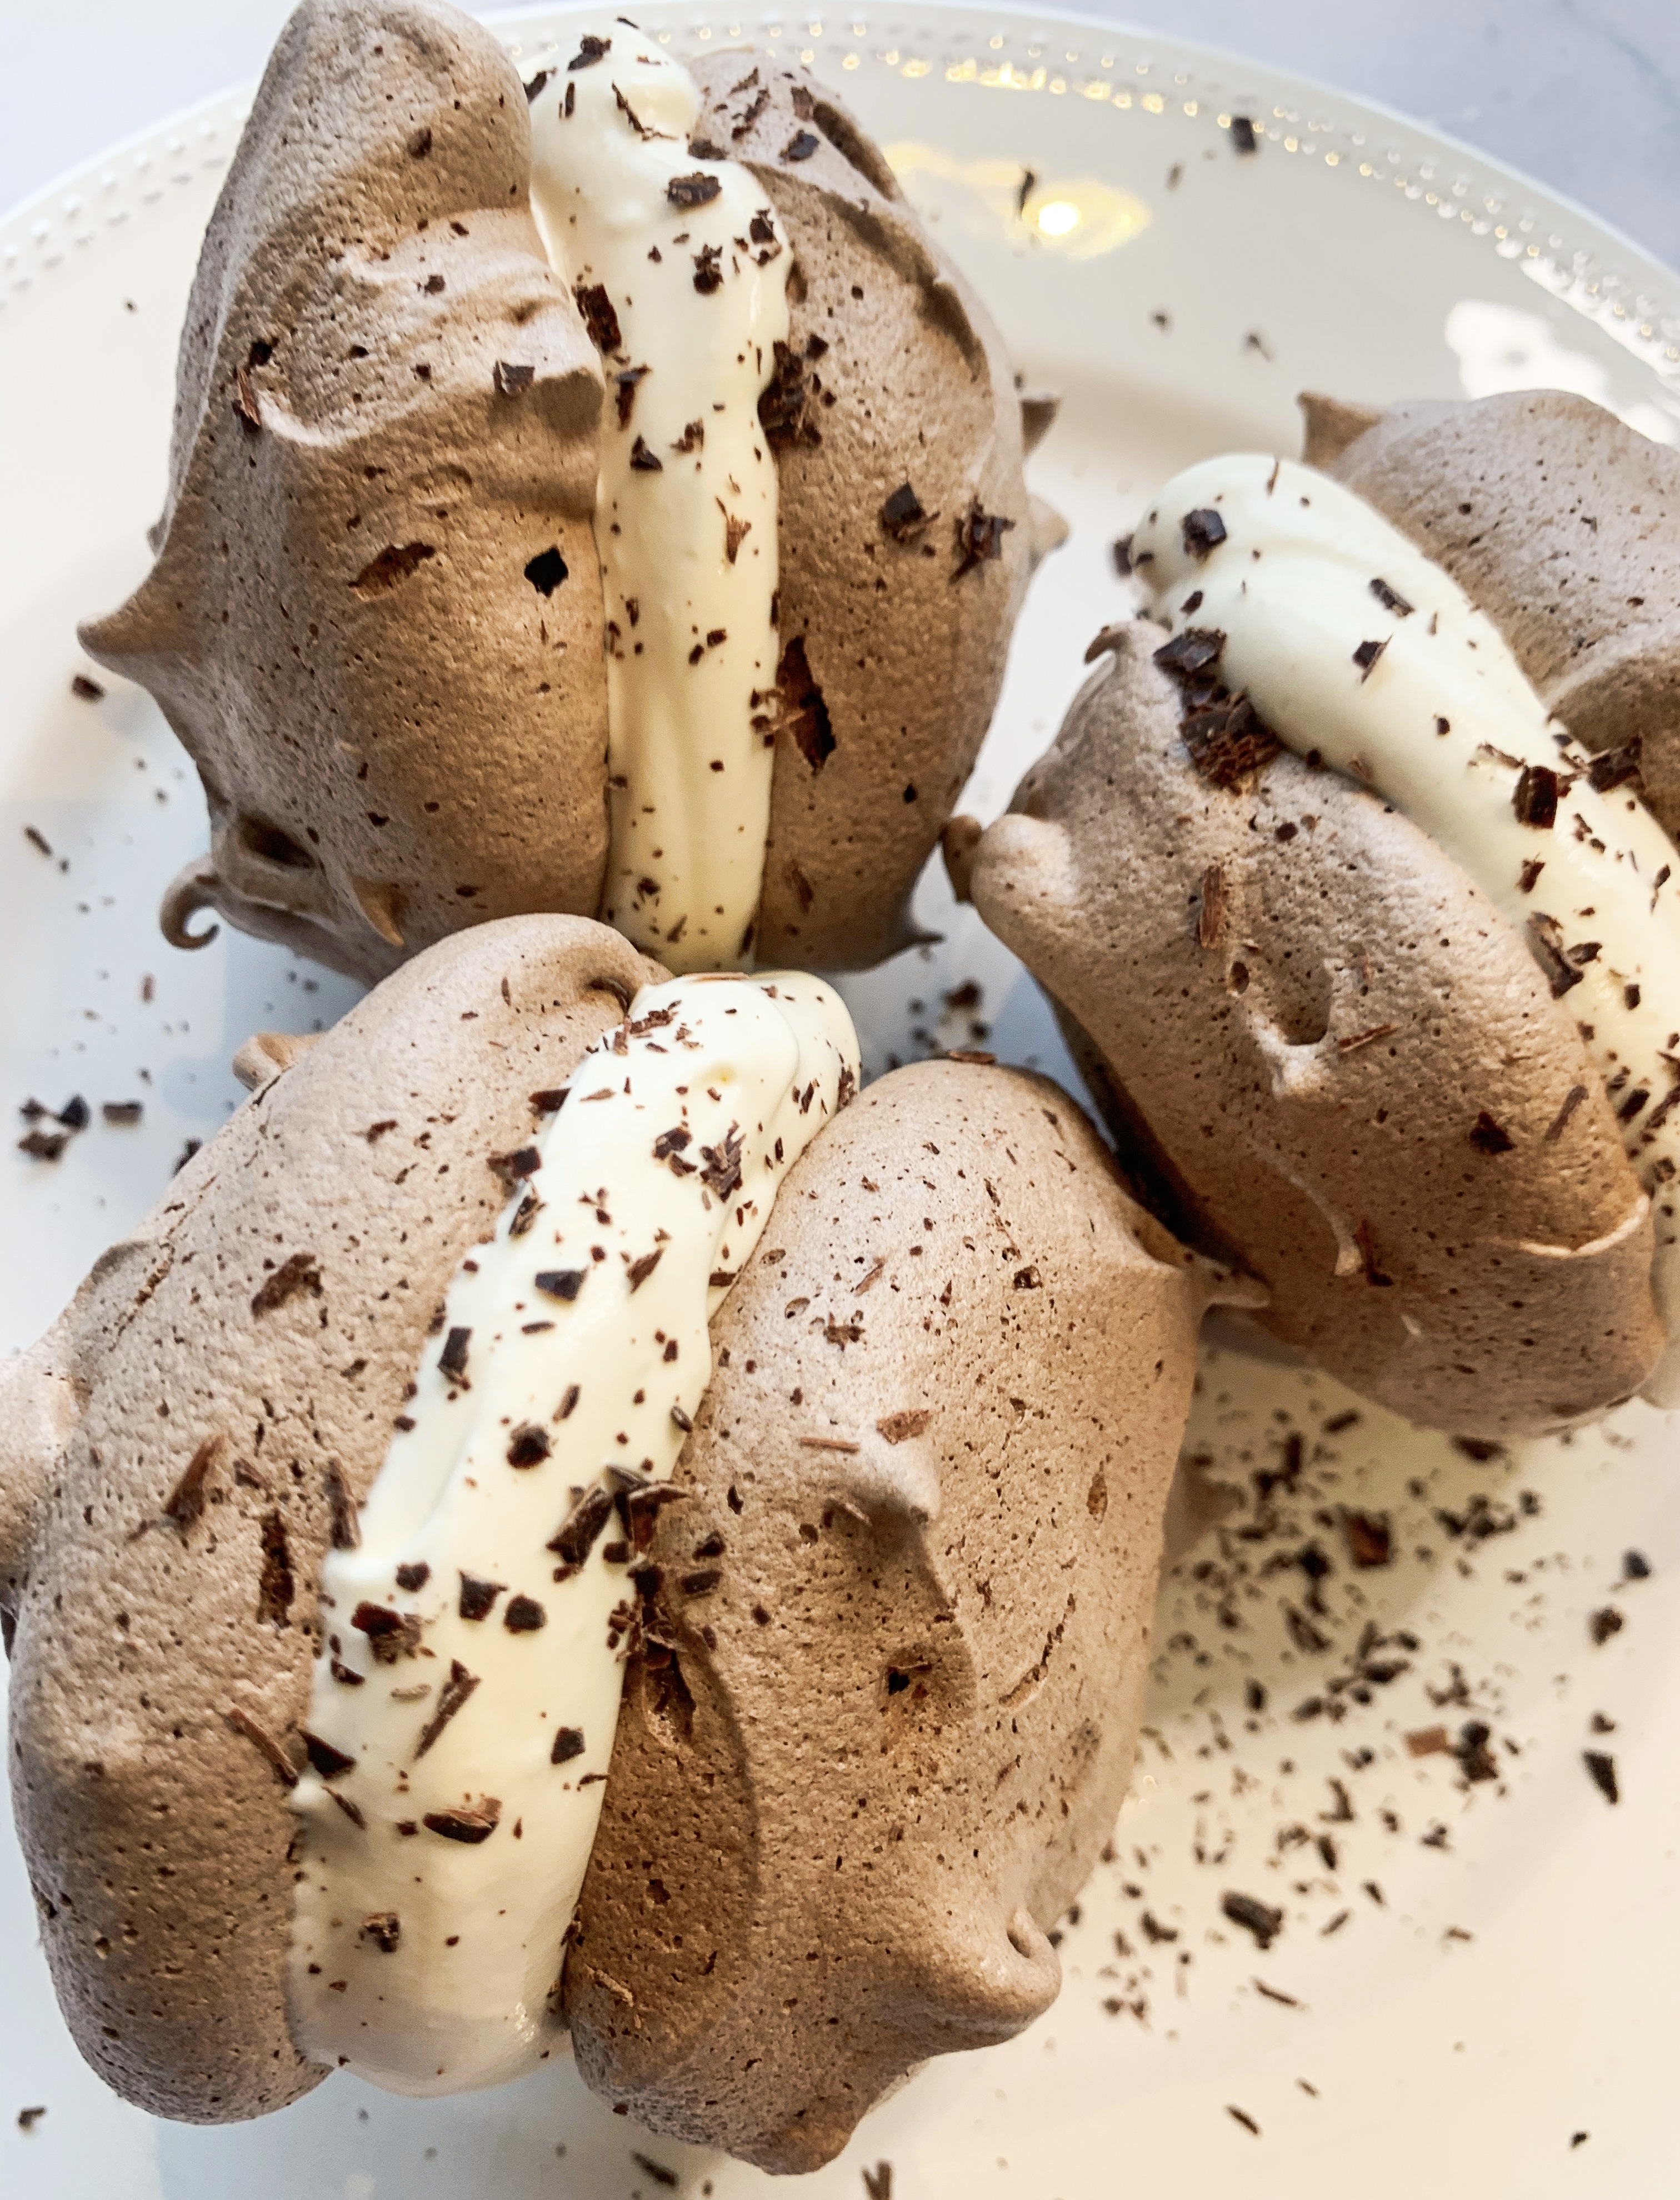
These are as good as they look – and so simple to make! One bite and you will be smitten, whilst crunchy on the outside they have a wonderful chewy centre, then of course there’s the addition of chocolate…plus Chantilly cream! They’re not for the faint-hearted and are rather messy to eat!
*The meringue shells will keep for a few weeks in an airtight container, just add the cream when you want to serve them!
3 egg whites
180g unrefined caster sugar
25g cocoa powder (I use ‘Green & Blacks’), sifted
1 teaspoon of cornflour
For the Chantilly cream:
300ml whipping cream
25g unrefined caster sugar
1 tablespoon Kahlua liqueur
Dark chocolate shavings to decorate (optional)
- Firstly, preheat the oven to 140’c fan.
- Put the egg whites in a bowl. Using an electric hand whisk, start to whisk them slowly, gradually increasing the speed to high until the egg whites are stiff. Gradually add the caster sugar a little at a time, continuing to whisk on a high speed until thick and glossy. Finally, whisk in the sifted cocoa powder and cornflour.
- Line a baking tray with baking parchment and scoop the meringue mixture onto the paper in 12 spoonfuls.
- Place in the oven and straightaway reduce the temperature to 120’c fan. Bake for 1 hour then turn off the oven and leave to cool in the oven for a further hour.
- When ready to serve, whisk the cream a little then add the sugar and Kahlua and continue to whisk until it stands in soft peaks. Sandwich the meringues together with the Chantilly cream.
Zabaglione (Serves 4)
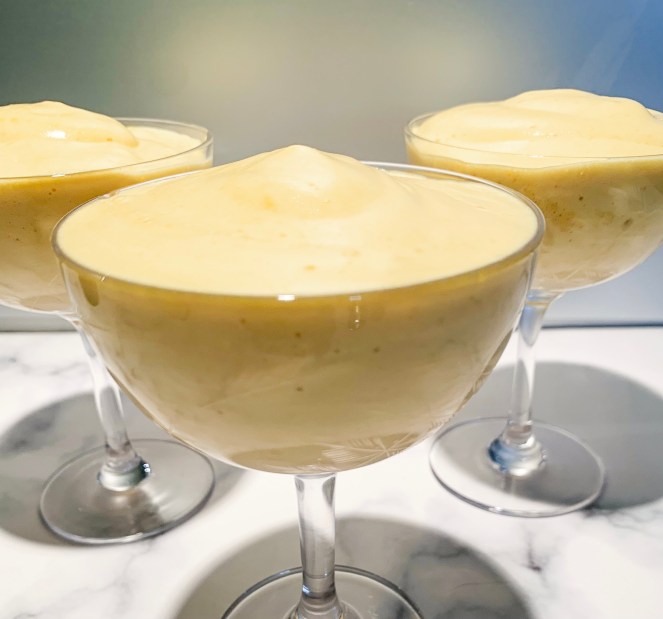
If you’ve never made Zabaglione or even tried it I urge you to do so with this recipe! It’s a light and creamy dessert with the most wonderful, subtle flavour of sweet Marsala wine. I have been making this particular recipe for more years than I can remember, I found it in Delia Smith’s ‘Complete Illustrated Cookery Course’ cookbook (yes, her really old one!). It’s super simple to make but it does need time whisking at the stove over simmering water (bain-marie), however, using an electric handheld whisk hurries things along. I recently discovered that Delia Smith had updated her recipe with the addition of cornflour so that it was possible to whisk it over direct heat without splitting and it thickened quicker. However, when I tried this recipe I found the result disappointing, it was nothing like the original recipe – you could taste the cornflour and the dessert was heavier. It’s definitely worth staying at the stove for an extra 5 minutes for this fantastic recipe!..
*Apart from this wonderful recipe, one of the best Zabaglione’s that I’ve tried was at Caffè Al Bicerin when I visited Turin a few years ago. Caffè Al Bicerin is a beautiful little cafe with just 6 or so tables, the interior is wonderfully antiquated and dimly lit by candles on white marble tabletops. It’s a ‘must-see’ place if you visit Turin (I would recommend a long weekend in this historic Italian city!). The cafe is renowned for having invented the Bicerin, but it’s also famous for its Zabaglione. What a dream a café where you can pop in just for a Zabaglione!.. (you can find my recipe for Bicerin here!)
8 Egg yolks
100g caster sugar
80ml Marsala wine
- Firstly choose a medium sized mixing bowl which will sit comfortably over a saucepan of barely simmering water (without touching it).
- Start with the bowl on the worktop. Place the egg yolks and sugar into it and whisk them with an electric handheld whisk until the mixture is pale and creamy (about 4 minutes). Then gradually whisk in the Marsala bit by bit.
- Now transfer the bowl to saucepan, keep the heat very low, and continue to whisk until the mixture thickens (about 8-10 minutes).
- To serve, pour into glasses and serve straightaway!..
Manhattan Coconut Cookies
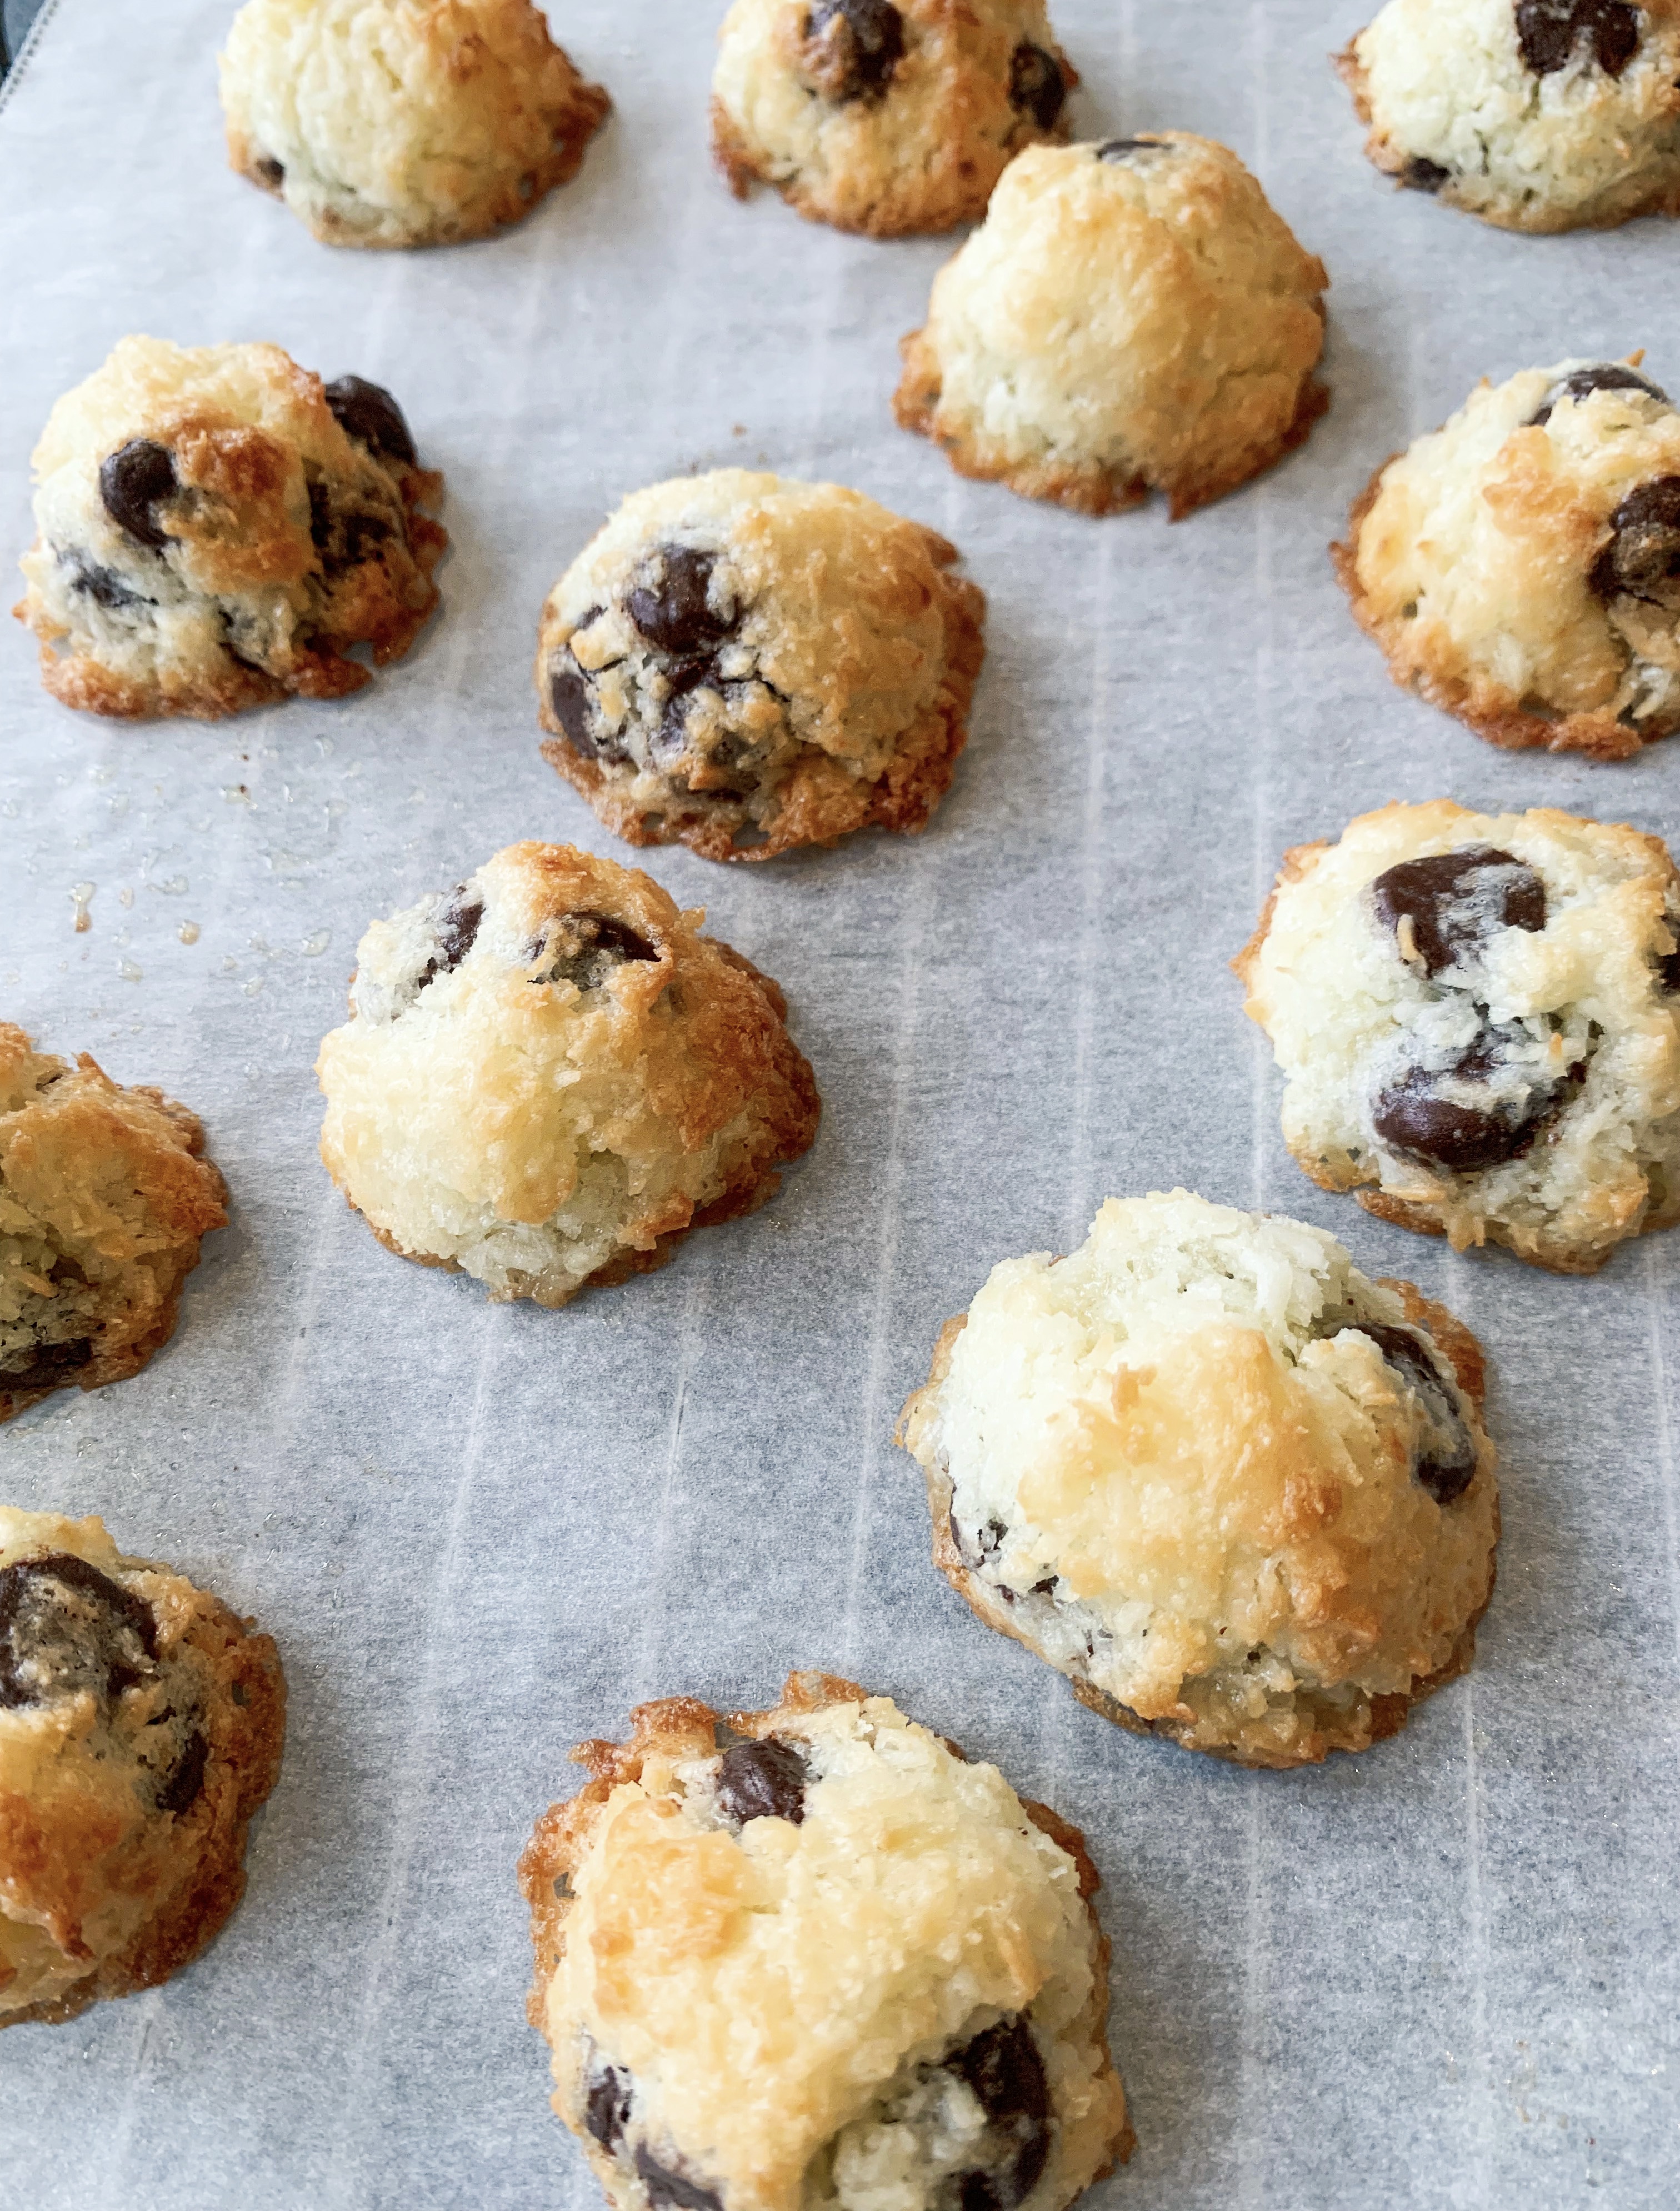
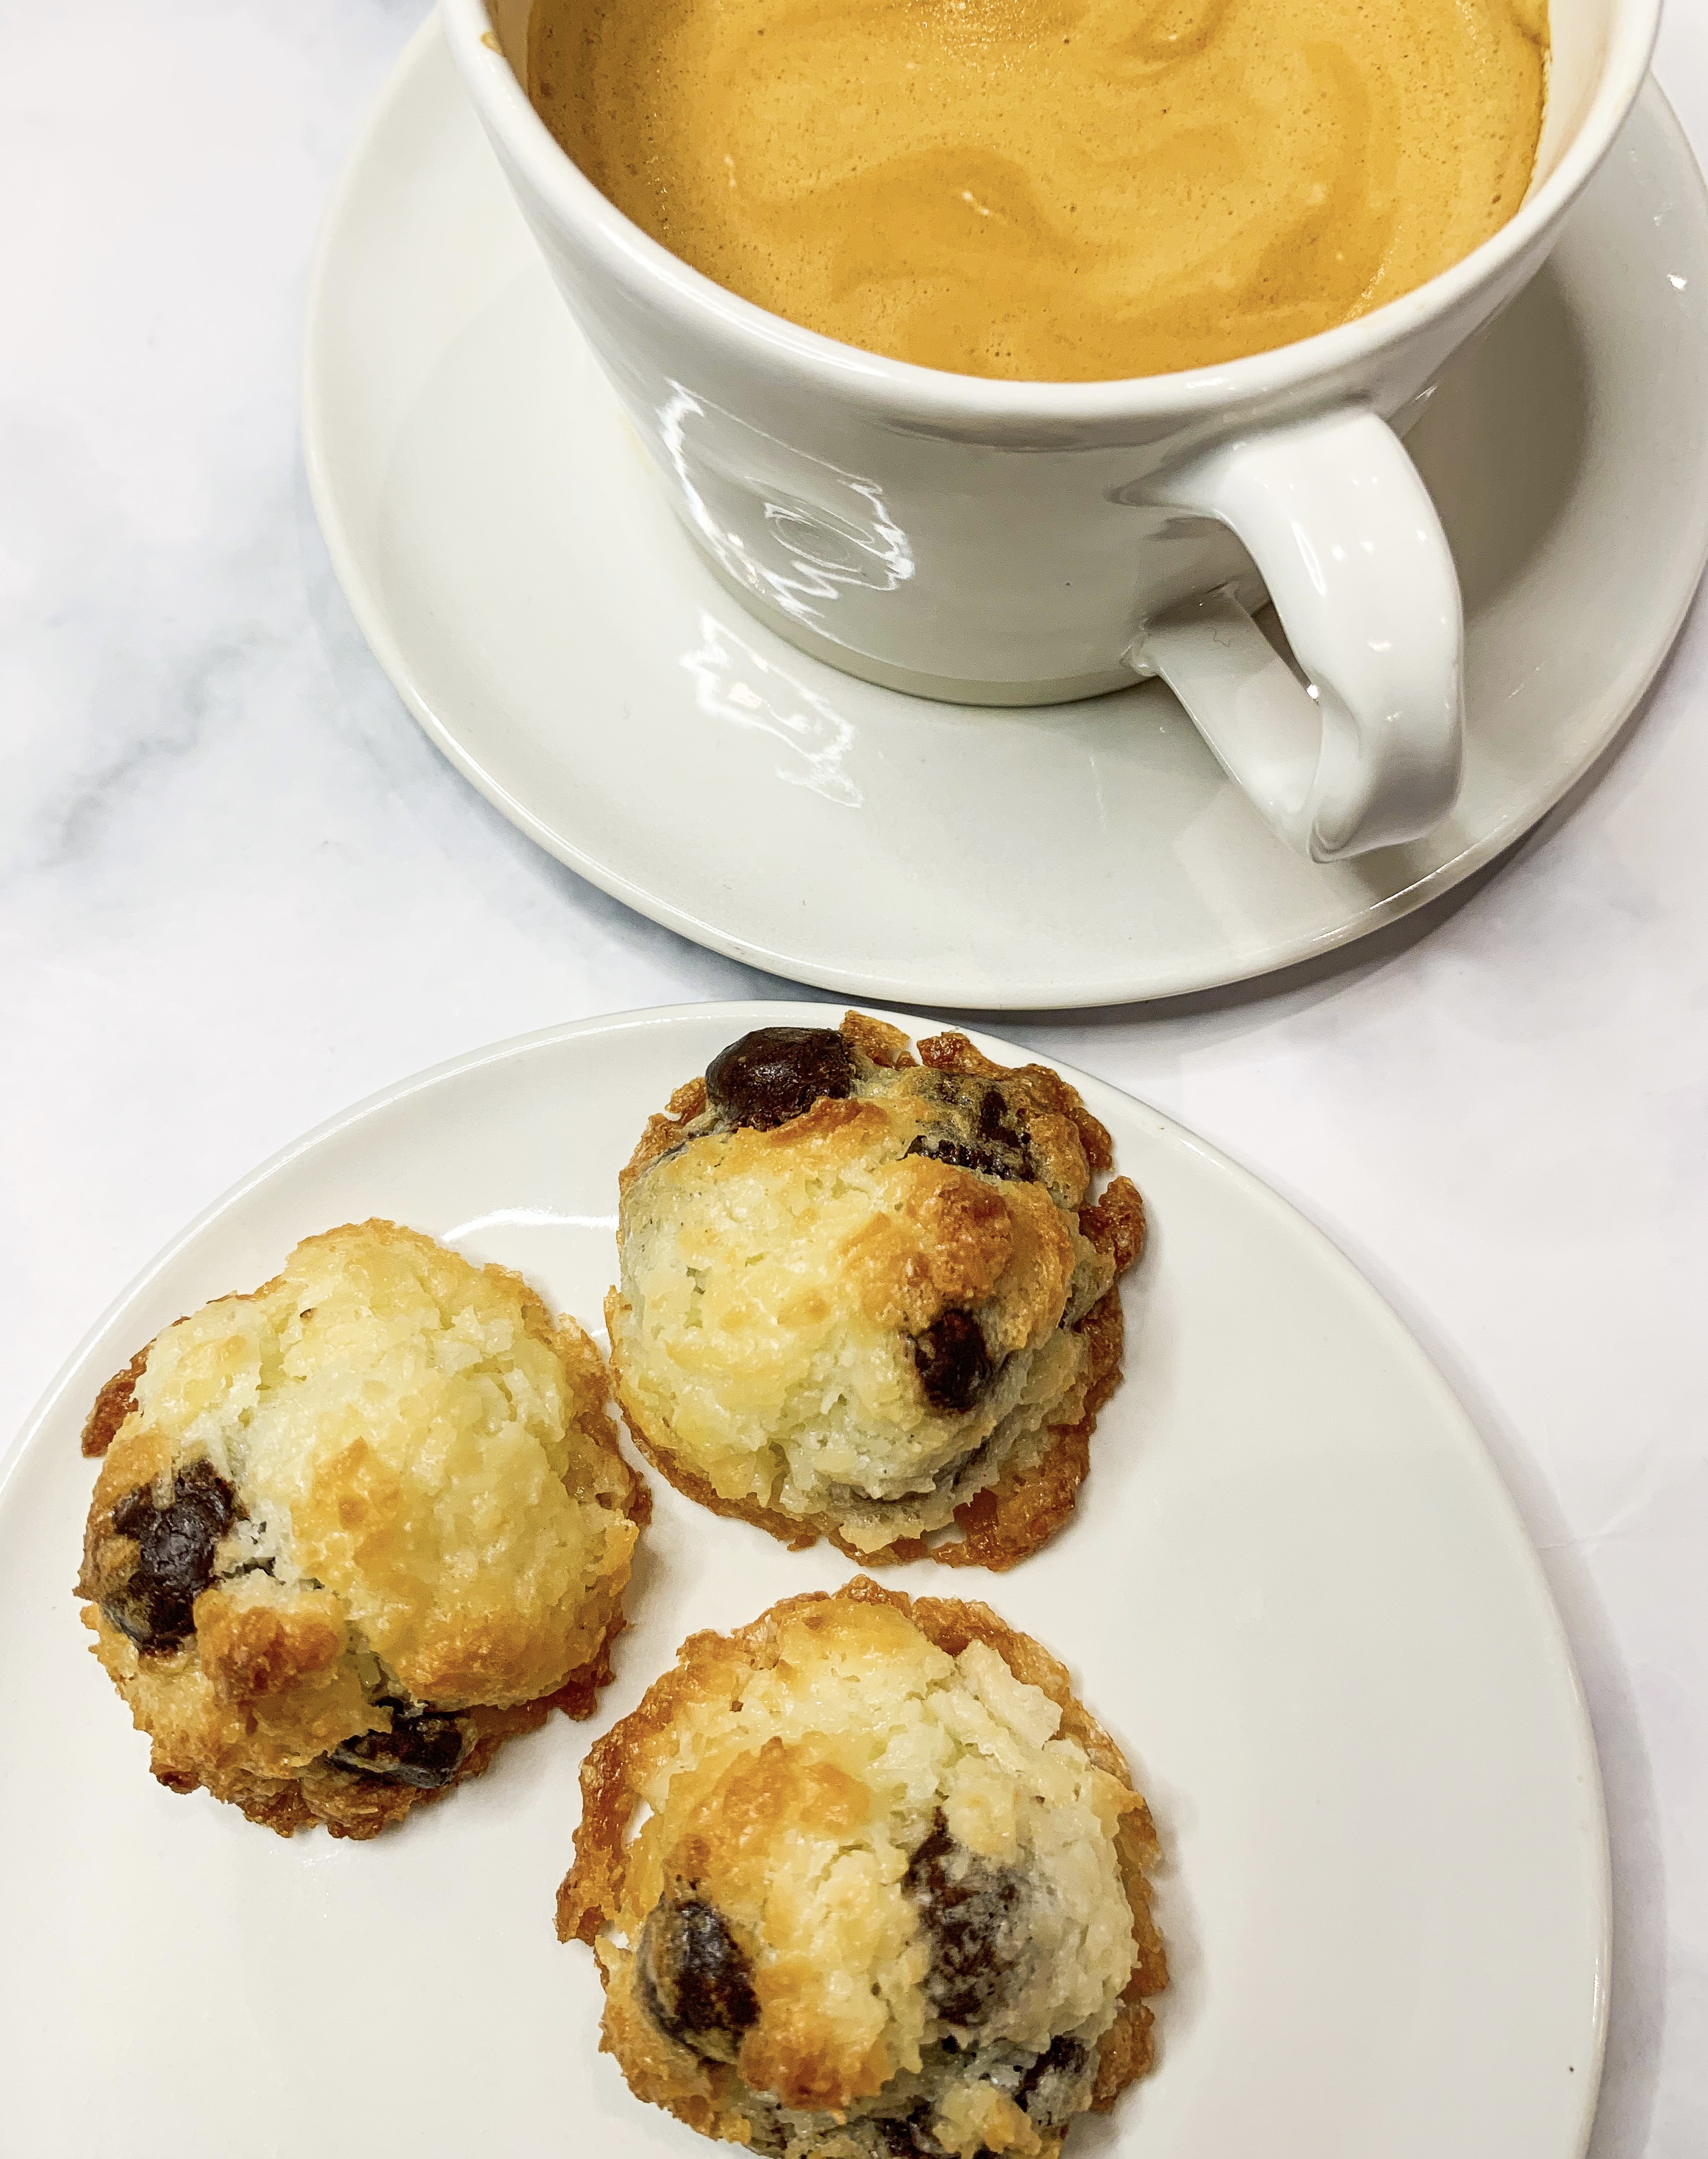
This is a rather grand name for what is essentially coconut macaroons with dark chocolate chips. I found this recipe in the cookbook, ‘Cooking’, by Michelin-starred chef, Tom Aikens. Most of his recipes are rather fancy and convoluted, however, these are ridiculously simple to make so naturally they caught my eye! It’s important to use dark chocolate chips as they cut the sweetness of the coconut. I like to make them small, just big enough to pop easily into the mouth with a strong espresso on the side. The perfect pick-me-up for February!..
125g icing sugar
125g desiccated coconut
2 egg whites
60g unsalted butter, melted
60g dark chocolate chips
- Place the desiccated coconut in a dry frying pan over a medium heat and gently toast.
- Place the sugar and toasted coconut in a bowl then add the egg whites and mix together. Add the melted butter, then when the mixture is cool, add the chocolate chips. Place in a container and chill for 20 minutes
- When the mixture is set hard, roll it into balls about 2cm in diameter. Place on a baking sheet and bake in a preheated oven, 180’c for about 10 minutes. Cool on a wire rack.
Pistachio Bites
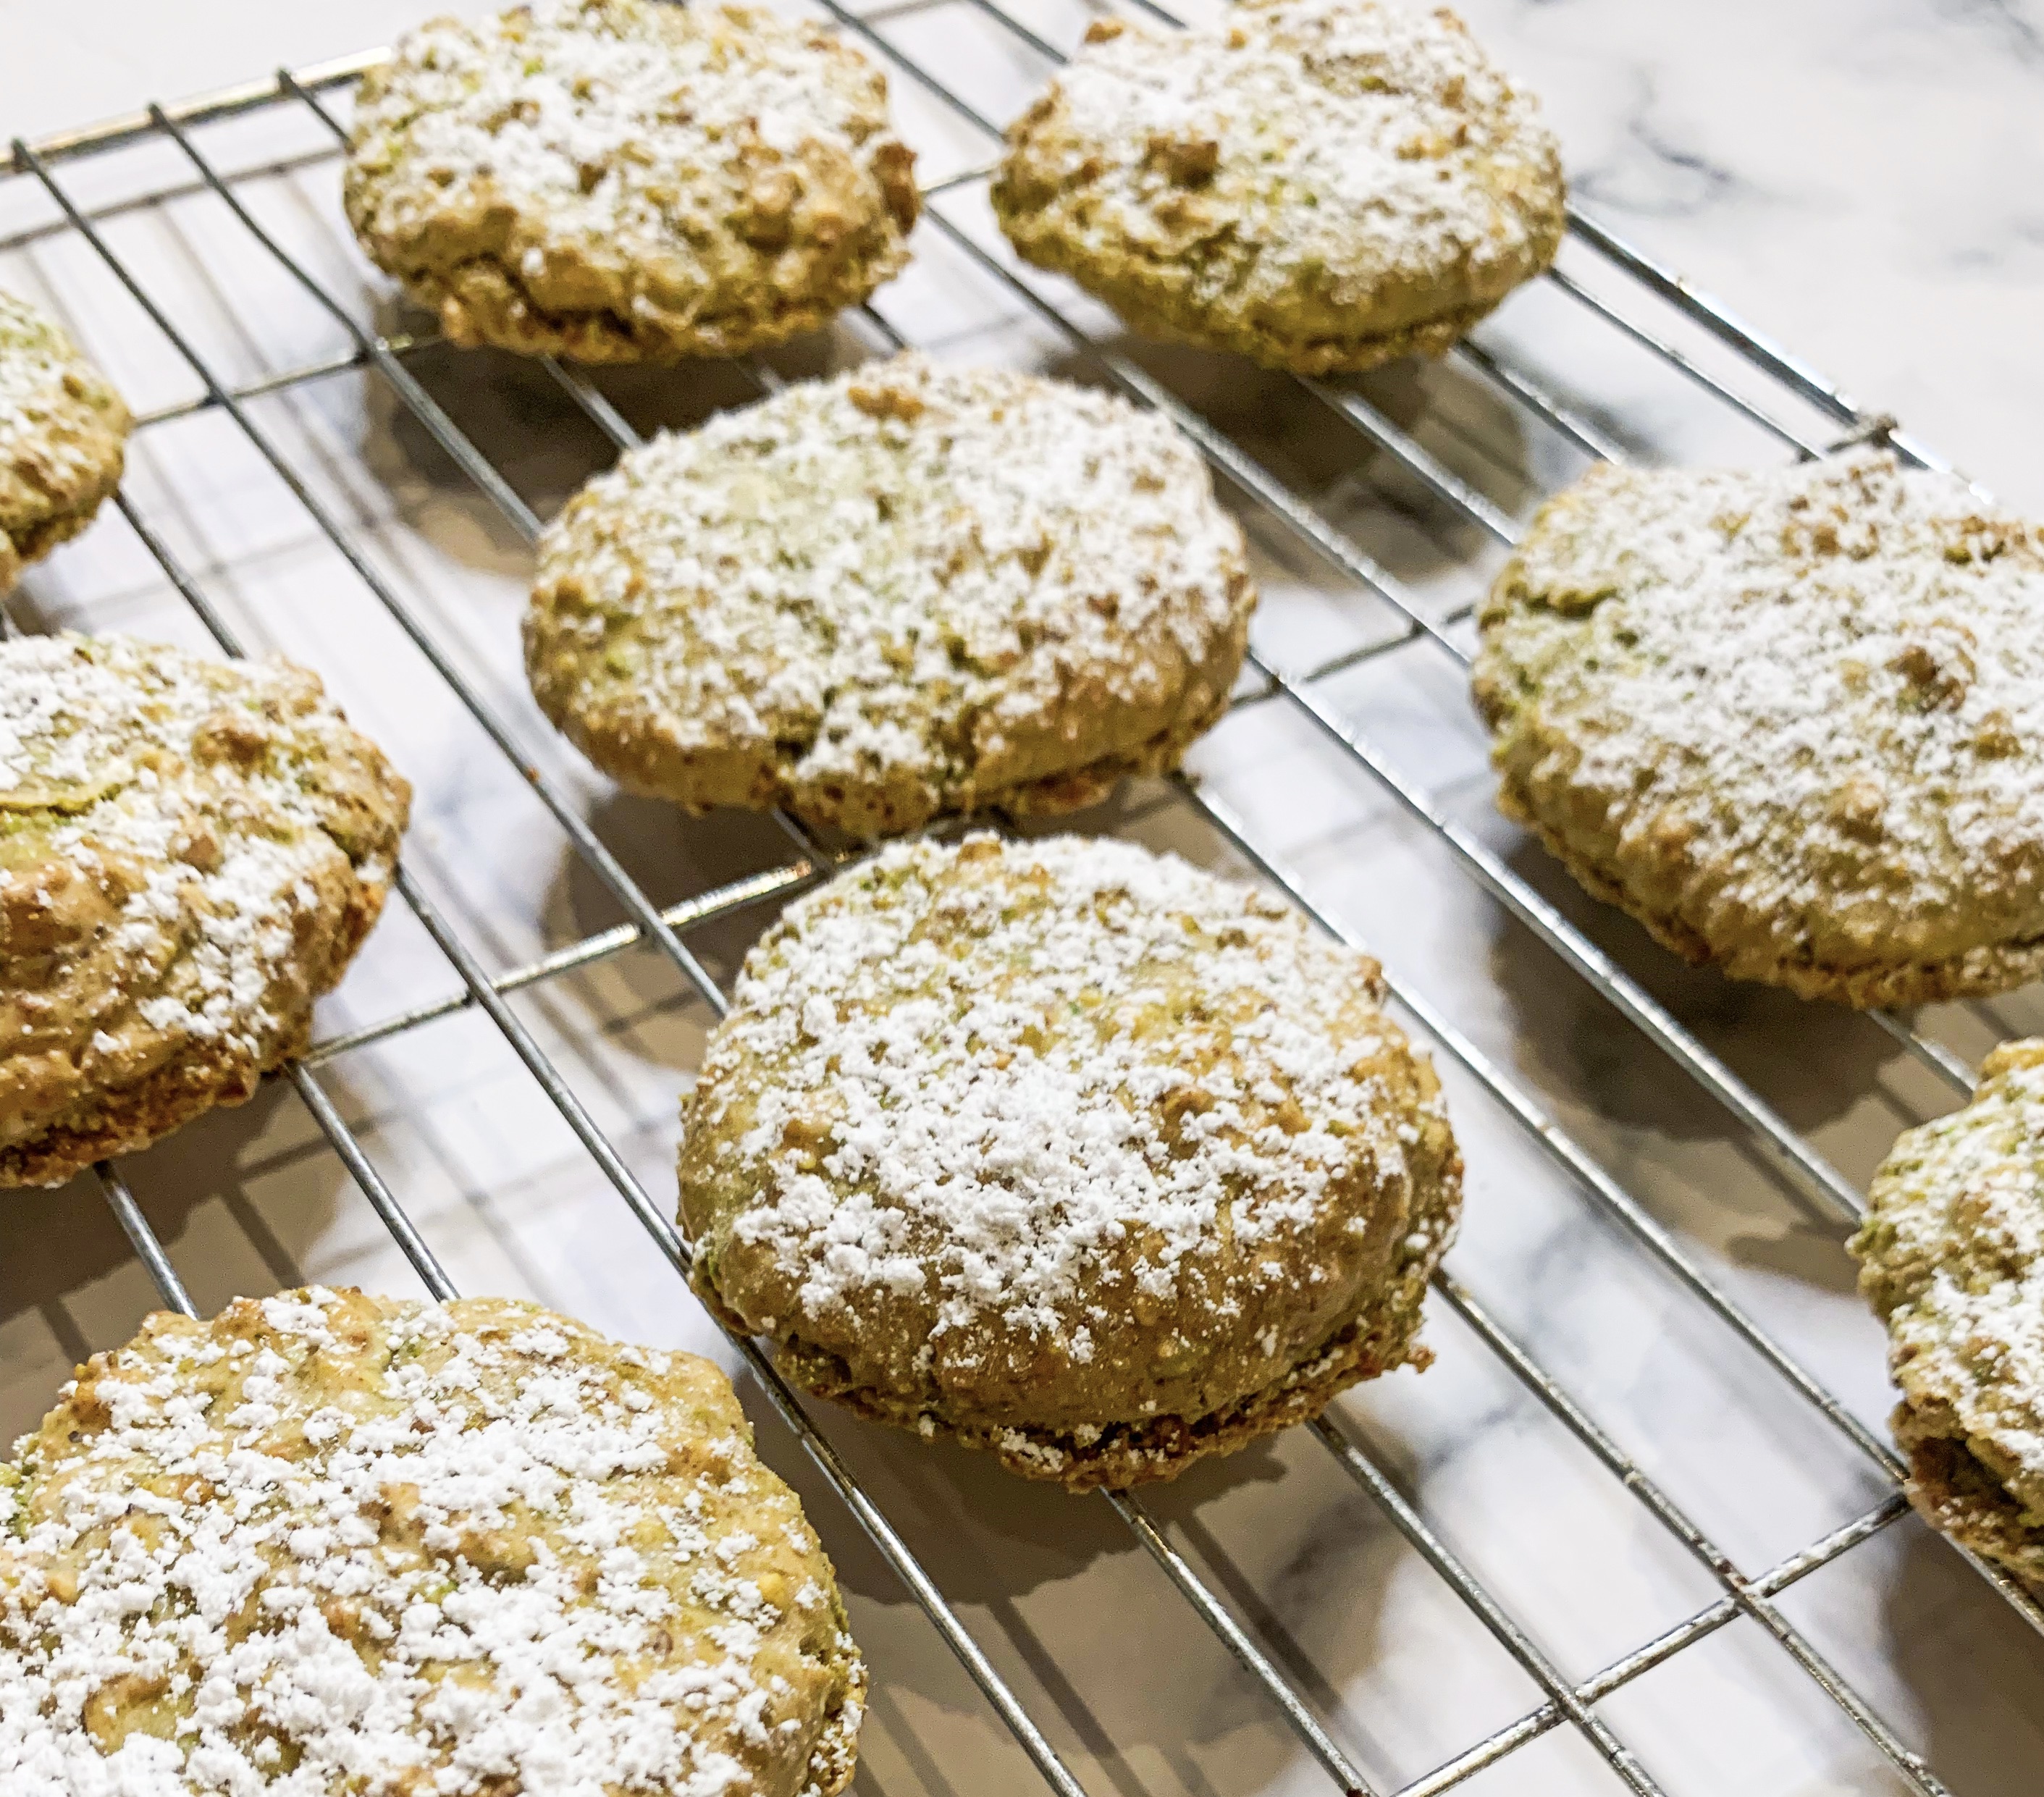
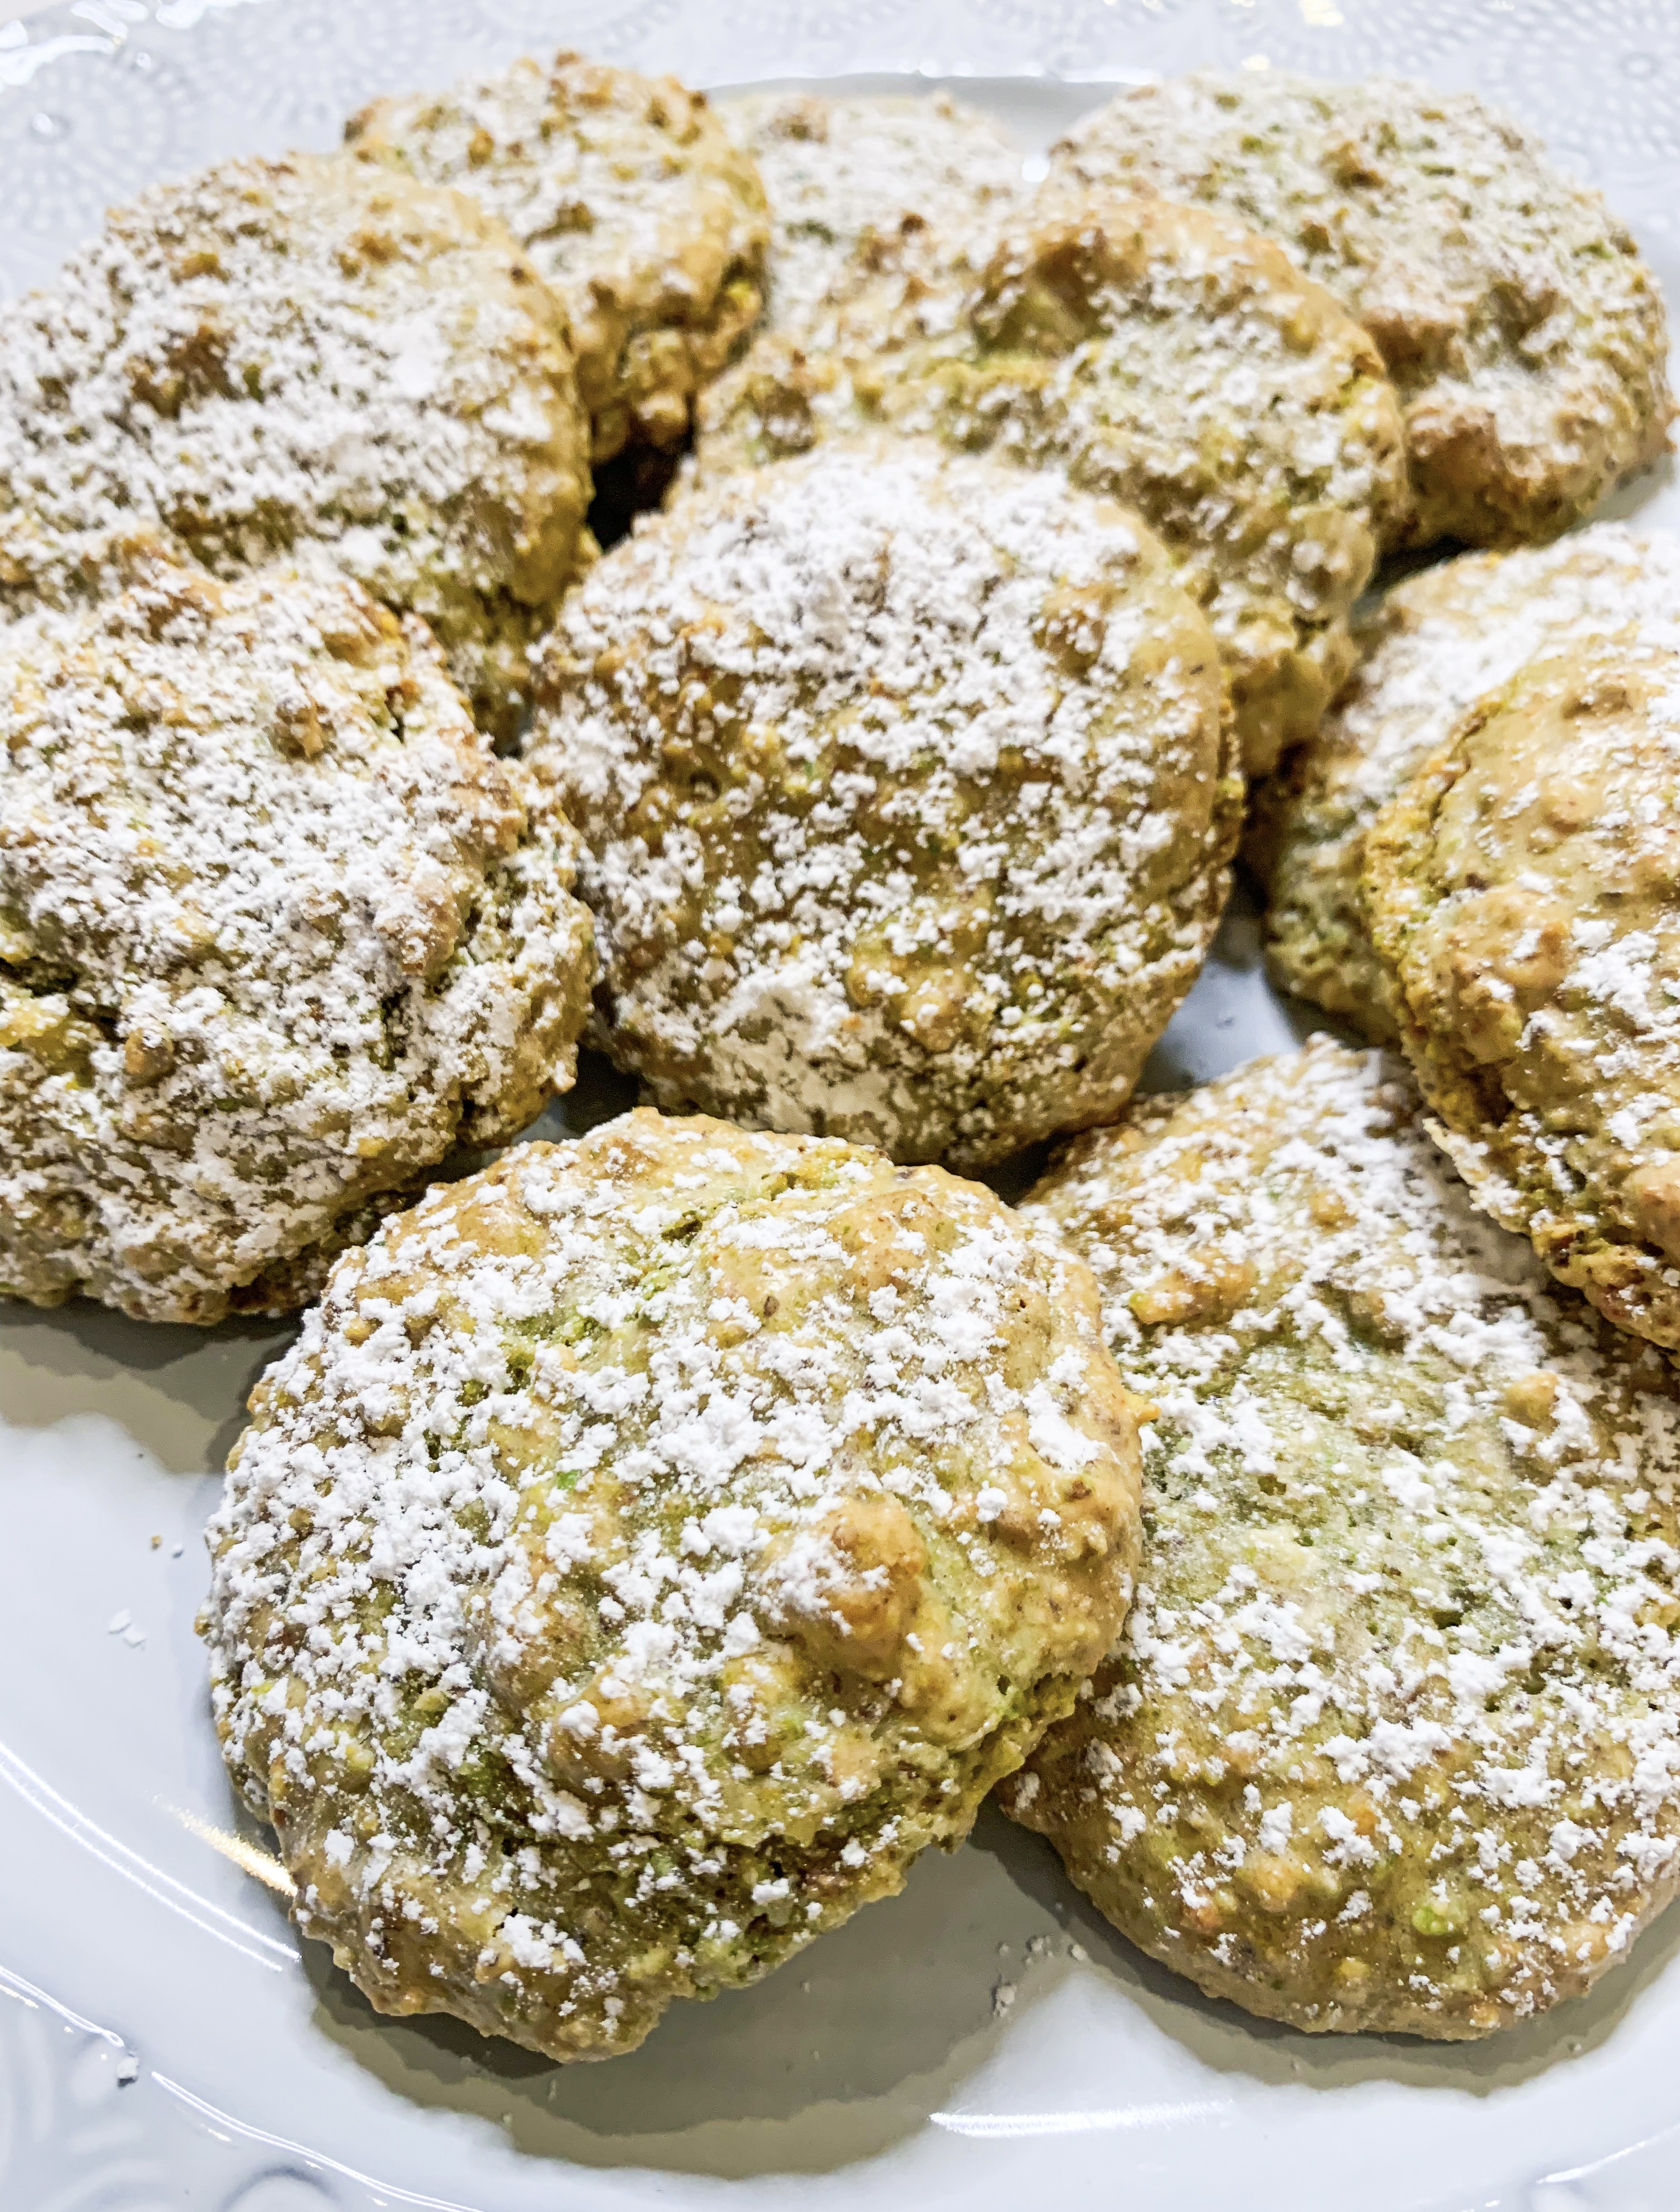
Let me introduce to the quickest biscuit recipe – it only needs three ingredients! These Pistachio Bites are chewy, sweet, delicious… and very addictive. What more could you ask for? Thank you to Sabrina Ghayour’s cookbook ‘Persiana Everyday’!
1 egg white
100g icing sugar, sifted (plus extra for dusting)
100g pistachio nuts, very finely blitzed in a food processor
- Using an electric hand whisk, whisk the egg white until stiff peaks form. Add the icing sugar and gently fold into the egg whites. Now add the ground pistachios and mix until evenly combined.
- Using a teaspoon, dollop 12 equal portions of the mixture on to a tray lined with greaseproof paper, spaced apart to allow them to spread a little. Bake in an preheated oven, 170’c fan, for 12 minutes.
- Remove from the oven, transfer to a wire rack to cool. Dust with icing sugar before serving.
Pistachio Roulade with Raspberries and White Chocolate
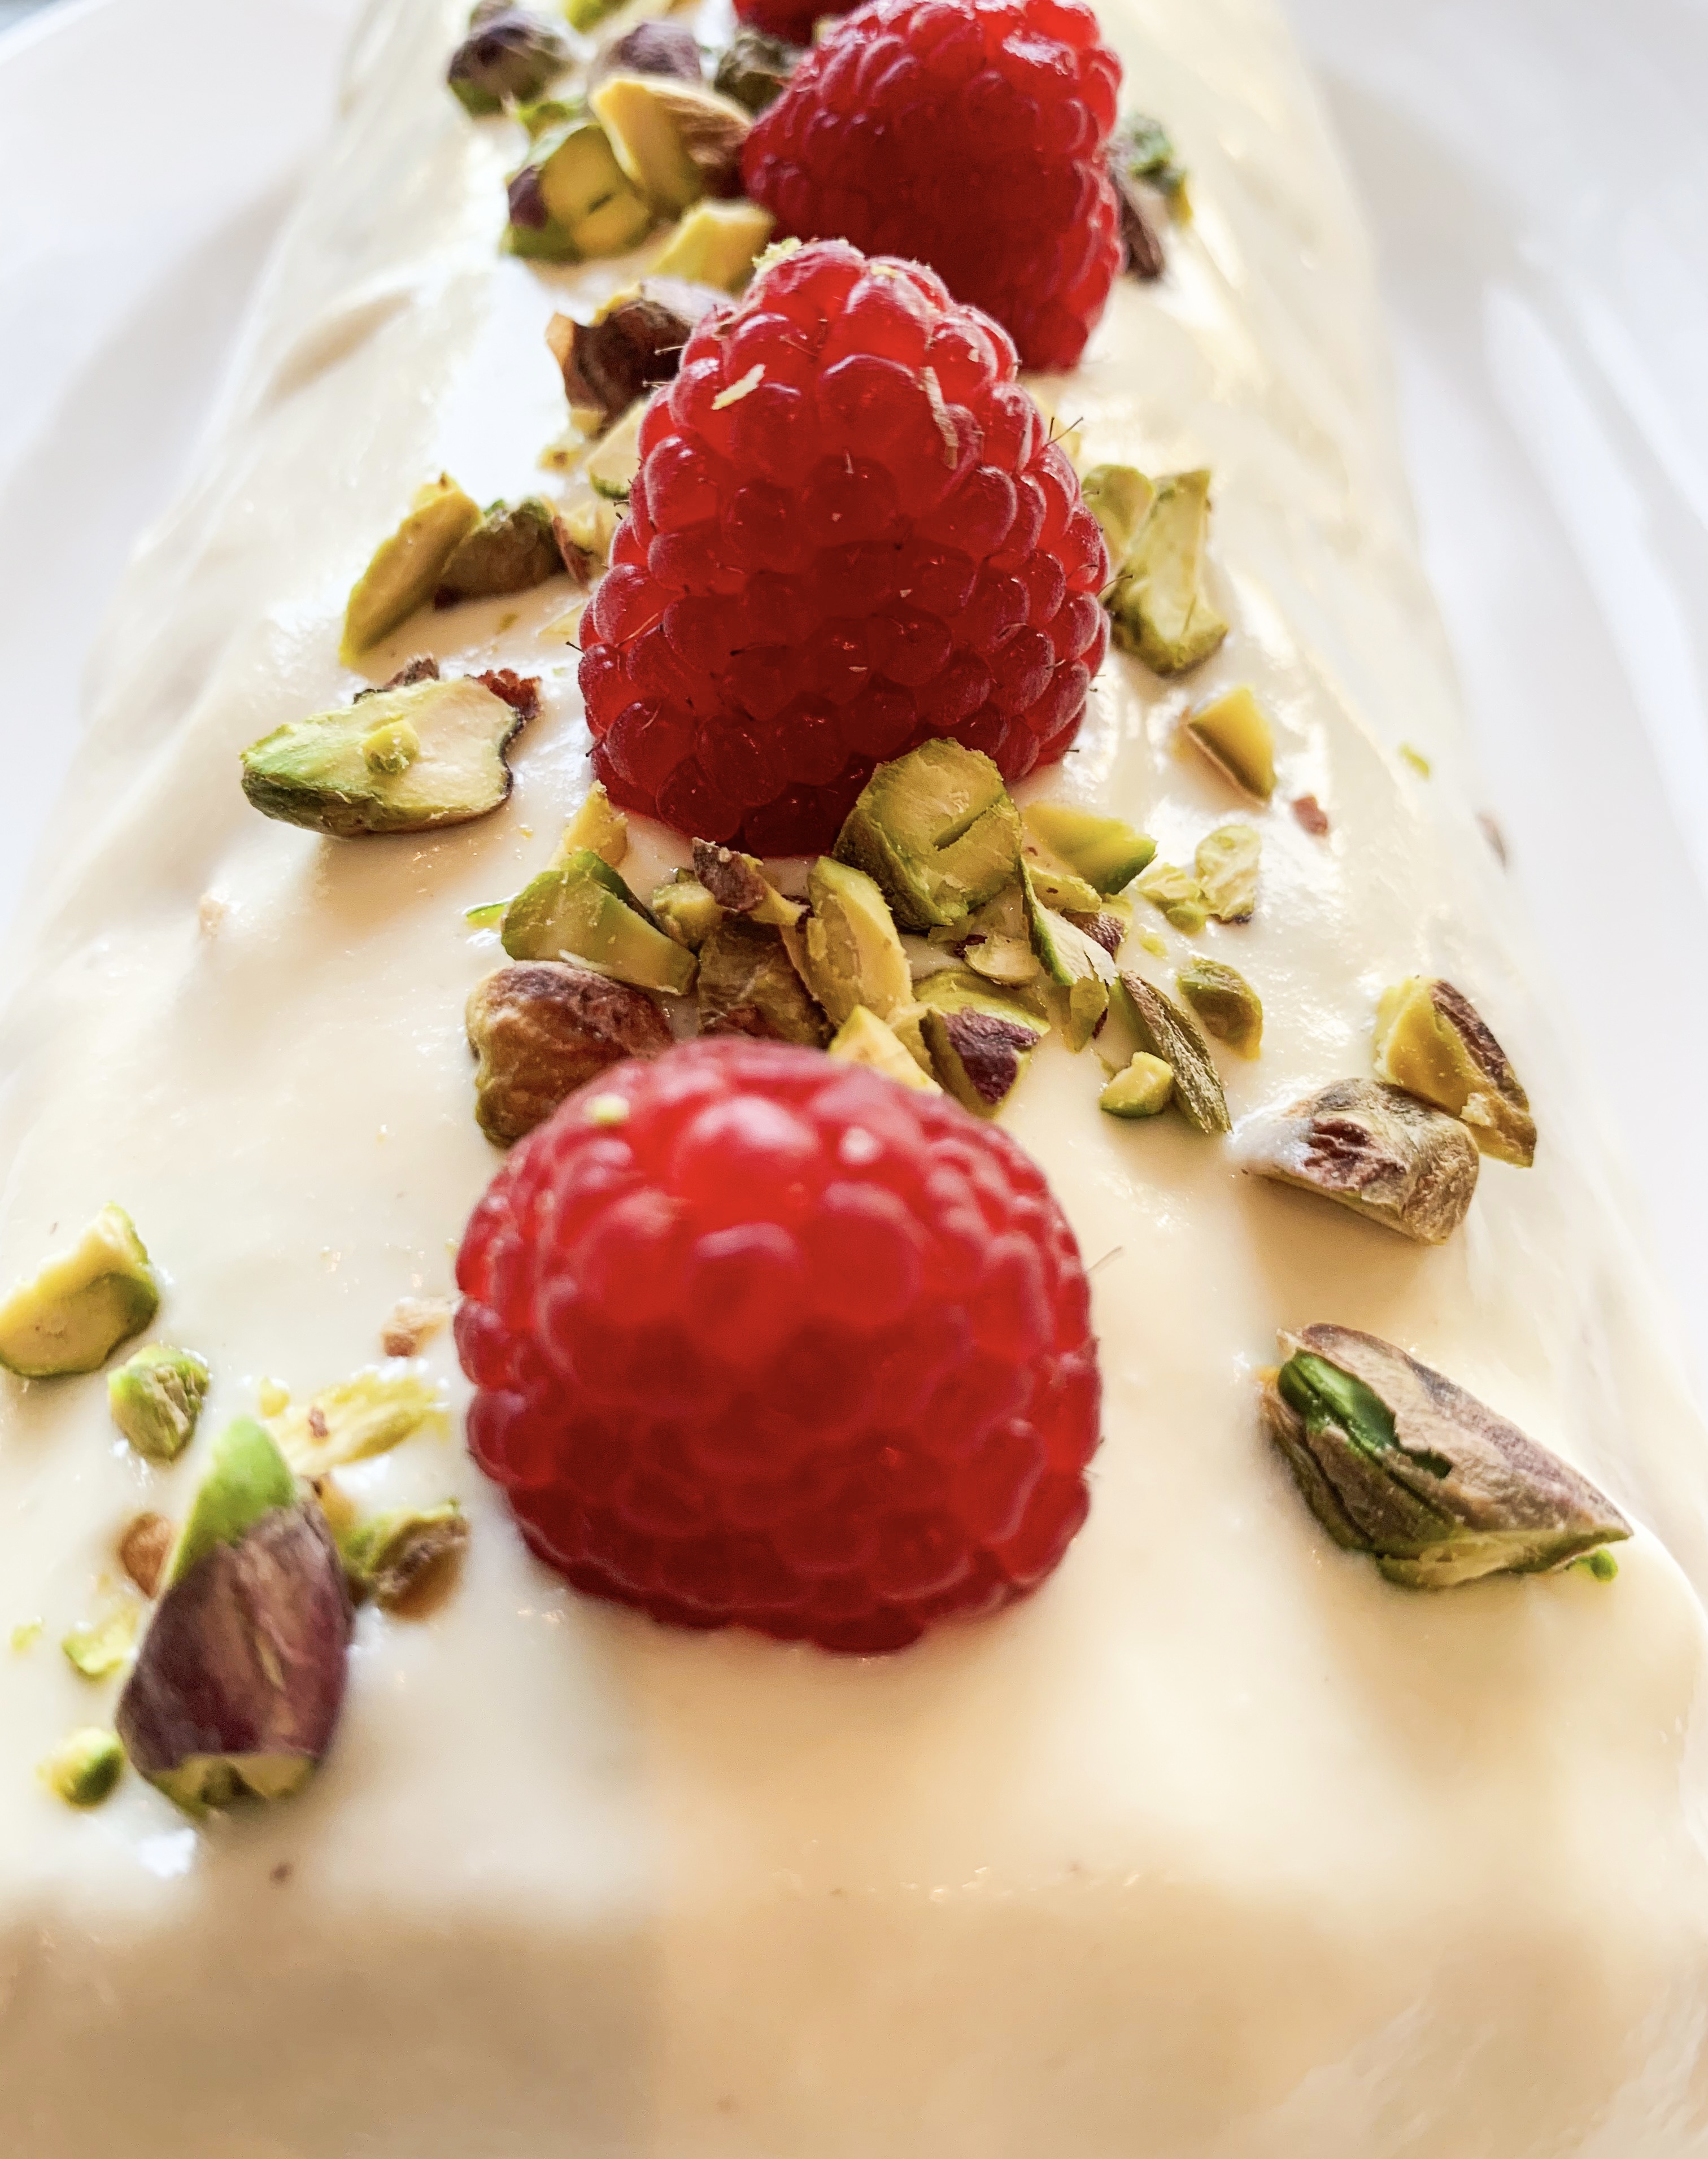
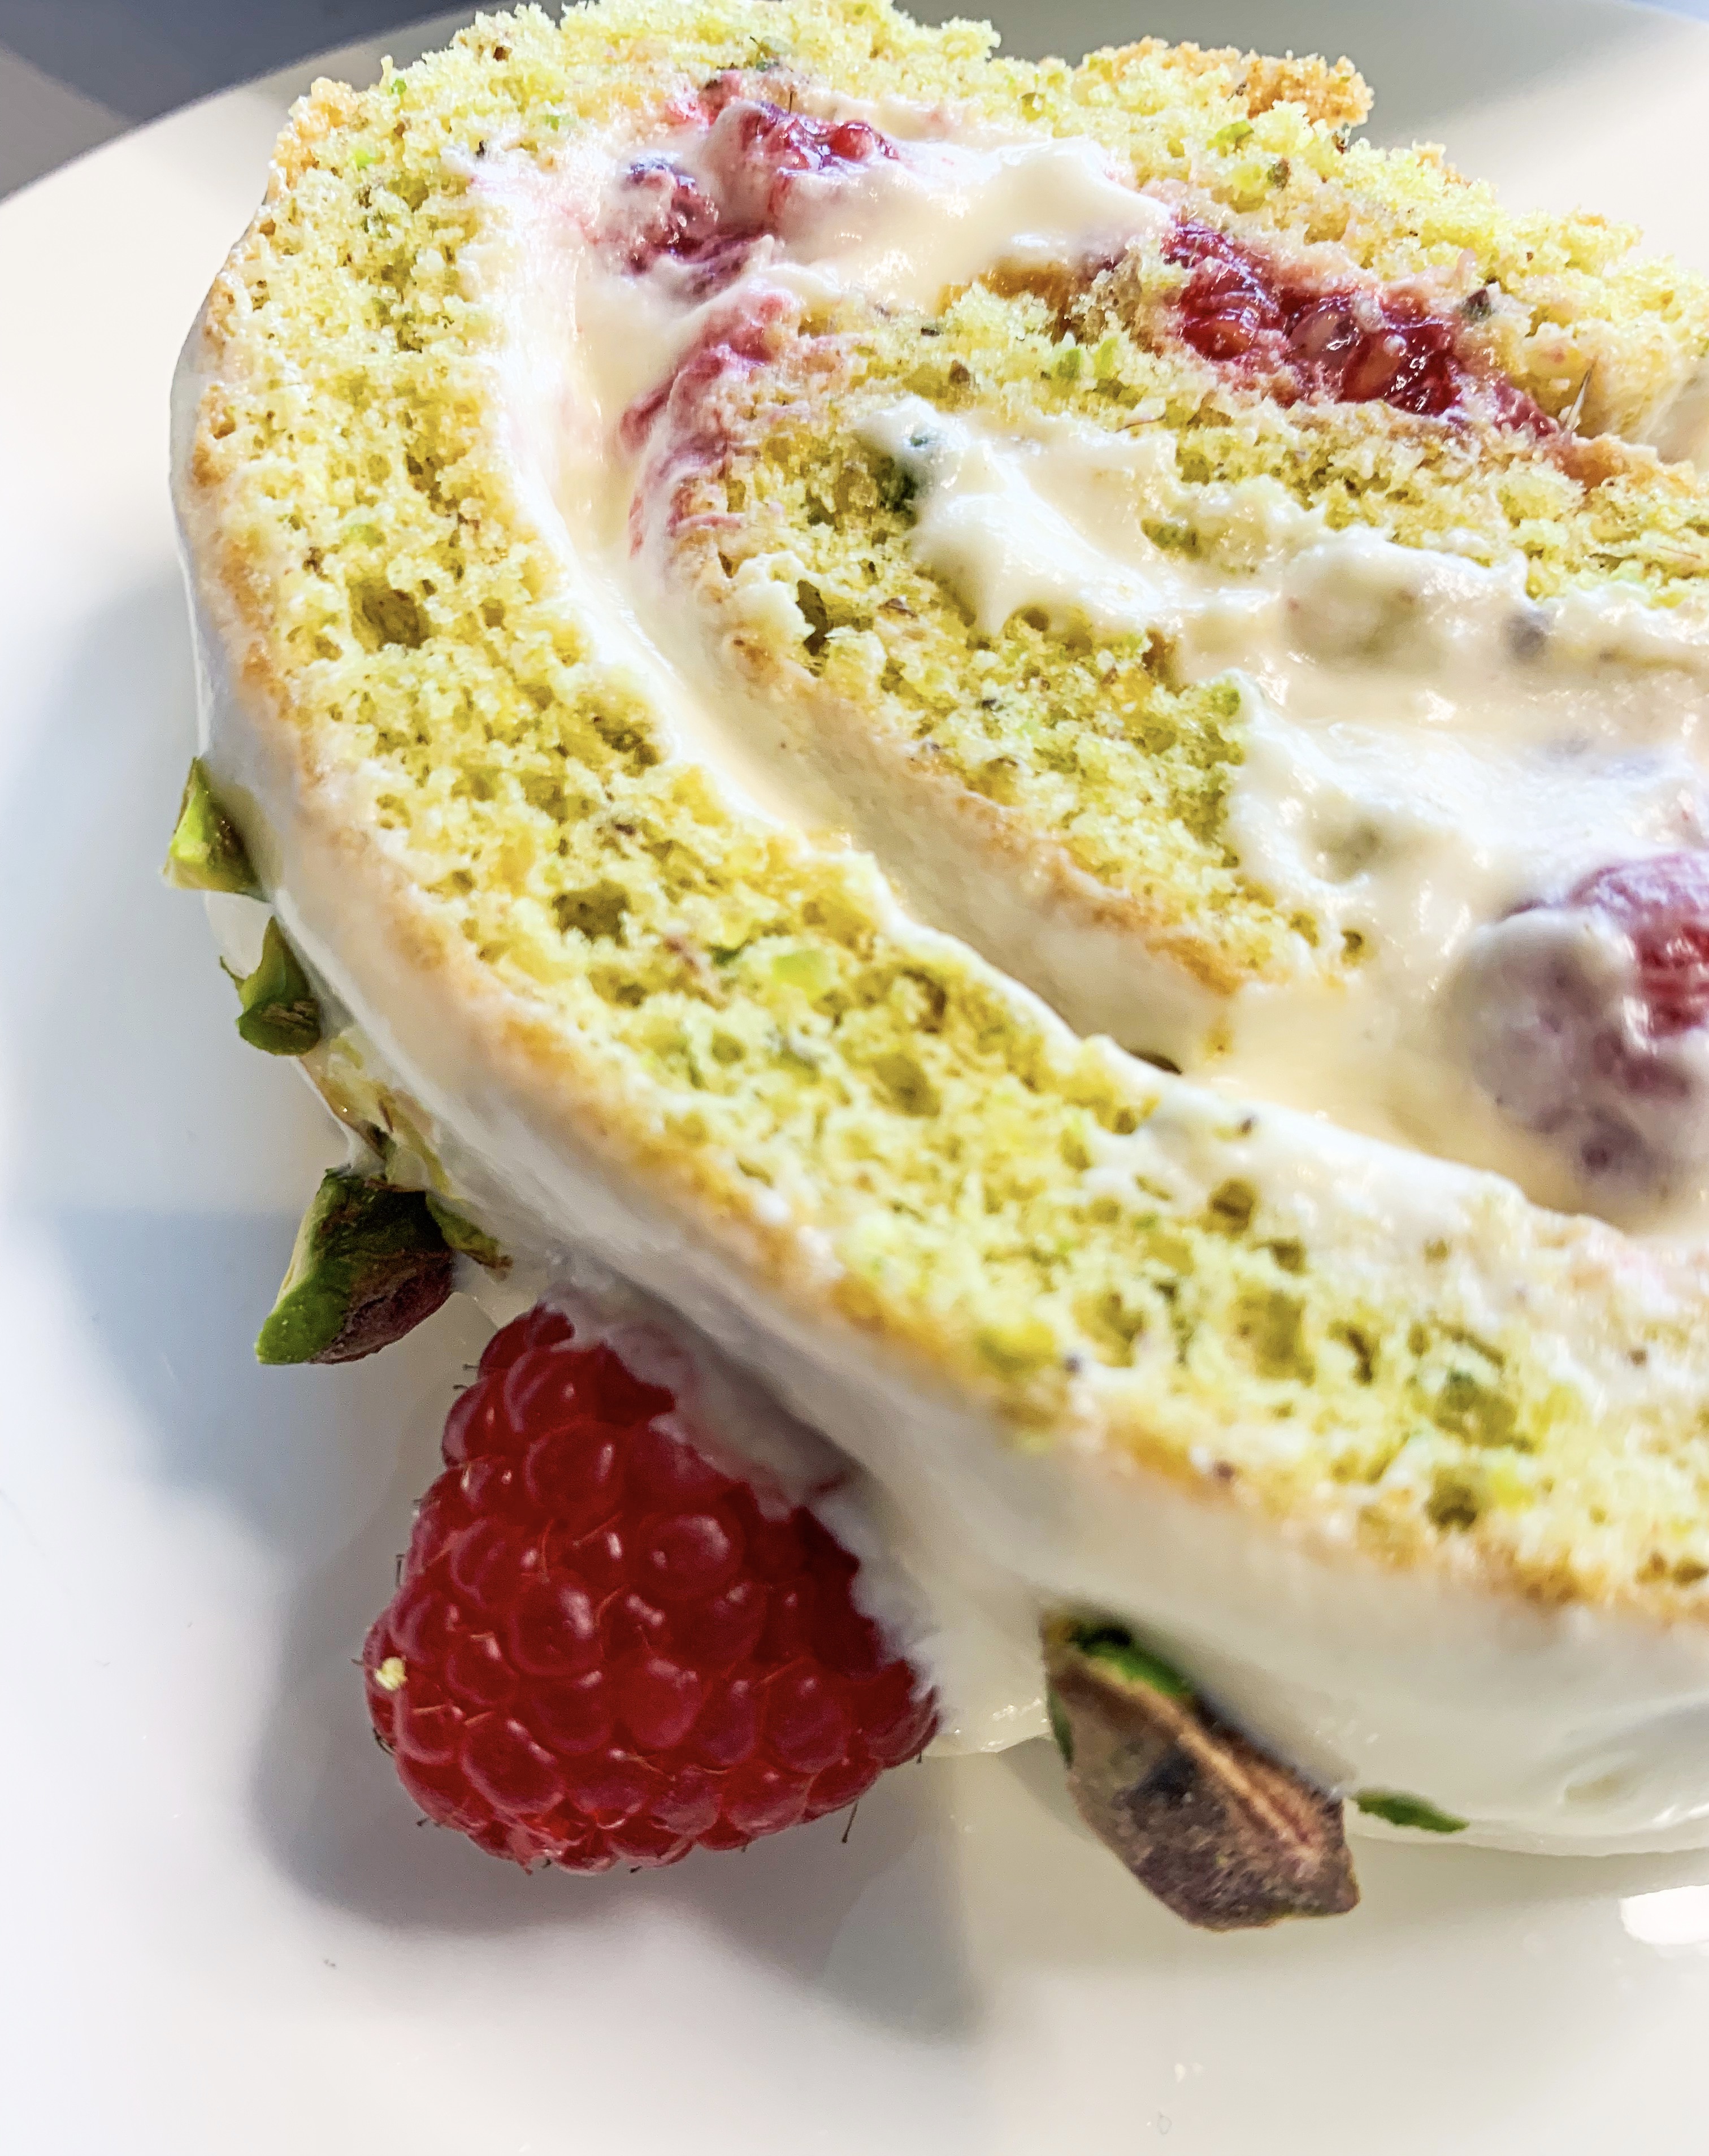
This is one of those ‘wow’ desserts! It would make a fantastic centre piece on any celebratory table. Naturally it tastes wonderful too, so your guests will be asking for the recipe – we have the talented Mr ‘Ottolenghi’ to thank for this delicious recipe (but put a tag in for ‘Menu Mistress’ too!). Make sure that you follow the instructions to roll the cake when it is still warm as in this way the roulade shouldn’t crack too much!
70g shelled pistachio kernals, plus 15g extra, roughly chopped
4 large eggs, whites and yolks separated
130g caster sugar
2 tablespoons hot water
80g self-raising flour (gluten free if required – I use Doves)
⅛ teaspoon salt
⅛ teaspoon almond extract
20g icing sugar
300g fresh raspberries
For the white chocolate cream:
200g white cooking chocolate roughly chopped into 1cm pieces
75g unsalted butter, soft but not oily
280g cream cheese
270ml double cream
⅛ teaspoon almond extract
You will also need: 35 x 30cm shallow baking tray greased and lined with baking paper.
- Place 70g of the pistachios in a food processor and grind until fine but not oily; don’t worry if there are some medium-sized pieces it will not affect the cake. Set aside until needed.
- Place the egg yolks and sugar in a large bowl and whisk for about 4 minutes until thick and creamy. Add the hot water by dribbling it down the sides of the bowl. Sprinkle over the ground pistachios and gently fold through to combine.
- Sift the flour and salt together and add to the egg yolk mixture. Fold to combine.
- Whisk the egg whites in a clean bowl to form soft peaks then fold into the yolk mixture along with the almond extract.
- Pour the mixture into the lined baking tray and bake in a preheated oven, 180’c fan, for 15-18 minutes until the cake springs back when lightly touched in the centre. Remove from the oven and leave to rest for 5 minutes.
- Sift half the icing sugar over the surface of the cake and cover with a clean tea towel. Place a wire rack on top, then flip the cake over so that the wire rack is now underneath the tea towel and cake. Lift off the tray and carefully peel off the baking paper and lightly dust the cake with the remaining sifted icing sugar.
- With one of the short ends of the sponge facing towards you, roll up the still-warm cake with the tea towel inside. Allow the cake to rest for 10 minutes in the rolled up tea towel (this ‘trains’ the cake for its final roll). Then unroll the cake and set aside to come to room temperature.
- Meanwhile prepare the white chocolate cream; Place the chocolate in a bowl set over (but not touching) a pan of simmering water. Stir from time to time until melted then remove from the heat and set aside to cool slightly.
- Place the butter a bowl and use an electric mixer to beat until smooth then add the cream cheese and beat again until well combined. Now add the white chocolate and continue to beat until smooth. Finally, add the double cream and almond extract and beat until the mixture forms soft waves (you may want to put the mixture in the fridge to thicken up a little).
- To assemble, use a spatula to spread about two-thirds of the white chocolate cream evenly over the surface of the cake. Leave a border of about 2cm without any cream at the short end of the cake furthest away from you. Place all but twelve of the raspberries over evenly over the top of the cream, then roll up the cake.
- Carefully transfer the rolled up cake to a serving plate and spread the remaining cream all over the cake – this can be a little messy, you will probably have to wipe around the plate before serving! Finally, place the remaining raspberries along the centre of the cake and sprinkle with the extra pistachio nuts.
Almond Amandines
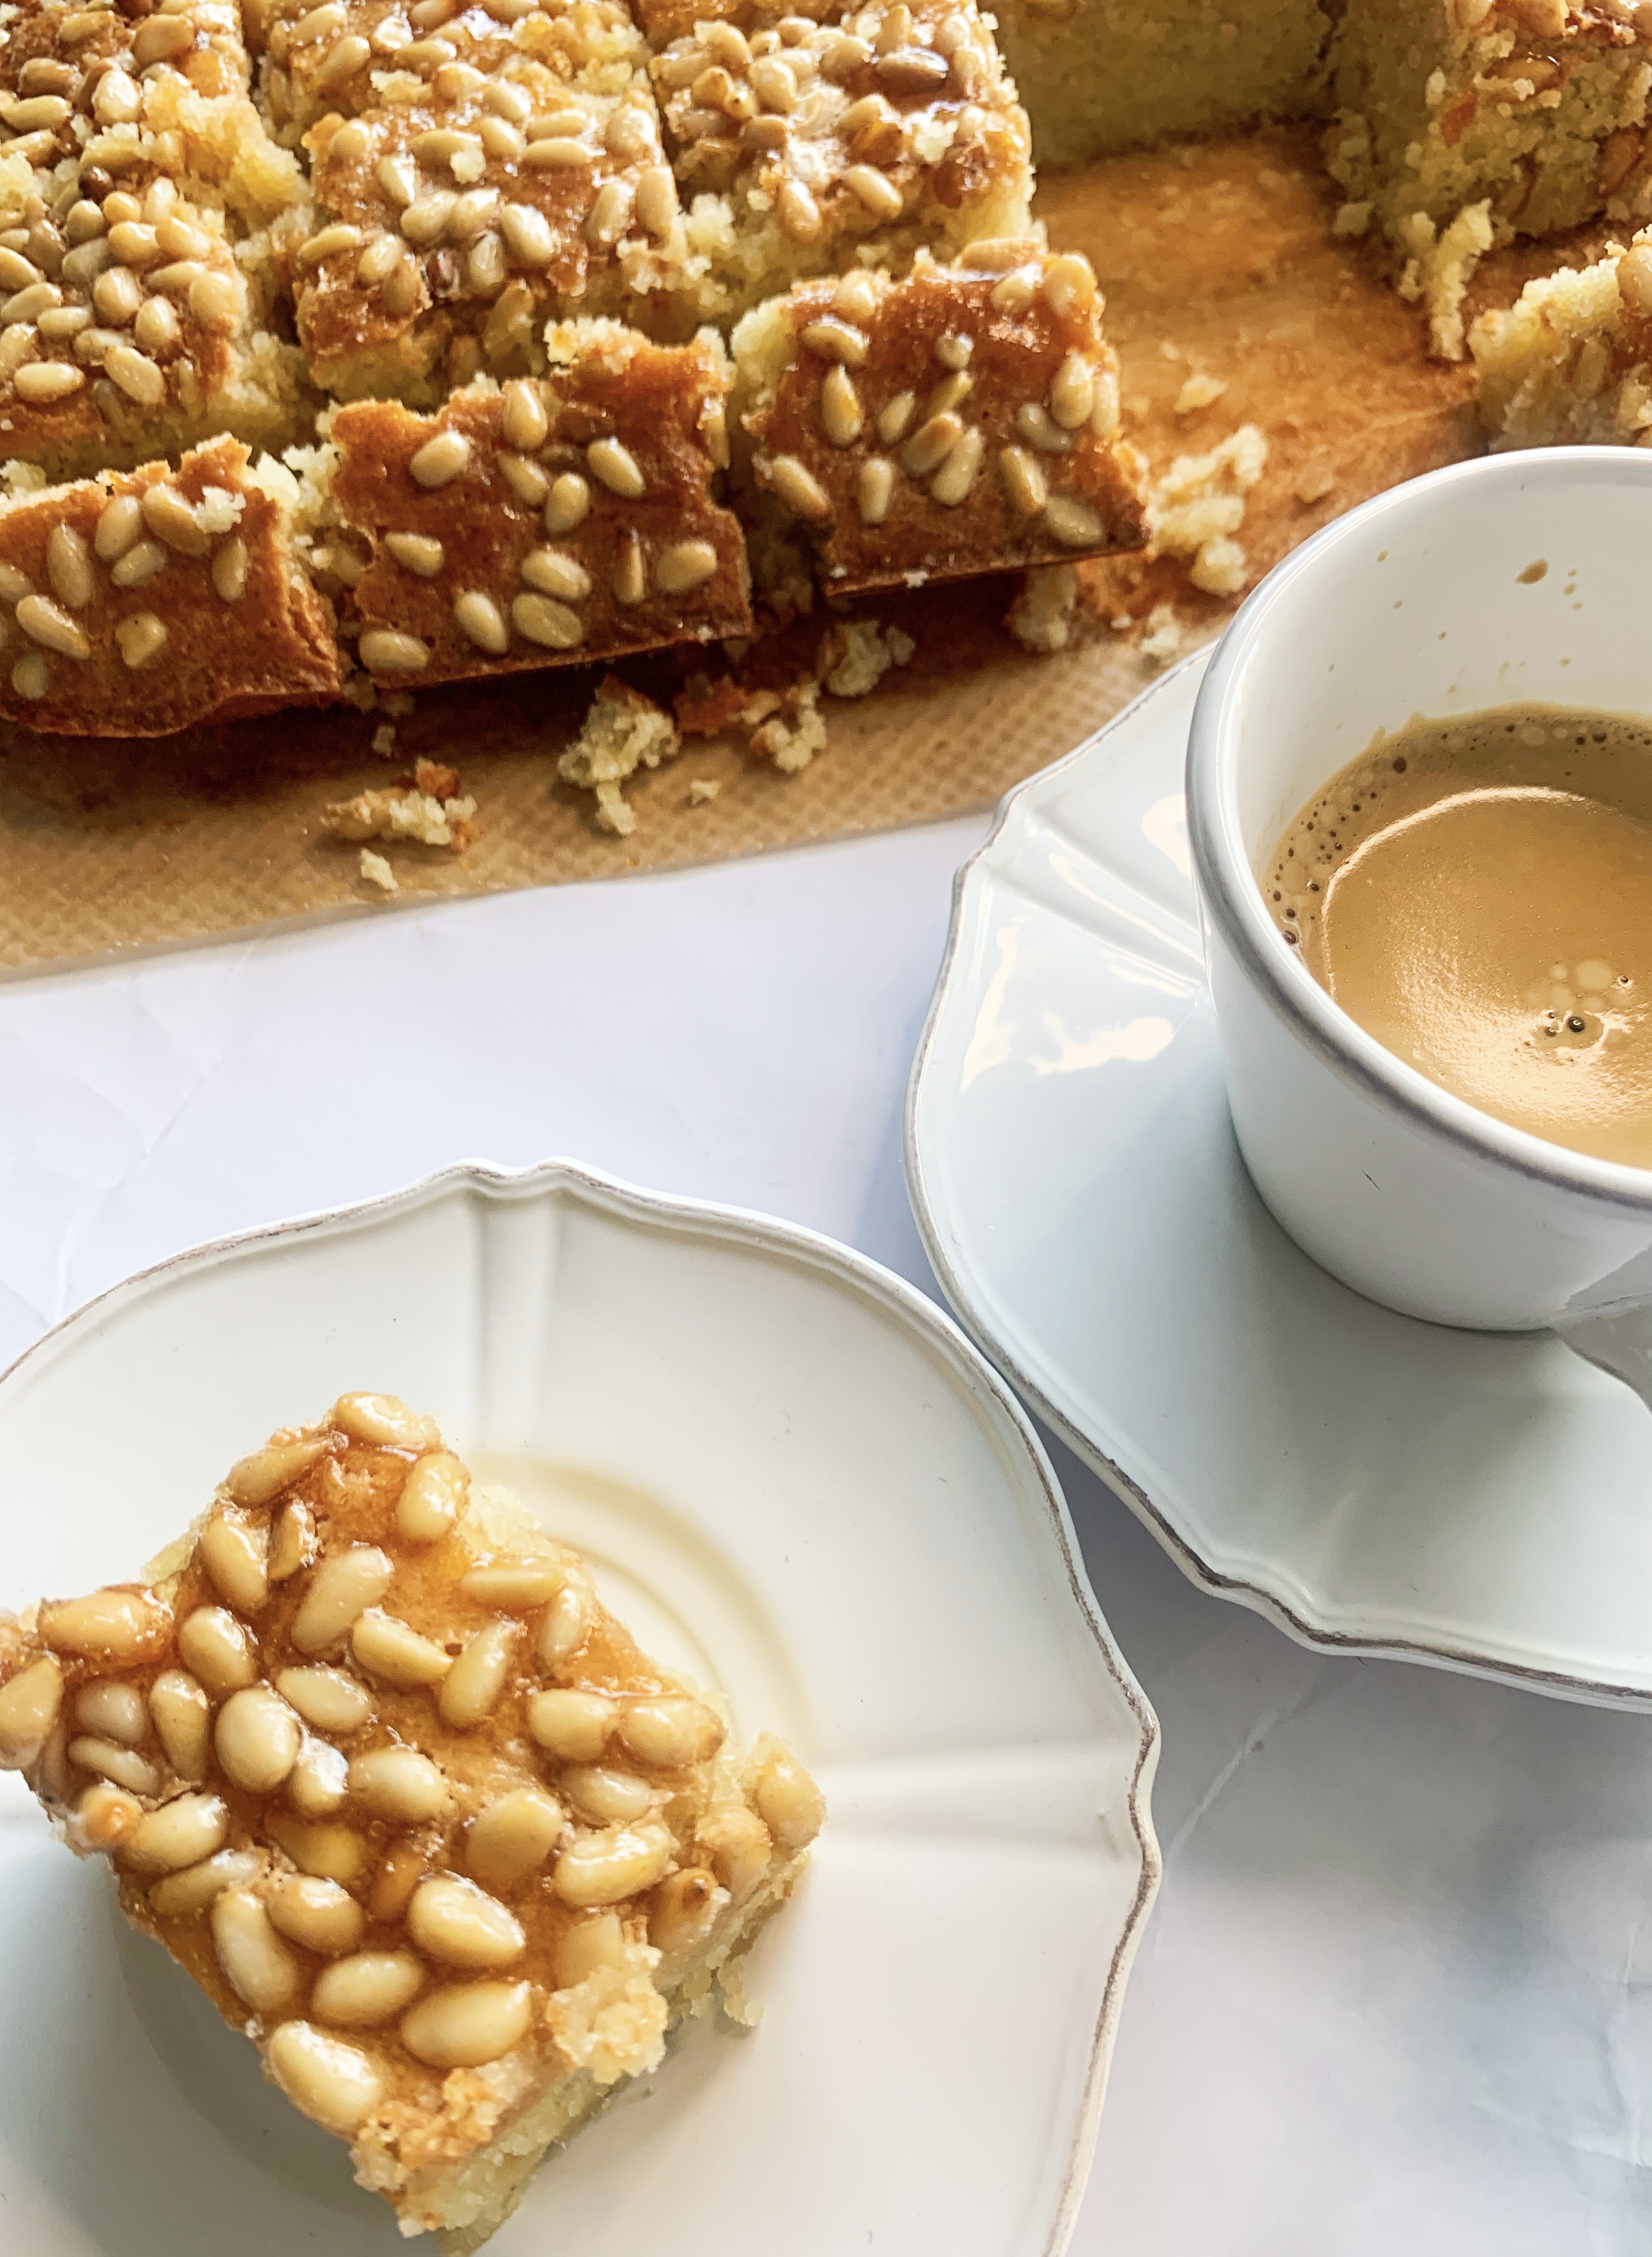
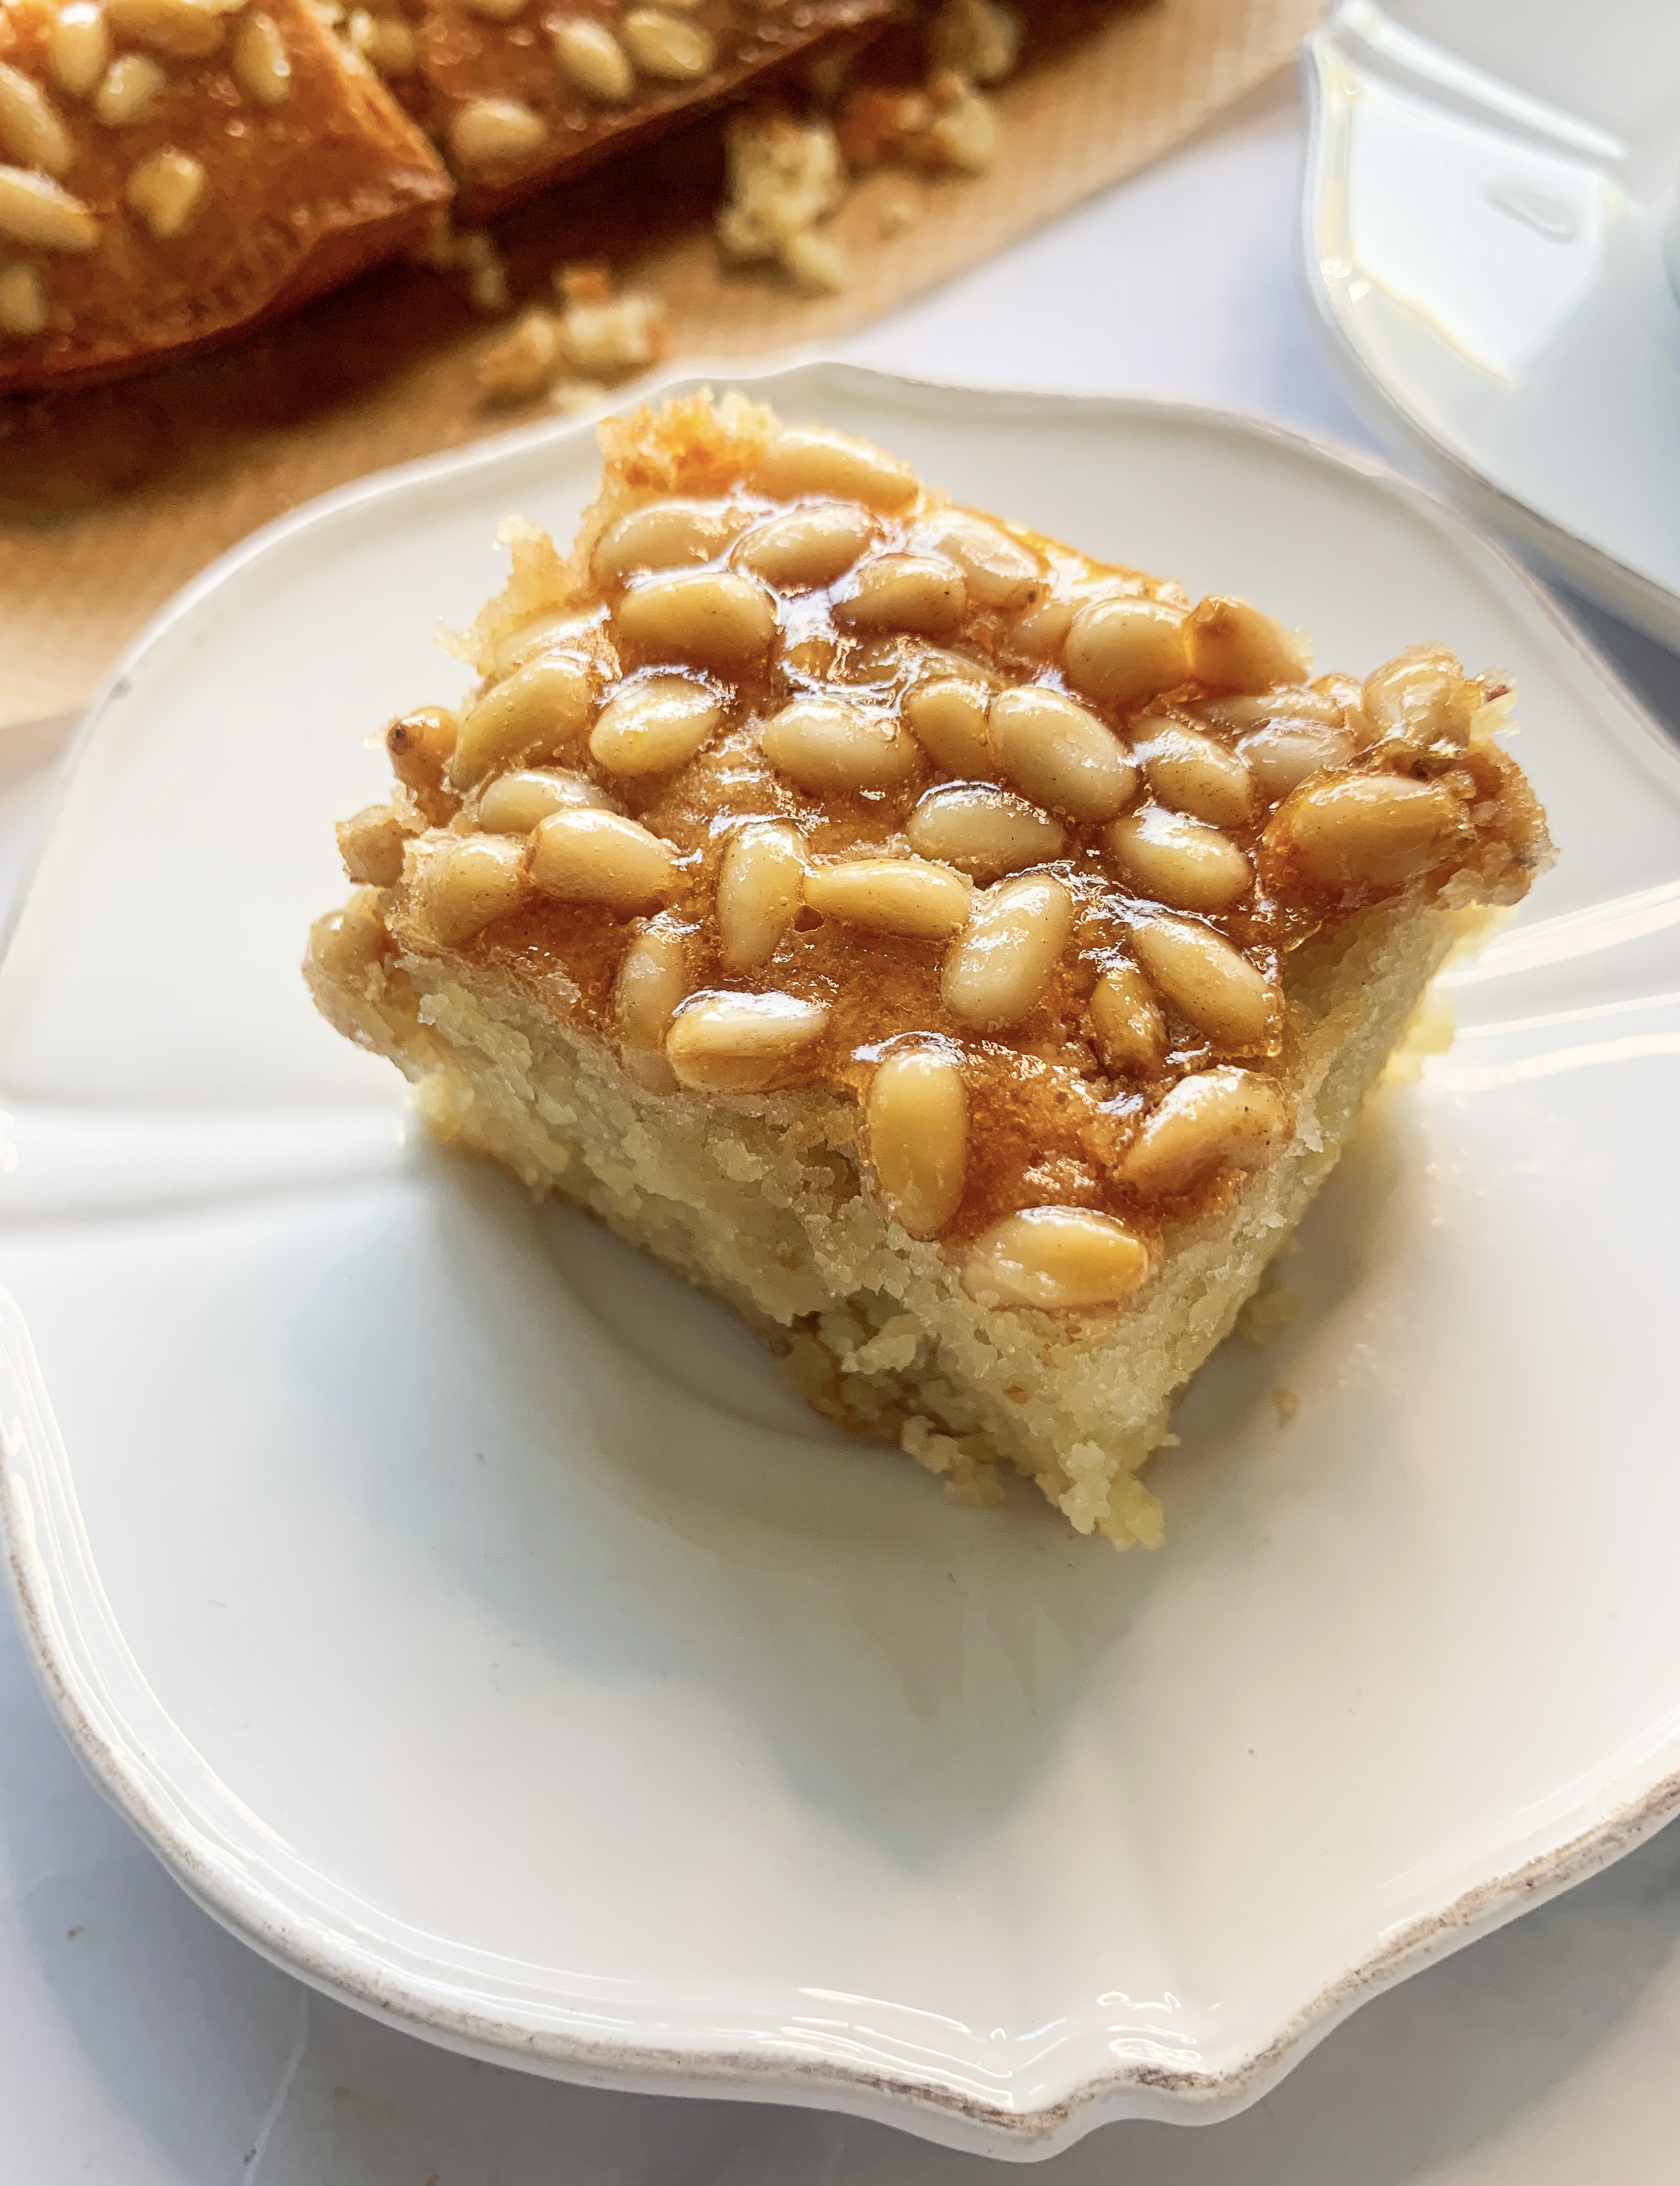
These make such a tasty treat. They are quite sweet so you only need a small square although the problem is that they’re rather moreish! The recipe, from Claudia Roden’s ‘Med: A Cookbook’ is super simple. The recipe calls for a shallow baking tin around 30 x 30cm, I didn’t have a tin but used a pyrex square dish and they came out fine!
6 eggs
400g caster sugar
500g ground almonds
200ml whole milk
½ teaspoon vanilla extract
5 drops almond extract
100g pine nuts
150ml apricot jam, to glaze
*You will need a baking tin about 30x30cm (or dish – see my note above), lined with baking parchment
- Using a fork, lightly beat the eggs with the sugar then add the ground almonds, milk, vanilla and almond extracts and mix thoroughly. Pour into the prepared tin. Sprinkle the pine nuts on top and bake in a preheated oven, 160’c fan, for 1 hour or until the top is brown and the cake feels firm. If it is browning too early cover the tin with foil.
- While the cake is still warm, melt the apricot jelly with 1-2 tablespoons of water and brush it over the top. Leave to cool.
- To serve cut into small squares and lift out the amandines from the tin one by one.
Sweet and Salty Crunch Nut Bars
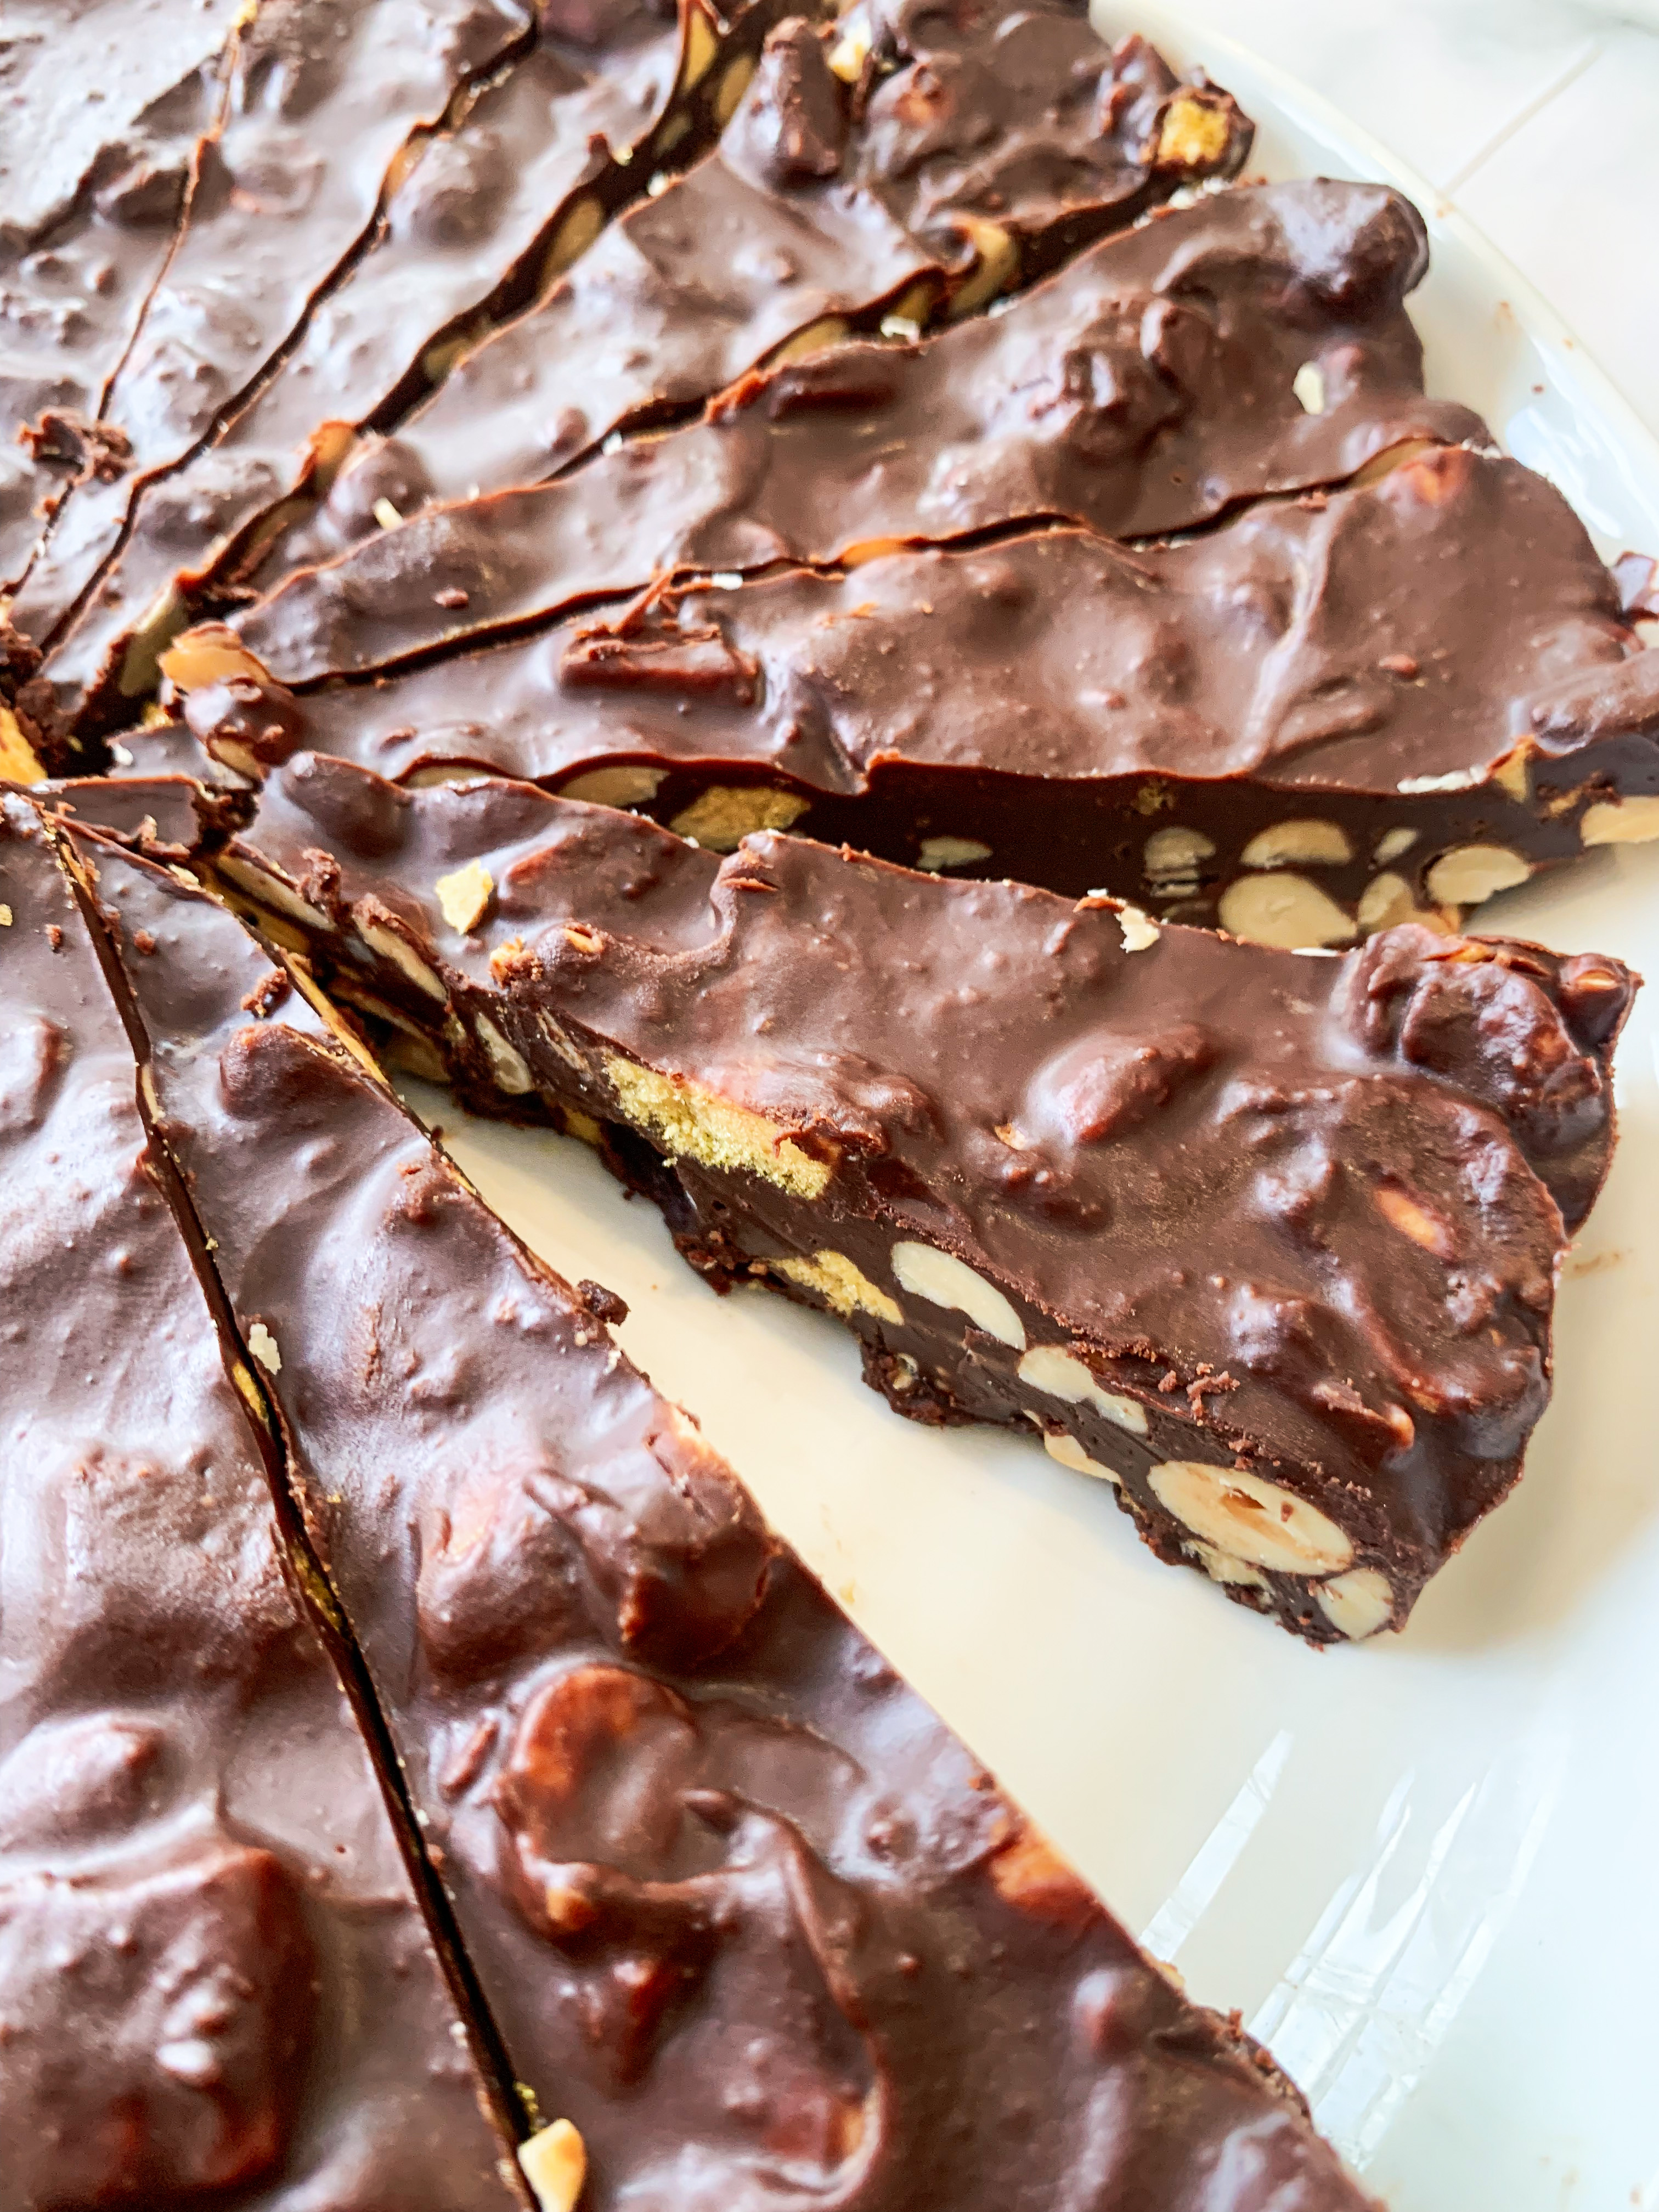
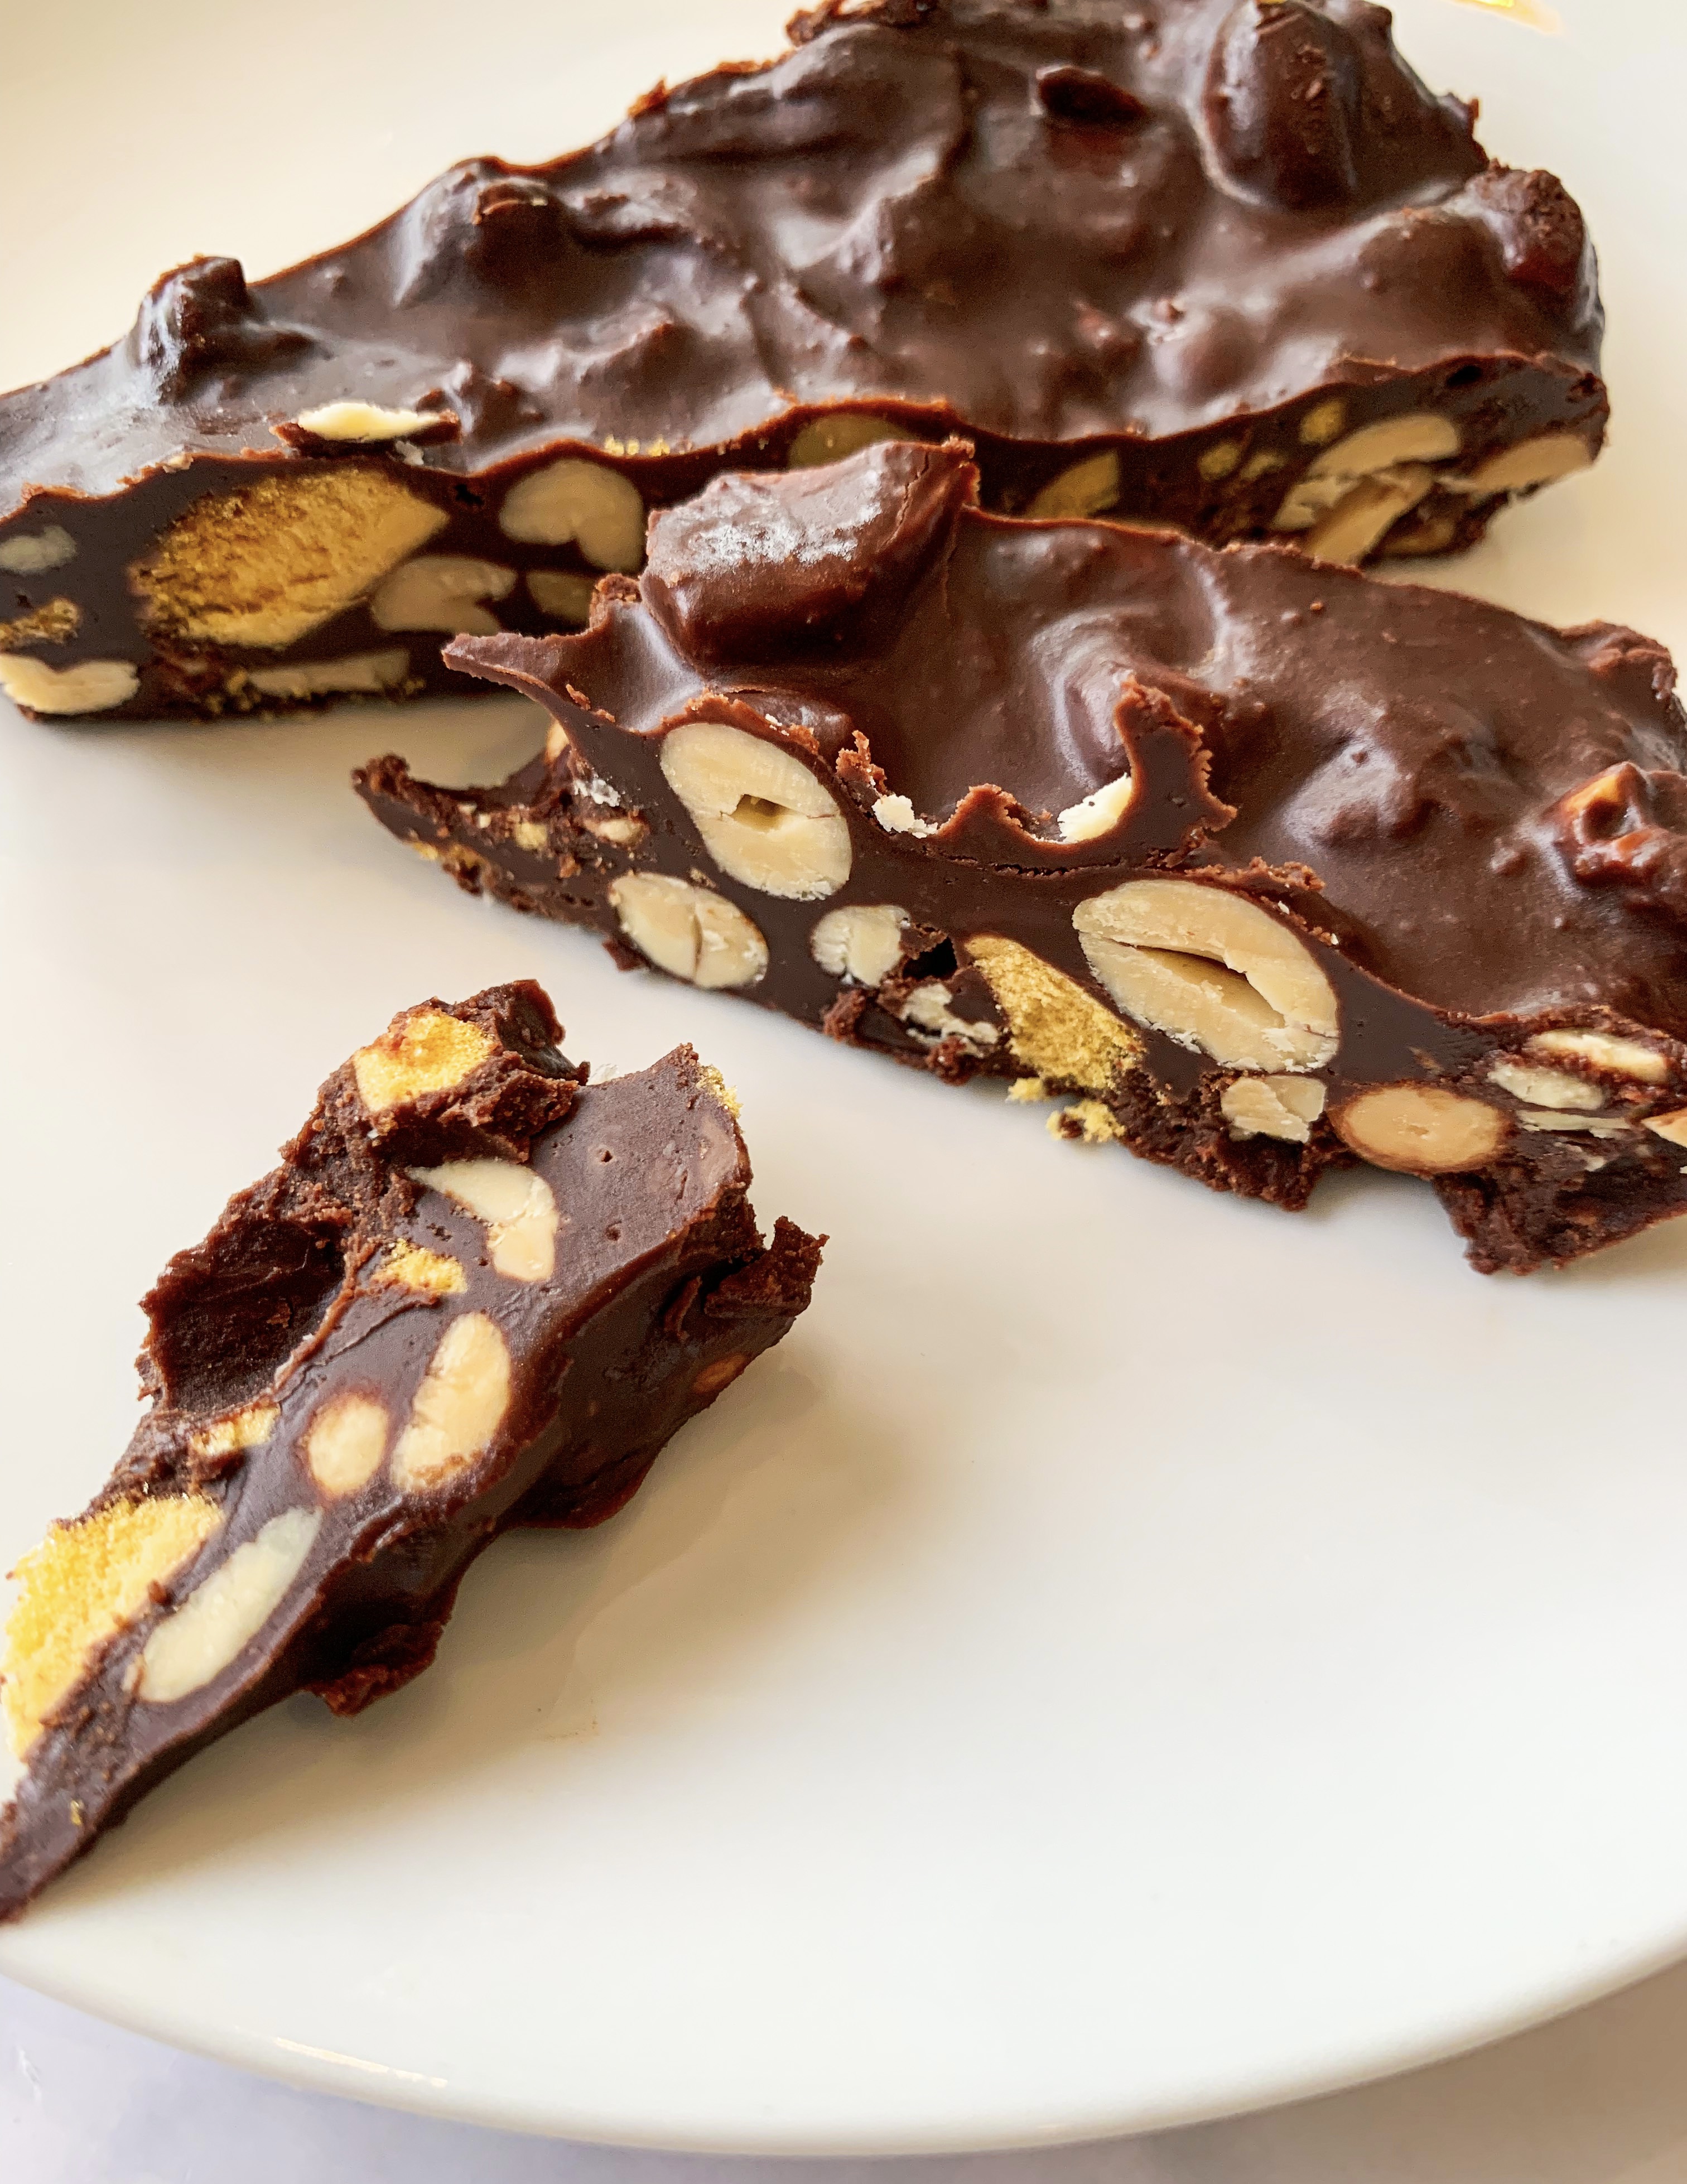
This is the type of sweet treat that every fridge deserves! Having a slice of its chocolatey deliciousness at hand is dangerously indulgent but fantastically fortifying. It’s childlike in its simplicity to make yet with a mix of dark chocolate and salt, it’s a very grown-up treat. We have Nigella Lawson to thank for creating such a wicked recipe – as she herself says it’s all about moderation…(?!)…
200g dark chocolate
100g milk chocolate
125g unsalted butter
3 tablespoons golden syrup
250g salted peanuts
4 x 40g Crunchie bars
*You will need a 25cm springform round tin lined with foil (or you could use a foil tray)
- Break up your chocolate into pieces and put in a heavy-based saucepan with the butter and syrup. Put on a low heat and melt gently together.
- Crush the Crunchie bars with your hands into a bowl and add the peanuts. Add the melted chocolate mixture and gently mix until fully incorporated.
- Tip into the foil lined cake tin. Smooth the top of the mixture as much as you can, gently pressing down with a silicone spatula.
- Put into the fridge for about 4 hours and, once set, cut into slices. Keep refrigerated until serving.
Tres Leches Cake
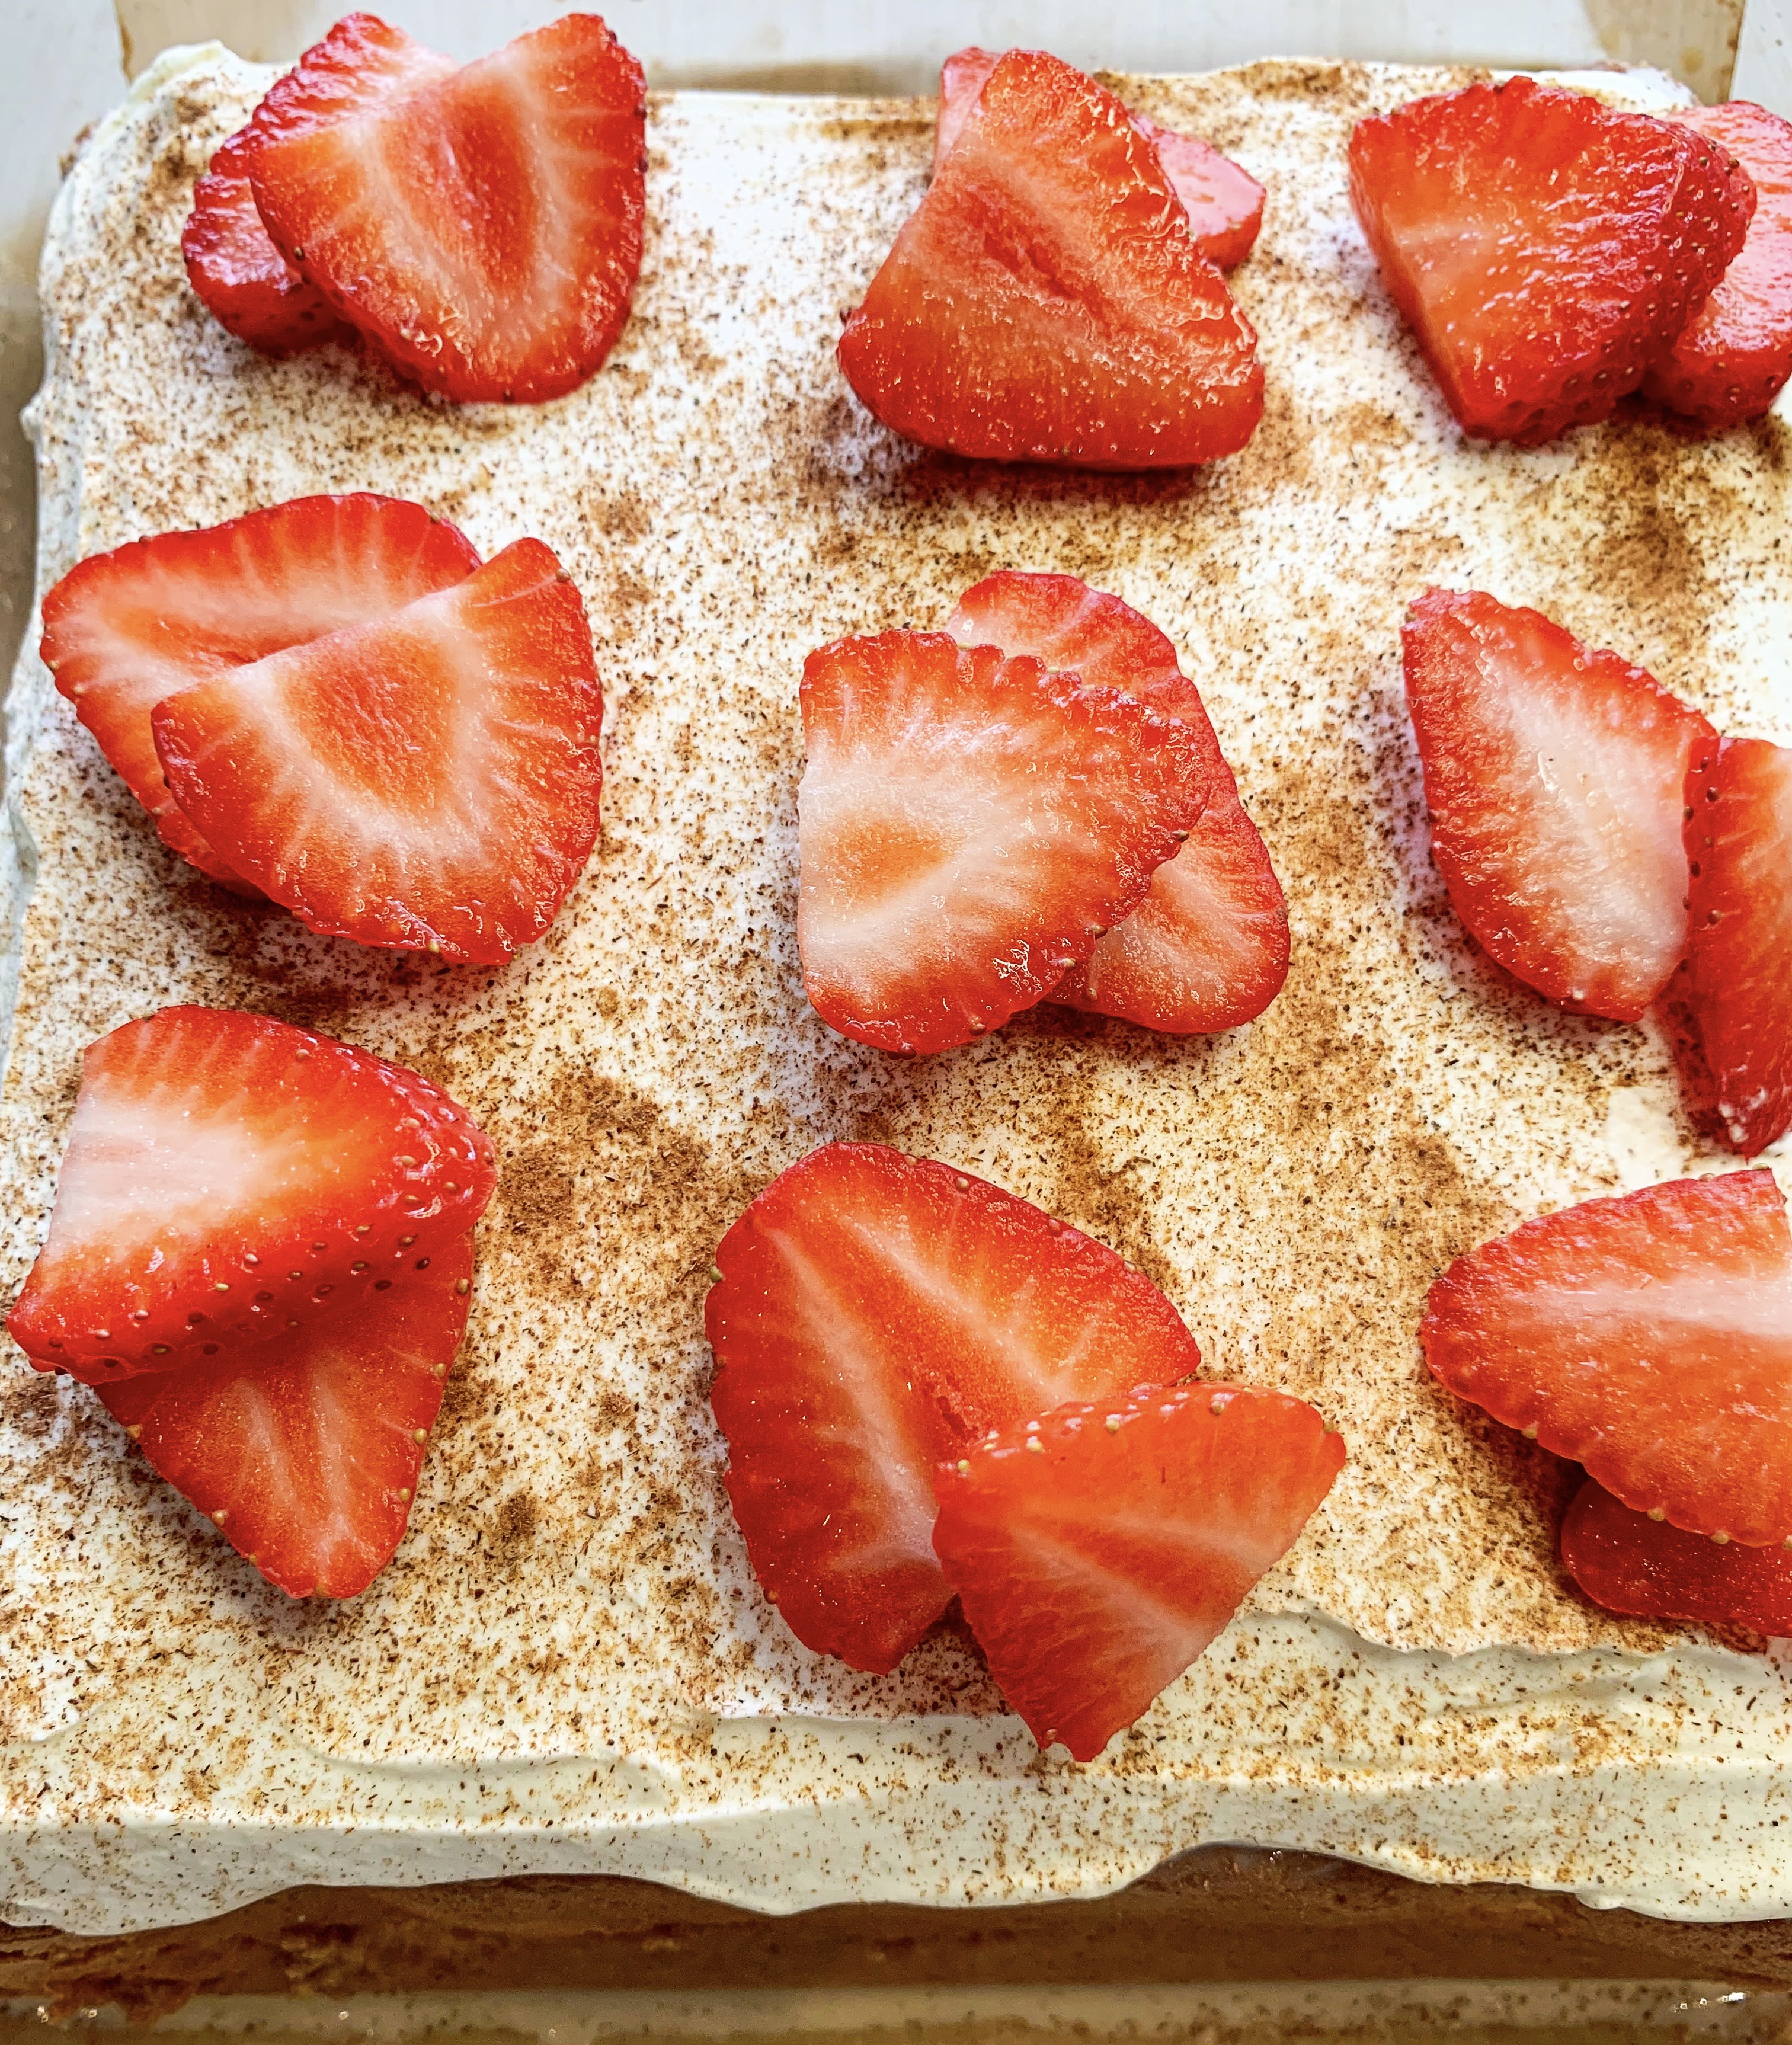

Wow, this is the most wonderful treat… a cross between a cake and a pudding! This Mexican cake is so called because the recipe uses three types of milk (tres leches). It’s incredibly light, moist and creamy. The sponge (which can be made with gluten-free flour if desired!) is soaked overnight with a mixture of evaporated, condensed and whole milk then topped with fresh whipped cream. Be warned it is very addictive – I like to serve it with strawberries to cut the creaminess!
For the Cake:
125g plain flour (gluten free if needed – I use Doves)
1½ teaspoons baking powder
¼ teaspoon salt
5 large eggs, separated
200g caster sugar – divided 150g/50g
80ml whole milk
1 teaspoon vanilla extract
For the Milk Mixture:
397ml tin condensed milk
340ml evaporated milk
60ml whole milk
For the Whipped Topping:
475ml double cream
3 tablespoons icing sugar
½ teaspoon vanilla extract
Ground cinnamon for topping
Strawberries to serve
You will need a square cake tin (20 x 20 cm), lined with baking paper
- Put the egg yolks in a bowl, add 150g caster sugar and whisk on high speed until the egg yolks are pale and creamy. Add 80g milk and 1 teaspoon of vanilla extract, stir to combine.
- In another bowl combine the flour, baking powder and salt. Now add the egg yolk mixture and stir gently until just combined.
- In a separate bowl whisk the egg whites to stiff peaks, then gradually add the remaining 50g of caster sugar and whisk until stiff and glossy.
- Gently fold the egg whites into the yolk batter until combined.
- Pour the batter into the lined cake tin and smooth over. Bake in a preheated oven, 175’c fan, for 25-35 minutes until a skewer inserted in the centre of the cake comes out clean. Remove from the oven and allow the cake to cool completely in the tin.
- Once the cake has cooled, whilst still in the tin, use a fork or skewer to pierce holes all over the cake.
- Combine the condensed milk, the evaporated milk and whole milk in a small jug. Slowly pour the milk mixture over the top of the cake, making sure you pour near to the edges and all around. Refrigerate the cake overnight to allow it to soak up the milks – don’t worry if there seems to be a lot of liquid – it will soak in eventually!
- In the meantime whip the cream together with the icing sugar and vanilla extract until stiff peaks.
- When ready to serve, smooth the whipped cream over the top of the cake. Sprinkle cinnamon on top. Cut into squares to serve (I find that it is easiest served from the tin or from the baking paper). Serve with sliced strawberries. Keep refrigerated for up to 4 days.
Marzipan Loaf Cake (with or without Raspberry Marzipan Icing!)
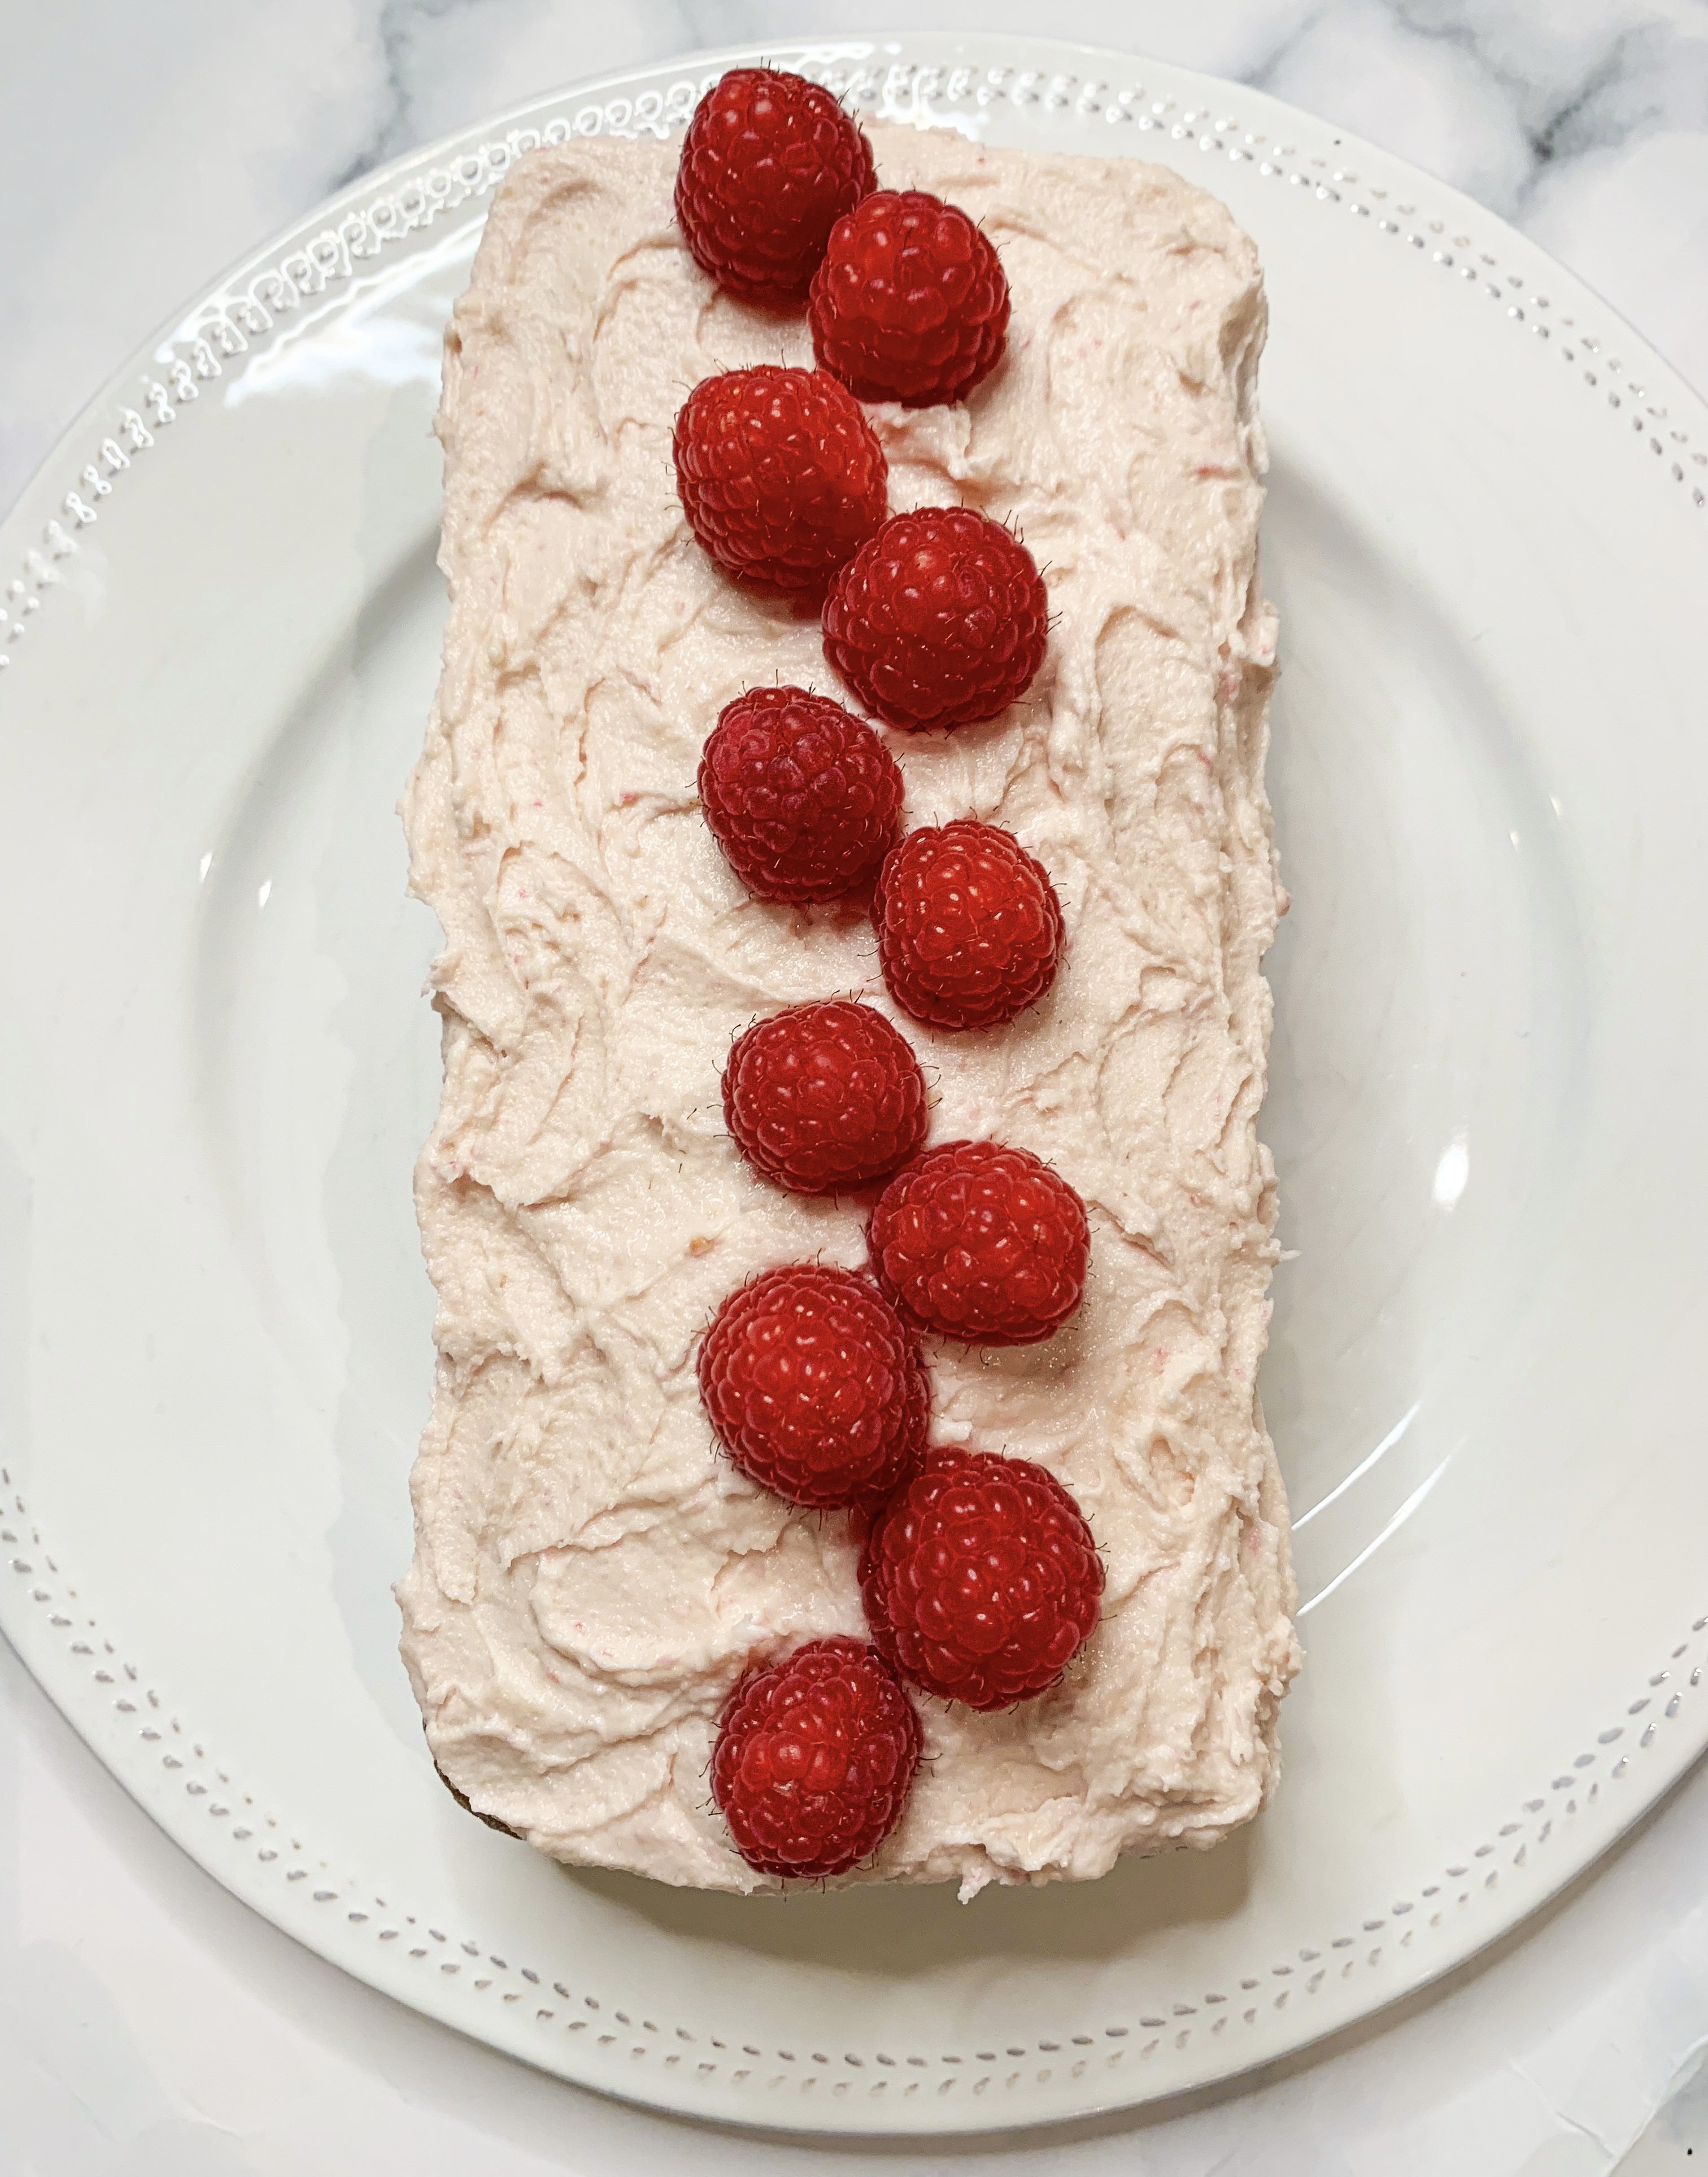

This is one of the cakes which will end up as a family favourite as not only is it delicious but super simple to make – you literally throw all the ingredients into a processor and blend. The flavour of marzipan is not overpowering, so even if you’re not a lover of marzipan do try it – you won’t regret it! The icing is optional, it’s very good simply unadorned as an everyday, anytime cake. It’s become my go-to recipe when I want something sweet in the house, I more often than not serve it plain, but when I want something a little more ‘wow’ I top it with the icing – it also photographs better with the icing! The recipe for the cake is from Nigella Lawson’s ‘Cook, Eat, Repeat’ cookbook whilst the icing is from Skye McAlpine’s ‘A Table Full of Love’.
You will need a loaf tin, lined with baking paper or a loaf-tin liner
150g marzipan (white or yellow) or almond paste, at room temperature
125g soft unsalted butter
1 teaspoon vanilla paste (or extract)
50g caster sugar
75g plain flour (gluten-free if required)
¼ teaspoon fine sea salt
1 teaspoon baking powder (gluten-free if required)
1½ teaspoons ground cardamom
3 eggs at room temperature
Raspberry Marzipan Icing:
150g fresh raspberries
110g icing sugar, plus 1 tablespoon
1 tablespoon boiling water
40g marzipan, grated
60g unsalted butter, softened
- Put all the ingredients (tearing up the marzipan into lumps first) into the bowl of a food processor and blend until smooth, stopping to scrape down the sides a couple of times.
- Pour the mixture into a loaf tin lined with baking parchment (or easier still use loaf-tin liner). Bake in a preheated oven, 150’c fan, for 40-50 minutes (cover with loose foil after 30-or-so minutes if it is becoming too brown) until the cake is beginning to come away from the sides and a cake tester comes out clean. It will ruckle a little on the top as it cools.
For the butter cream icing:
- If you are serving it with the butter icing: Combine 70g of the raspberries in a food processor with 1 tablespoon of icing sugar and blitz to a smooth puree. Pass the puree through a sieve to remove the seeds and put the deep pink puree to one side.
- In a small bowl add the tablespoon of boiling water to the grated marzipan and stir to melt it slightly (this will stop it going lumpy when you add it to the buttercream).
- In a second bowl use a hand-held electric whisk to mix 110g of the icing sugar and butter until pale and fluffy, then add the marzipan and beat until smooth. Finally add the raspberry puree and beat.
- Spread the icing over the top of the cake and decorate with the remaining raspberries.
Brown Sugar Pavlova with Strawberries and Rhubarb (Serve 6)
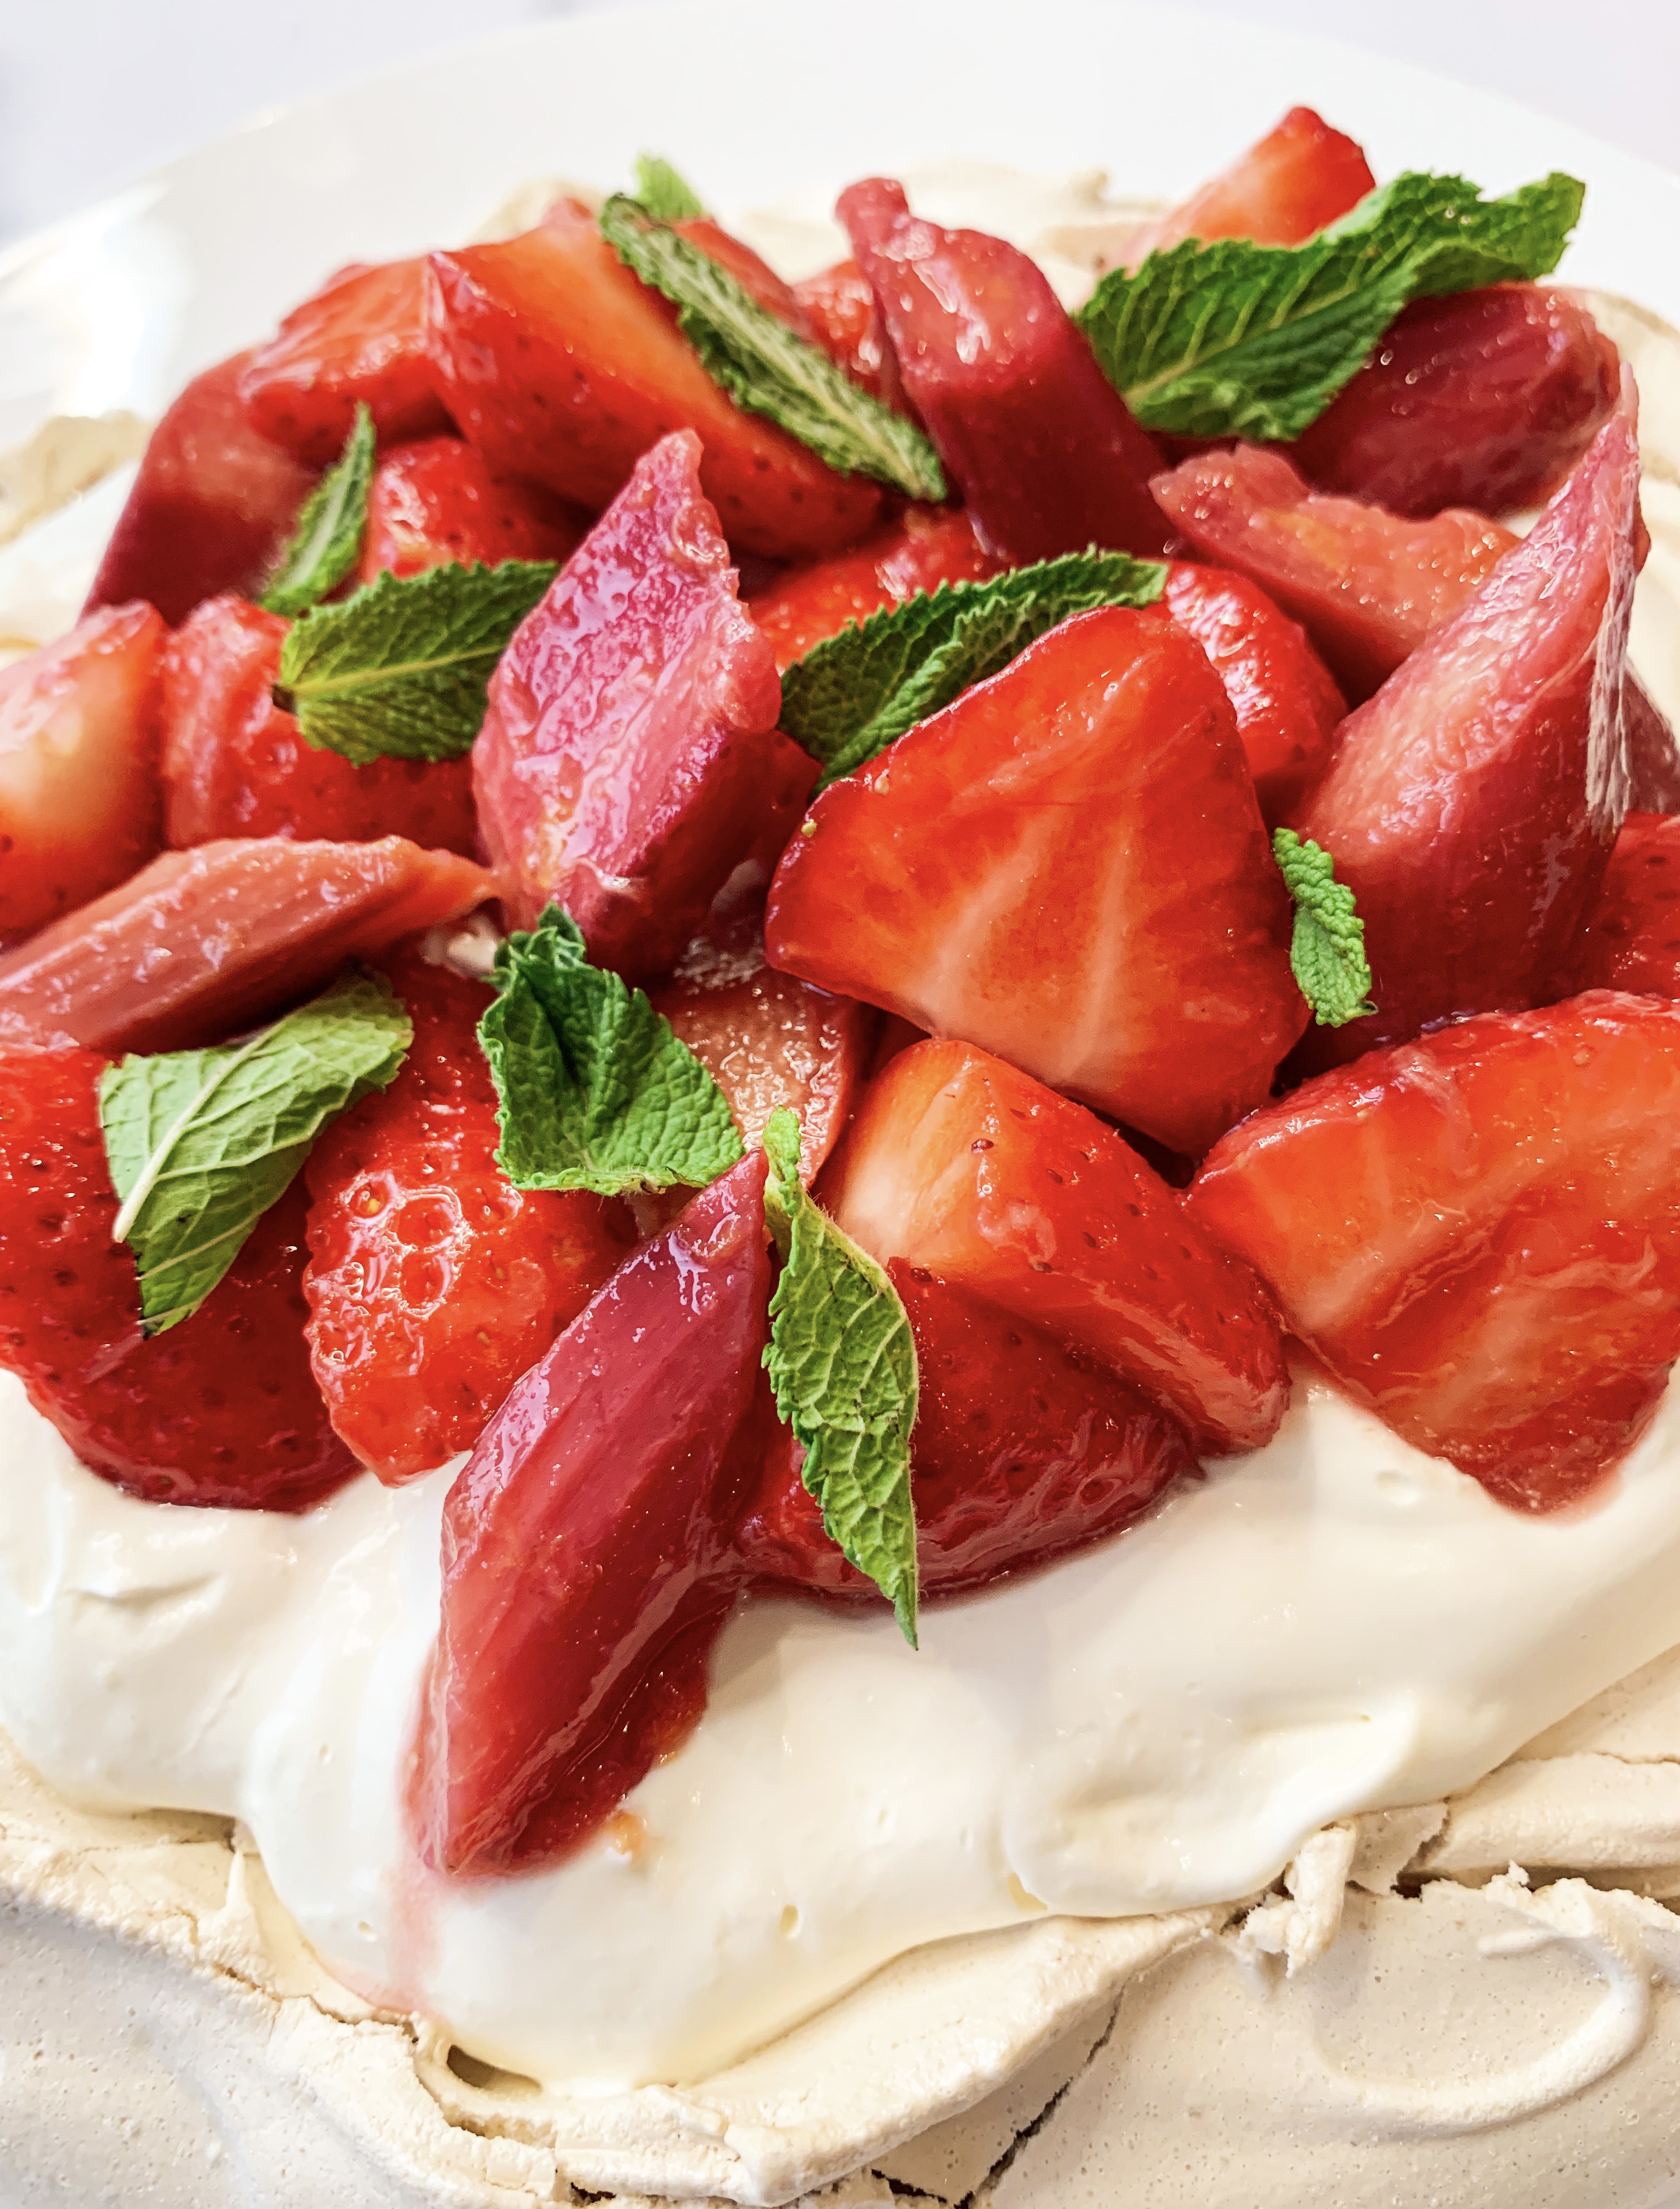
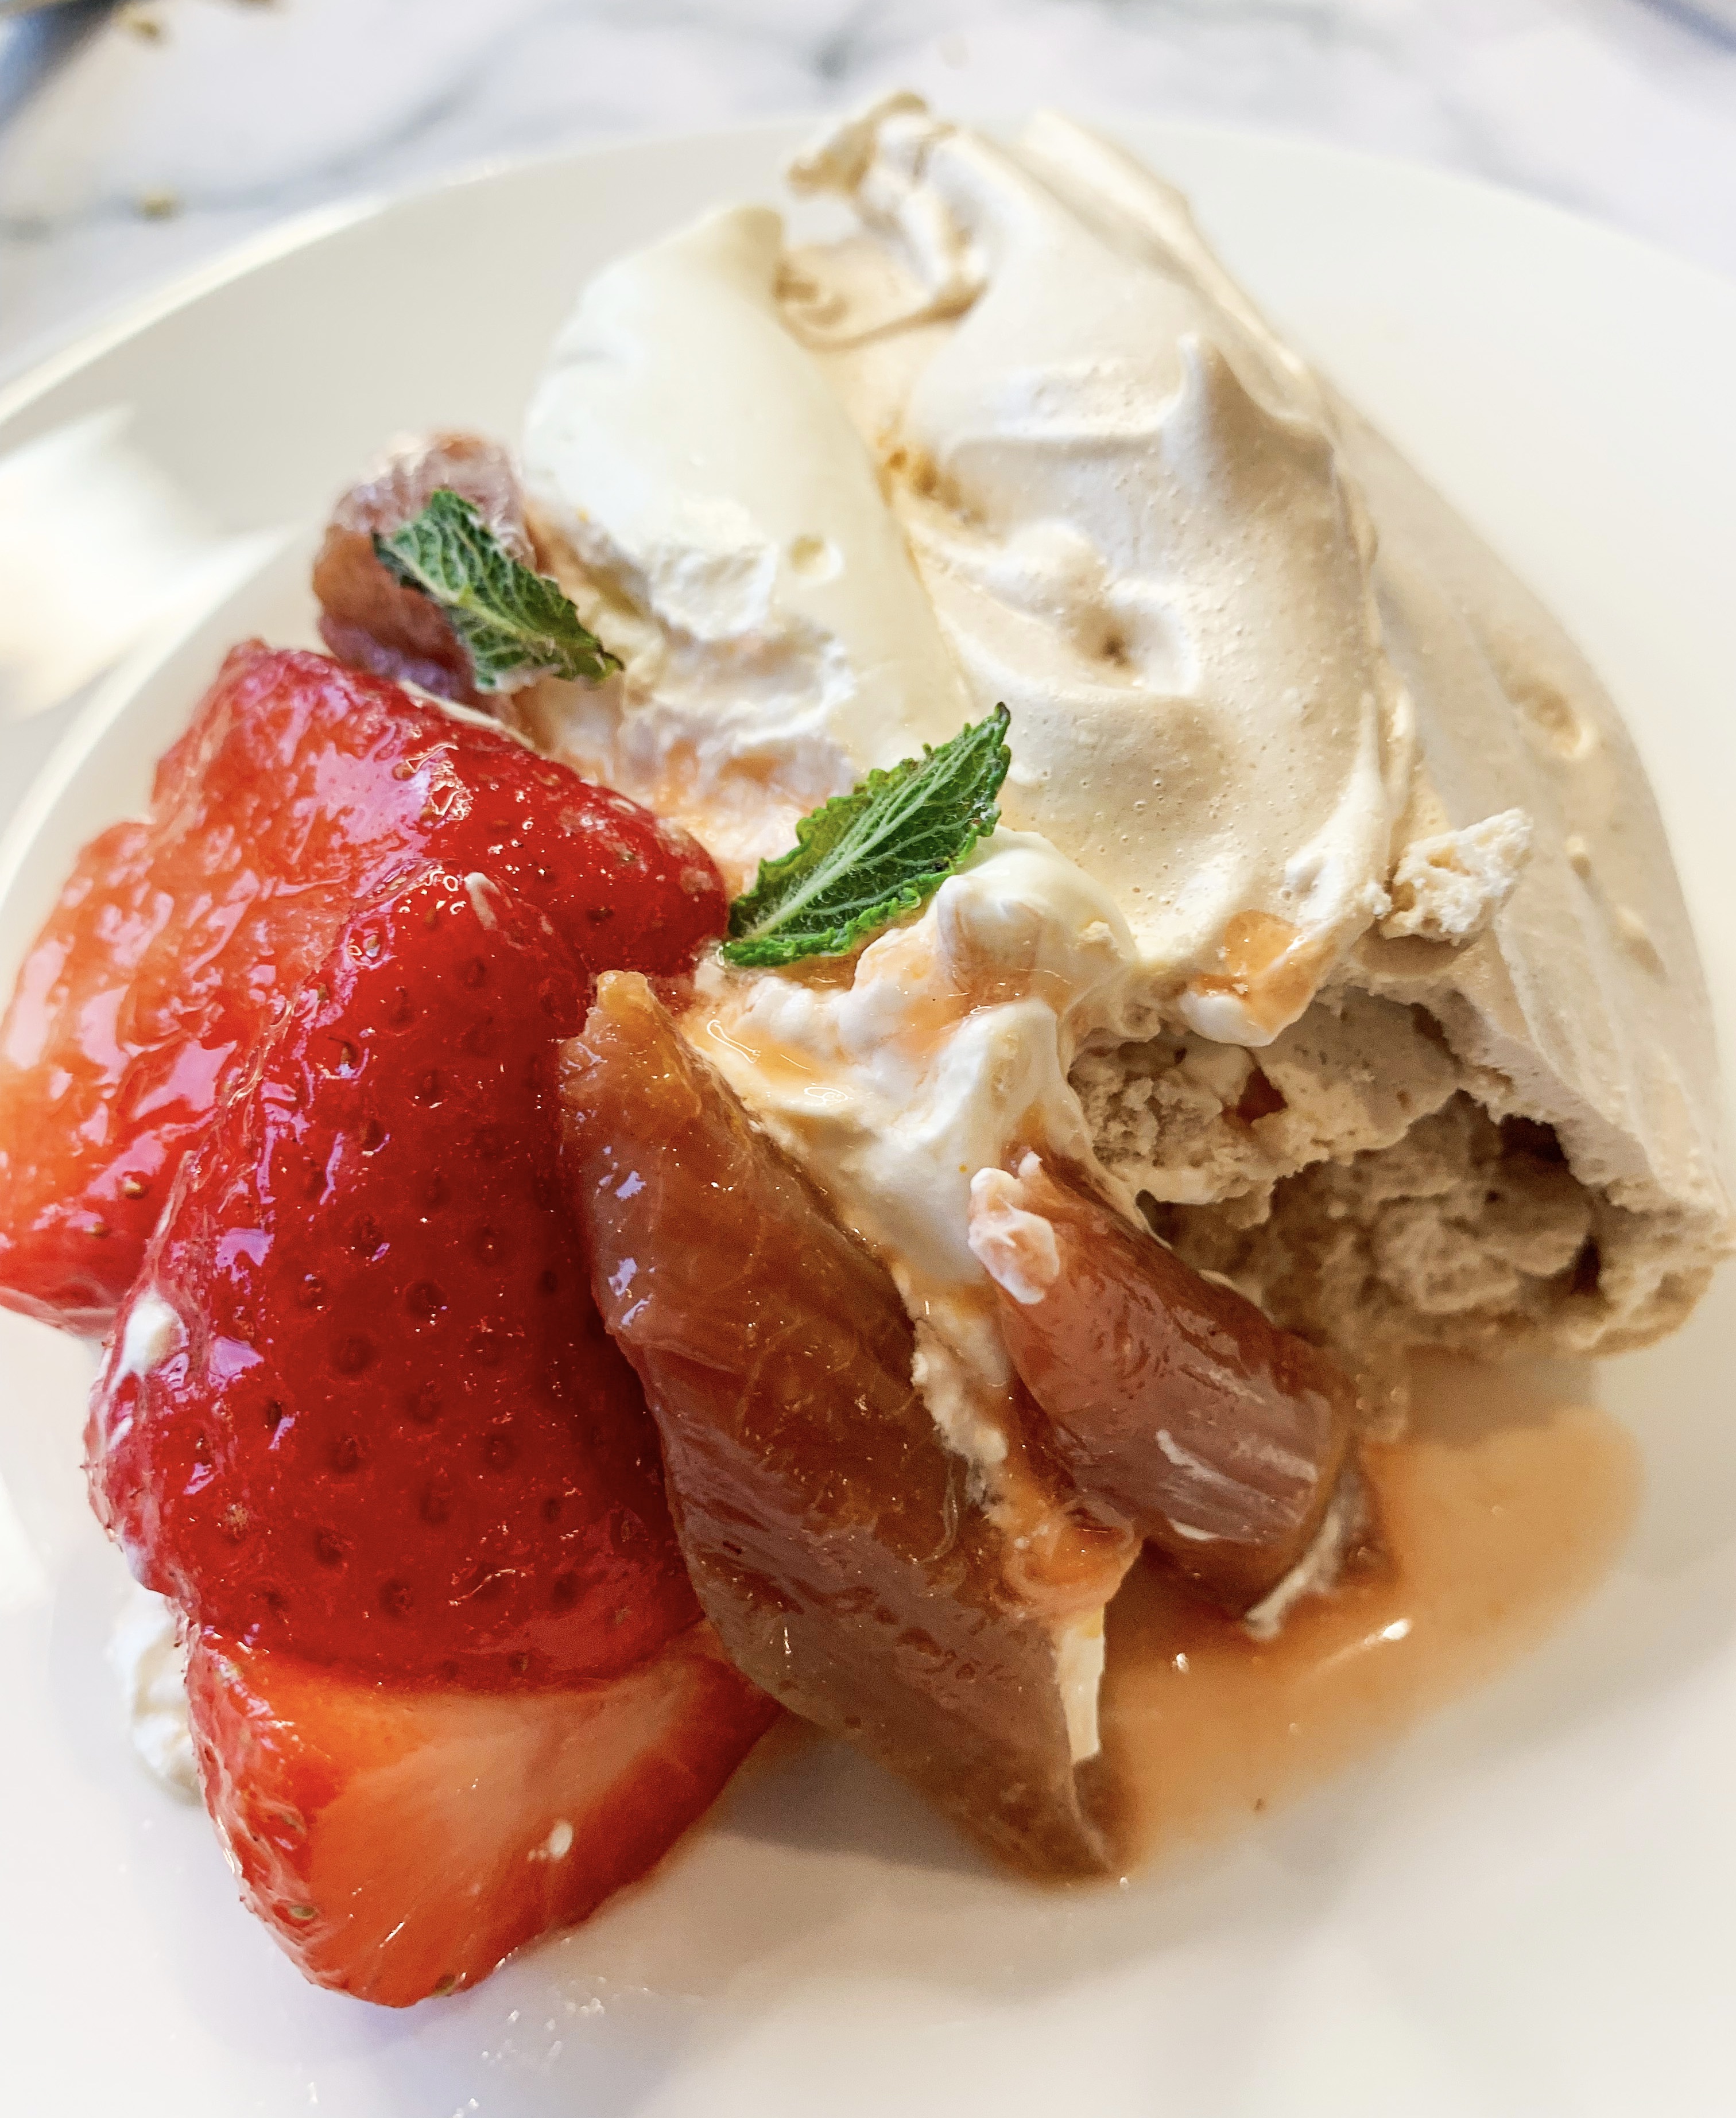
I adore Pavlova and this recipe for ‘Brown Sugar Pavlova’ is a new favourite. I discovered it just recently in Sally Clarke’s cookbook , ‘First Put on Your Apron’. The brown sugar gives the meringue a subtle caramel flavour and a sweetness that cuts the tart rhubarb beautifully. It doesn’t like to sit around, so assemble it at the last minute in order to keep the meringue as crisp as possible. Having said that, in the past I’ve keep the leftovers in the fridge and enjoyed them the following day; even if the meringue is a little ‘soggy’ it’s still delicious!..
4 egg whites
Pinch of salt
160g caster sugar
90g brown sugar
4 drops of vanilla essence
For the Rhubarb and Strawberry topping:
400g rhubarb stalks
1 orange, juiced
1 tablespoon caster sugar
400g strawberries
500g Double cream, stiffly whipped
Mint leaves to decorate
- Using an electric whisk, whisk the whites with the salt until they are stiff. Add the caster sugar and whisk for a further minute or two until the meringue is glossy and very stiff. Carefully fold in the brown sugar and vanilla essence until smooth.
- Line a baking sheet with baking parchment, draw a circle, roughly 22cm in diameter – you can draw around a plate. Scoop the meringue mixture onto the circle, spreading it out to create a crater by making the sides a little higher than the middle.
- Place in a preheated oven, 120’c fan, for 1 hour 10 minutes, then turn off the oven and allow to cool completely in the oven or overnight.
- Meanwhile, trim the rhubarb and cut the stalks slightly at an angle into 2 cm lengths and place in a wide-based saucepan, ideally in one layer. Add the orange juice and caster sugar, cover with a lid and bring slowly to a simmer and cook until barely soft, approximately 3 minutes. Check often as you don’t want the rhubarb to overcook, you want it to be a little ‘al dente’ so that it keeps its shape. Remove from the heat and allow to cool down in the covered pan.
- About an hour before you are ready to serve the pavlova, hull the strawberries and cut each into 2 or 3 depending on the size and place in a bowl. Carefully pour over the cooled rhubarb and its juices. Do not mix the fruit together at this stage as the rhubarb is very delicate. Leave for up to an hour in the fridge to macerate.
- To serve, spoon the whipped cream into the well of the pavlova and carefully arrange the rhubarb and strawberries, without the juices, on top and decorate with sprigs of mint. Serve the juices in a small jug to go alongside.
Lemon Mousse Cake (Serves 4-6)
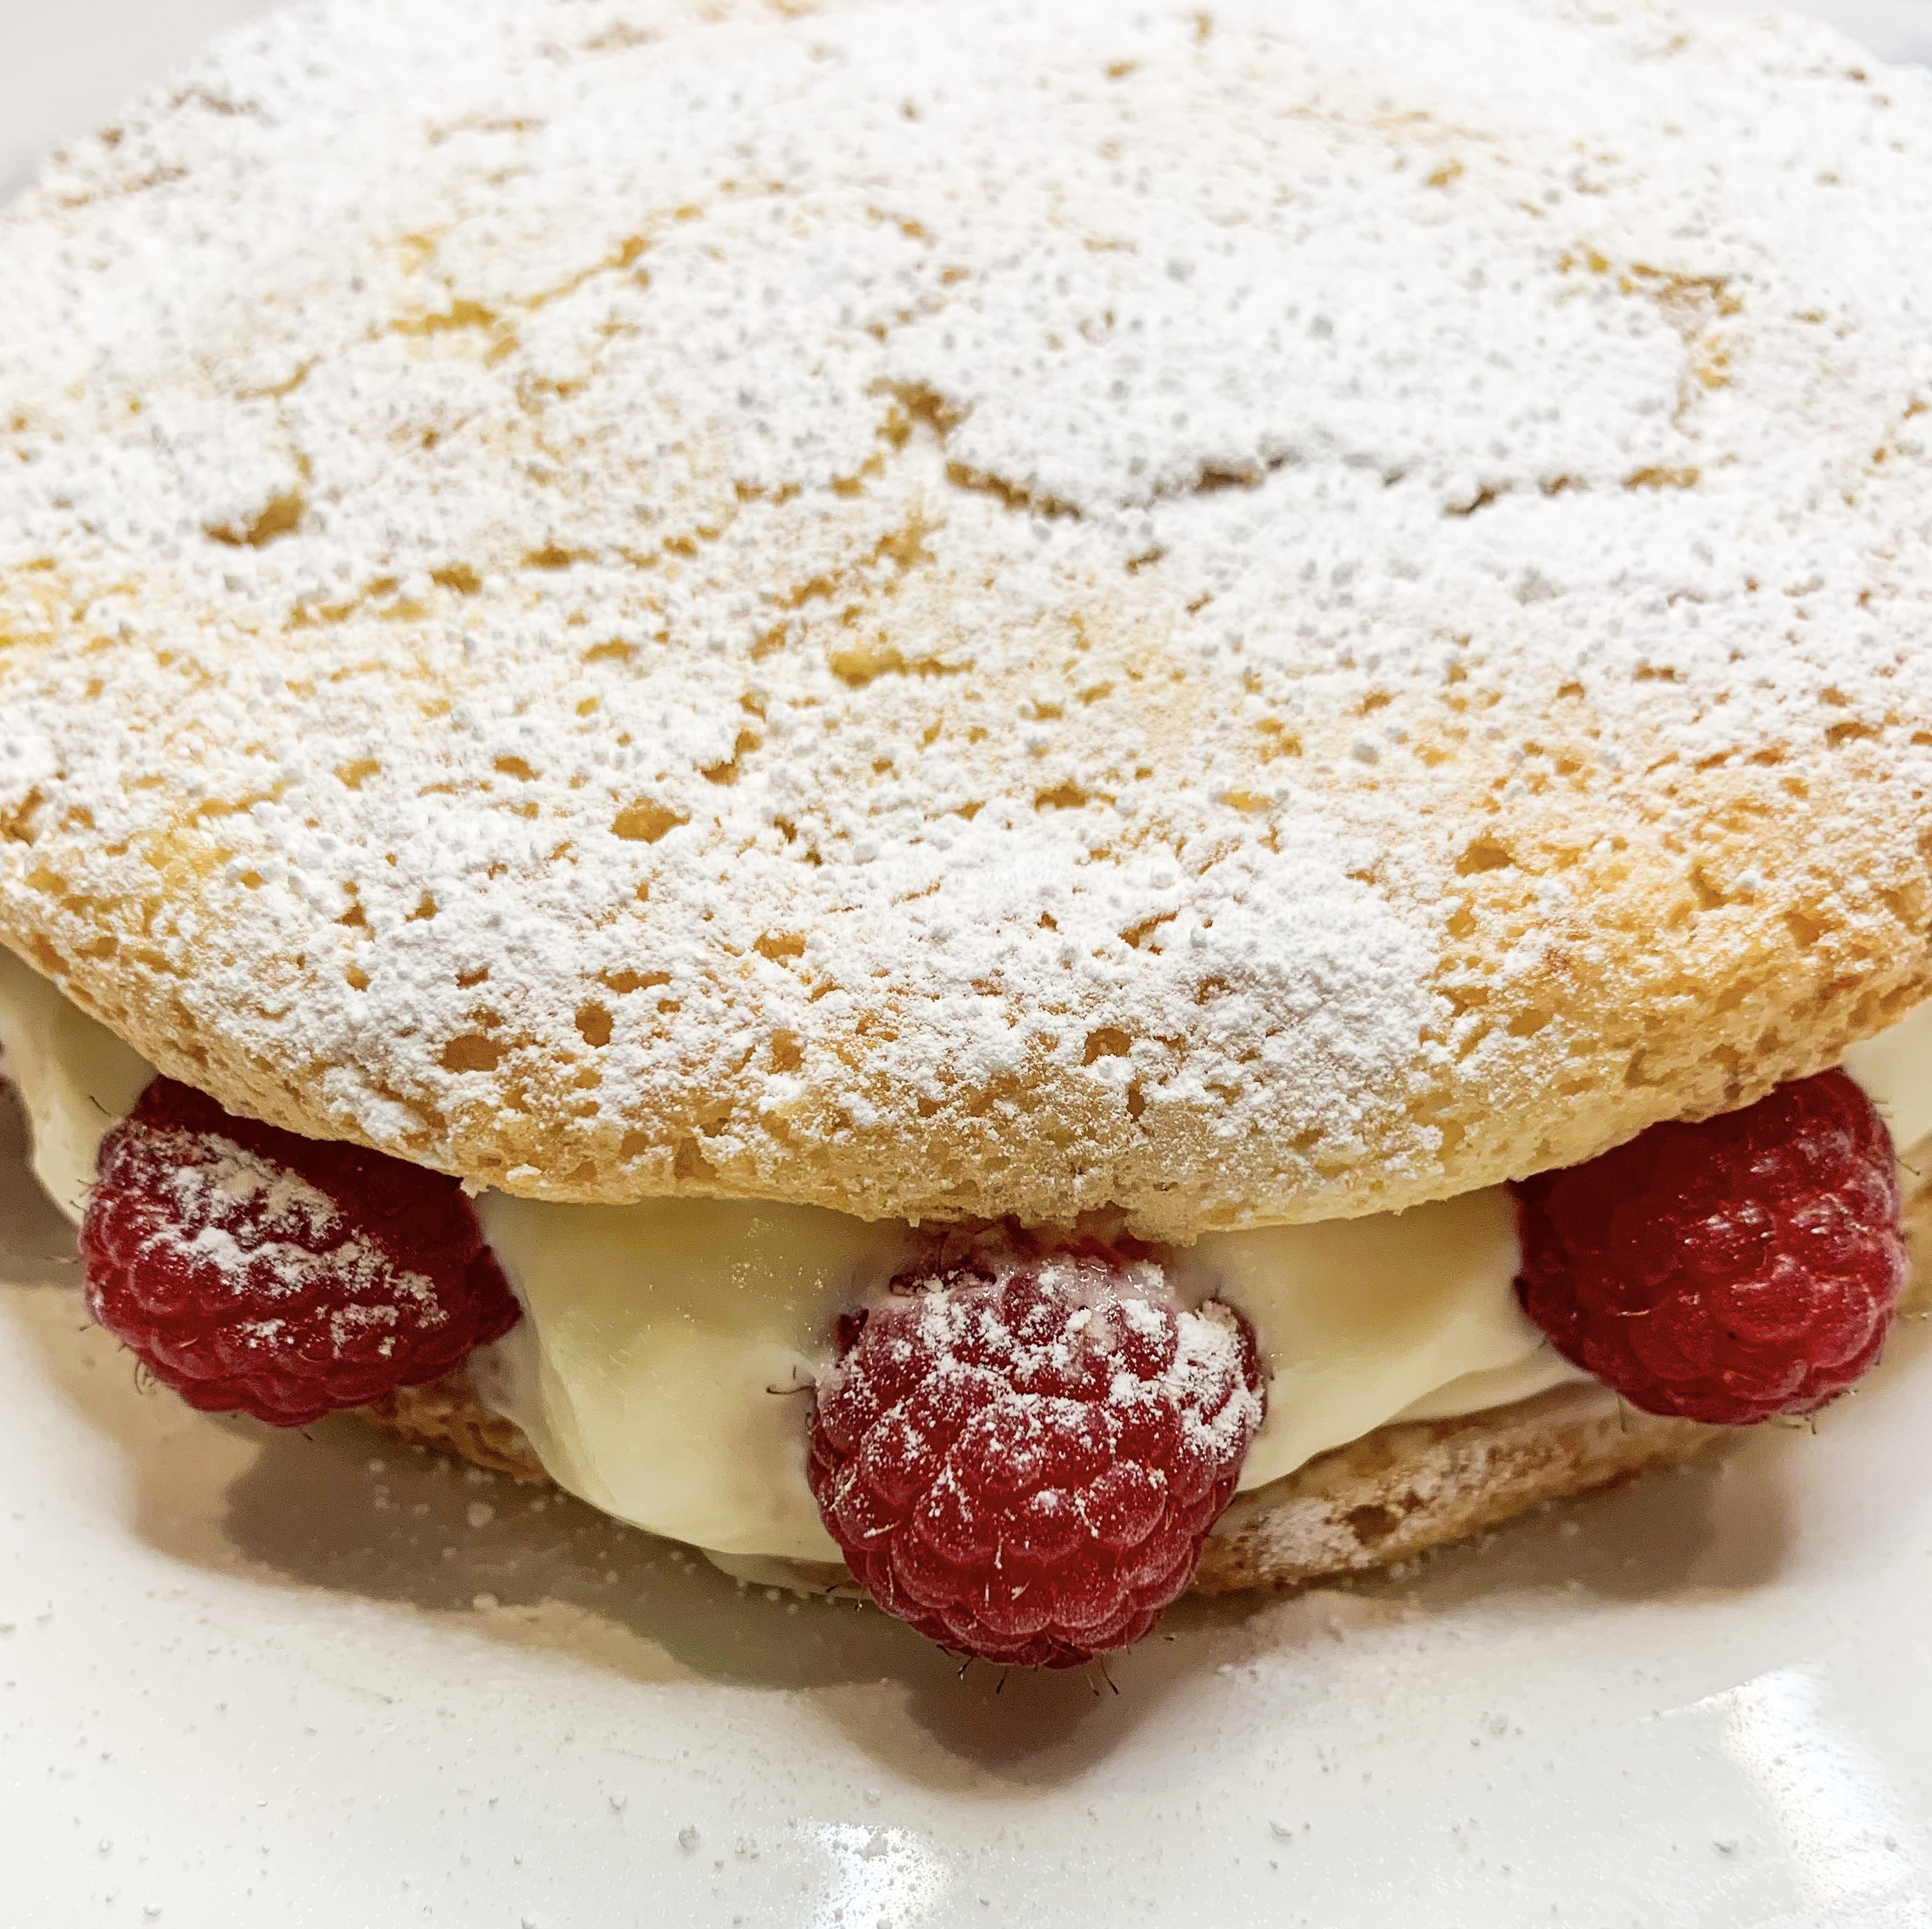
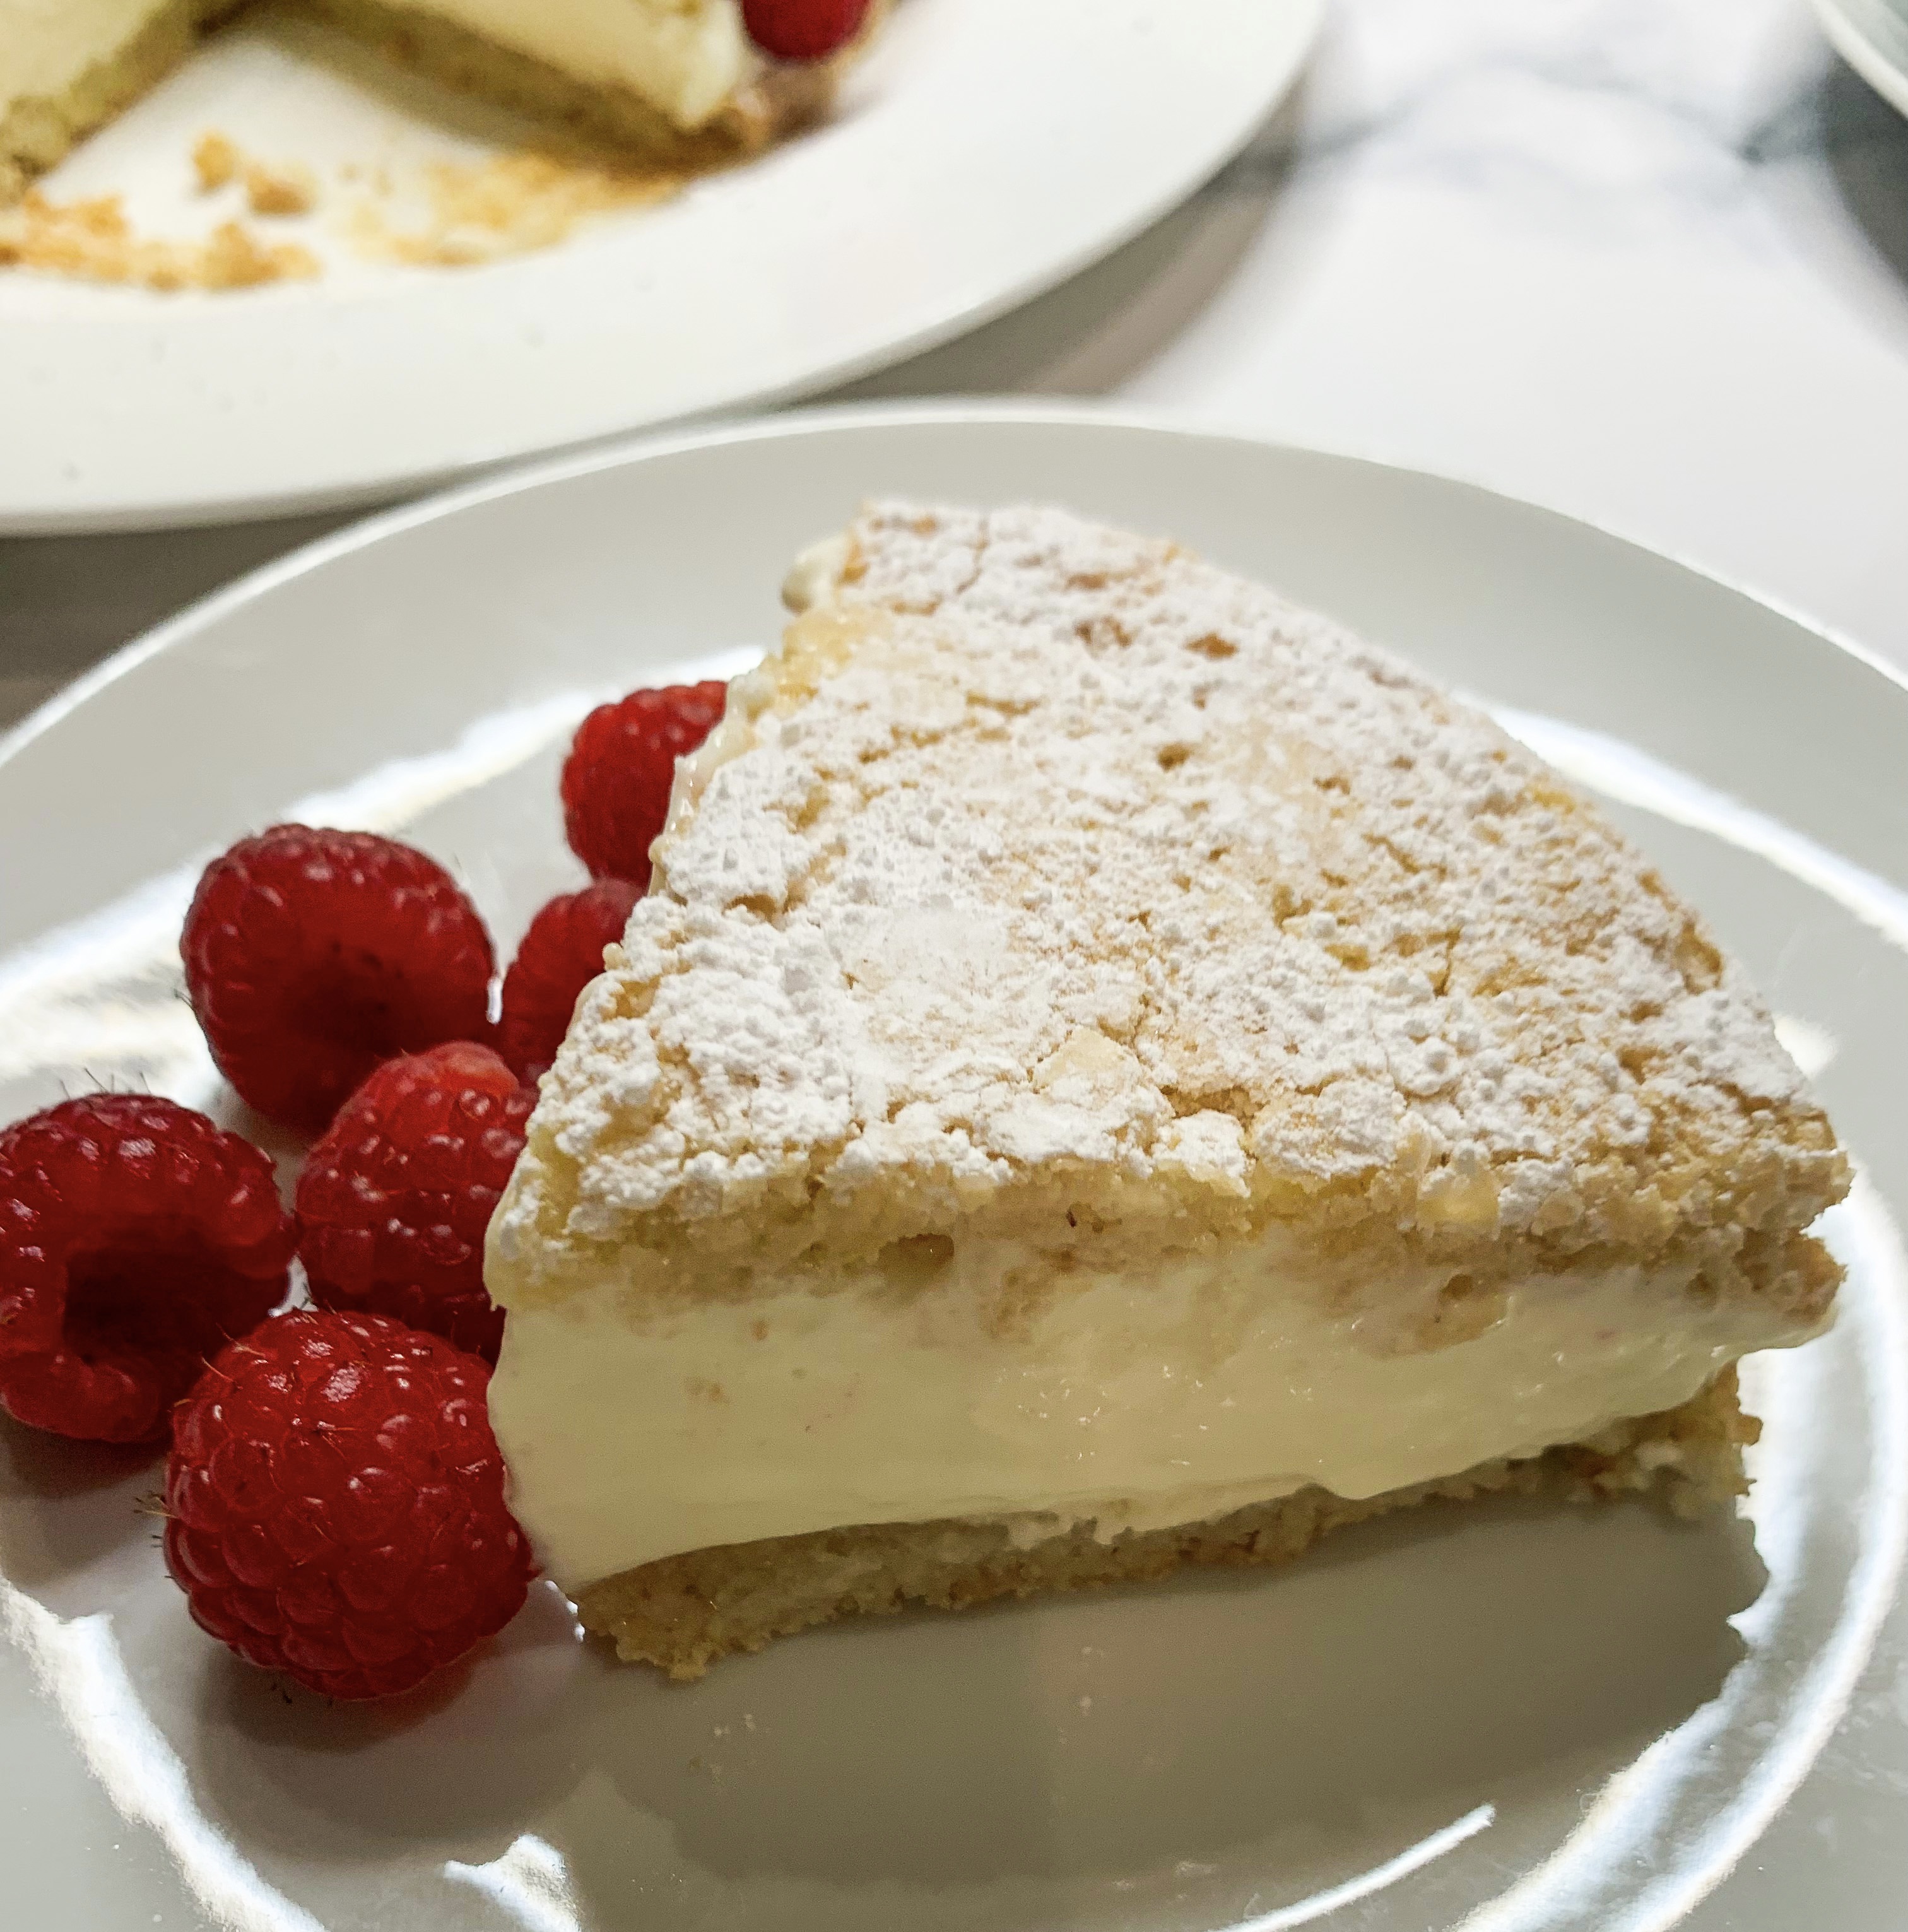
This lemon mousse cake has just the right balance of sweet and sour. It’s rather like a ‘lemon posset’ sandwiched between two chewy almond biscuits (macronades) – wonderful! The recipe is from Simon Hopkinson’s cookbook ‘Roast Chicken and Other Stories’, he suggests that it serves 4, but although I’m greedy, I found it could easily serve 6, as it is rich.
For the macaronades:
2 egg whites
125g icing sugar
50g ground almonds
Grated zest of 1 lemon
For the mousse:
2½ leaves of gelatine, pre-soaked in cold water until softened
200ml lemon juice
250ml double cream
100g caster sugar
A handful of fresh raspberries, plus more to serve
Icing sugar to sift over
*Baking parchment
- Draw two circles 12cm in diameter on a piece of baking parchment and place on a baking tray.
- Beat the egg whites to soft peaks. Sift the icing sugar and almonds together, gently fold them into the egg whites, together with the lemon zest.
- Spread the mixture onto the circles on the baking parchment.
- Bake in a preheated oven, 200’c fan, for 10 minutes, until pale golden. Remove, leave to cool for 5 minutes before carefully lifting from the paper to dry on a cooling rack.
- Melt the gelatine with a couple of tablespoons of the lemon juice over a low heat. Add the rest of the lemon juice and place the bowl over ice to chill stirring occasionally until just beginning to gel.
- Whip the cream with the sugar until thick then slowly incorporate the lemon-gelatine mixture while continuing to beat until the mixture is thick (you can thicken it more by placing it in the fridge for 30 minutes).
- To assemble, place one of the macaronades on a serving plate, smooth side up, and carefully spread the mousse right up to the edges, smoothing around the edge with a palette knife. Gently press the second marcaronade on top. To decorate place the raspberries at intervals around the edge of the mousse and sift a little icing sugar over the top of the cake. Put in the fridge to chill for up to 2 hours before serving.
Pear Almondine (Serves 6)
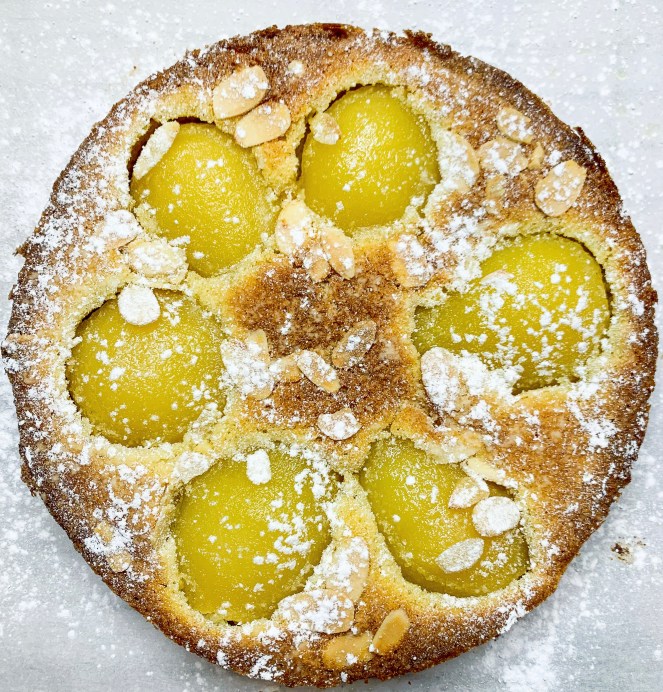
I have my sister to thank for finding this recipe, it’s from Raymond Blanc’s cookbook ‘Simply Raymond’. Although I had this cookbook I hadn’t noticed this particular recipe – I think I’d overlooked it as I presumed it would be laden with gluten, but it’s totally gluten-free! When my sister served it I was smitten. It has a lovely chewy crust, it’s wonderful warm or cold – for dessert or breakfast! It’s very straightforward to make, however, as Blanc suggests, it’s worth using a tart ring rather than a tin; if you haven’t got one it will be a good investment as I assure you – you will want to make this again and again (you can buy them on Amazon). The reason for a this ring, is that by having no base it ensures that the bottom of the Almondine is cooked to perfection. It will seem a bit precarious to slide the uncooked tart onto the heated baking tray but in fact, it’s rather easy, and worth it to get the heat directly underneath for a crisp bottom.
4-6 pear halves, tinned or jarred, drained
100g unsalted butter, at room temperature plus extra for brushing the ring
100g caster sugar
100g ground almonds
1 teaspoon cornflour
1 teaspoon vanilla bean paste
1 egg
A handful of flaked almonds (lightly toasted in a dry pan)
Icing sugar for dusting
*A 18cm x 2cm tart ring and two baking trays
- First butter the tart ring, then cut a strip of greaseproof paper to line the inside of the buttered tart ring (the butter will allow it to stick). Place the ring on a flat baking sheet lined with greaseproof paper. Place the second tray on the middle shelf of a preheated oven, 180’c fan, ready to slide the pear tart onto.
- In a large bowl, mix the softened butter and sugar. Then add the ground almonds, cornflour, vanilla bean paste and egg, and mix well. Spoon the mixture into the tart ring, spreading it evenly.
- Slice the pears in half and arrange them evenly around the outside of the tart, resting them on top of the almond sponge mixture, with the tip of each half meeting in the middle. Scatter over the almonds.
- Slide the pear tart on the greaseproof paper onto the preheated tray in the oven and bake for 25-30 minutes until golden brown.
- Leave to cool for a few minutes before removing it from the ring.
- Before serving, dust with icing sugar.
Chocolate & Amaretto Cake
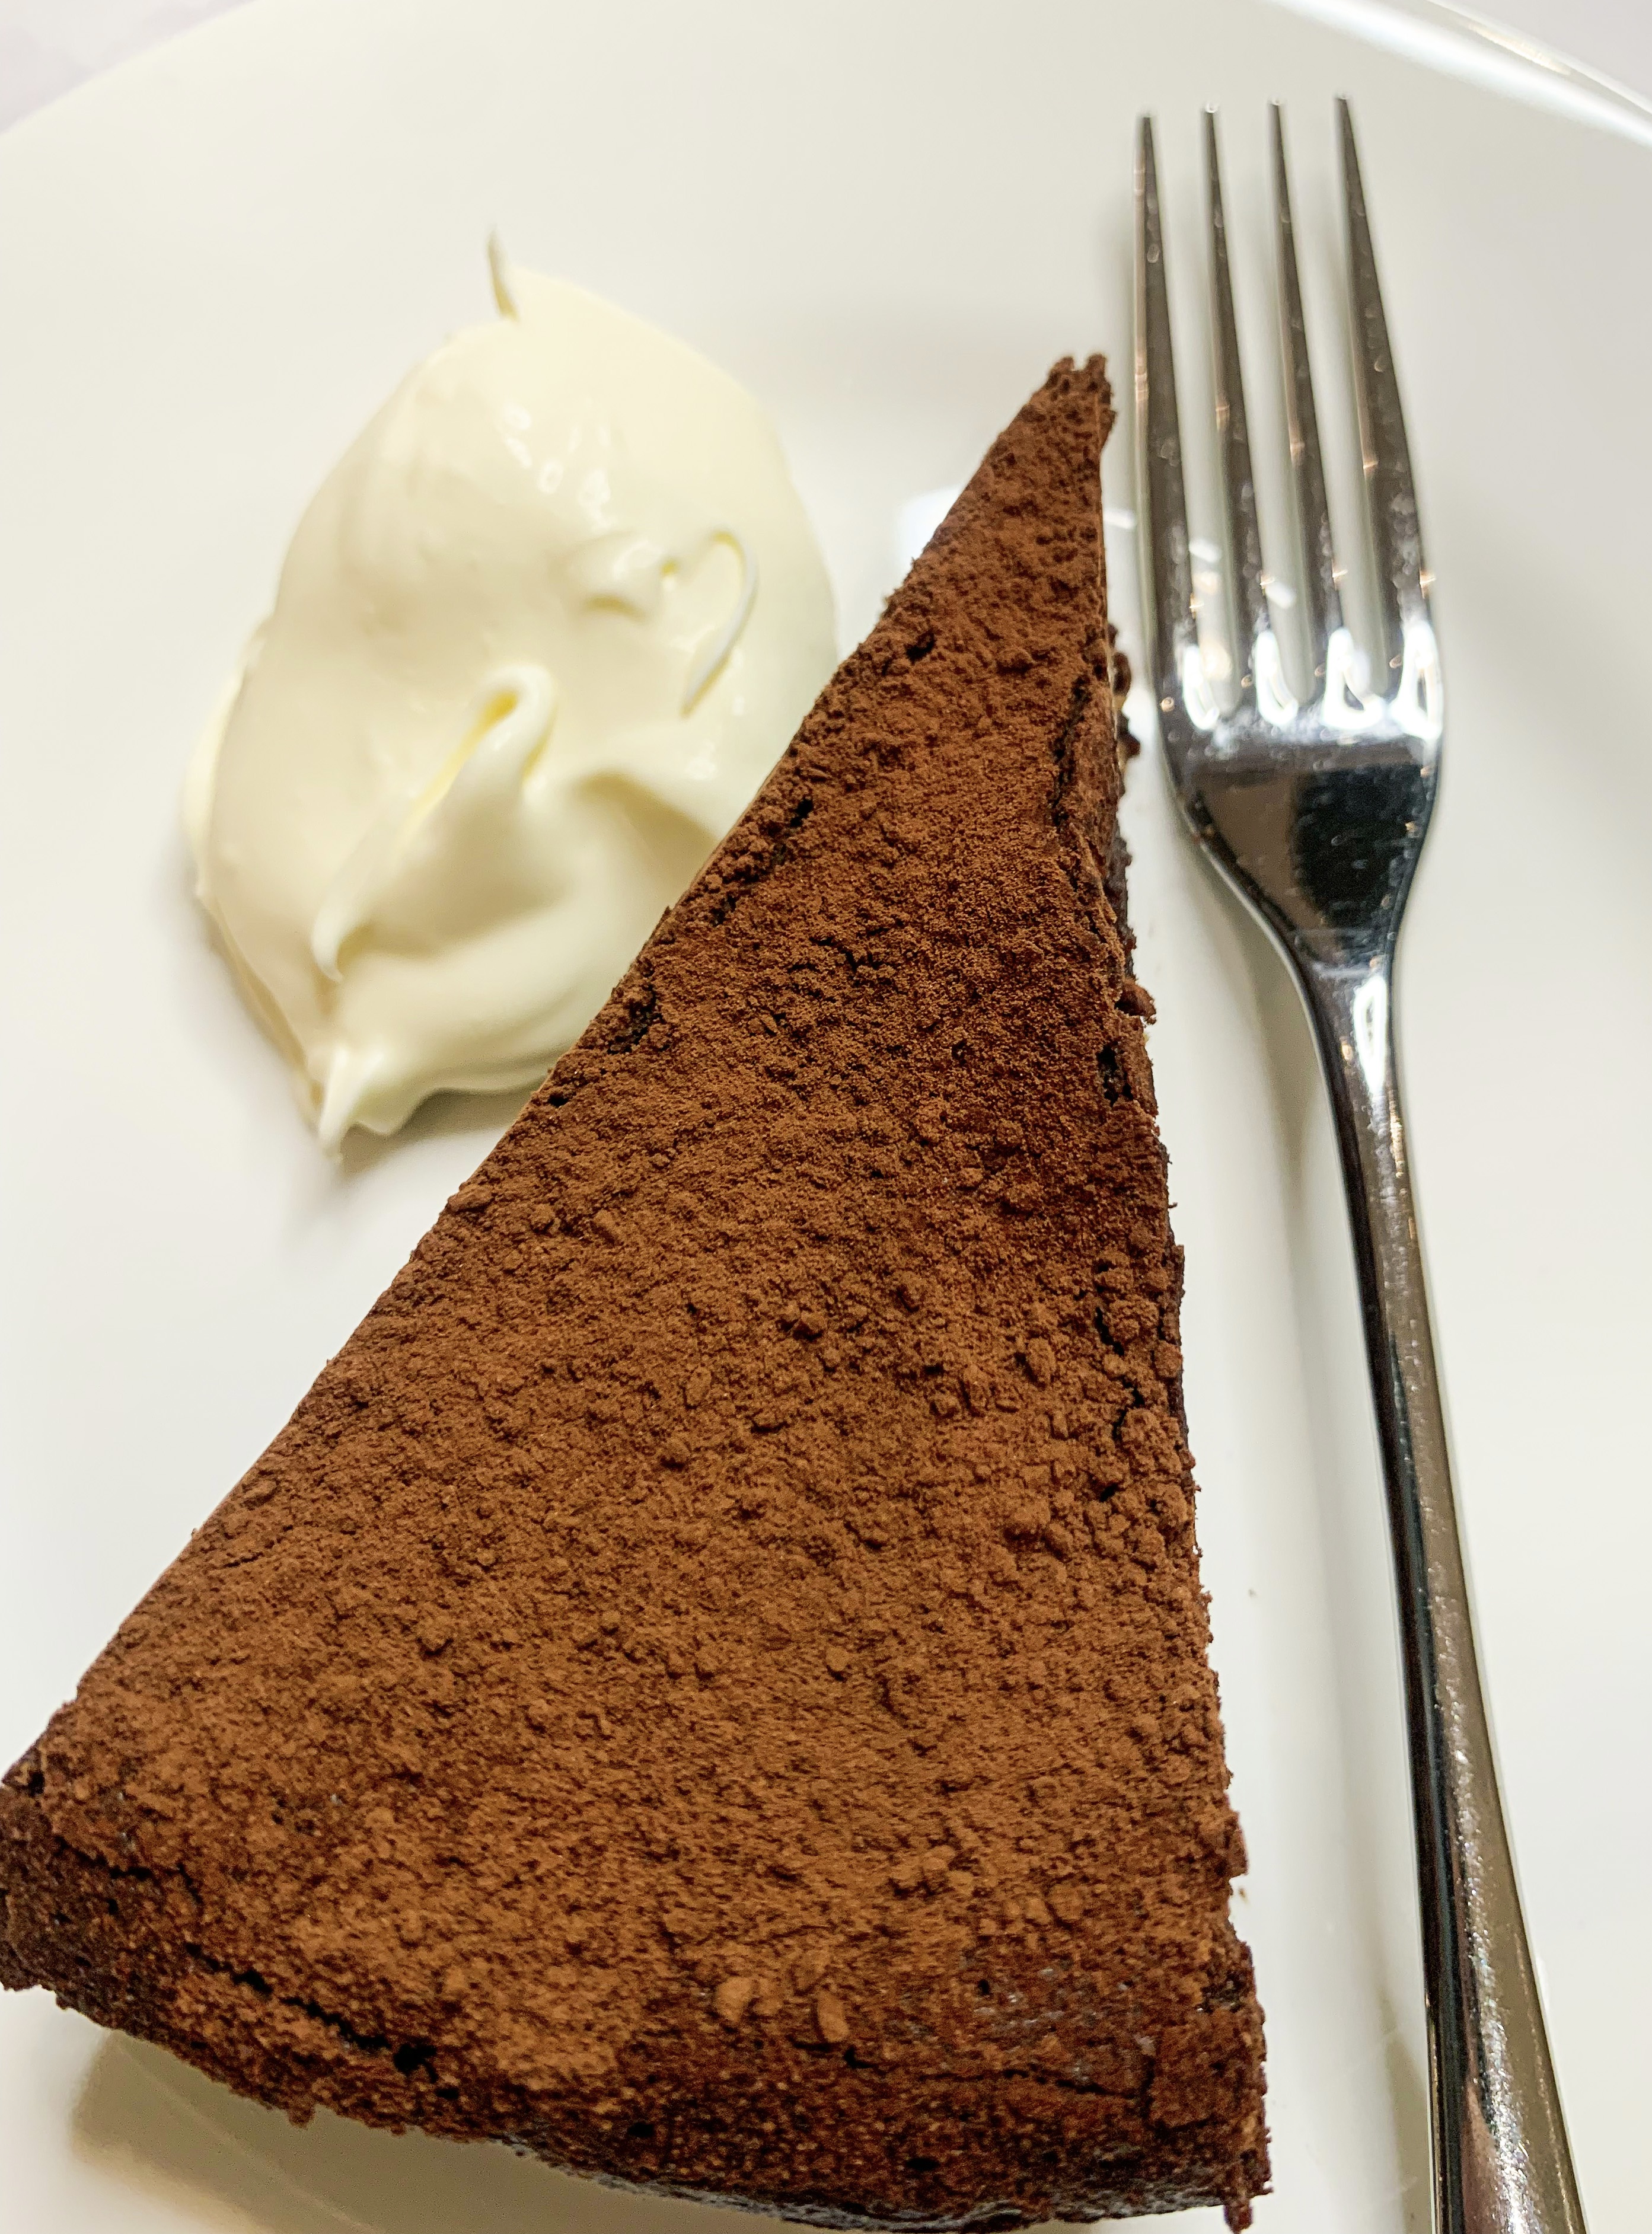
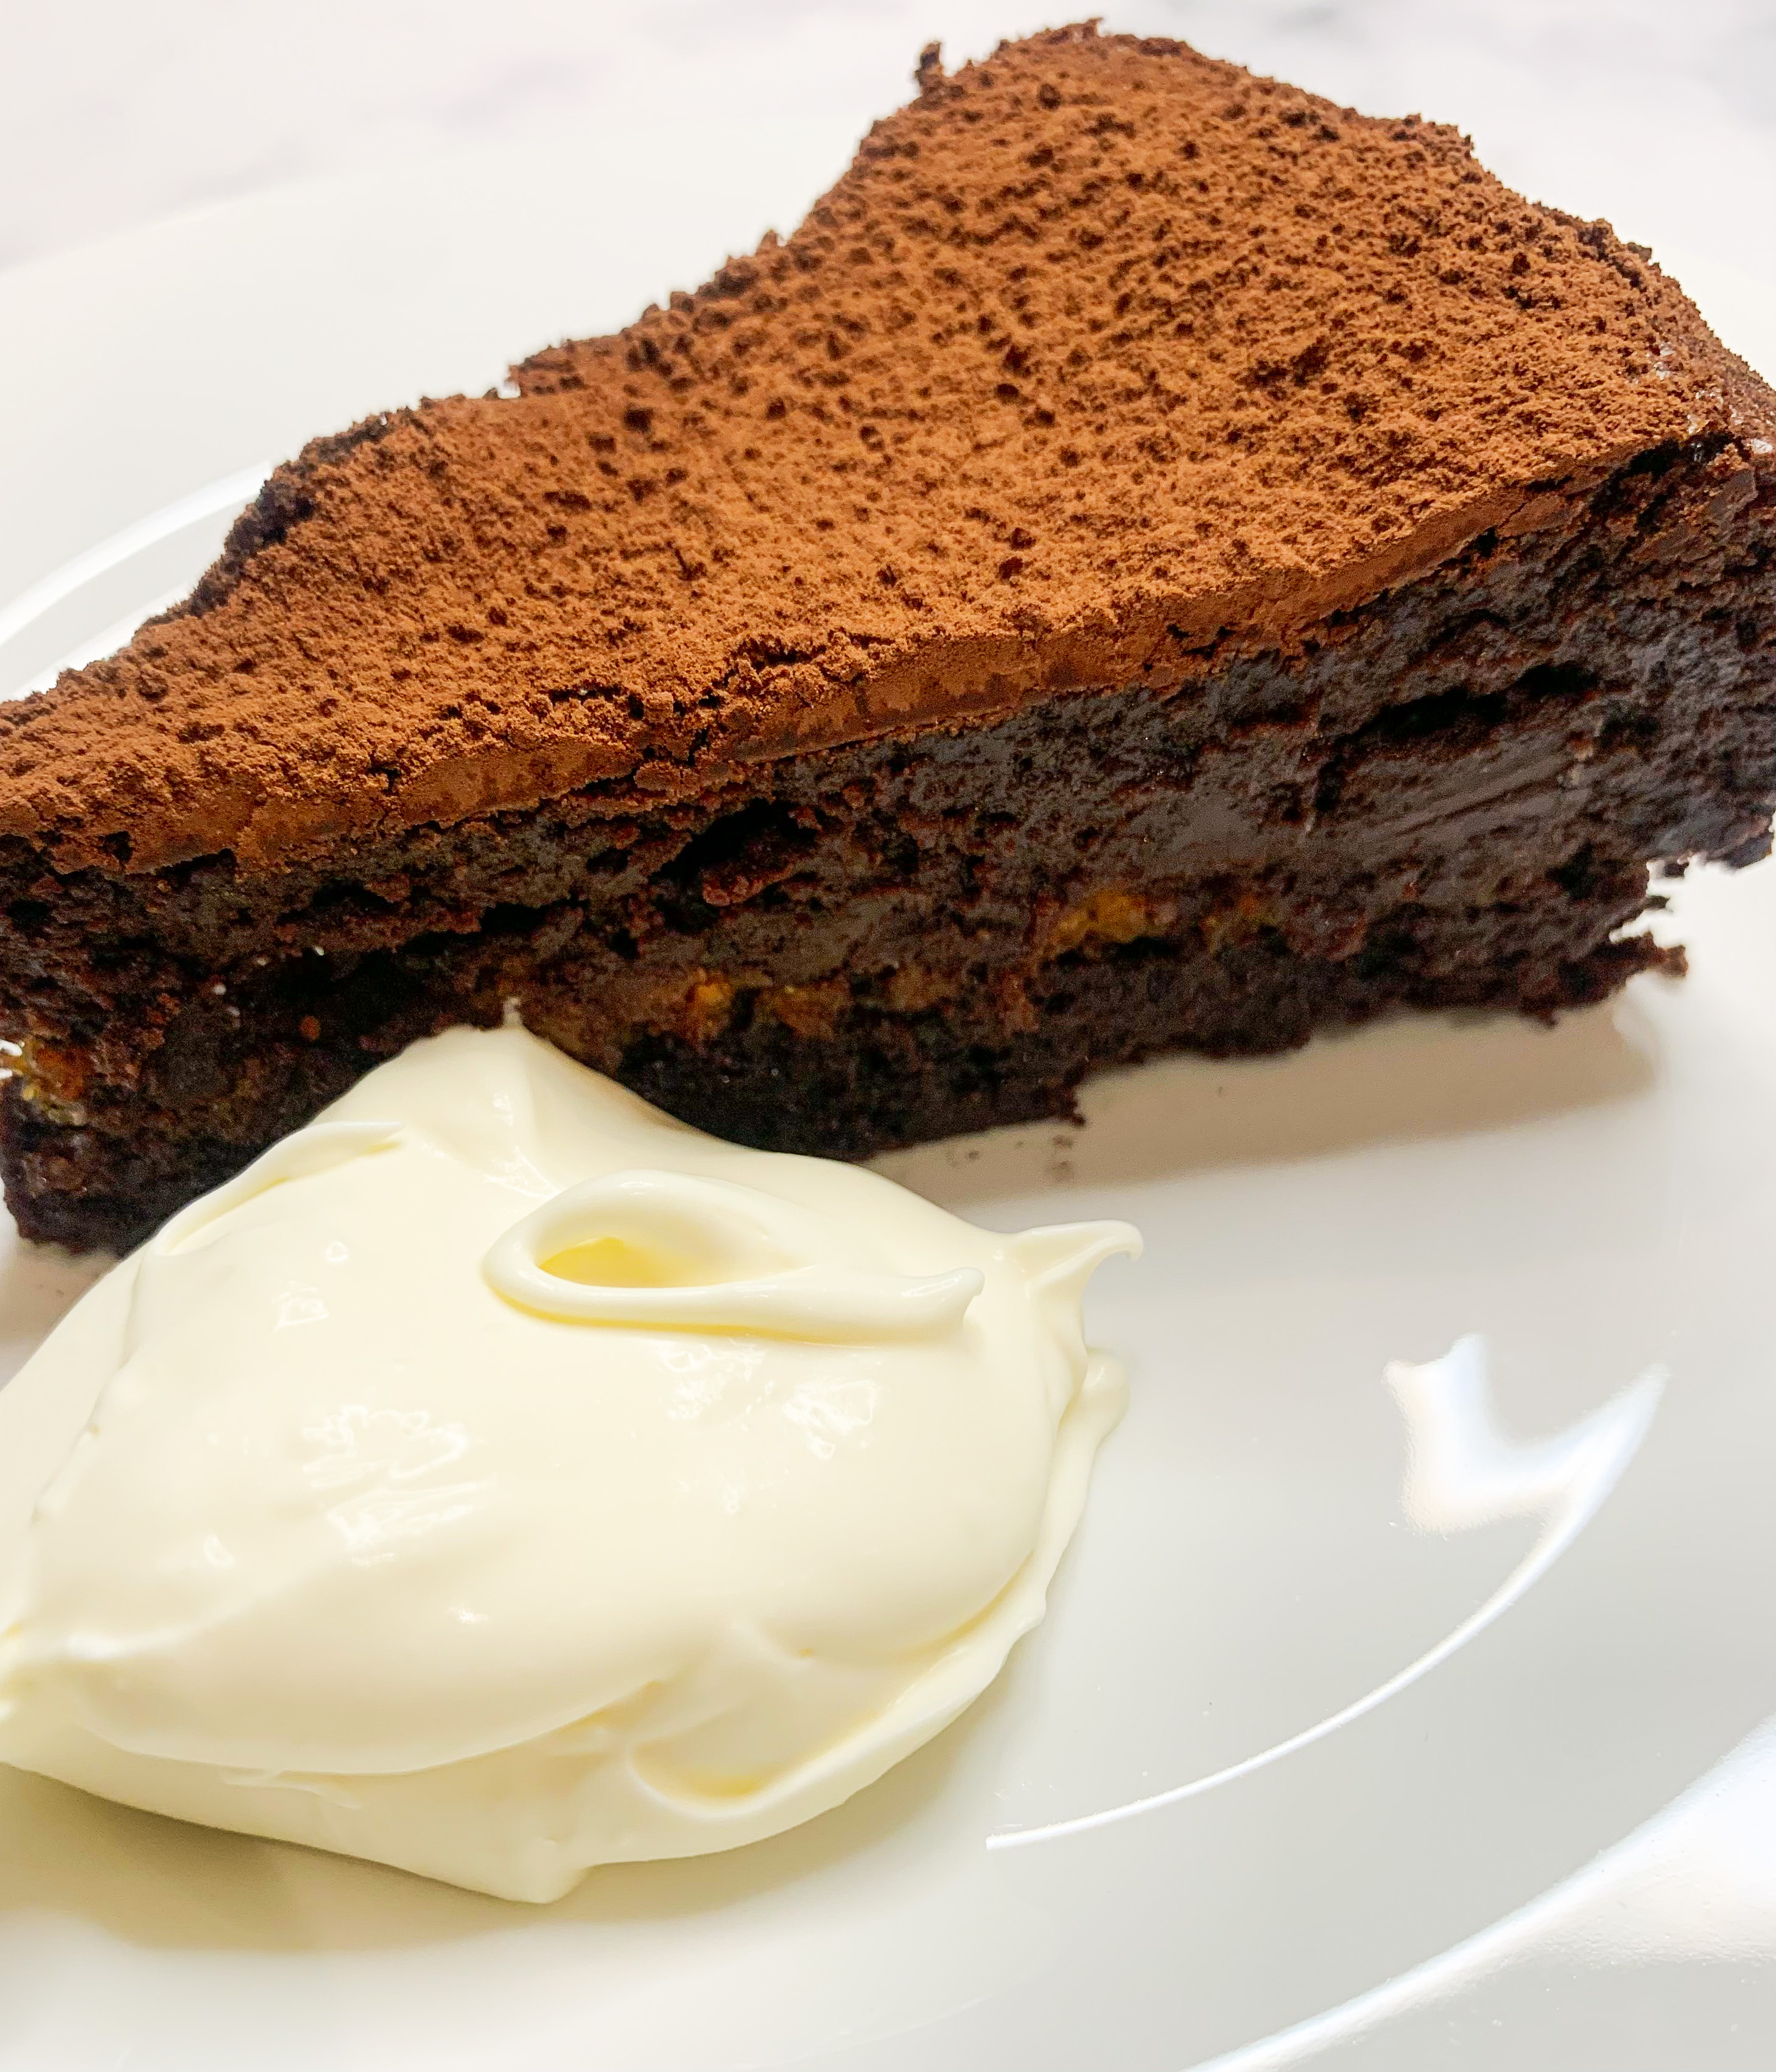
This is no ordinary chocolate cake, it’s particularly indulgent; heaven for chocoholics! It is, needless to say, absolutely delicious – it has a fudgy consistency with Amaretti and chunks of chocolate running through it. The recipe is from Florence Knight’s cookbook ‘One’. Although it’s easy to make, it does require some time as it’s actually baked twice, but believe me it’s worth the wait… you’ll need a dollop of crème fraiche on the side to cut it’s richness!
270g dark chocolate, plus 100g
240g butter
290g Muscovado sugar
5 tablespoons water
5 eggs
115g Amaretti biscuits (gluten-free if required)
A pinch of salt
75ml Amaretto liqueur
Cocoa powder, to dust
Crème Fraiche to serve
*A 23cm round cake tin buttered and base lined with greaseproof paper
- Break up 270g of the chocolate and melt together with the butter in a heatproof bowl over a pan of barely simmering water.
- Meanwhile pour the sugar and water into a small pan over a low heat. Dissolve the sugar and bring the mixture to the boil for a couple of minutes.
- Remove the chocolate and butter from the heat and pour in the sugar syrup. Give it a good stir and leave to one side to cool for 10-15 minutes (you don’t want it so hot that it scrambles the eggs).
- While the mixture is cooling, separate the eggs and bash the Amaretti biscuits.
- Once the mixture has cooled, pour in the egg yolks, adding a pinch of salt and stir to combine.
- Whip the egg whites until they hold soft peaks. Carefully fold them through the chocolate mixture.
- Pour half of the batter into the prepared tin and bake in a preheated oven, 180’c fan, for 30 minutes. Leave the remaining half of the batter in the bowl, cover with cling film and keep in the fridge until needed.
- While the cake is baking pour the Amaretto over the crushed Amaretti and leave them to soften and absorb the liqueur. Smash up the 100g of chocolate into chunks and set aside.
- Remove the cake from the oven and allow to cool in the tin for 10 minutes.
- Scatter the Amaretti and chocolate chunks over the cooled base and spoon over the remaining cake batter. Place back in the oven for 20-30 minutes until a cocktail stick or knife tip comes out almost clean (there will be some melted chocolate over it). Remove from the oven and leave to cool in the tin.
- When the cake is completely cool, dust with cocoa powder, slice and serve with crème fraiche.
Honey & Ricotta Cake
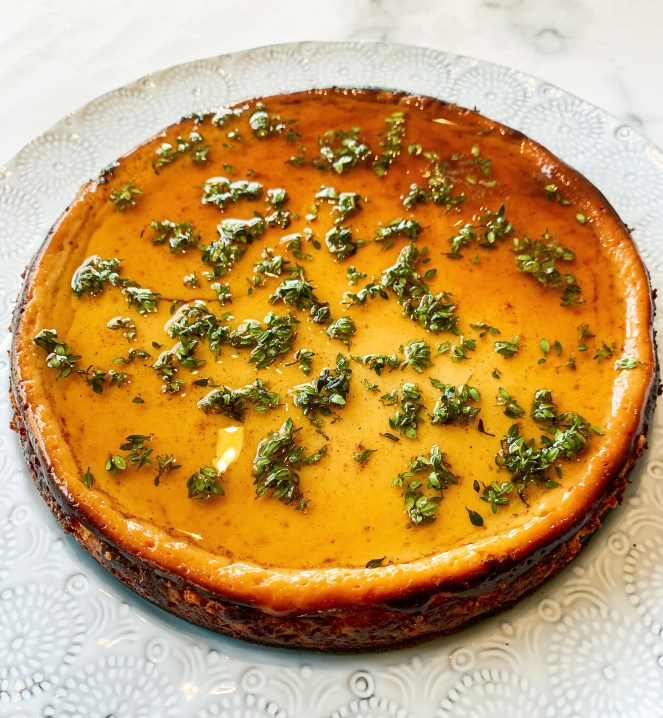
This is one of those cakes which you can eat for breakfast, lunch, afternoon tea or dinner!… It’s a very moist cheesecake, made with creamy ricotta, honey and a sprinkling of thyme leaves. The honey syrup will seem very runny but believe me it works. It’s a Greek recipe from Yasmin Khan’s cookbook ‘Ripe Figs’, you can serve it warm, as a soft pudding or cold when it is set and firm – it’s great with an espresso on the side!
650g ricotta cheese
150ml runny honey
1 teaspoon vanilla extract
1 teaspoon ground cinnamon
1 teaspoon finely grated lemon zest
1 tablespoon lemon juice
3 large eggs, lightly beaten
1 tablespoon cornflour
Salt
For the topping:
6 tablespoons runny honey
2 tablespoons thyme leaves
1⁄8 teaspoon ground cinnamon
*You will need a 20cm springform baking tin, greased with butter and sides lined with baking parchment.
- Place the ricotta in a large bowl and add the honey, vanilla, cinnamon, lemon zest and juice and a pinch of salt. Whisk the mixture until it is smooth and free of any lumps.
- Add the eggs to the cheese mixture along with the cornflour and whisk again.
- Spoon the batter into the prepared tin and bake for 50-60 minutes, 180’c fan, until the top of the cake is golden brown.
- Meanwhile, heat the honey for the topping in a small saucepan with the thyme and cinnamon until it comes to the boil. Switch off the heat and leave the mixture to infuse.
- When the cake is cooked, remove from the oven and cool in the tin for 5 minutes, then gently transfer to a serving plate. Reheat the infused honey until it is loose and pourable, then spoon it over the cake.
- You can now either leave it to cool for 10 minutes before serving it as a warm pudding, or leave it until is completely set and serve it cold.
Brown Butter Blondies
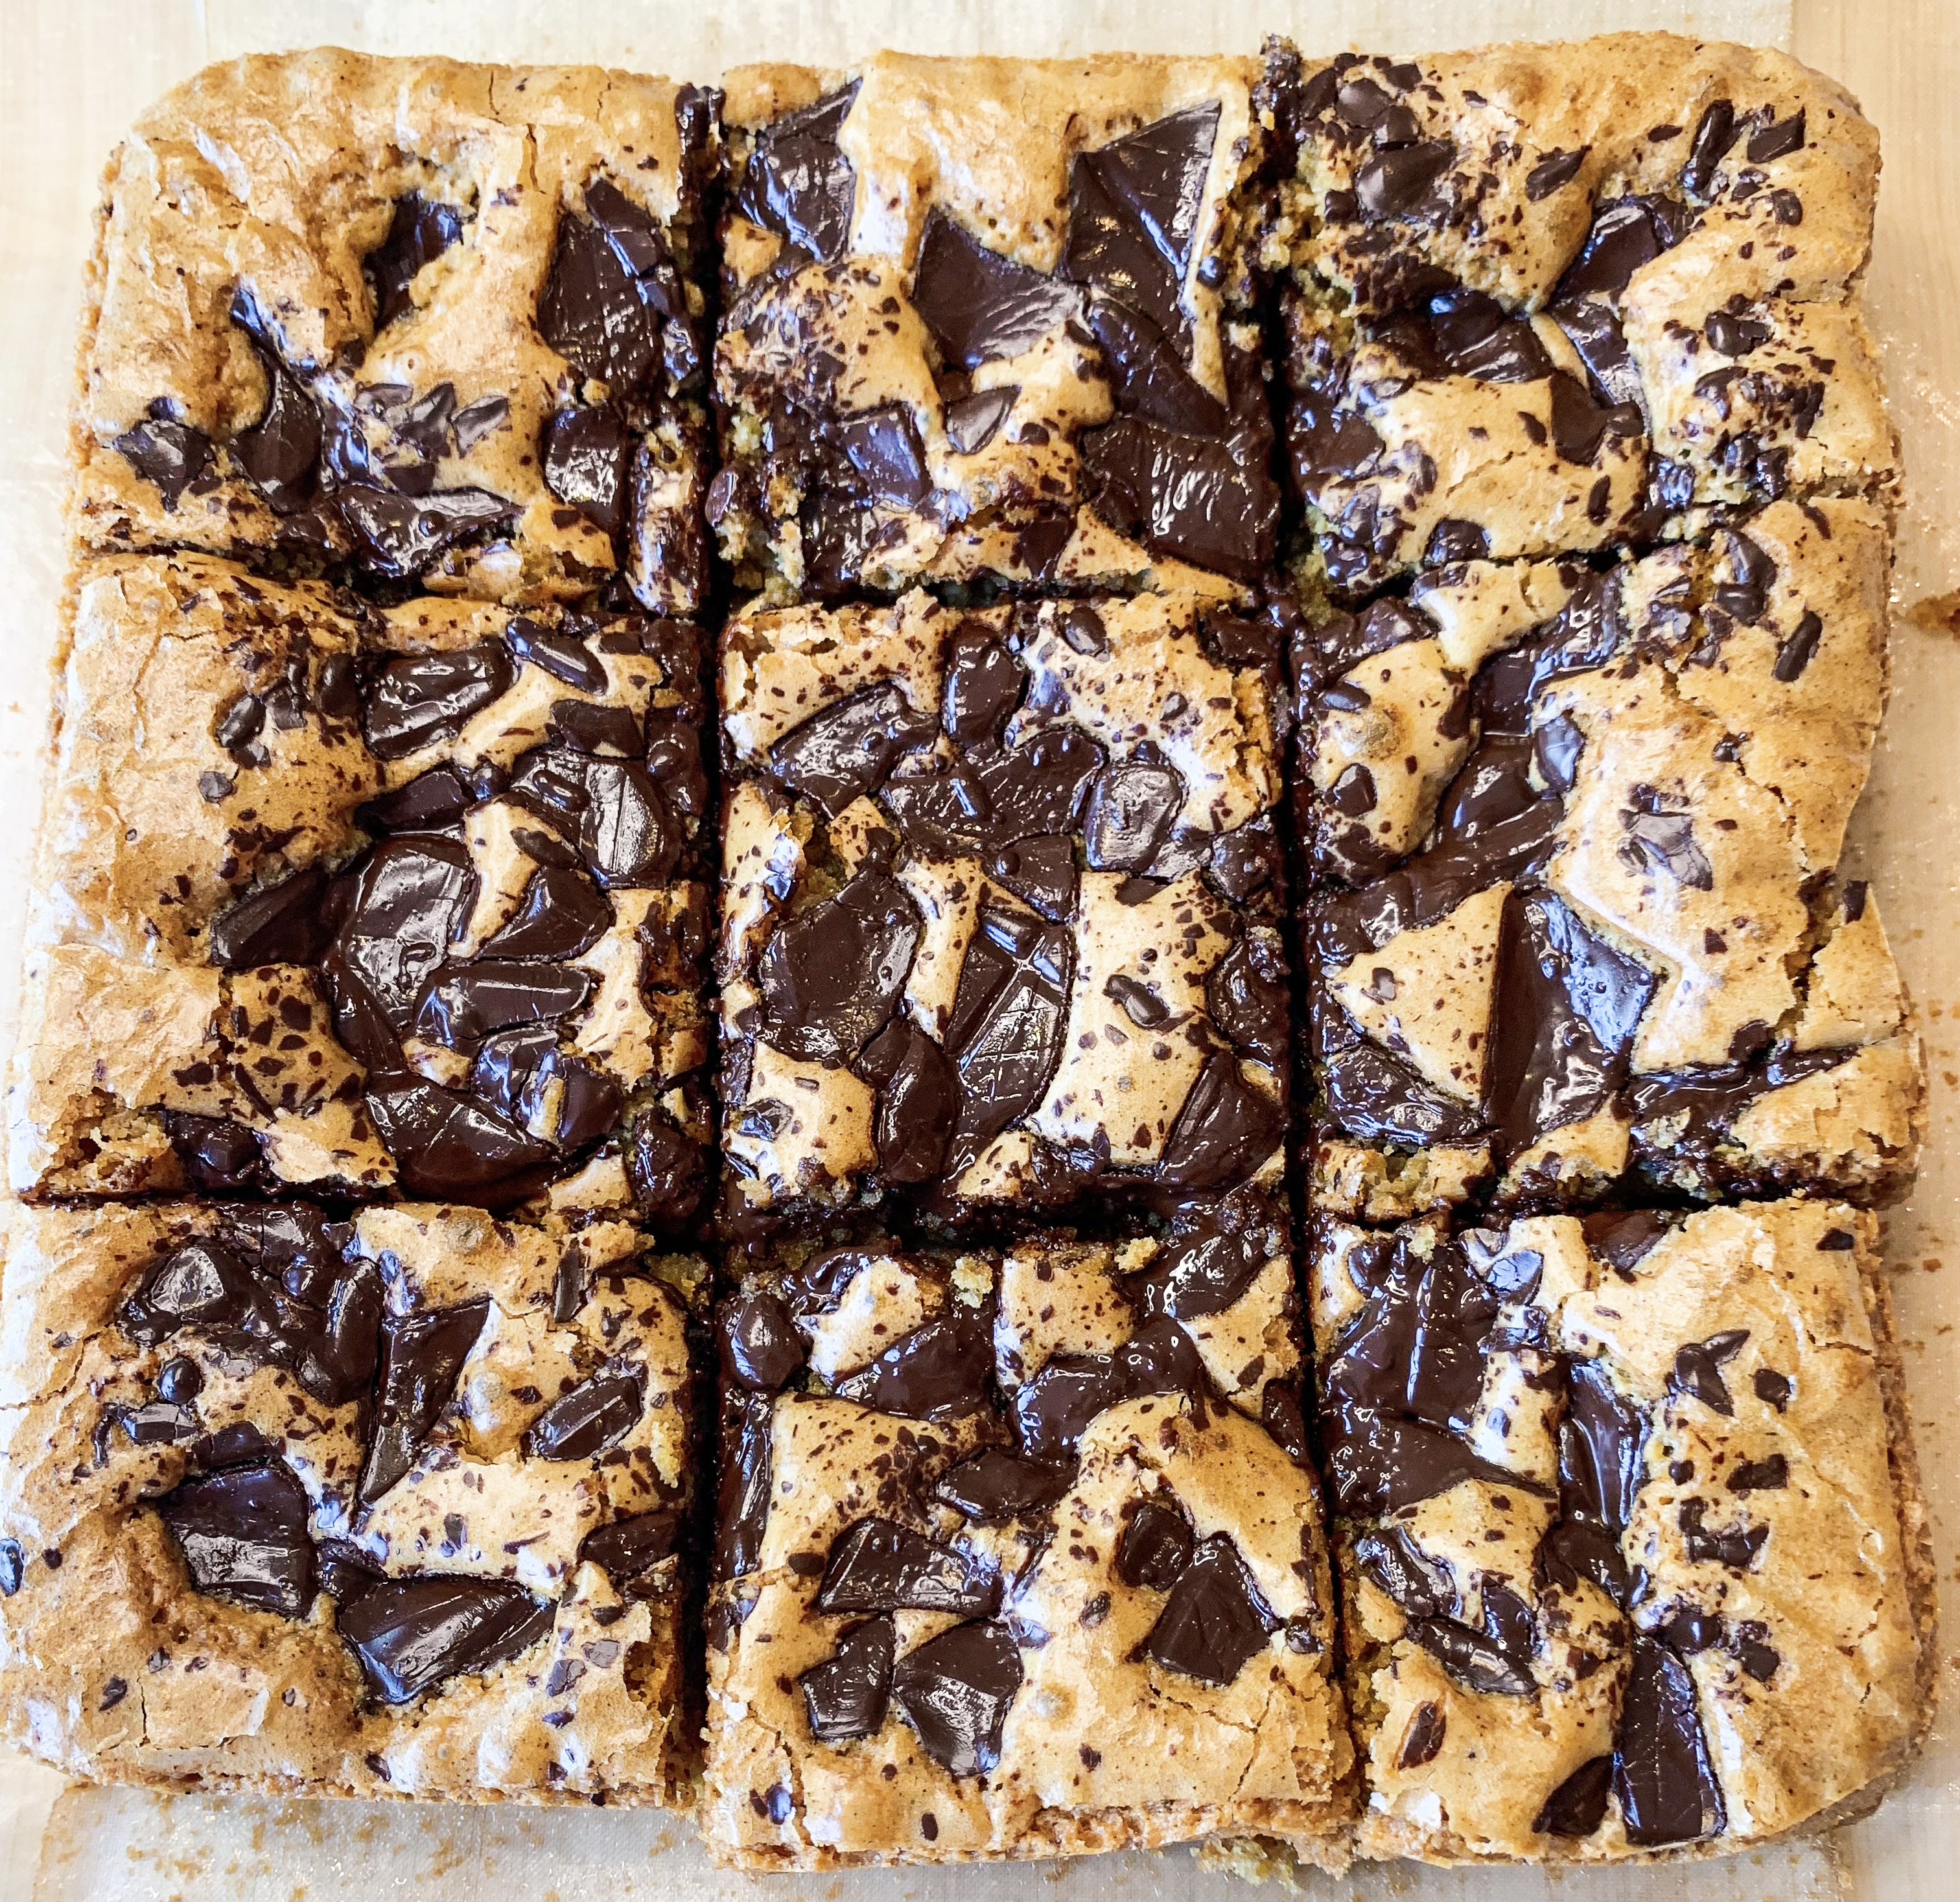
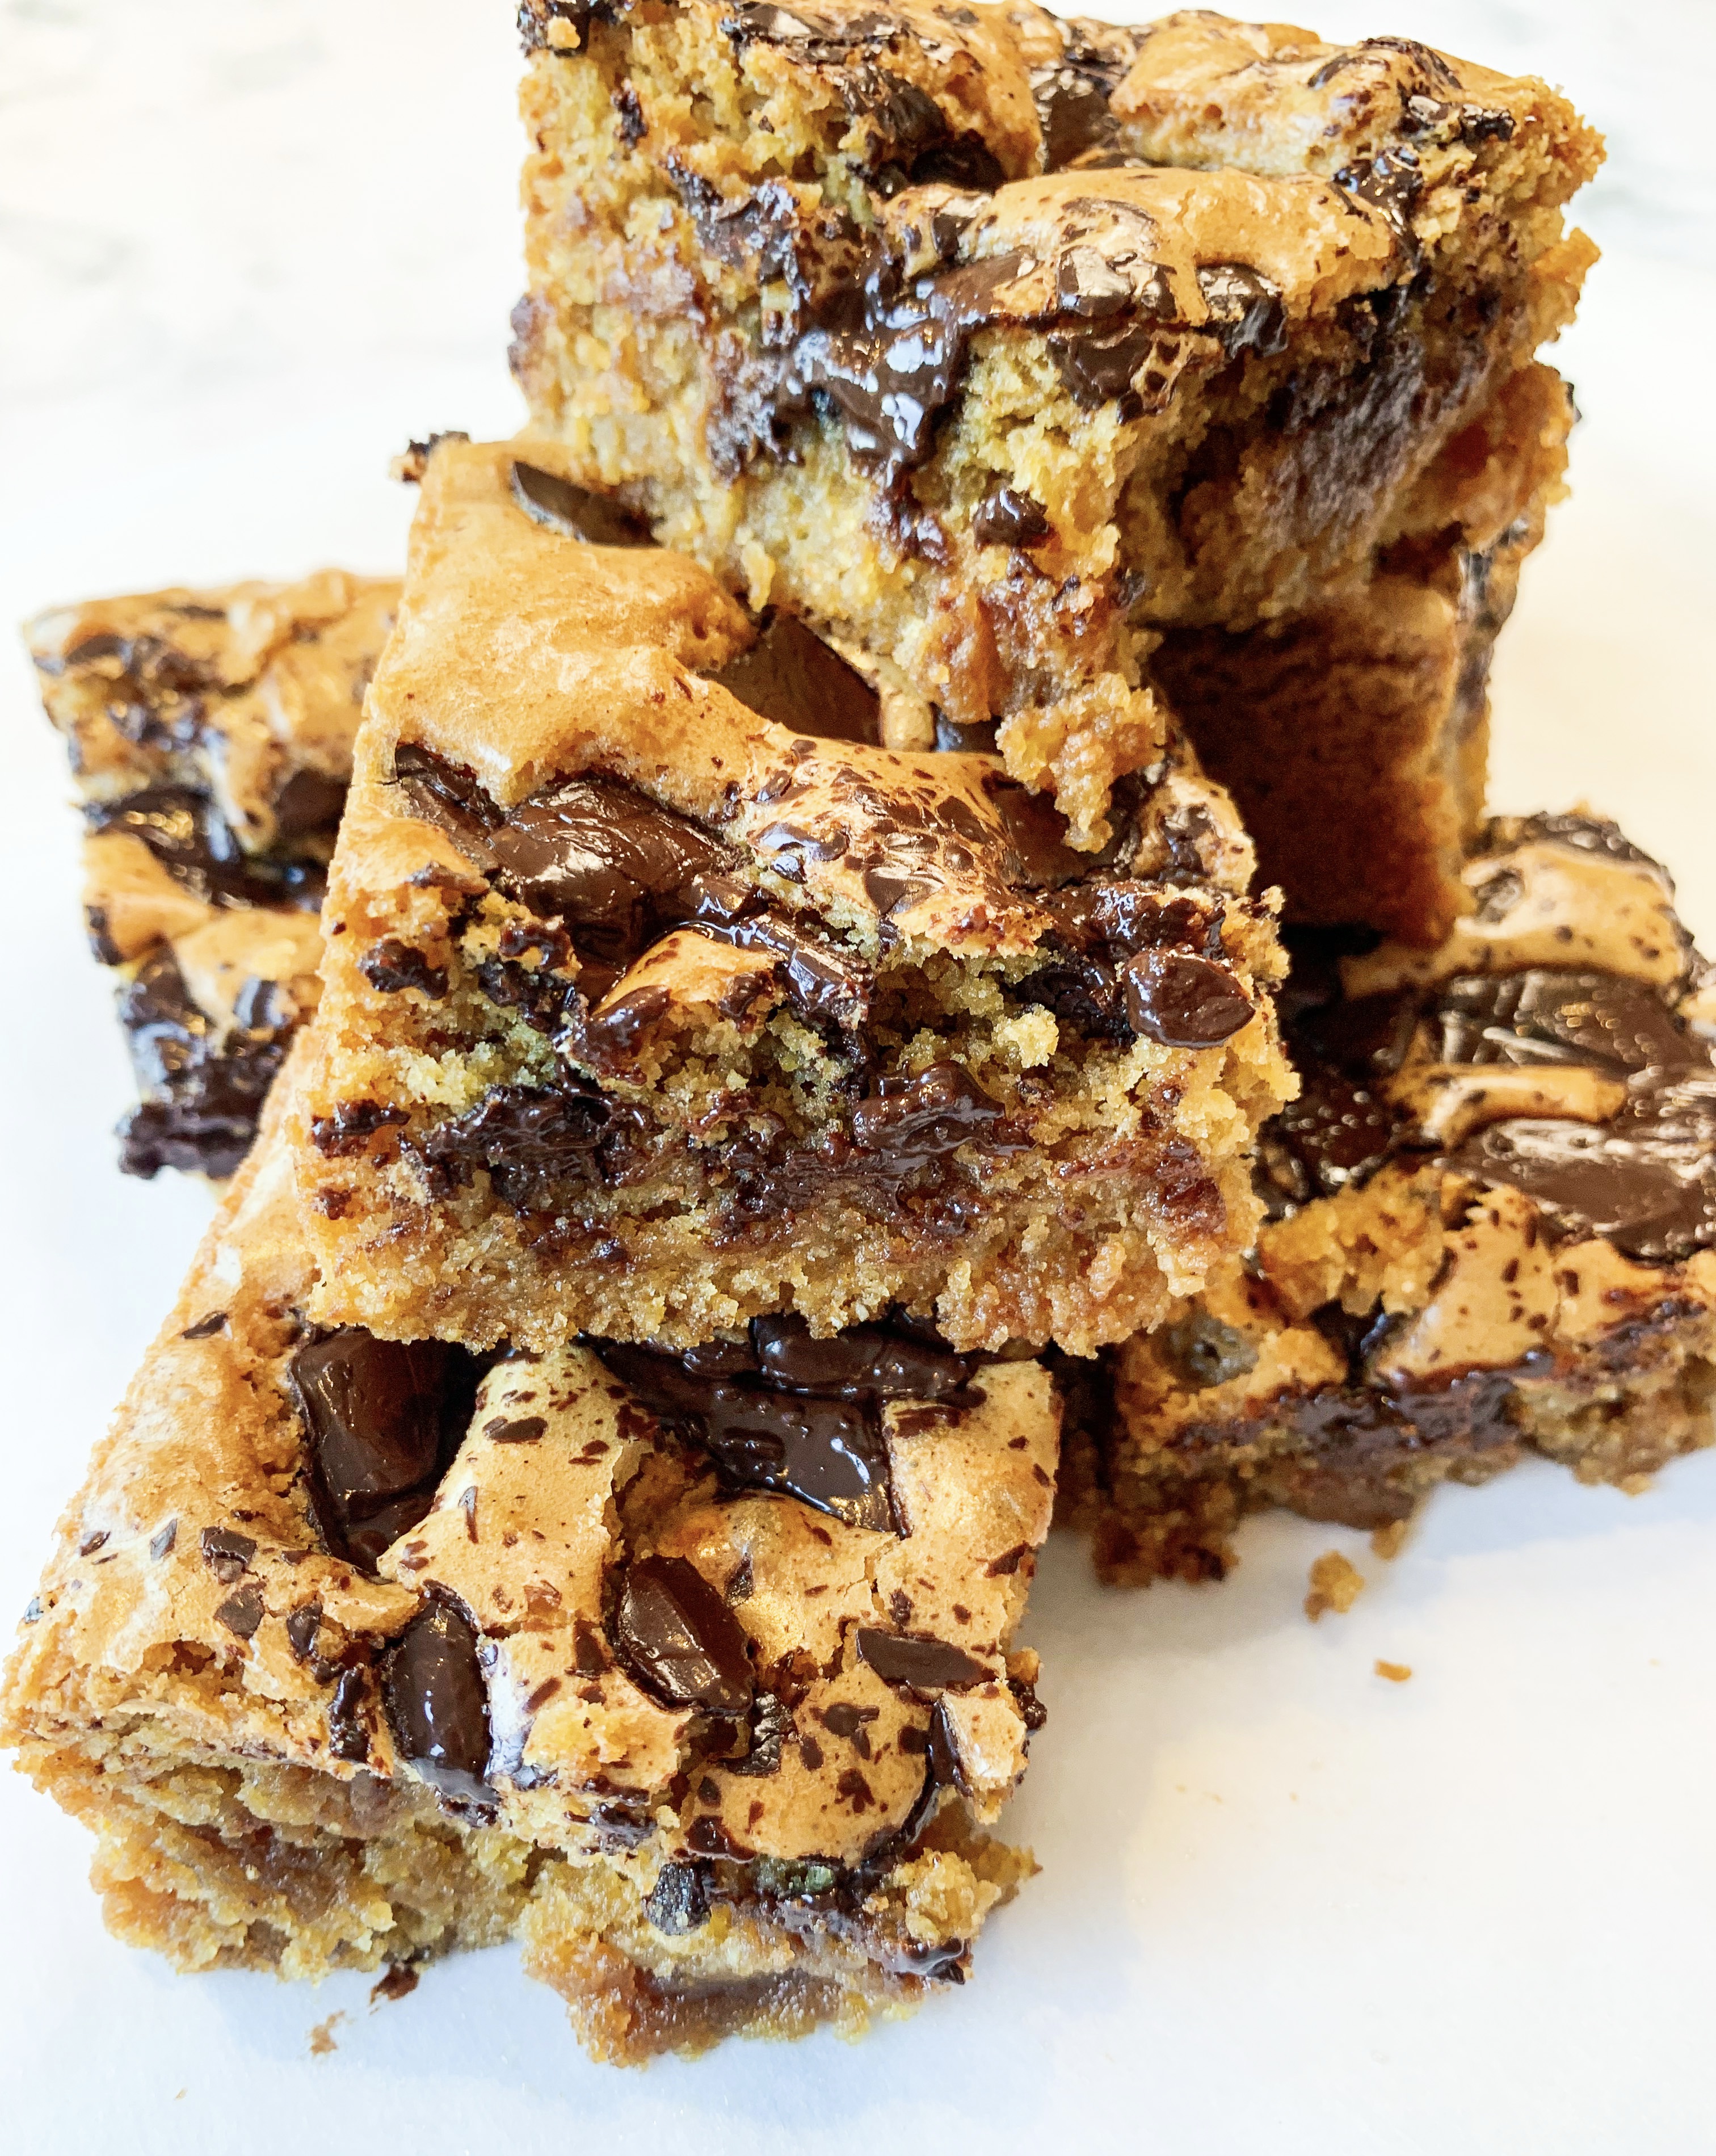
I’ve never been completely sold on ‘blondies’ (‘brownies’ which are made with vanilla instead of cocoa). On the first bite my taste buds cry out ‘but where’s the chocolate?!’… But, on tasting this recipe from cookbook writer Nina Parker, I changed my mind! The brown butter really gives a wonderful depth to the blondie’s vanilla flavour plus they do have some chocolate chips! They are very moreish, particularly if you try one warm, straight from the oven – you have been warned…
250g unsalted butter
240g muscovado brown sugar
2 eggs
2 tablespoons maple syrup
2 teaspoons vanilla extract
1 teaspoon salt
140g plain flour (gluten free if required)
120g ground almonds
1 teaspoon baking powder
100g dark chocolate, roughly chopped (I use Lindt Excellence 70% Cocoa Dark Chocolate)
*8-inch square tin, lined with baking paper
- To make the brown butter, melt the butter in a small saucepan on a medium to high heat. As the butter melts and begins to bubble move it around the pan and continue to cook until the butter starts to darken a little and you smell a hazelnut aroma – it will take around 4 minutes. Remove from the heat and transfer to a bowl and allow to cool.
- In a bowl mix together the flour, ground almonds, baking powder and sea salt. Put to one side.
- In another bowl combine well the muscovado sugar, eggs, maple syrup and vanilla extract. Slowly add this mixture to the cooled brown butter and mix to form a smooth, silky batter.
- Finally, stir in the flour mixure and mix until everything is incorporated. Transfer to the lined baking tin and sprinkle over the chopped chocolate. Bake in a preheated oven, 160’c fan, for 35 minutes, until a skin has formed on top but the inside will still be gooey – it will firm up as it cools.
- Allow to cool in the tin (if you can resist!) before slicing into squares. Enjoy!
Florentine Meringue Cake (Serves 6-8)
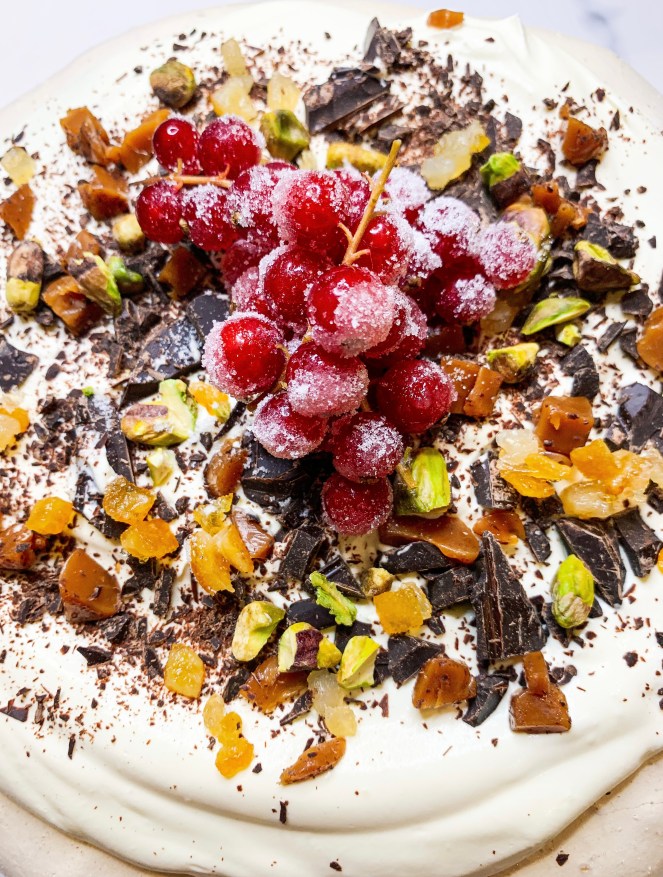
This is a real show-stopping dessert and one which is perfect for the Christmas season, but delicious anytime of the year! It’s my interpretation of a recipe I found in Skye McAlpine’s cookbook ‘A Table for Friends’ which layers meringue with a marron glacé-cream filling. I found that this version was overly sweet, plus it seemed a rather extravagant use of the expensive candied ‘marrons’; McAlpine does suggest similar additions such as candied peel, so I started playing around with different cream-filling combinations. I can proudly say I came up with the ultimate meringue cake one which, as its name suggests, is inspired by a favourite of mine, florentines! Despite being incredibly easy to make it looks incredibly impressive on the dinner table; topped with redcurrants frosted with sugar it makes the perfect winter dessert – a fantastic centrepiece for a Christmas celebration!…
300g caster sugar
6 egg whites
2 teaspoons cornflour
1 teaspoon white wine vinegar
4 tablespoons icing sugar
700ml double cream
200g plain dark chocolate, roughly chopped
40g candied peel, chopped
20-30g soft caramel sweets (I use Werther’s Soft Caramels), roughly chopped
30g pistachio nuts, roughly chopped
To decorate:
Redcurrant sprigs
3 tablespoons caster sugar
*You will need three baking trays and grease-proof paper.
- On three separate pieces of grease-proof paper draw a circle roughly 23cm in diameter (you could trace around a cake tin). Place each piece of paper on separate baking trays and set aside.
- Whisk the egg whites until they form soft peaks, then gradually whisk in the caster sugar. Once the egg whites are stiff and glossy gently fold in the cornflour and vinegar. Divide the meringue evenly between the baking trays, using the circles as a guide.
- Bake in a preheated oven, 130’c fan, for 1 hour, then switch off the oven and leave the meringues there to harden for another hour.
- Meanwhile, prepare the frosted redcurrants (if using to decorate). Simply dip the redcurrant sprigs in water, then gently roll in the caster sugar and set aside to dry out.
- When you are ready to serve the meringue cake, sift the icing sugar into the cream and whip until firm but still silky.
- Set one of the meringue discs on a serving plate and top with one-third of the cream and sprinkle over a third of the chopped plain chocolate, candied peel, caramel and pistachios. Top with the second meringue disc and repeat. Finally, top with the third meringue, followed by the remaining cream, chocolate, candied peel, caramel and pistachios.
- Finally, if using, decorate the top of the cake with the frosted sprigs of redcurrants.
- Chill in the fridge until ready to serve, it will keep for up to 12 hours.
Absolutely Almond Slices
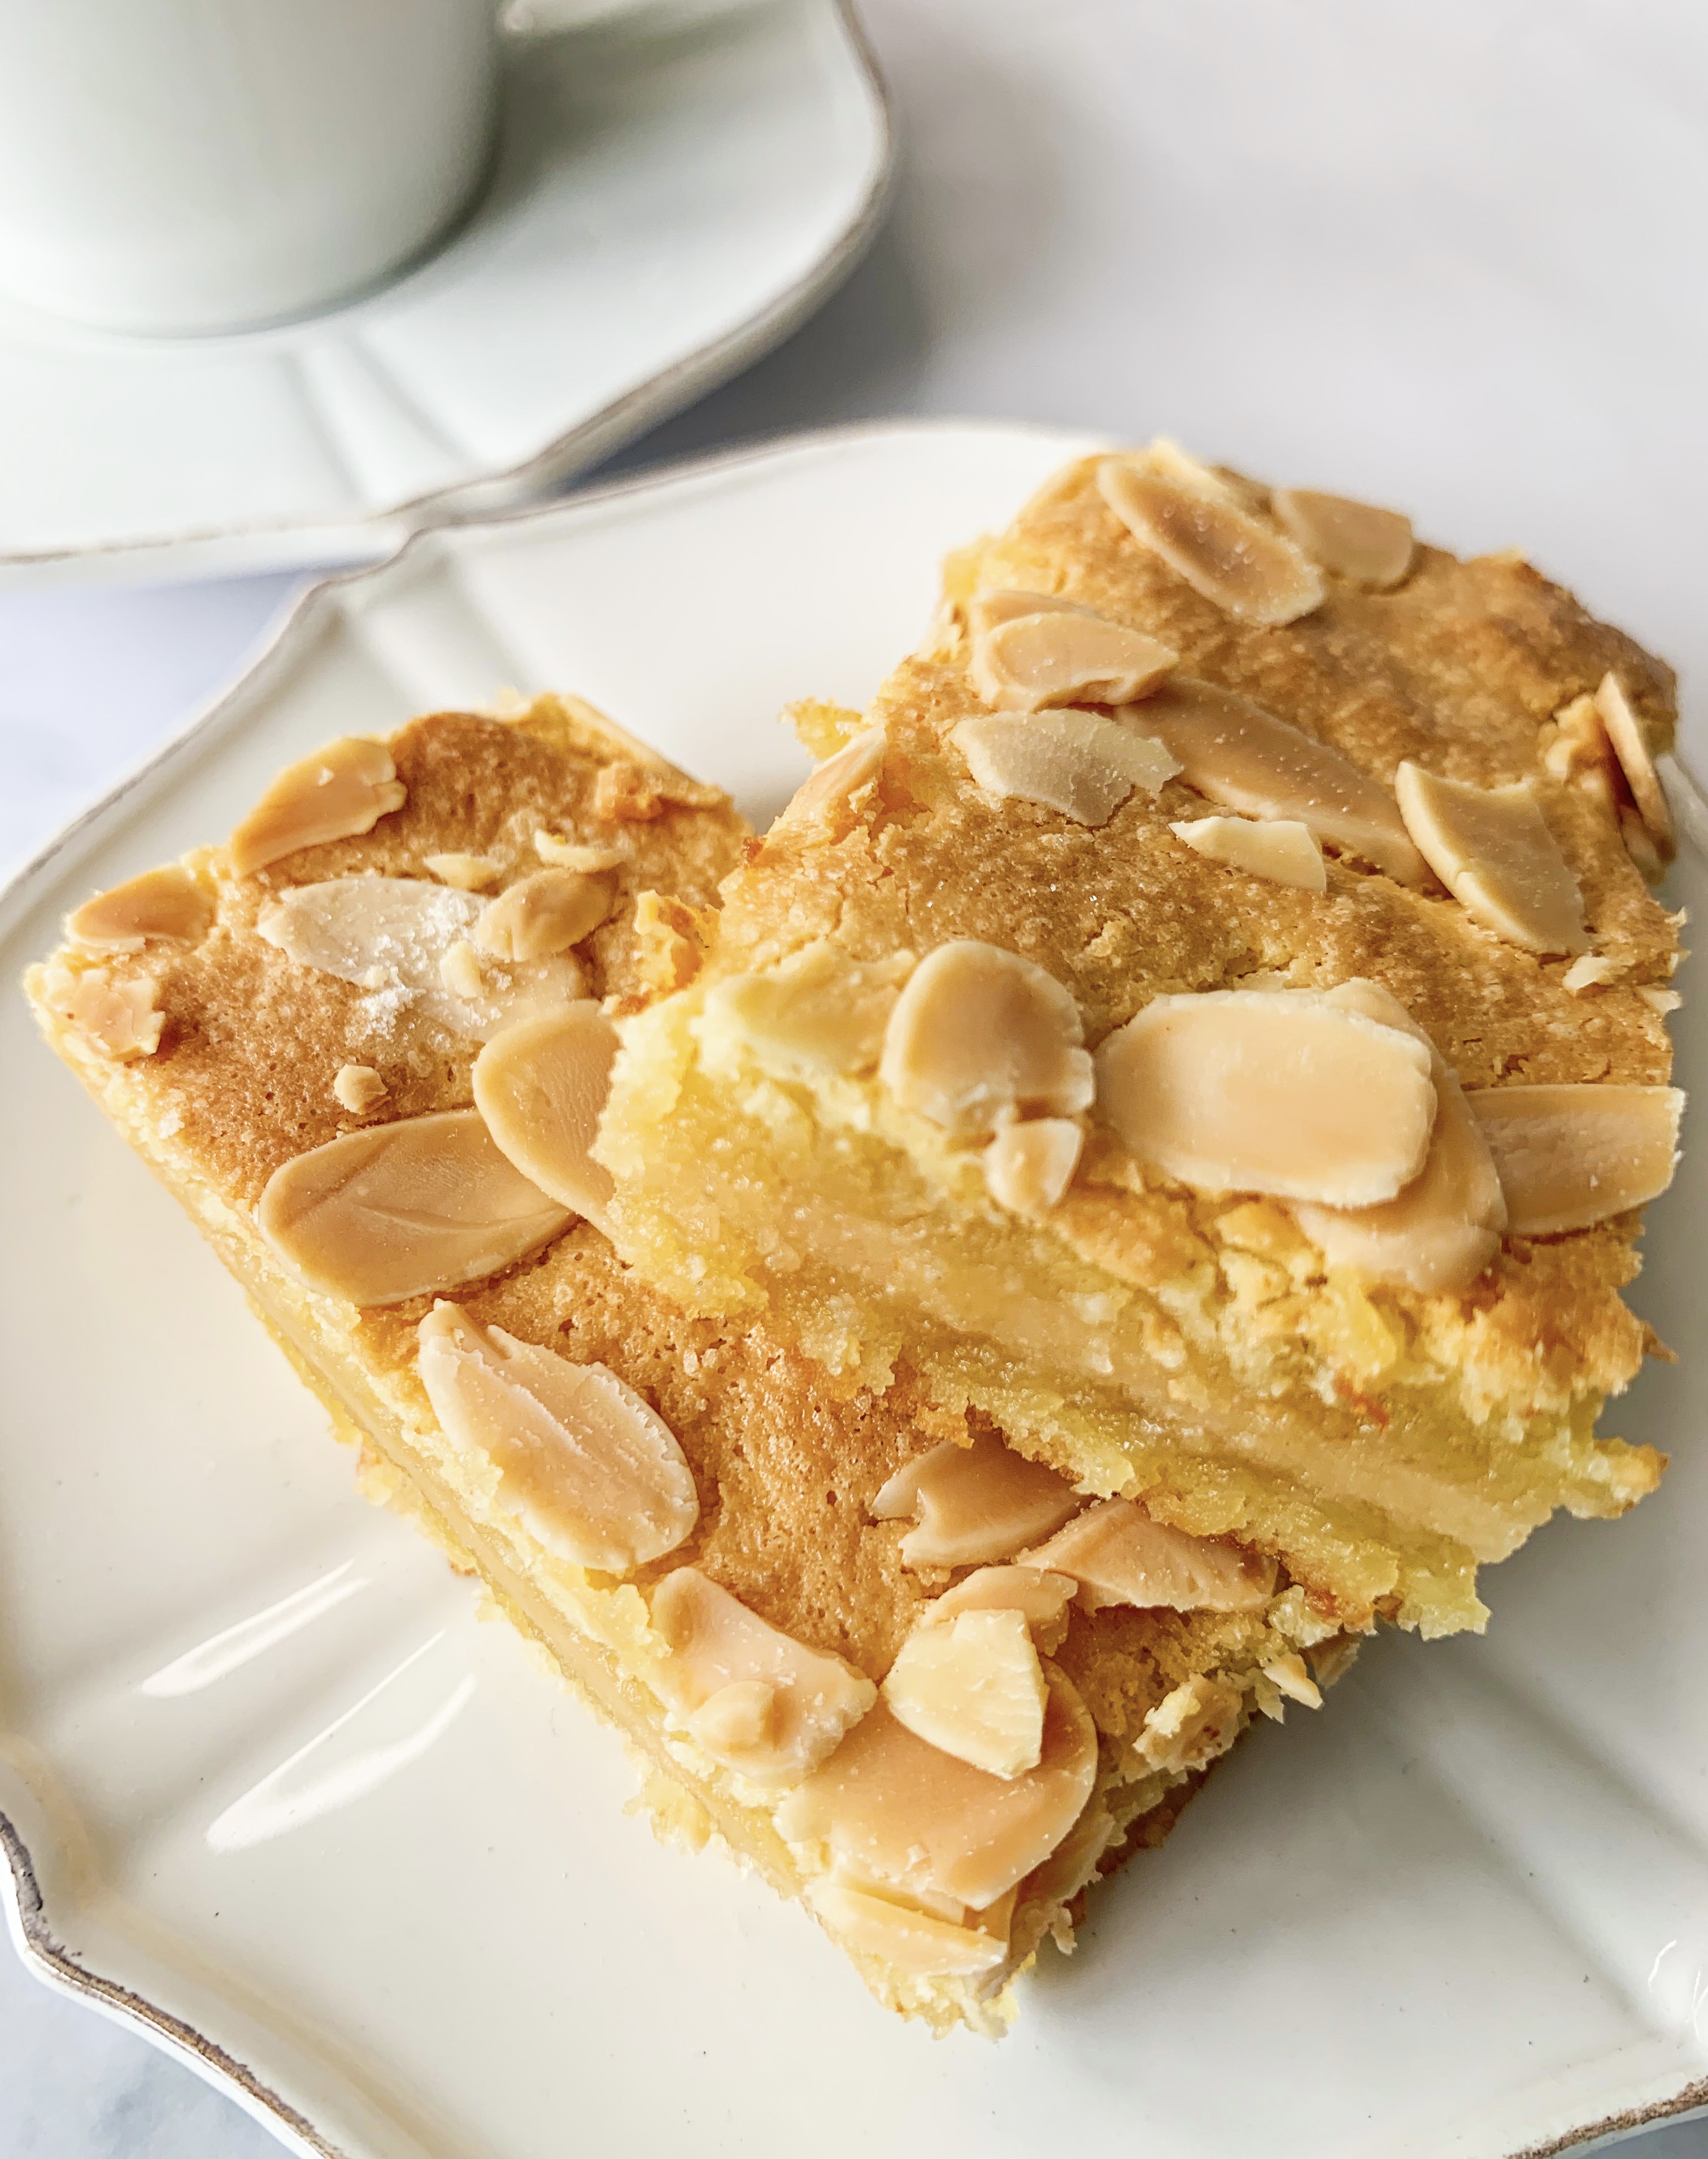
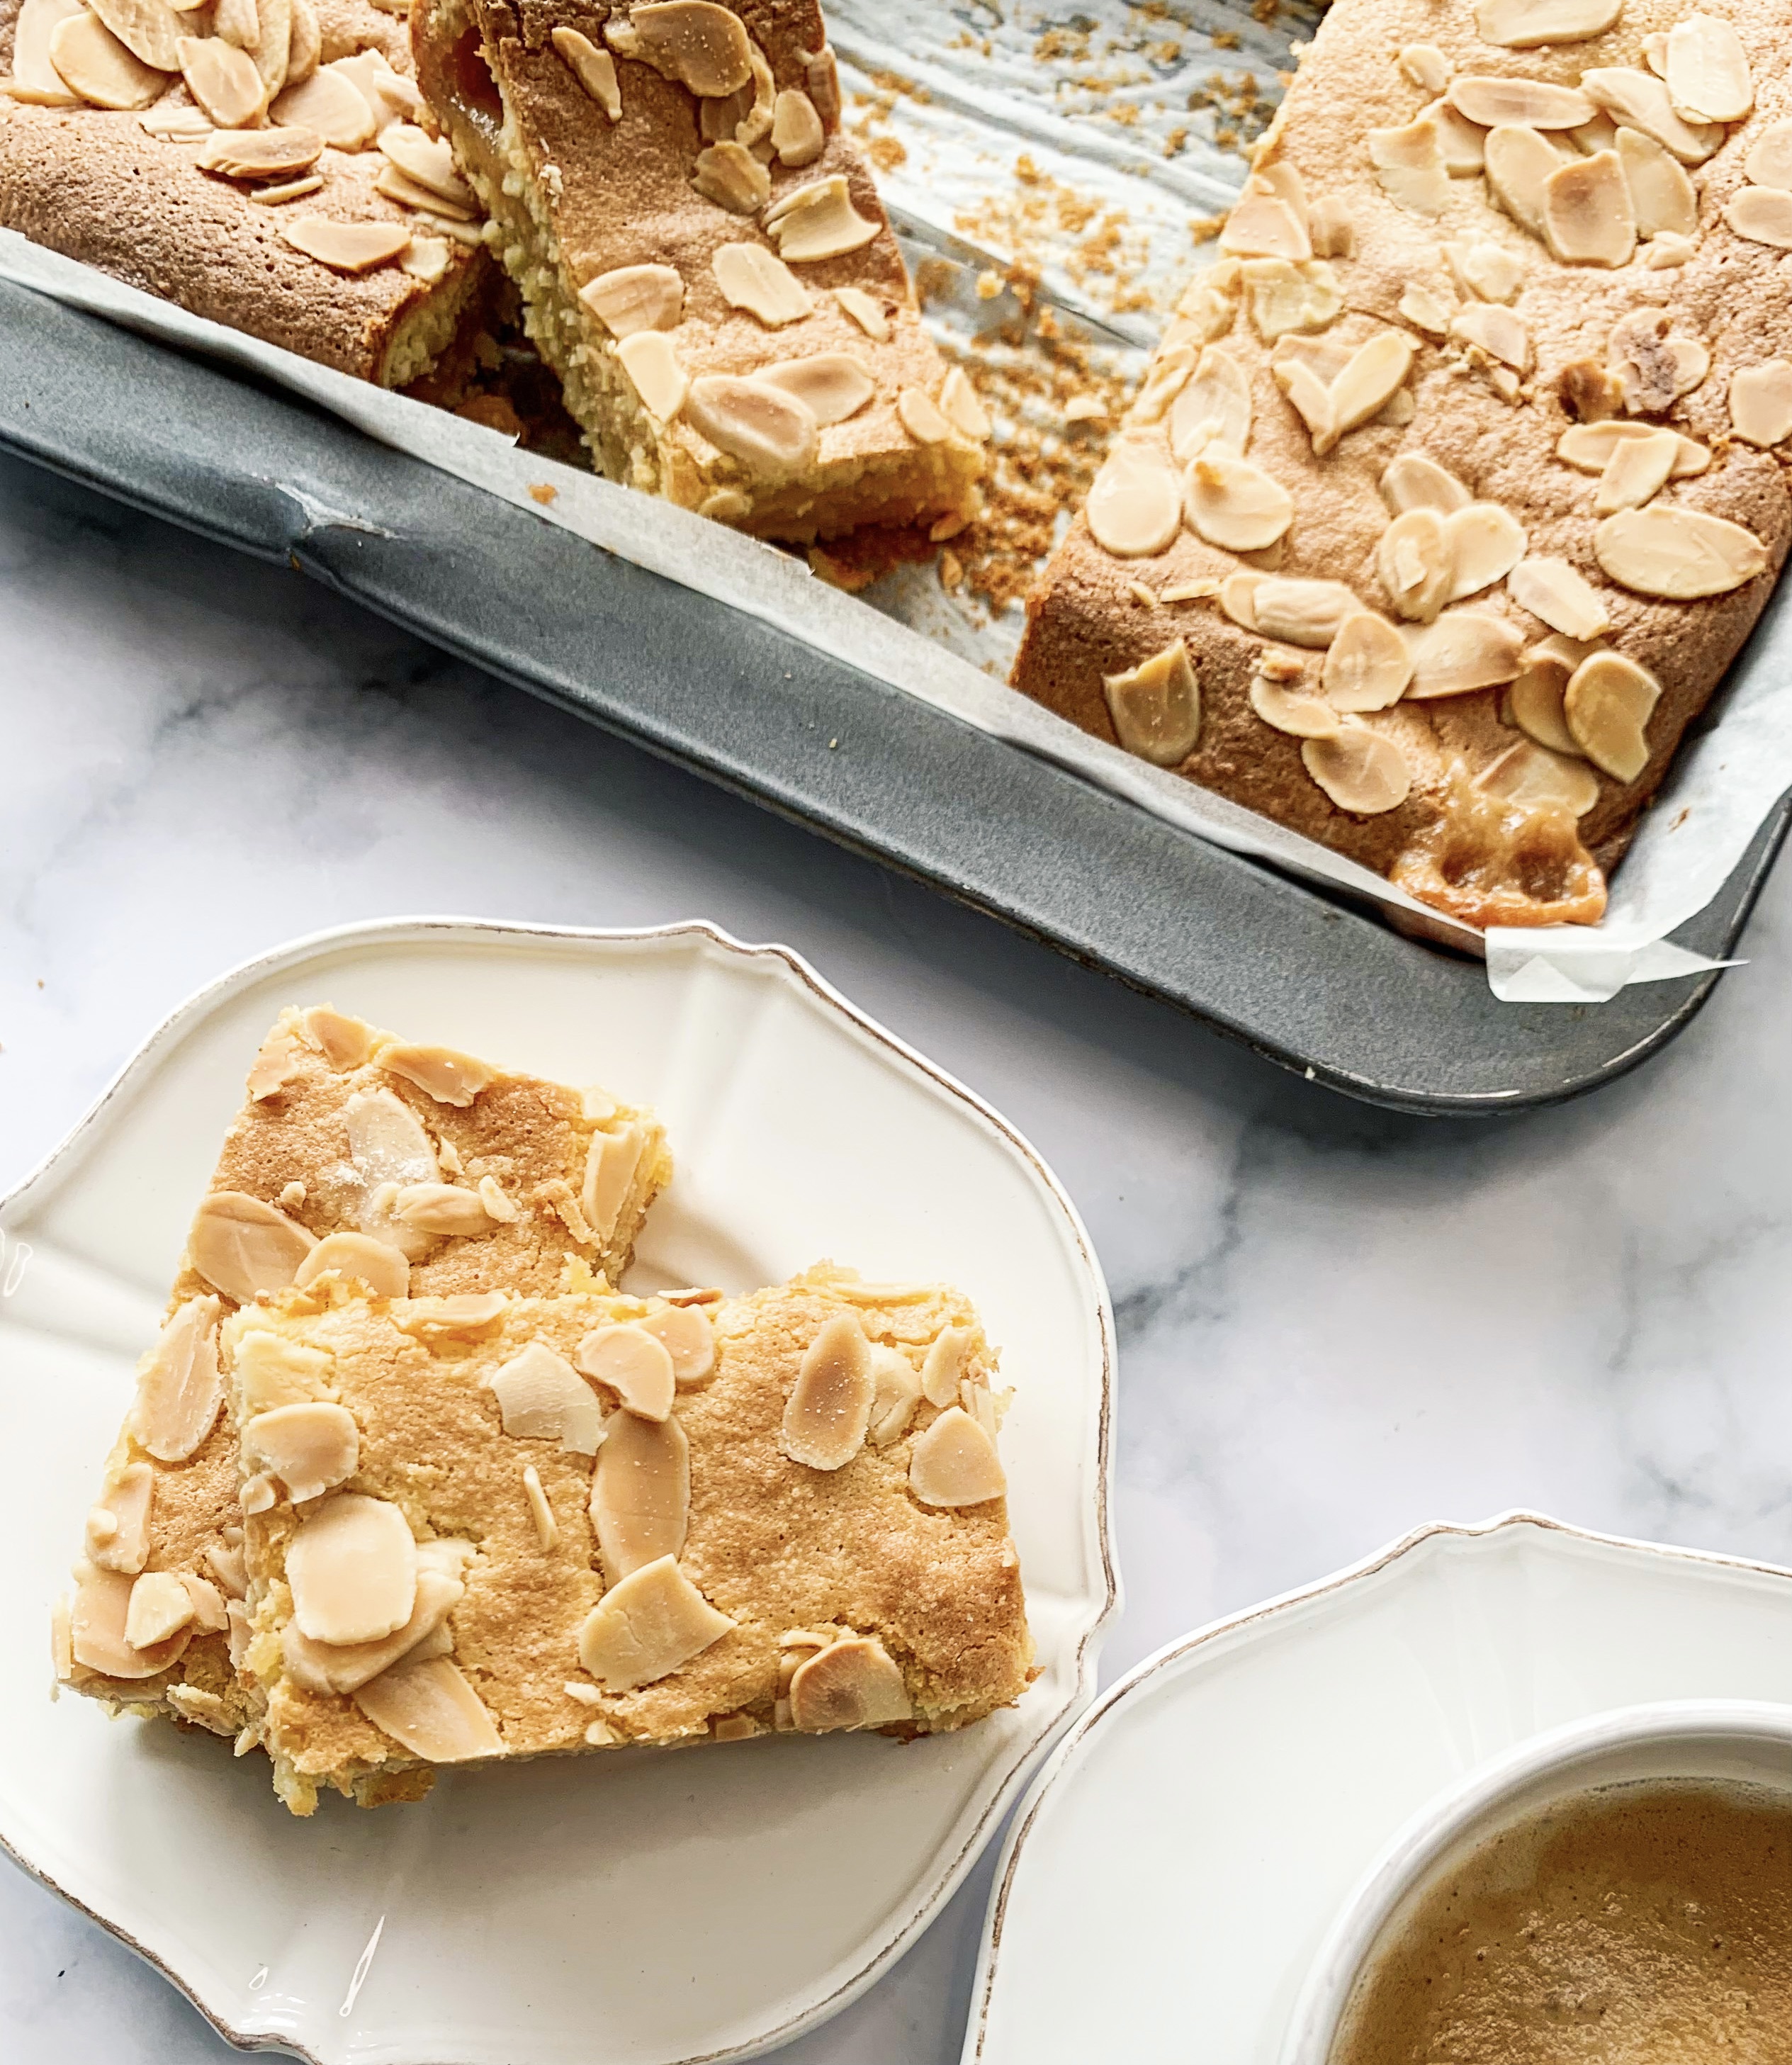
If like me you love almonds and marzipan then you will definitely love these! My friend introduced them to me – she was so adamant that I should try them that she cooked me some. I was sold. The recipe on paper is super easy, but I will warn you that rolling out the marzipan requires some elbow grease; I must admit that I nearly gave up – but believe me it’s worth it! They are super sweet so are best cut into small slices (although I ate many more than one!). They are fantastic with an espresso or a strong cup of tea…
250g butter, melted
400g marzipan
4 eggs
350g ground almonds
225g caster sugar
4 teaspoons almond extract
Zest of orange (optional)
50g flaked almonds
(Baking tin – 30 x 23cm, lined with baking parchment)
- Knead the marzipan to soften it. Then roll it between two pieces of baking parchment; I found that starting off this way was easiest and then finished rolling without the top sheet of parchment. Roll to a rectangle that will fit the baking tin.
- Put the eggs into a large mixing bowl. Add the ground almonds, sugar and almond extract and then add the melted butter. Beat with an electric mixer at high speed until smooth and creamy. Add the grated orange zest if using and mix well.
- Pour half of the mixture into the prepared baking tin and smooth over with a palette knife. Gently place the rolled-out marzipan on top then pour over the remaining mixture, smoothing it over, taking care to cover all of the marzipan.
- Bake in a preheated oven, 180’c fan, for 30 minutes until a light golden colour.
- Allow to cool in the tin before cutting into small slices. (Keeps for up to five days in an airtight tin).
‘The Worlds Best Chocolate Cake’
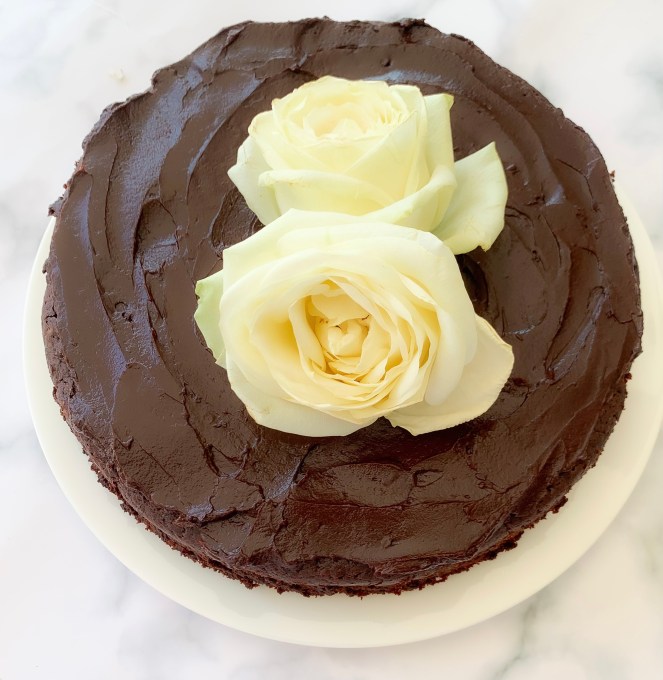
This recipe is from Ottolenghi’s cookbook ‘Sweet’. Originally when I bought this book I somehow overlooked it (he calls it his ‘Take-Home Chocolate Cake’); it only came to my attention when a friend told me that it’s also known as ‘The Worlds Best Chocolate Cake’. Well how could I not try it?… And yes, it is very, very good; depending on my mood it’s my ‘new’ favourite chocolate cake – there are so many! It’s great as a celebratory cake (topped with a rose as in the photo!); in fact I made it just recently for my Dad’s 90th birthday. It’s extremely easy to make, it’s a melt and mix recipe, you don’t even need a food processor and, if required, it works beautifully with gluten-free flour (I use Doves).
For the cake:
250g unsalted butter, at room temperature and cut into 2cm cubes, plus extra for greasing
200g dark chocolate, chopped into 2cm pieces (I use Lindt Excellence 70% Cocoa Dark Chocolate)
1½ tsp instant coffee granules, dissolved in 350ml boiling water
250g caster sugar
2 large eggs, lightly beaten
2 tsp vanilla extract
240g self-rising flour (gluten-free if required)
30g Dutch-processed cocoa powder, plus 1½ teaspoons, for dusting
1/4 tsp salt
For the chocolate ganache:
200g dark chocolate, broken or chopped roughly into 2cm pieces (I use Lindt Excellence 70% Cocoa Dark Chocolate)
200ml double cream
1 tbsp golden syrup
1 tbsp unsalted butter, softened
(*23cm round cake tin, greased and base lined with greaseproof paper)
- Place the butter, chocolate and hot coffee in a large heatproof bowl and mix well until everything is melted, combined and smooth. Whisk in the sugar by hand until dissolved. Add the eggs and vanilla extract, and whisk again until thoroughly combined and smooth. Sift the flour, cocoa powder and salt together into a bowl and then whisk this into the melted chocolate mixture. The batter here is liquid, don’t worry this is how it should be!
- Pour the batter into the prepared tin and bake in a preheated oven, 150’c fan, for 1 hour, or until the cake is cooked and a skewer inserted into the centre comes out clean or with just a few dry crumbs attached. The top will form a crust and crack a little, but don’t worry, this is expected and it will be covered by the ganache! Leave the cake to cool for 20 minutes before removing from the pan, then set aside until completely cool.
- To make the chocolate ganache, place the chocolate pieces in a food processor, process until fine and set aside. Combine the cream and golden syrup in a small pan and place over medium-high heat. As soon as bubbles begin to appear (just before it comes to a boil), remove from the heat. Get the food processor running again, with the chocolate still inside, and pour in the hot cream in a steady stream. Process for 10 seconds, then add the butter. Continue to process until mixture is shiny and smooth. (You can also make the ganache by hand; just make sure the chocolate is chopped fairly finely before adding the cream mixture. Stir with a wooden spoon until almost melted, then add the butter. Stir again until the ganache is smooth.)
- Use a rubber spatula to scrape the ganache into a bowl and cover with plastic wrap, with the plastic actually touching the top of the ganache. Set aside until it has set to the consistency you want. If you want a thin layer to spread over the cake, it can be poured over while liquid so that you get an even, light and shiny coating. For a thicker ganache with a spreading consistency, leave it for about 2 hours at room temperature.
- Finally, peel the parchment from the cake and discard. Transfer to a serving platter and spread the ganache over the top of the cake. (This cake will keep well for 4 to 5 days in an airtight container, if refrigerated bring the slices to room temperature before tucking in!)
Salted Caramel Bourbon Ice Cream (No-Churn)

This Salted Caramel Bourbon ice cream is a favourite of mine – Nigella Lawson deserves a round of applause for this recipe! It really is one of the best flavours I’ve come across. The Bourbon not only gives it a wonderful taste but makes it incredibly soft. Meanwhile, by using ‘Carnation Caramel’ rather than natural condensed milk you get the additional flavour of caramel, plus there is that extra pinch of salt – all in all, it’s heavenly! And it’s so easy to make…what are you waiting for?!…
(Scroll down for Salted Honey Ice Cream, Coffee & Cardamom Ice Cream and Strawberry Ice Cream – these are also easy, no-churn recipes!)
397g can of Carnation Caramel (or dulce de leche)
300ml double cream
1-2 teaspoon sea salt flakes
2-3 tablespoons Bourbon
Pecan nuts, chopped to serve
- Scrape the caramel condensed milk into a large bowl, add the cream and 1 teaspoon salt. Using an electric hand whisk, whisk until it becomes thick.
- Taste to see if it needs more salt, I usually find 1 teaspoon is about right. Then gradually whisk in the Bourbon, taste again to check how much you want – I find 3 tablespoons is good. It will now be thick but floppy, rather like thick melted ice cream.
- Pour the mixture into a freezer-safe container and cover with a lid..
- Freeze for 6-8 hours or overnight. The ice cream will keep in the freezer for up to 3 months.
- Scoop to serve and sprinkle with some chopped pecan nuts.
Nectarines Baked with Almonds & Marsala (Serves 6)
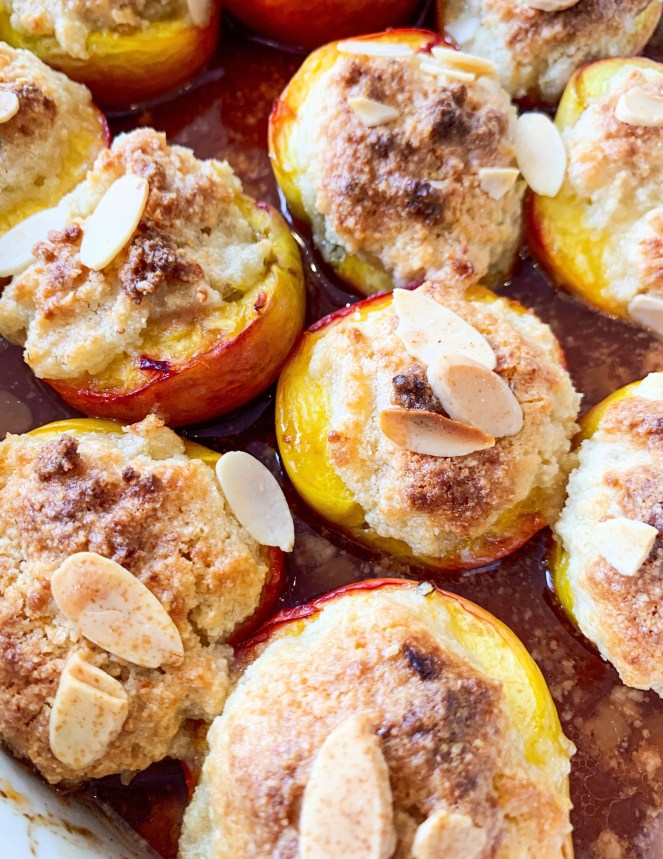
This is one of those desserts that’s been around ‘forever’! Indeed, I’ve been serving this particular recipe for many years, all seasons – it works just as well with nectarines that are out of season as they sweeten with cooking. I like to serve it with crème fraîche as it cuts the sweetness of the amaretti filling, but you could also serve it with a scoop of good quality vanilla ice-cream.
* Any leftover amaretti filling can be baked separately in a small dish for about 20 minutes in the same oven – it’s pretty good as an extra sweet treat with a cup of tea!
6 nectarines, halved and stoned
100g amaretti biscuits (gluten-free if required)
100g butter, softened
85g ground almonds
85g caster sugar
1 egg
1-2 tablespoons, flaked almonds
250ml Marsala
Crème fraîche or vanilla ice-cream to serve
- Place the nectarine halves snugly in a baking dish.
- Put the amaretti biscuits into a large bowl and using the end of a rolling pin, bash into crumbs. Add the softened butter and mix well before stirring in the almonds, caster sugar and egg, to form a thick paste.
- Push generous spoonfuls of the mixture into the cavities of the nectarines (any leftover mixture can be baked separately in a small dish – see note above). Scatter with the almonds and then carefully pour the Marsala into the dish, between the nectarines, so it doesn’t touch the topping – otherwise it will go soggy!
- Bake in a preheated oven, 160’c fan, for 40-50 minutes until golden and crisp.
- Serve warm with the juices spooned over with a dollop of crème fraiche or a scoop of vanilla ice-cream.
Lemon Angel Pie
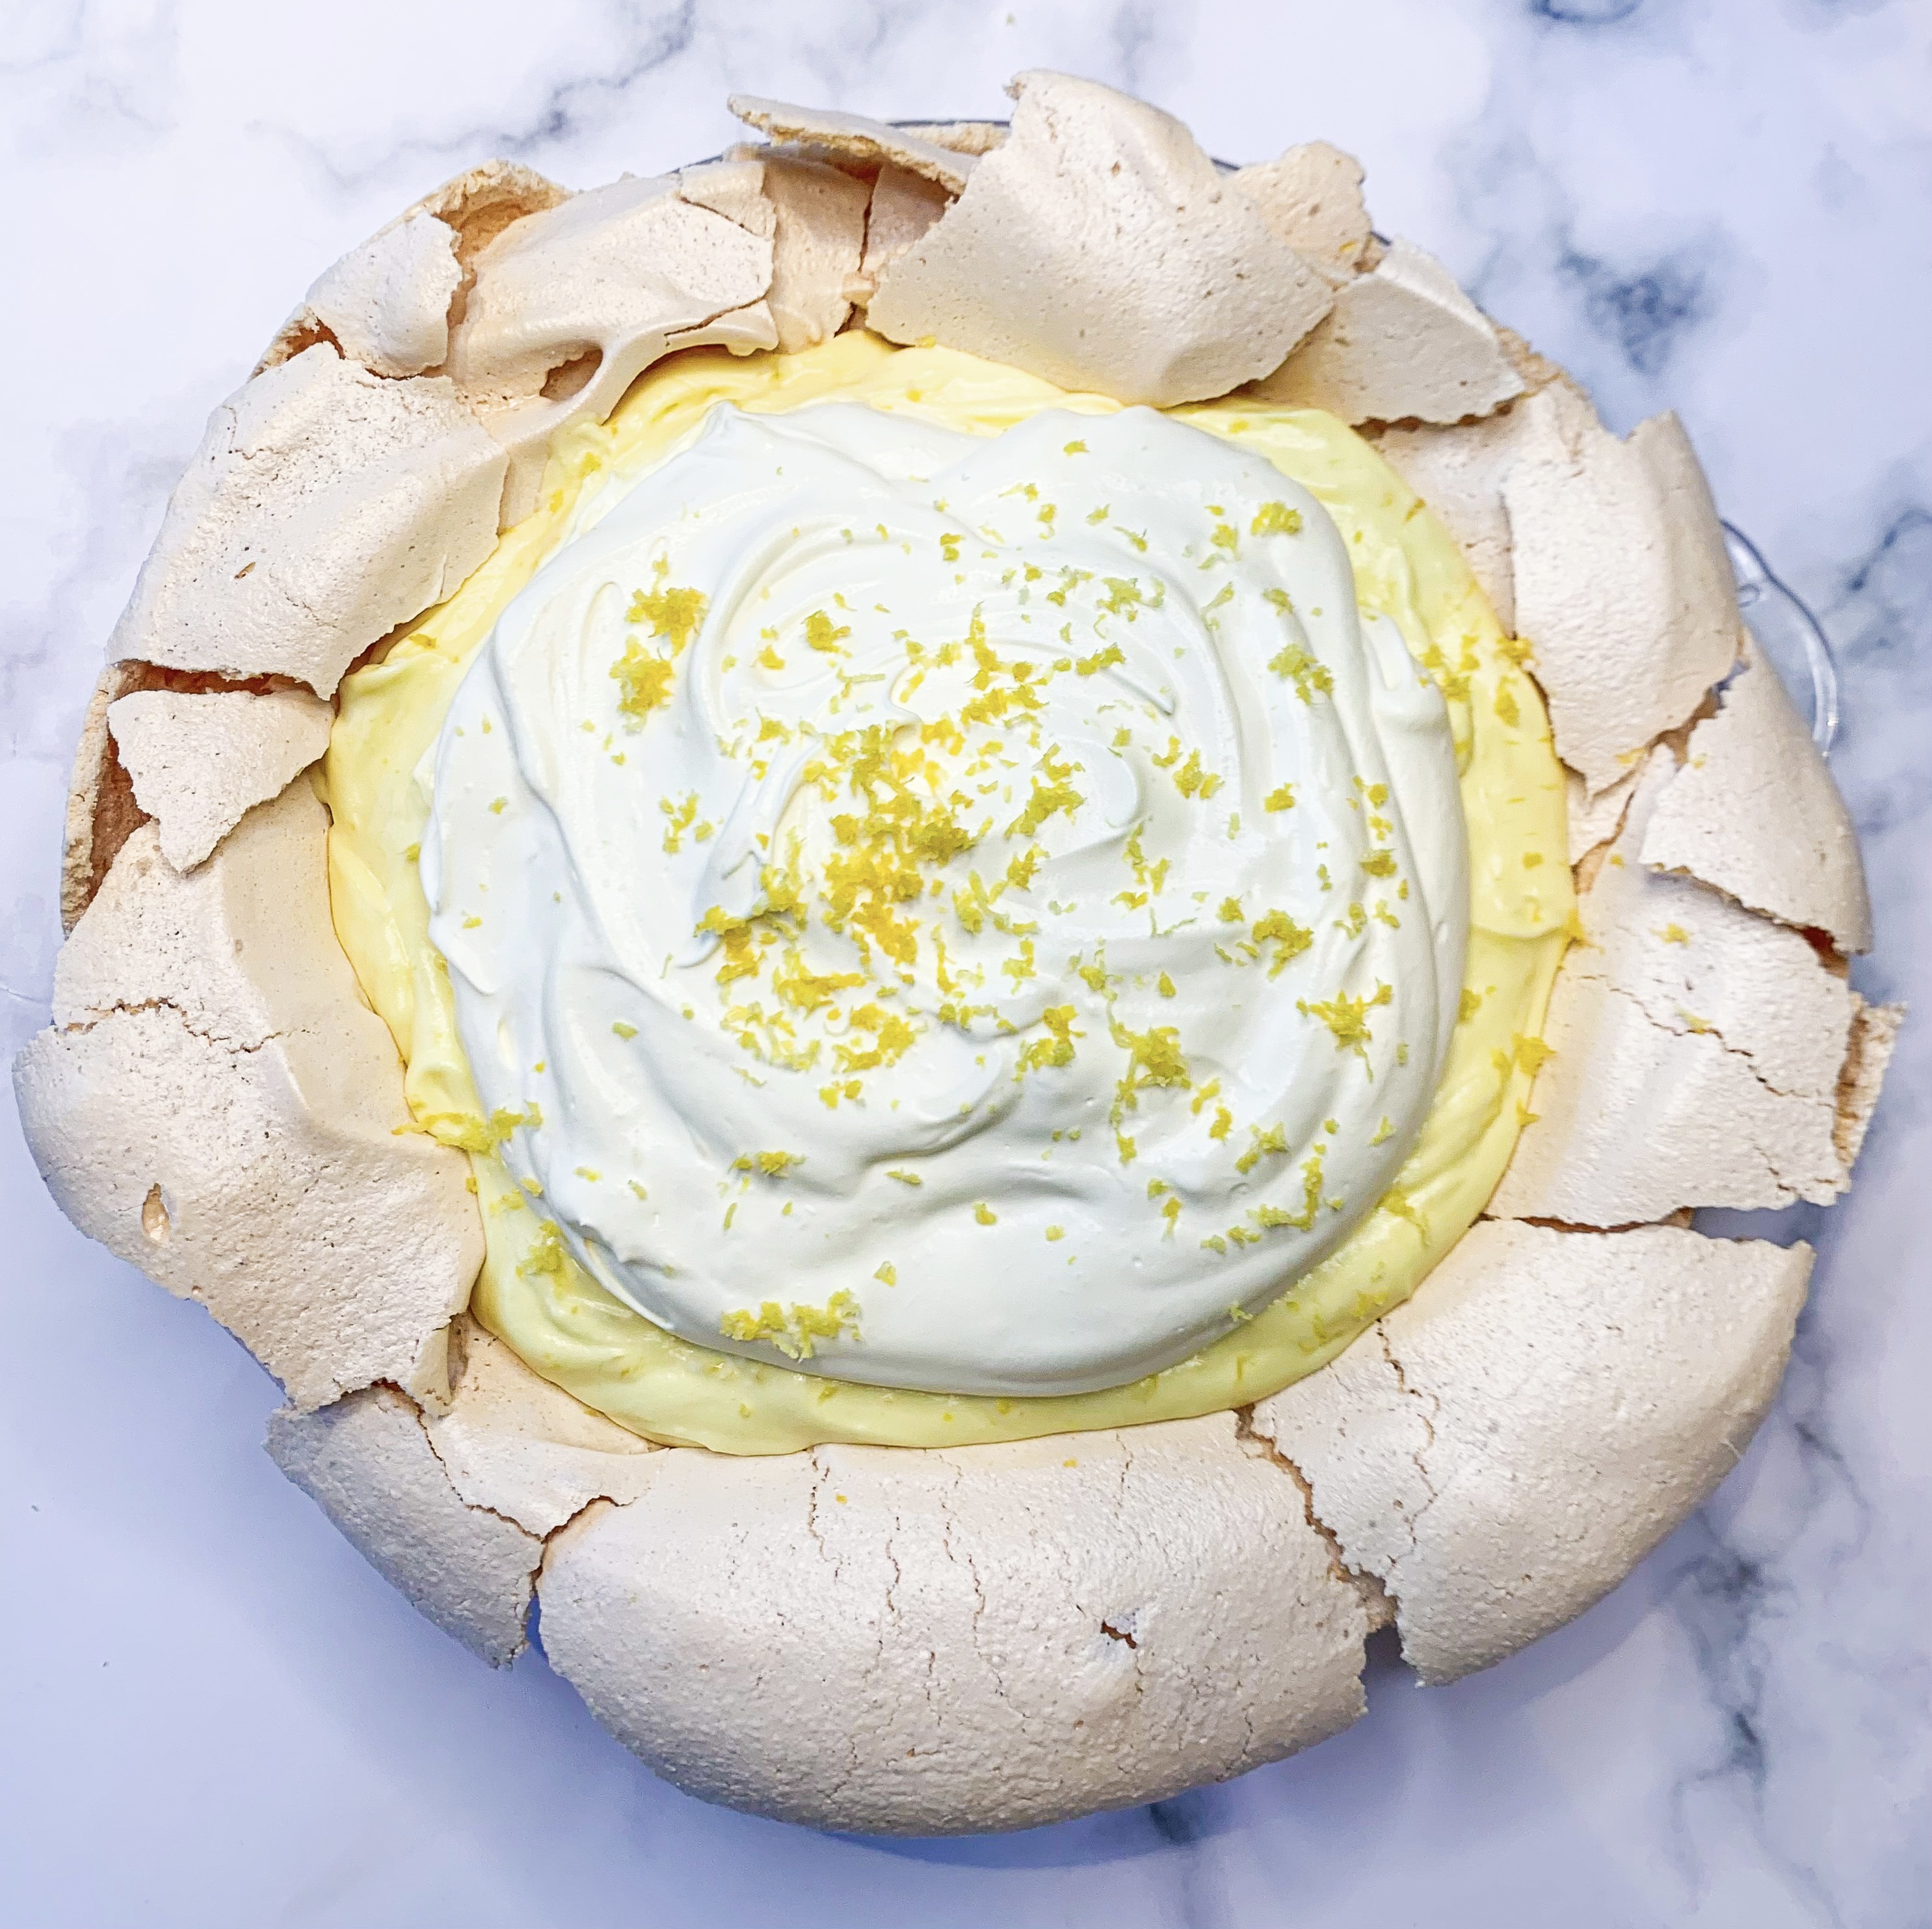

This is the most delicious dessert ever!… Ok, I admit that I’ve said this before about numerous other desserts, but seriously you ‘must’ make this, it really is a little piece of heaven! It has the wonderful flavours of its better-known relation, ‘Lemon Meringue Pie’, but is much lighter as it has no pastry thus is also much easier to make, plus of course, it’s totally gluten-free. Be warned, it’s not the prettiest of desserts – you’ll be rather dismayed when minutes after removing the meringue base from the oven it starts to sink and crack, but fear not, once you add the lemon curd and cream you cover a lot of these undesirable looking cracks. The important thing is that it tastes incredibly good!…
(I’ve found that the size of the dish really does make a difference with this recipe, use a 9” round deep pie dish – I use one which is available from amazon here)
200g caster sugar
4 eggs, separated
¼ teaspoon white wine vinegar
Butter to grease dish
For the Filling:
100g caster sugar
3 tablespoons lemon juice
Grated zest of 1 lemon
¼ teaspoon salt
500ml double cream
To Serve:
Grated zest of 1 lemon (optional)
(9” round, deep pie dish – buttered)
- Beat the egg whites until white and fluffy. Add the sugar and white wine vinegar and beat until stiff and glossy.
- Pour into a buttered pie dish, using the back of a spoon push the meringue up the sides of the dish so it looks a little like a pastry case and will hold the filling after it’s baked.
- Bake in a preheated oven, 150’c, for 50 minutes until puffed and lightly browned. Remove from the oven and allow to cool – don’t be dismayed when the meringue sinks and starts to crack, the filling will cover the multitude of sins!
- Meanwhile, make the lemon curd by placing the egg yolks in a bowl and beating lightly. Stir in the sugar, lemon juice, grated lemon zest and salt. Then put the bowl over a saucepan of gently simmering water (don’t allow the base of the bowl to touch the water) and continue to stir until thickened into a ‘curd’, this can take up to 10 minutes. Allow to cool.
- Whip the cream until stiff.
- Gently fold the lemon curd into half of the whipped cream, pour this lemon curd mixture into the meringue pie shell. Top the pie with the remaining whipped cream and sprinkle with the grated lemon zest.
- Chill in the fridge before serving – serve cold.
Rhubarb Crème Brûlêe (Serves 6)
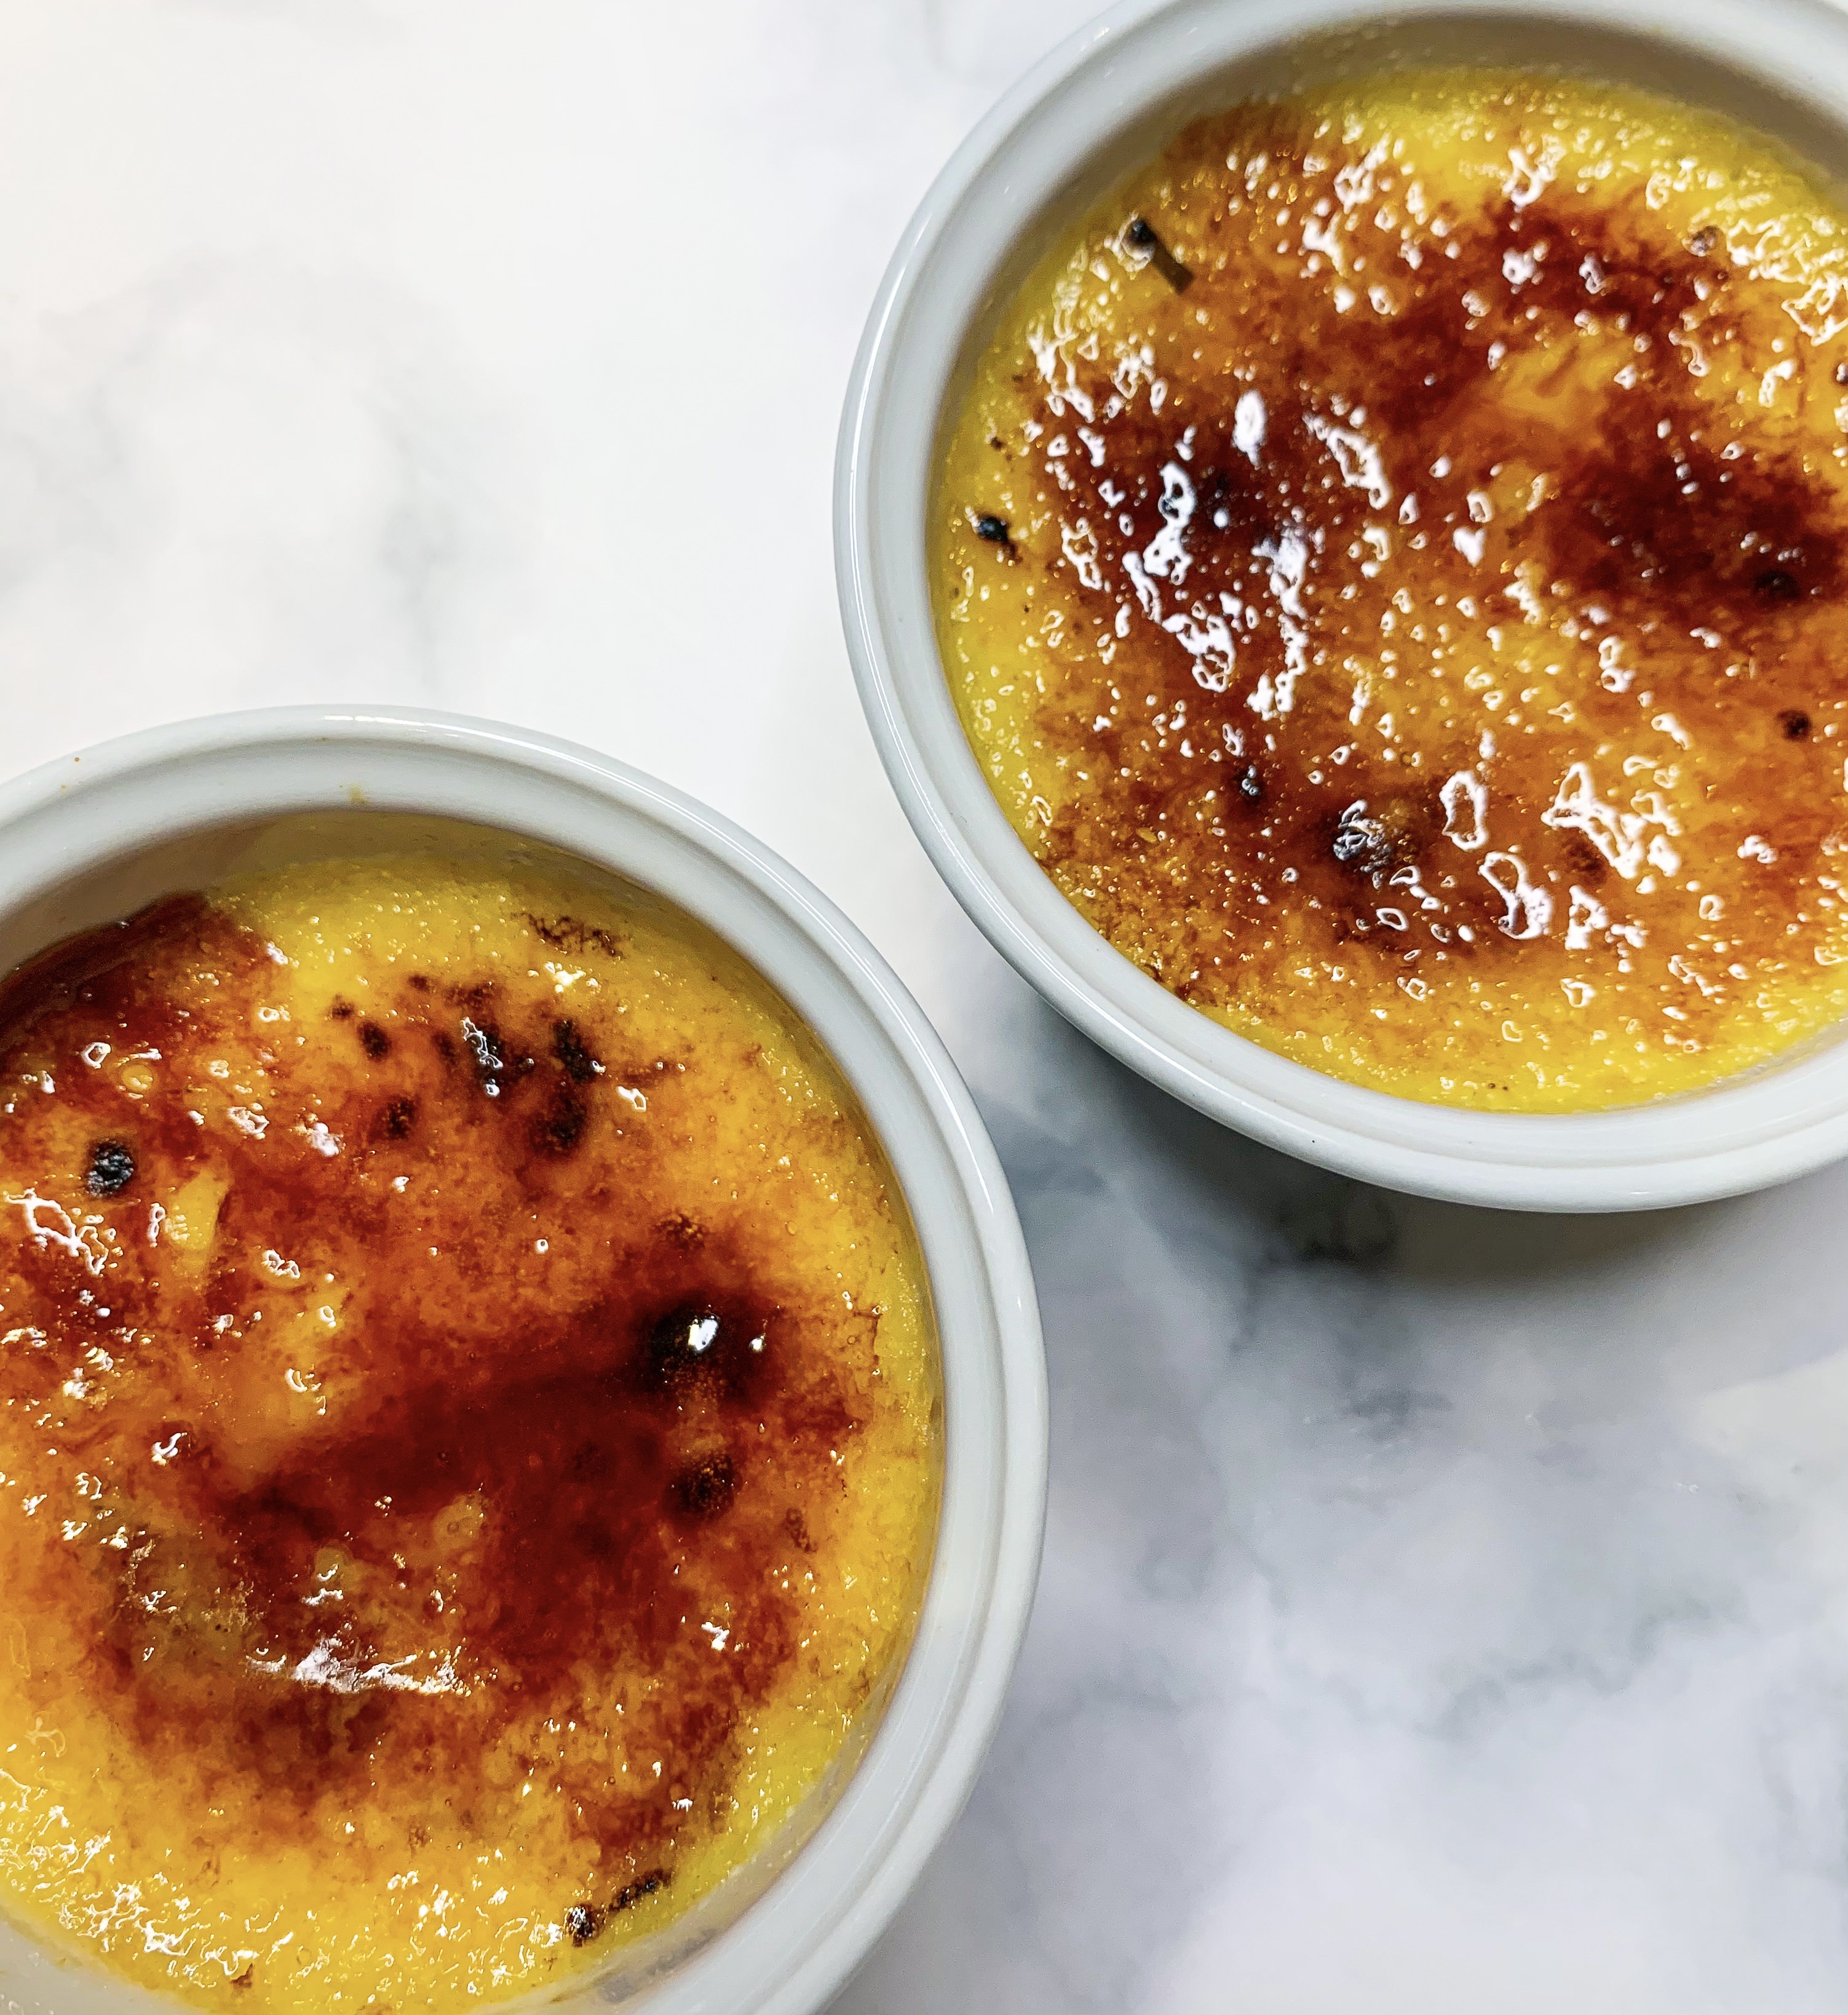
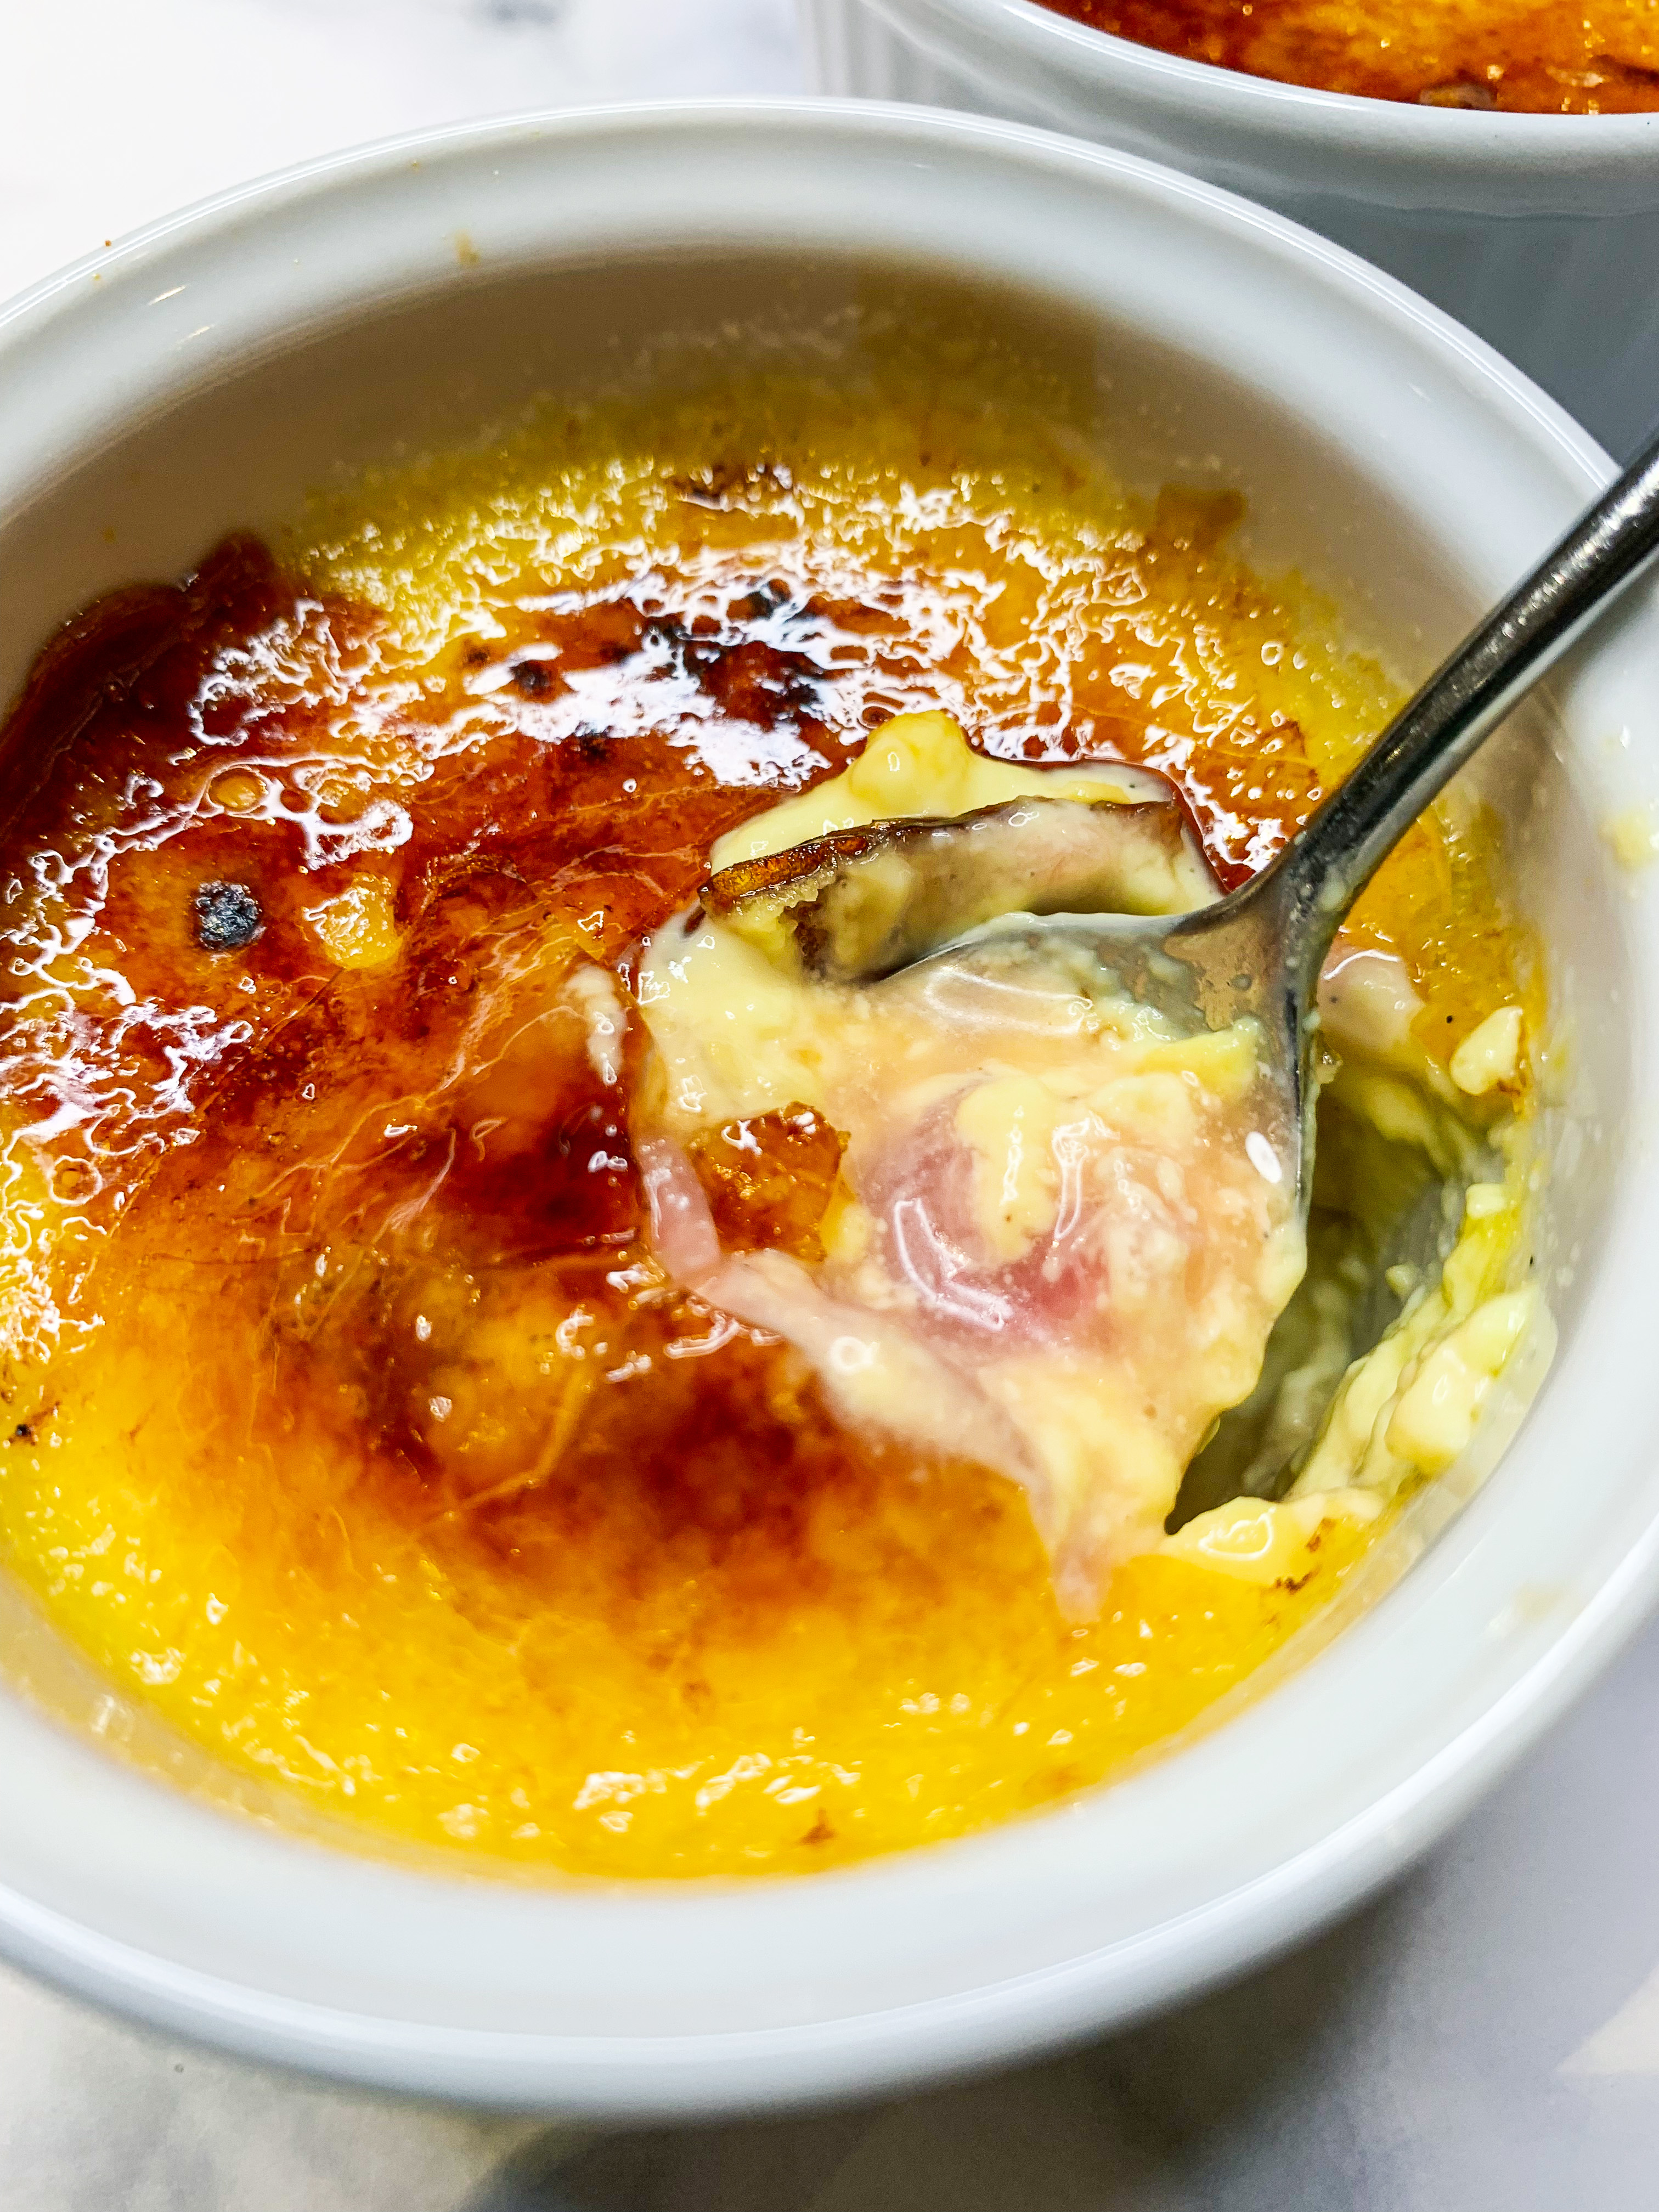
Who can resist the combination of rhubarb and custard?!… In this recipe the French classic, crème brûlée, is given an English twist with the addition of rhubarb and I must say, it’s better for it! The slightly tart rhubarb cuts the creamy richness of the brûlée beautifully.
I suggest you use a kitchen blowtorch to create the caramelised topping as it’s much easier than trying to get your grill hot enough to do it. Dare I mention the ‘Amazon’ word?…kitchen blow torches can be found there for around £12-14; they are a great addition to any kitchen and you will seriously appreciate the wonderful crunch they will give to your Brûlée!
400g rhubarb cut into 1cm slices
4 tablespoons caster sugar
330ml double cream
160ml whole milk
50g caster sugar, plus more for caramelising
Pinch of sea salt
4 large egg yolks
1 teaspoon vanilla bean paste
You will need 6 ramekins with 125ml capacity
- First of all place the rhubarb in a roasting dish and sprinkle over 4 tablespoons of caster sugar. Roast in a preheated oven, 180’c fan, for 20-30 minutes until soft. Divide into the ramekins and chill.
- In a small saucepan over a medium heat, warm the cream, milk, sugar, and salt until the sugar has melted.
- In a bowl, whisk together the egg yolks. Gradually add the warm cream mixture, stirring rather than whisking, as you don’t want to create too much froth.
- Mix in the vanilla paste then use a sieve to strain the cream mixture into large jug.
- Gently pour the mixture between 6 ramekins, over the chilled rhubarb.
- Place a tea towel over the base of a roasting tin (this will stop the ramekins from slipping), then place the ramekins in the tin. Pour enough boiling water into the roasting tin so that it comes halfway up the sides of the ramekins. Cover with foil.
- Place the roasting tin in a preheated oven, 150’c fan, cook for about 40-45 minutes until they are just about set but still a little ‘jiggly’.
- Remove the ramekins to cool on a rack. When cool, refrigerate until ready to serve.
- To serve, sprinkle with a thin, even layer of sugar (about 1½ teaspoons), then use a kitchen blow torch to caramelise the sugar – you may need to lift the ramekin to swirl the caramel evenly across the top. Serve immediately.
Ricotta and Cherry Cake
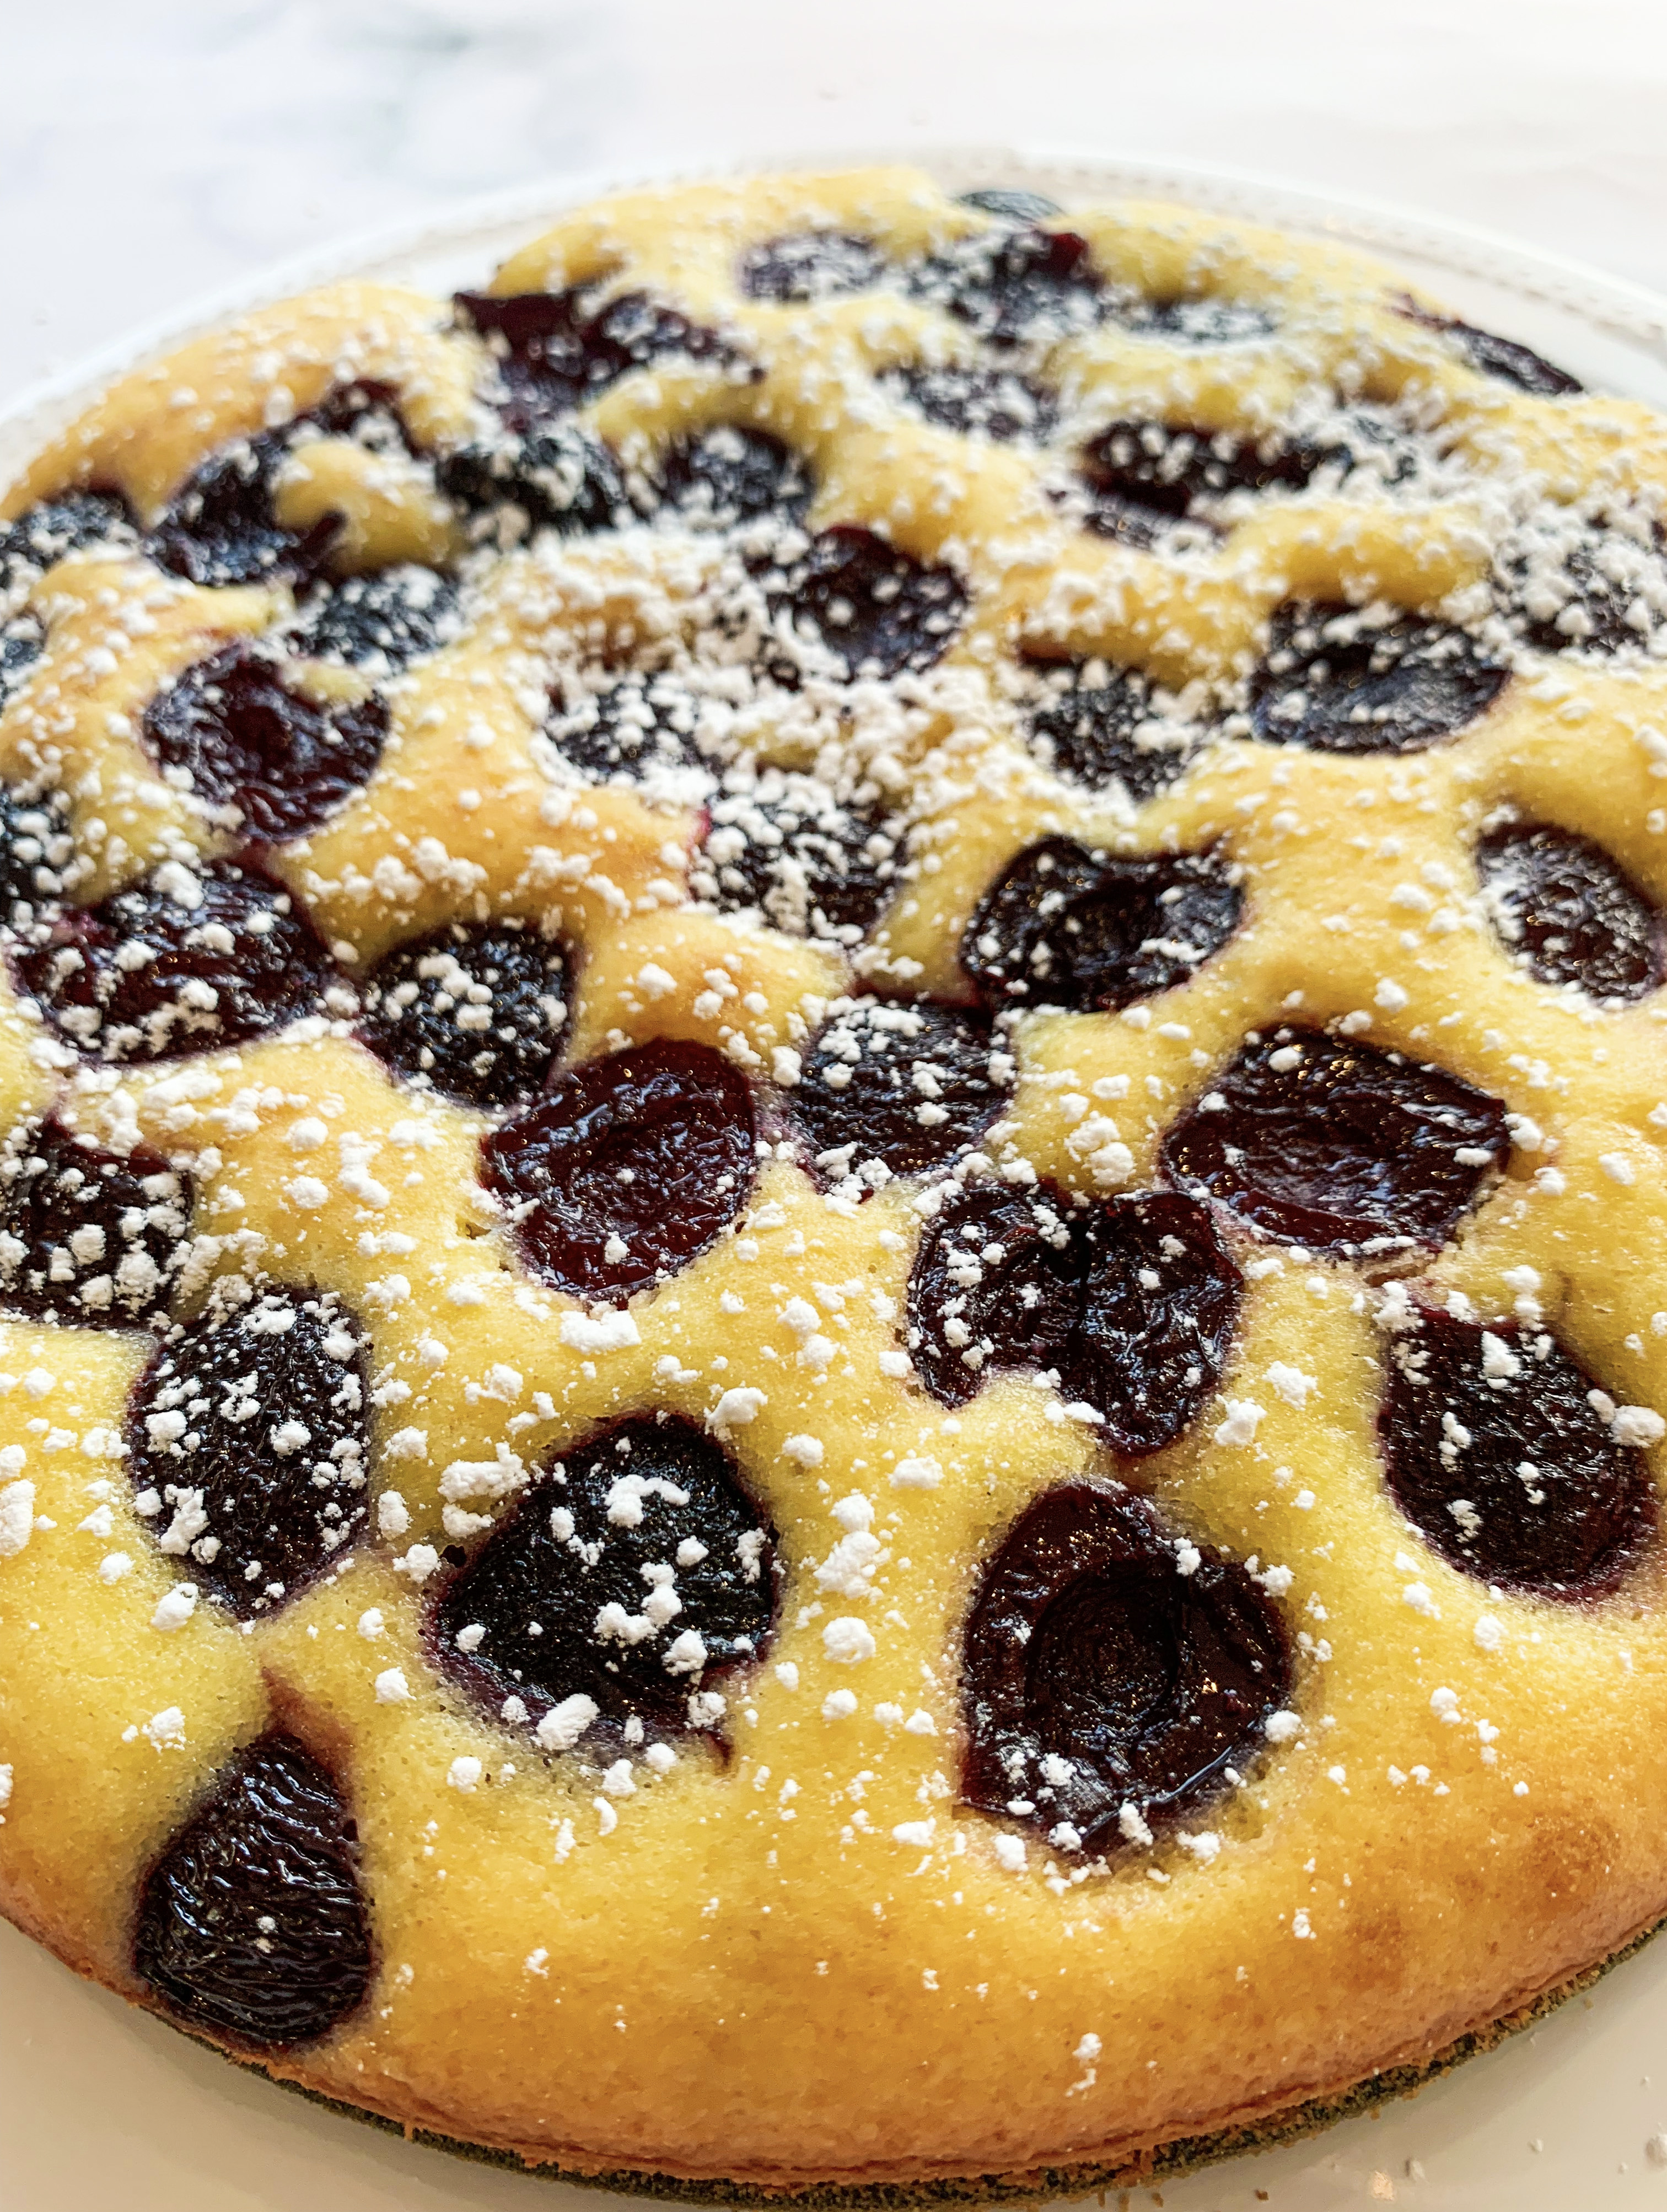
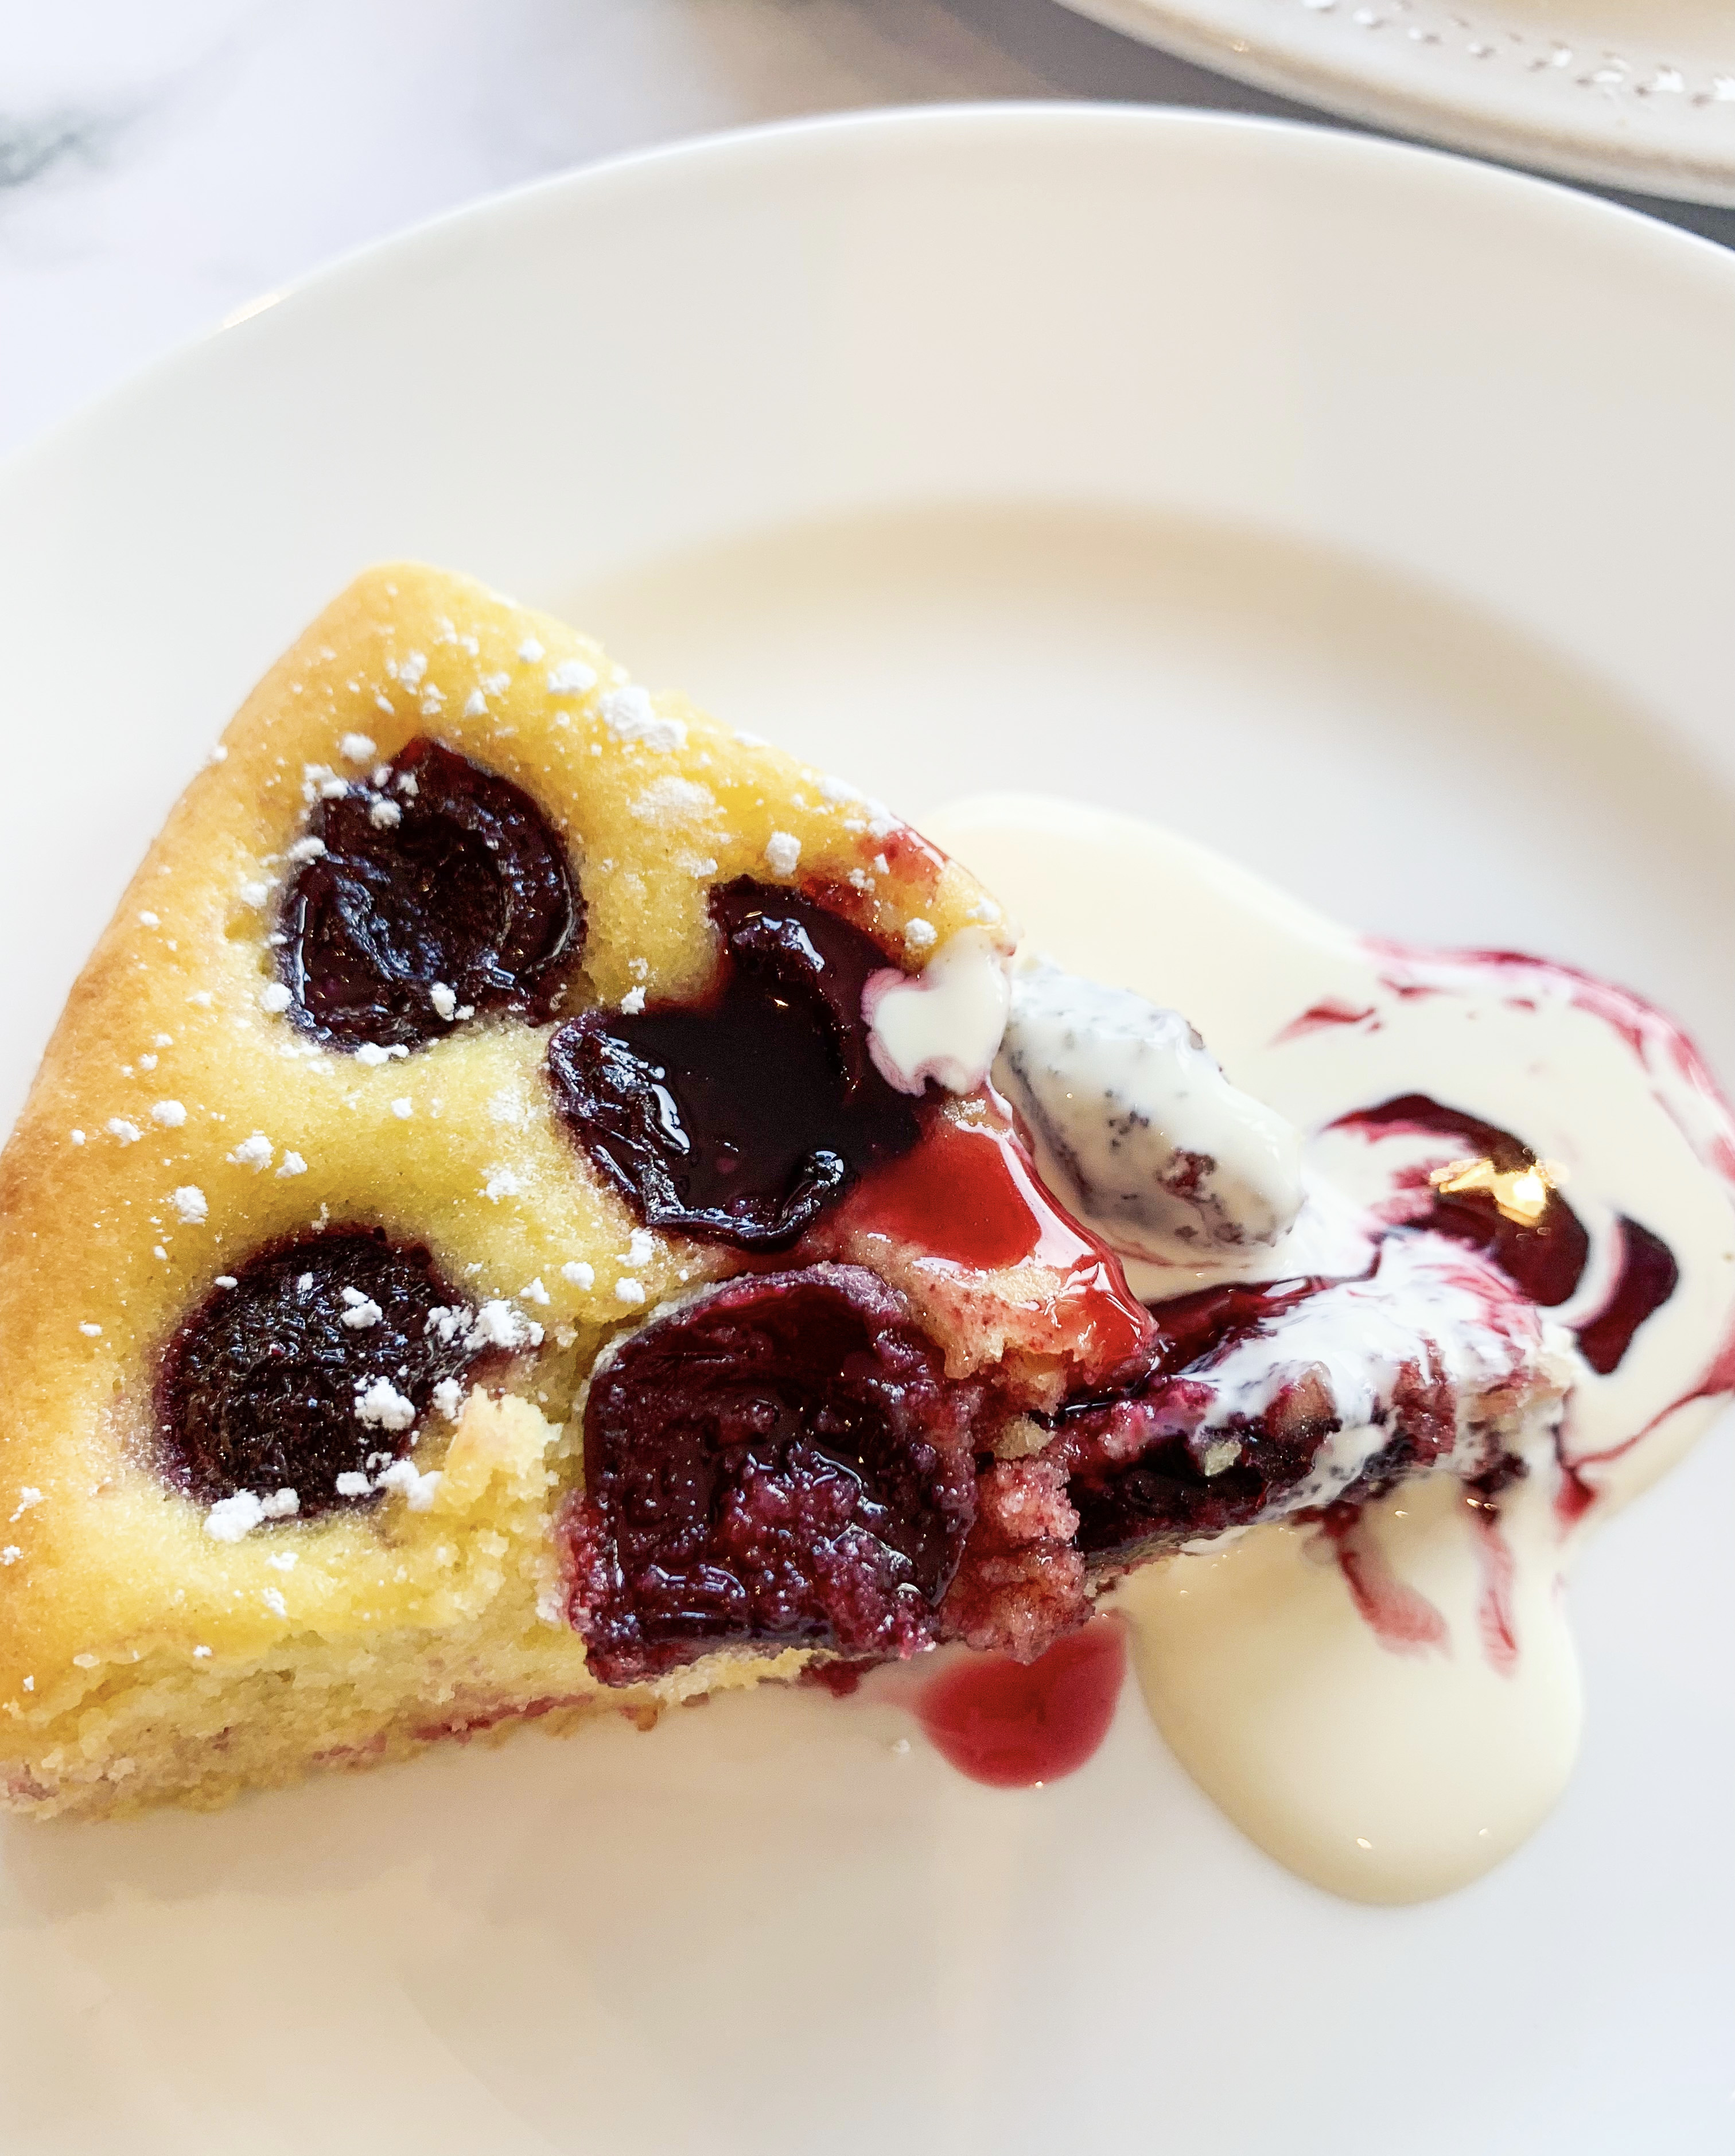
This is a soft, almost pudding-like sponge. The addition of the cherries with their glorious syrup is the icing on the cake (and of course don’t forget a good dollop of cream!). This is one of those cakes which is a perfect teatime treat but also particularly good for breakfast… Don’t be put off by its rather ‘flat’ appearance, looks can be deceiving, it really is delicious and better still, is incredibly easy to bake. The recipe is from Florence Knight, the wonderful chef of the fashionable London restaurant, Sessions Arts Club (see my review here!).
200g fresh cherries, halved and pitted
50g sugar
100ml red wine
For the sponge:
1 egg
2 egg yolks
180g caster sugar
100g ricotta
65g butter, melted (plus extra to grease the tin)
130g plain flour (gluten-free if required – I used Doves)
¾ teaspoon baking powder
A good pinch of salt
Double cream to serve
- Lightly butter of a 20cm cake tin and line the base with greaseproof paper.
- Add the cherries, sugar and wine to a small pan and simmer for 8 minutes until glossy but holding their shape. Remove the pan from the heat and set aside.
- In a large bowl beat the whole egg, the yolks and sugar until pale and thick. Slowly add the cooled butter followed by the ricotta, mix well to create a smooth batter.
- Sift in the flour, baking powder and salt and fold through.
- Spoon the mixture into the prepared tin and smooth over with the back of a spoon. Scatter over the drained cherries, reserving the liquor for later!
- Place the cake in the middle of a preheated oven, 160’c fan, and cook for 25-30 minutes until a skewer comes out clean when inserted into the centre.
- Meanwhile, reduce the reserved cherry liquor into a syrup over a medium heat until thick and glossy.
- Allow the cake to cool in the tin before serving in wedges with the syrup and a dollop of cream.
Raspberry Friands
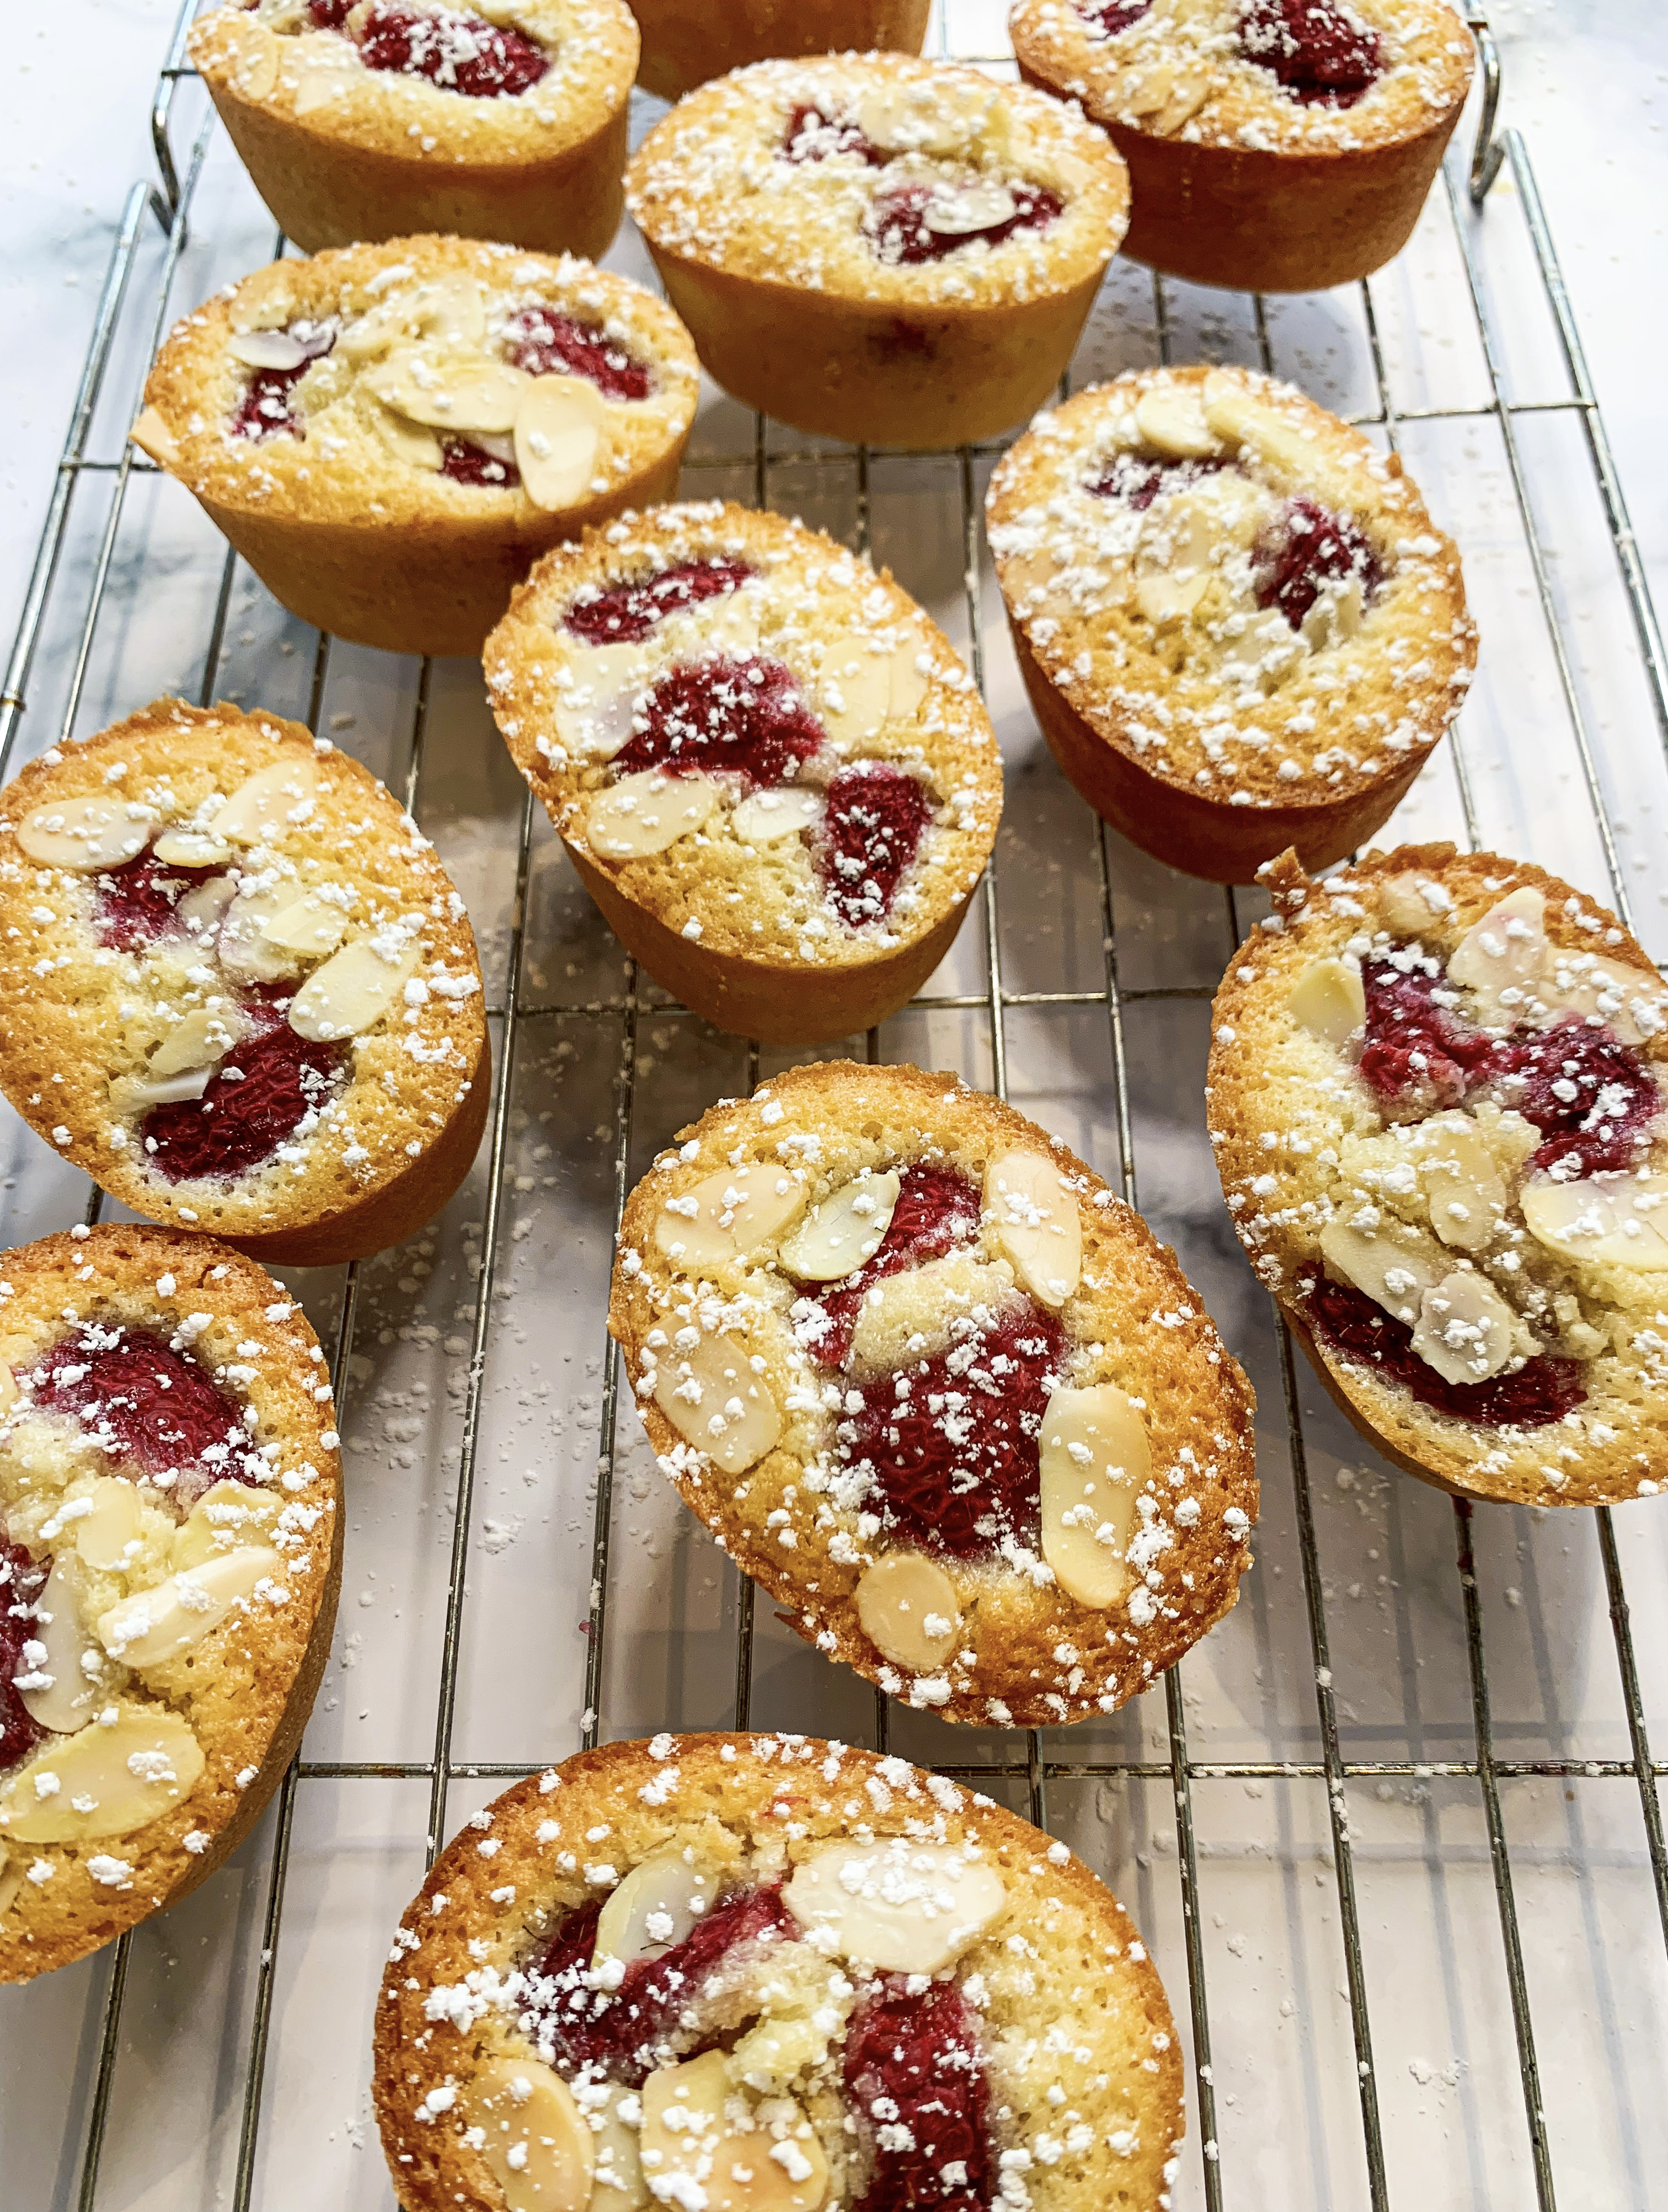
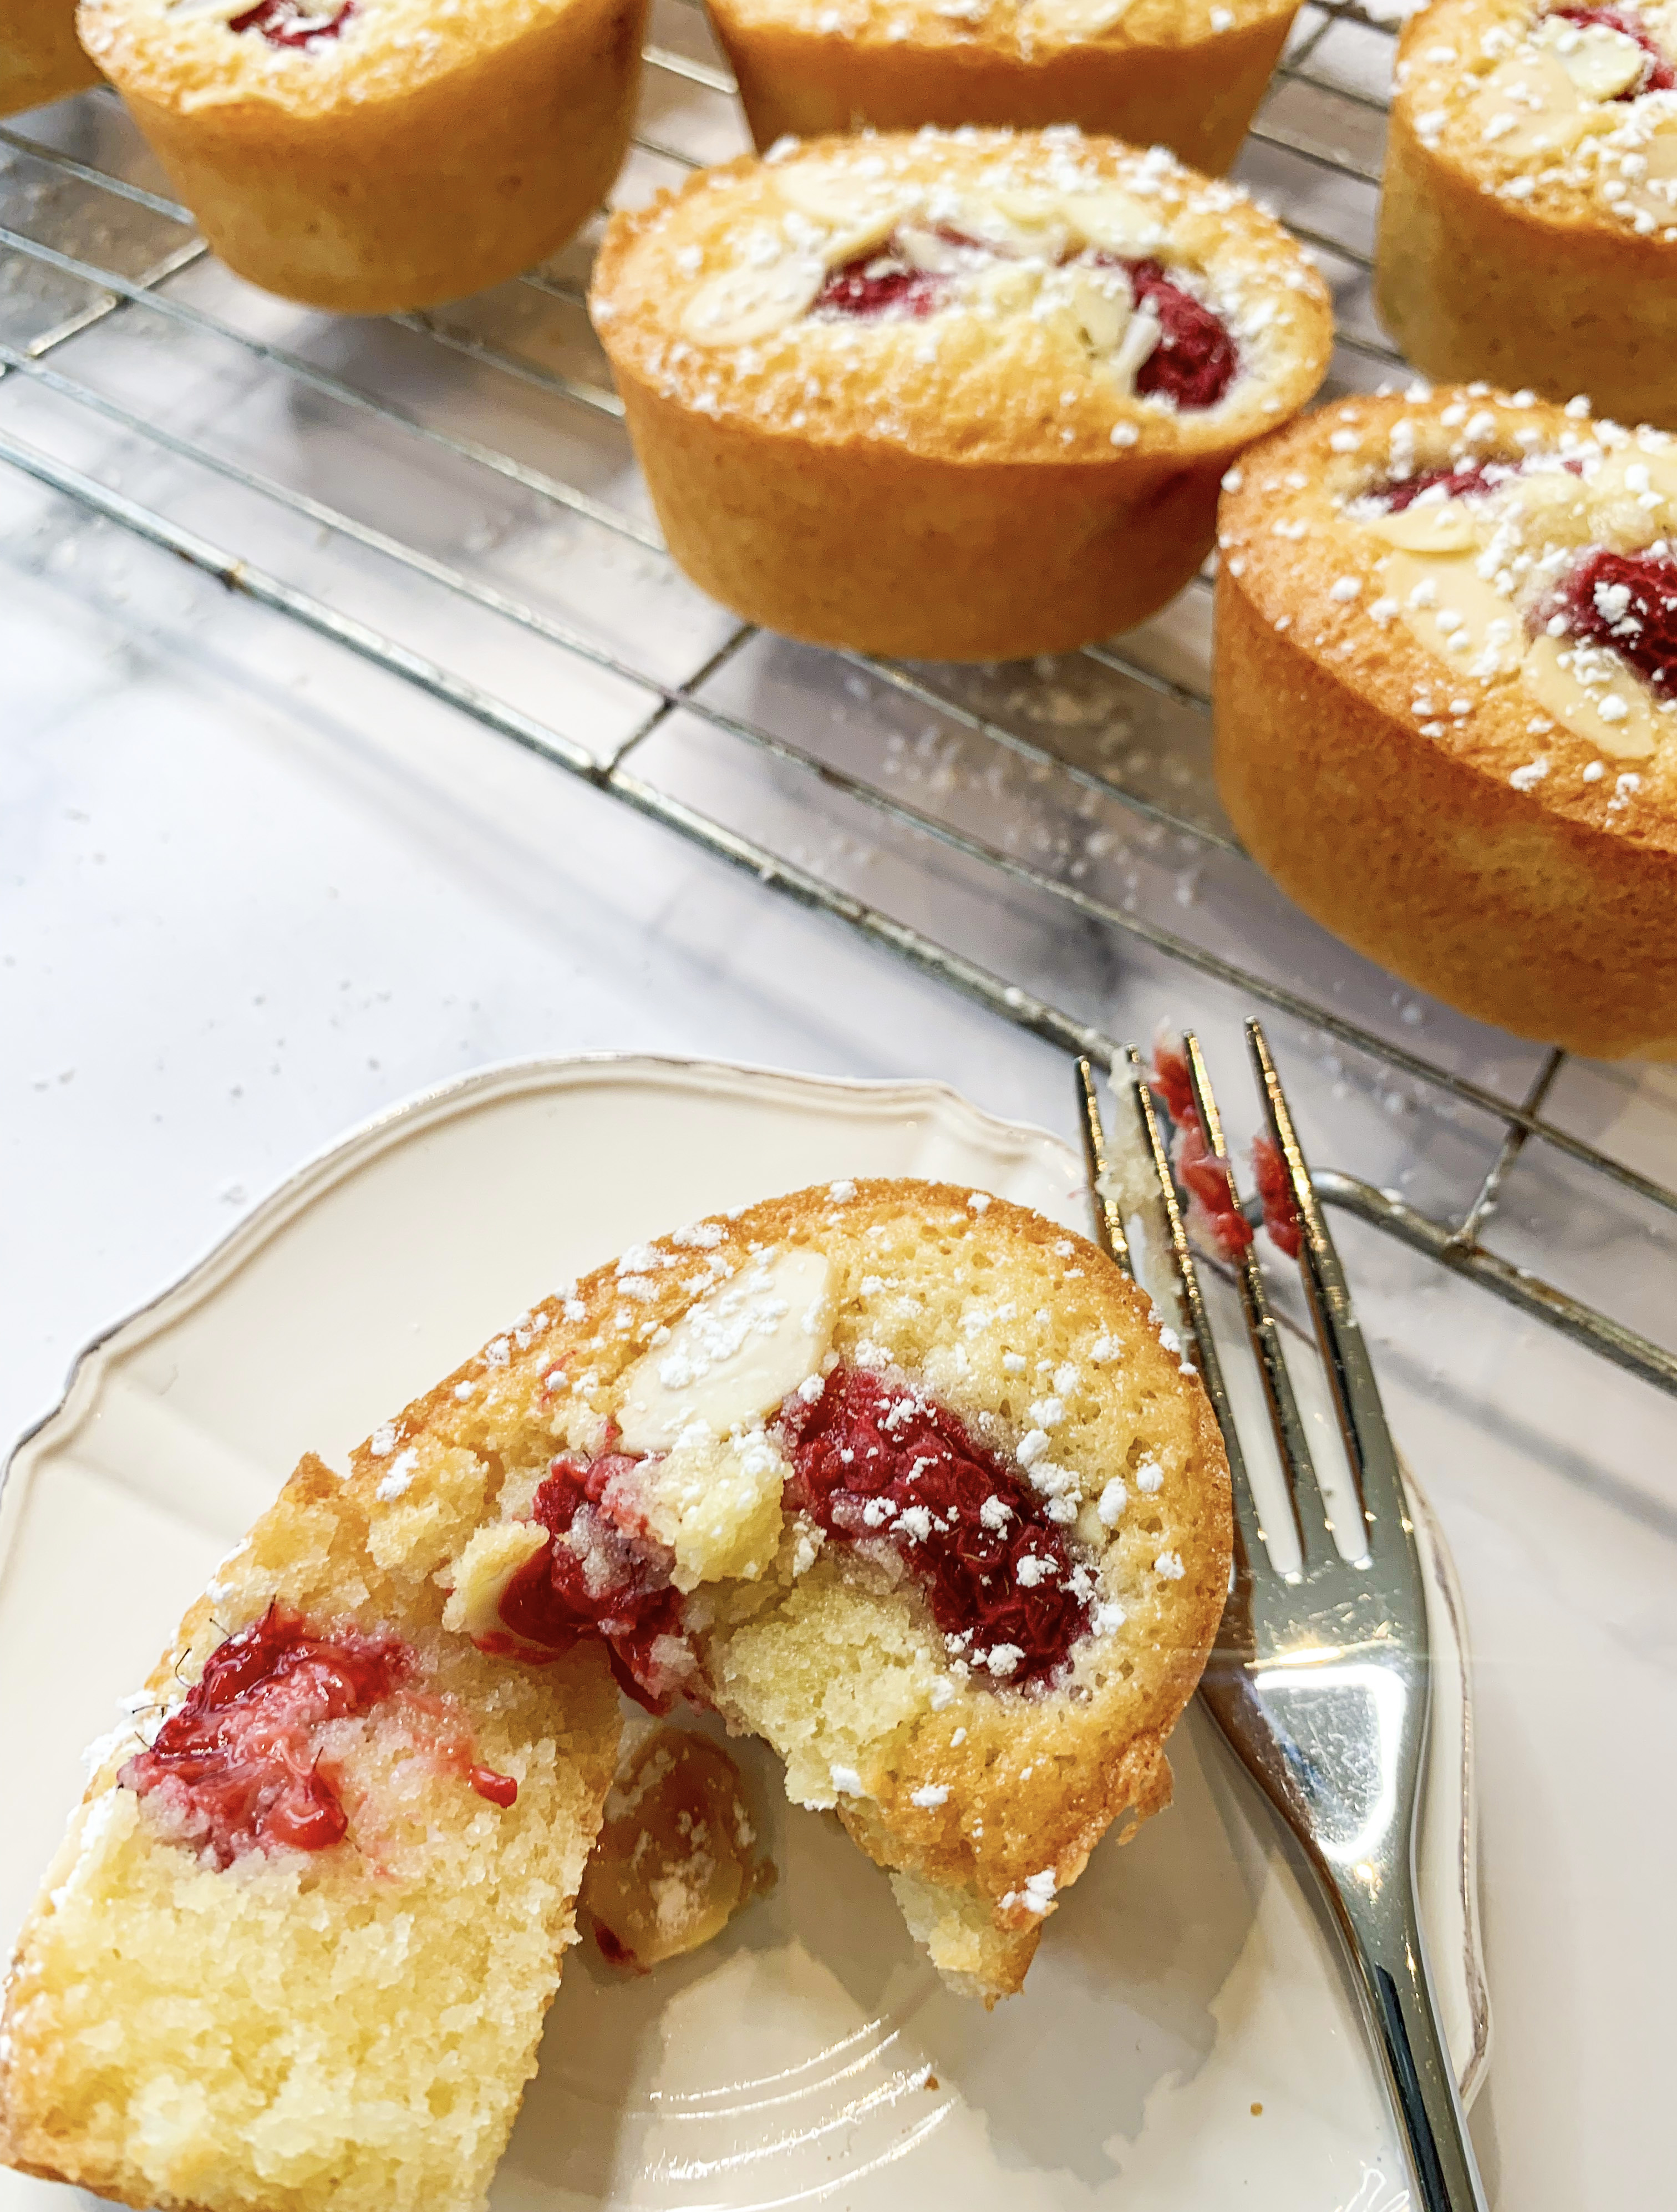
Friands are delicious little almond cakes that are rich, dense, moist and very moreish! They are particularly good for those of us who are gluten-free as they contain only a small quantity of flour which can easily be substituted for a ‘free-from flour’ with no ill side effects. Traditionally they are baked in friand tins to produce oval little cakes which really do look gorgeous, but if you don’t have a friand tin you can always use a muffin tin – just make sure you butter it well. I would thoroughly recommend the friand tin I bought from Amazon here – you will be making these again!!…
200g unsalted butter, plus extra for greasing
225g icing sugar
75g plain flour (gluten-free if required – I recommend Doves)
150g ground almonds
½ teaspoon almond extract
6 egg whites
150g fresh raspberries
25g flaked almonds
Icing sugar to dust
- Grease a friand tin (or muffin tin – see note above).
- Melt the butter in a small pan, then remove from the heat and allow to cool a little.
- Meanwhile sift the icing sugar and flour into a bowl and stir in the almonds and extract.
- Whisk the egg whites until they are just foamy (they don’t need to have soft peaks).
- Fold the egg whites and melted butter into the dry ingredients until just combined.
- Divide the mixture between the greased tin – the mixture should come to about three quarters of the way up each hole. Add two or three raspberries and sprinkle with a few flaked almonds. Bake in a preheated oven, 180’c fan, for 15-20 minutes until golden and firm in the centre. Leave to cool for 5 minutes then turn out onto a wire rack to cool. Dust with icing sugar before serving.
Persian Love Cake with Rose, Cardamom & Figs
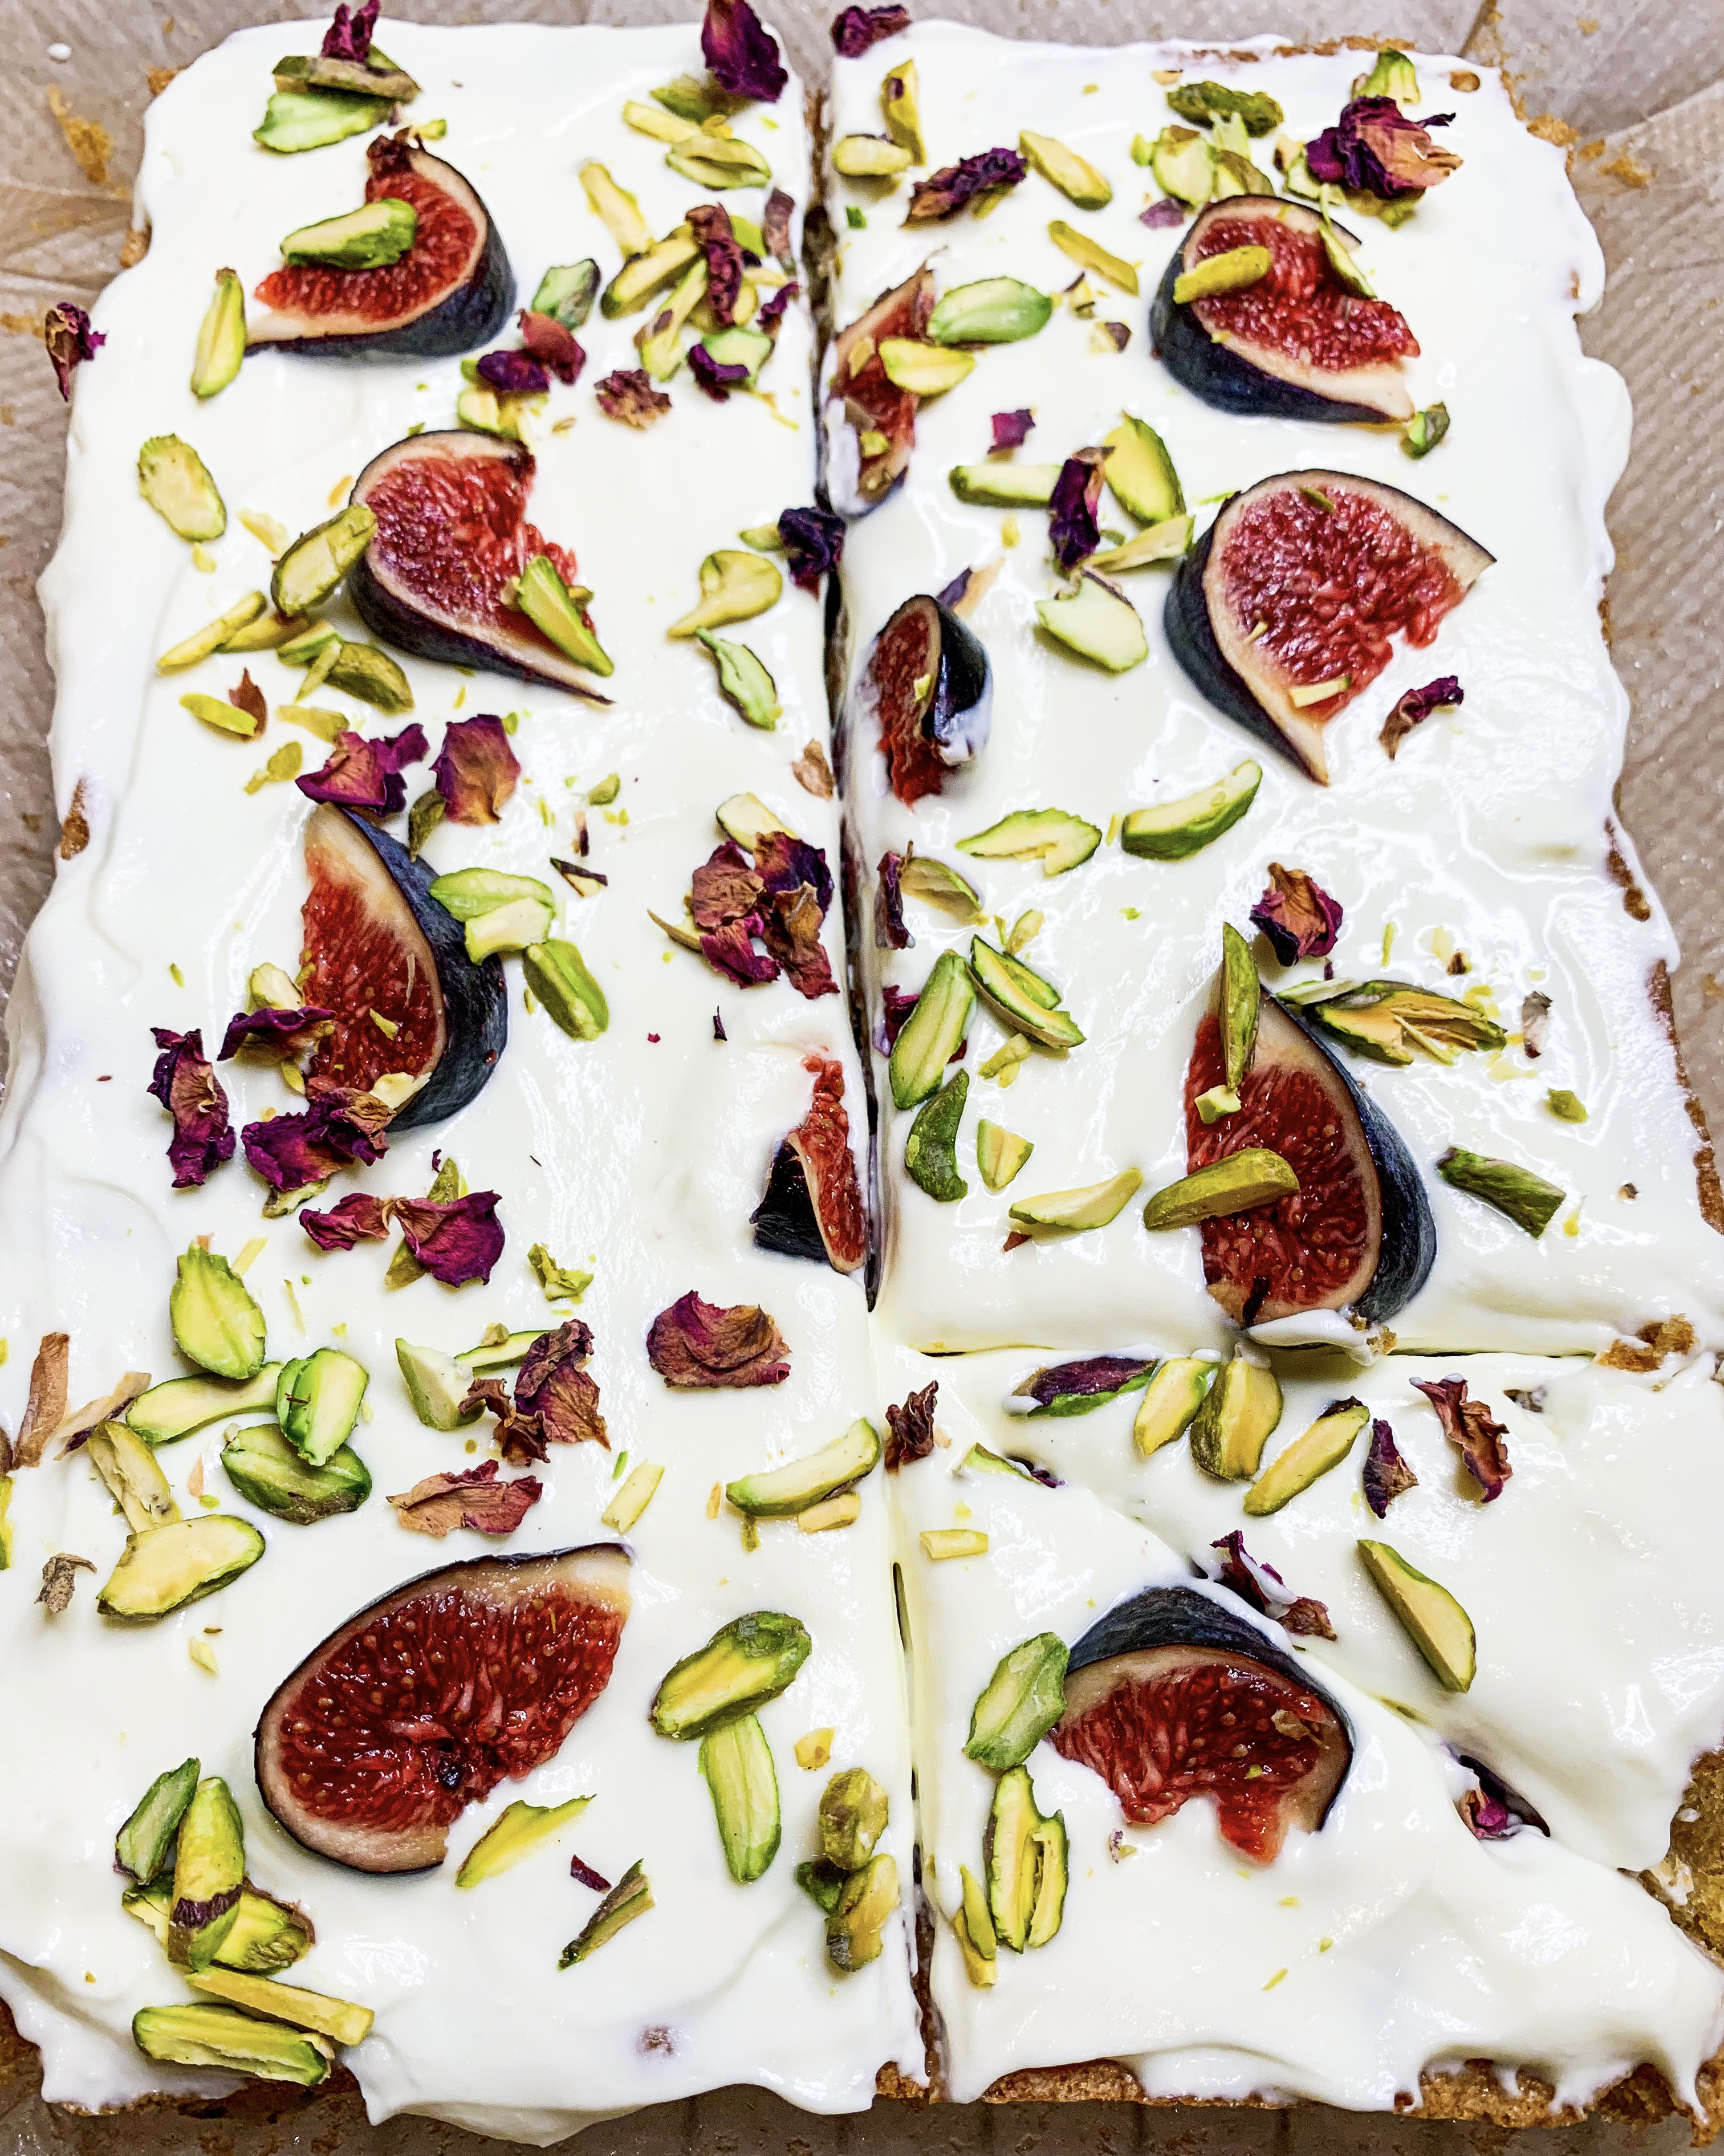
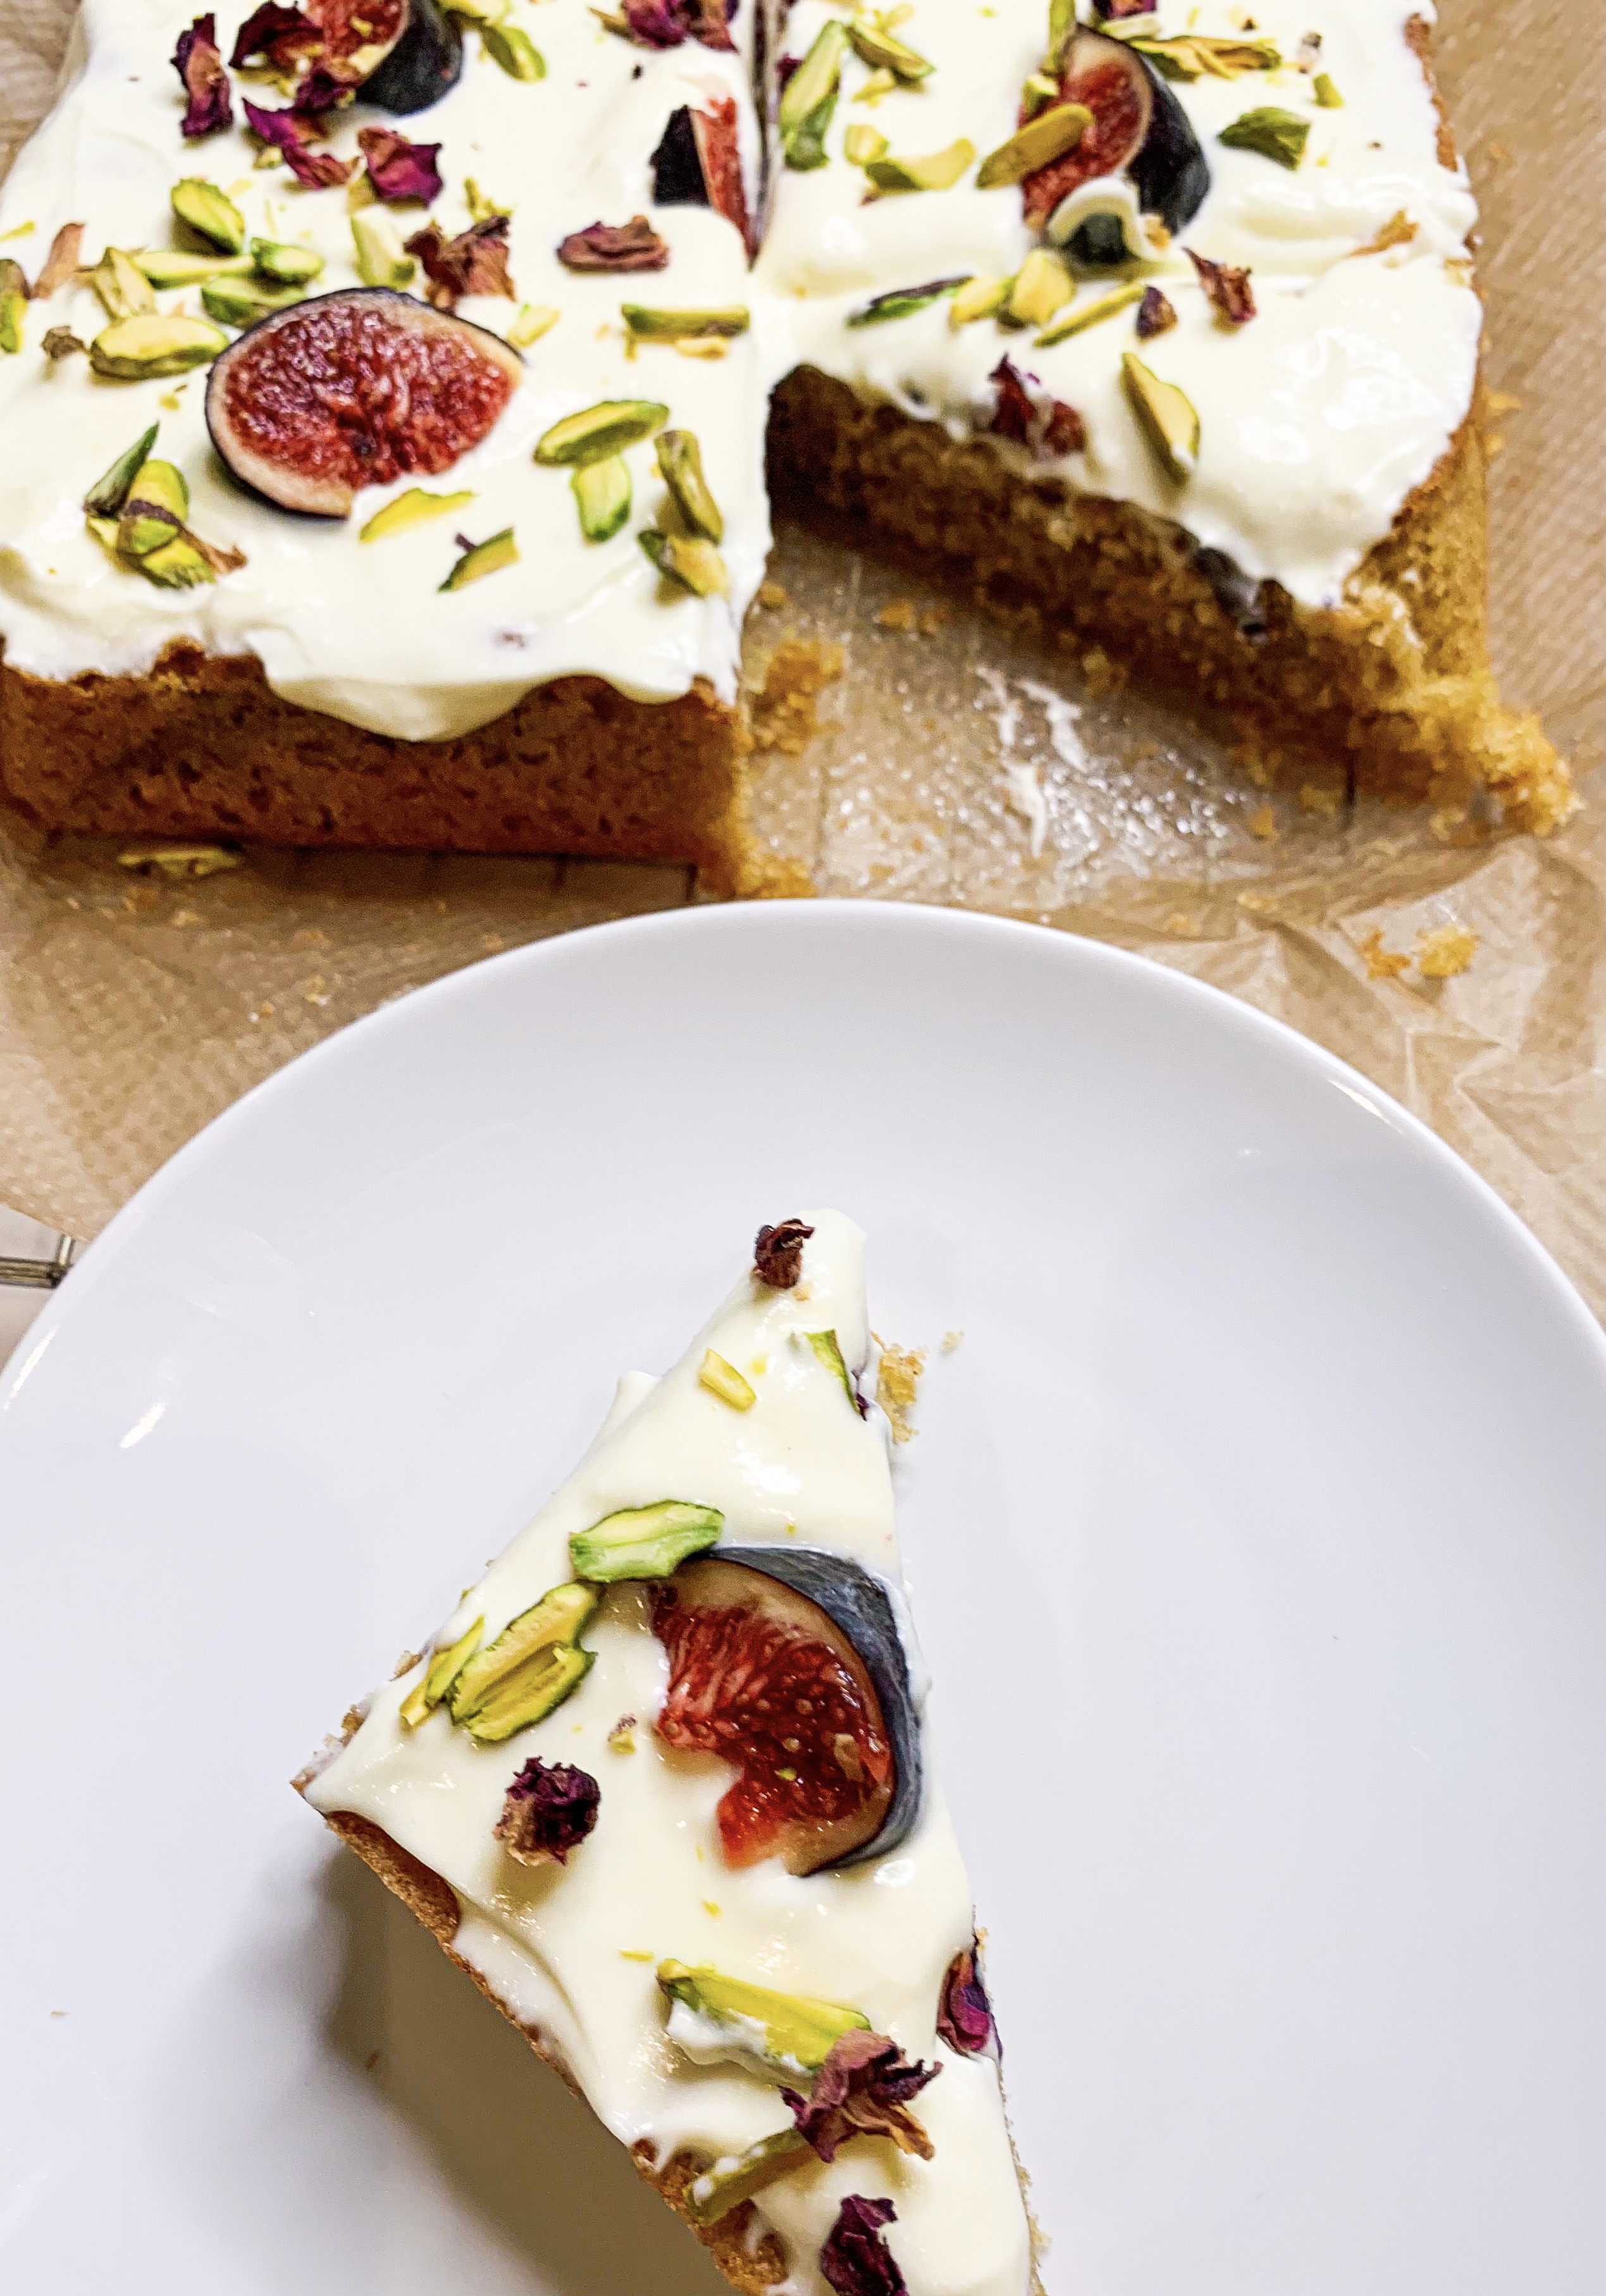
Let’s face it everyone deserves a little ‘sweet’ love!…
There is a lovely fairytale behind this cake…
“Once upon a time, there was a young Persian woman, who was madly in love with a prince. She made him this cake, filled with magical love powers, and he promptly fell in love with her; they lived happily ever after!”…
Have I sold the recipe to you?!…I can’t promise you love, but I can assure you that it is one of the easier recipes for Persian love cake that I have come across (there are many out there!), and it is of course very tasty! I found this recipe in Rukmini Iyer’s cookbook ‘The Roasting Tin Around the World’, it is a very moist cake with a lovely delicate flavour. I particularly like the mascarpone icing – it looks so pretty decorated with rose petals, pistachios and figs (if you can’t get hold of figs, don’t worry it will still taste wonderful!). Because of the mascarpone icing, it should be kept in the fridge (that’s if you don’t eat it straight away!), just make sure you allow it to come to room temperature before serving. Rosewater varies in its strength depending on the brand – I used ‘Holylama Spice Drops Rose Extract’ which is quite intense, so I only needed 2 drops of it, however, if you are using a different brand you may need more. This recipe works well with gluten free flour – I use Dove’s.
170g soft light brown sugar
170g soft unsalted butter
3 large eggs
125g self-raising flour (gluten free if required)
1 teaspoon baking powder
45g ground almonds
½ teaspoon ground cinnamon
4 cardamom pods, seeds only
Approx. 1 teaspoon rosewater or 2 drops of ‘Holylama Spice Drops Rose Extract’ (see note above)
For the Icing and Decoration:
250g mascarpone
25g icing sugar
Approx. 1 teaspoon rosewater or 2-3 drops of ‘Holylama Spice Drops Rose Extract’ to taste (see note above)
Dried rose petals
A handful of pistachio nuts, cut into slivers
2 fresh figs, thinly sliced into quarters (optional)
- Beat the sugar and butter together until soft and fluffy, then whisk in the eggs.
- Fold in the flour, baking powder, ground almonds, spices and rosewater, then pour the mixture into a lined shallow tin (26cm x 20cm).
- Bake in a preheated oven, 160’c fan, for 25-30 minutes until the cake is golden brown and a skewer, when inserted, comes out clean.
- Meanwhile, beat the mascarpone, rosewater (to taste) and icing sugar together.
- Remove the cake from the oven, let it cool in the tin for 5 minutes, then transfer to a rack to cool completely. When it is cold, spread the icing all over the cake using a palette knife, and sprinkle over the rose petals, pistachio slivers and sliced figs.
Apple and Almond Puddings (Serves 6)
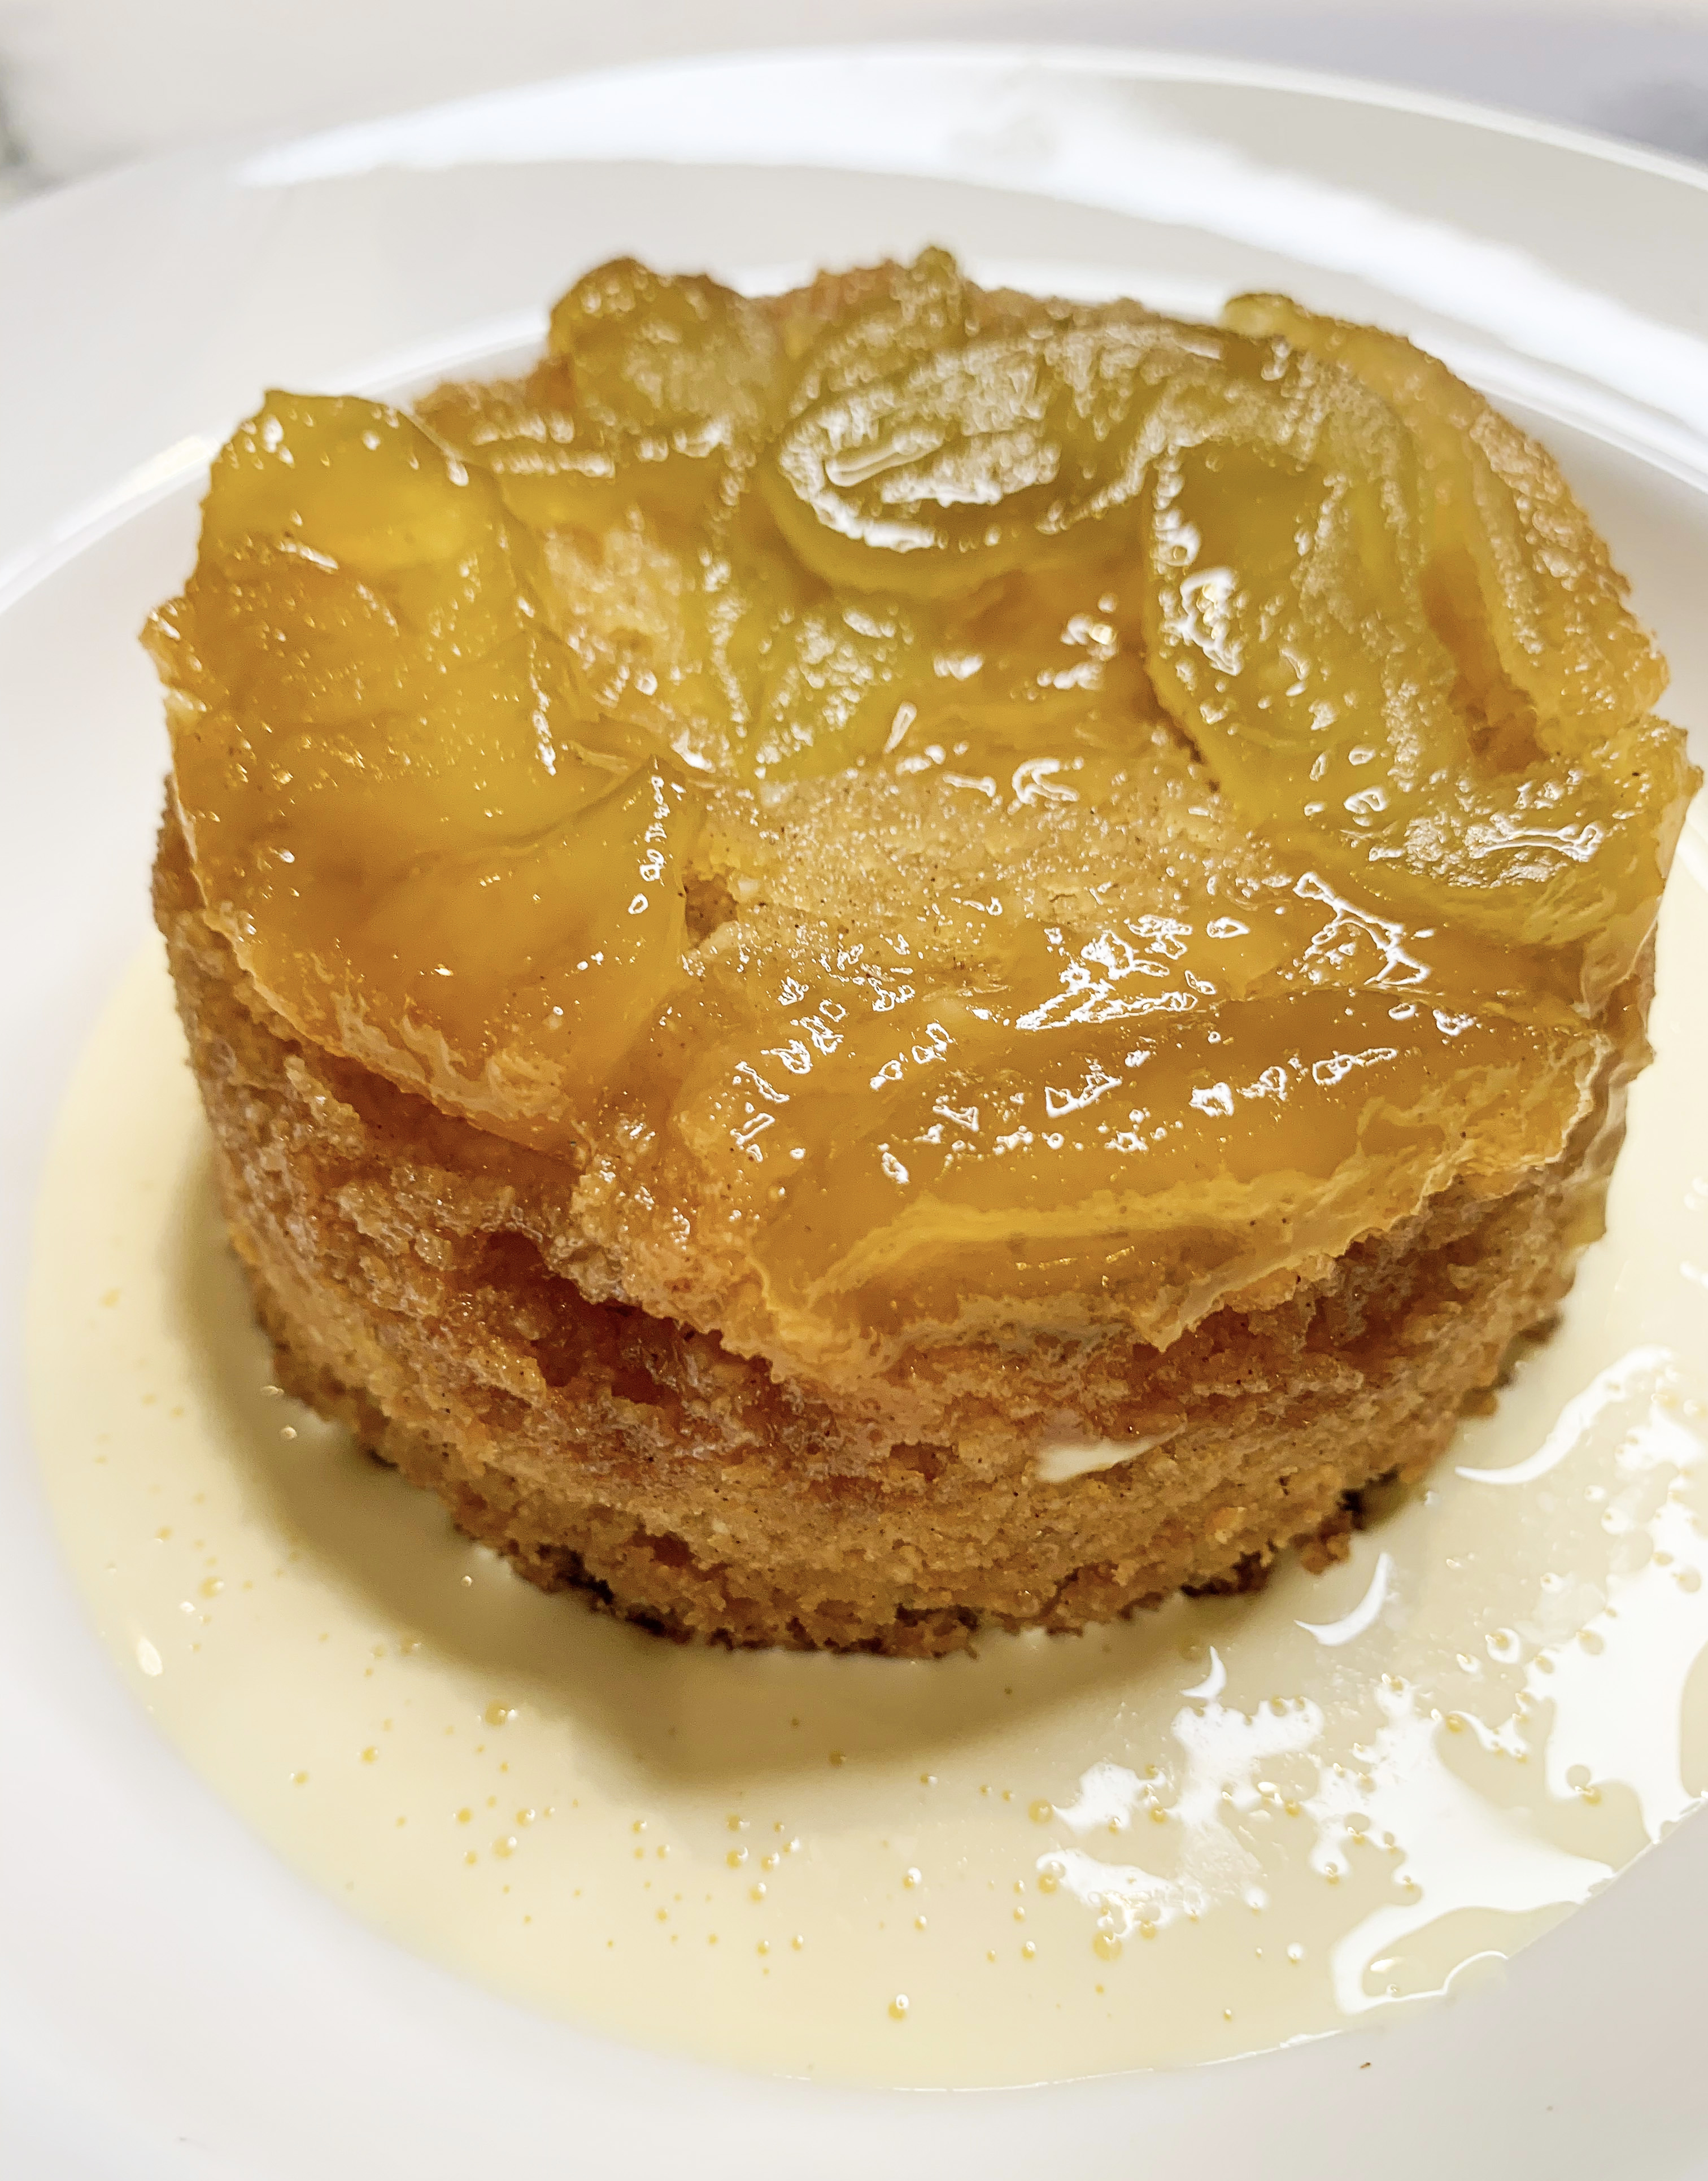
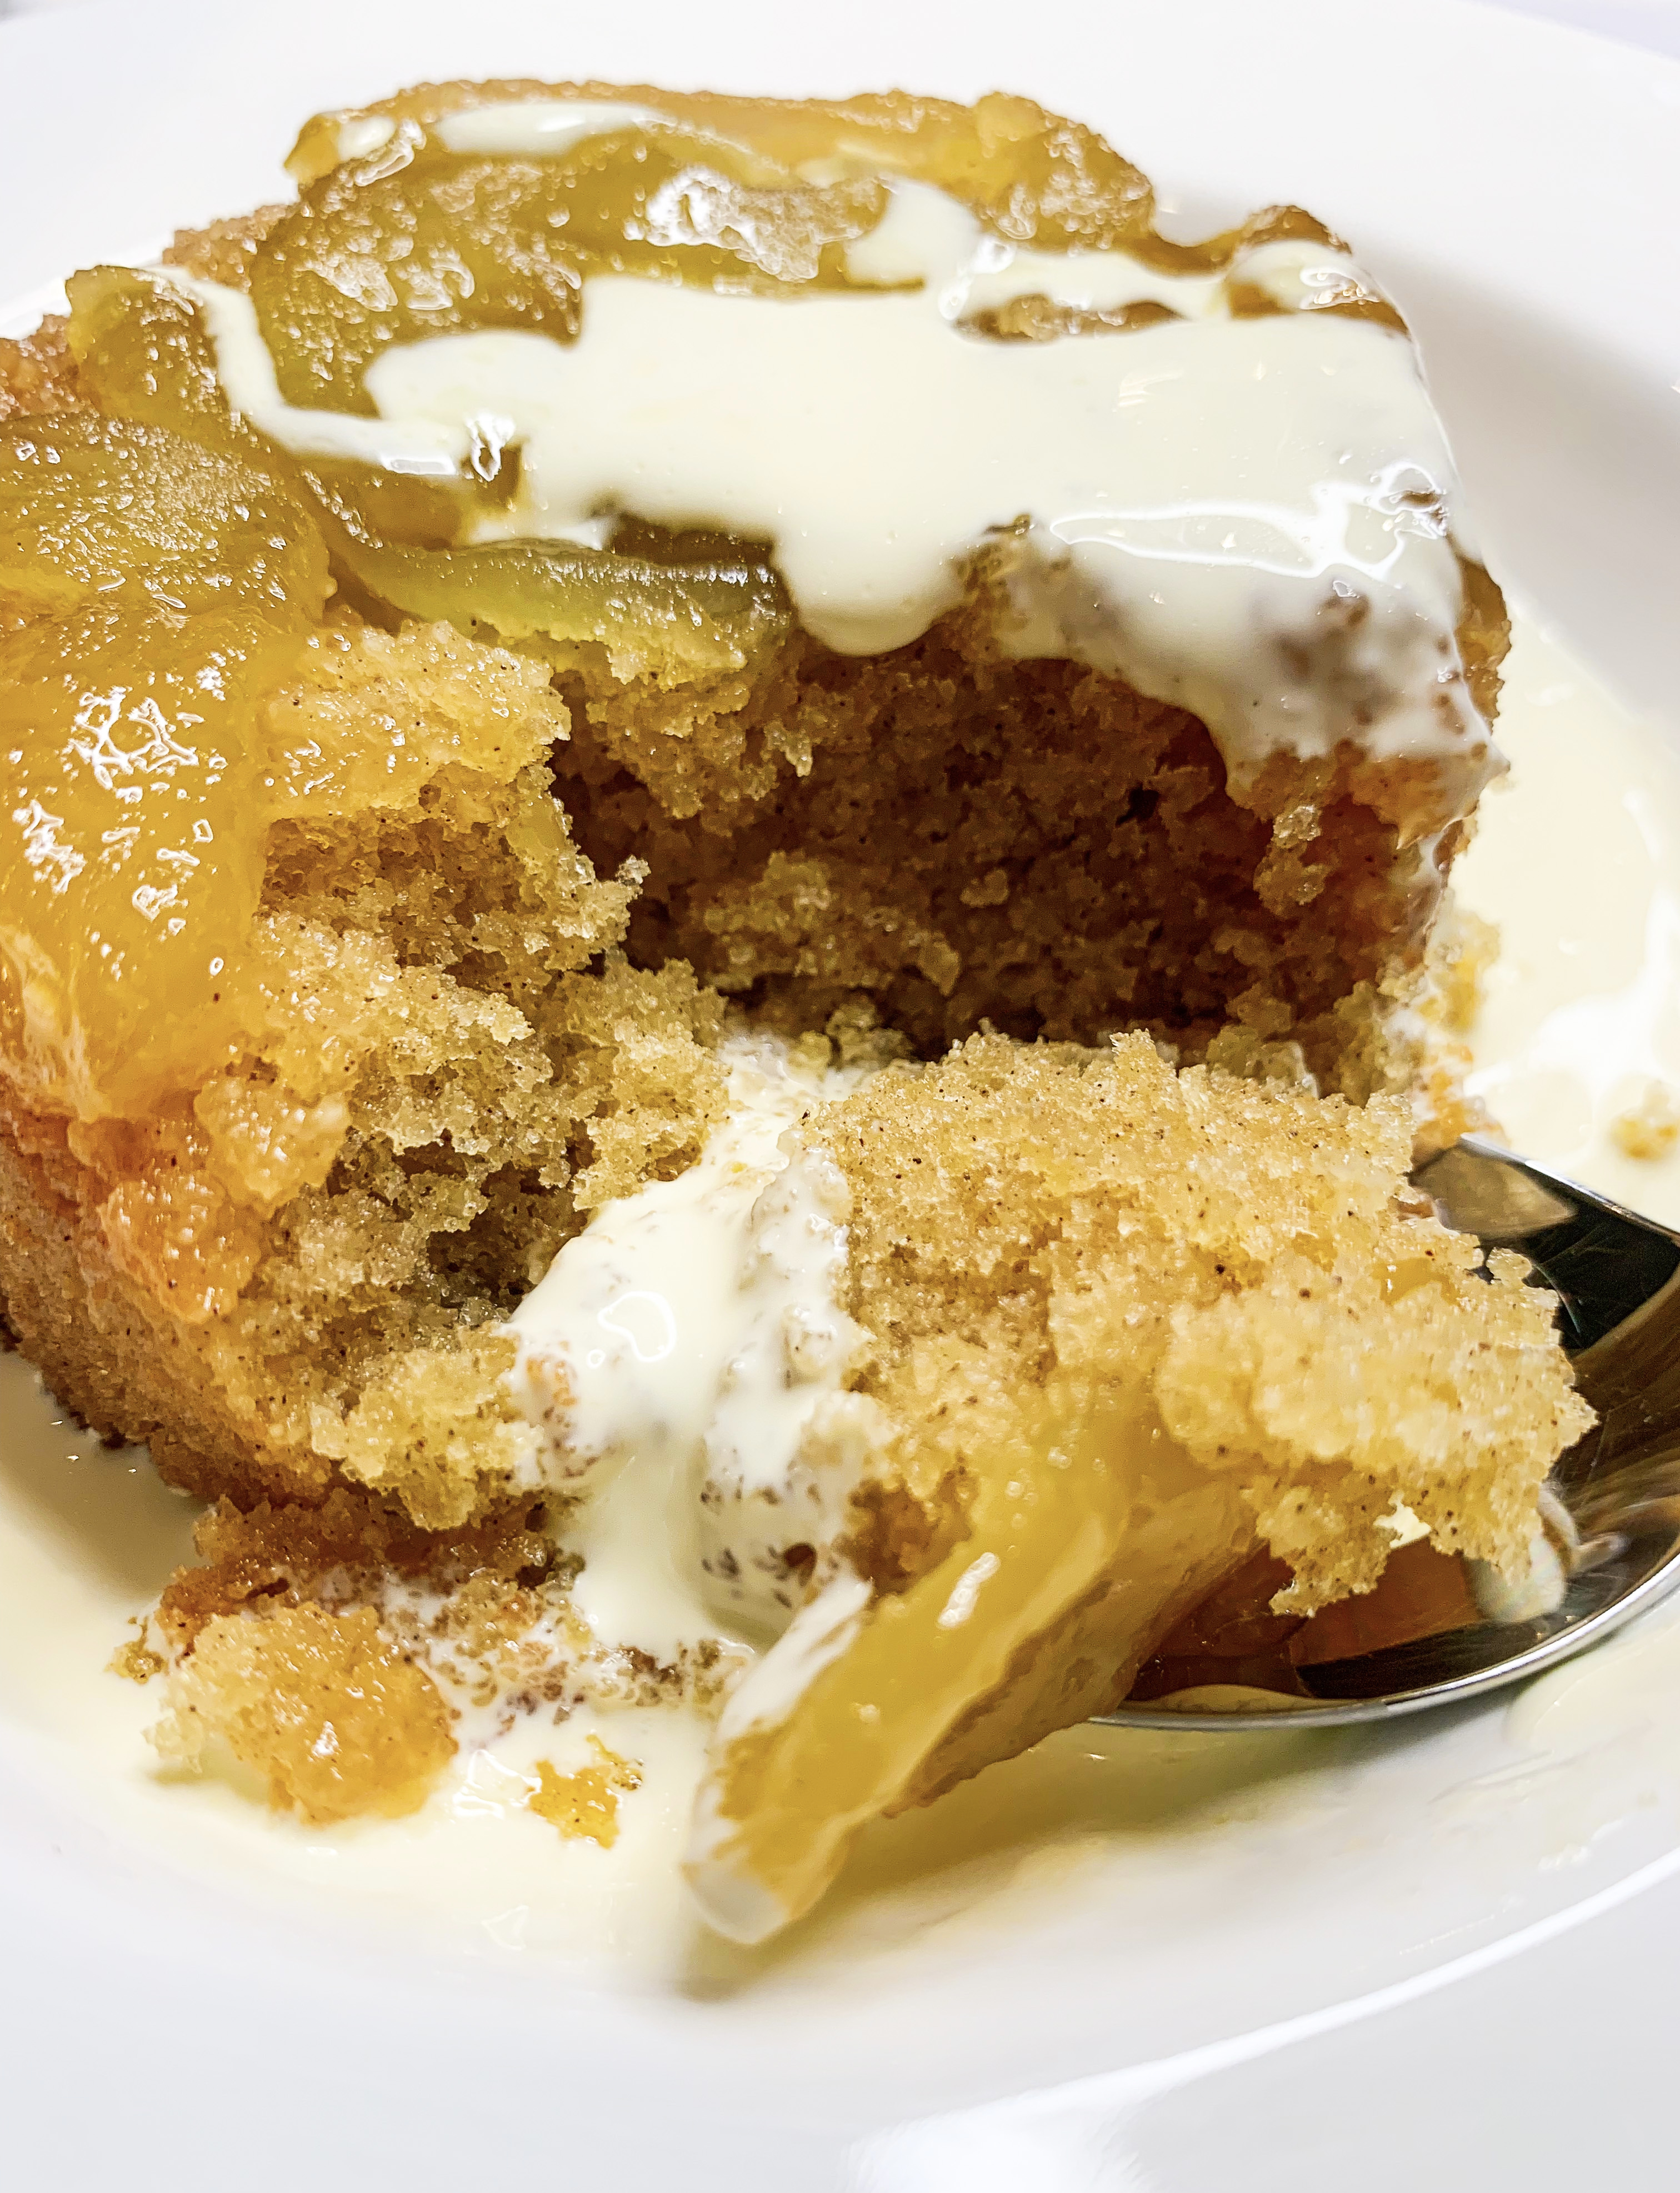
This is one of those delicious, comforting puddings that was made for a winters day, but is just as good in the summer – you really have got to make it! They are wonderfully light; just make sure you serve them with lashings of cream!… The recipe is from Bill Granger’s cookbook, ‘Bills Open Kitchen’. You can substitute the plain flour for gluten-free flour – I use ‘Dove’s’.
150g unsalted butter
150g caster sugar
3 Granny Smith apples, peeled, cored and sliced
1 teaspoon natural vanilla extract
Batter:
175g unsalted butter, cubed (plus extra to grease ramekins)
175g caster sugar
3 eggs
100g ground almonds
100g plain flour (gluten- free if required – see note above)
2 teaspoons baking powder
1 teaspoon cinnamon
(To serve – cream)
*You will need six large 250ml ramekins, greased.
- For the apples – place a saucepan over a medium-high heat and add the butter and sugar. Stir until the butter has melted and the sugar has dissolved. Add the apple and vanilla and cook for 10-15 minutes until soft and caramelised.
- To make the batter, cream the butter and sugar together until pale and creamy. Add the eggs, one at a time, stirring well until combined. Fold in the ground almonds, flour, baking powder and cinnamon and mix until combined.
- Grease six 250ml ovenproof ramekins with butter. Arrange the caramelised apples on the bottom. Divide the batter evenly between the ramekins and smooth over with the back of a spoon. Cook in a preheated oven, 180’c fan, for 25 minutes until lightly golden.
- Run a knife around the edge of each ramekin then invert onto a serving dish. Serve with cream.
Chocolate Mousse Roulade
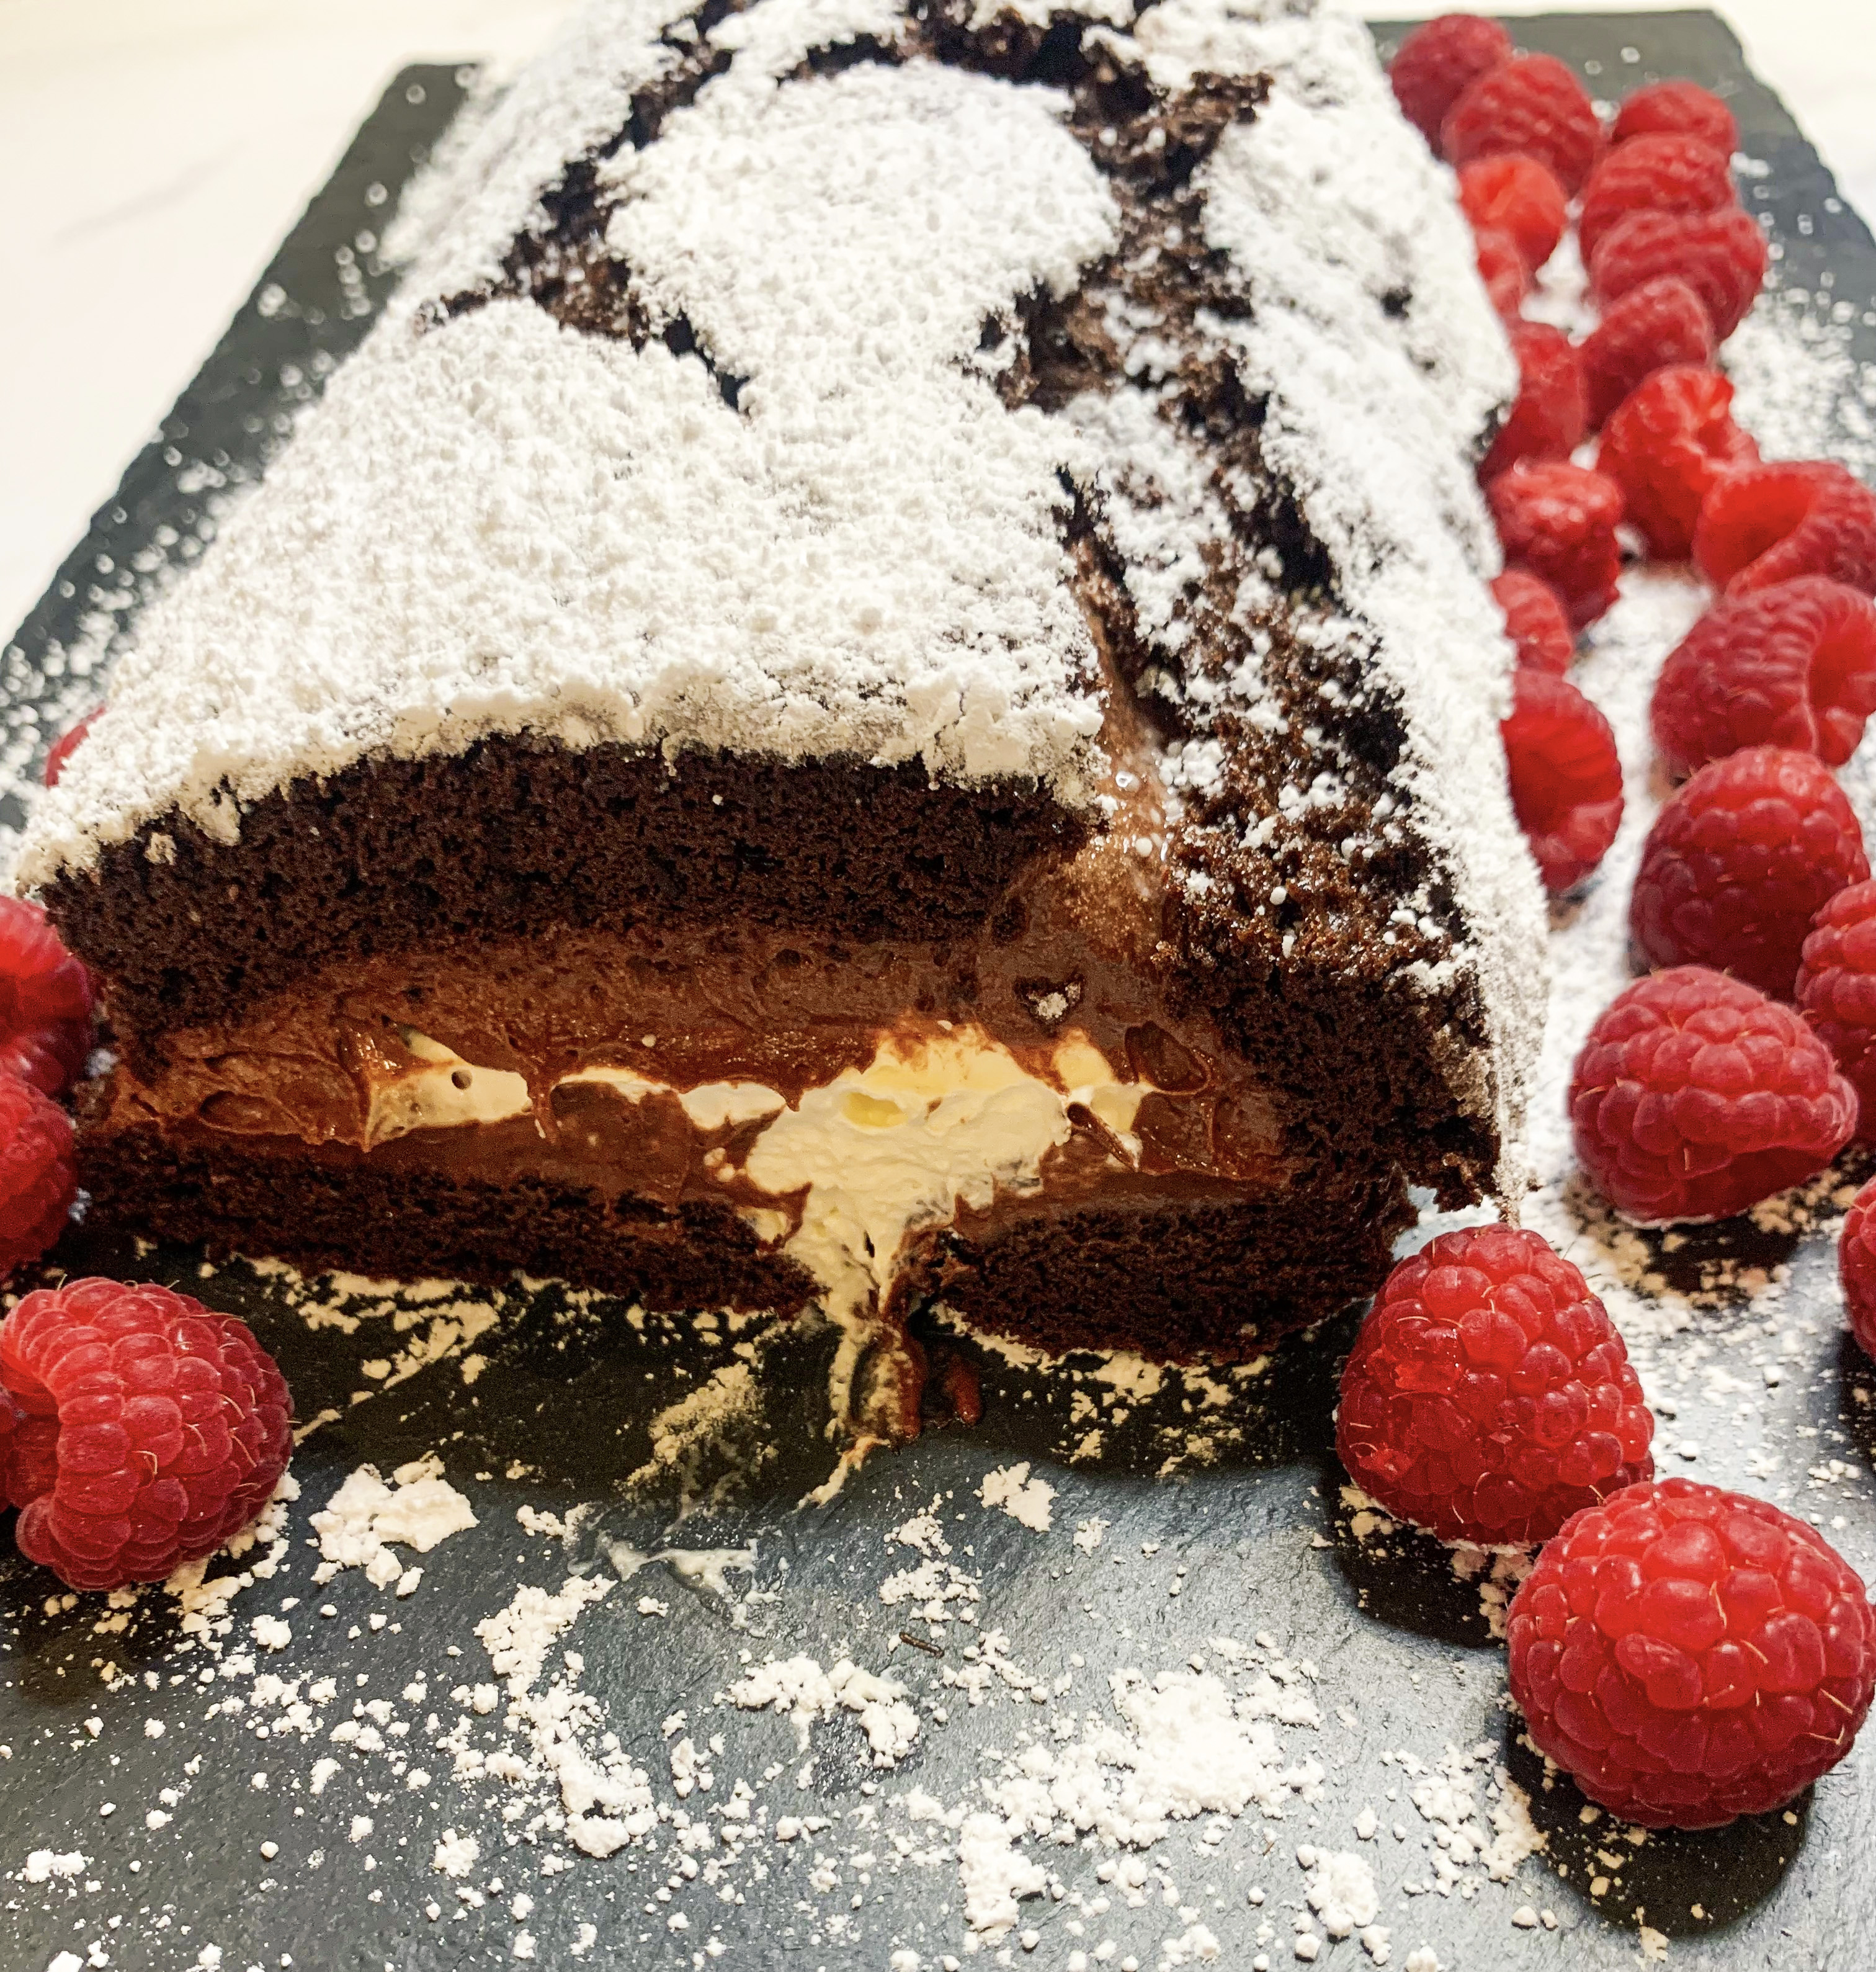
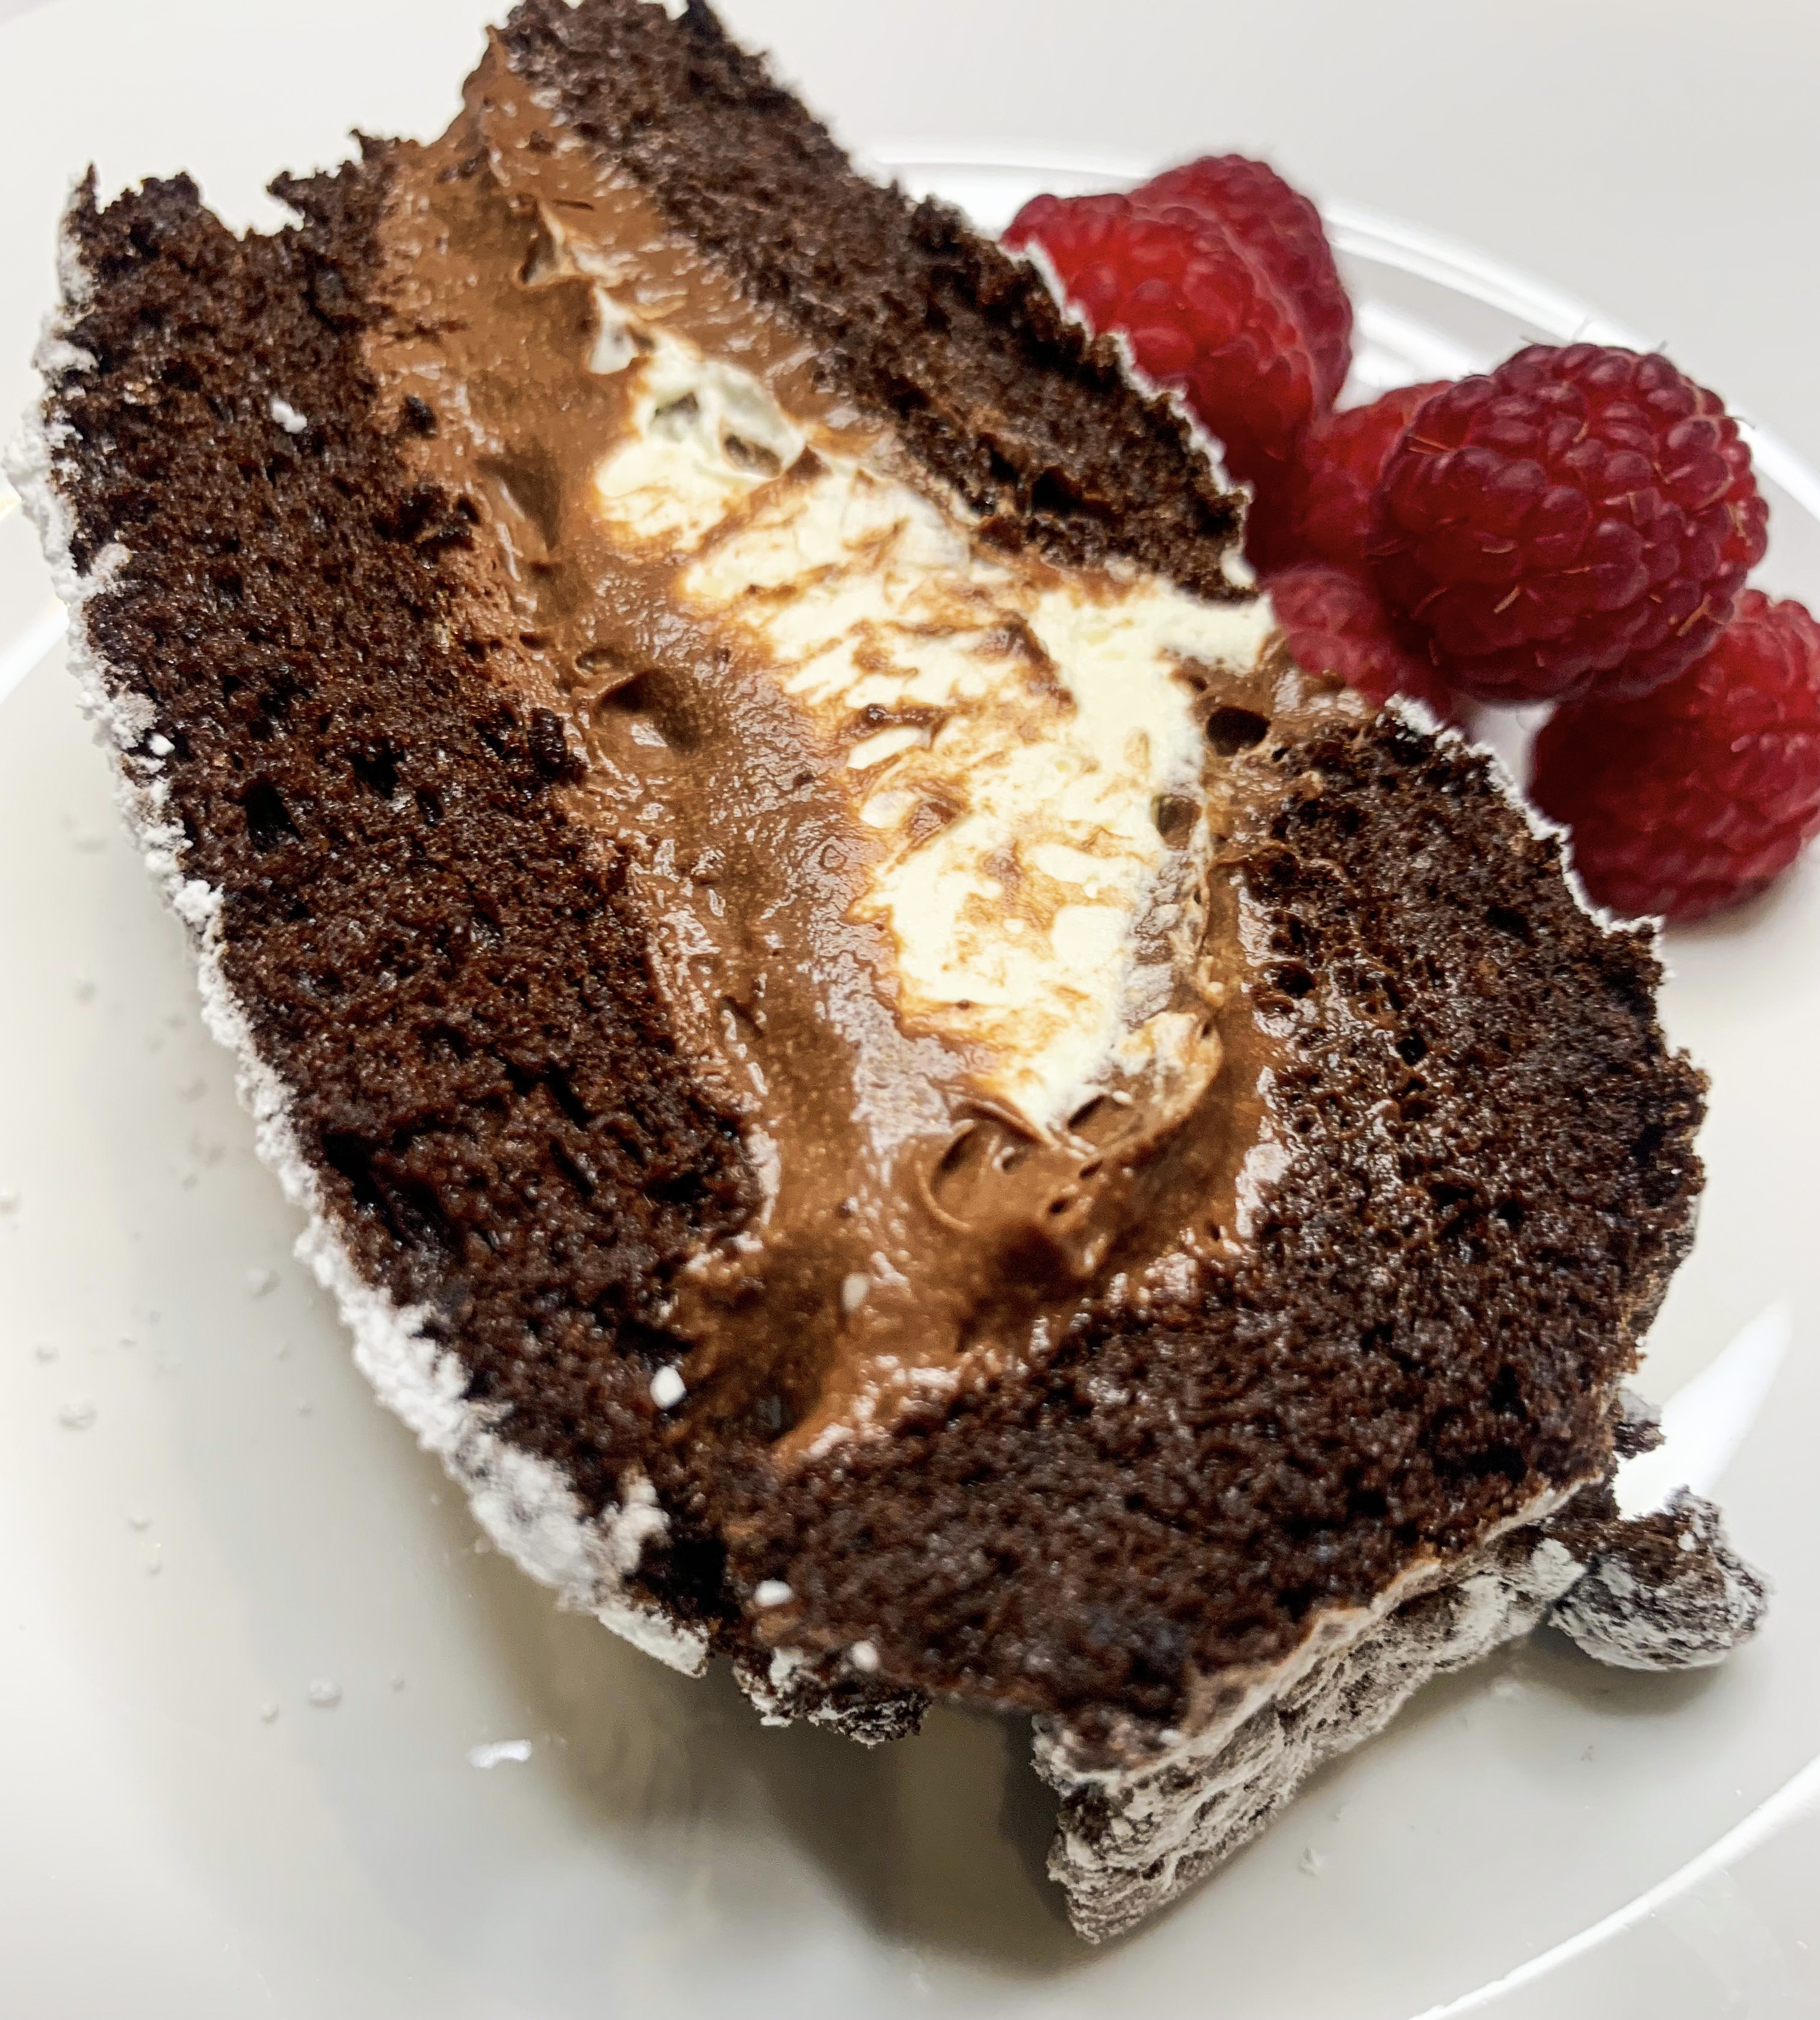
I found this recipe in Rachel Allen’s cookbook, ‘Entertaining at Home’. You will definitely thank me for sharing it – with its chocolate mousse and cream filling, it is incredibly delicious and surprisingly light. It also makes a great centrepiece for a Christmas celebration, you could add a sprig of holly to make it really festive! Roulades have a reputation for being difficult to make as they are renowned for cracking, but this is their nature and once you accept this outcome you will realise just how easy they are to bake – personally, I think their cracked style adds to their beauty and deliciousness! Indeed, when I was making this roulade I asked myself why I don’t make them more often, especially as many are naturally gluten-free. So, I have decided to start searching out more roulade recipes (watch this space!), in the meantime, you really should try this one!!… It will keep in the fridge for a couple of days but bring it to room temperature before serving.
6 eggs separated
150g caster sugar
50g cocoa powder
Icing sugar, for dusting
225ml double cream
For the chocolate mousse:
125ml double cream
125g dark chocolate, roughly chopped
2 tablespoons brandy or dark rum (optional)
2 eggs, separated
*You will also need a 20 x 30cm Swiss roll tin, lined
- Place the egg yolk and sugar in a bowl and whisk until the mixture starts to thicken, then whisk in the cocoa powder.
- In a separate bowl, whisk the egg whites until they are just stiff, then carefully fold these into the chocolate mixture. Pour into the prepared tin and bake in a preheated oven, 180’c for 15-20 minutes until the sponge feels springy to touch. Remove from the oven and allow to cool in the tin.
- To make the mousse filling, pour the cream into a saucepan and bring to the boil. Remove from the heat and stir in the chocolate until it has all melted. Add the brandy or rum (if using) and whisk in the egg yolks.
- In a clean bowl, whisk the egg whites until stiff, then stir in a quarter of the egg whites into the chocolate mixture, then pour the chocolate mixture into the remaining egg whites and fold in gently. Cover the bowl with clingfilm and chill in the fridge for 1-2 hours to set.
- When the roulade sponge has cooled turn it out onto an oblong sheet of greaseproof paper liberally dusted with icing sugar (or you could use cocoa powder if desired).
- Carefully pull away the lining paper. Spread the chocolate mousse over the sponge. Now whip up the cream and spread this over the chocolate mousse.
- With one long side facing you, gently roll up the roulade into the shape of a log. Transfer to a serving plate with the join facing down – this can be tricky, I usually use both a frying pan spatula and a palette knife to do this!
- Finally, dust with a little more icing sugar (or cocoa powder) and enjoy!
White Chocolate, Pecan Nut & Oat Cookies
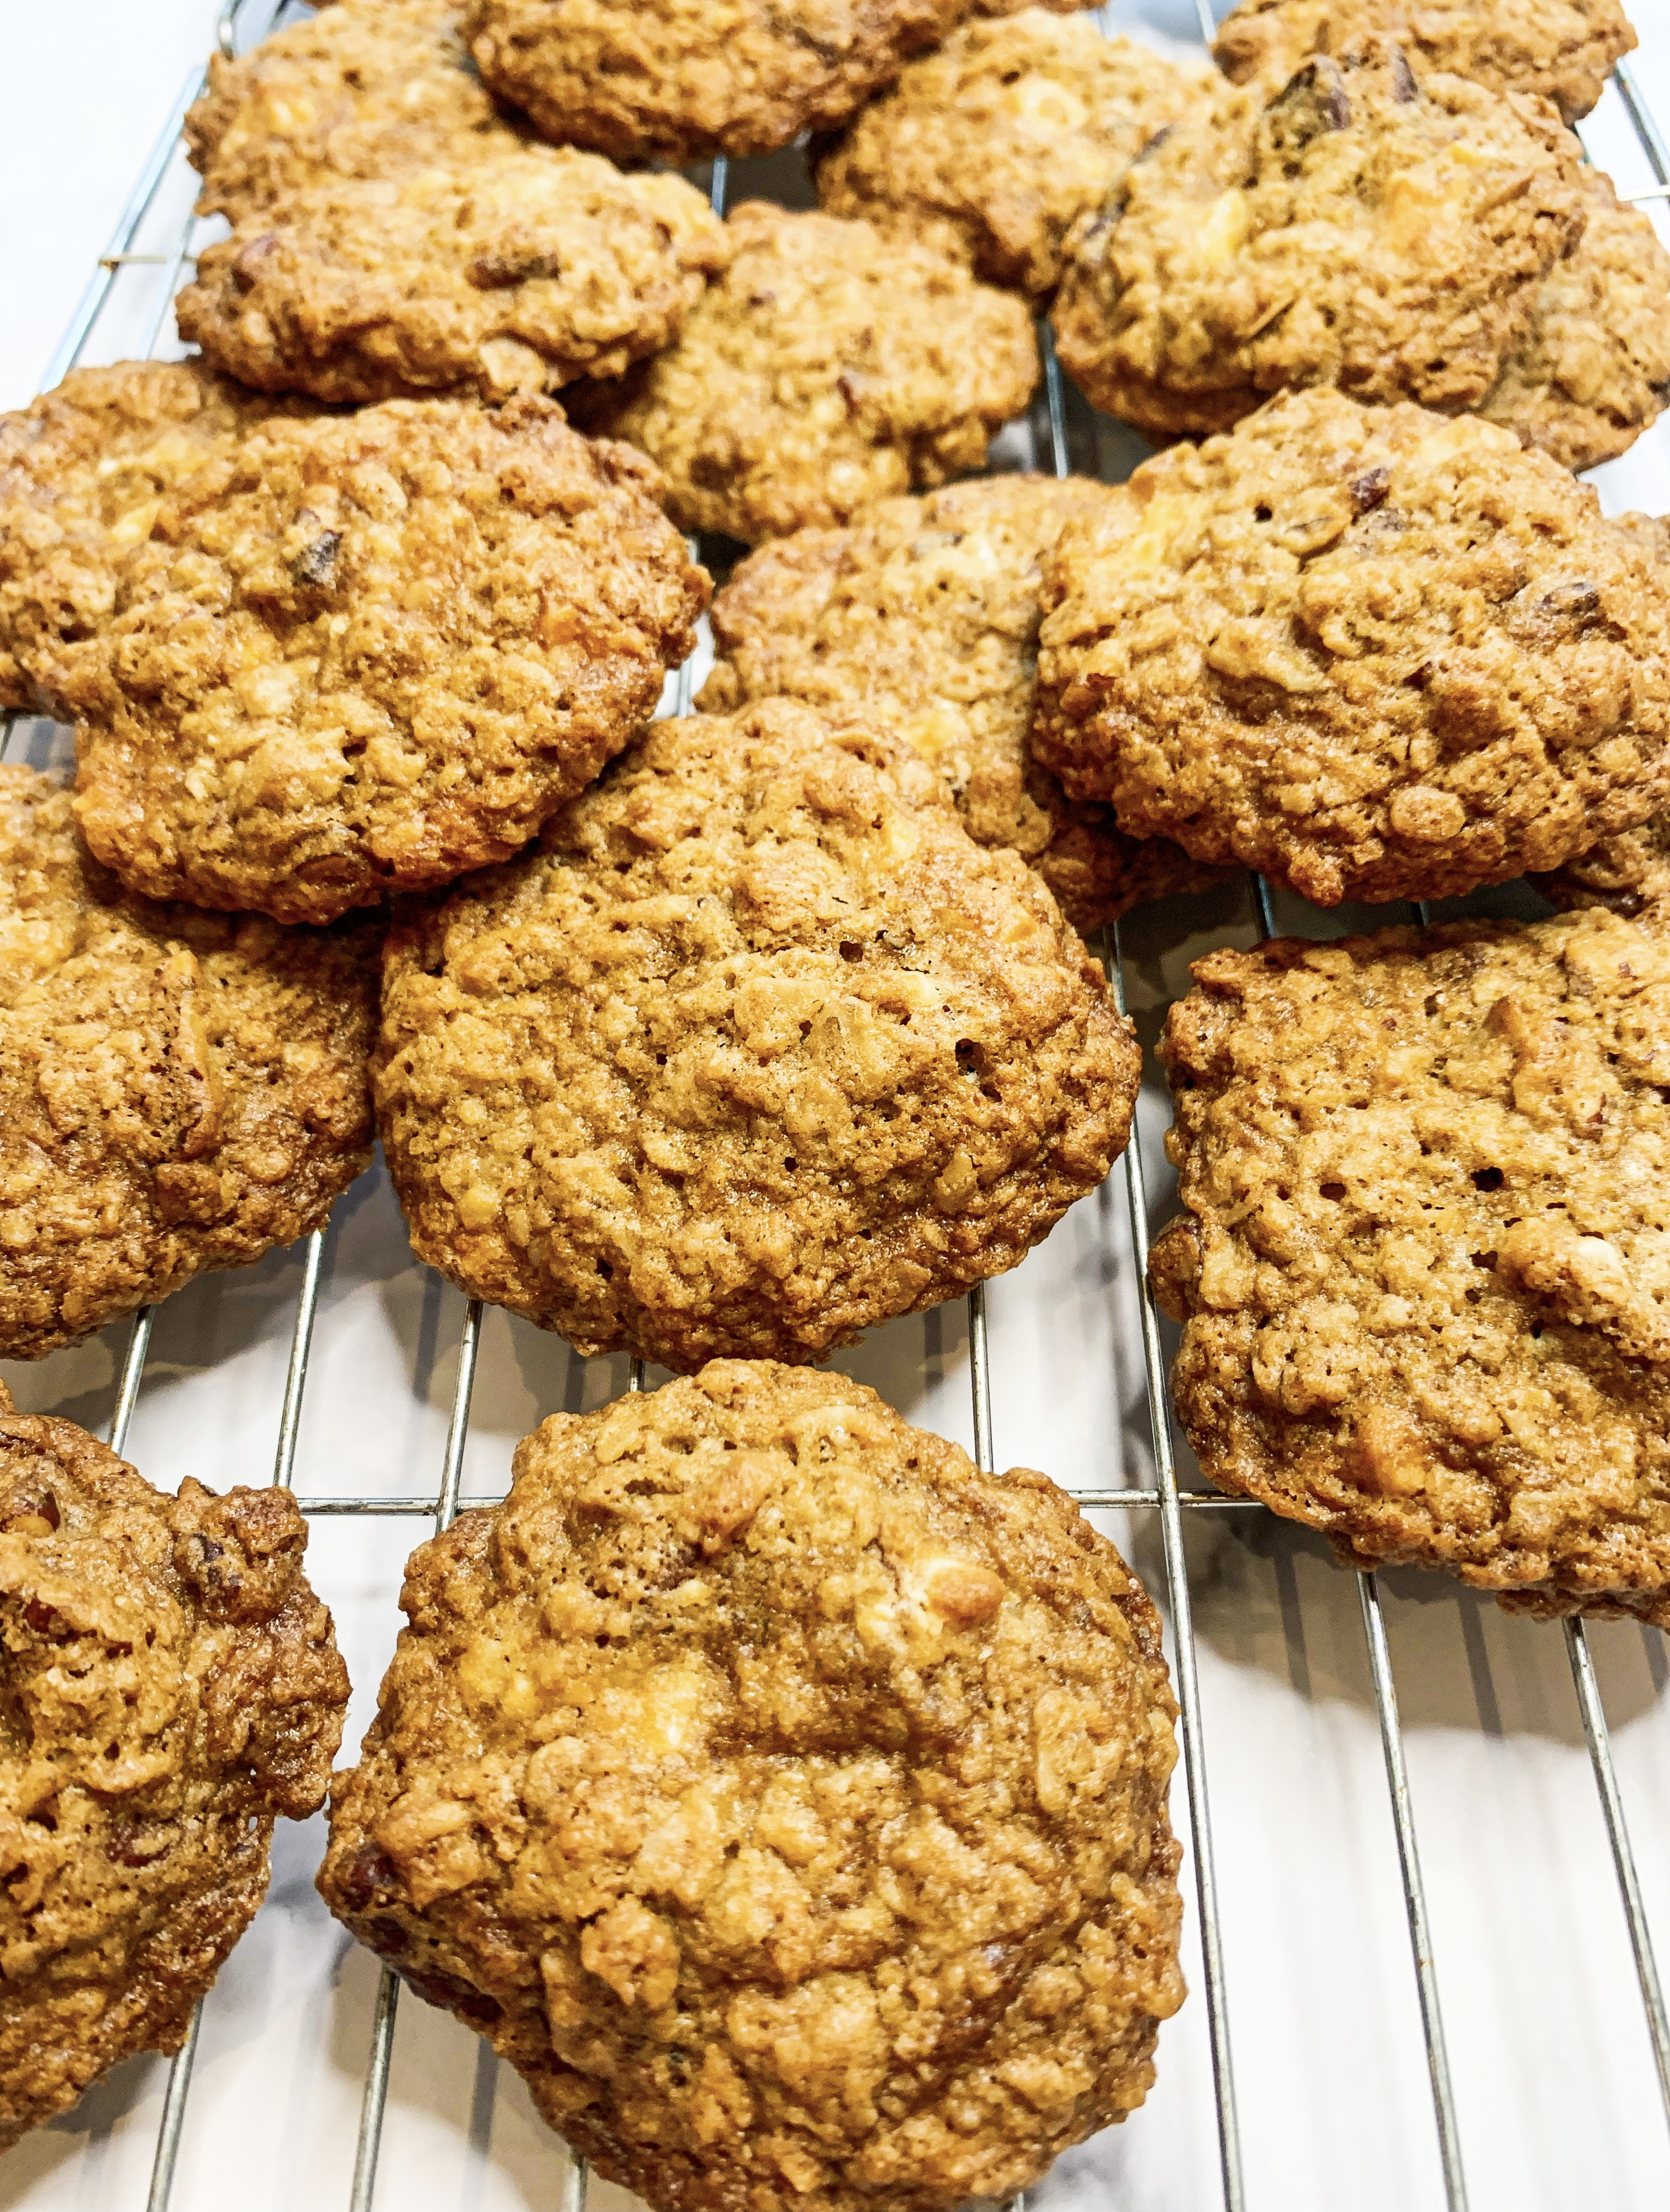
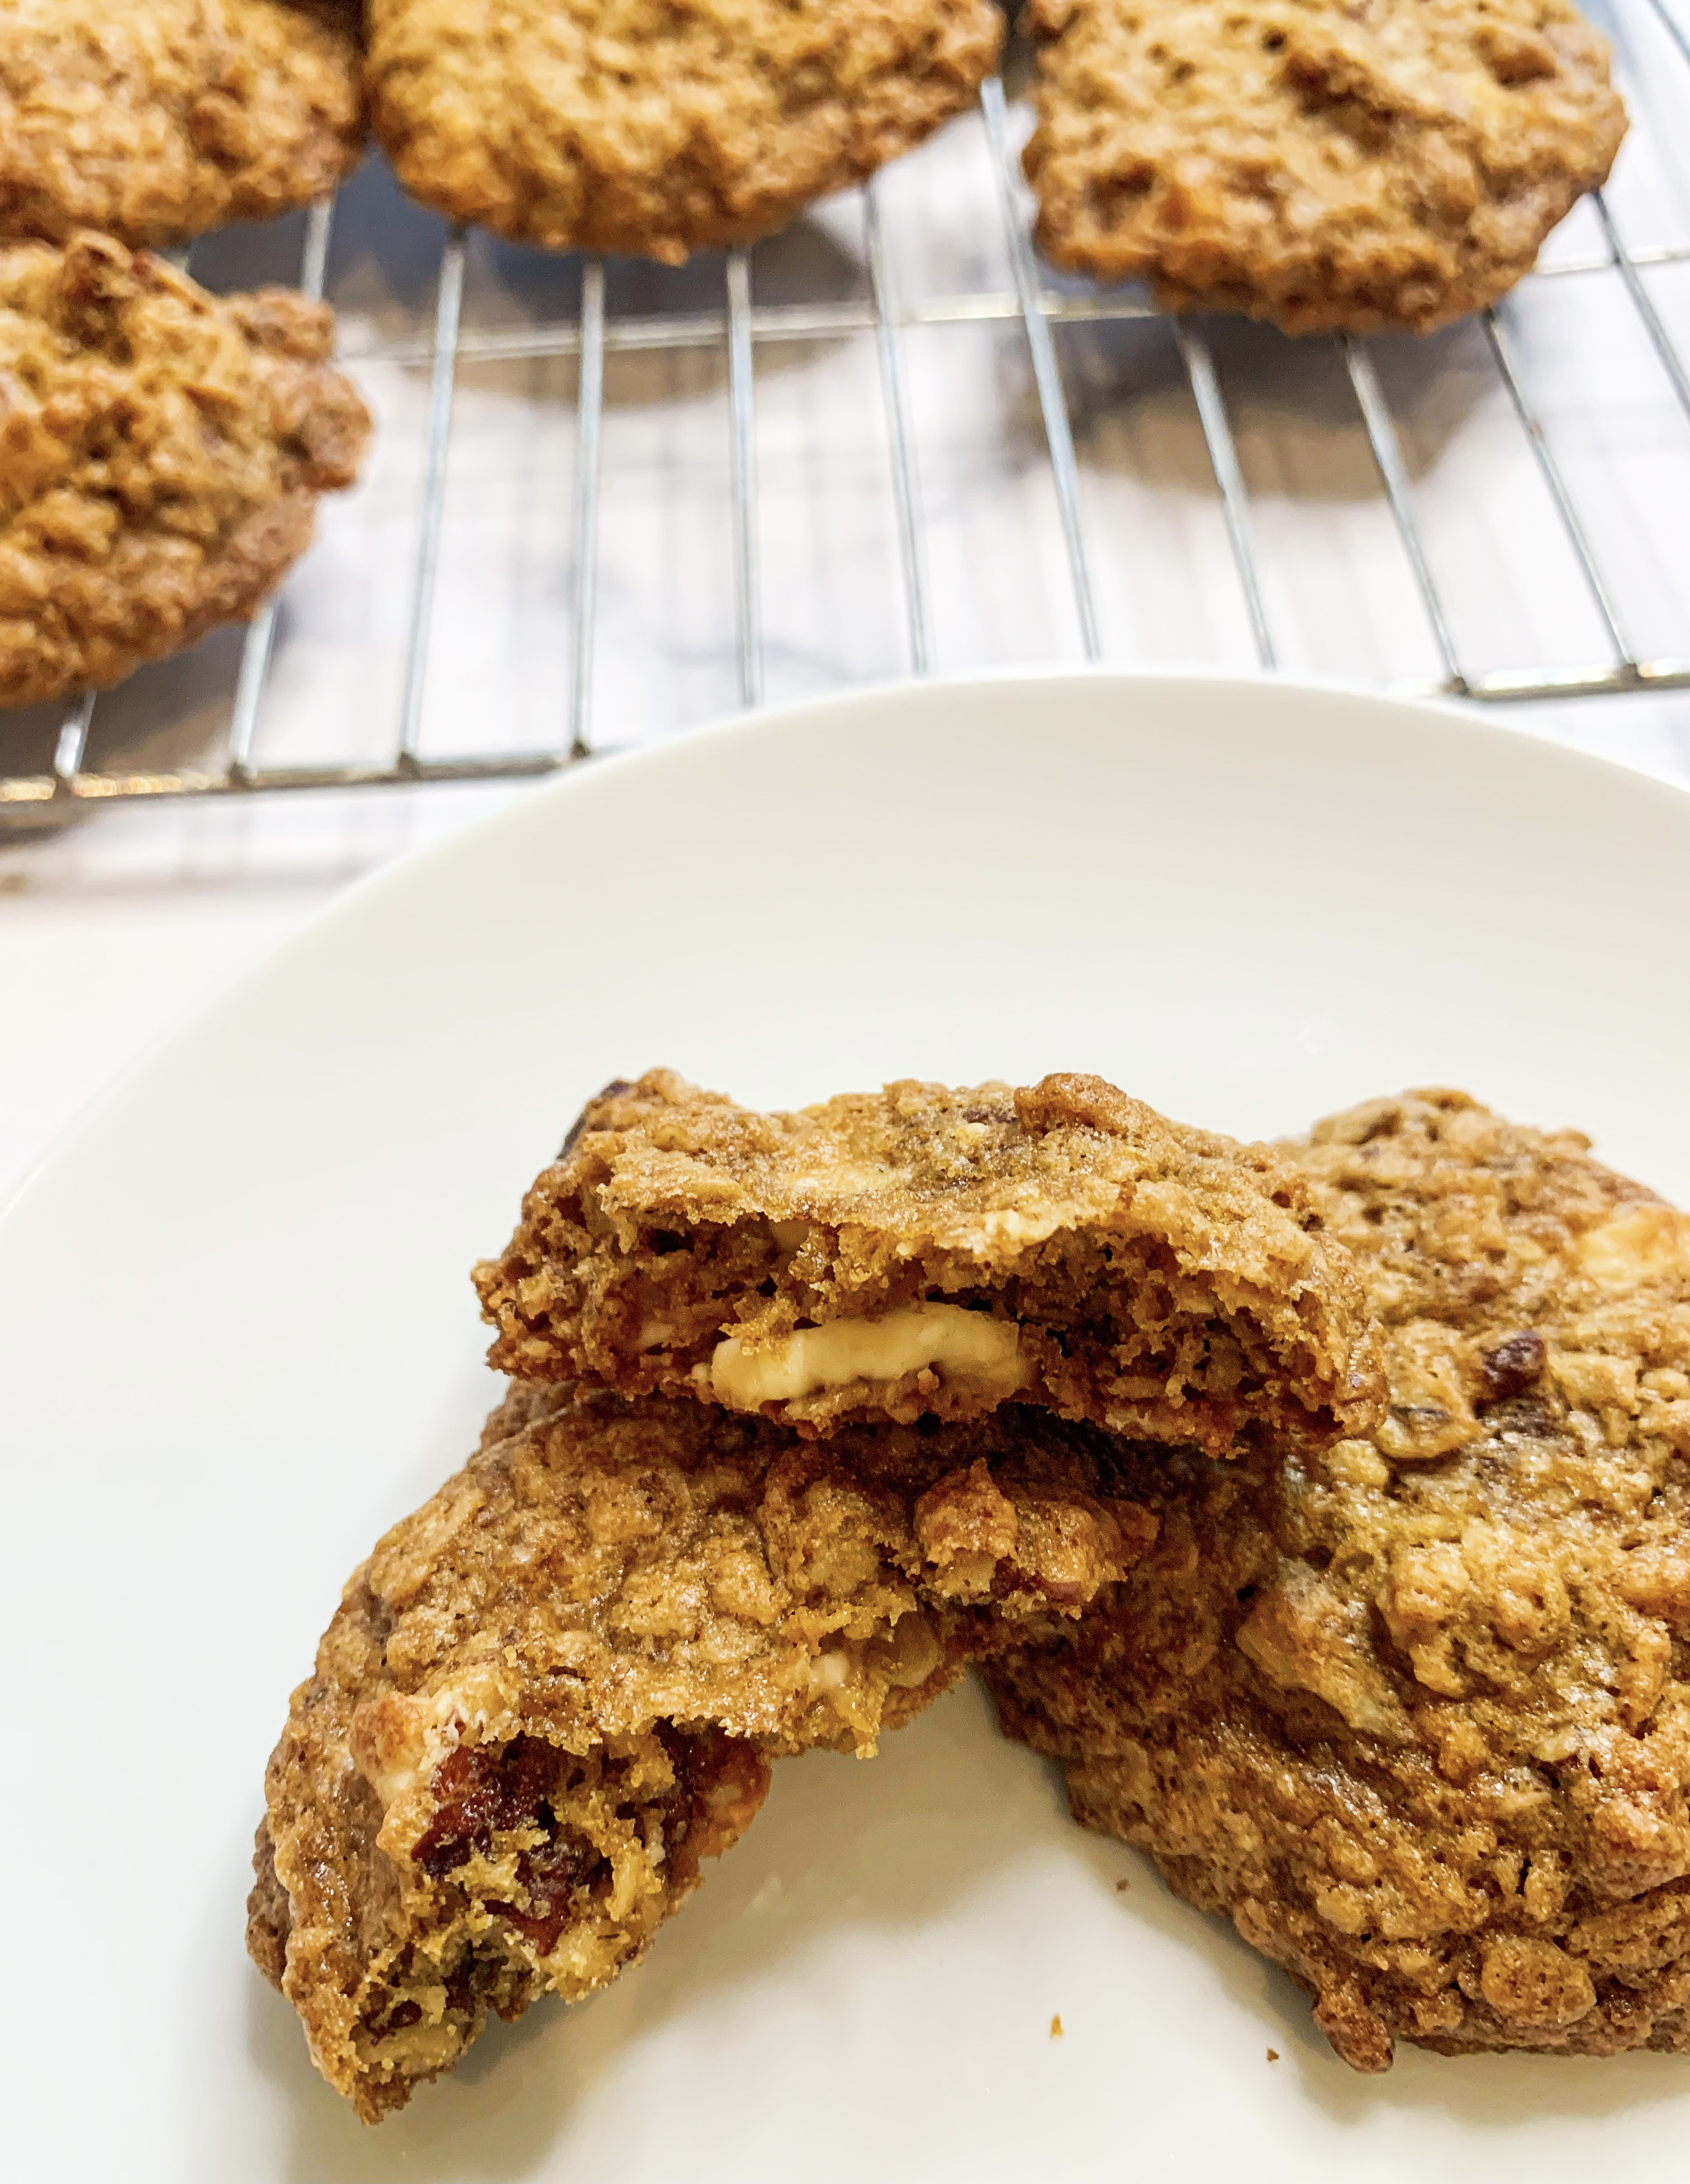
These are very good and very moreish, they are the type of cookie that can be easily eaten at just about any time of the day – you have been warned! The recipe is from the cookbook, ‘A Love of Eating: Recipes form Tart London’, written by Lucy Carr-Ellison and Jemima Jones. In their recipe they use macademia nuts which I’m not so keen on, so I have substituted them for pecan nuts which are delicious with the sweet, white chocolate, a little like that other match made in heaven – pecan and maple syrup. This recipe works well with gluten-free flour, I use Dove’s. (Makes about 20 cookies)
150g unsalted butter, softened
130g light muscovado sugar
1 egg, beaten
1 teaspoon vanilla extract
50g plain flour (gluten-free if required – see note above)
1 teaspoon bicarbonate of soda
130g porridge oats
100g pecan nuts
100g white chocolate, chopped
*A couple of baking sheets, lined with baking paper.
- First, place the pecan nuts on a baking tray and bake in a preheated oven, 180’c fan, for 5-10 minutes until golden and toasted. Remove from the oven, allow to cool then chop.
- Cream the butter and the sugar together until soft and pale. Add the egg, vanilla, flour and bicarbonate of soda and beat until smooth.
- Add the oats, chopped white chocolate and pecan nuts, fold until combined.
- Take walnut size amounts of the sticky dough and place on the lined baking sheets, spacing them well apart. Bake in a preheated oven, 180’c fan, for 10-12 minutes until golden brown. Transfer to a wire rack to cool….before eating…enjoy!!
Bicerin (Serves 1)
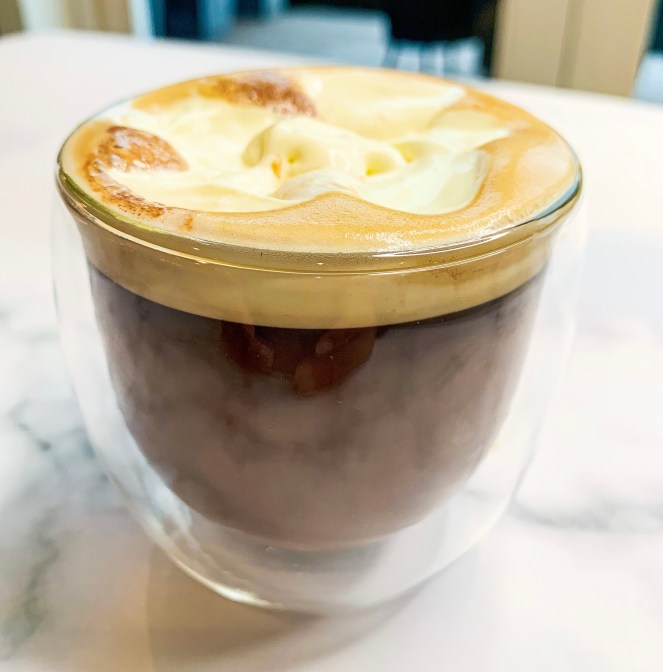
This wonderful drink isn’t exactly a dessert, but I have put it in my desserts section as it is a delicious sweet treat!…A Bicerin is a luxurious coffee-and-chocolate drink topped with cream that originates from Turin. Rather than being mixed together like a ‘mocha’, the espresso and hot chocolate are poured in layers and topped with whipped cream – so initially through the light cream you taste the sweetness of the velvety chocolate this is then followed by the punch of espresso coffee; it is heavenly! I first tasted it at Caffè Al Bicerin when I visited Turin a few years ago. Caffè Al Bicerin is a beautiful little cafe with just 6 or so tables, the interior is wonderfully antiquated and dimly lit by candles on white marble tabletops. It really is a ‘must-see’ place if you visit Turin (I would definitely recommend a long weekend in this historic Italian city!). The cafe is not only renowned for having invented the Bicerin, but it is also famous for its other delicious sweet treats such as Zabaglione – but that’s another story… (I will be sharing that recipe in the future!).
Back to the Bicerin… If you love coffee and chocolate (and cream!), you can’t go wrong with this recipe. It is important to make it with the very best, strong espresso coffee and velvety hot chocolate; I think that the following recipe is pretty authentic!.. Enjoy!
50ml double cream
½ teaspoon icing sugar
125ml full fat milk
50g dark chocolate, roughly broken up
½ tablespoon caster sugar
75ml hot espresso coffee
- Firstly whip the cream with the icing sugar until is just forms soft peaks.
- Put the chocolate, milk and caster sugar in a small saucepan, whisk until it begins to boil, then reduce the heat and let it simmer for a minute, continue whisking, ensuring that the chocolate has melted.
- Pour the hot espresso coffee into a heatproof glass. Carefully and slowly pour the hot chocolate over the top. Finally, top with a generous dollop of whipped cream. Heaven!
Almond ‘English’ Macaroons (Makes about 20)
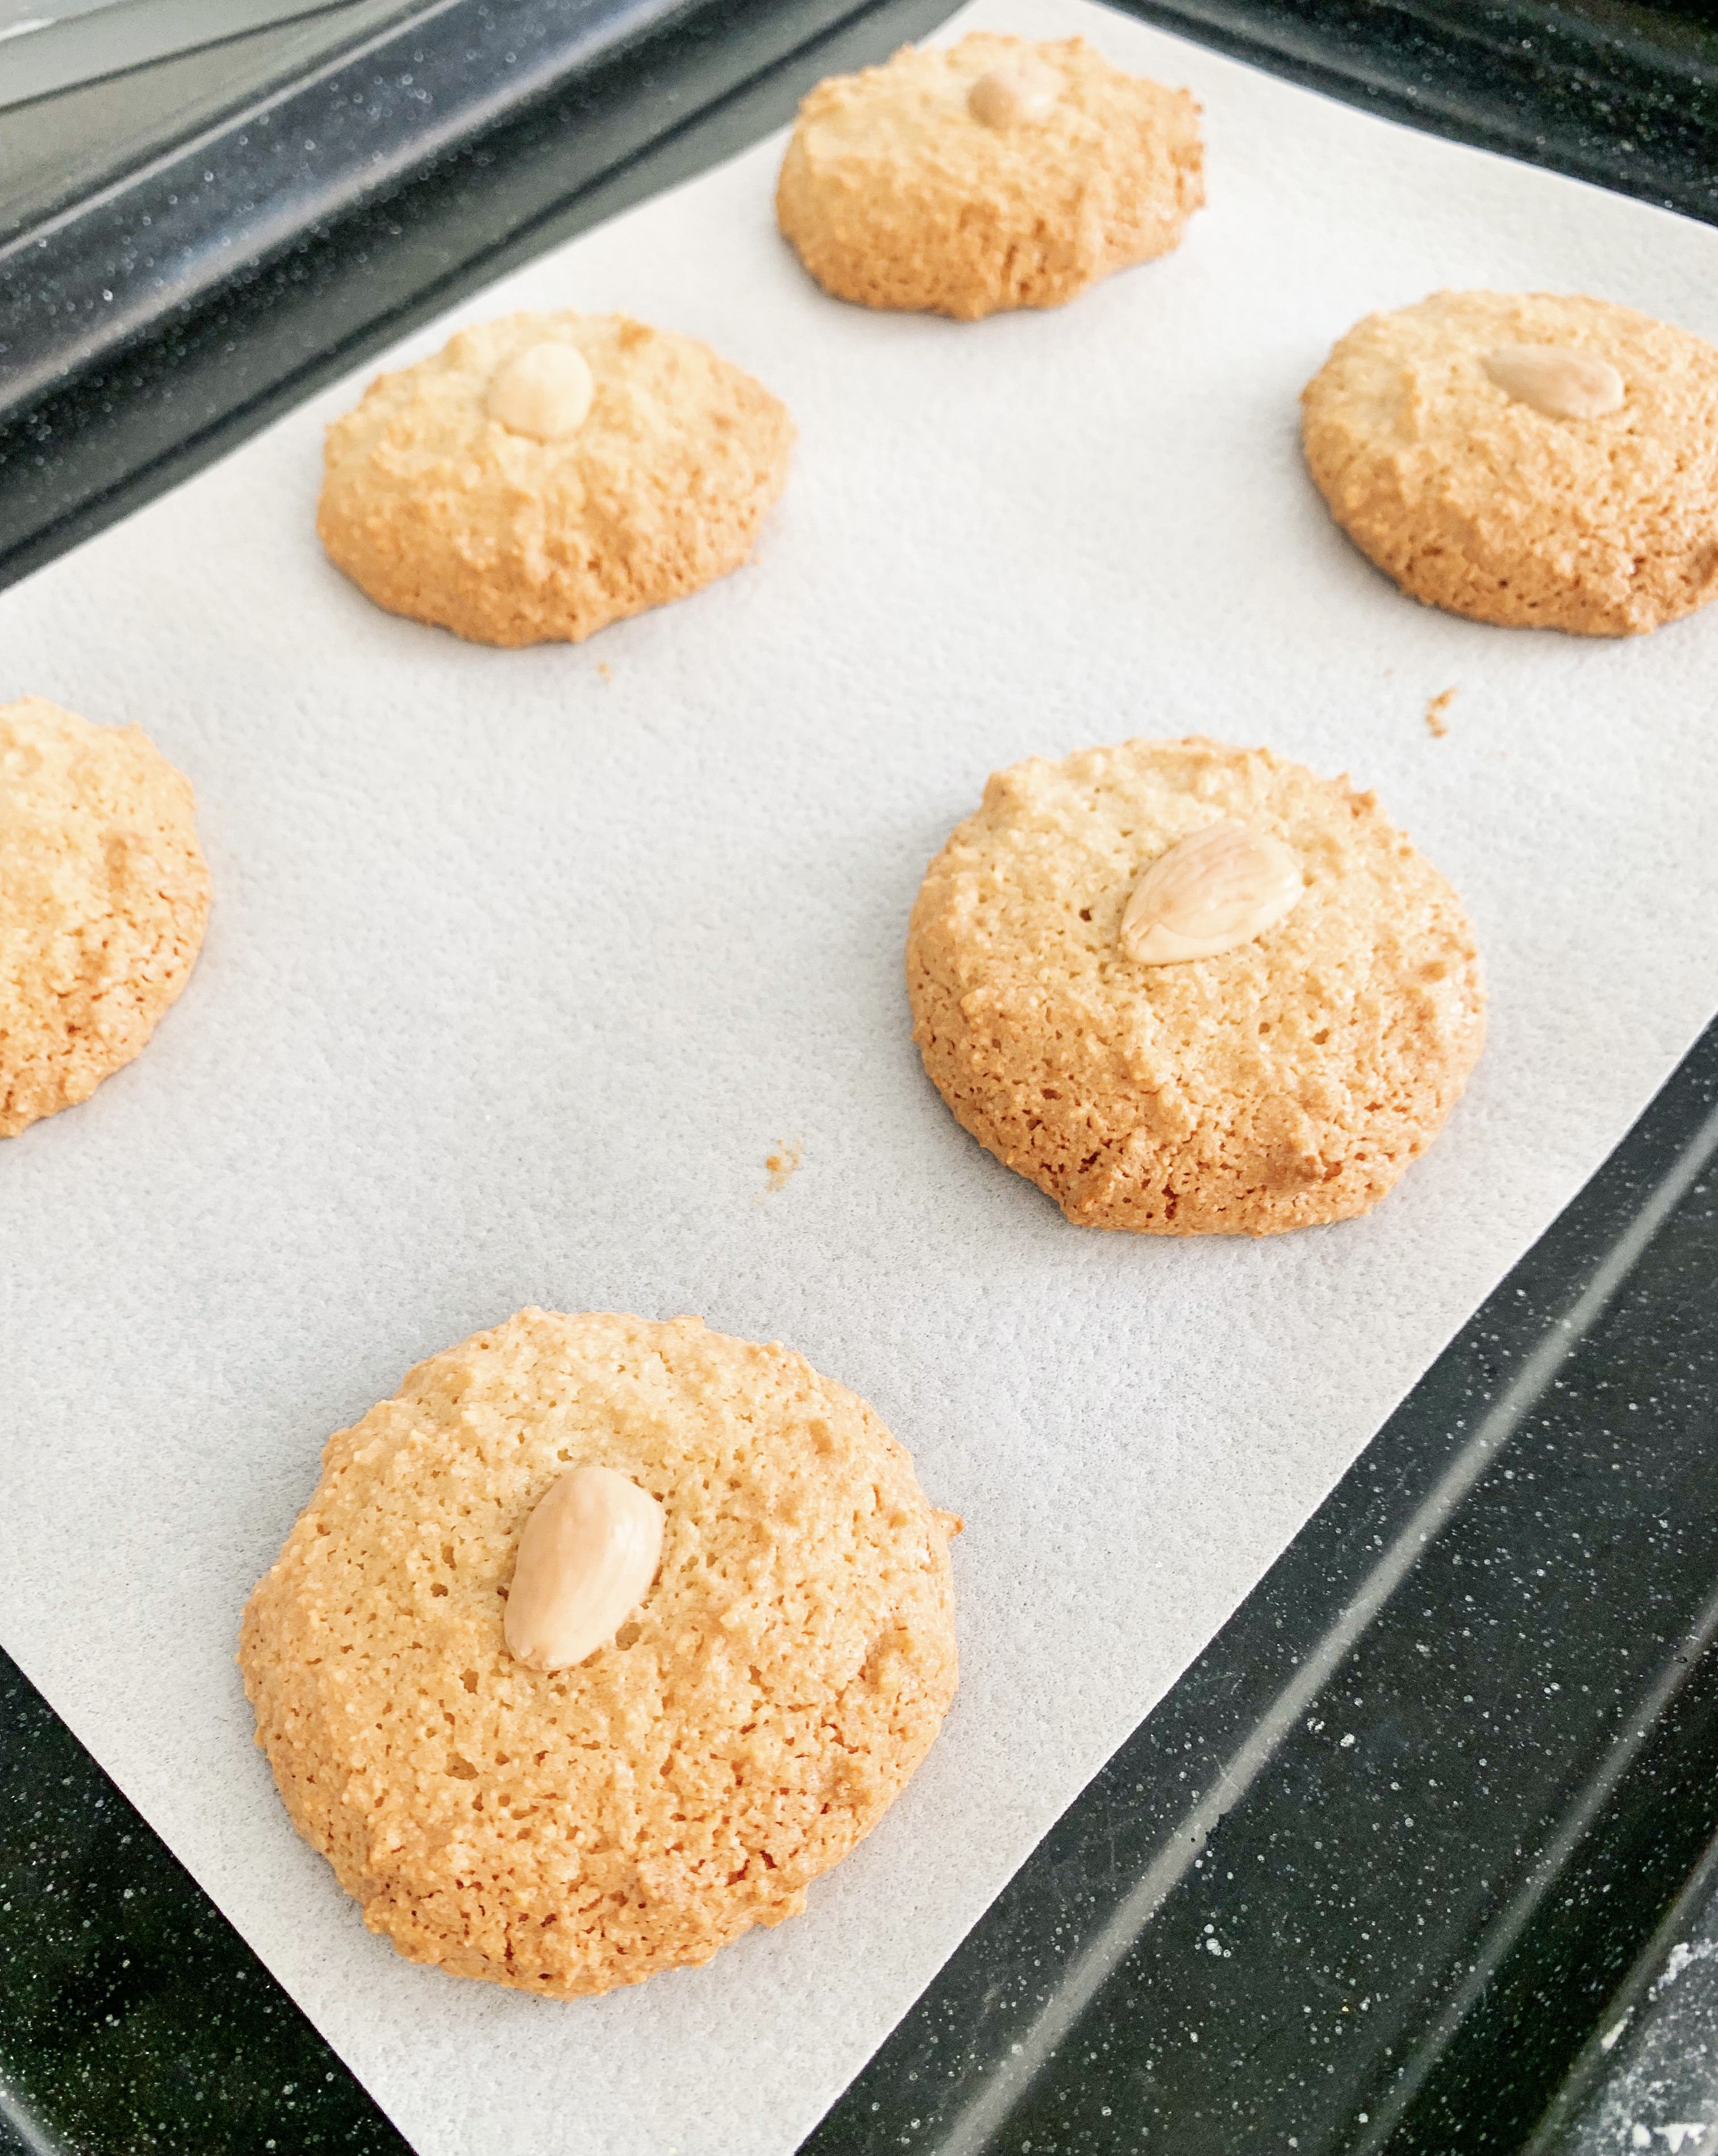
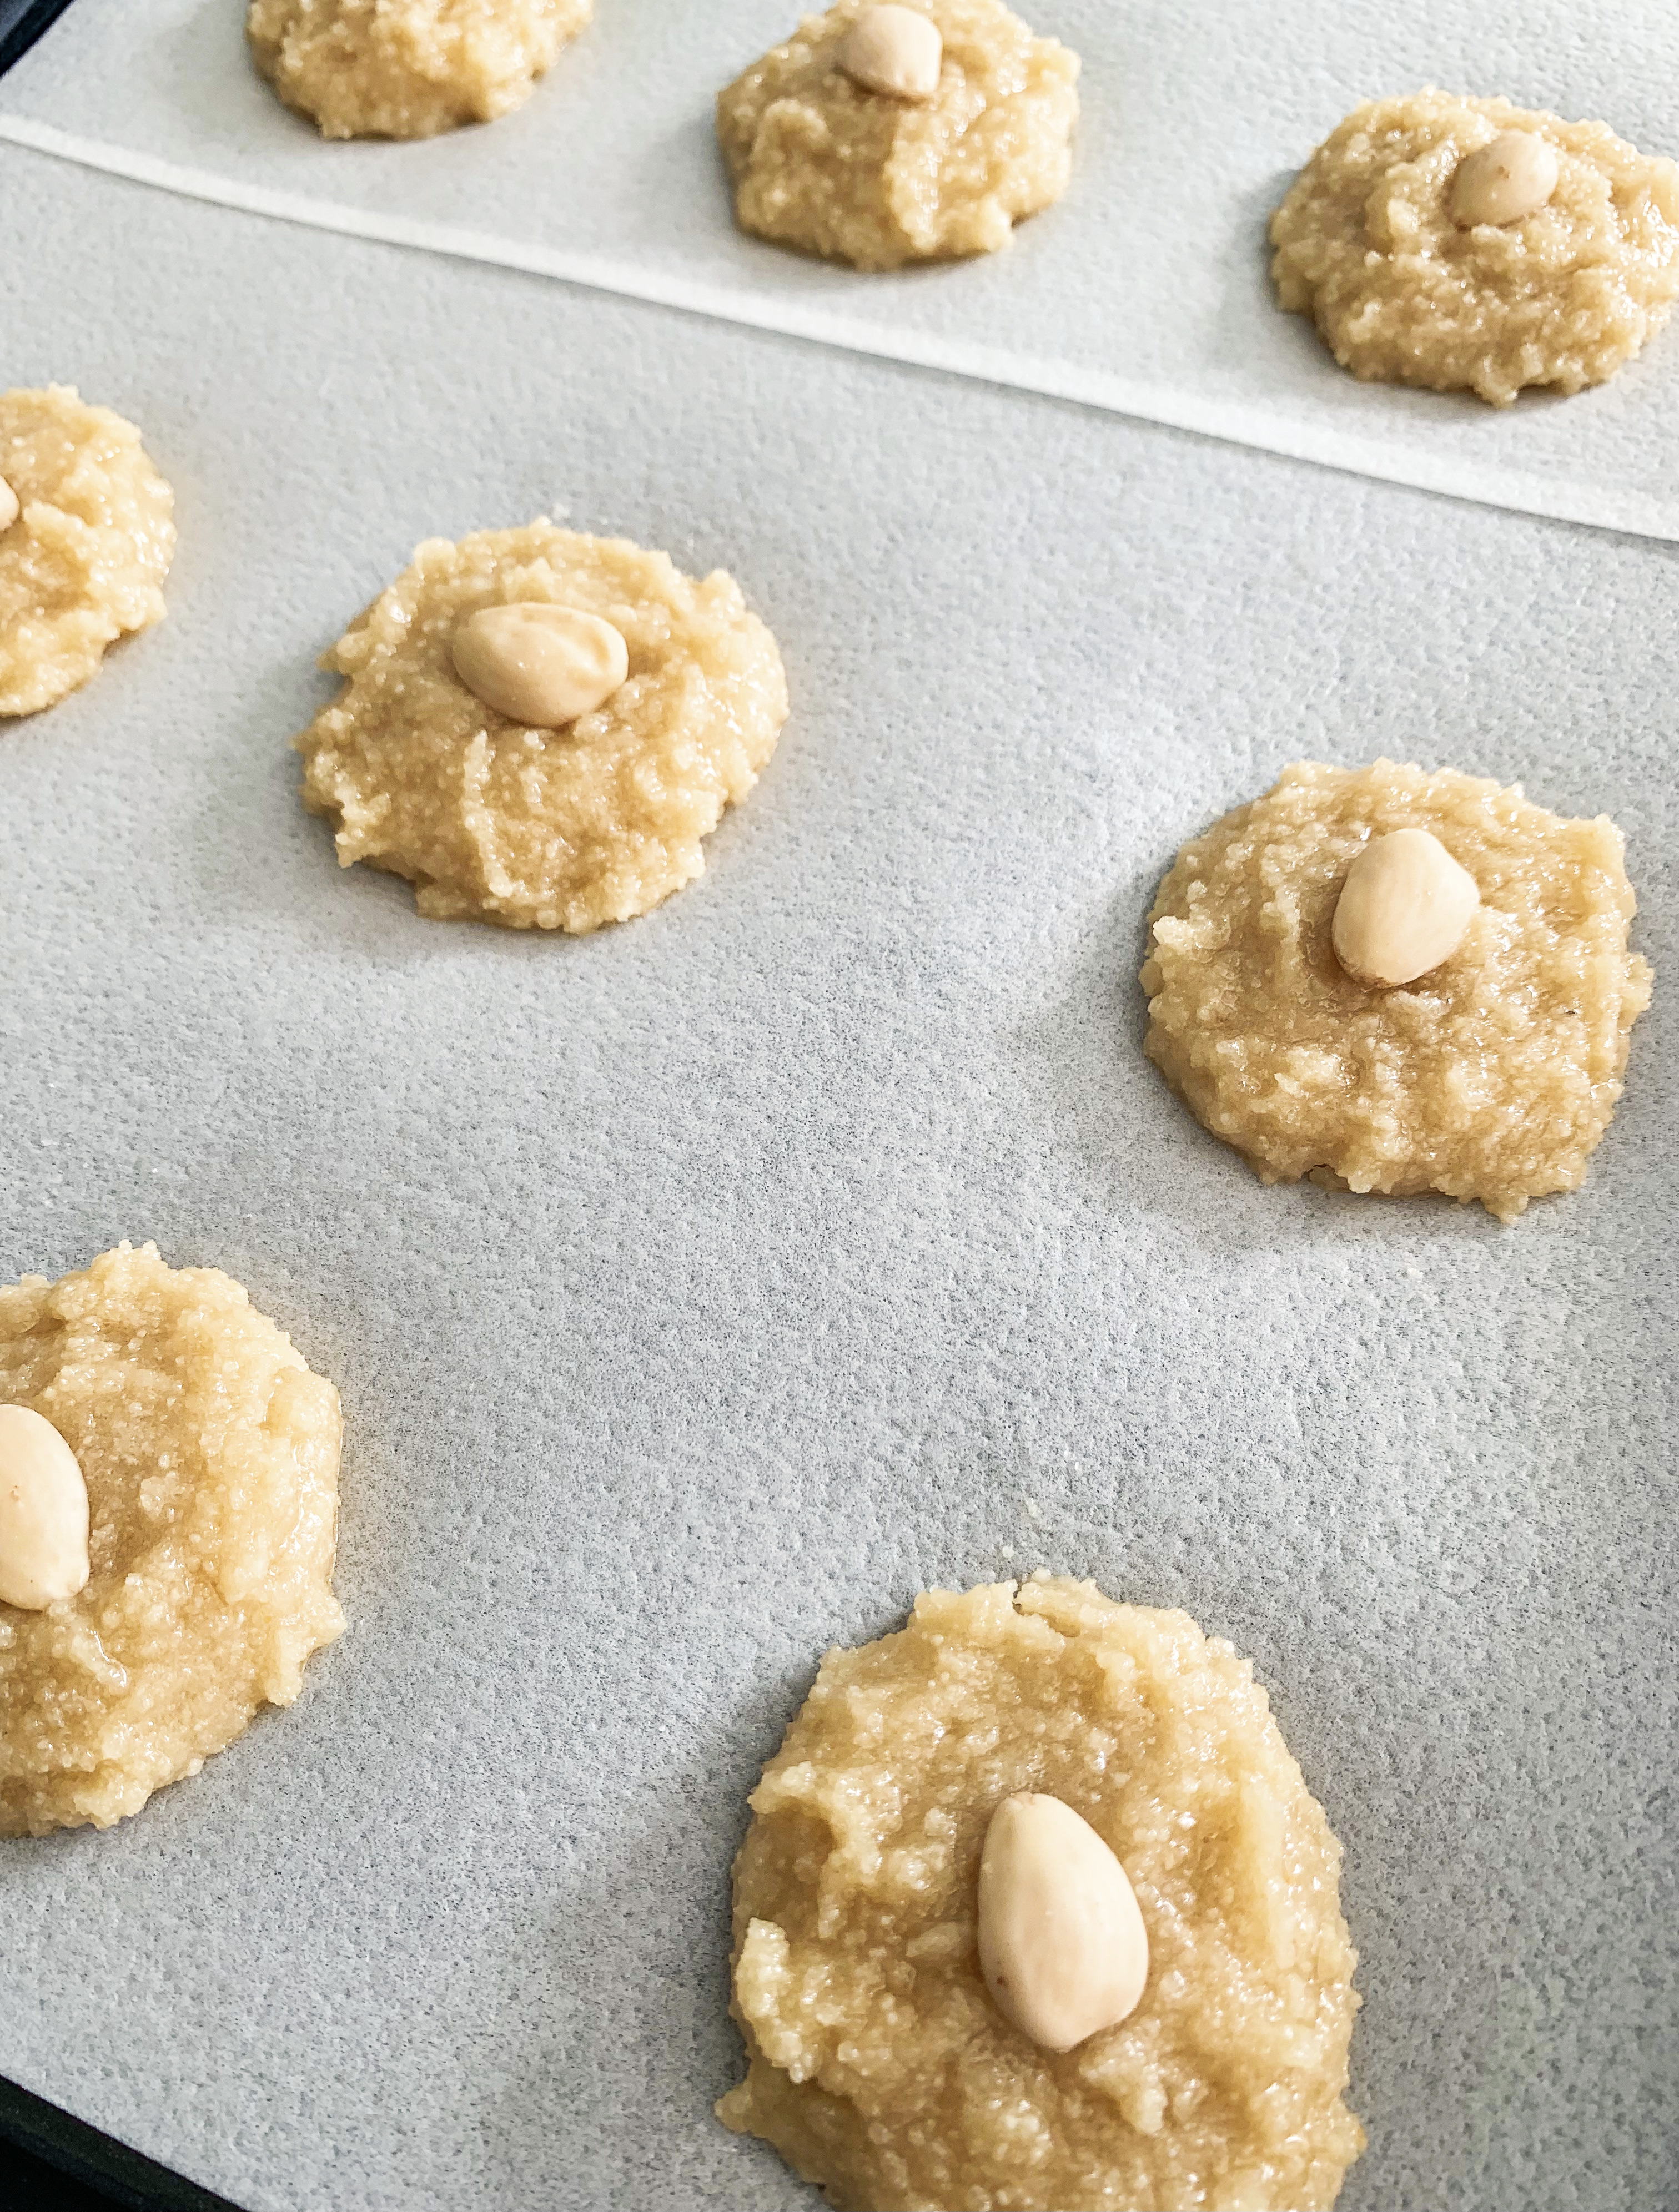
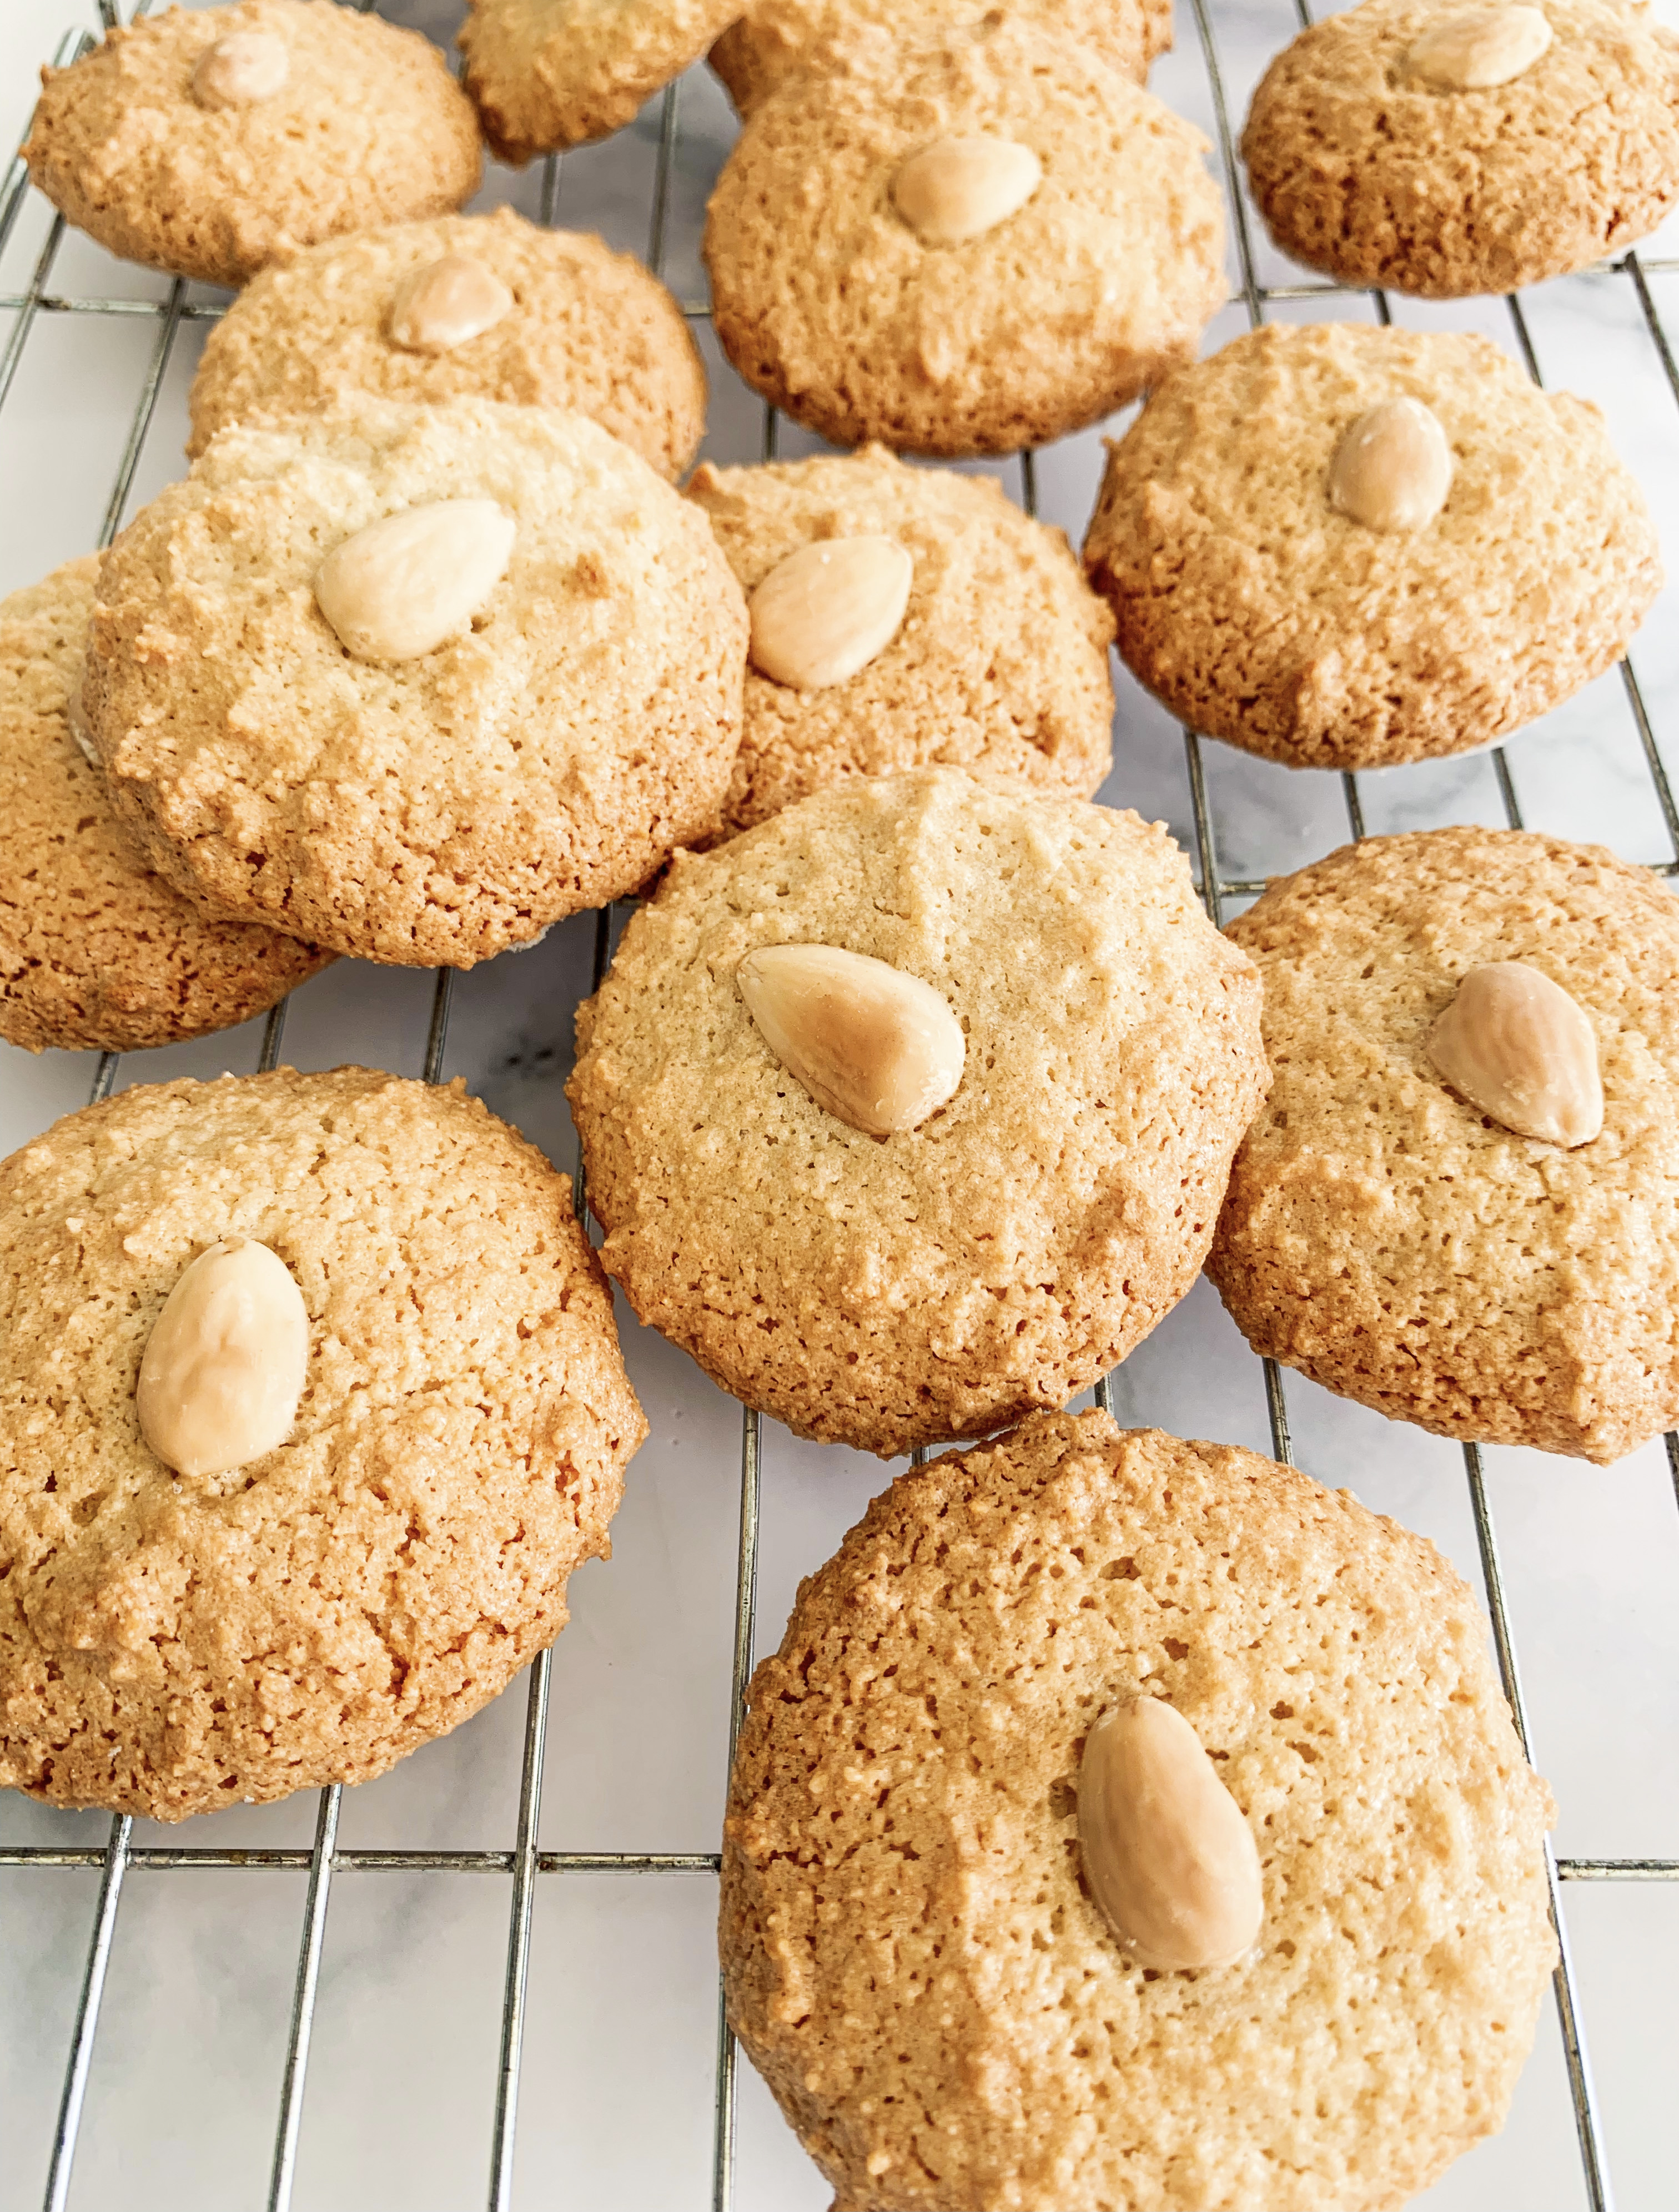
These biscuits always remind me of my late mother-in-law, Deitha, she was a wonderful traditional cook and at Christmas time would always cook me a batch of these delicious biscuits! They aren’t quite as fancy as their ‘French cousin’ the Macaron, which come in chic colours, but they are just as moreish and in my opinion, slightly more satisfying with their crisp exterior and wonderfully chewy middle. Even better, unlike the French macaron, they are incredibly easy to make, you just need to bake them on confectioners edible rice paper as it adds to the chewy texture – it is readily available online if you can’t find it in your local supermarket.
200g ground almonds
250g caster sugar
1 rounded tablespoon ground rice
1 tablespoon orange flower water
Few drops of real almond extract
3 large egg whites
Sheets of edible confectioners rice paper (approx. 4 x A4 size)
About 20 whole blanched almonds
You will need 2 large baking sheets
- Mix the dry ingredients together, apart from the whole almonds, in a large bowl. Then add the orange flower water, almond extract and egg whites. Beat vigorously to form a soft paste.
- Line the baking sheets with the rice paper (shiny side up). Take a large walnut-sized piece of the paste, form into a round patty and place on the rice paper. Repeat with the rest of the paste, leaving plenty of room between each patty. Put a whole almond on the top of each one.
- Put the baking sheets in a preheated oven, 170’c fan, for about 20-25 minutes until they are a light golden colour.
- Leave to cool on the rice paper, then gently tear the macaroons from the rice paper sheets, leaving a disc of paper in place on the bottom of each one.
Salted Miso Brownies (Makes 16)
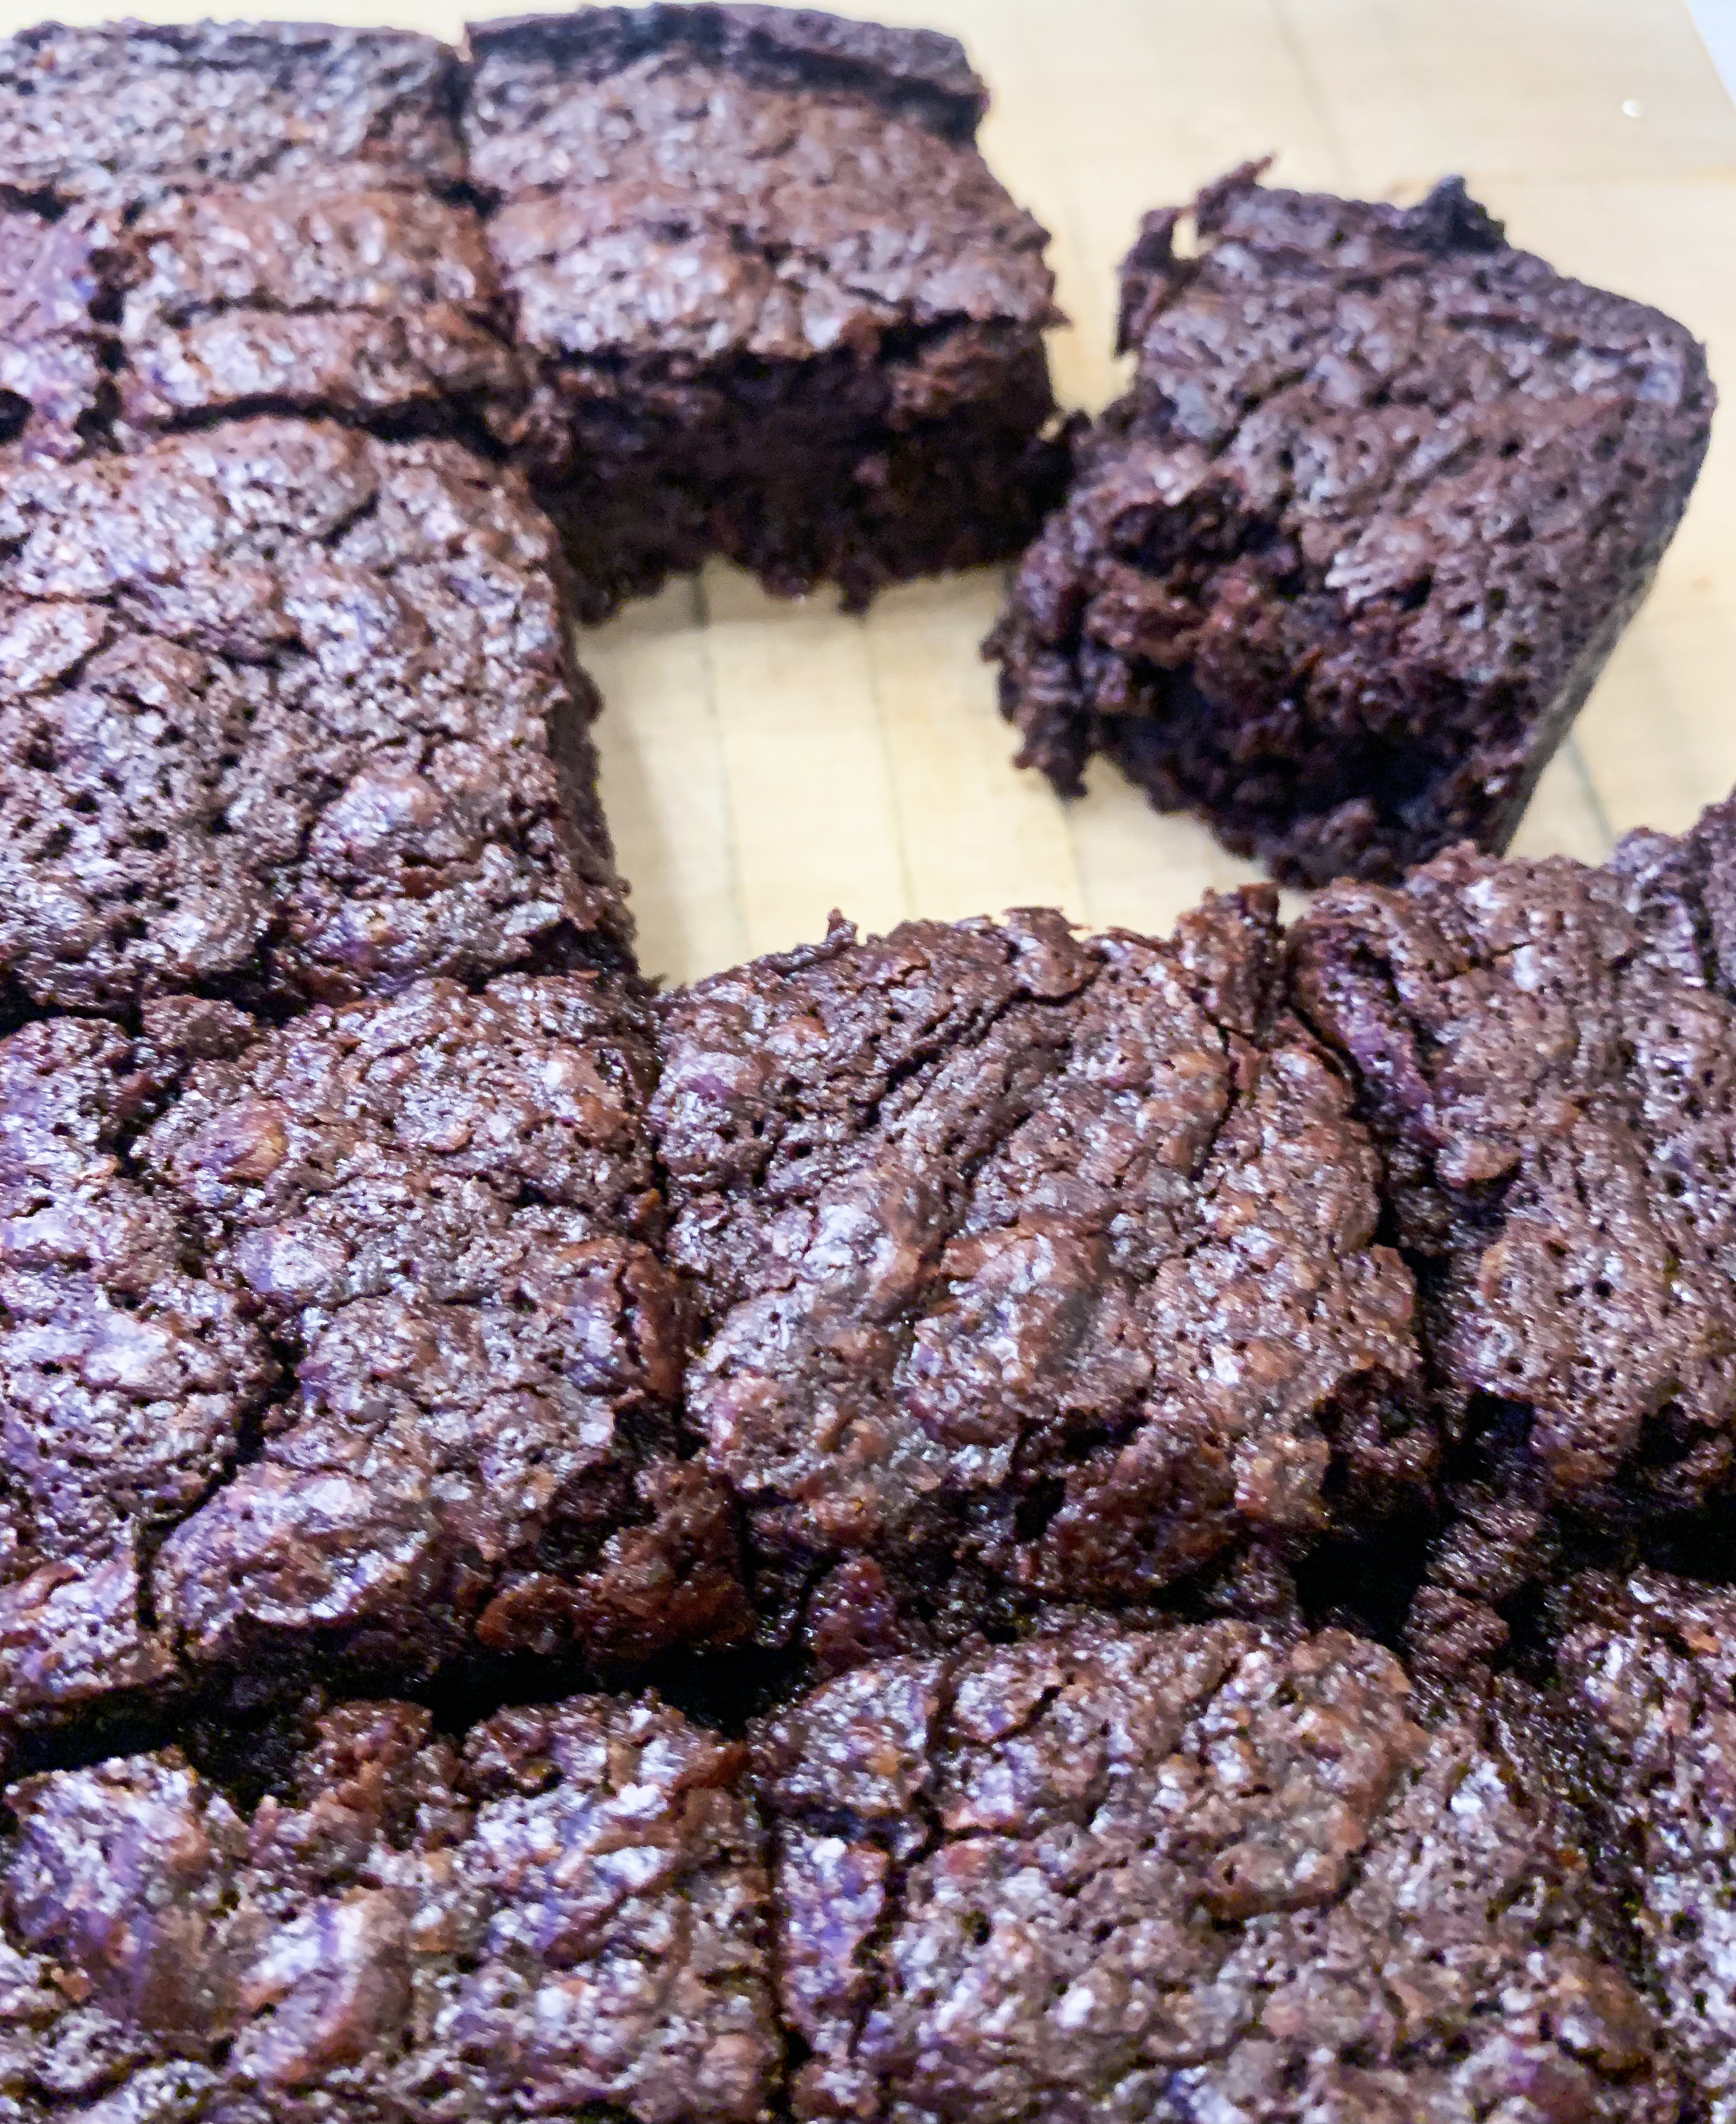
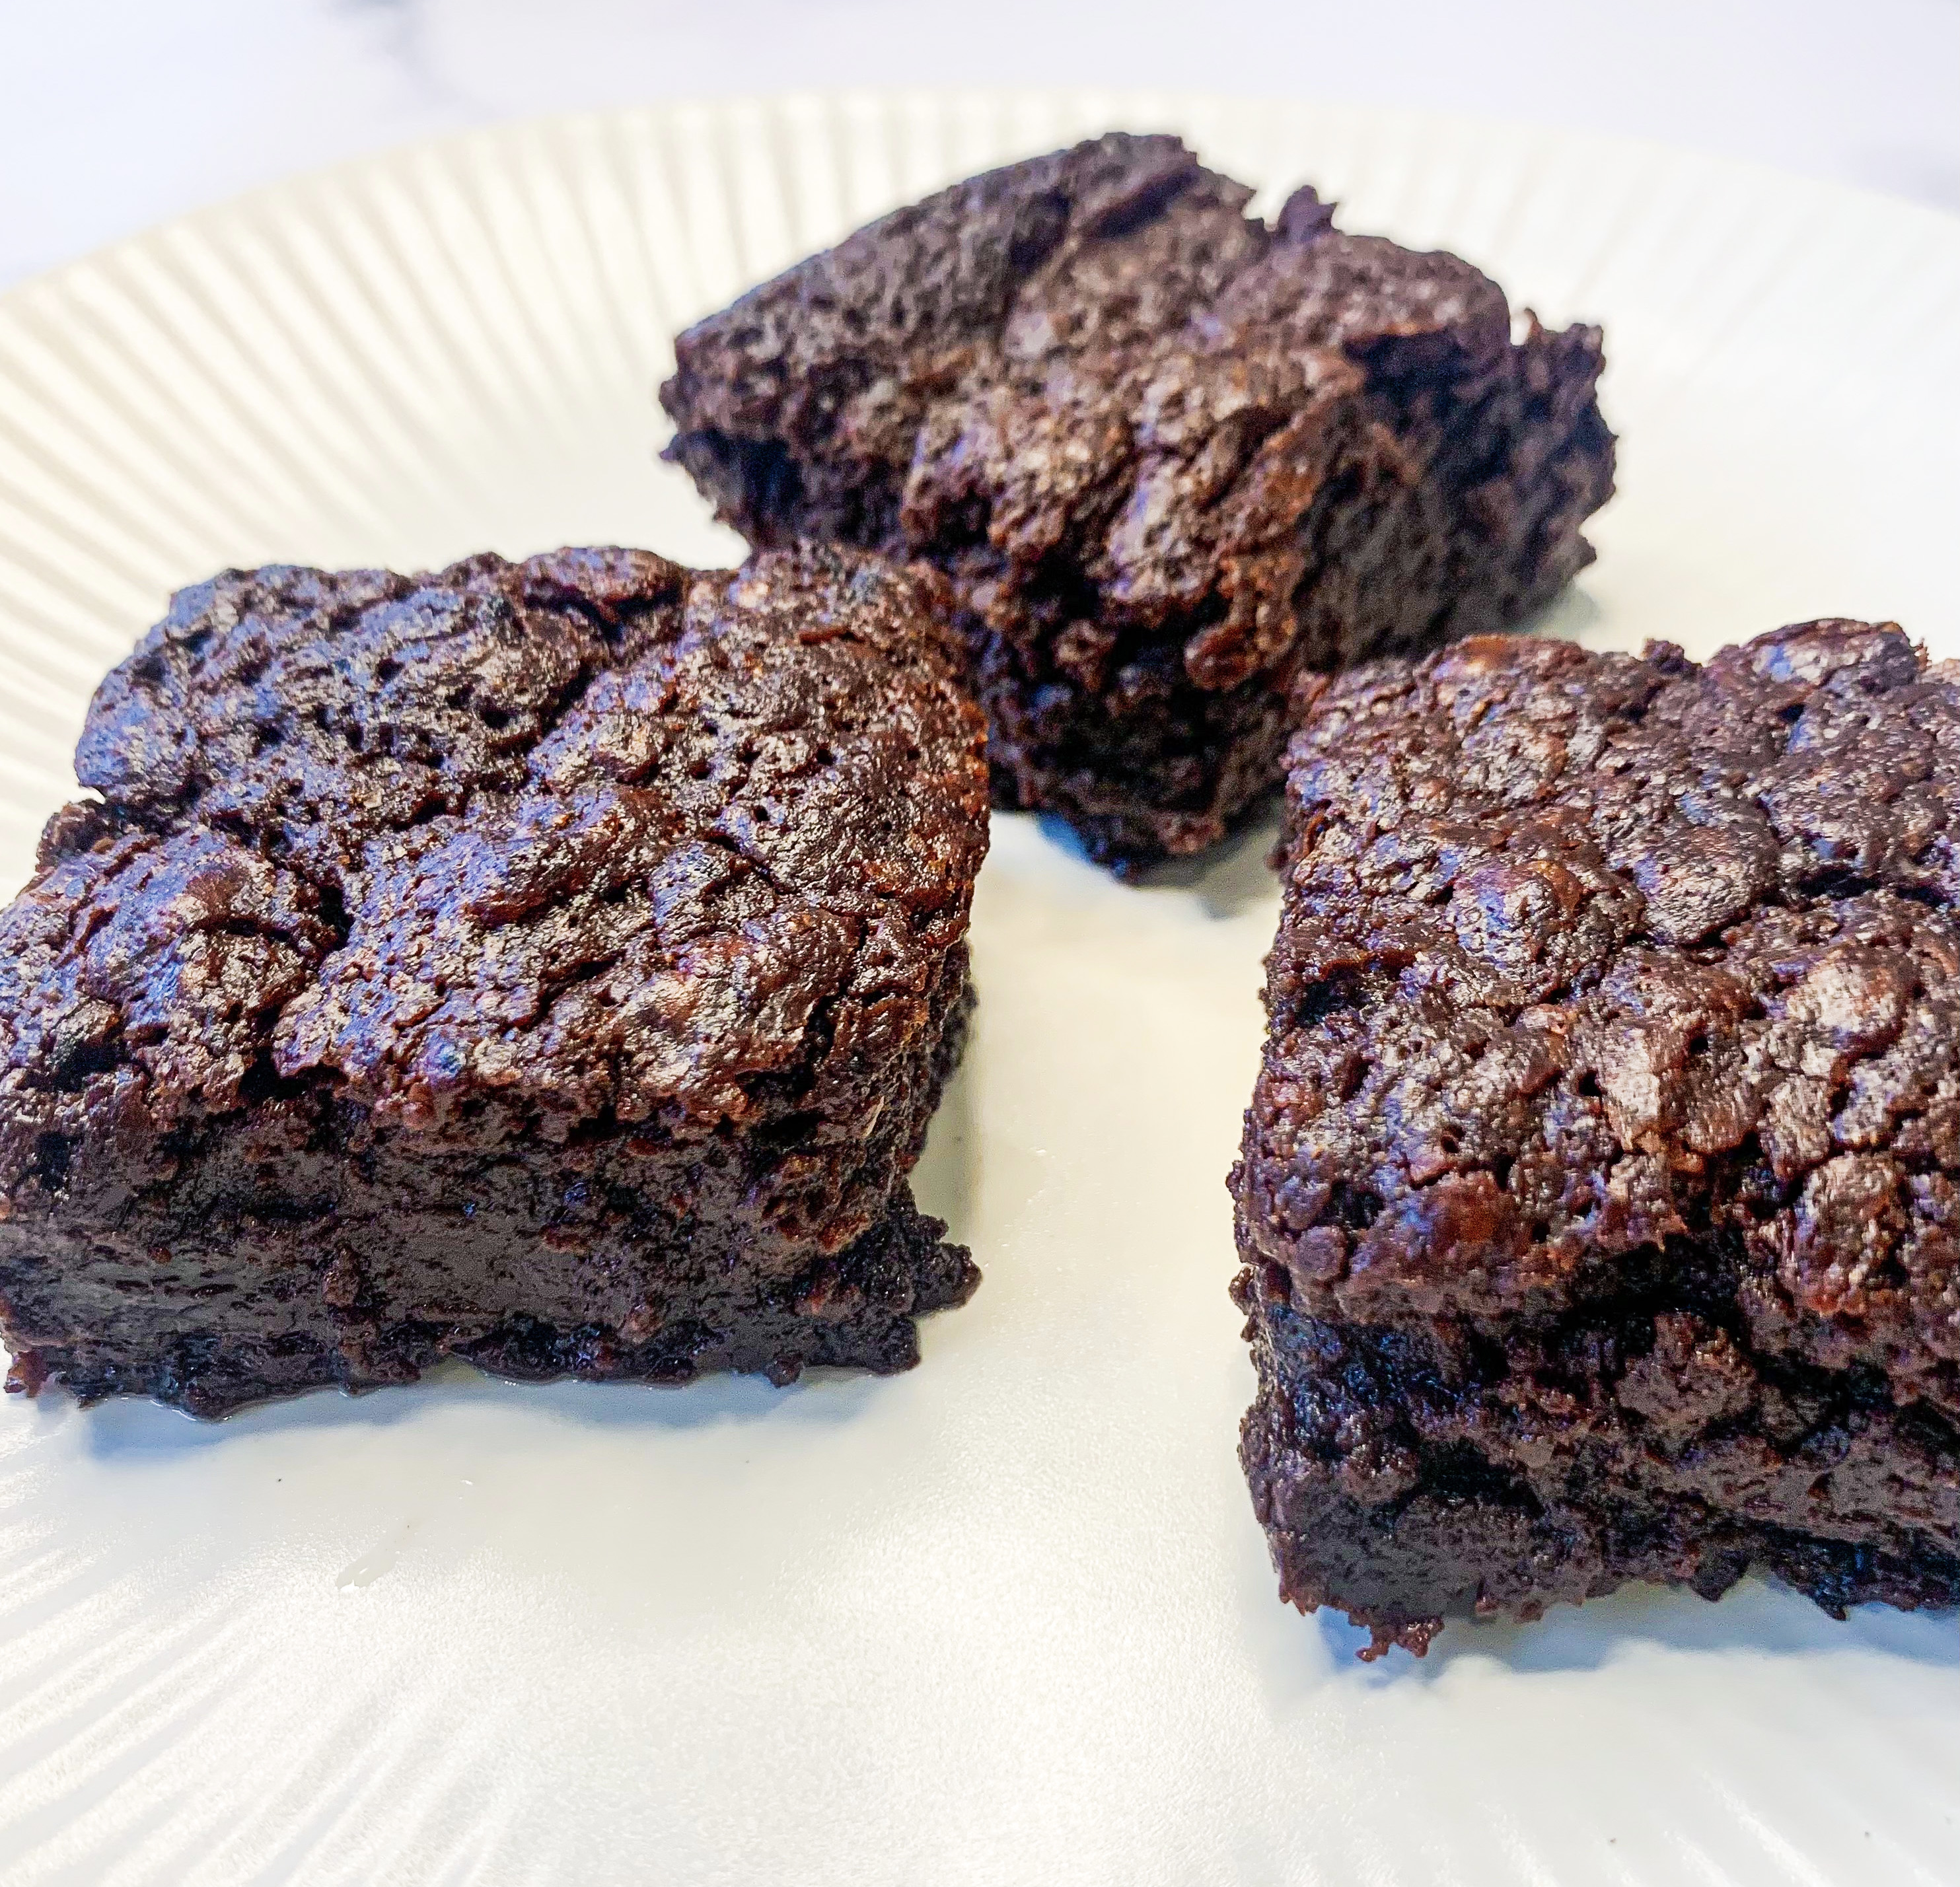
We all have a favourite recipe for brownies, this is without doubt mine…I urge you to make them – they will become your new favourite too! The addition of the white miso and salt gives them an incredible salted caramel flavour whilst the chia seeds create a dense and fudgy consistency. Admittedly, they don’t look like the smartest of brownies, but as I have often said, ‘looks can be deceiving’, and in this case they definitely are!…This magnificent recipe is from Meera Sodha’s cookbook ‘East’.
5 tablespoons milled chia seeds
150g flavourless coconut oil
250g dark chocolate, broken into small pieces (I use Lindt Excellence 70% Cocoa Dark Chocolate)
350g light brown Muscovado sugar
120g plain flour (gluten free if required)
3 tablespoons white miso
¾ teaspoon flaky sea salt
*20cm square cake tin, lined with greaseproof paper
- First of all put the chia seeds in a small bowl, add 270ml water and set aside.
- Place the coconut oil and chocolate pieces in a saucepan over a low heat. Stir occasionally until melted. Take off the heat and mix in the sugar, flour, miso and salt. Finally, add the ‘bloomed’ chia seed (and their water), mix well.
- Pour into the prepared, lined tin and gently shake to distribute the mixture evenly. Bake on the middle shelf of a preheated oven, 180’c fan, for 40 minutes. The brownies will be still wobbly in the middle but they will settle down and become deliciously fudgy as they cool. Cool completely before cutting into 16 squares.
Pineapple and Black Pepper Crumble (Serves 4-6)
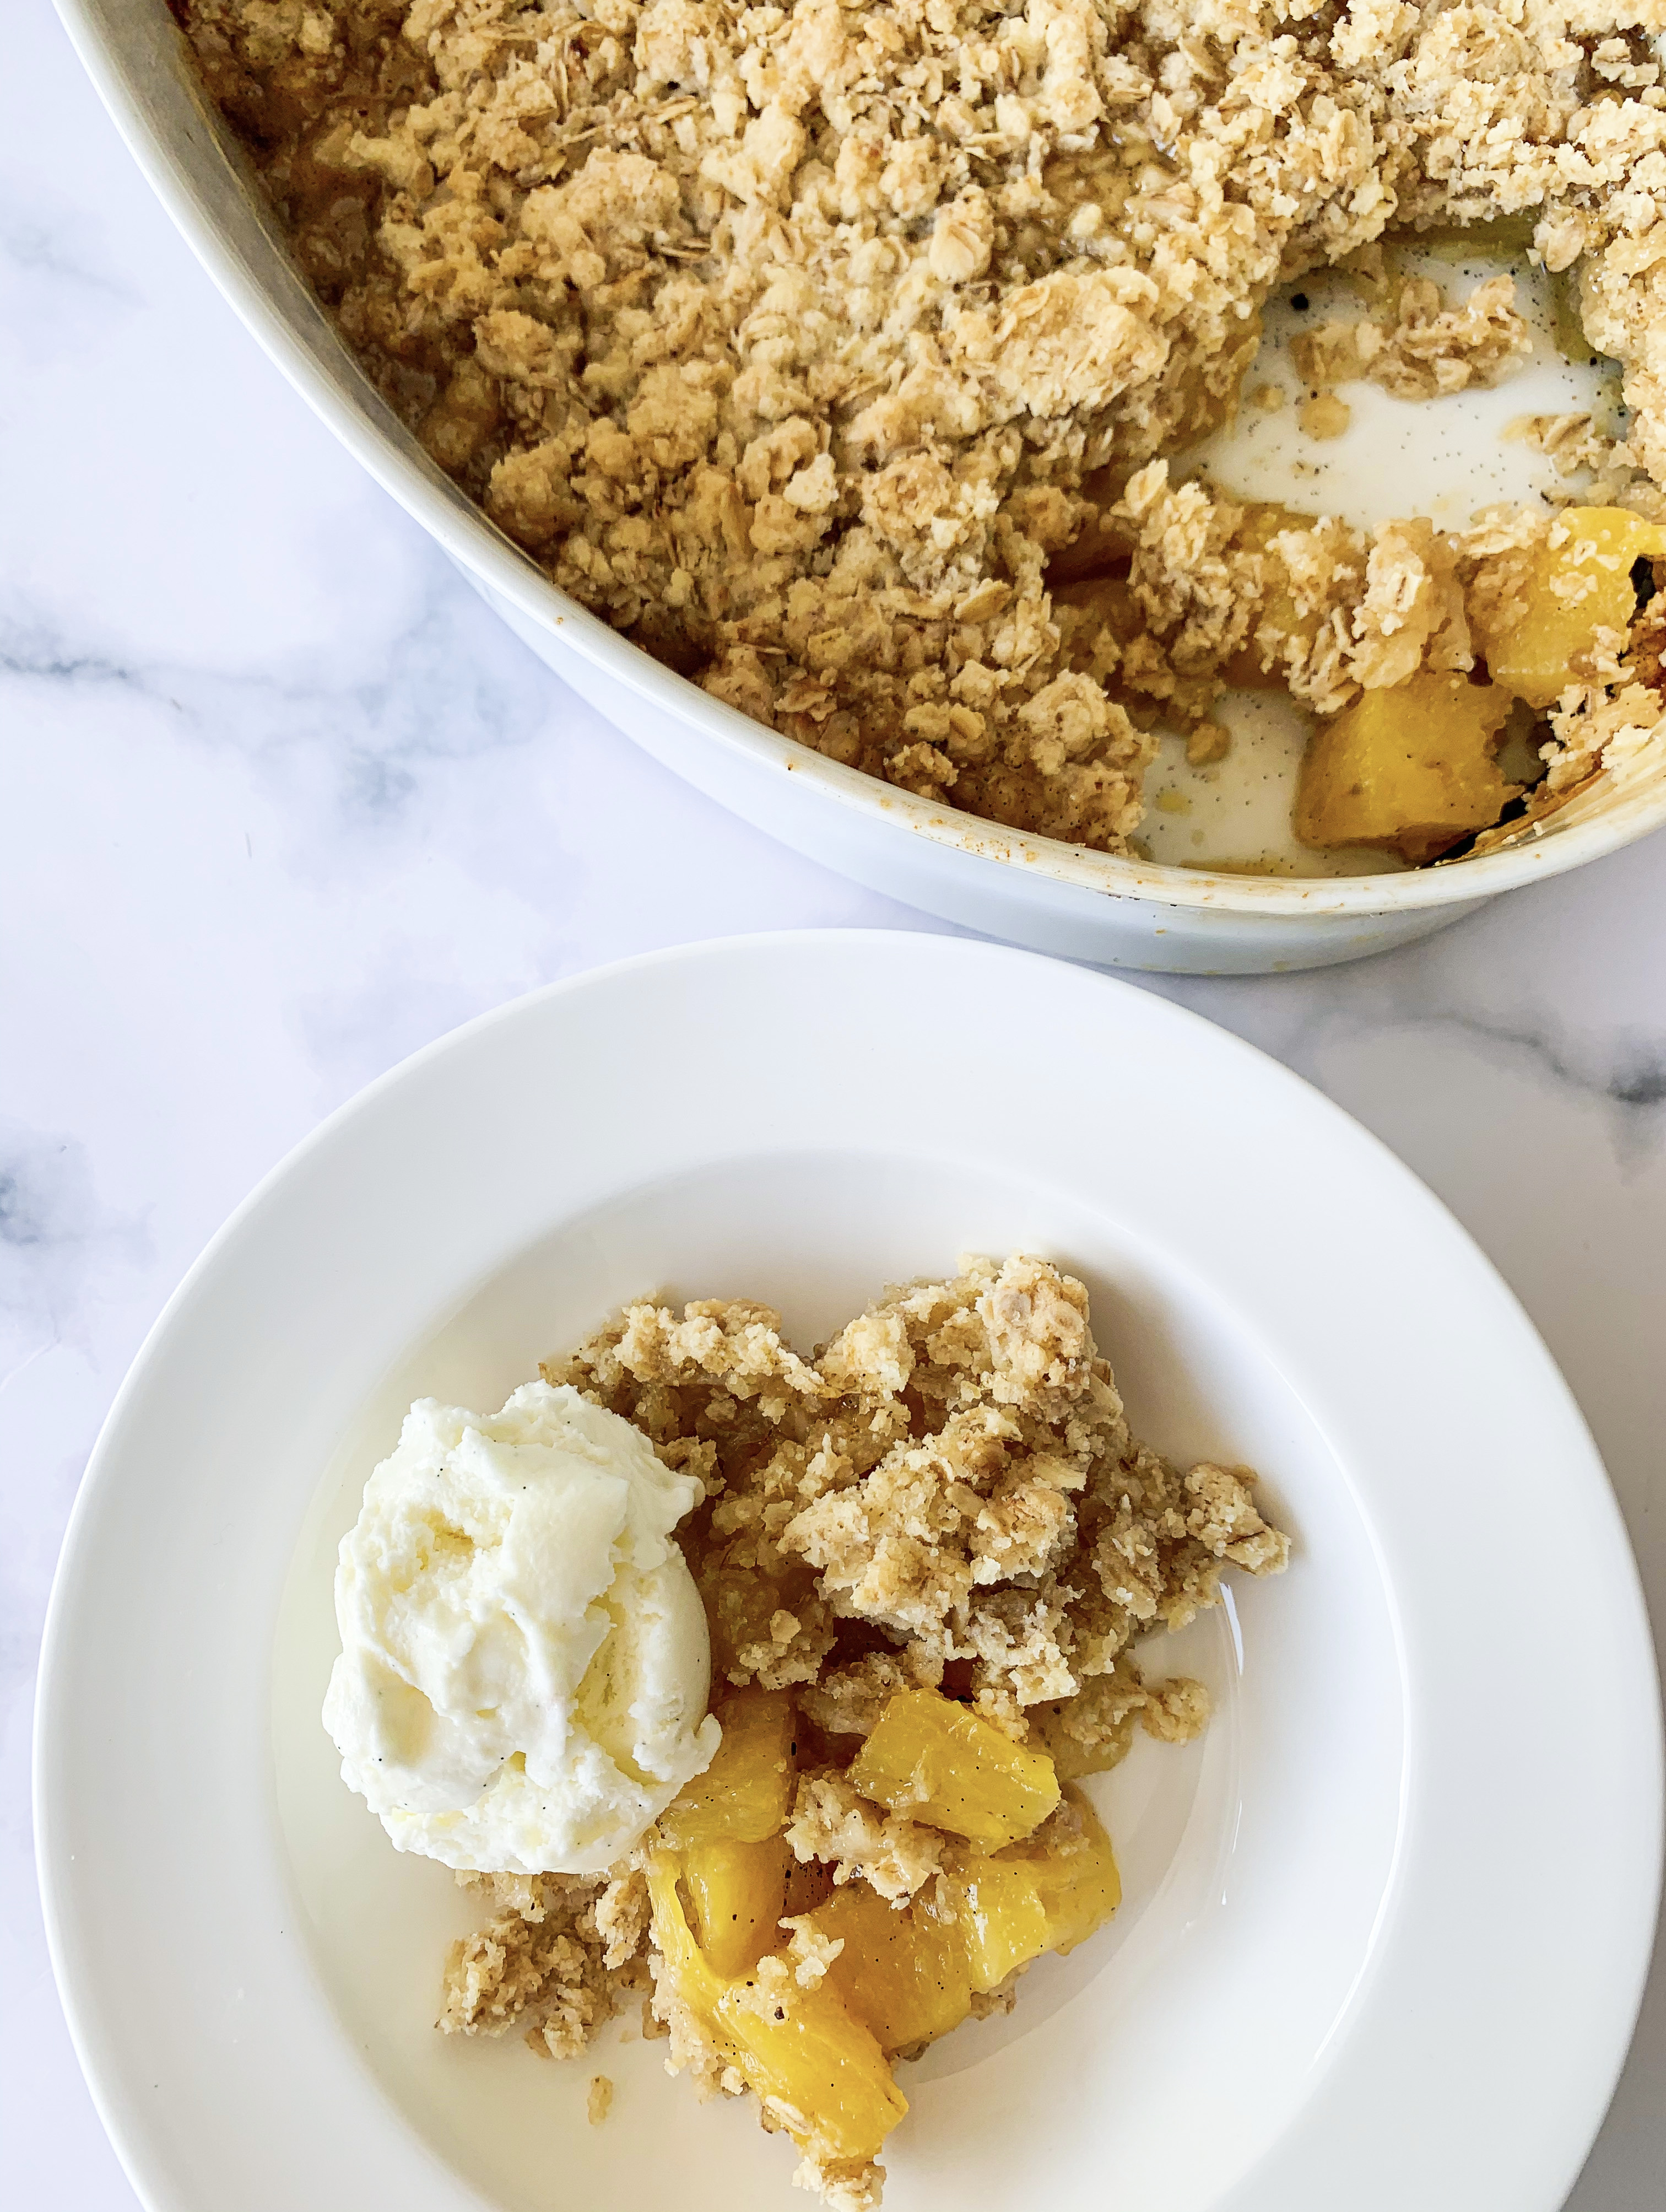
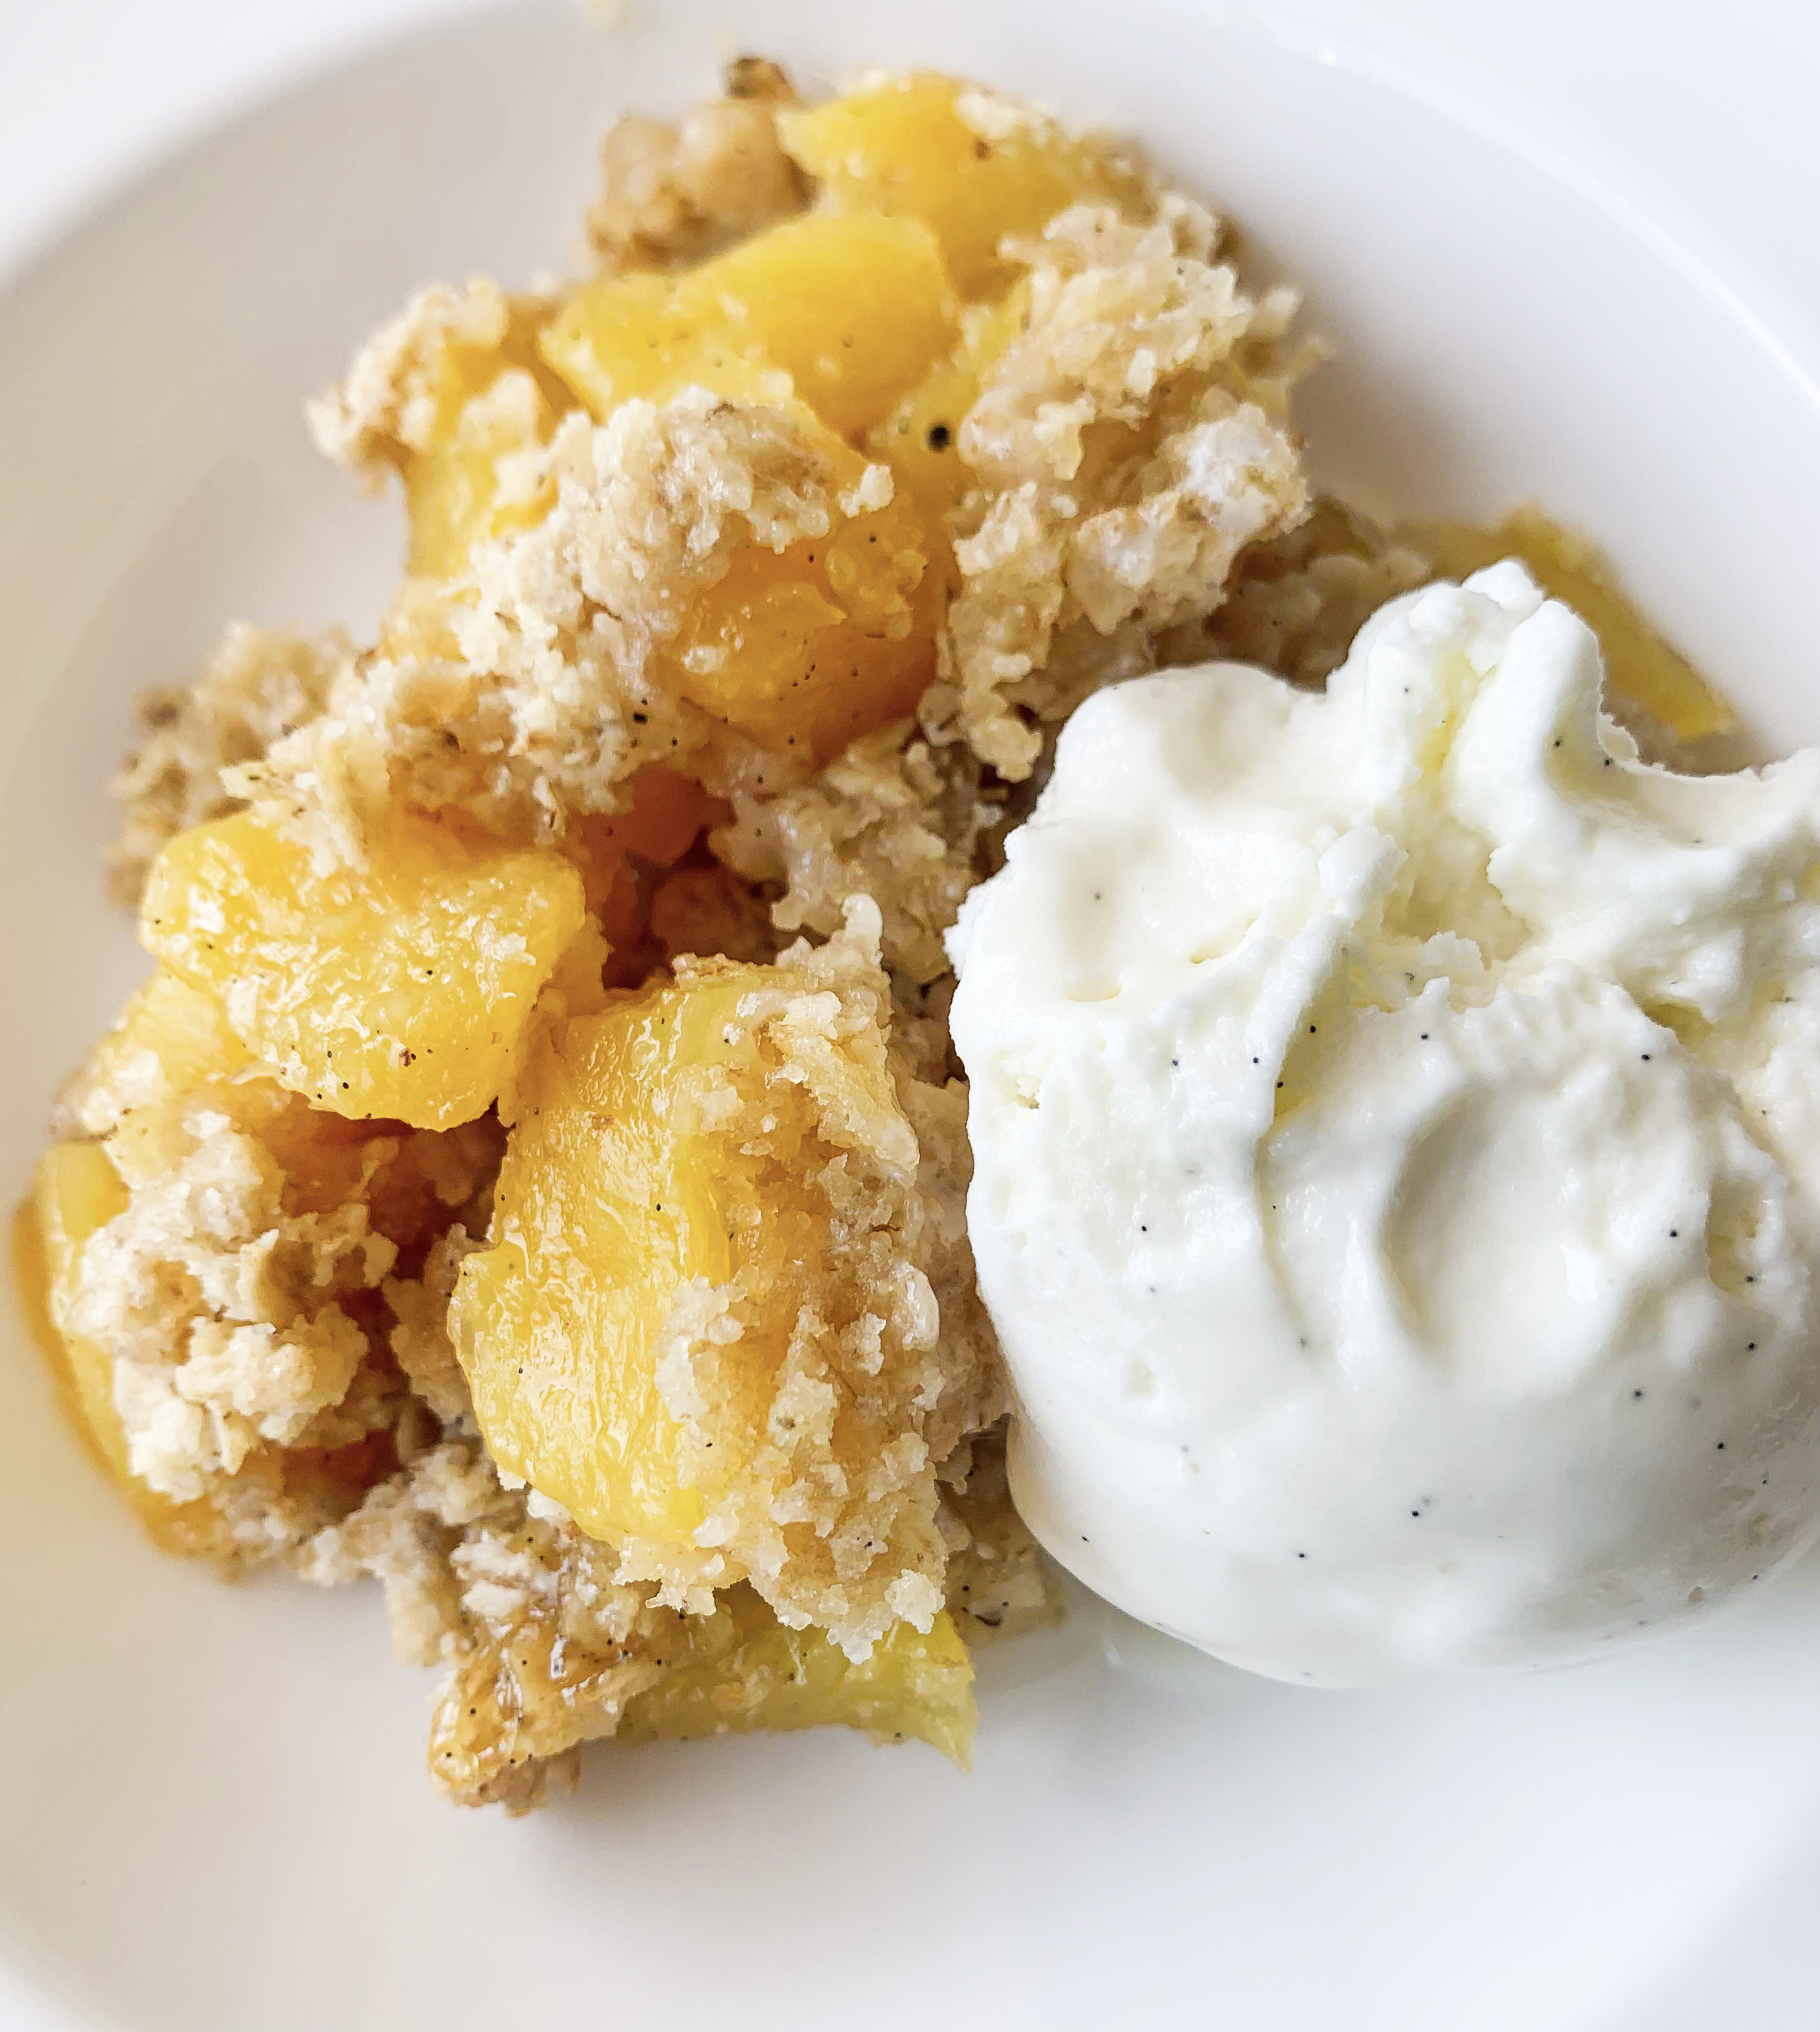
This is no ordinary crumble(!) – the tang of the pineapple is beautifully complemented by the spice of the black pepper, it is a delicious and unusual take on the British classic crumble. The recipe is from the cookbook ‘Dishoom’, which is by the owners of the Indian restaurant chain of the same name. Once you’ve tried this crumble you may find it difficult to return to the classic fruit versions…
*This crumble recipe works well with gluten free plain flour – I used ‘Doves’.
1 large, fresh ripe pineapple (you need about 750g flesh)
1 vanilla pod or 2 teaspoons vanilla extract
100g granulated sugar
A few twists of black pepper
For the crumble:
100g plain flour (gluten free if required)
100g rolled oats
100g granulated sugar
100g salted butter, cubed at room temperature
To Serve:
Vanilla Ice-cream or a dollop of fresh cream
- Peel the pineapple, prising out the ‘eyes’ and cut the flesh into 2 cm chunks, discarding the hard core.
- Place the pineapple chunks in a saucepan with 200ml water. If using a vanilla pod, split it in half and run a knife down the length to remove the seeds, add both the seeds and the pod to the pan (if using vanilla extract you will need to add this later). Simmer over a medium-high heat for 20-25 minutes until the pineapple is soft. If the pan becomes a little dry add a little more water.
- Once the pineapple is soft, add the sugar and simmer for an extra 5 minutes. Add the black pepper and if using the vanilla extract instead of the vanilla pod, add it now. Turn off the heat and leave to one side.
- Meanwhile make the crumble. Mix the dry ingredients together in a large bowl. Add the butter and rub it into the mixture with your hands until it is fully incorporated – there should be no loose flour left.
- Spread the pineapple mixture in a medium baking dish and top with the crumble mixture. Bake in a preheated oven, 180’c fan, for 30-40 minutes until the topping has formed a golden crust.
- Allow to stand for 5 minutes then serve with vanilla ice-cream or a dollop of fresh cream (or custard!).
Ricciarelli

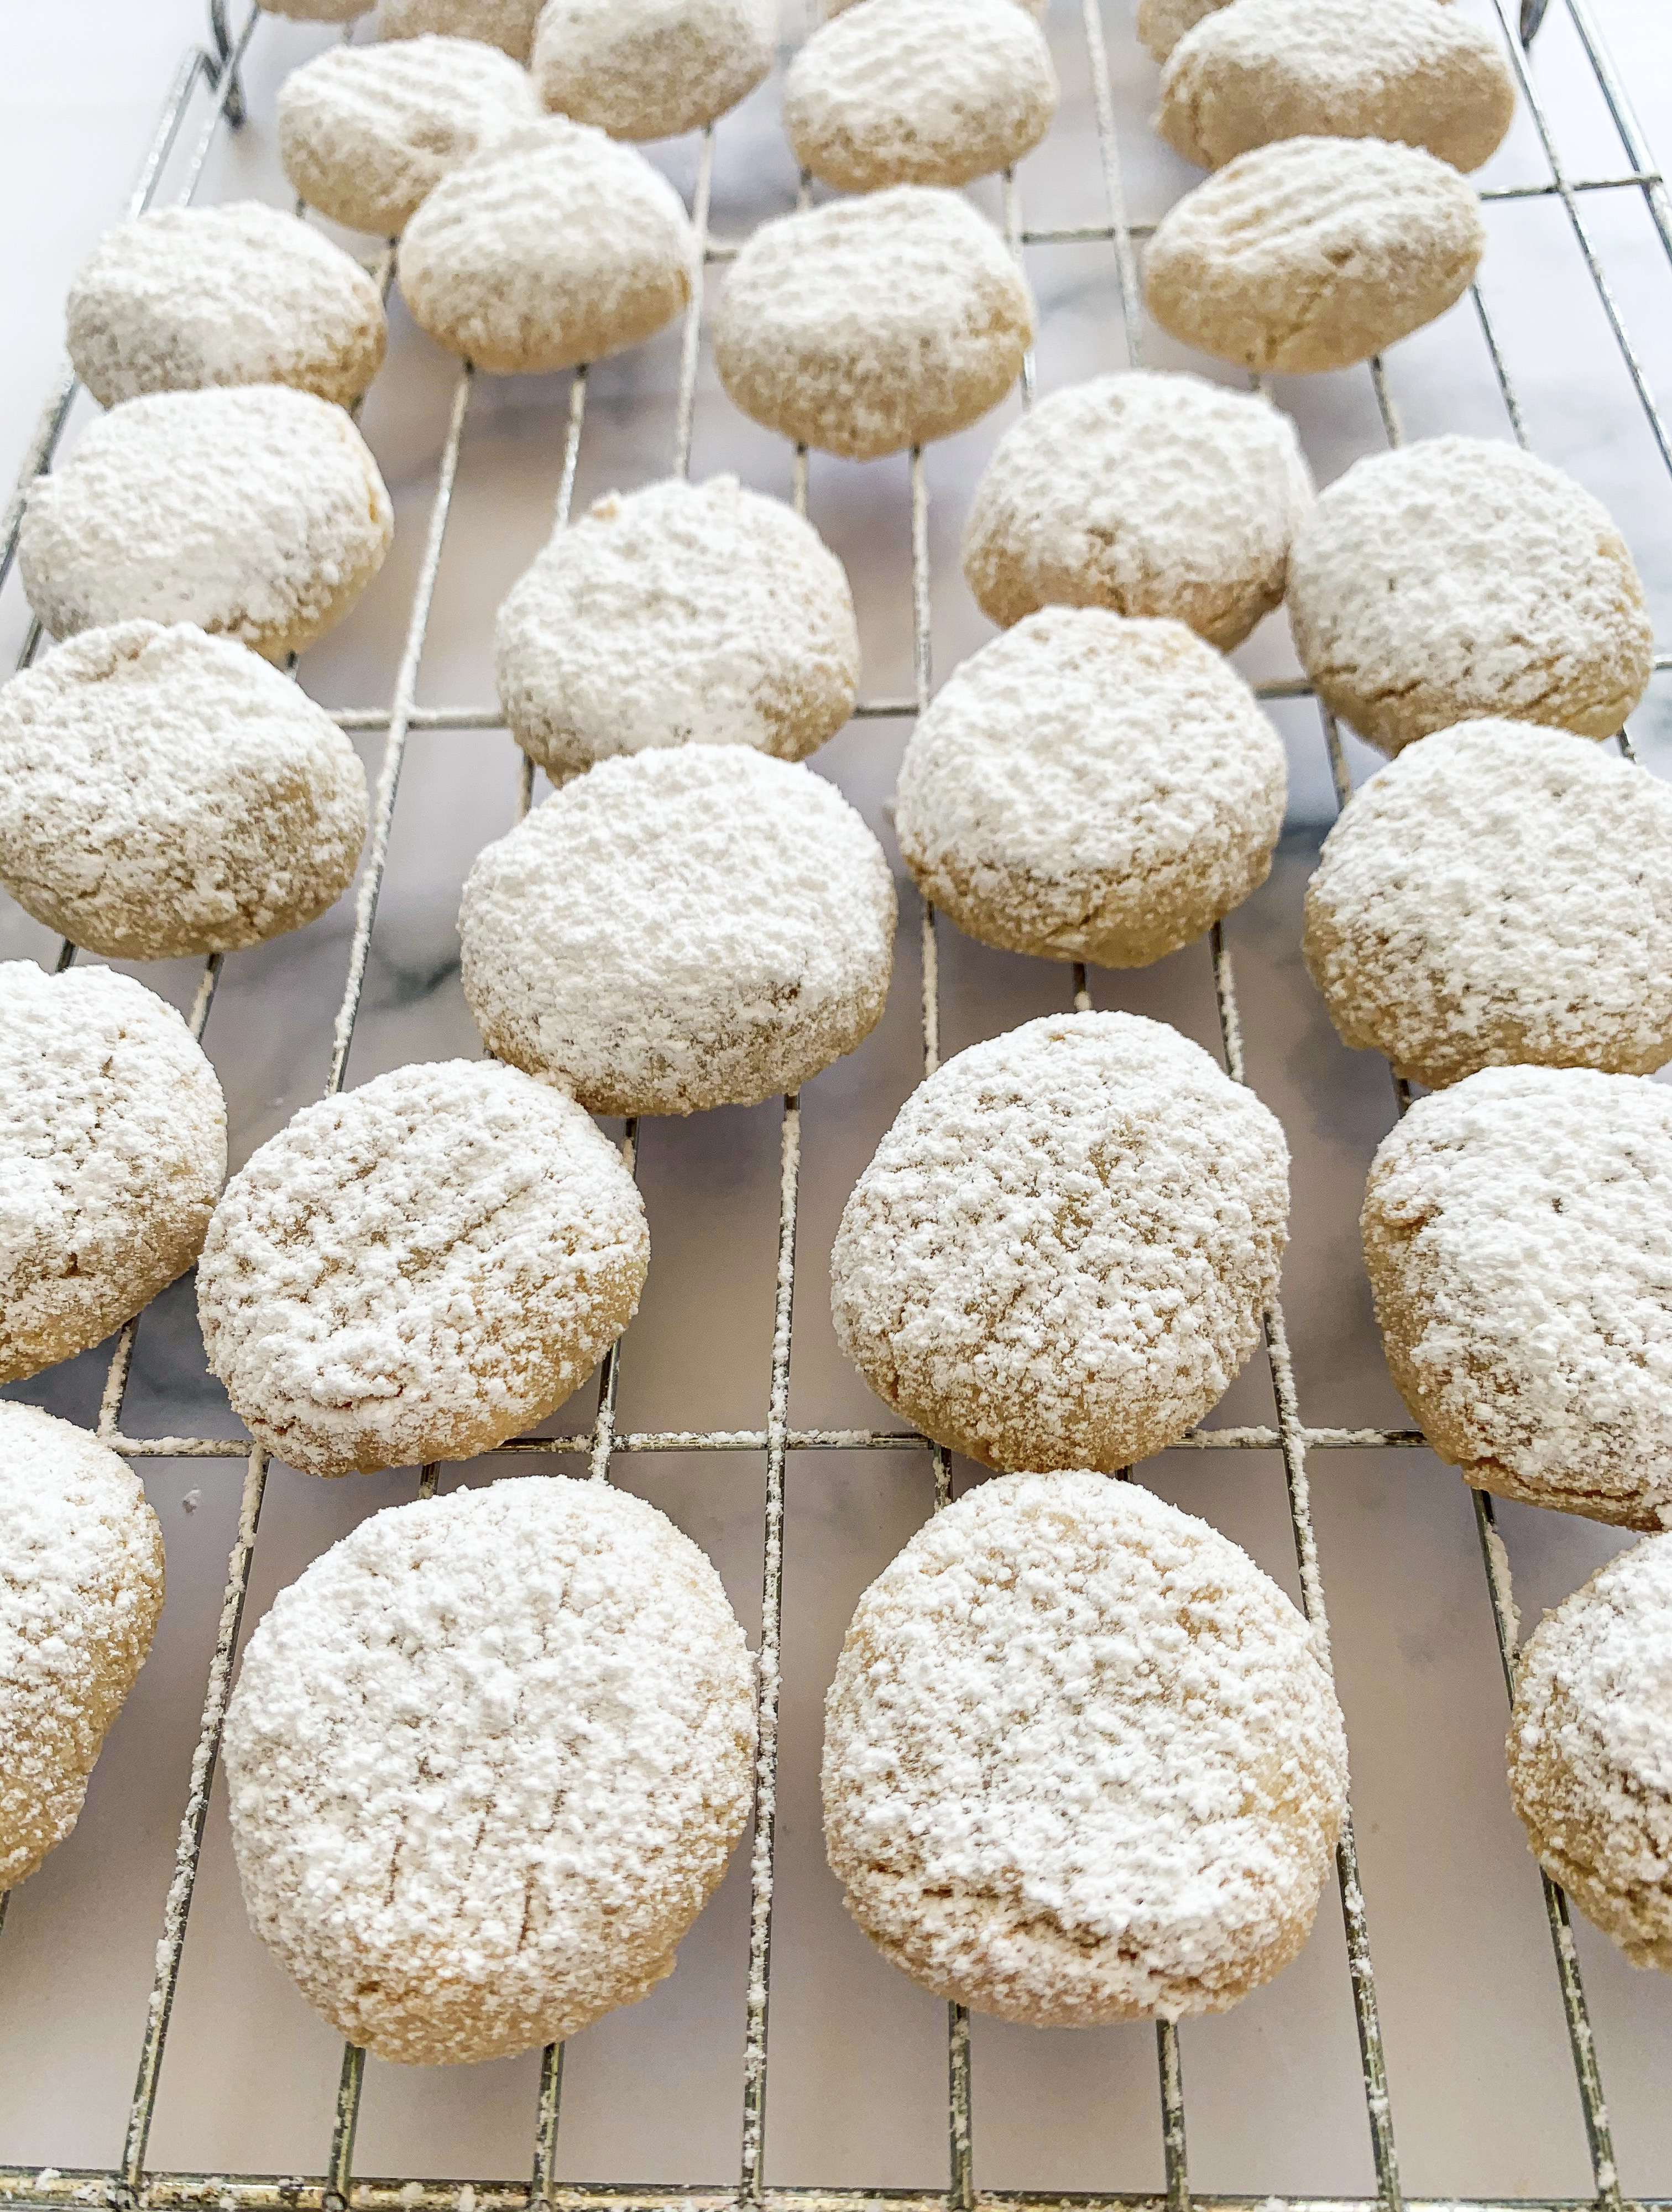
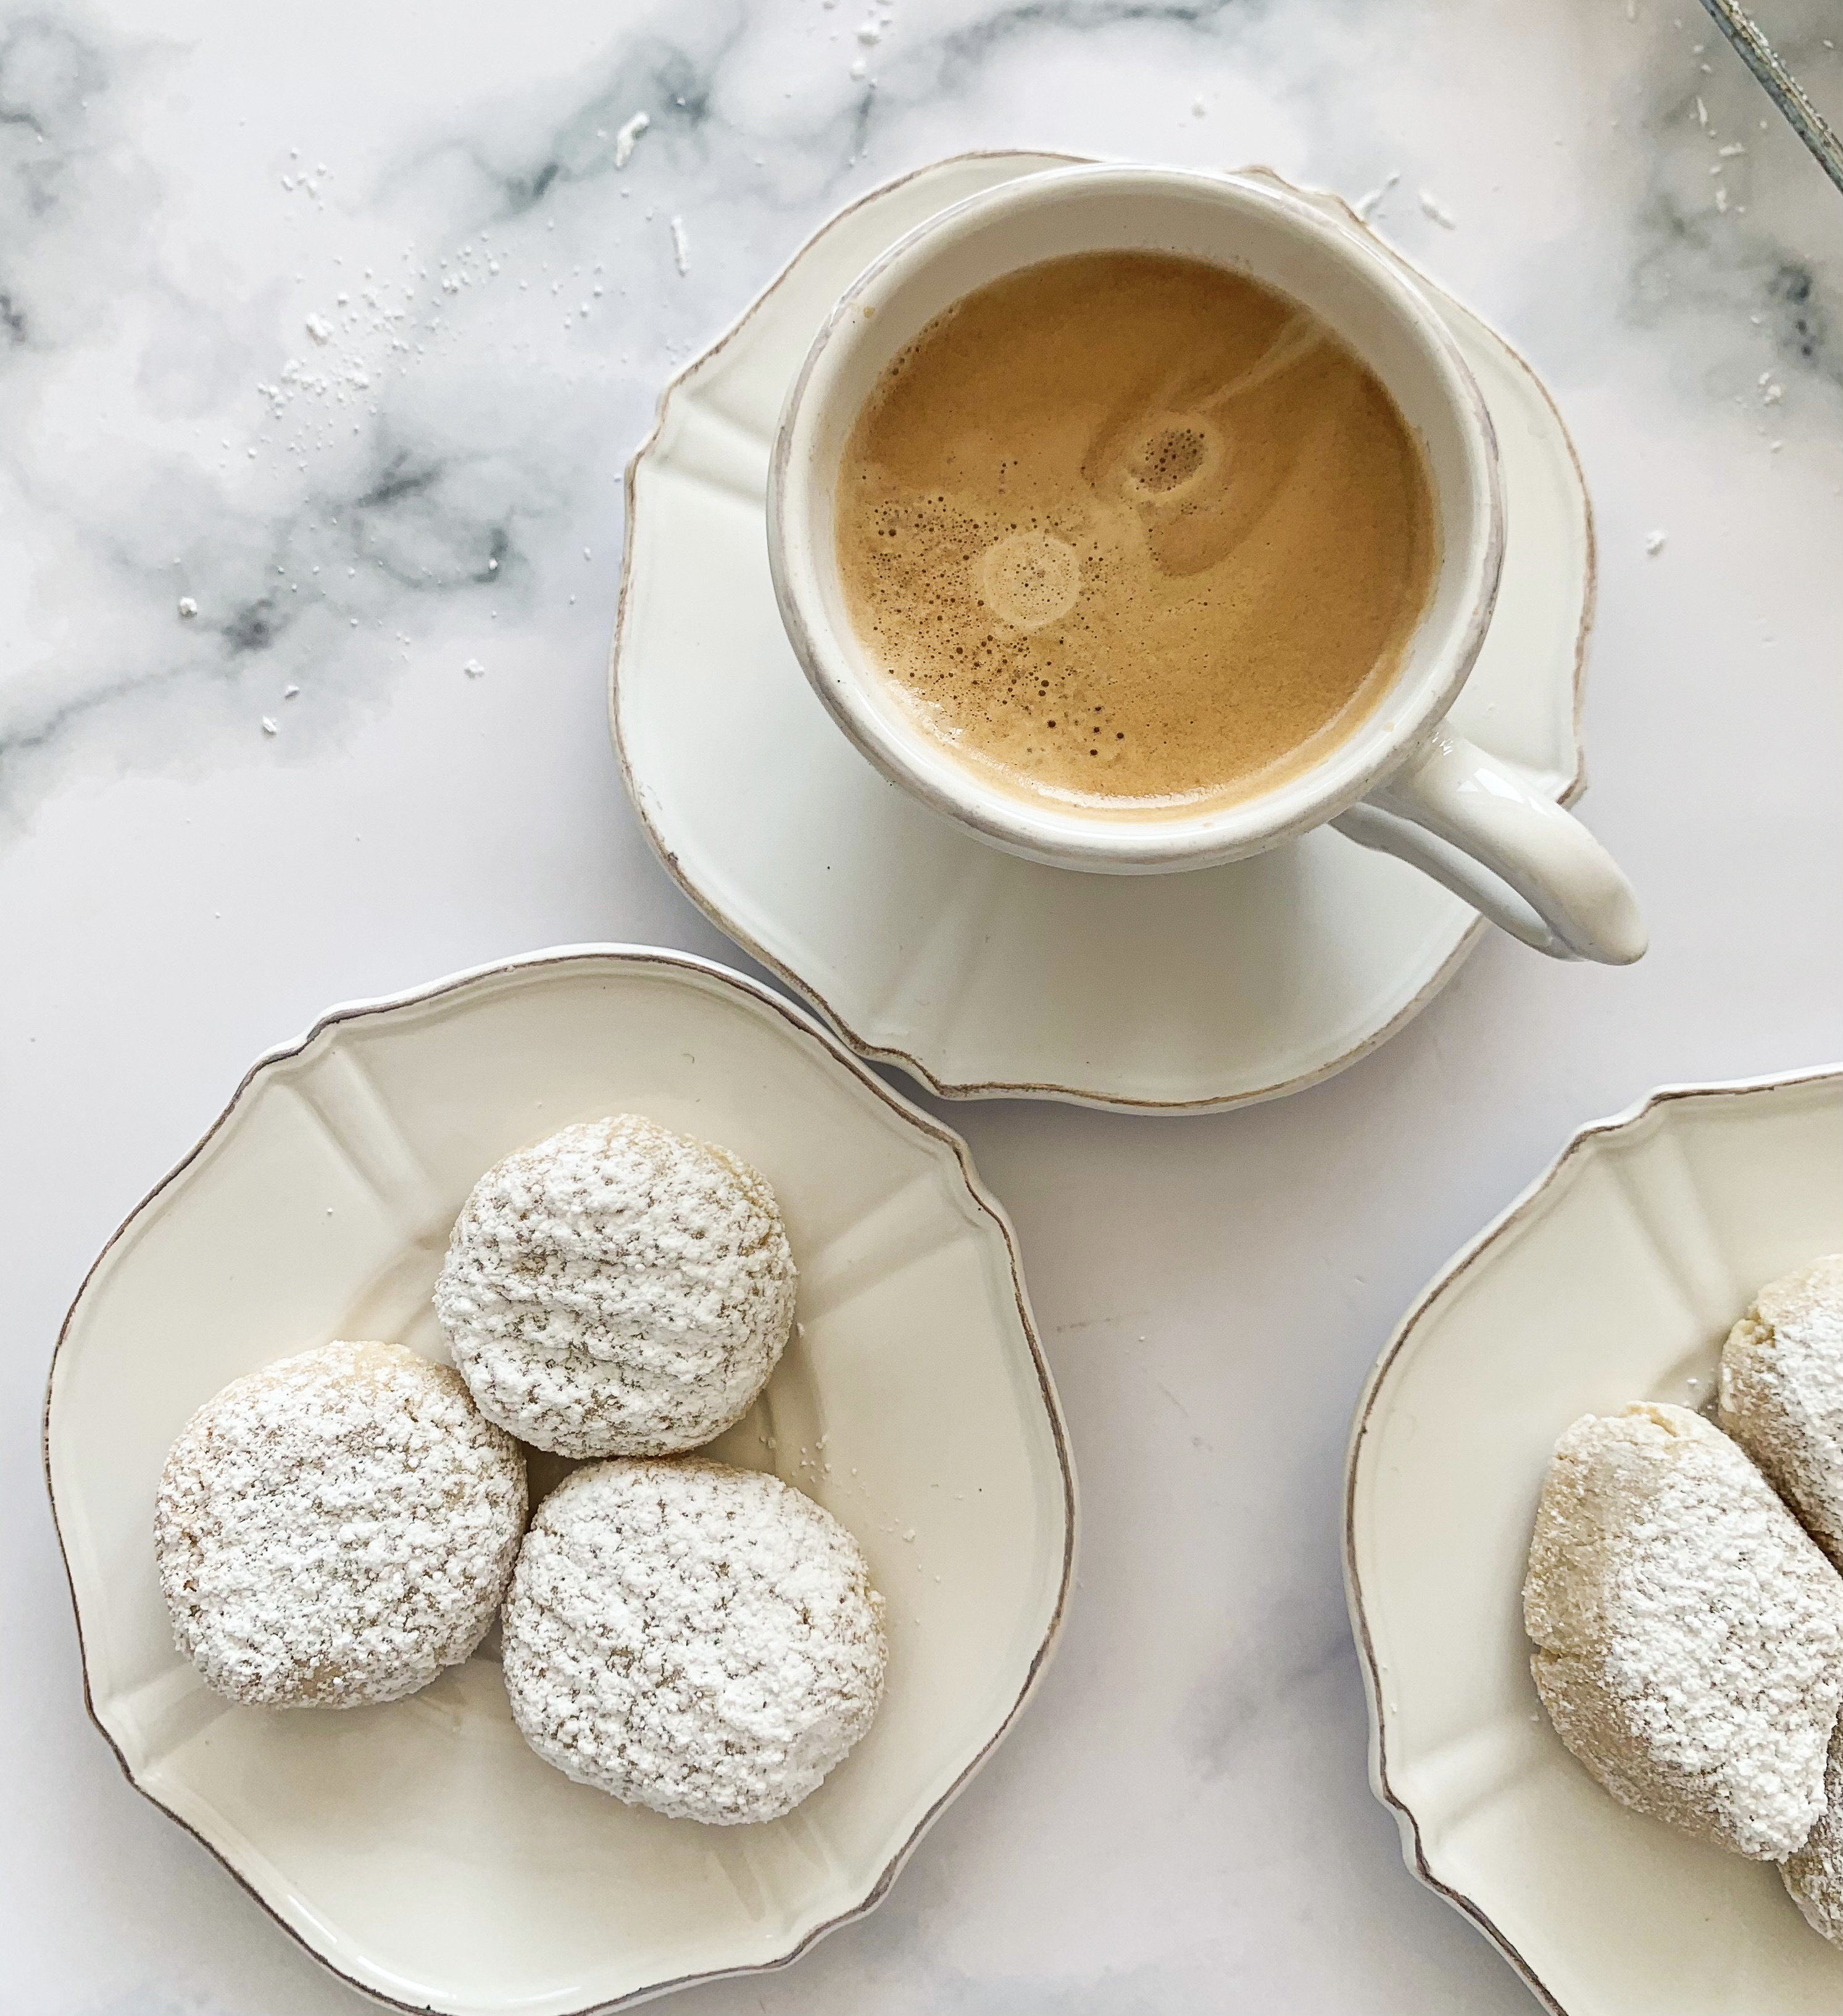
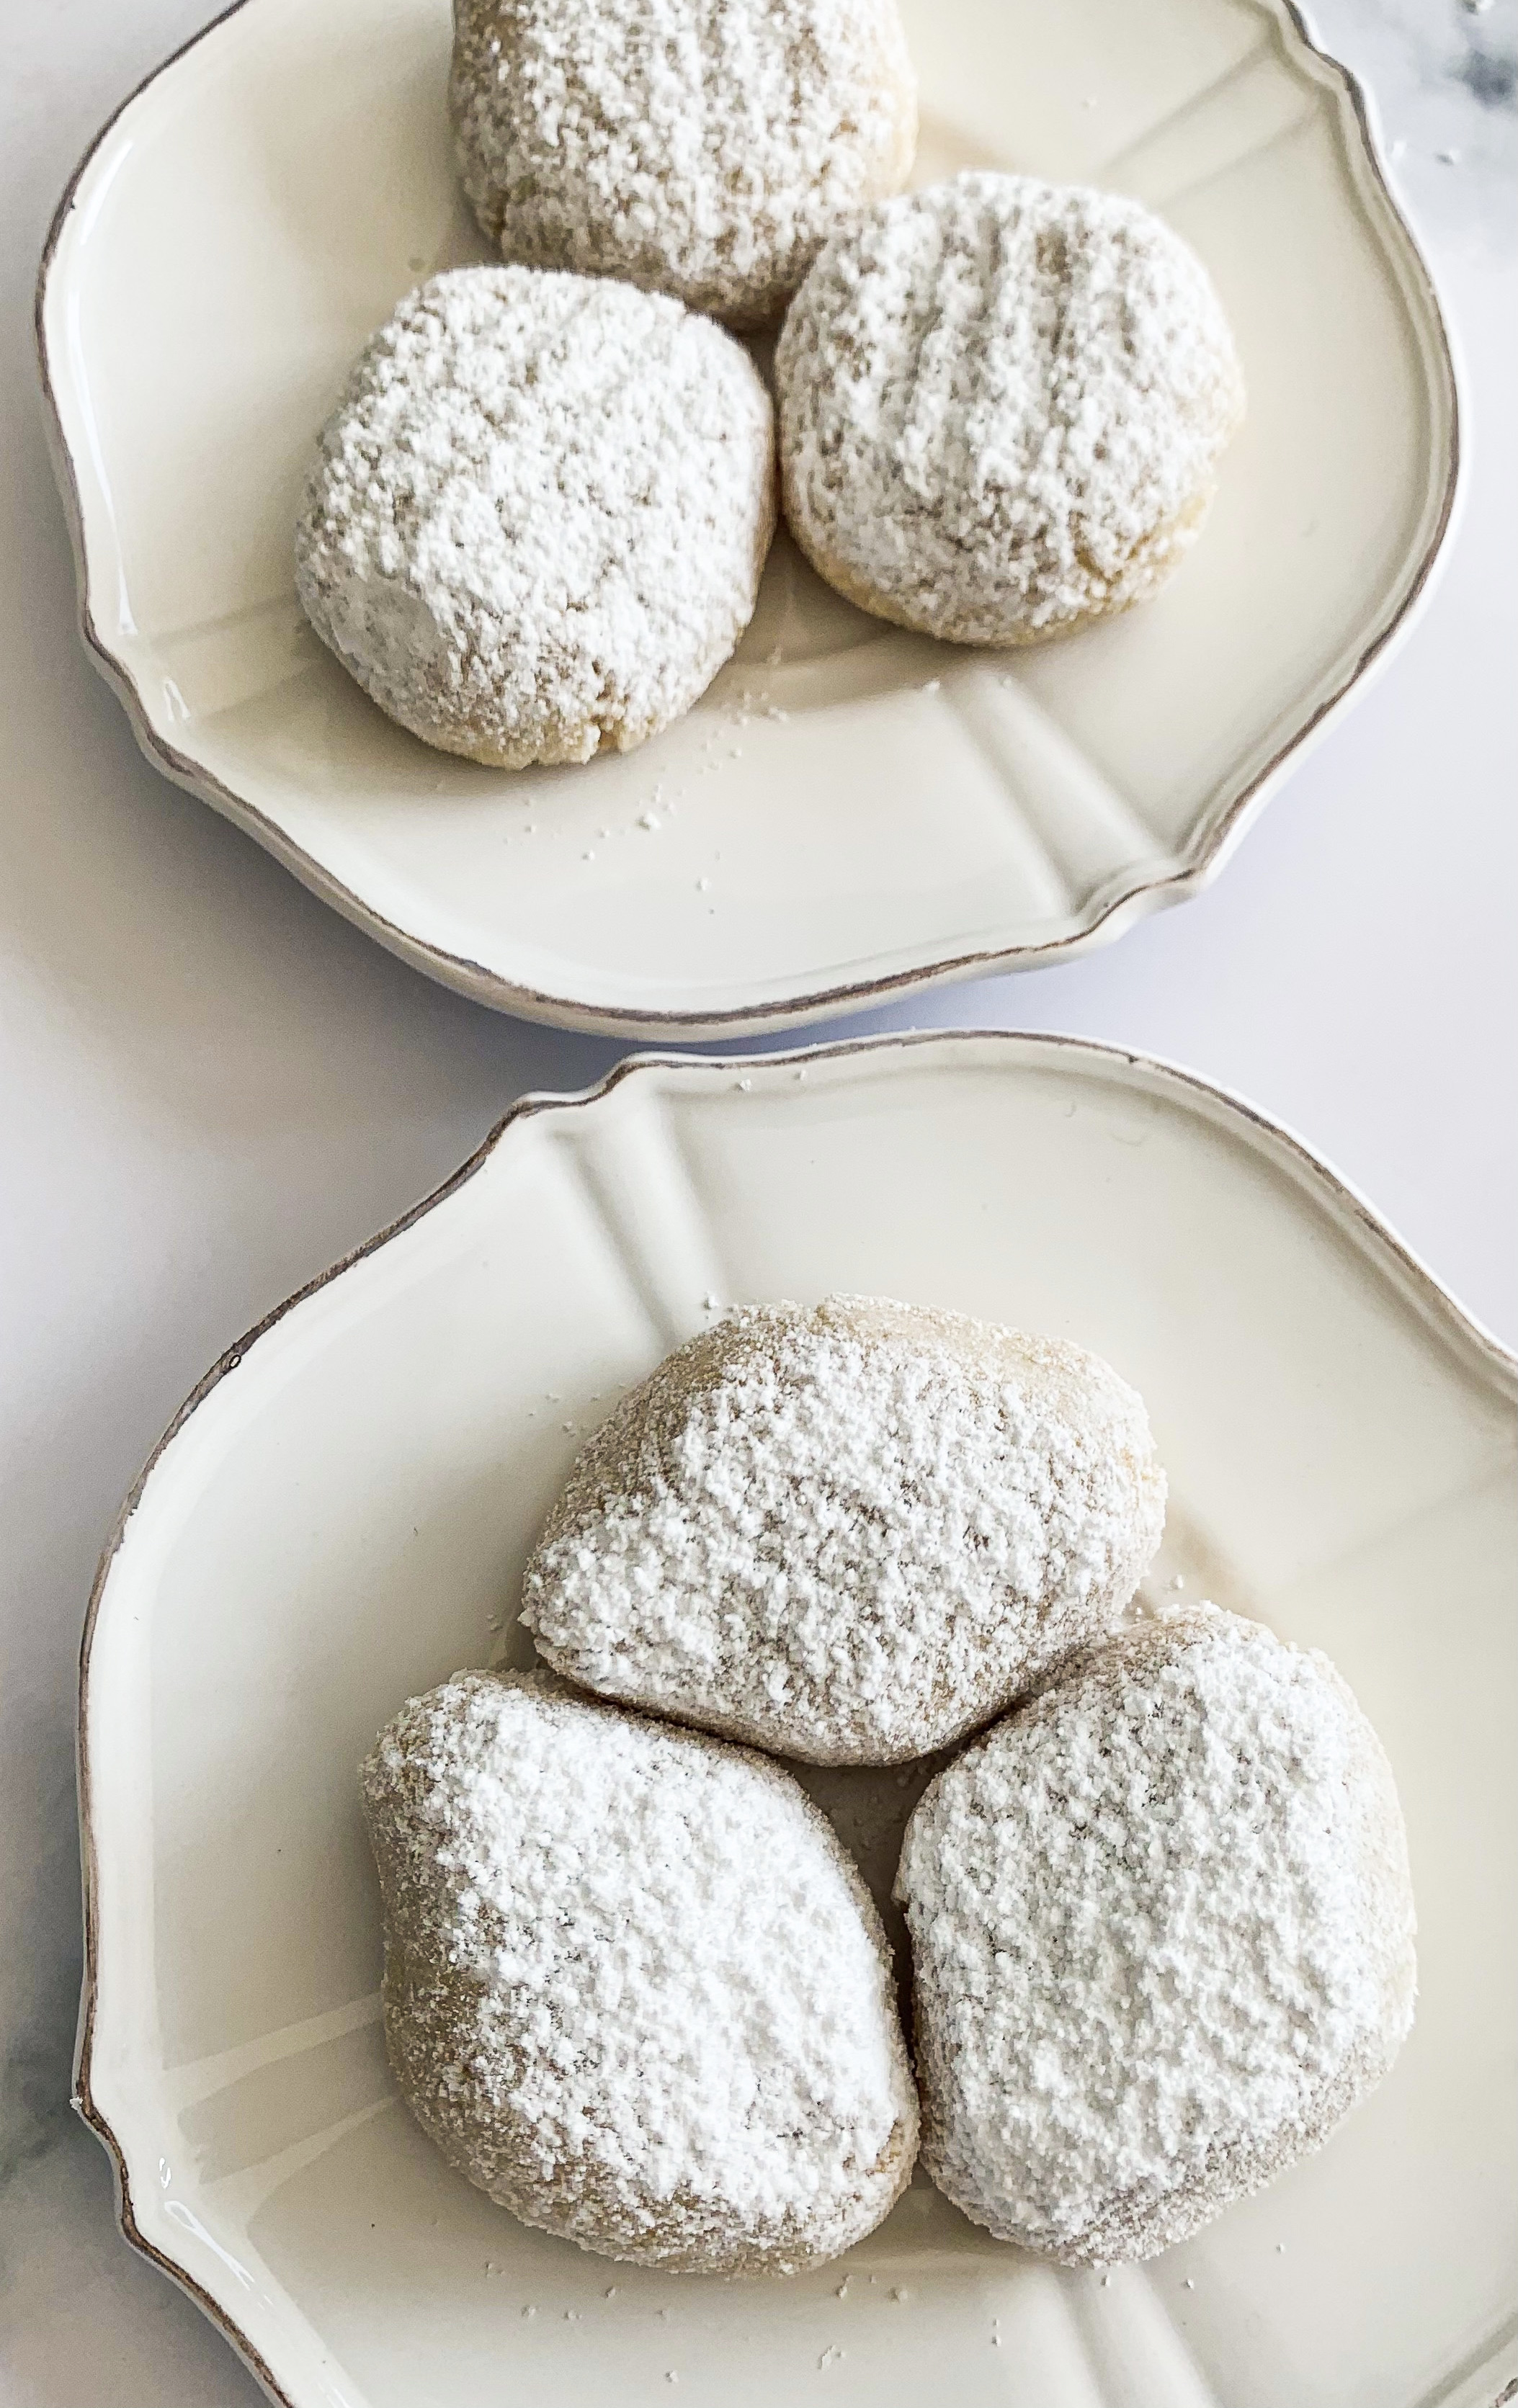
I love these little Italian biscuits – sweet and almondy, they are the perfect complement to an espresso coffee but are equally good with just about anything! This recipe will make around 34 little biscuits, they only need to be small as they are quite sweet, but the problem is I can never seem to stop at eating just the one!…They are incredibly easy to make, however you do need to make them the day before baking as by allowing the uncooked biscuits to rest and dry out overnight they become deliciously chewy – they are totally worth the wait!…
2 large egg whites
Pinch of salt
225g caster sugar
Zest of one lemon
½ teaspoon vanilla extract
1 teaspoon almond essence
300g ready-ground almonds
Icing sugar for dusting
2x baking sheets lined with greaseproof paper
- Whisk the egg whites with the salt until they are stiff, then gradually whisk in the sugar until you reach a marshmallowy consistency. Now add the lemon zest, vanilla extract and almond essence along with the ground almonds, mix to form a quite hard paste.
- Shape into either small diamonds or little rounds (see photo), dusting your hands with icing sugar to stop the mixture becoming too sticky. Lay them on the prepared baking sheets and leave to dry out overnight.
- The following day, cook the riccarelli in a preheated oven, 140’c fan, for about 30 minutes, by which time they should be pale and slightly cracked. Leave to cool.
- Finally dust with icing sugar and serve. They will keep well in an airtight container.
Gluten Free Coffee Cake with Espresso Buttercream Icing
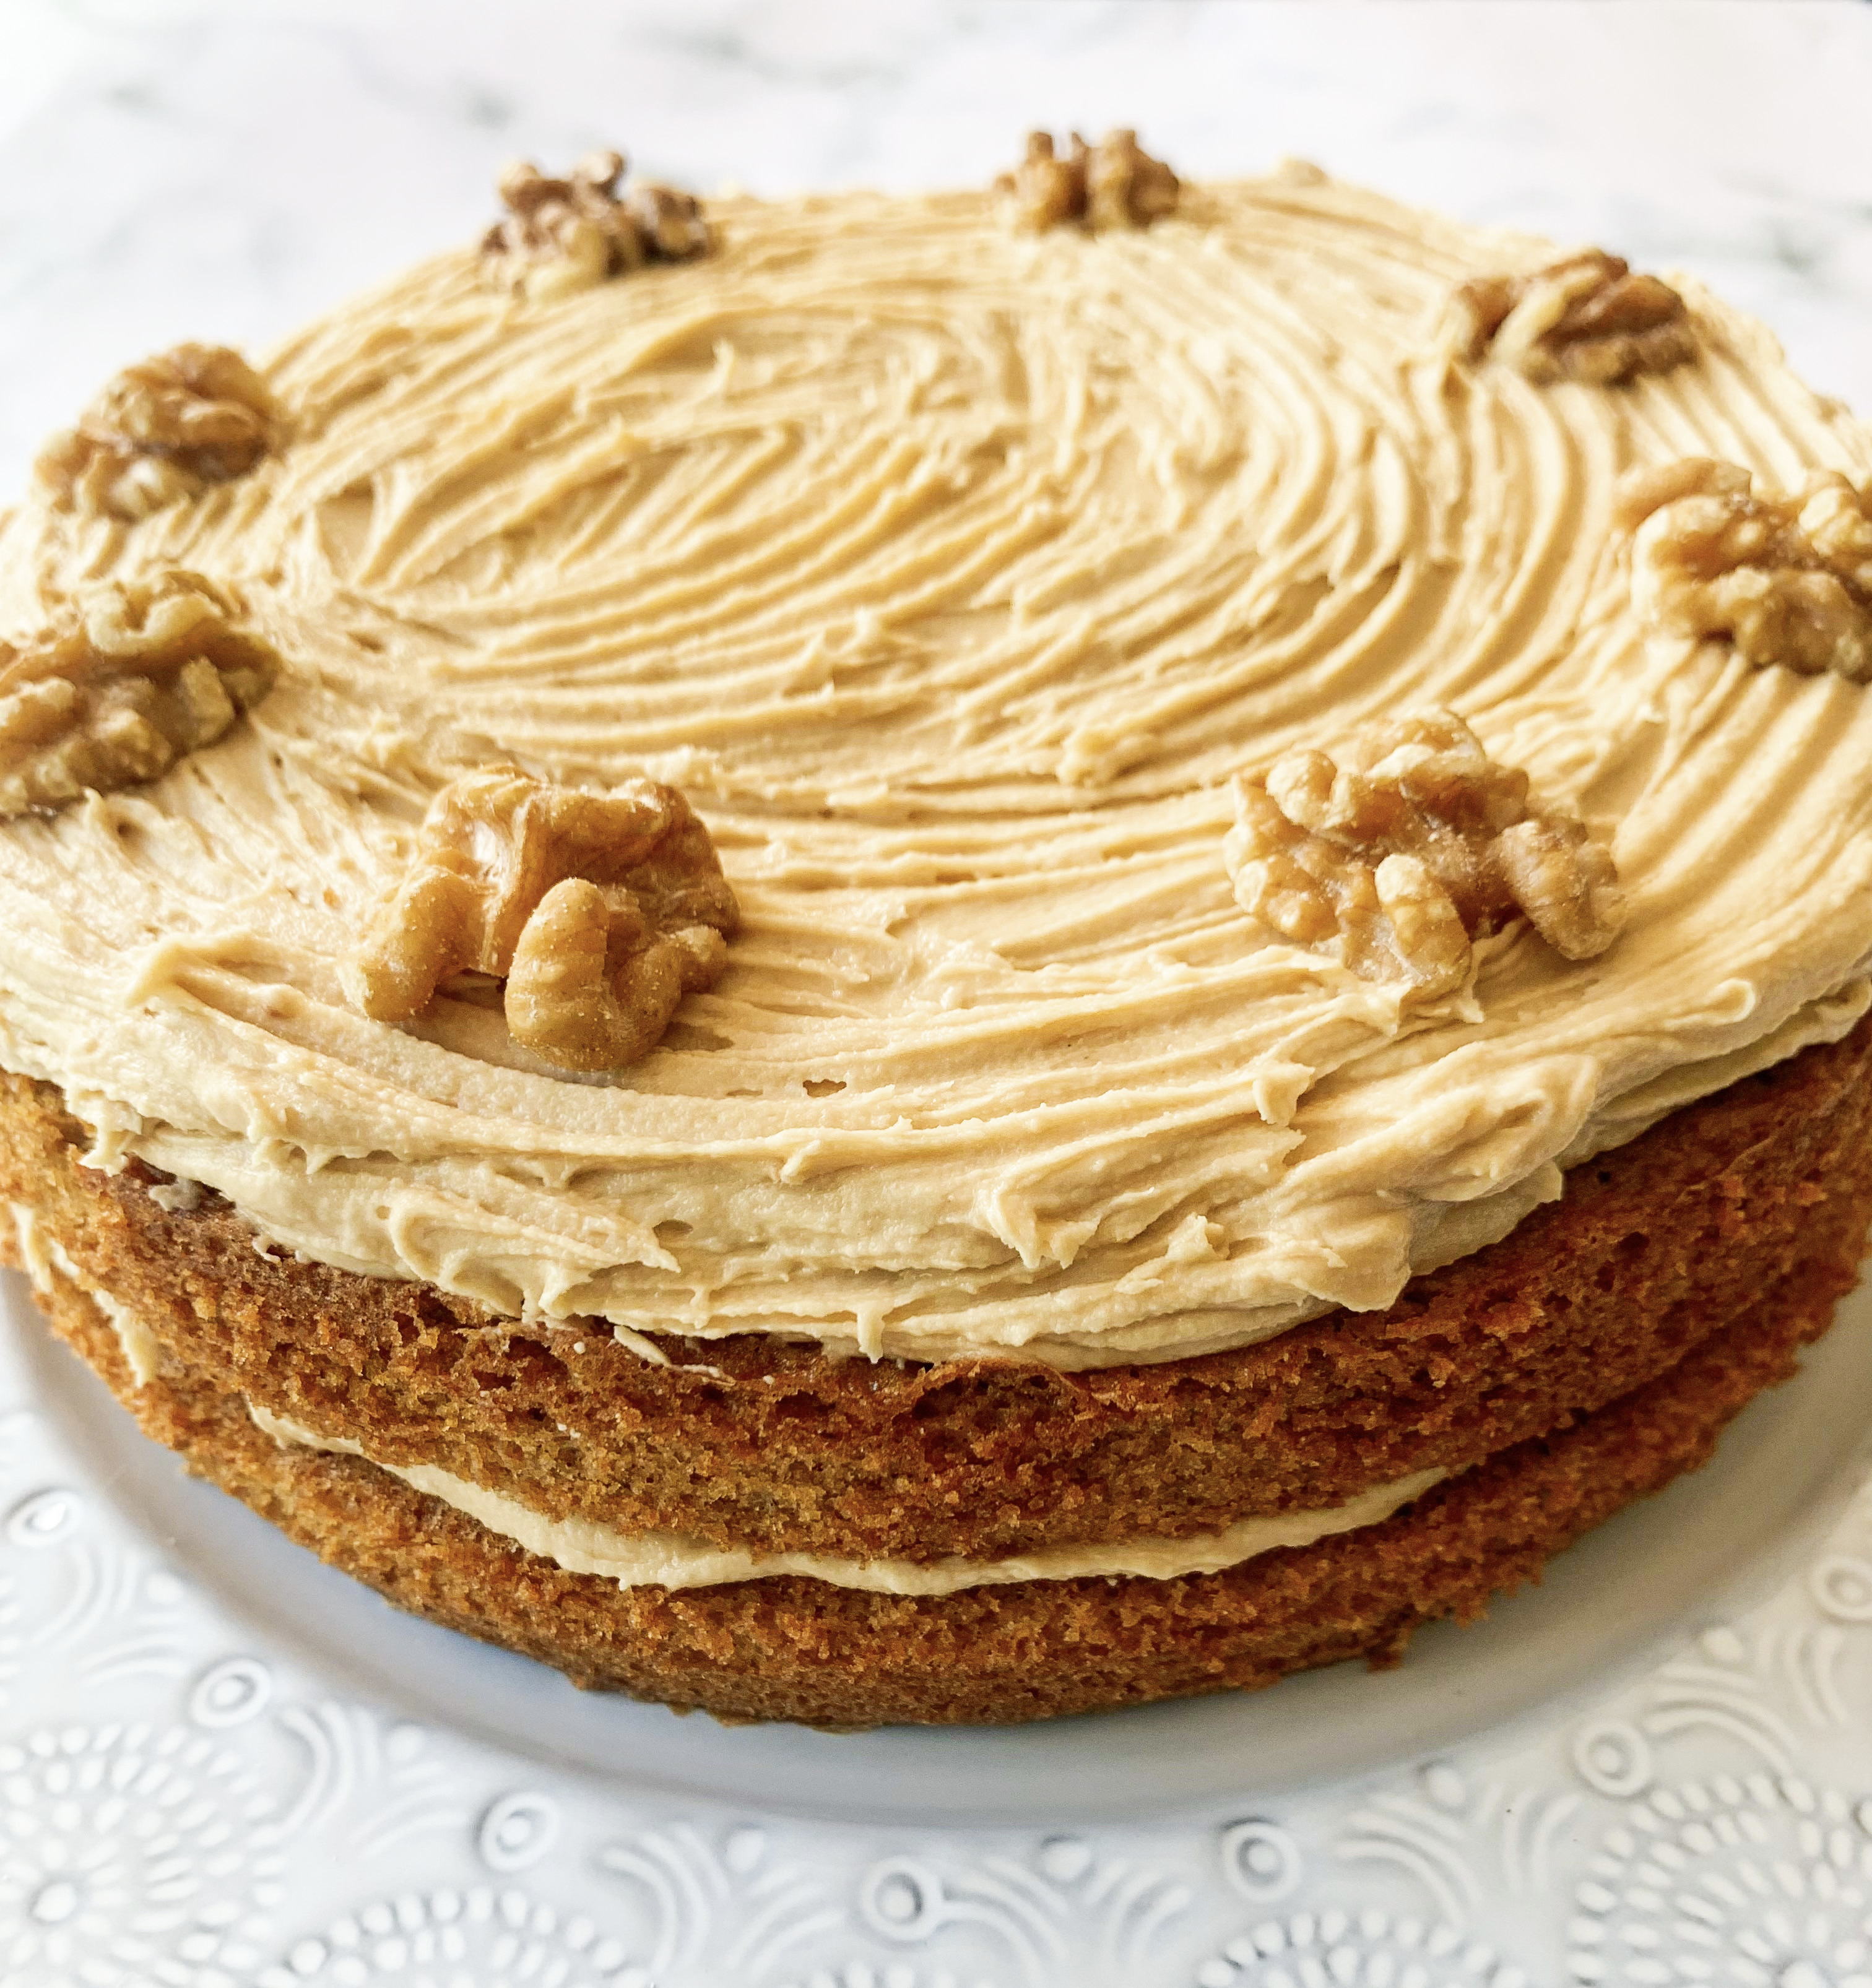
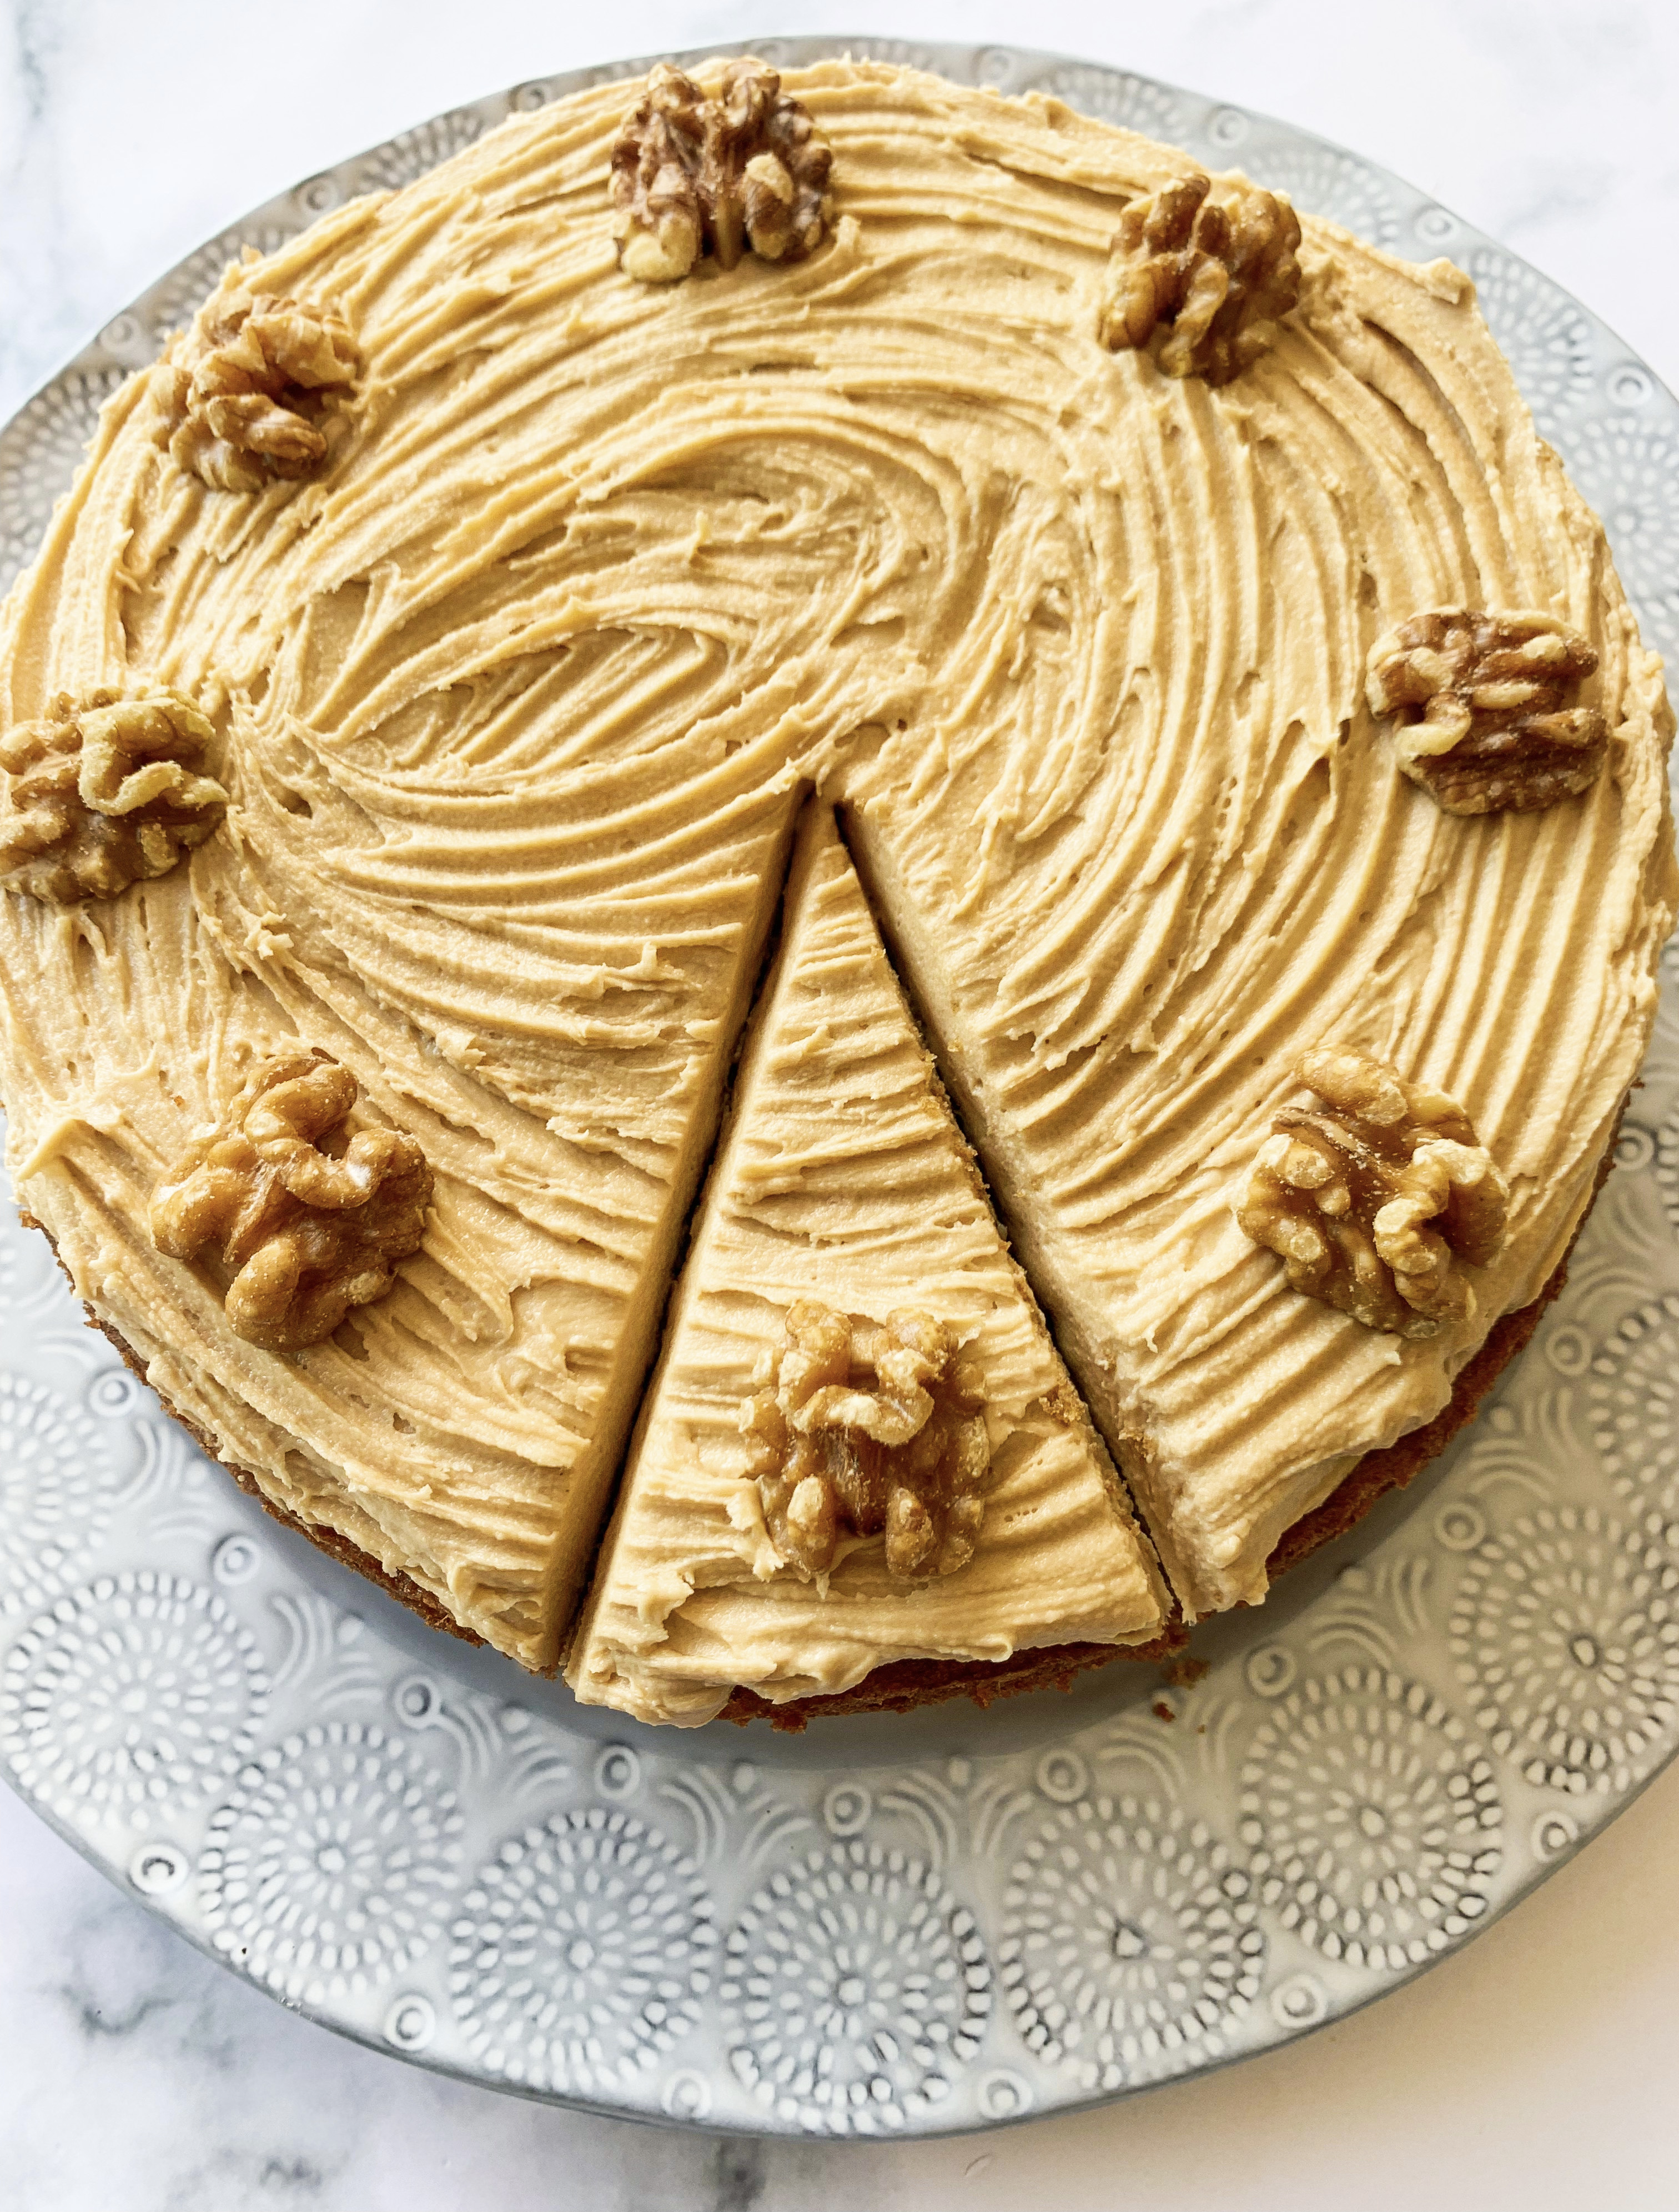
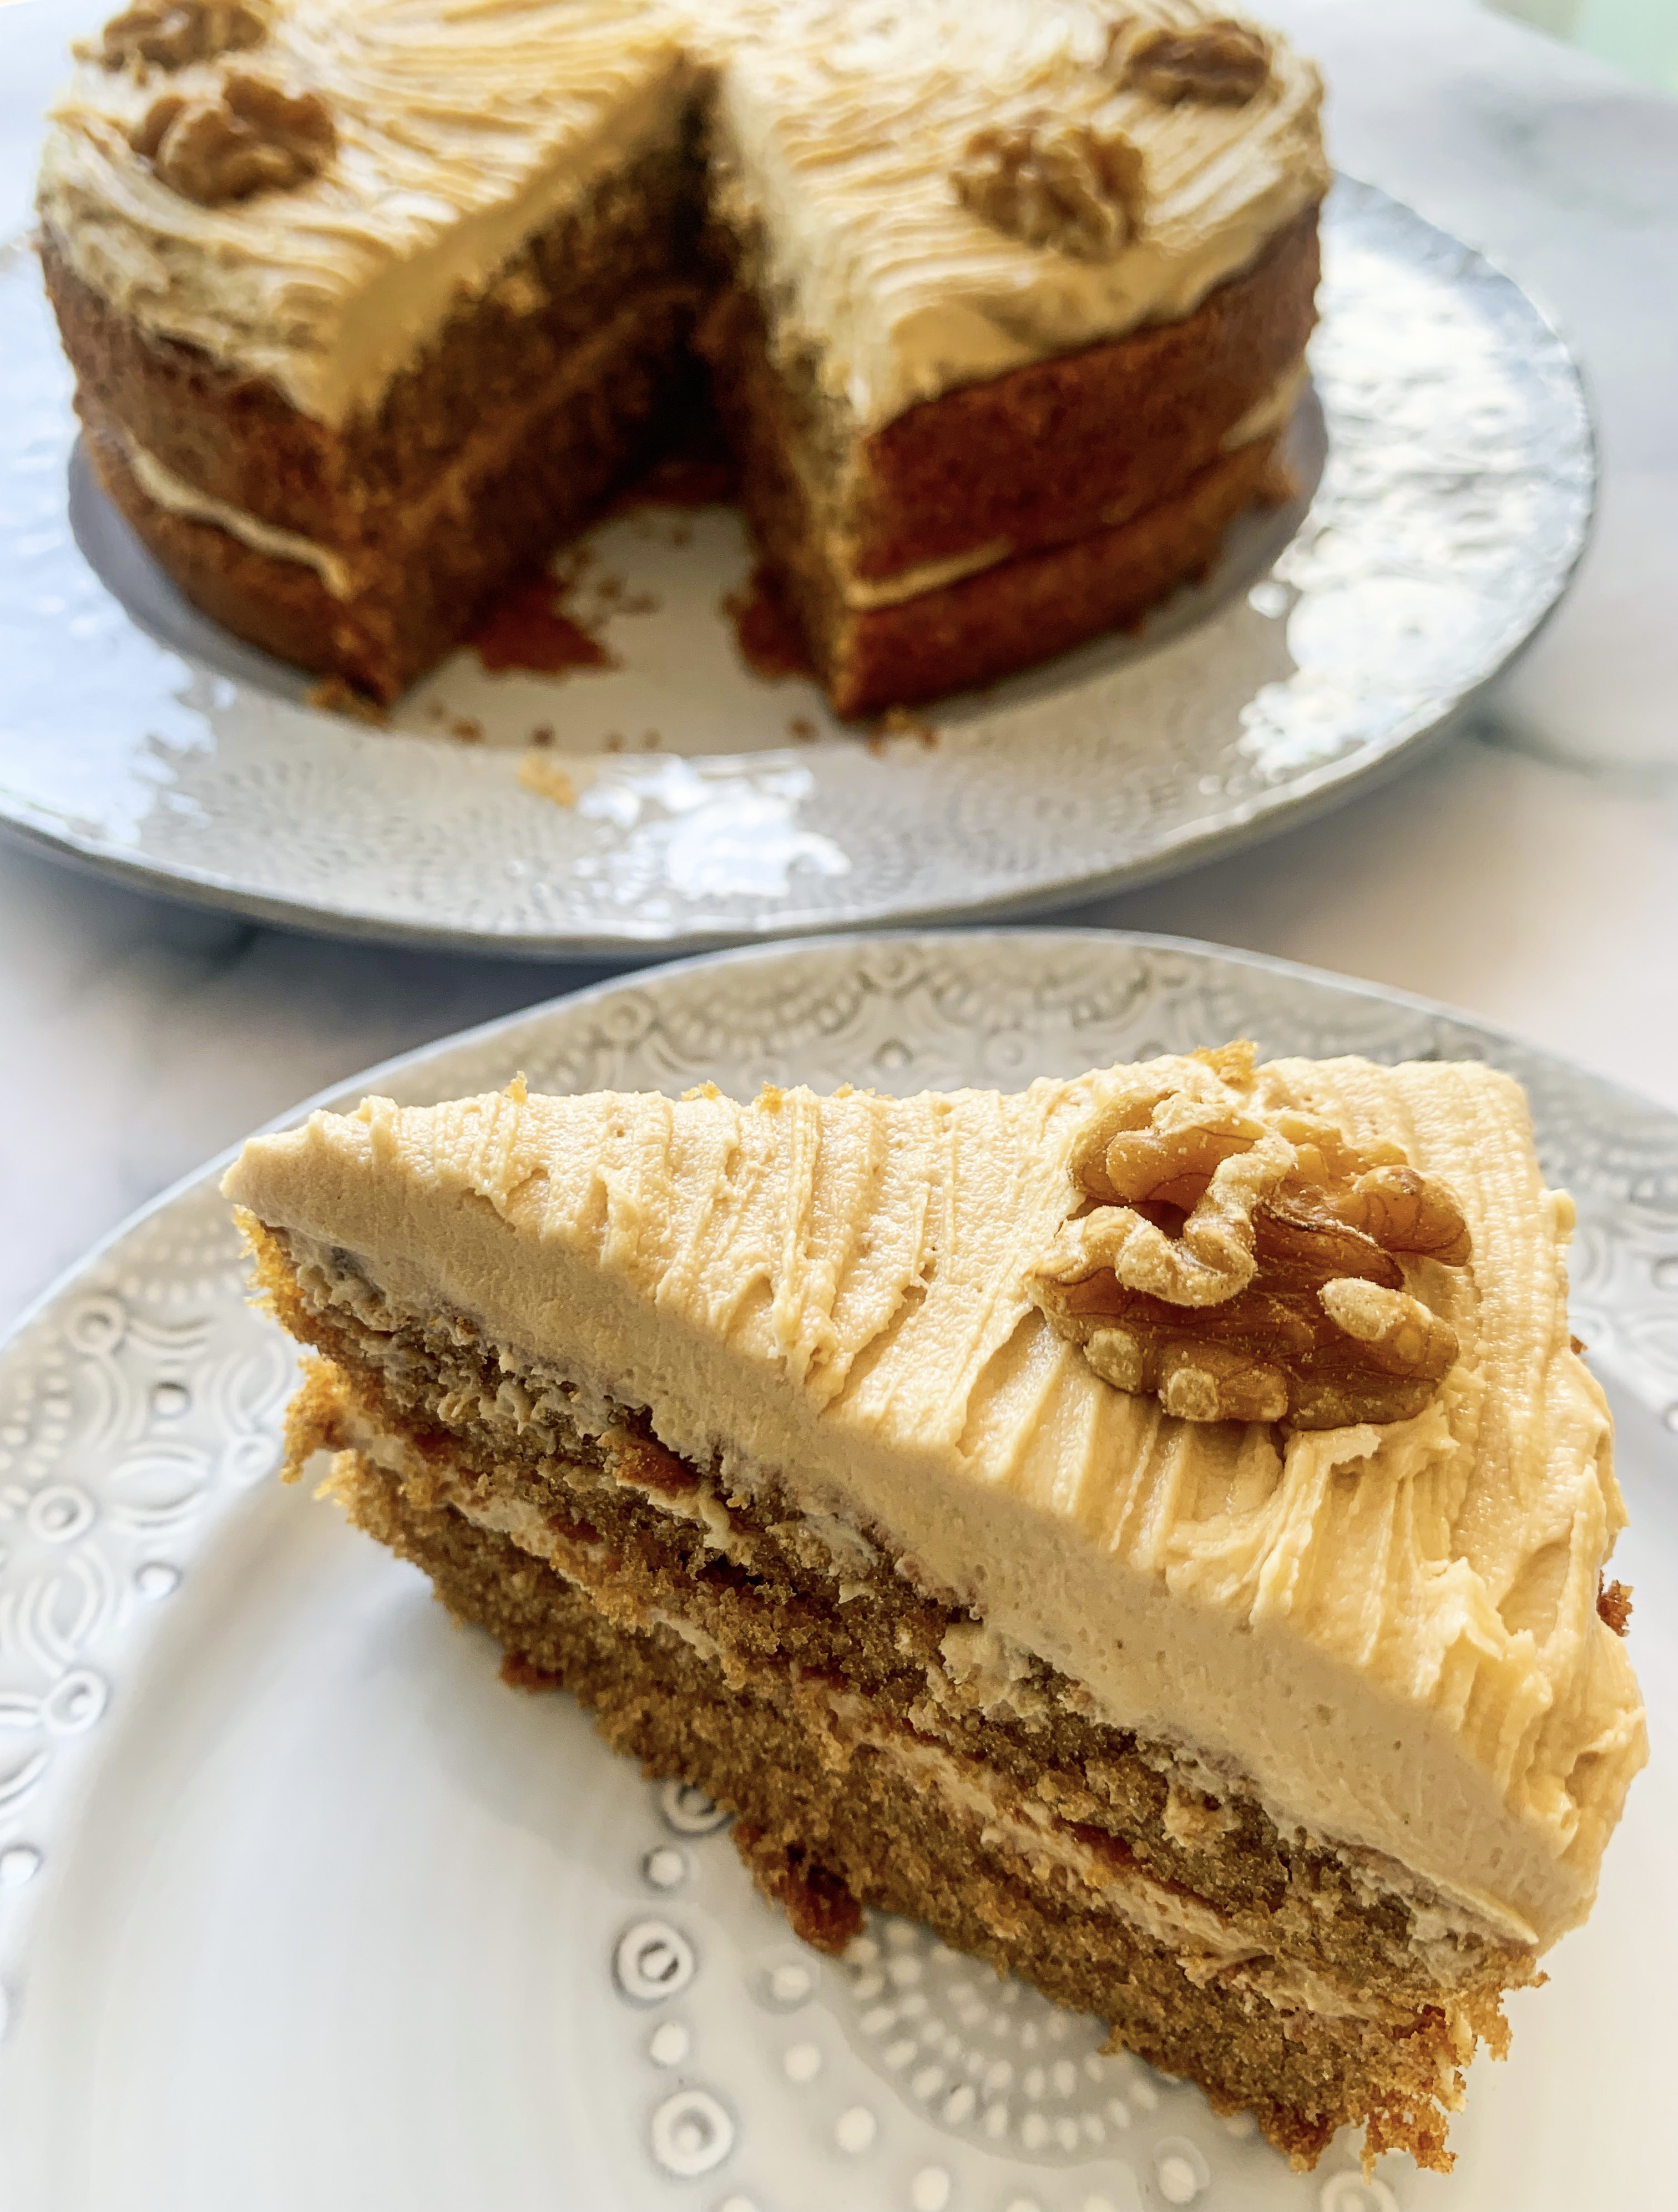
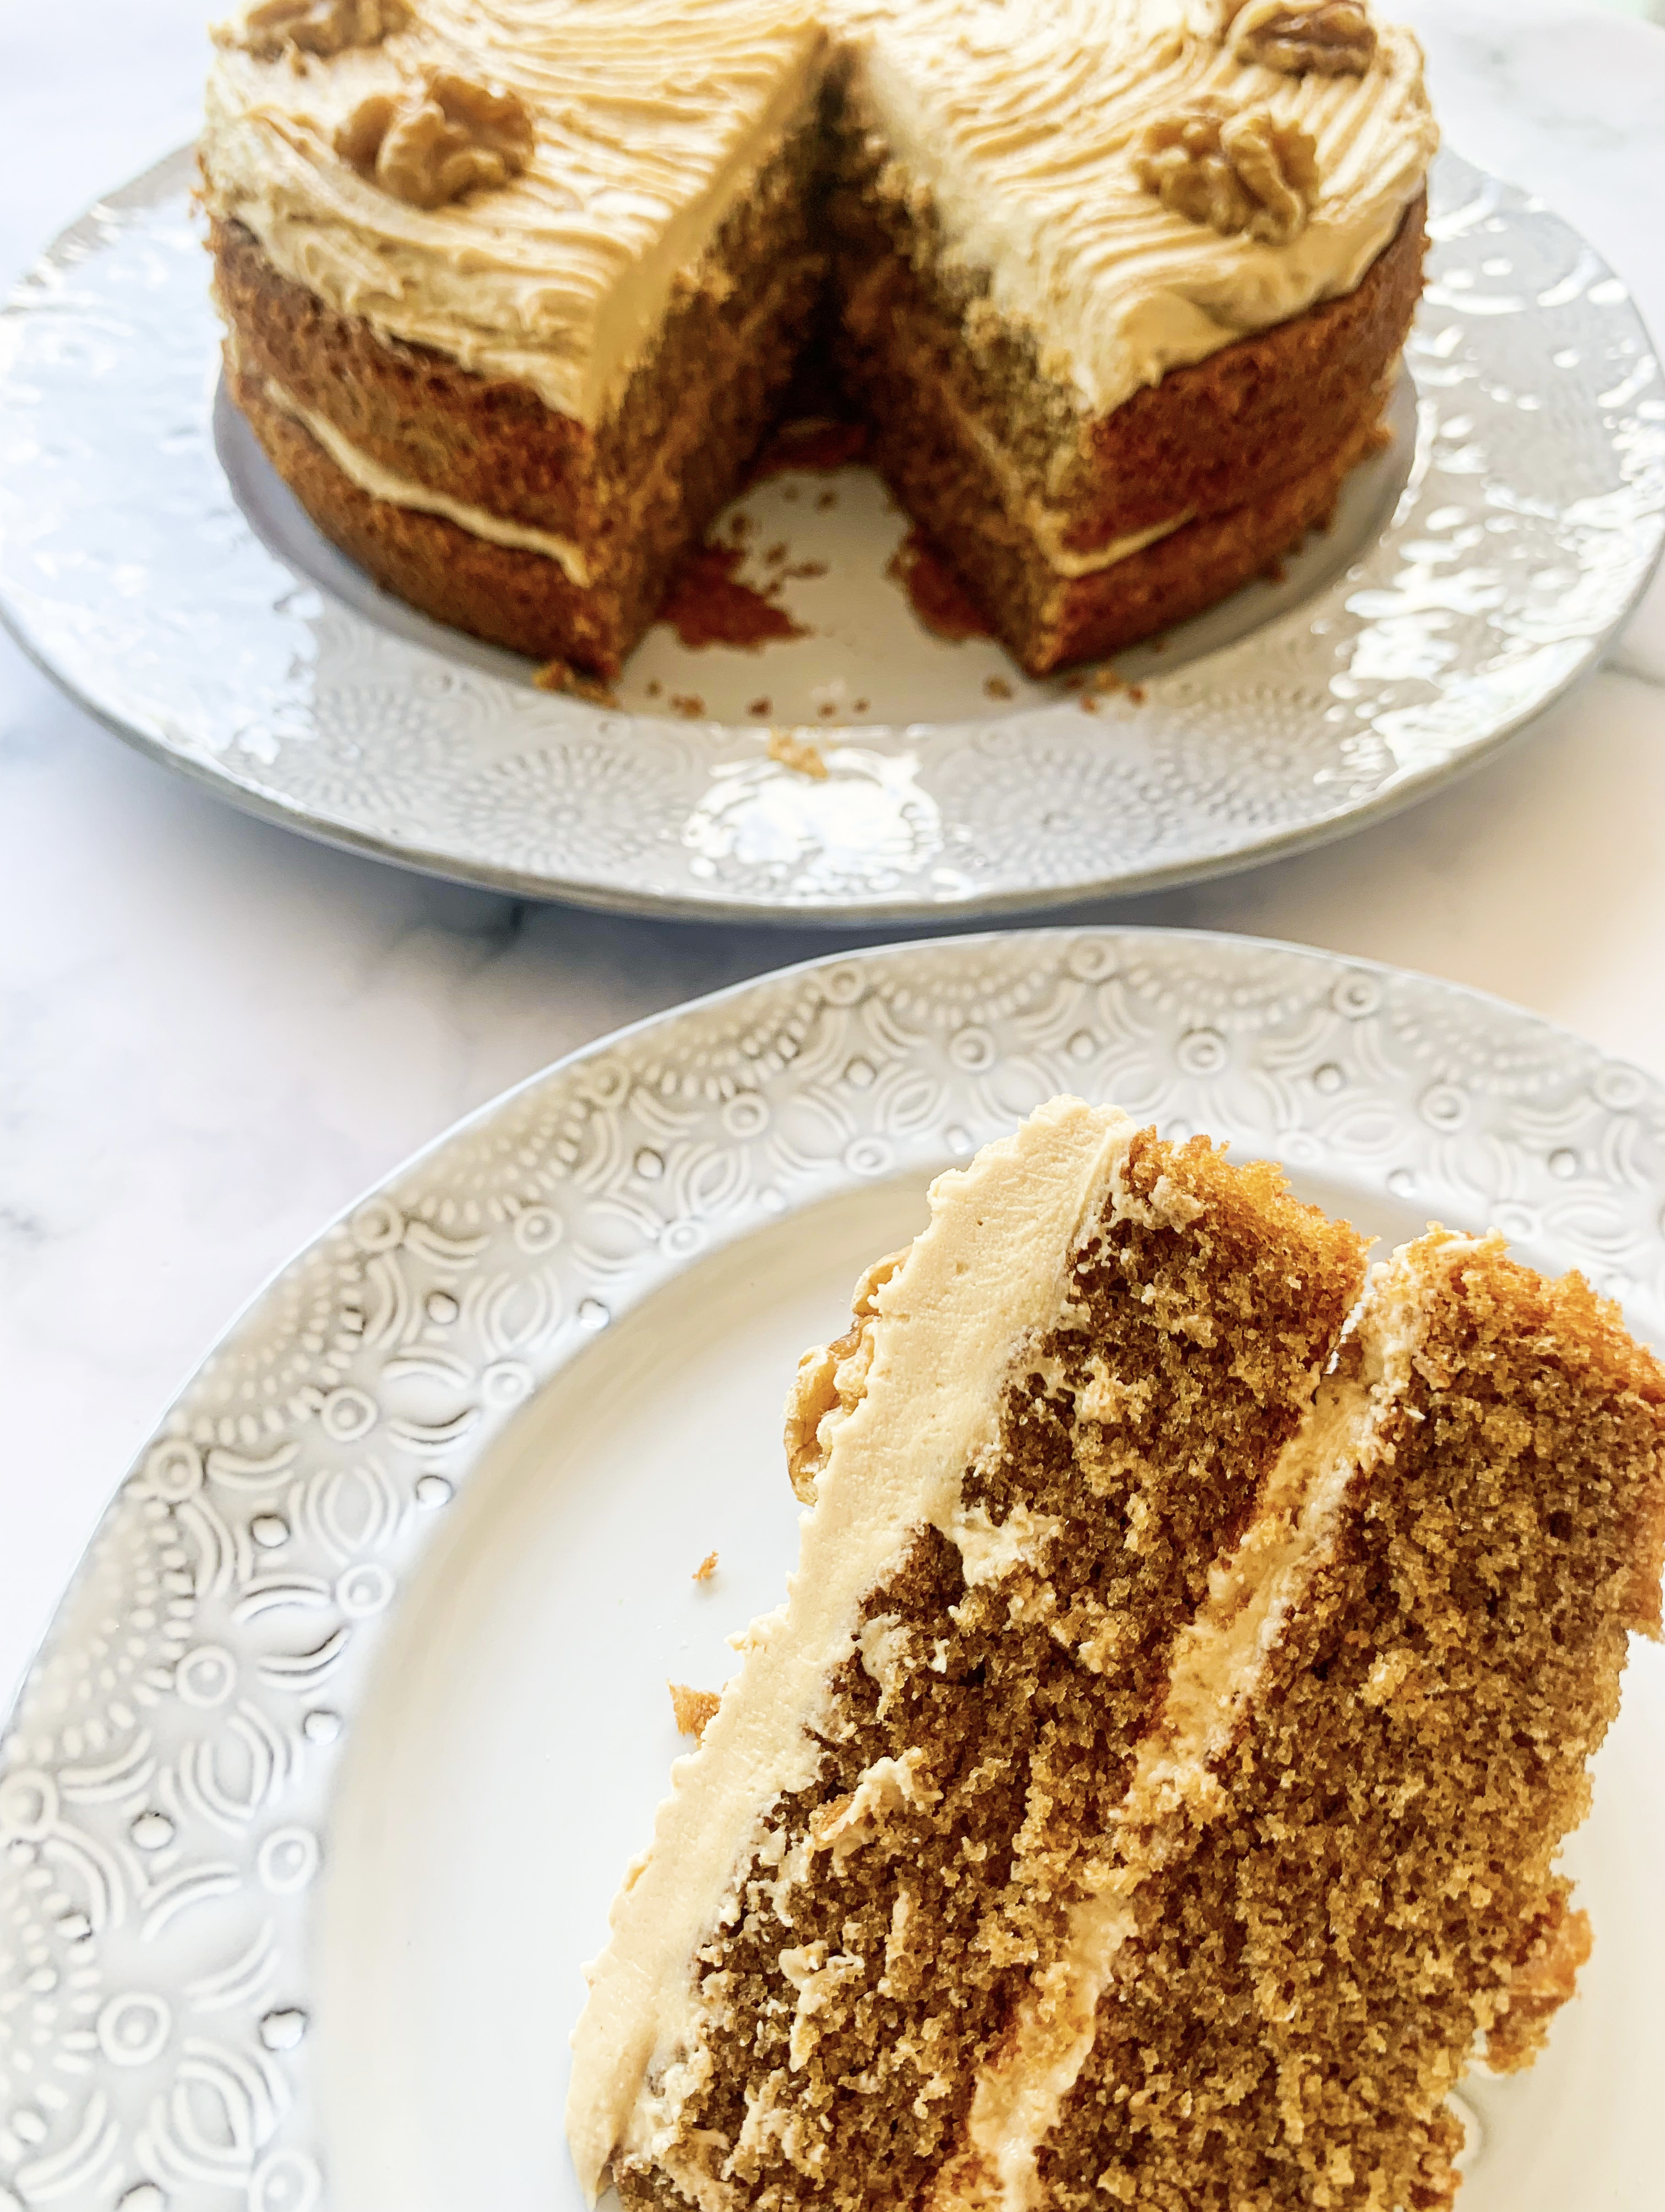
Even if you’re not gluten free I urge you to make this cake, it has a beautifully light sponge and the buttercream really is the ‘icing on the cake’!! Finding recipes for traditional sponge cakes which are both gluten free and light can be a challenge. My son Felix found this one when searching for a recipe which would please us both (he adores coffee and I am gluten free!). It is a recipe from the producers of ‘Doves Flour’ and it uses their wonderful gluten free flour.
2 tbsp espresso coffee powder
2 tbsp boiling water
200g butter
200g caster sugar
4 eggs
200g Doves Self Raising gluten free flour
For the Buttercream icing:
4 teaspoons espresso coffee powder
3 teaspoons boiling water
¼ teaspoon salt
250g icing sugar, sifted
125g unsalted butter, at room temperature
8 walnut halves to decorate
*2x 20cm/8’ round baking tins, buttered and bases lined.
- For the cake: put the coffee powder into a cup, add the boiling water, stir to make a paste and leave to cool.
- Rub some butter around the inside of two 20cm/8″ round baking tins and line the bases with baking paper.
- Put the butter and caster sugar into a large bowl and beat with electric beaters until light and fluffy. Beat in the eggs one at a time, then sieve the flour into the bowl and beat again. Finally, add the coffee mixture and stir until everything is well combined.
- Divide the mixture between the prepared tins and smooth the top.
- Bake in a preheated oven, 170’c fan, for 20-25 minutes (until a cocktail stick pressed into the centre of the cake comes out clean). Cool the sponges in the tin a little before turning them onto a wire rack and leaving to cool.
- Meanwhile make the buttercream icing: combine the coffee powder with the boiling water and put to one side. Place the butter and salt in a mixing bowl and beat with electric beaters until light and fluffy, then add the sifted icing sugar, and whisk until well combined, finally beat in the cooled coffee mixture.
- To assemble the cake turn one of the sponges upside down (flat side facing up) and spread with half of the buttercream, top with the second sponge (flat side facing down), and spread over the remaining buttercream, use a fork or knife to make a pattern and place the 8 walnut halves around the edge.
Almond, Pear and Ricotta Cake
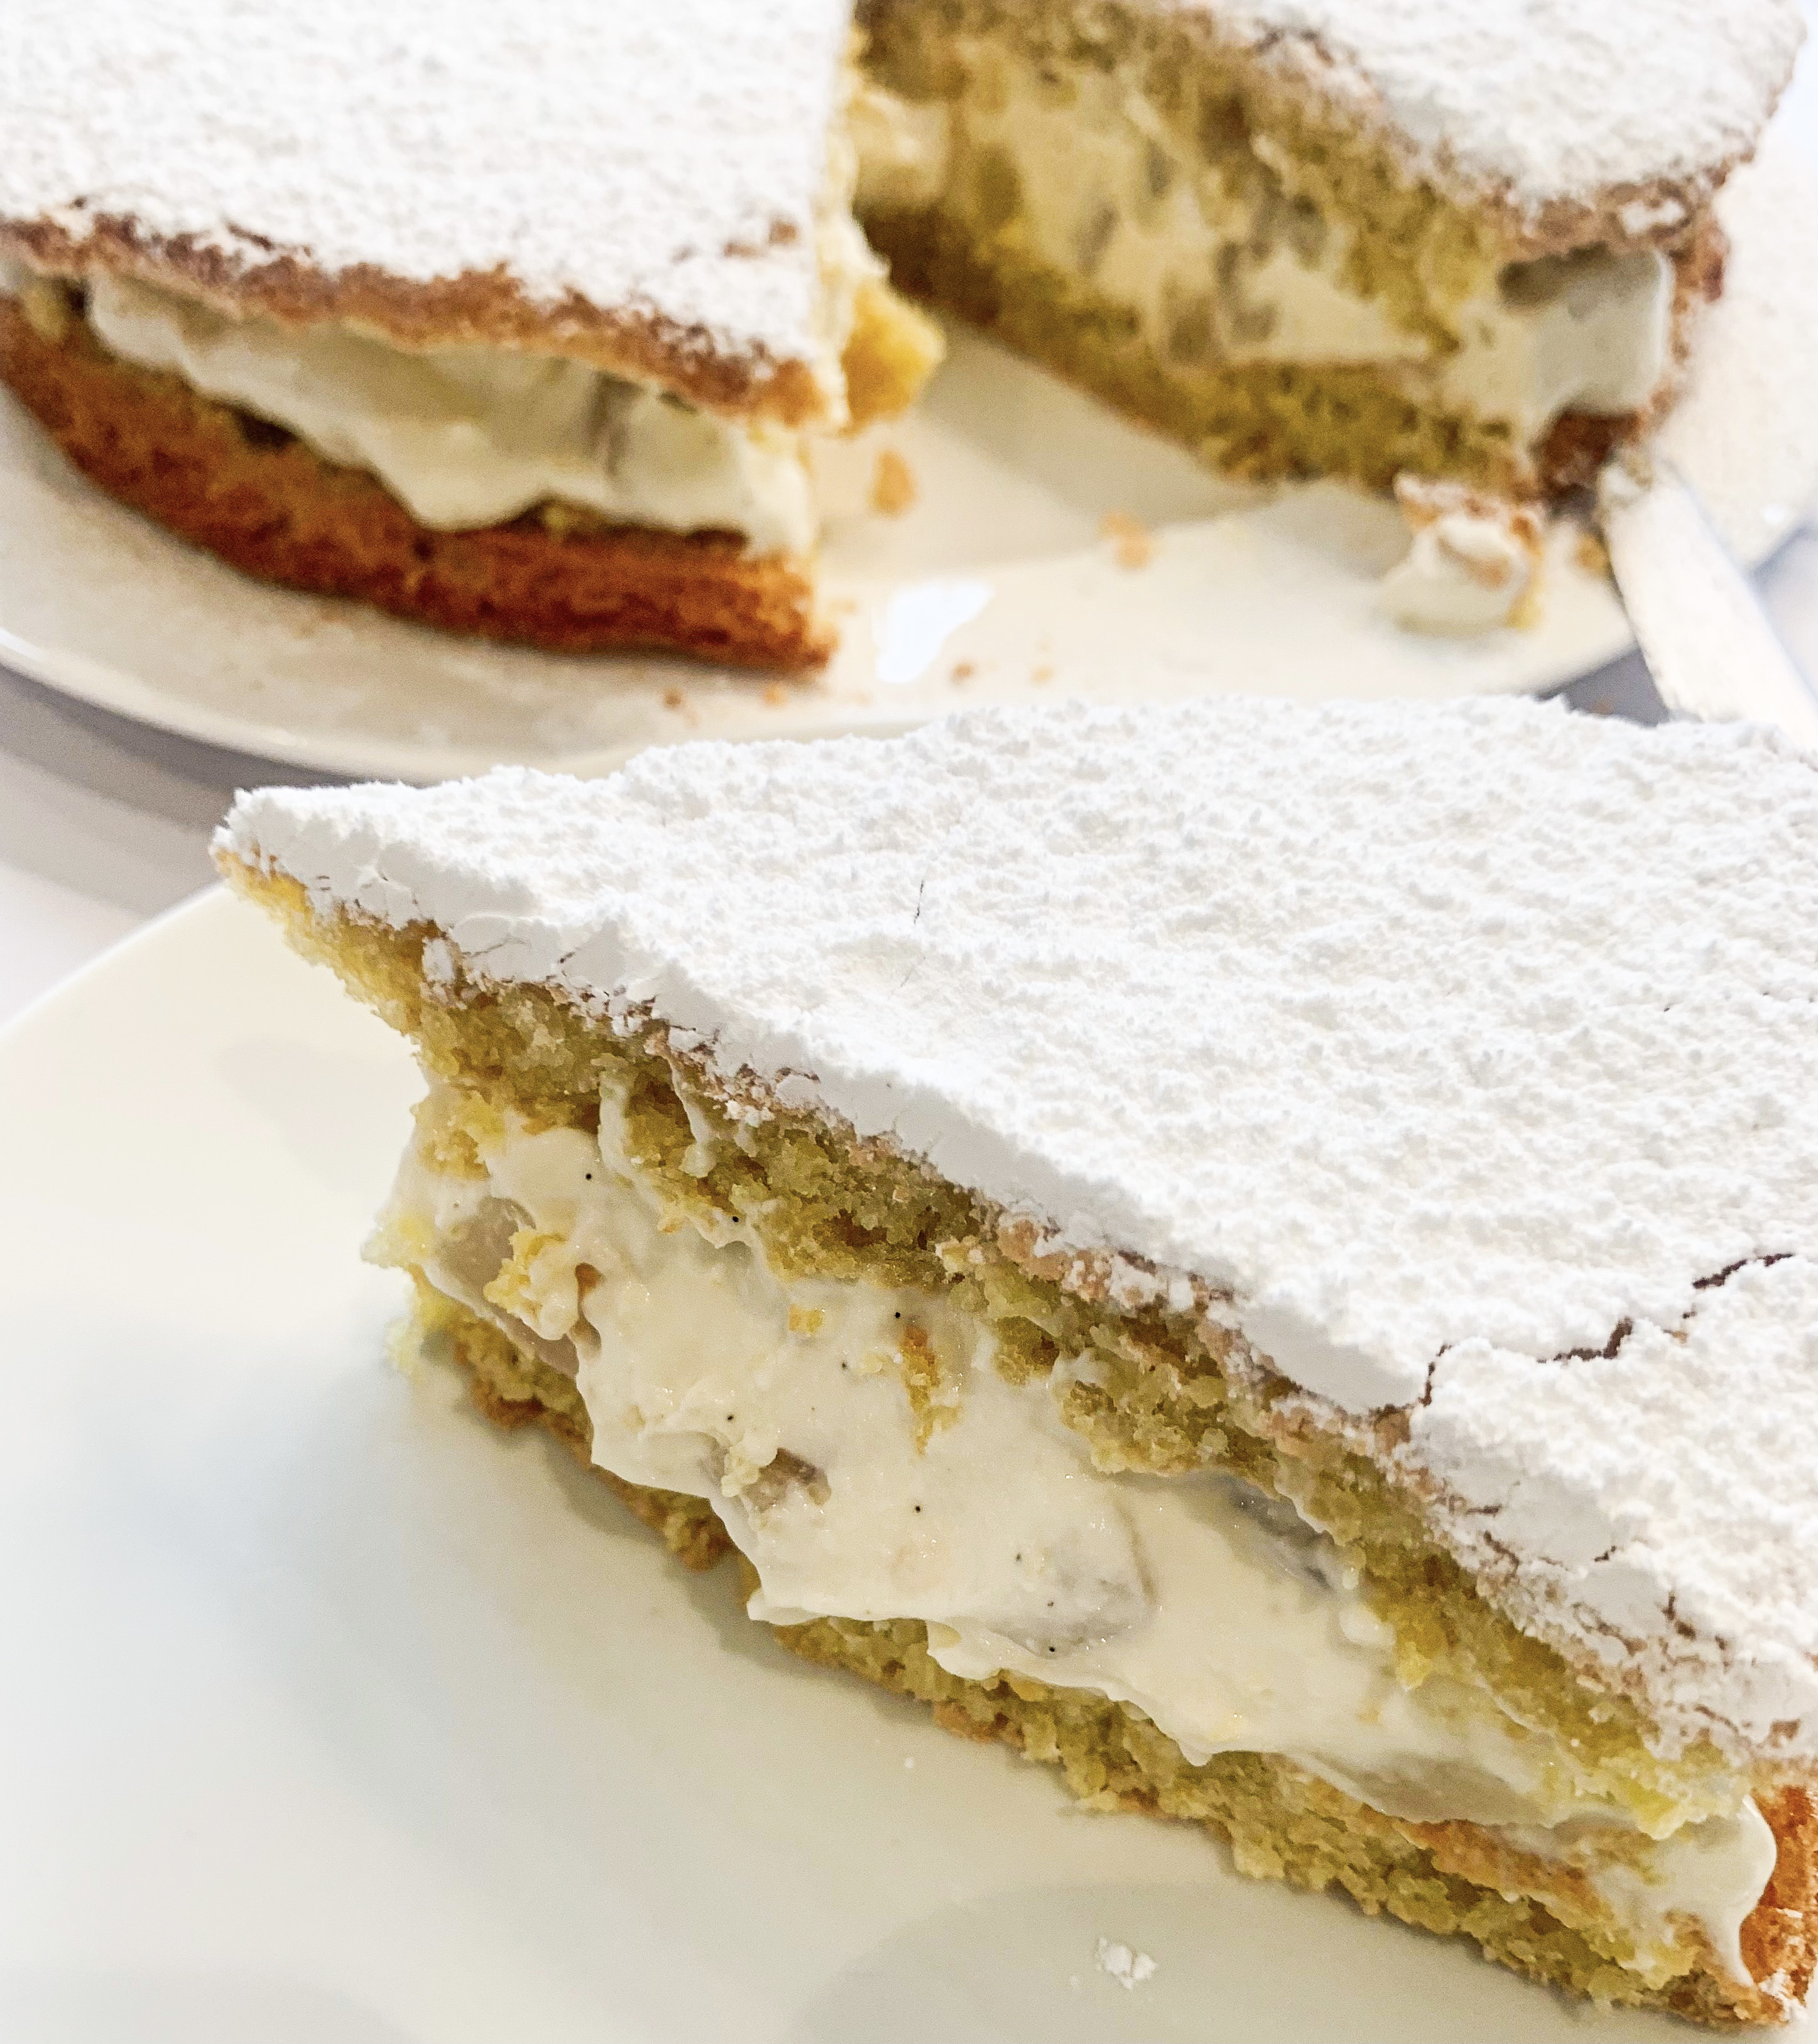
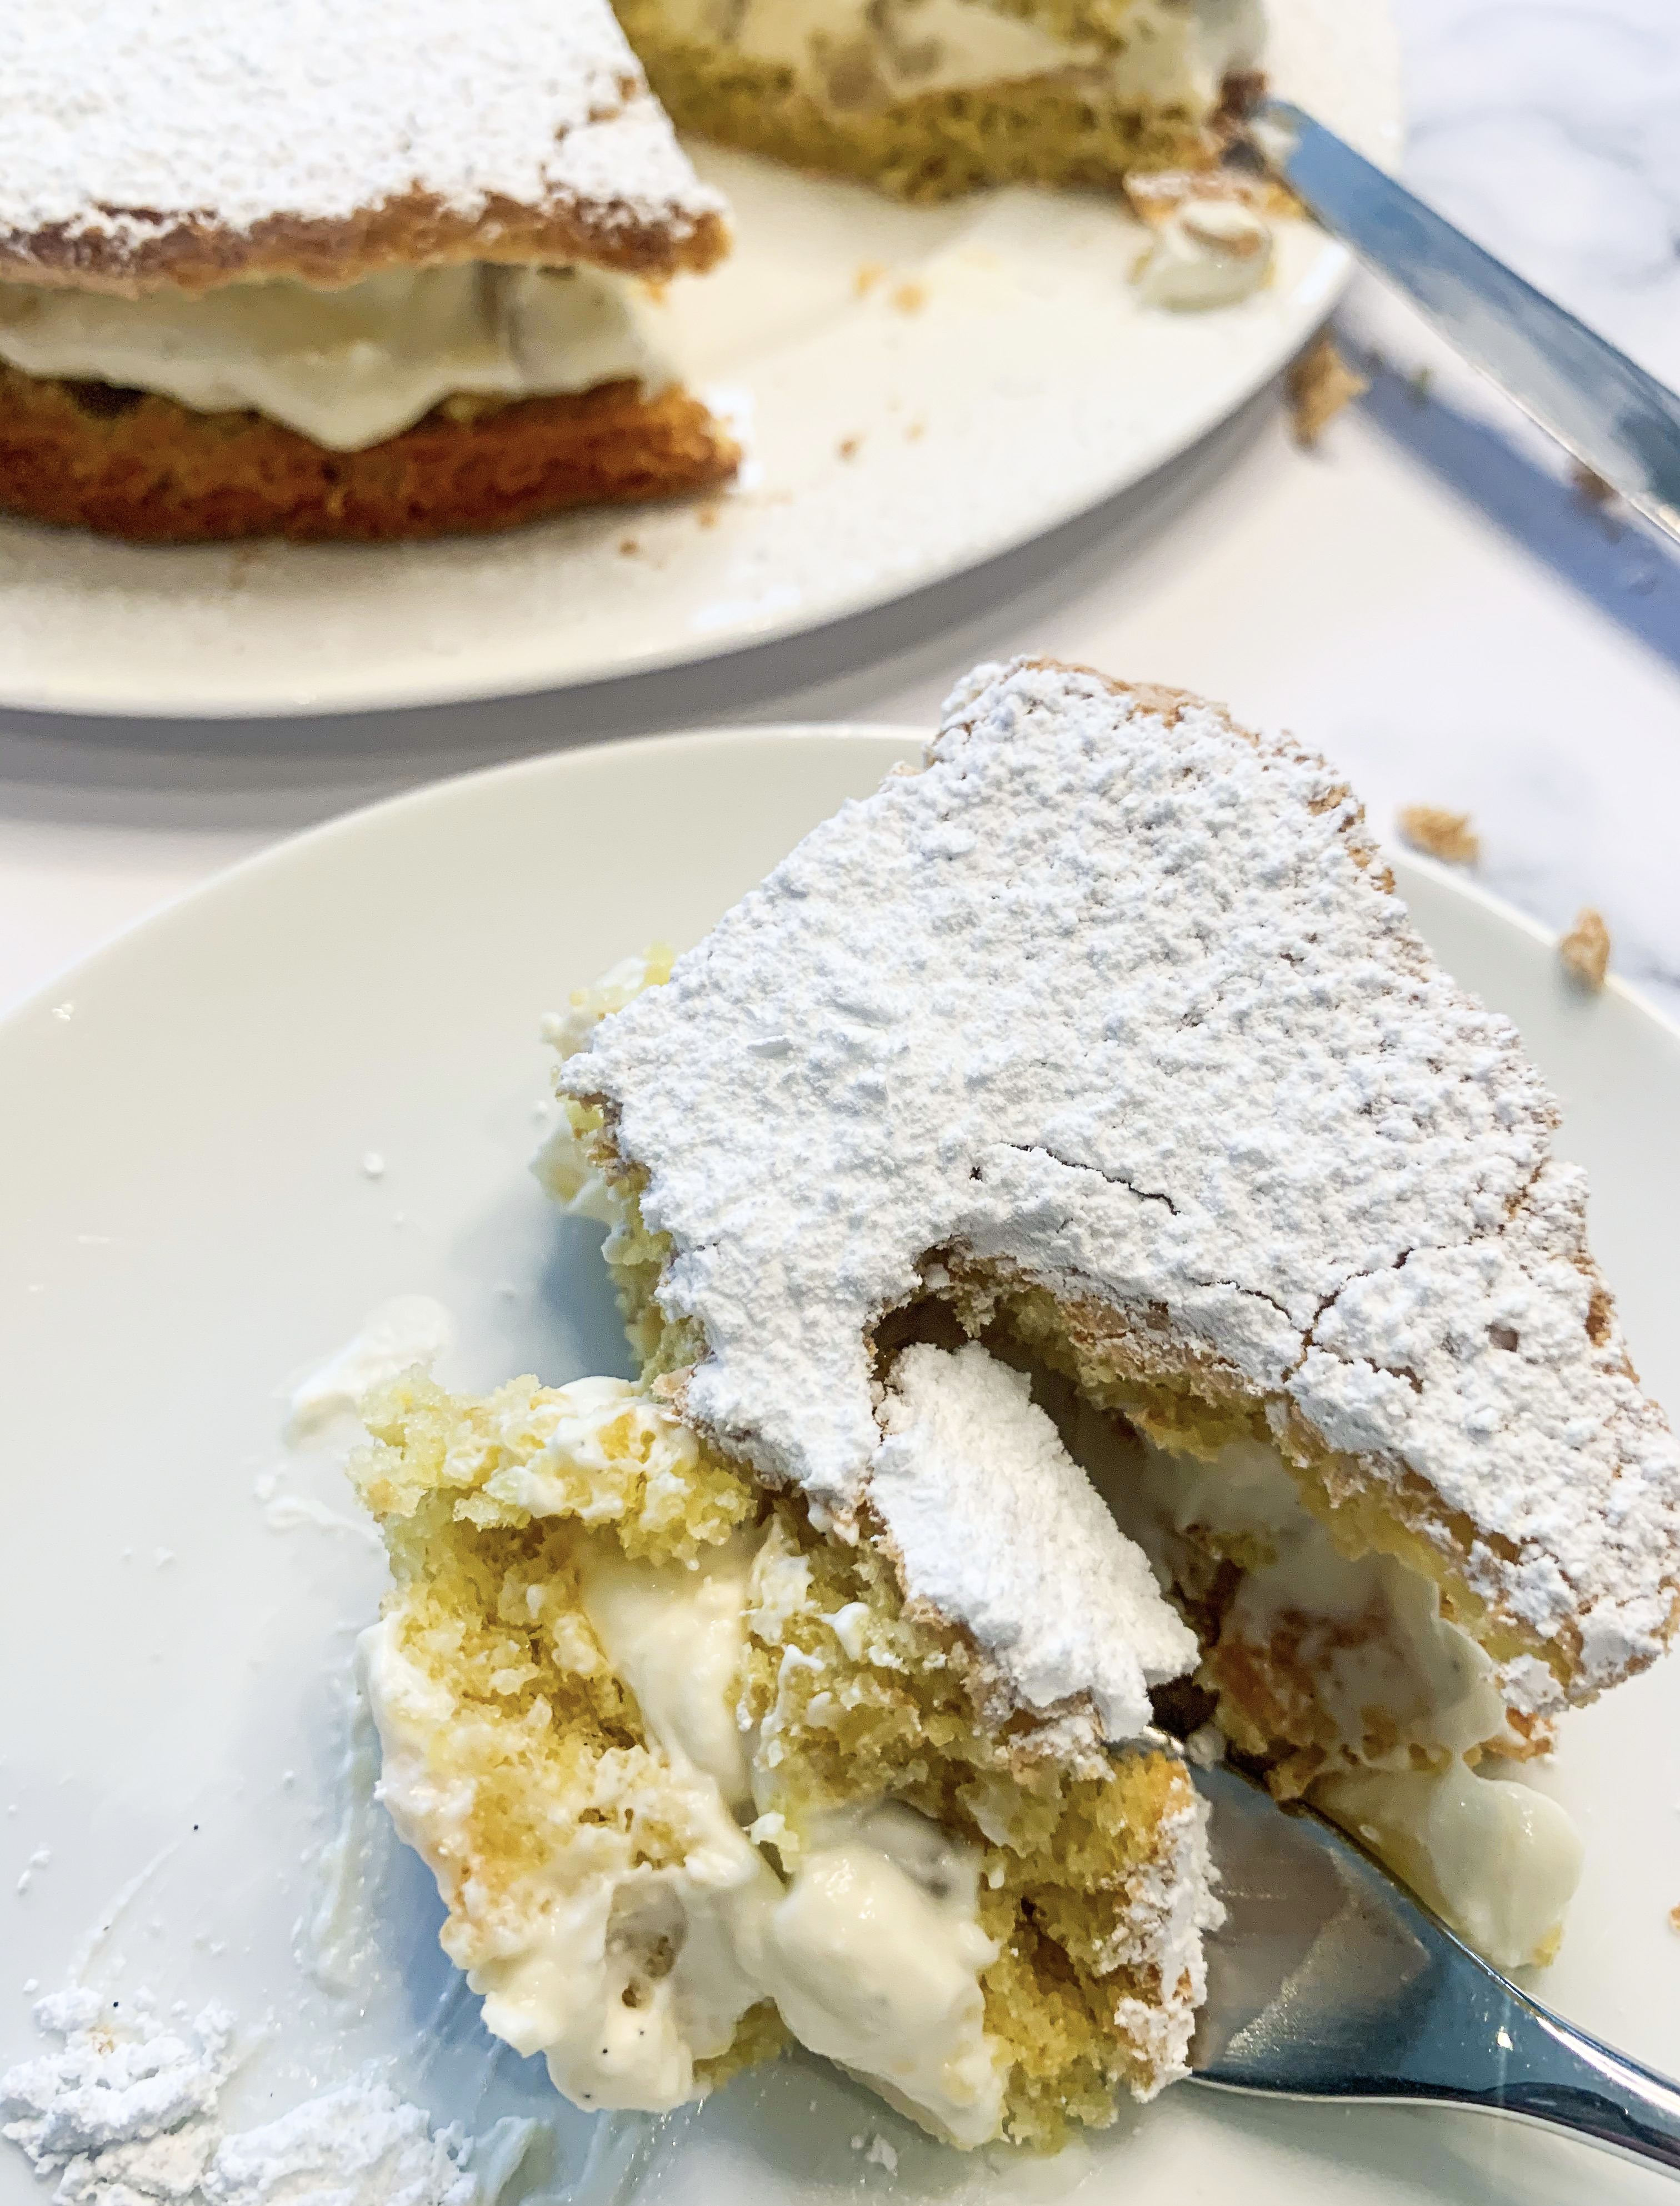
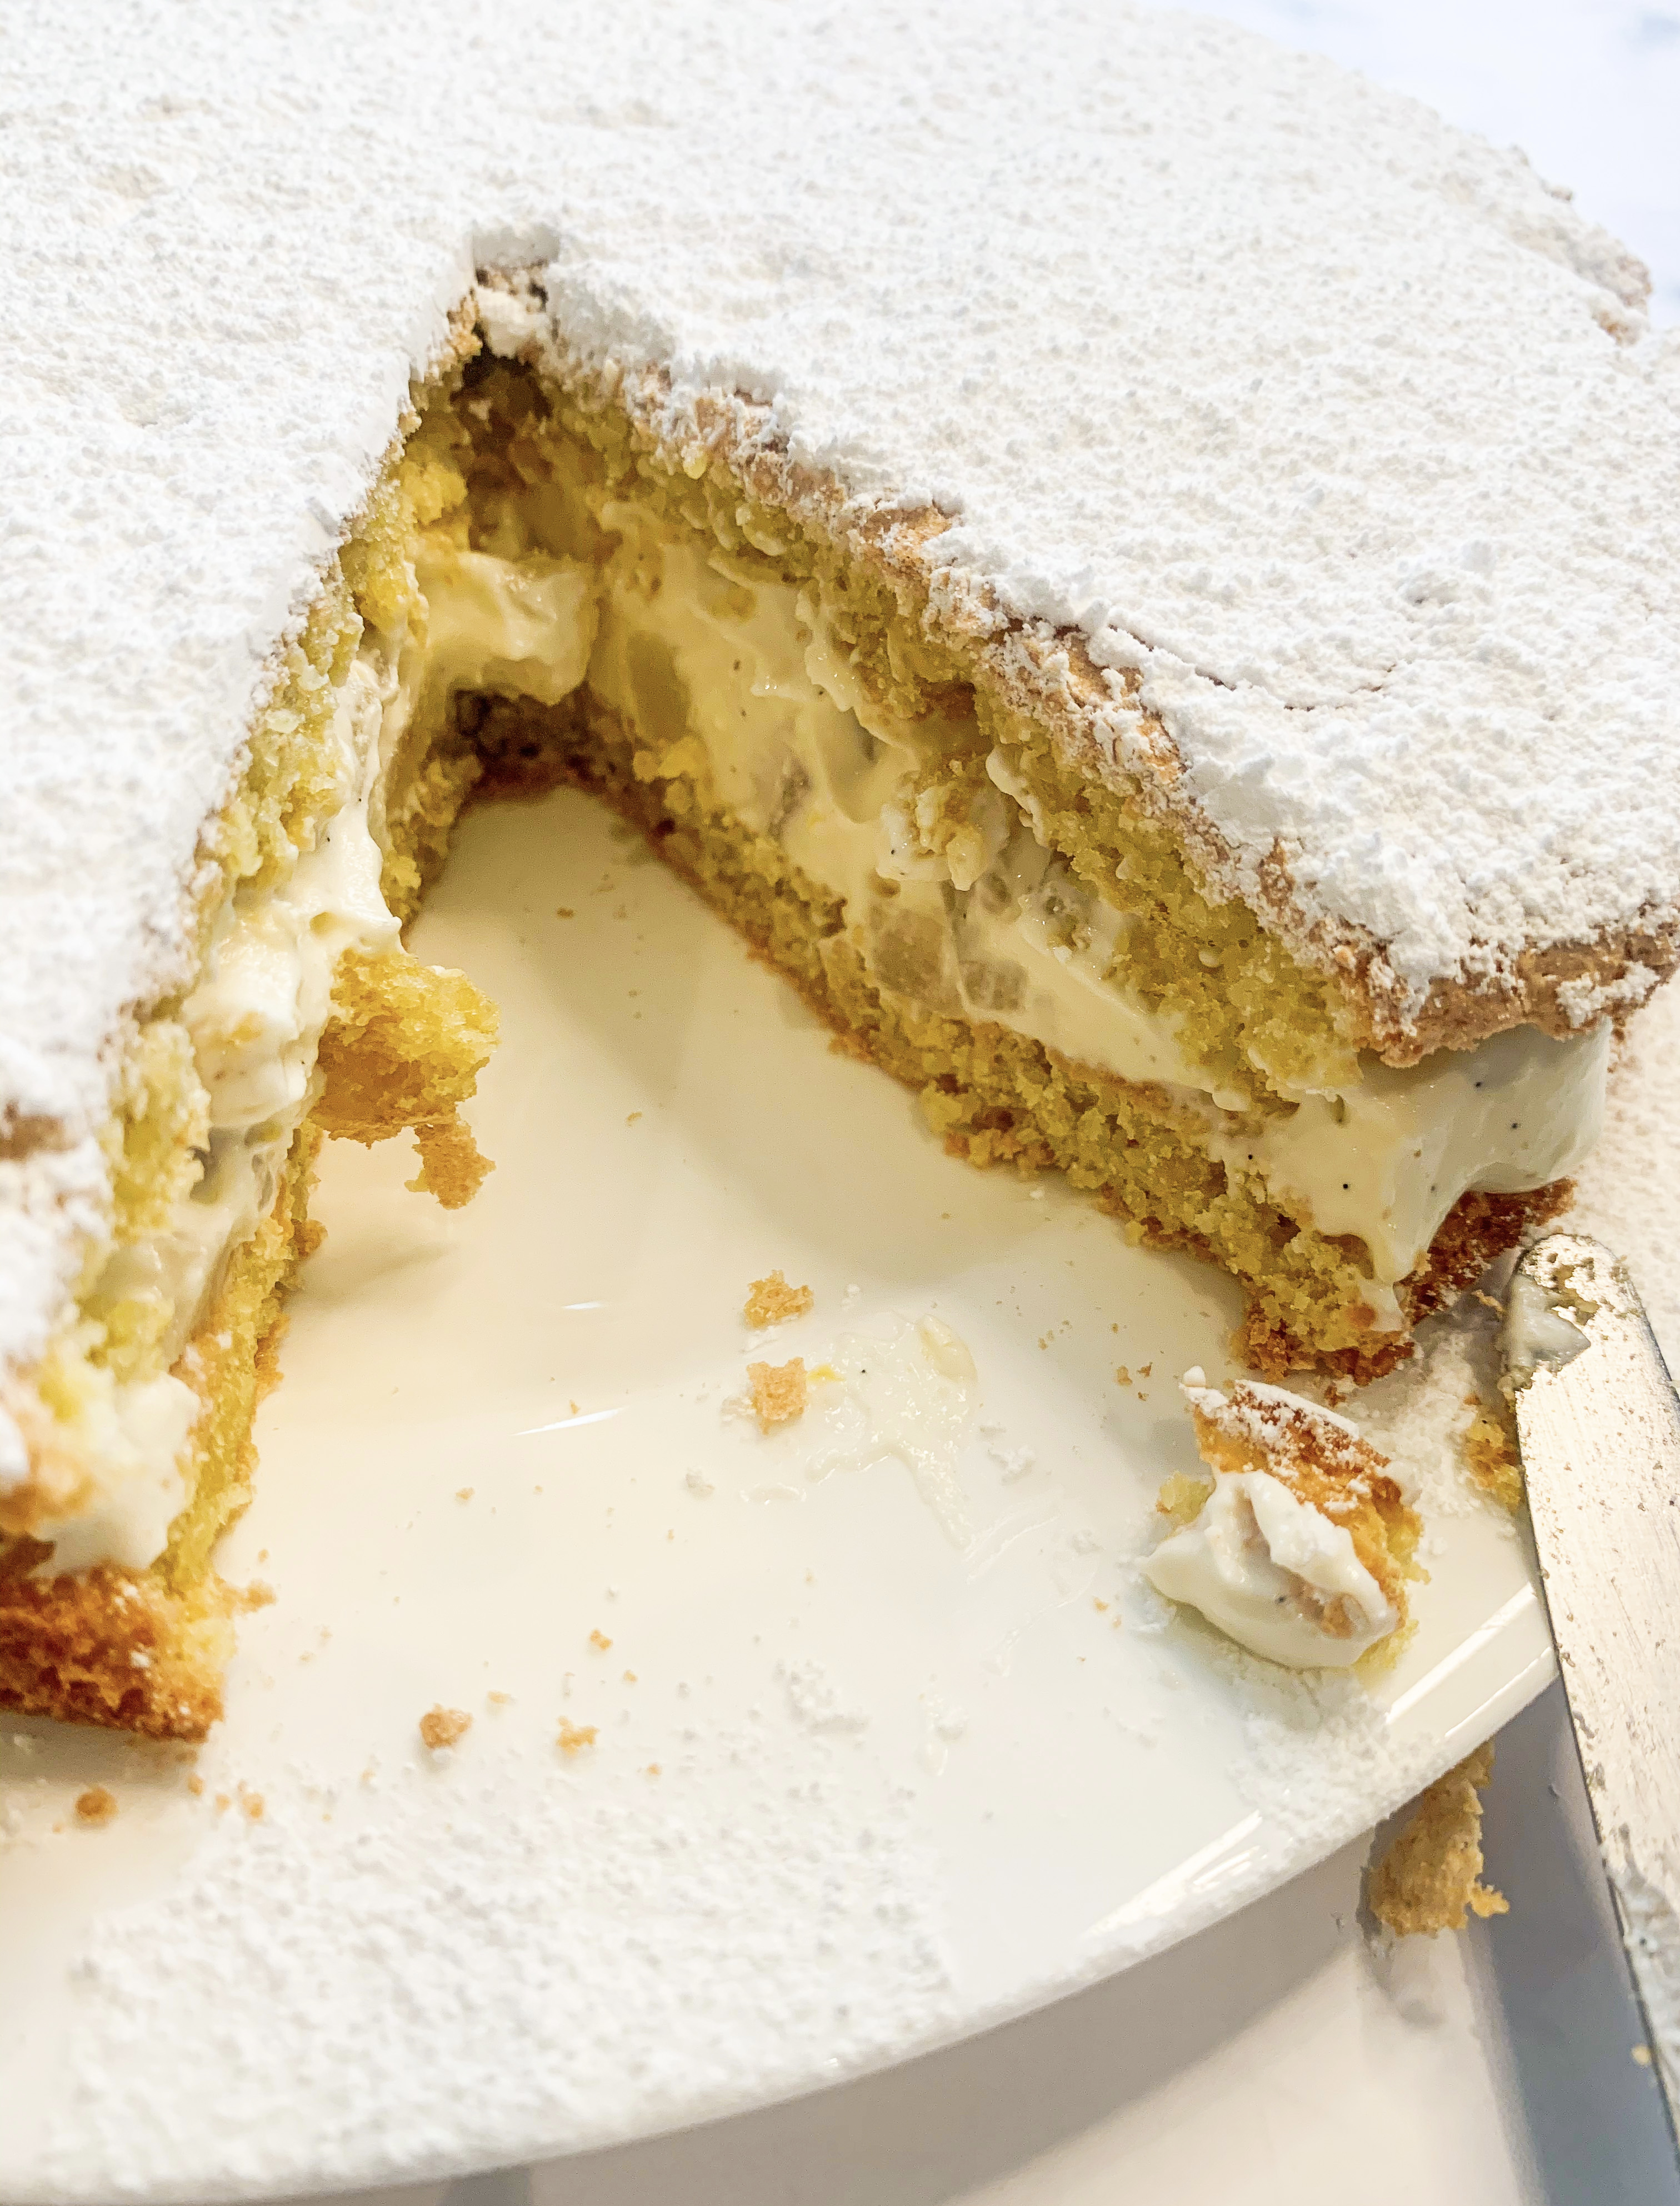
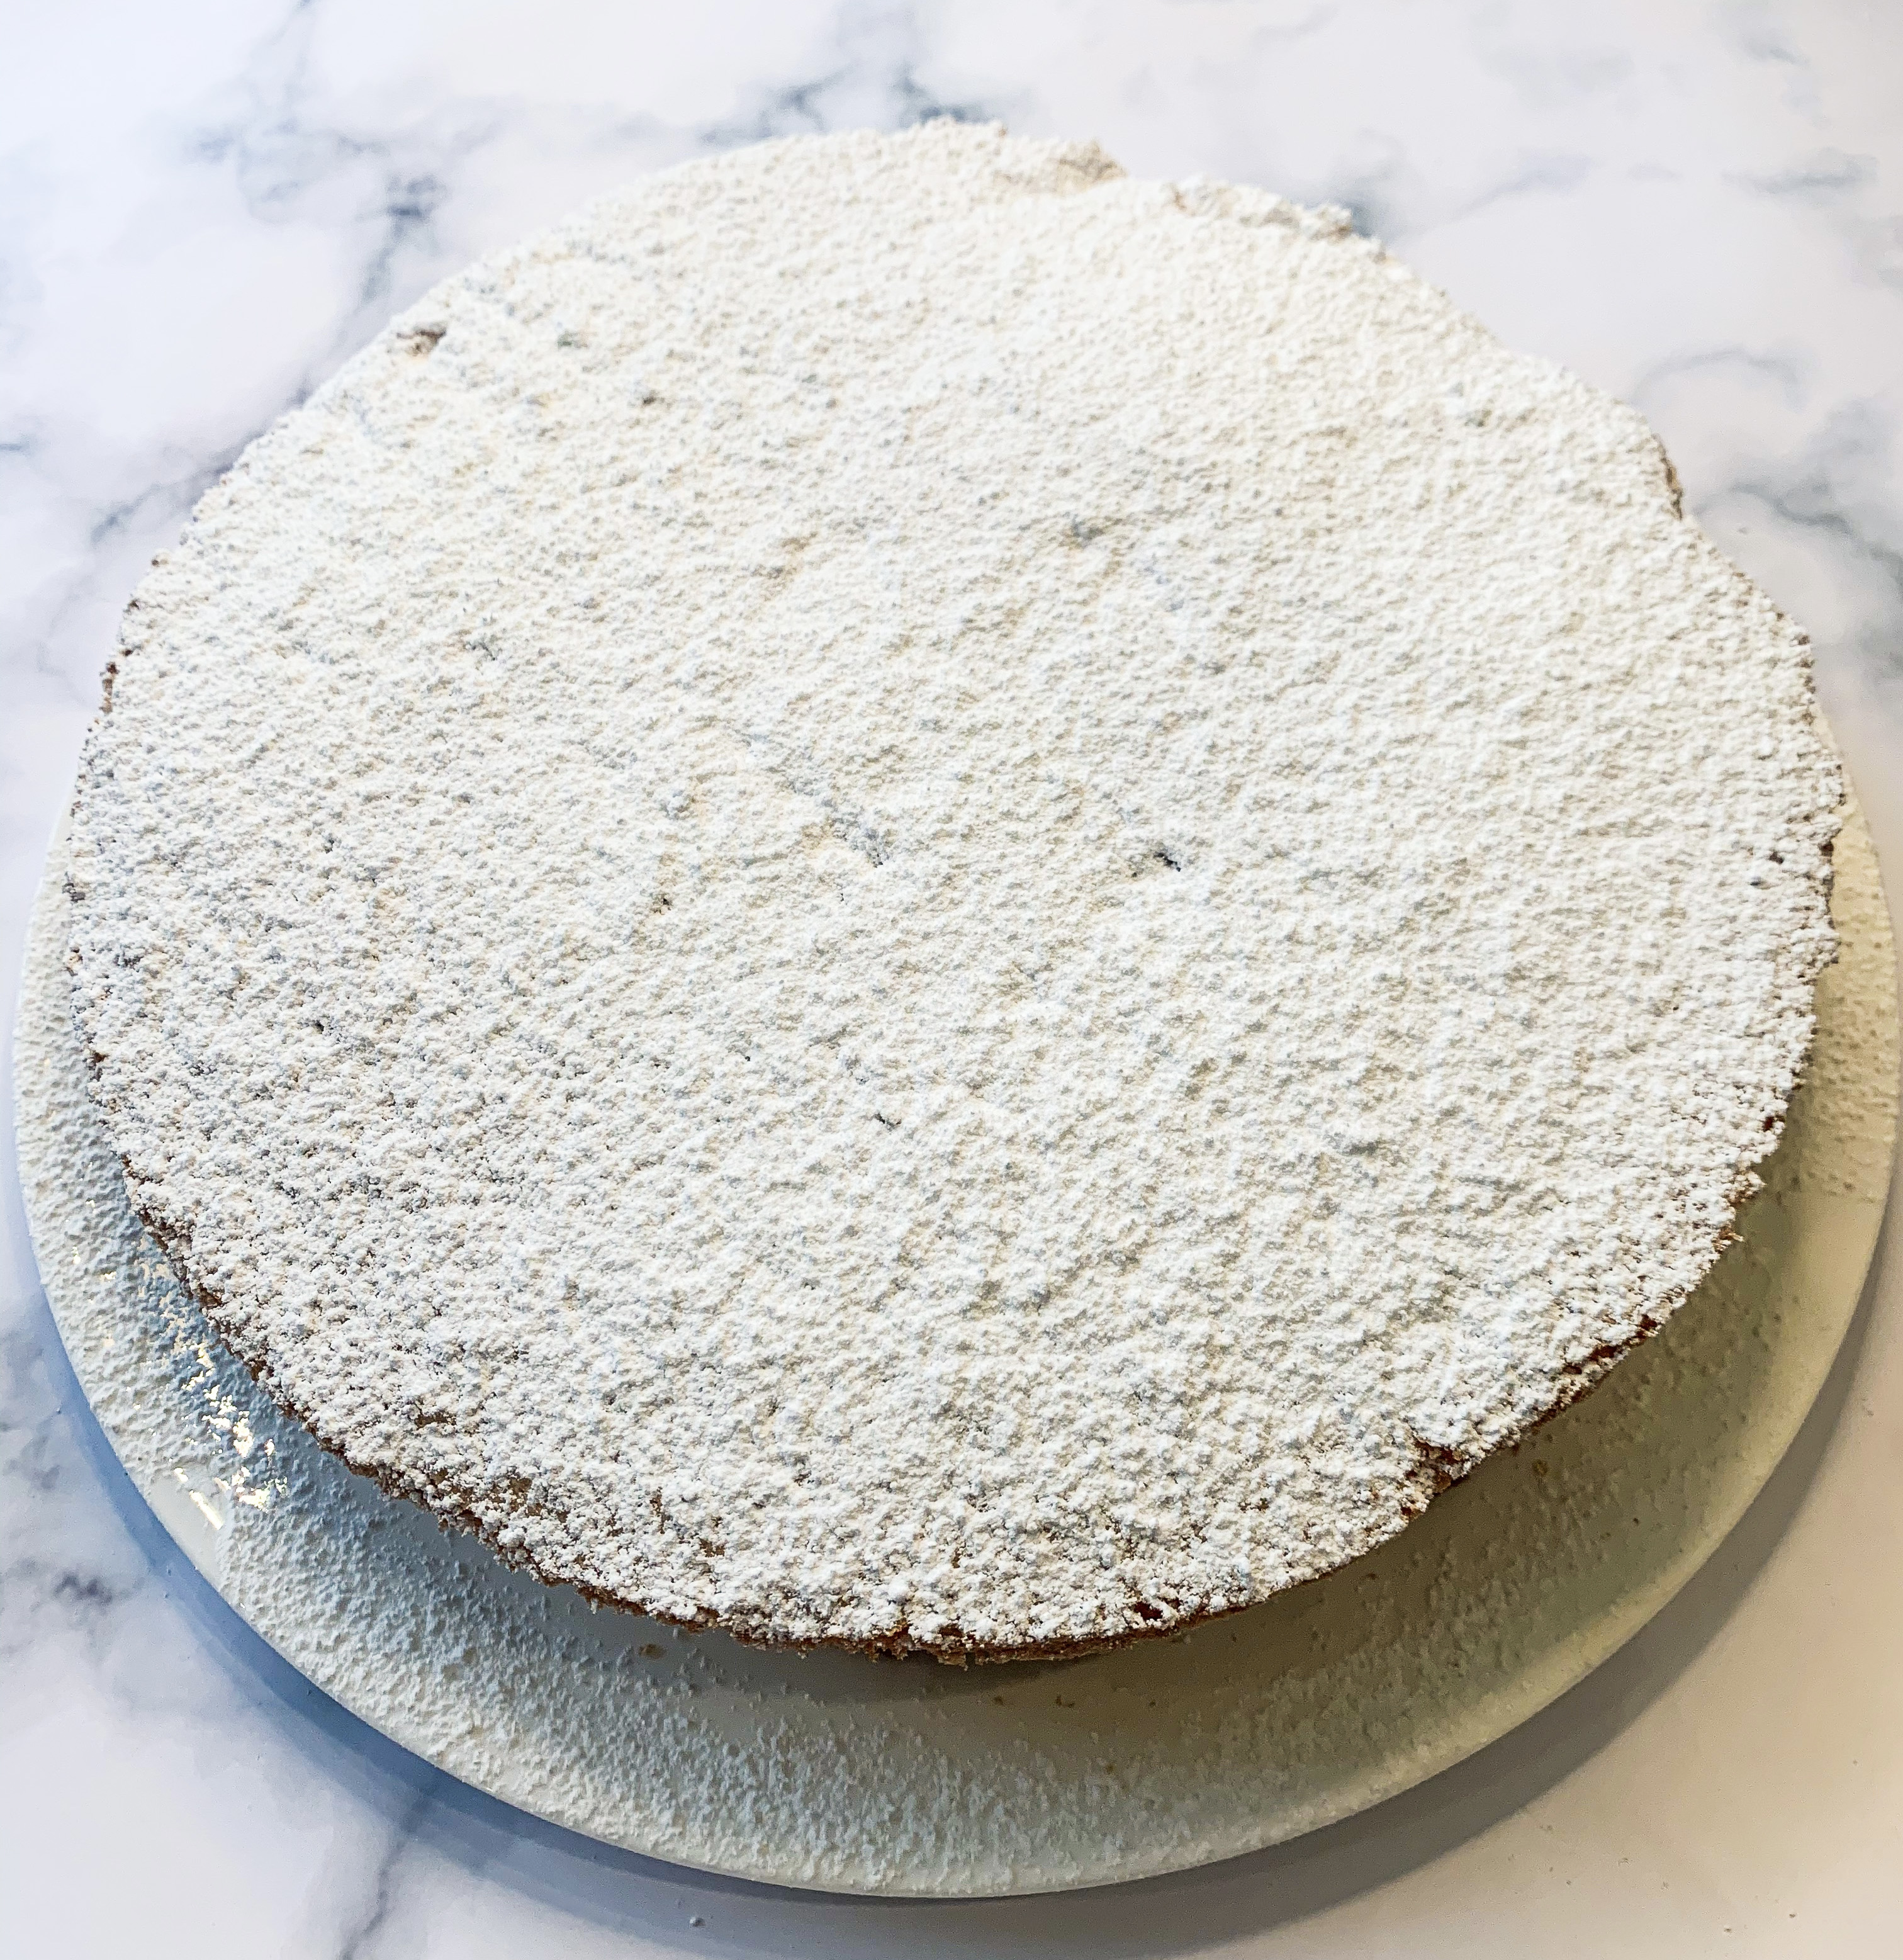
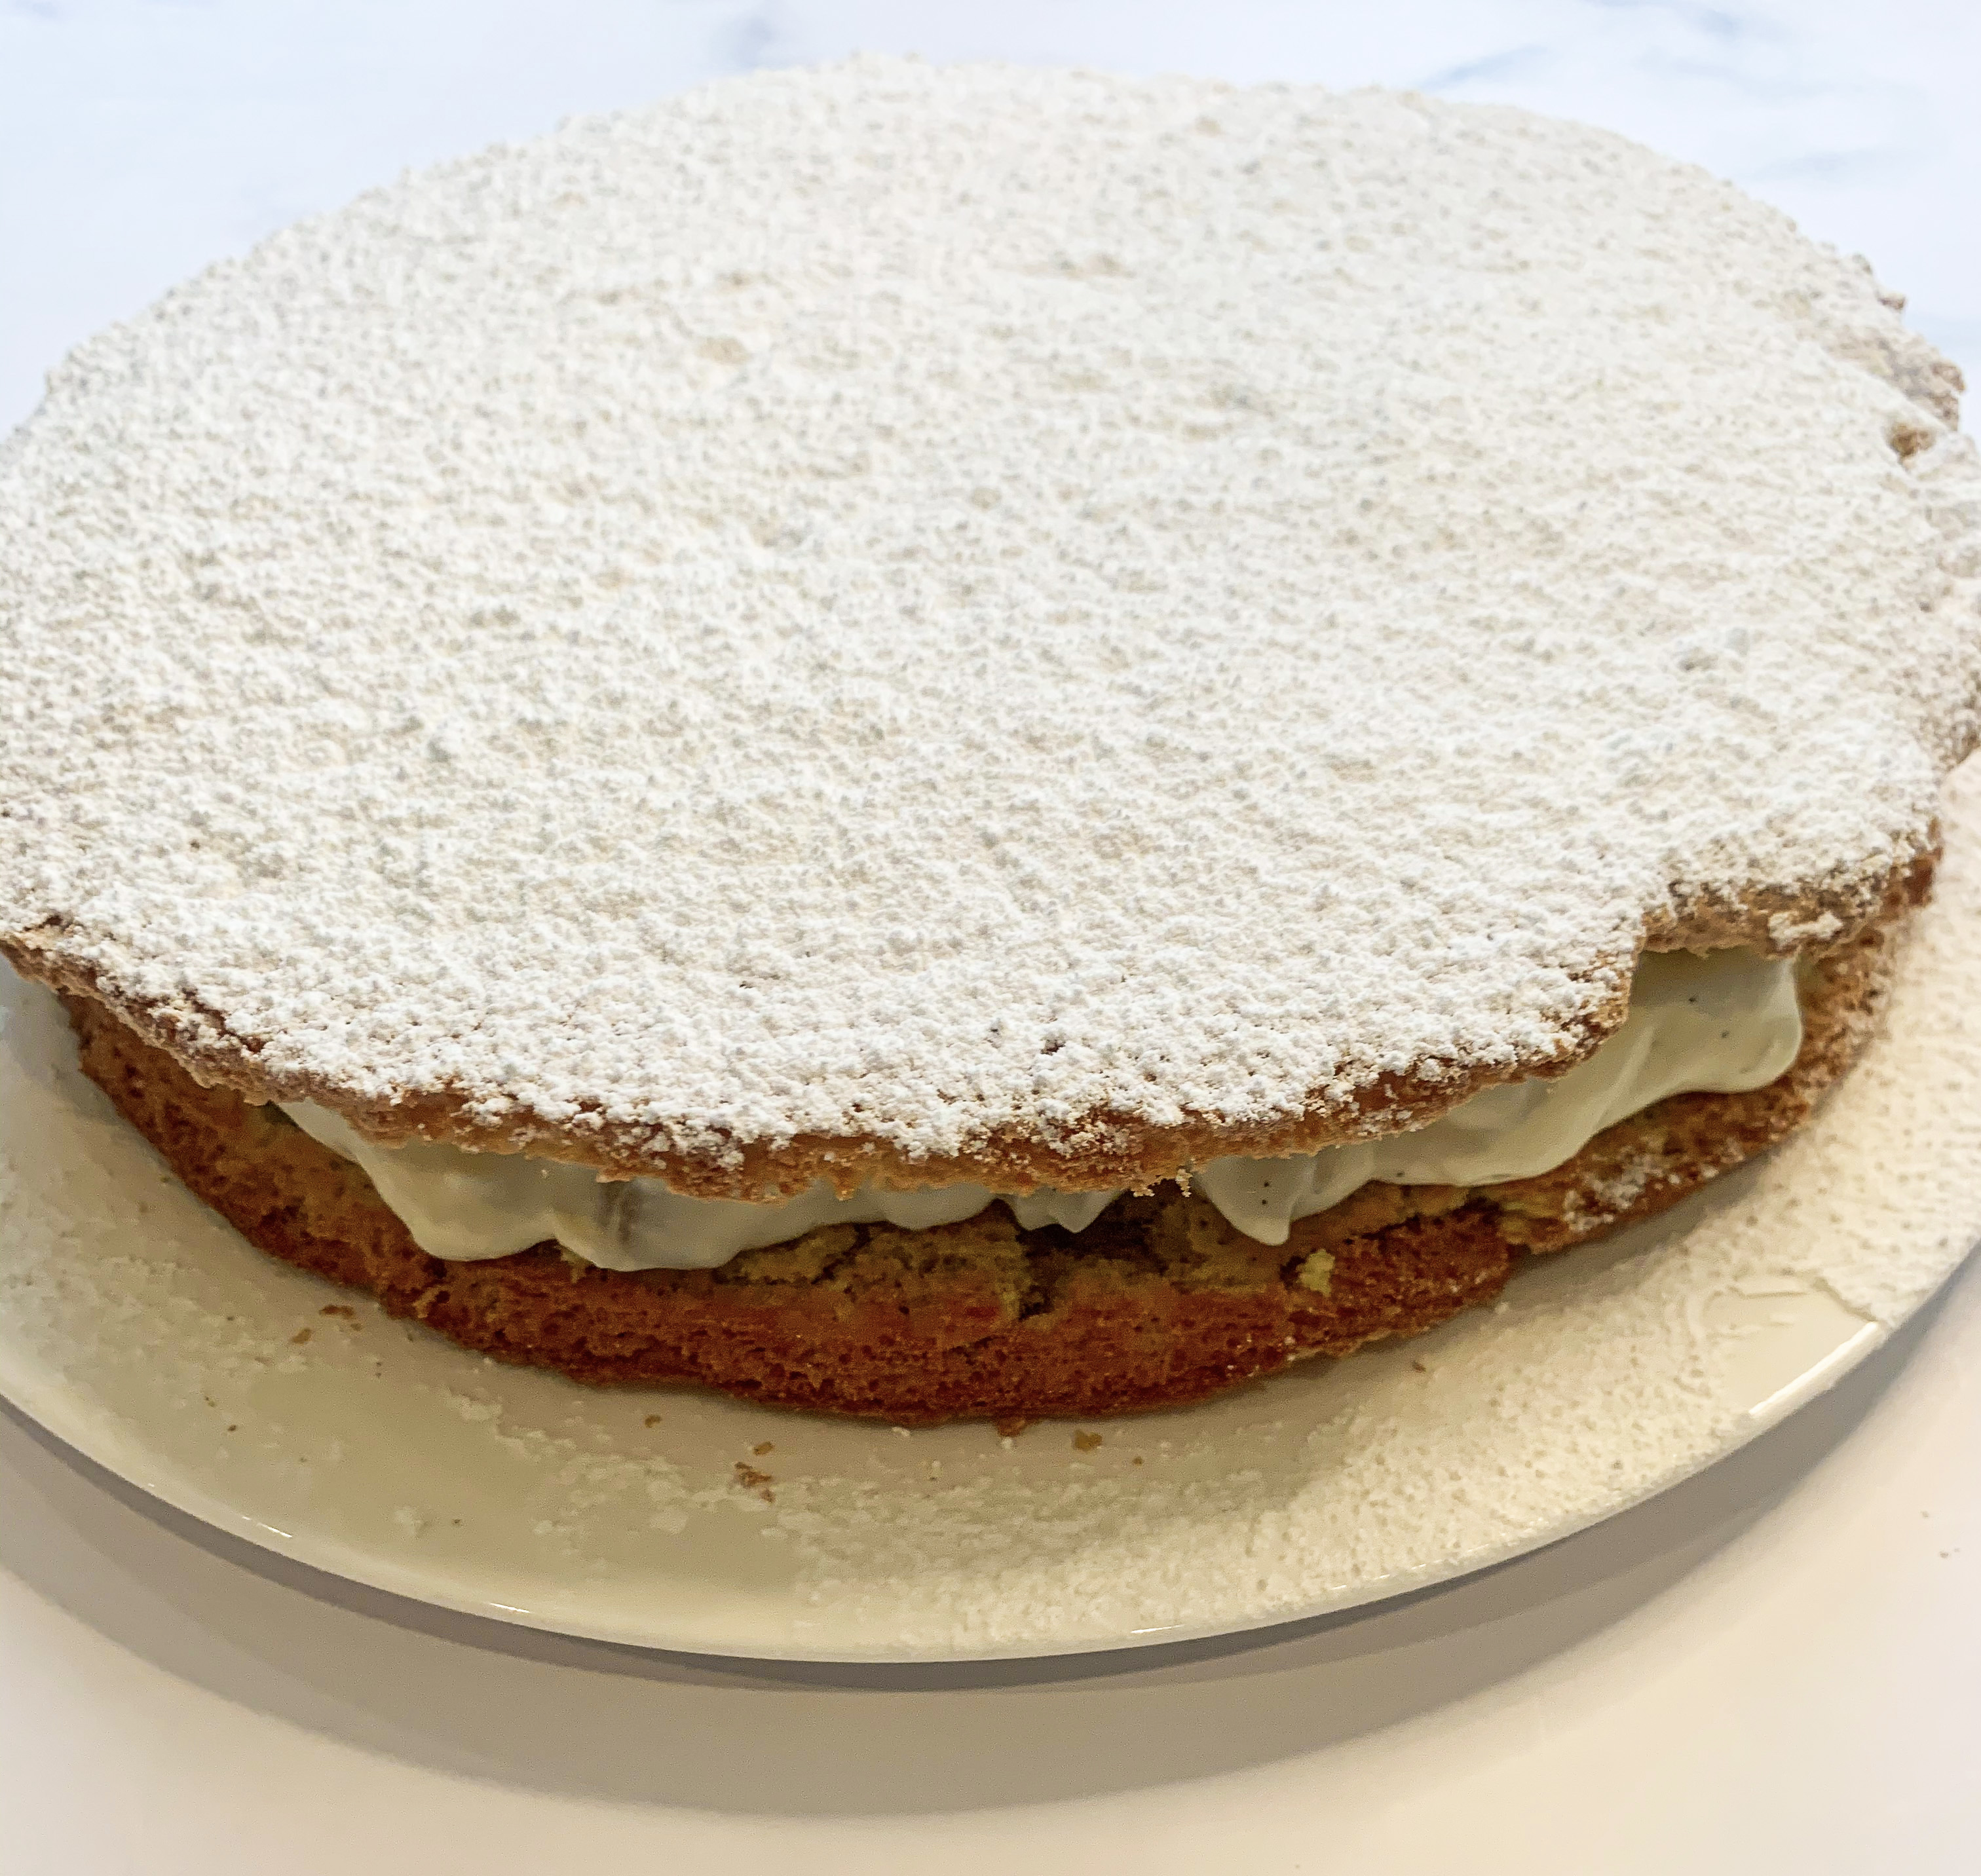
This is the most delicious, delicate tasting cake. It’s not overly sweet and is quite light, but be warned it is very moreish! I have taken this recipe from Nina Parker; she mentioned that she first tasted it in Capri, where she had it for breakfast….So, how could I resist, I had to try it myself for breakfast, and yes, it’s indulgent, but, oh my, it really is a great start to the day – try it! In her recipe, Nina poaches fresh pears for the filling, however I have tried it with both fresh poached and tinned pears, and there really is little difference, so now I always make it with tinned pears, which of course makes life a lot easier. The cake itself is rather flat looking, don’t expect a risen ‘victoria sponge’ like cake, but as you know looks can be deceiving and in this case they really are – it is a dream cake and it’s gluten free!
190g caster sugar
5 eggs, 4 separated, 1 left whole
170g ground almonds
1 tablespoon rice flour
½ teaspoon almond extract
For the filling:
250g ricotta cheese, drained of any water
100ml whipping cream
A few gratings of nutmeg
Seeds from ½ vanilla pod
Zest of a lemon
70g caster sugar
400g tin pear halves, drained and cut into small cubes
Icing sugar to dust
*2 x 10 inch cake tins
- First of all grease two 10 inch cake tins and line the bases with baking parchment.
- Using an electric whisk, whip the 4 egg whites until just light and fluffy and then slowly begin whisking in the sugar until it is all mixed in.
- In a separate bowl lightly beat together the 4 egg yolks, 1 whole egg and the almond extract, then add the ground almonds and rice flour – the mixture will be dry.
- Use a spatula to mix in ¼ of the egg whites, to loosen the mixture and to help get rid of lumps. Carefully add another ¼ of the egg whites and finally, fold in the remaining whites until the mixture is well combined – it may still appear a little ‘lumpy’, but don’t worry too much.
- Divide the mixture between the two tins and bake in a preheated oven, 170’c fan, for about 25 minutes until they are light and springy to touch and golden on top. Allow to cool completely on cooling racks.
- Meanwhile make the ricotta filling. Whisk the ricotta, whipping cream, nutmeg, vanilla pod seeds, zest of lemon and the caster sugar until it forms soft peaks, the consistency of whipped cream, then gently fold in the cubes of pear.
- Spread the ricotta cream over one of the cake bases and place the remaining cake on top. Dust generously with icing sugar and serve. (This cake keeps well in the fridge)
Roast Apricot & Orange Blossom Fool (Serves 8)
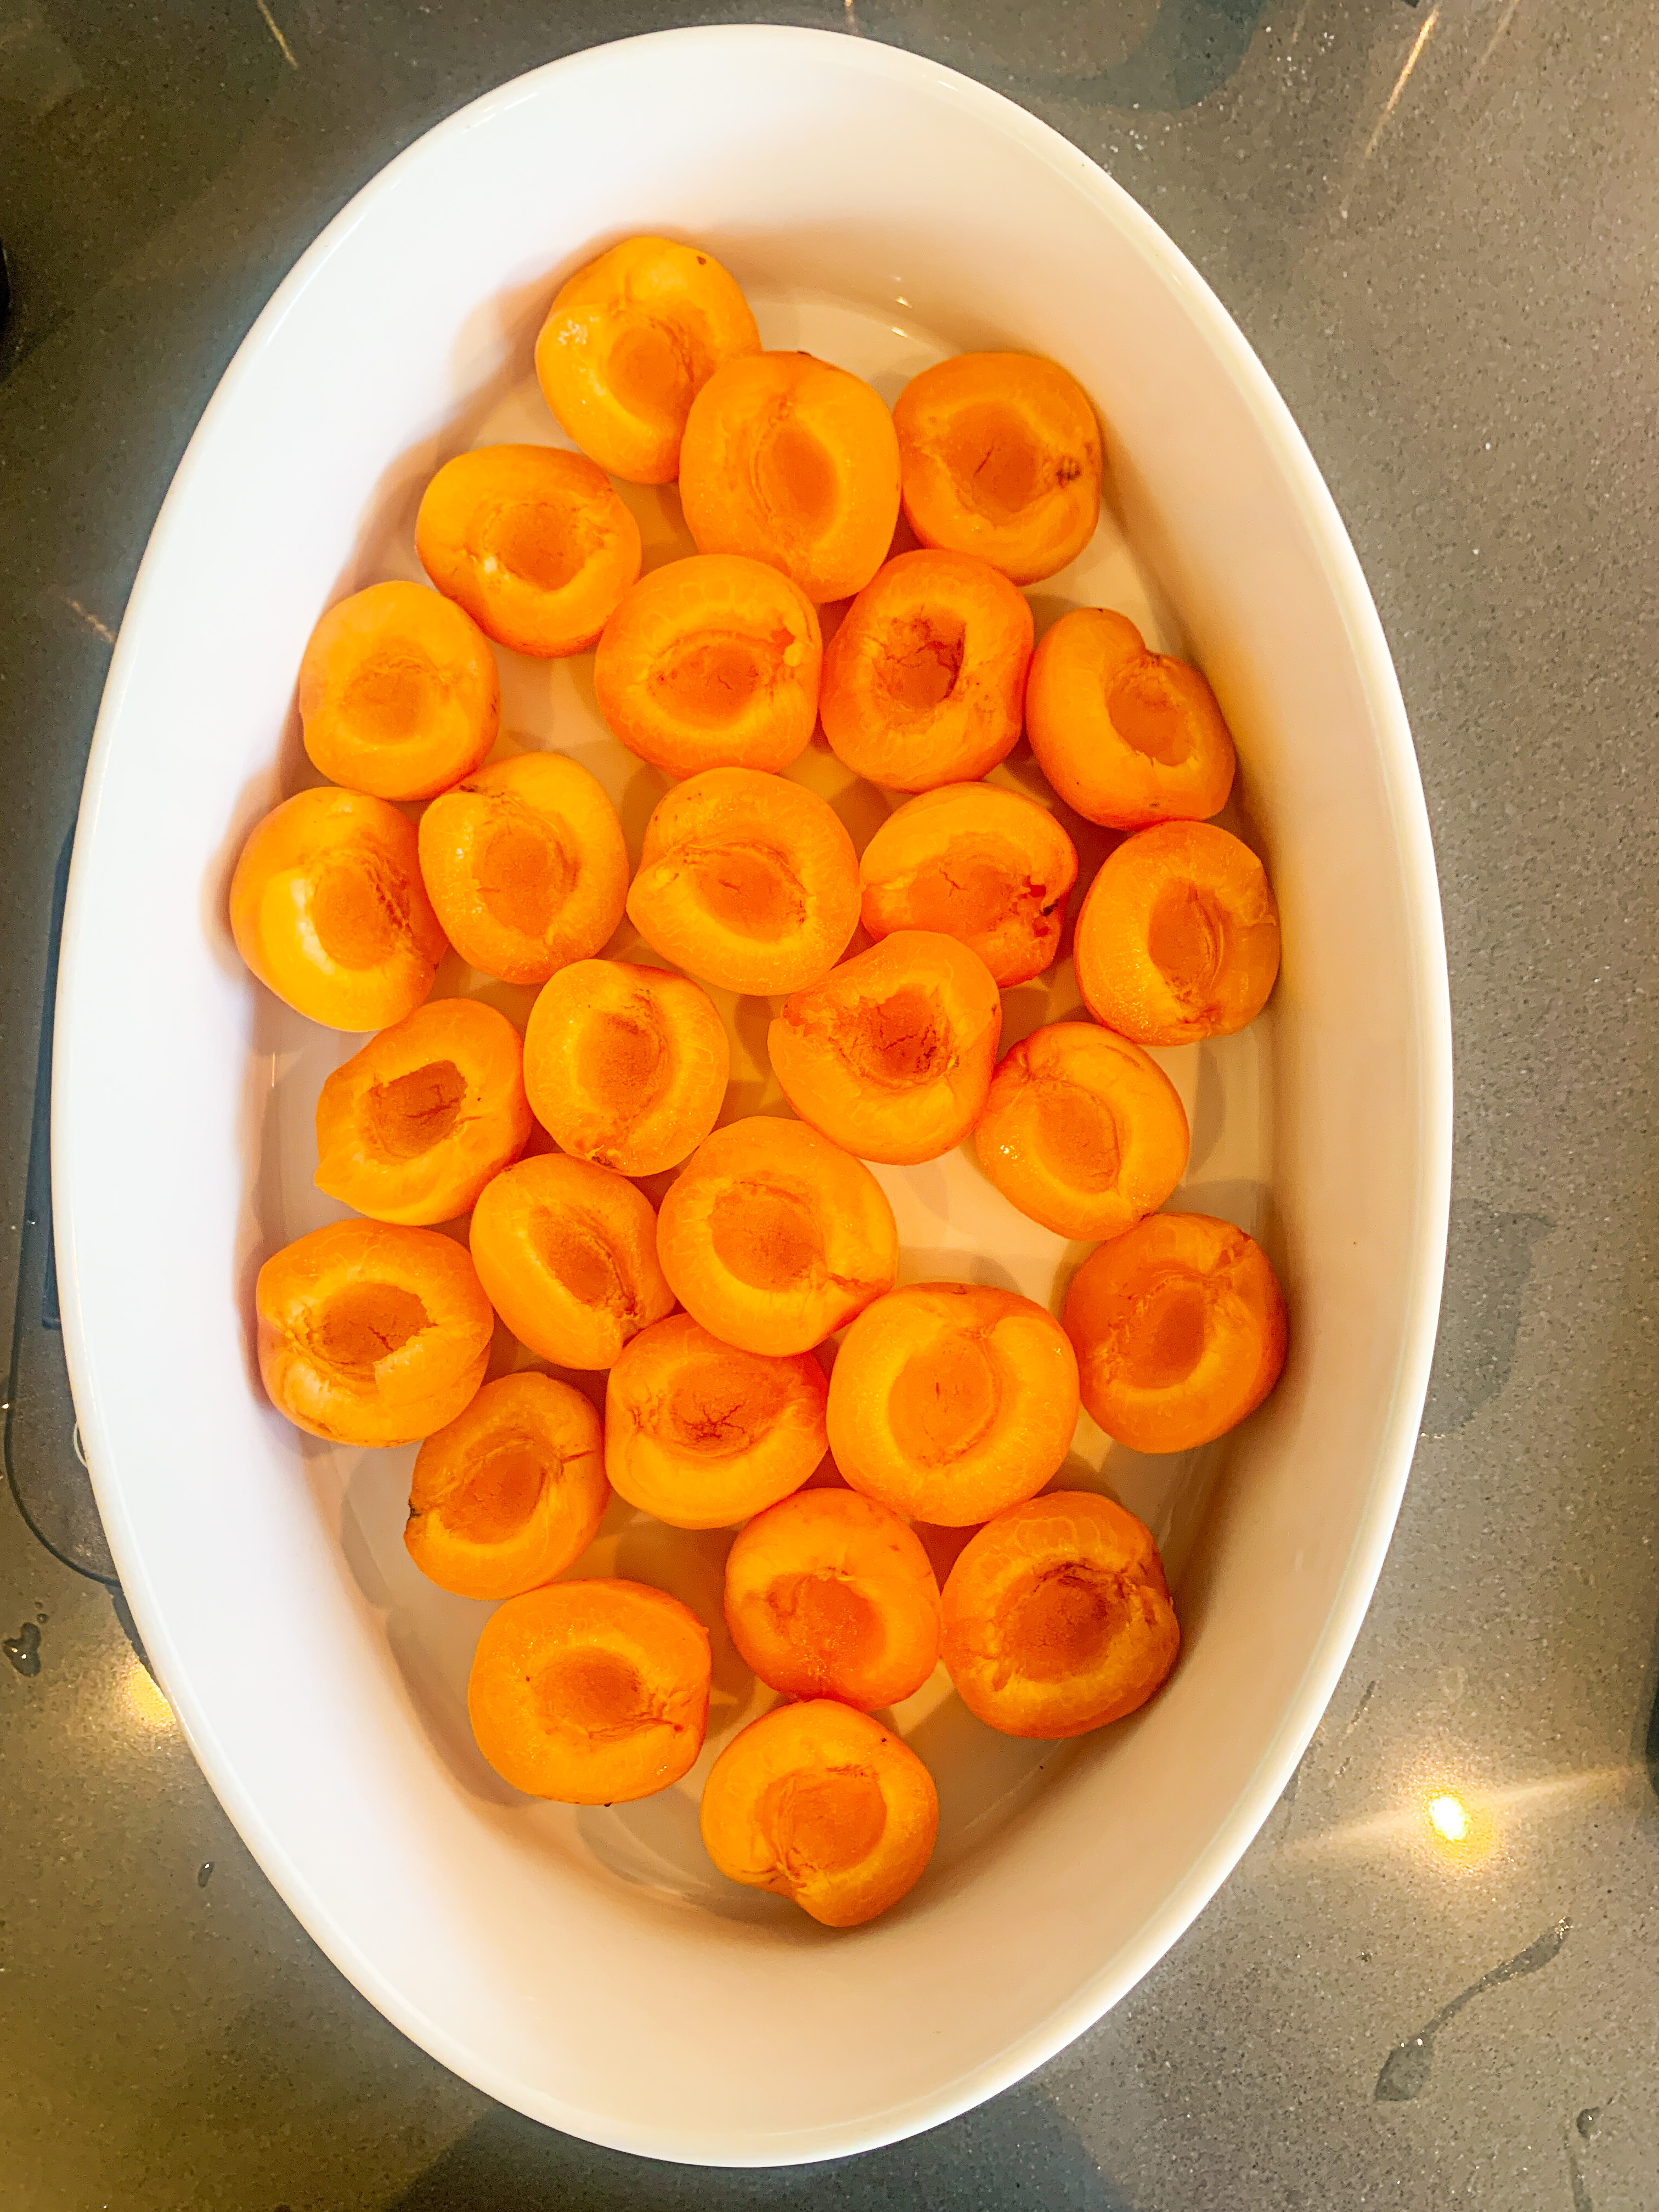
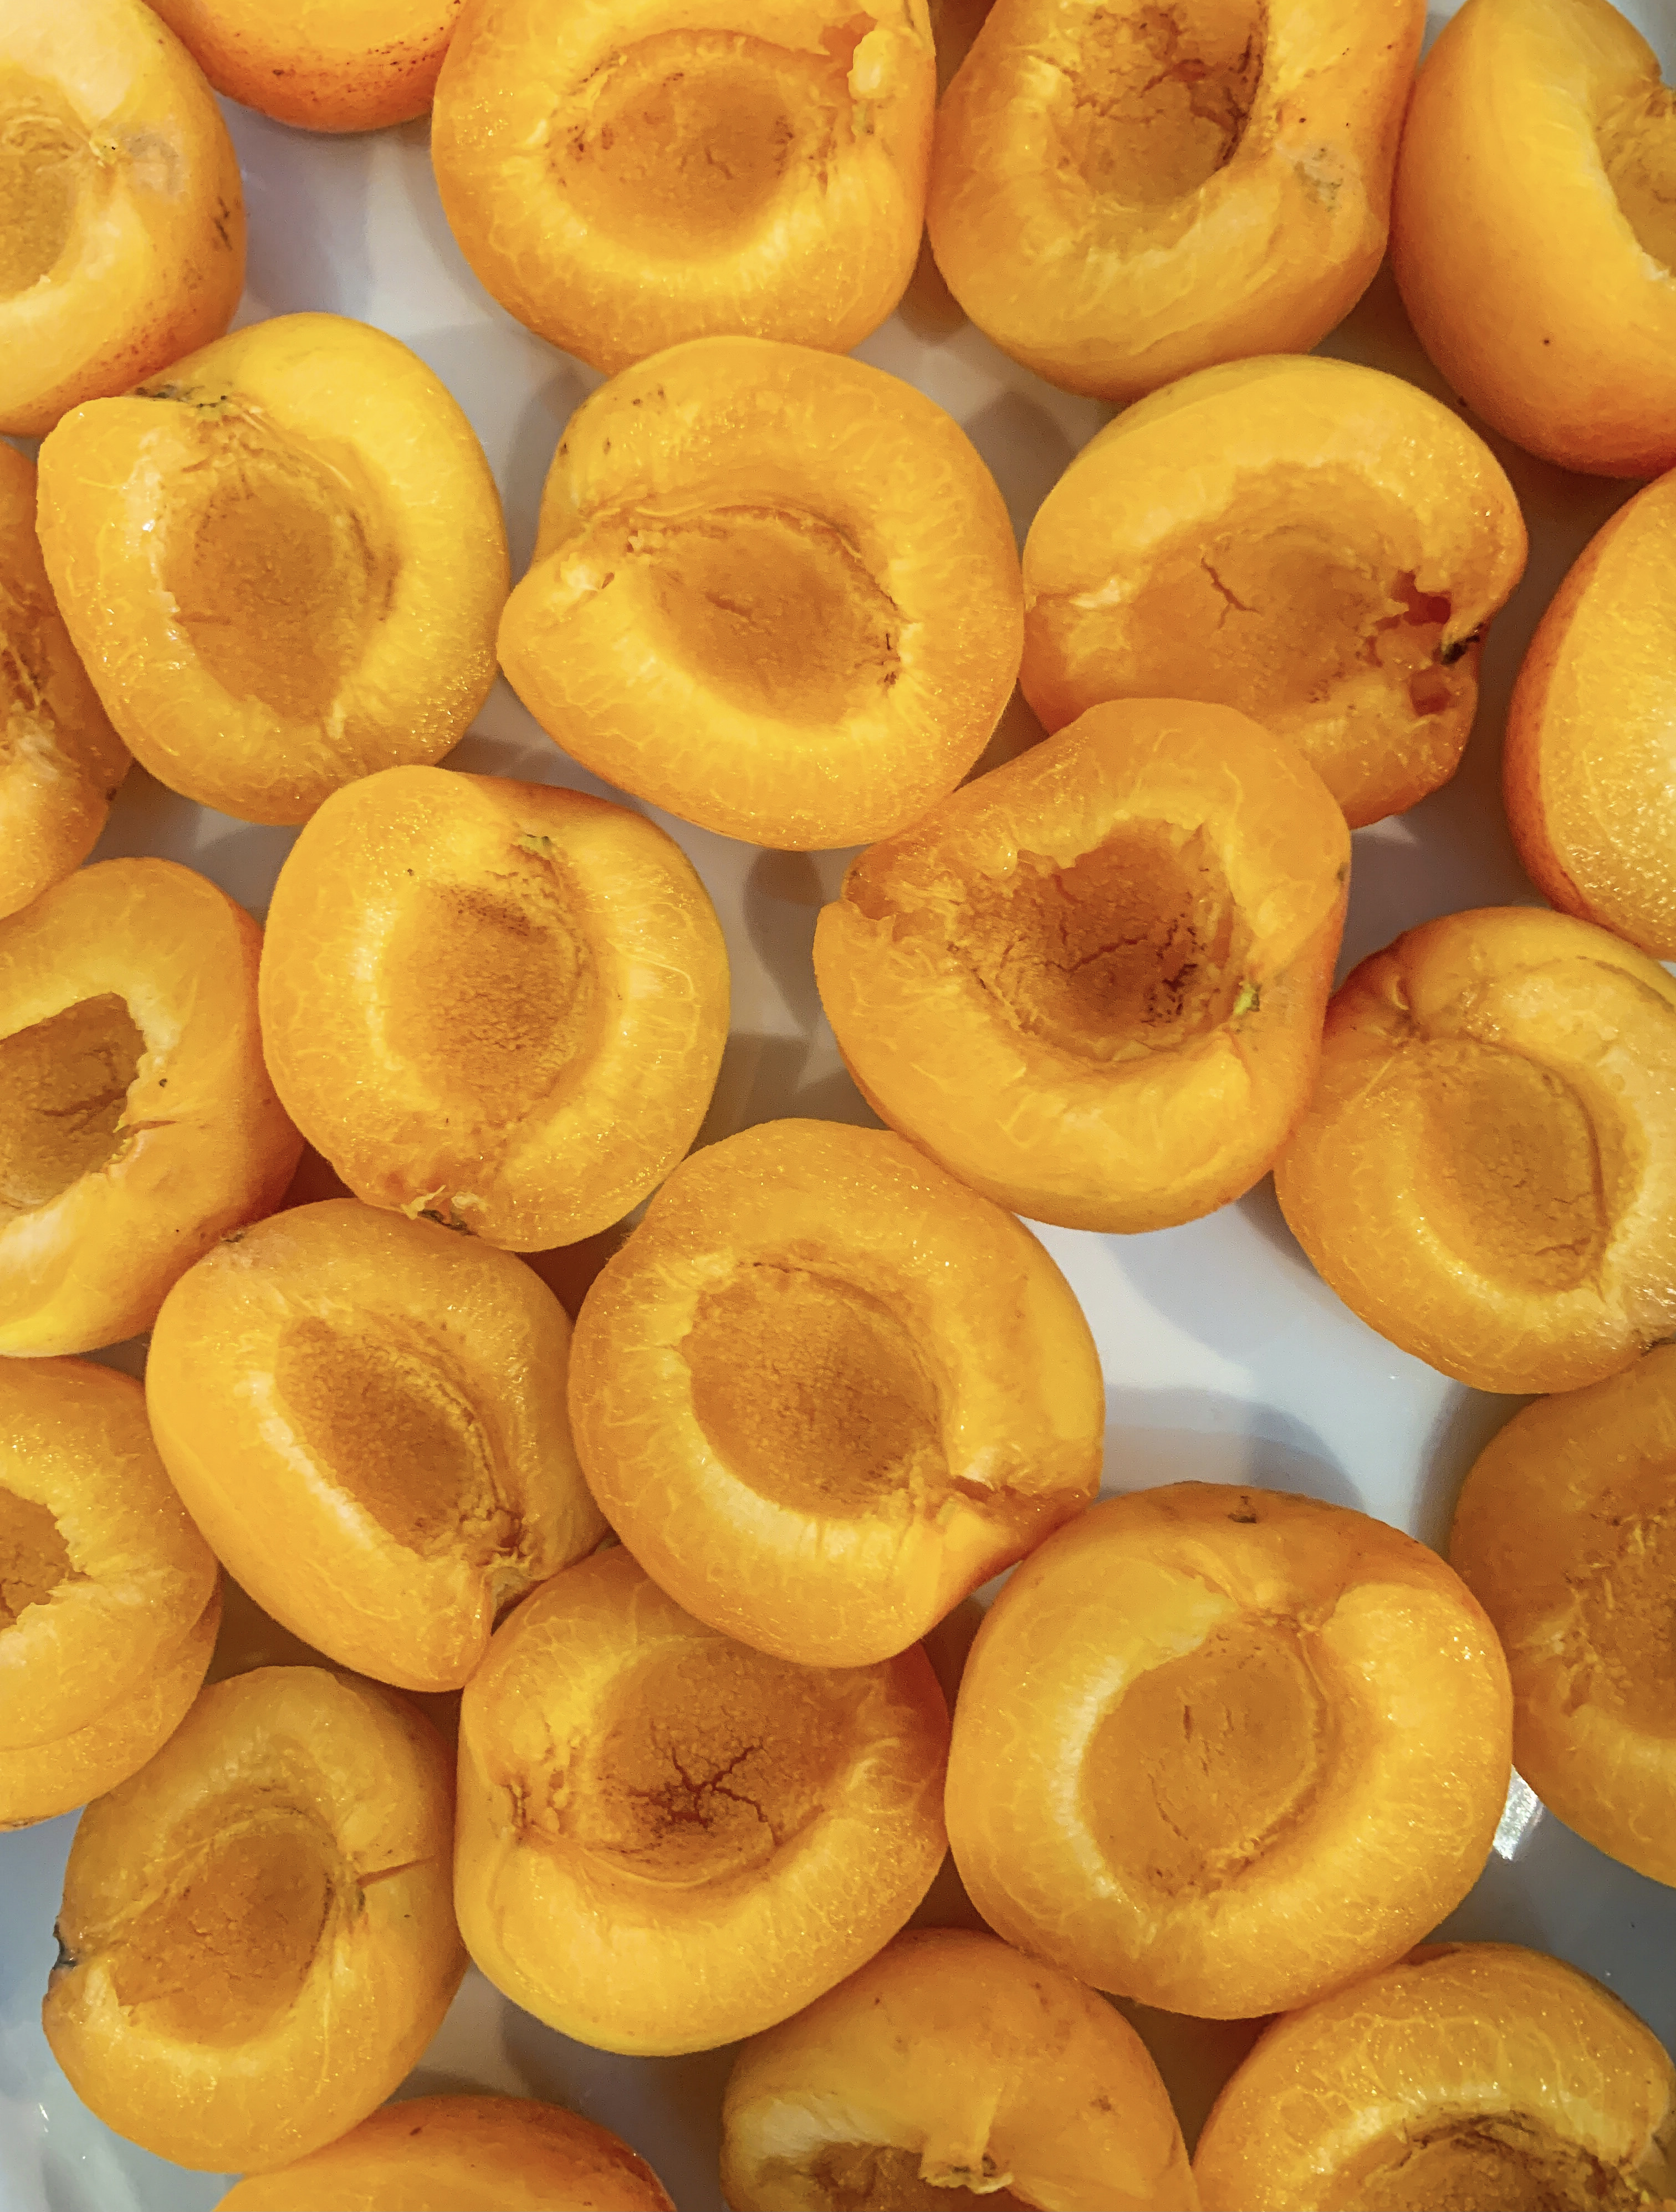
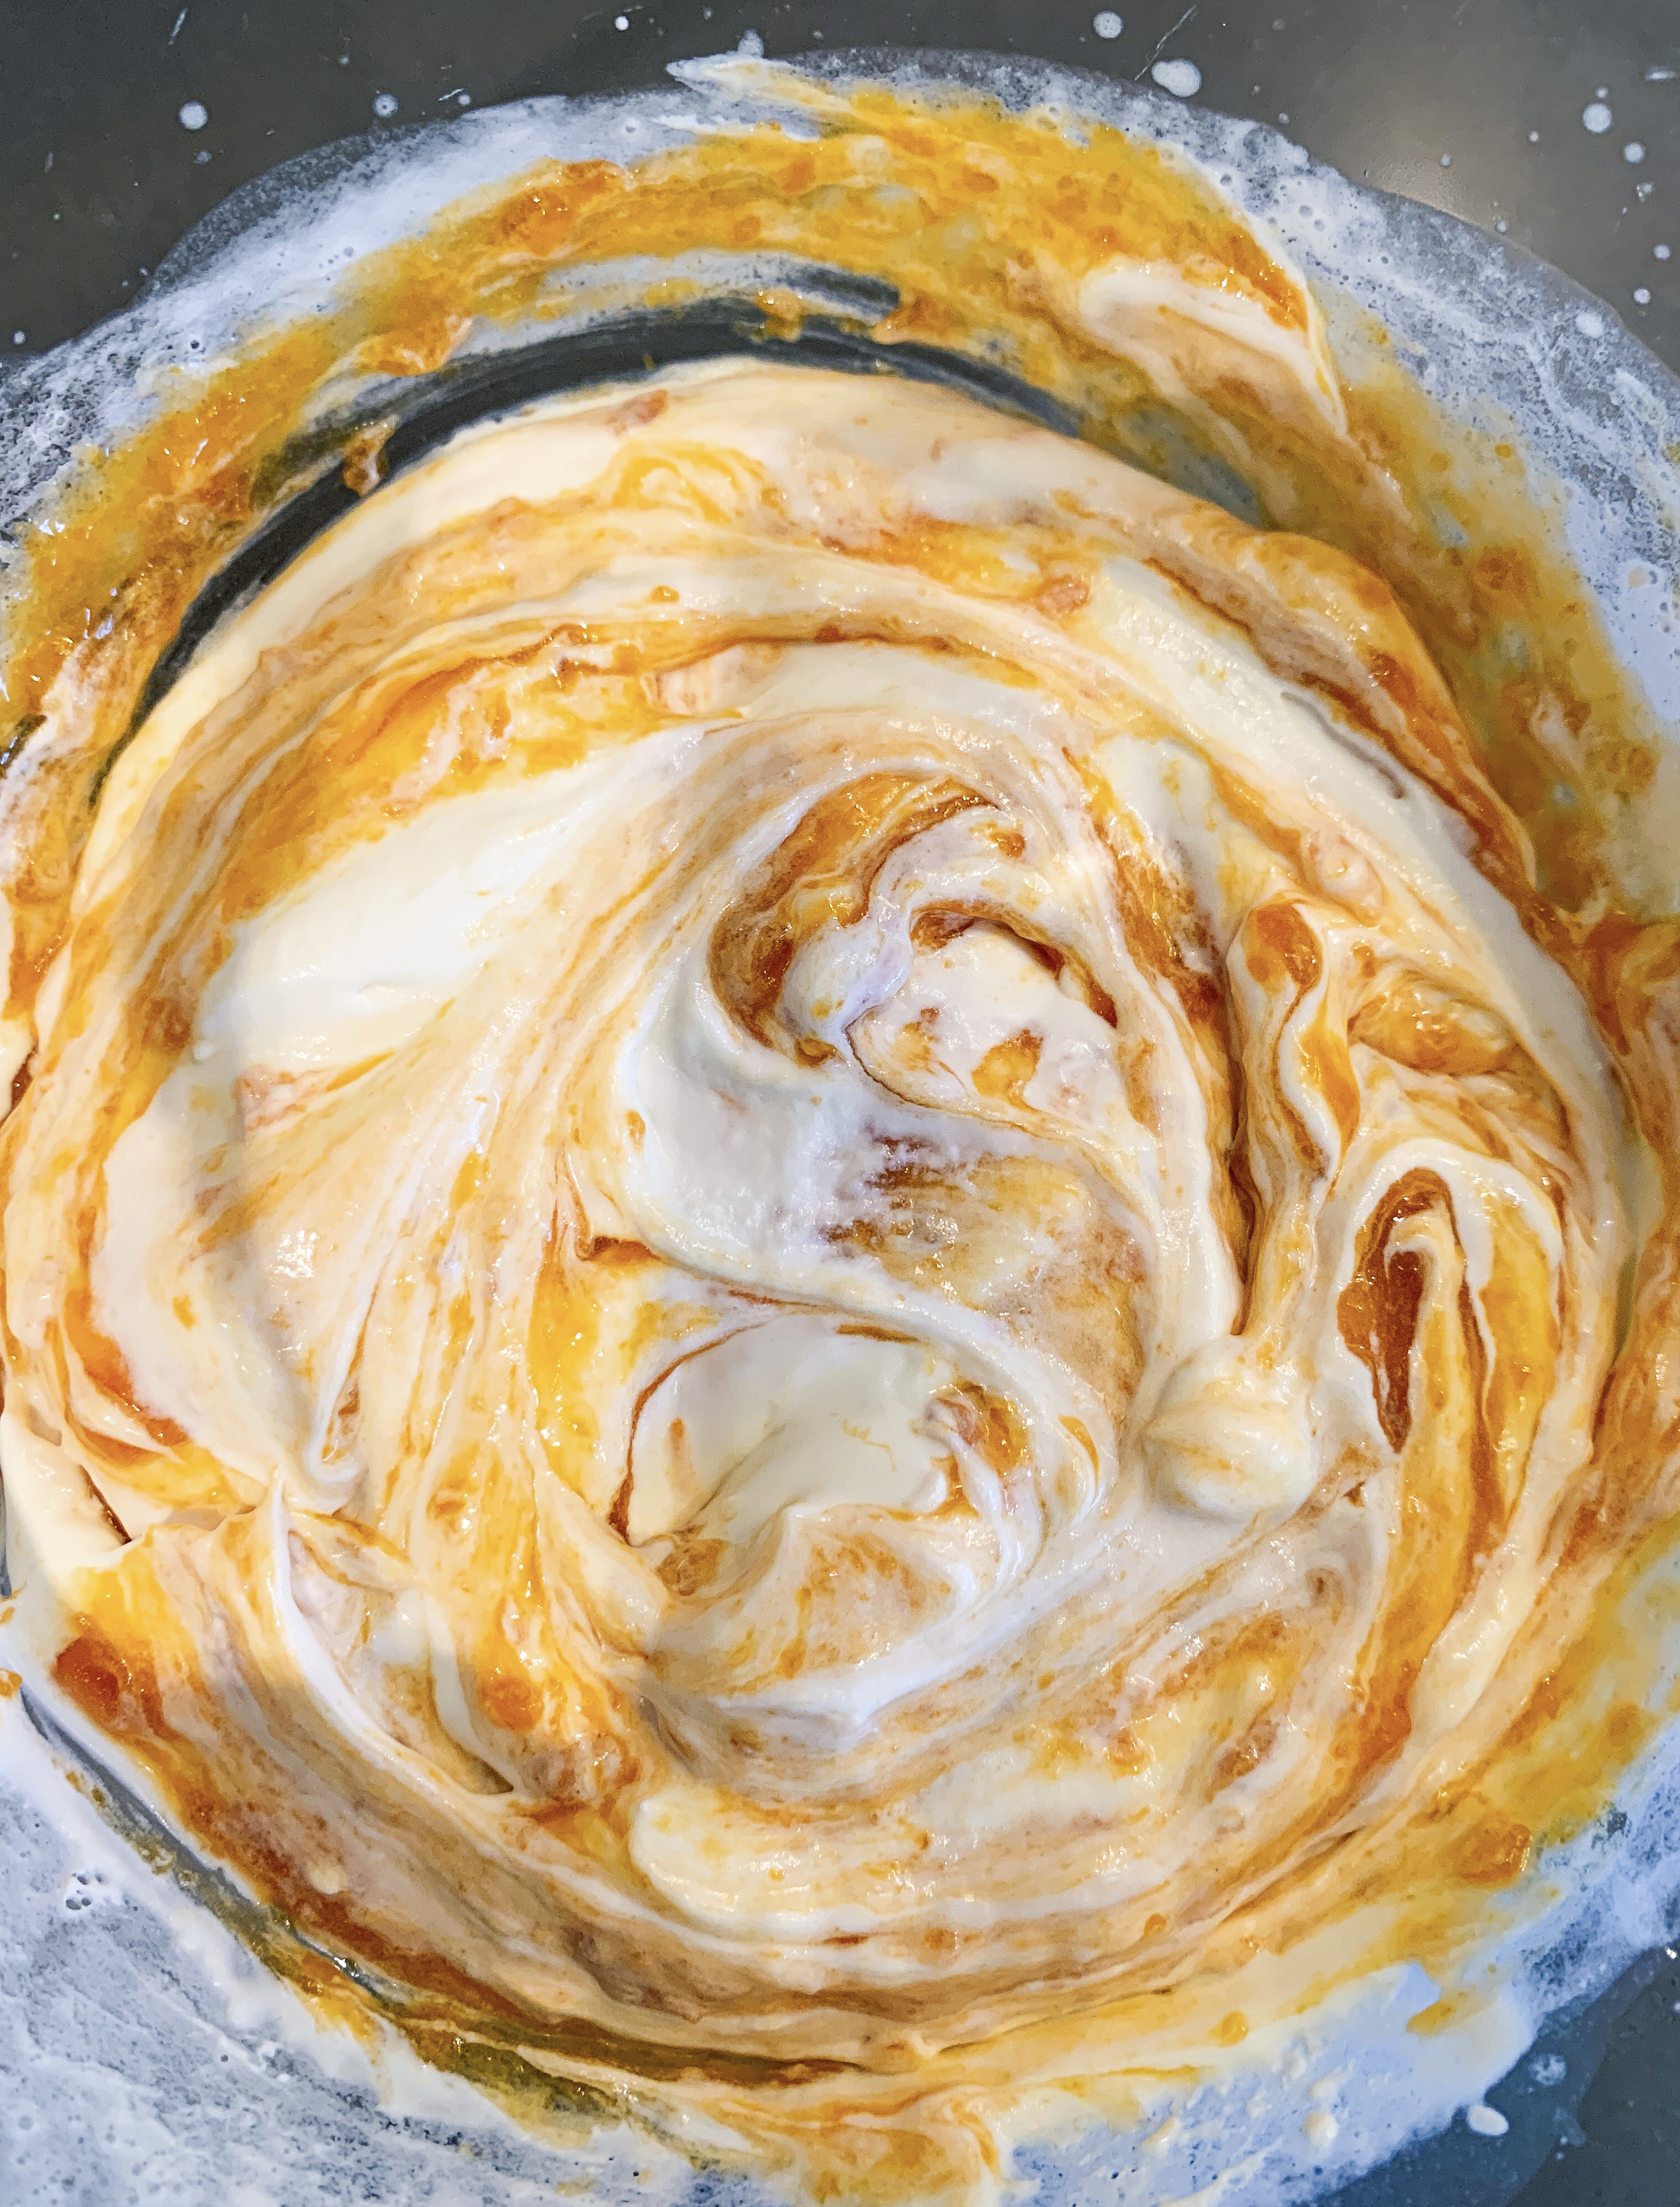

This is a fantastic recipe for making the most of fresh apricots. The flavours are perfectly balanced; the sweetness of roasted apricots is delicately cut by whipped cream which is combined with a little Greek yogurt, orange flower water and honey. I have taken the recipe from Diana Henry’s cookbook ‘Simple’, and yes it is simple but very impressive! (Any leftovers make a great, indulgent breakfast!!)
900g apricots, halved and pitted
75ml white wine or water
1 teaspoon vanilla extract
115g granulated sugar
300ml double cream
4 tablespoons Greek yogurt
5 tablespoons orange blossom honey, or to taste, plus more to serve
3 teaspoons orange flower water, or to taste
Toasted almond flakes, to serve
- Put the apricots in a gratin dish, cut sides up, so that they lay in a single layer. Mix the wine or water with the vanilla, then pour it over the apricots. Sprinkle evenly with the sugar and roast in a preheated oven, 190’c fan, for 30-45 minutes until completely soft. Leave until cold.
- Remove eight of the best looking apricot halves to put on top of each serving. Puree the rest of the fruit and any of its juice in a food processor.
- Whip the cream until it forms soft peaks, then stir in the yogurt, honey and orange flower water.
- Fold the purée through the cream, don’t over mix – you want it to be marbled with the bright orange colour. (You can add more flower water to taste).
- Spoon into bowls, top each with an apricot half, if you want a little more sweetness drizzle with extra honey, then sprinkle with the toasted almonds.
Basque Burnt Cheesecake (with or without Liquorice Sauce!)

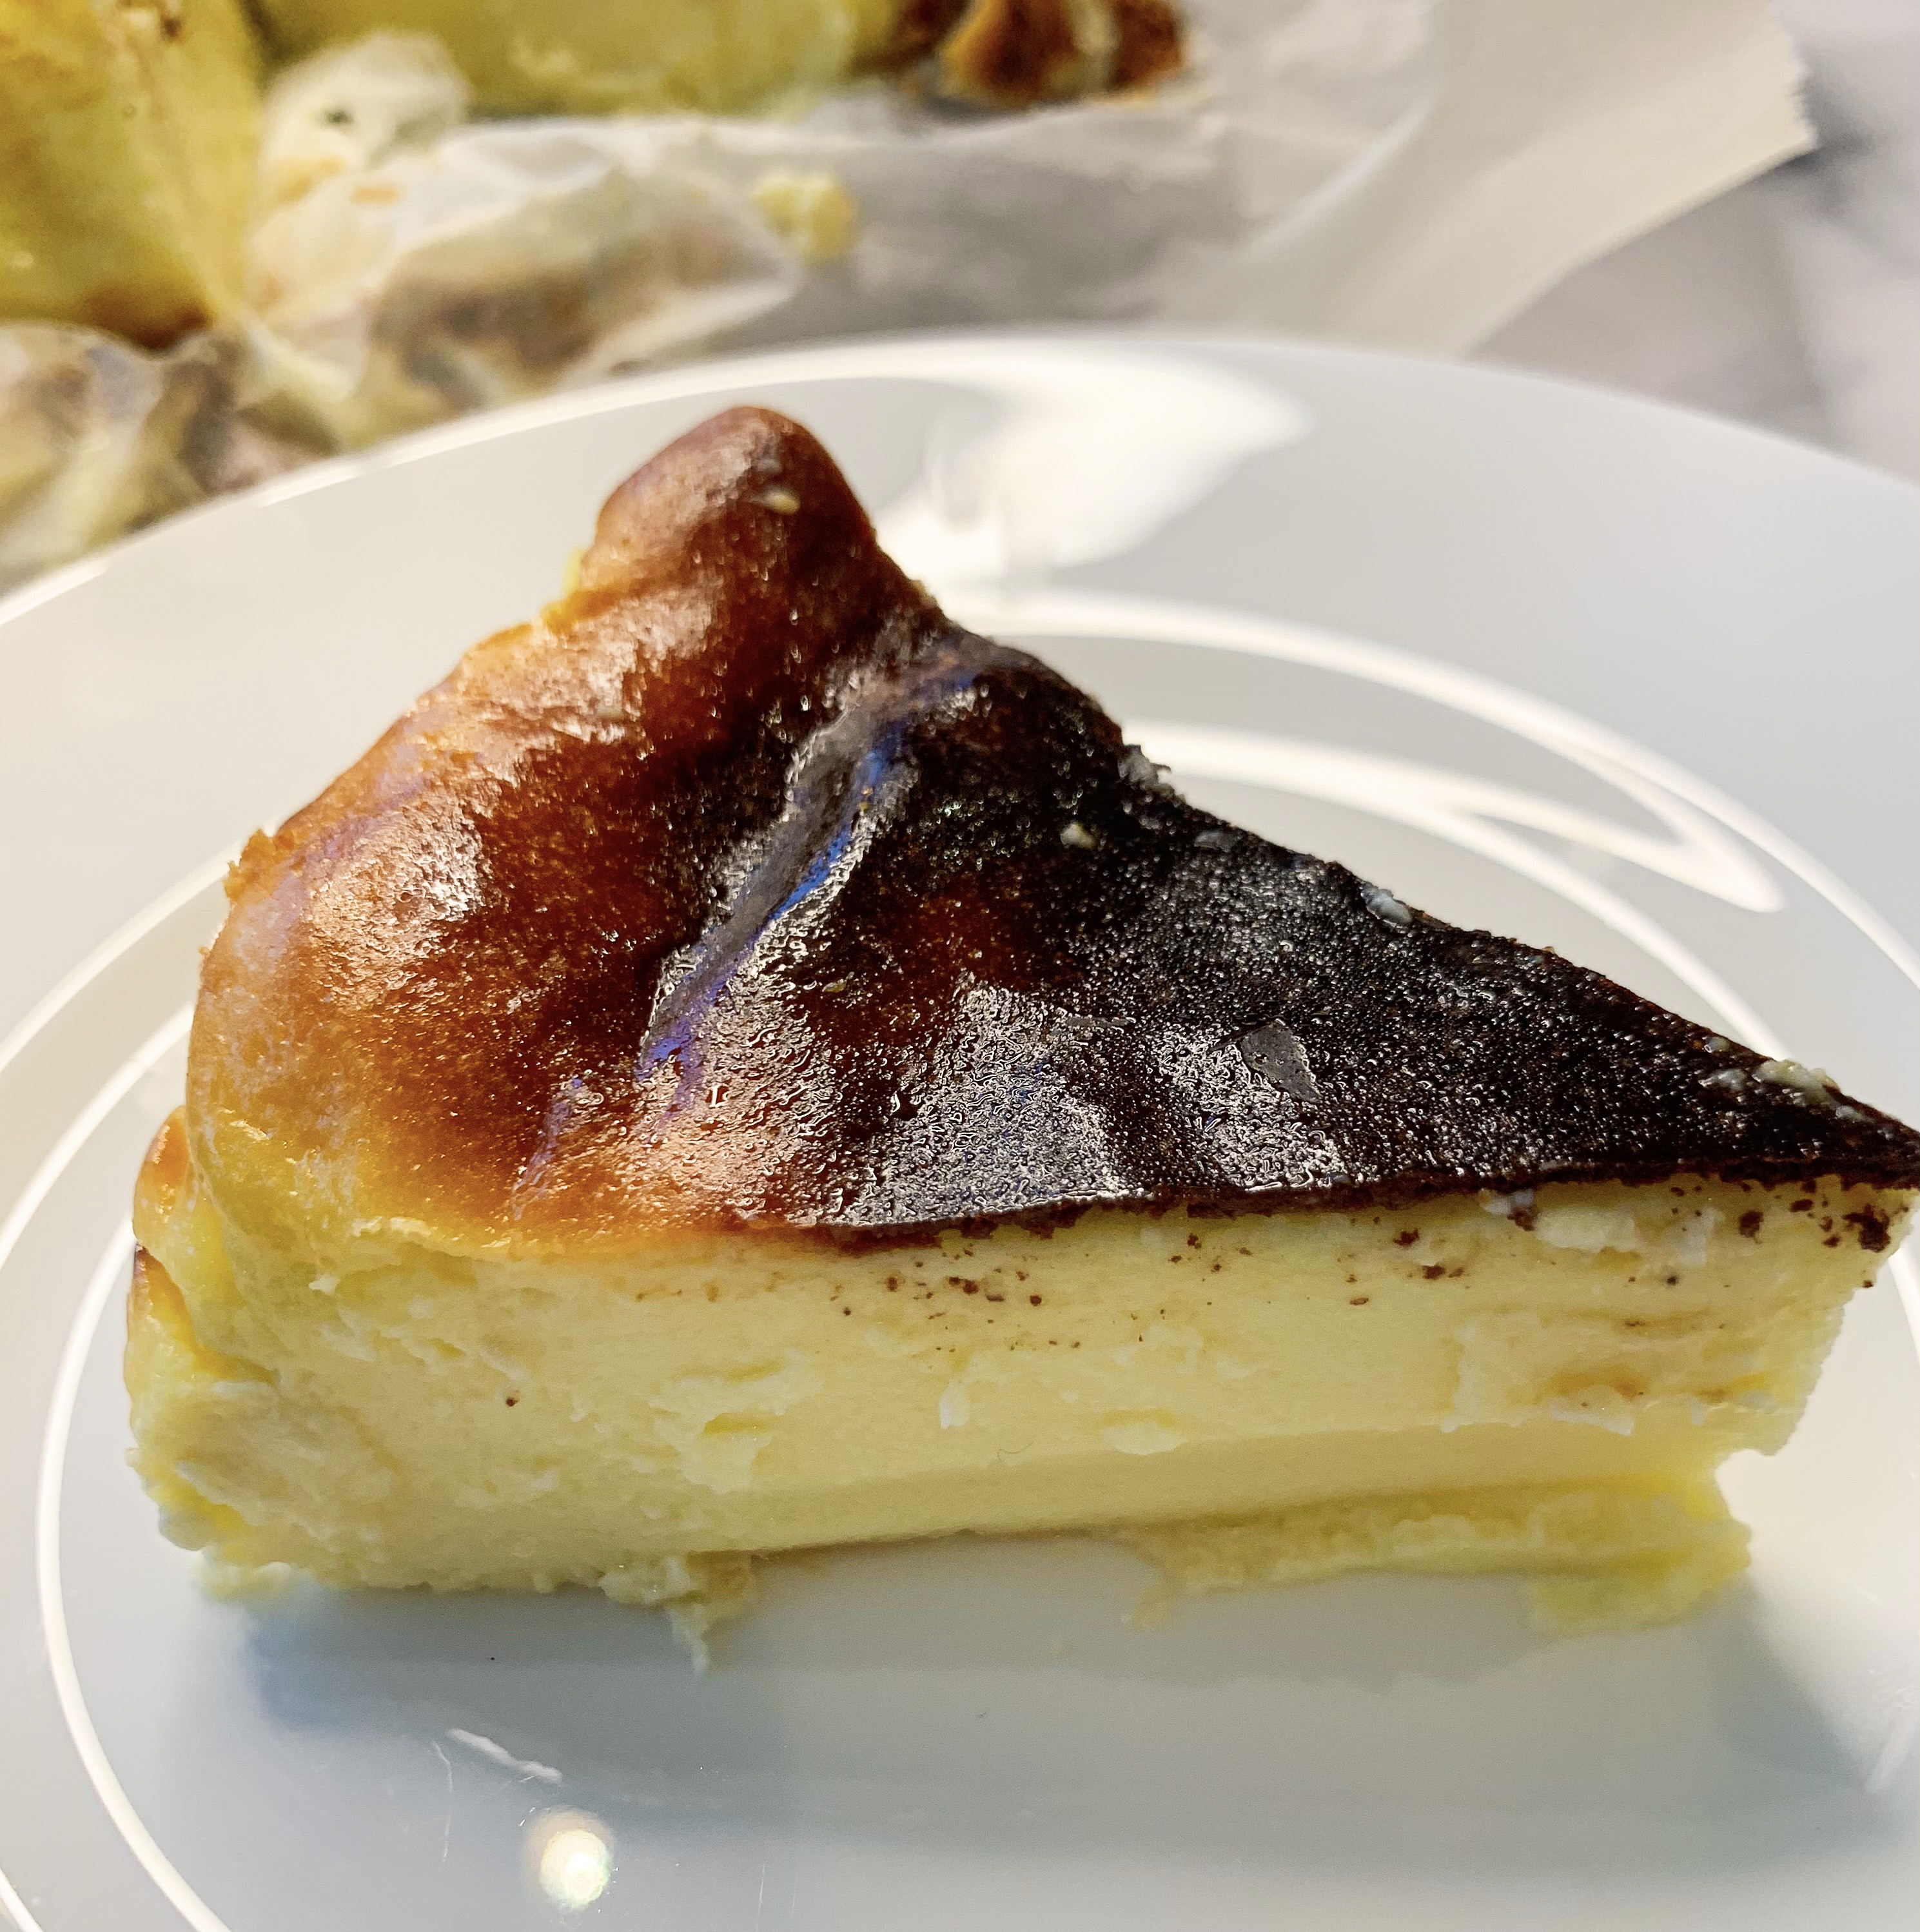
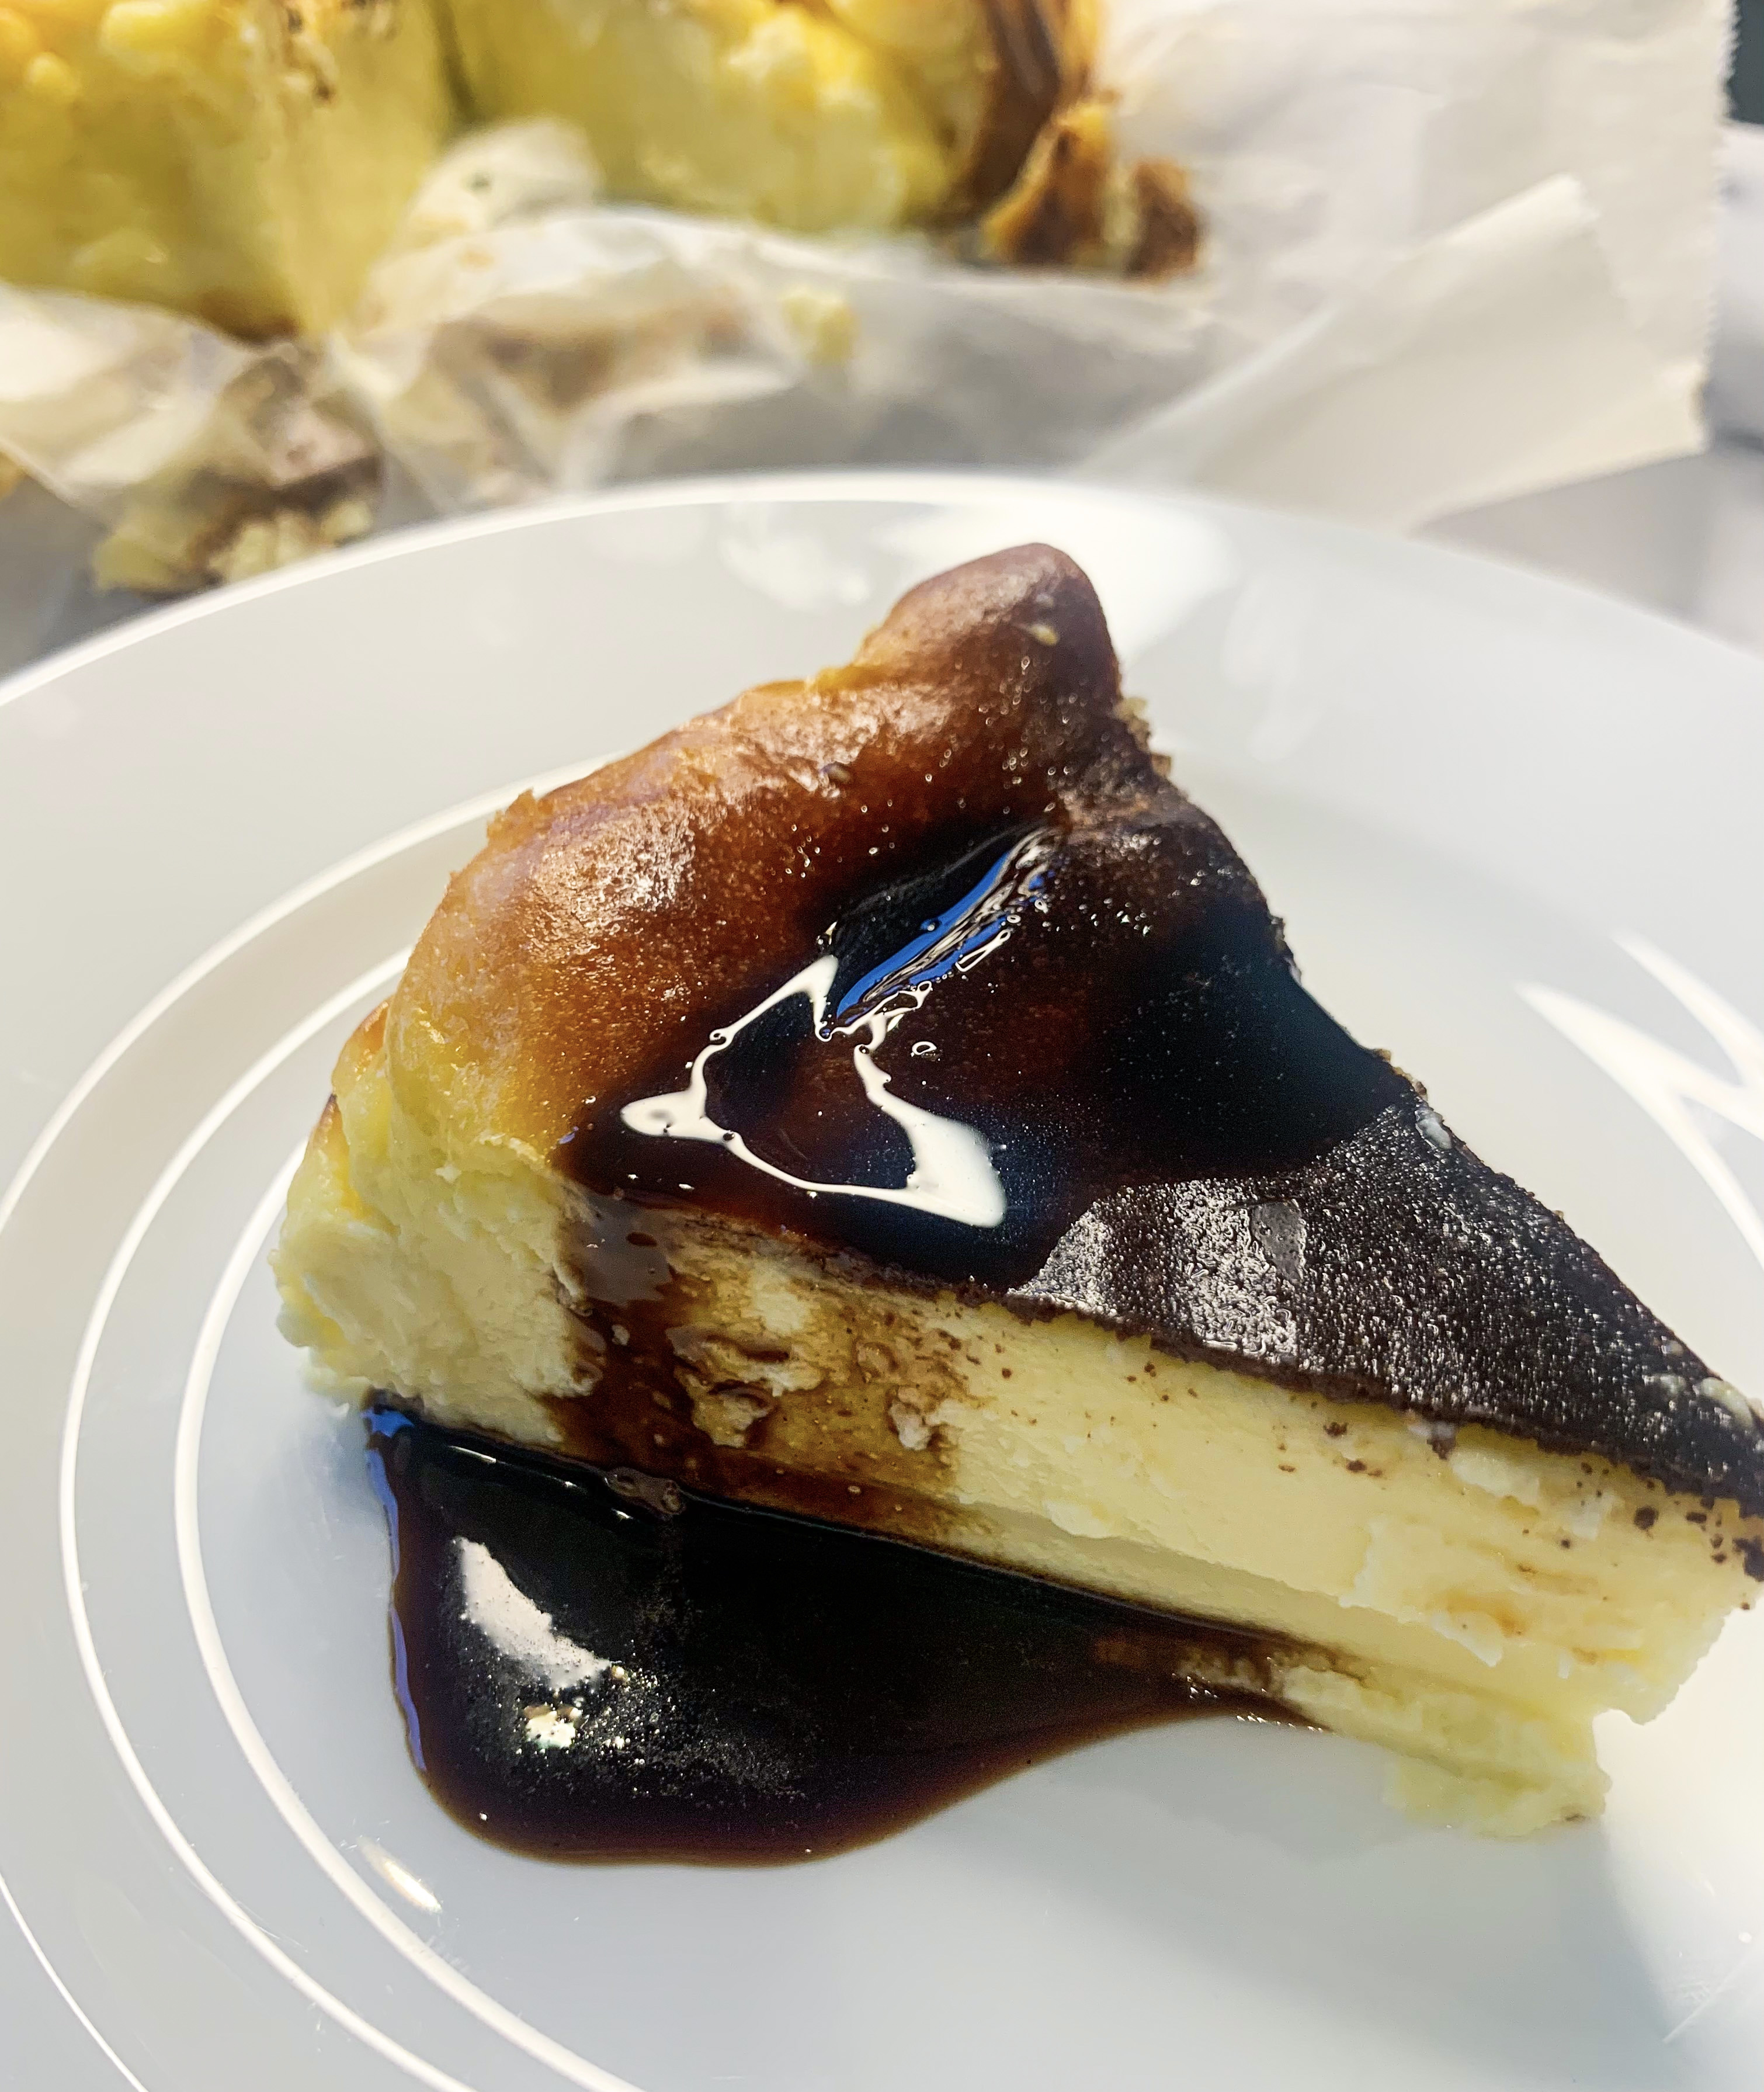
When I was working in St Johns Wood, London, over 20 years ago, I used to visit, almost daily, the local patisserie (now sadly gone), and order a slice of their baked cheesecake. It was the here that I discovered the incredible creamy nature of a proper, baked, cheesecake. Since then I have always had a soft spot for baked cheesecake, but since becoming gluten free I have found it difficult to find those without a crumbed, wheat base. So, when a girlfriend raved about Nigella Lawson’s Basque Burnt Cheesecake, I was very pleased to discover that it was baked without a crumb base so is totally gluten free. I have now baked it on a number of occasions – it is my new addiction! It is not only delicious but incredibly easy to make, admittedly it doesn’t look as good as a traditional baked cheesecake, but as we all know, looks can be deceiving! Nigella recommends a liquorice sauce to complement it, I have included the recipe here, but unless you’re an avid liquorice lover, I actually don’t think you need it – it really is perfect on its own. However, if you do make the liquorice sauce, do also try it over vanilla ice-cream!
Nigella likes this cheesecake served at room temperature, but I must admit that I rather like it straight from the fridge, but either way it is wonderfully smooth and creamy.
A couple of notes before cooking it – make sure that the ingredients are at room temperature as this will give a smoother texture. Also, the tin should have sides which are no deeper that 6cm, as you want the cheesecake to rise up (and burn!). Finally, don’t be too fussed if the lining of the tin looks a little messy, it’s supposed to be a rough and ready ‘look’!
600g full fat cream cheese, at room temperature
175g caster sugar
3 large eggs, at room temperature
300ml sour cream, at room temperature
¼ teaspoon fine sea salt
25g cornflour
*20cm springform cake tin with sides no deeper than 6cm
- First of all you need to line your cake tin. This is simply a matter of taking two long pieces of baking parchment with enough length to fit into the tin with an overhang of 5-7cm. Press the first length down into the tin and then take the second piece and lay it across, perpendicularly, the first piece, so that the tin is completely lined. It will look messy and creased! I find that it helps to place something heavy in the tin to keep the paper in place until you need it.
- Using a mixer/processor, beat the cream cheese with the sugar until it is light and smooth – this should be done for quite some time – at least 3 minutes (if by chance you do mix it by hand it will need elbow grease and more time!).
- Beat in the eggs, one at a time, incorporating each one fully before adding the next. Then add the sour cream, continuing to beat the mixture to fully combine.
- Slow down the mixer to beat in the corn flour and finally beat in the salt.
- Before pouring the mixture into the cake tin, use a spatula to scrape the sides of the bowl and give the mixture a final stir. Pour into the tin (having removed whatever you have used to weigh down the lining!!) and rap the tin a few times on the work surface to get rid of any air bubbles.
- Place in an oven, 200’c fan, for 50 minutes, by which time it will have risen and be chestnut brown in places. It will, however, still seem undercooked and very ‘jiggly’ but do not be tempted to cook it for longer as it will set as it cools.
- Remove the tin to a rack and leave to cool. It will sink – it isn’t supposed to look pretty! After about 3 hours it will be cool enough to eat.
- Serve at room temperature or chilled from the fridge, as you prefer. To serve, unclip the sides and lift it up with the edges of the parchment. Place it on a plate with the parchment still around, peeling it back to cut into slices. If using, serve the liquorice sauce on the side (recipe below).
Liquorice Sauce
If you are a liquorice lover, this sauce from Nigella Lawson’s cookbook ‘Cook, Eat, Repeat’, is definitely a ‘must try’. It’s a good accompaniment to the Basque Burnt Cheesecake (above), but is also wonderful simply spooned over vanilla ice-cream! It will keep well in the fridge.
*You can get the liquorice pellets from good Italian delis or online at Amazon – I used Amarelli Spezzata.
15g hard pure Italian liquorice pellets
90g caster sugar
300ml water
Pinch of fine sea salt (optional)
- Put the pellets in a small saucepan with 300ml water. Stir in the sugar. Place over a low heat until the liquorice has melted – giving it a stir now and again.
- Now turn up the heat and let it bubble away until it has reduced to about 150ml and is syrupy – this can take up to 20 minutes.
- Taste, adding a pinch of salt if you desire before serving.
Chocolate and Cherry Pavlova
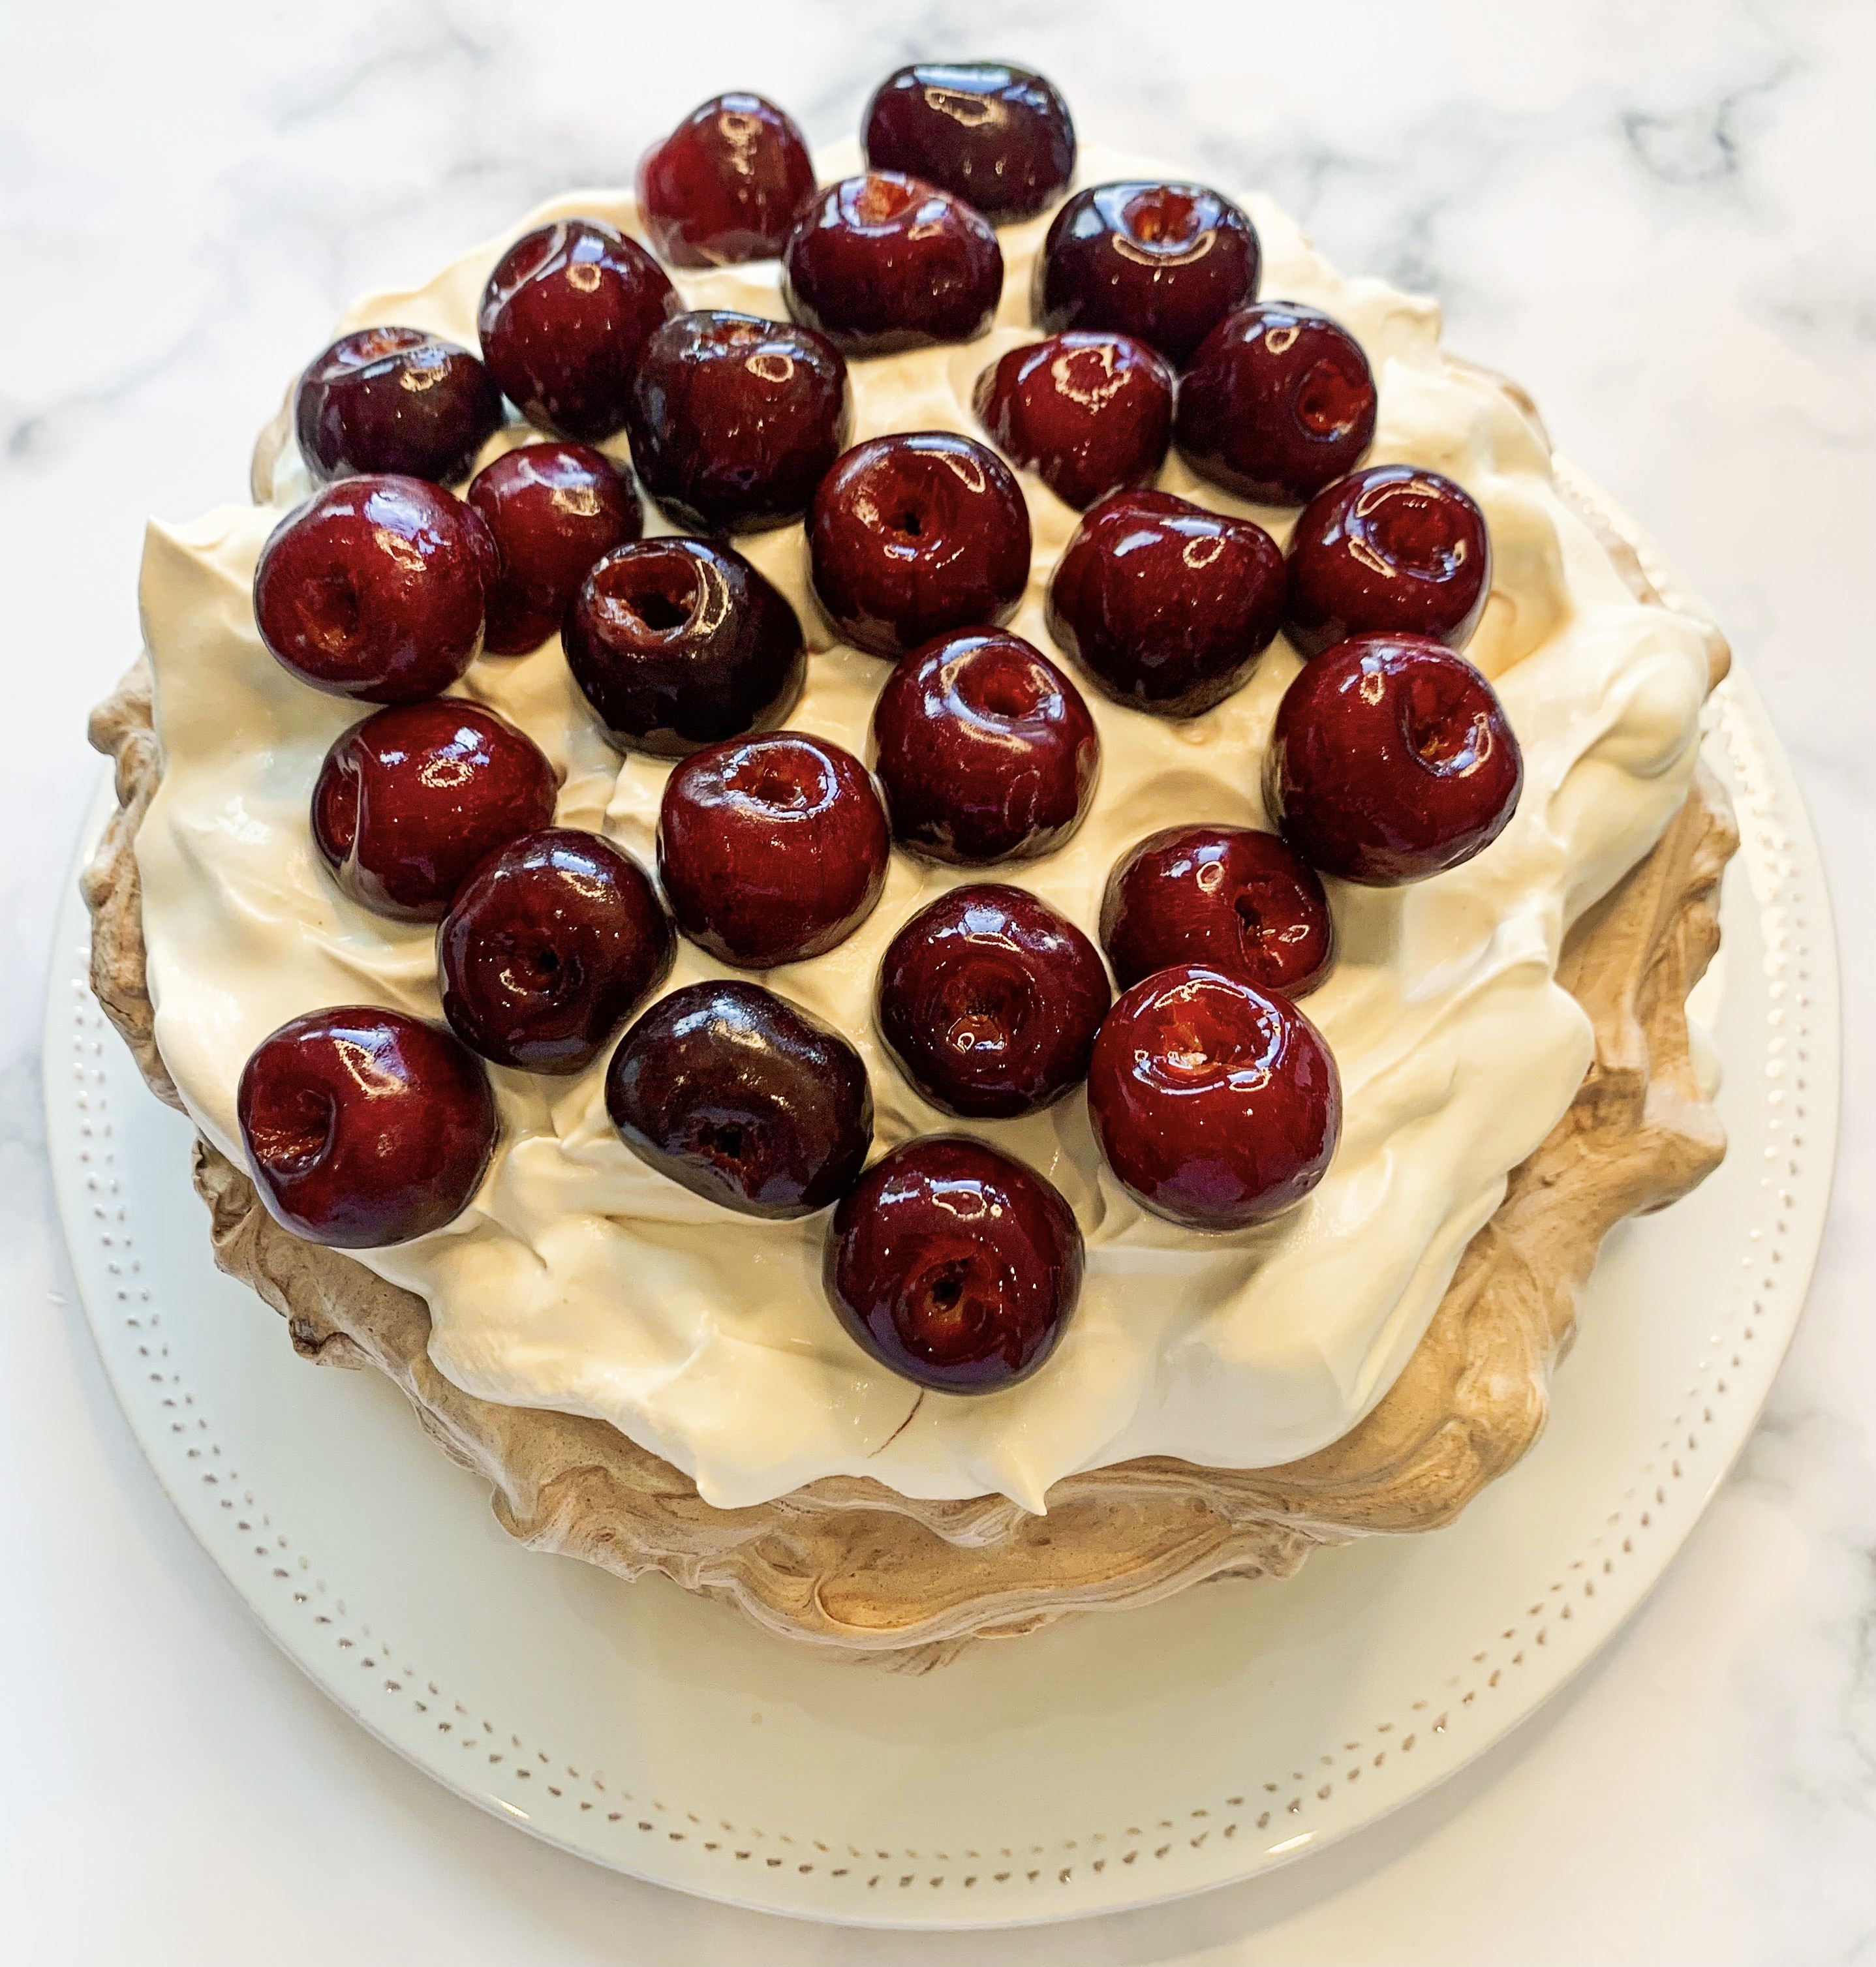
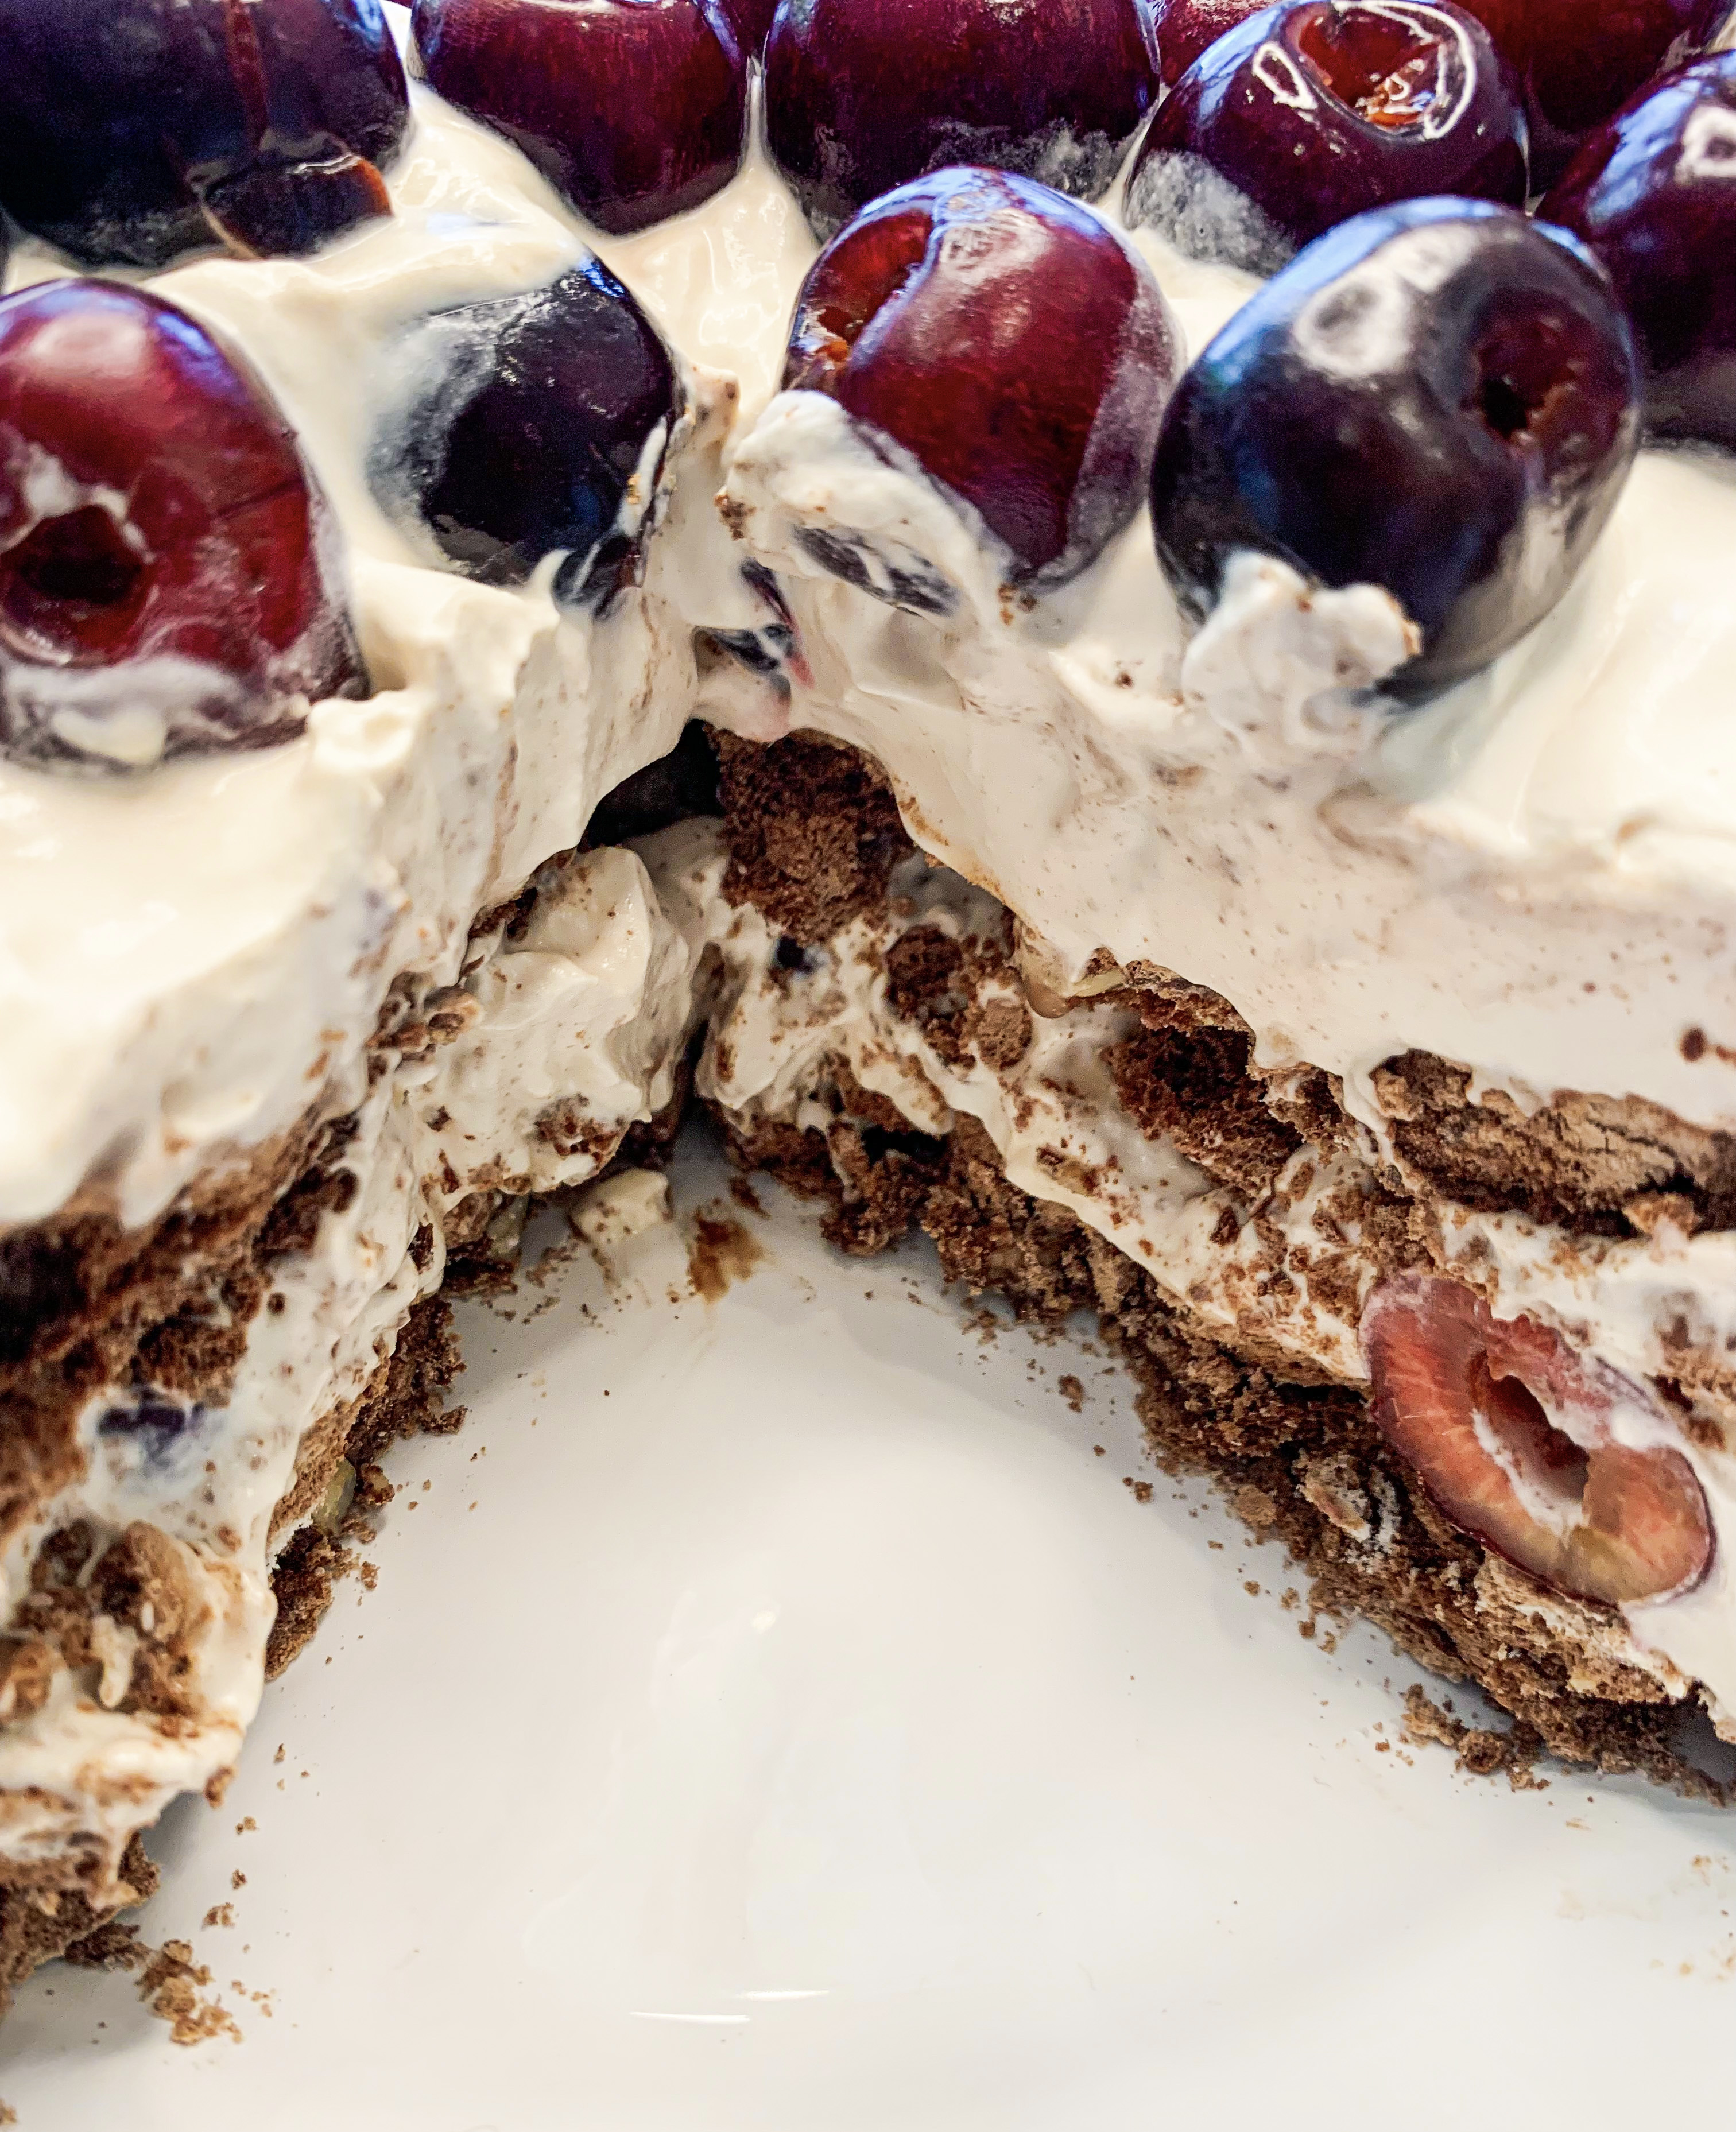
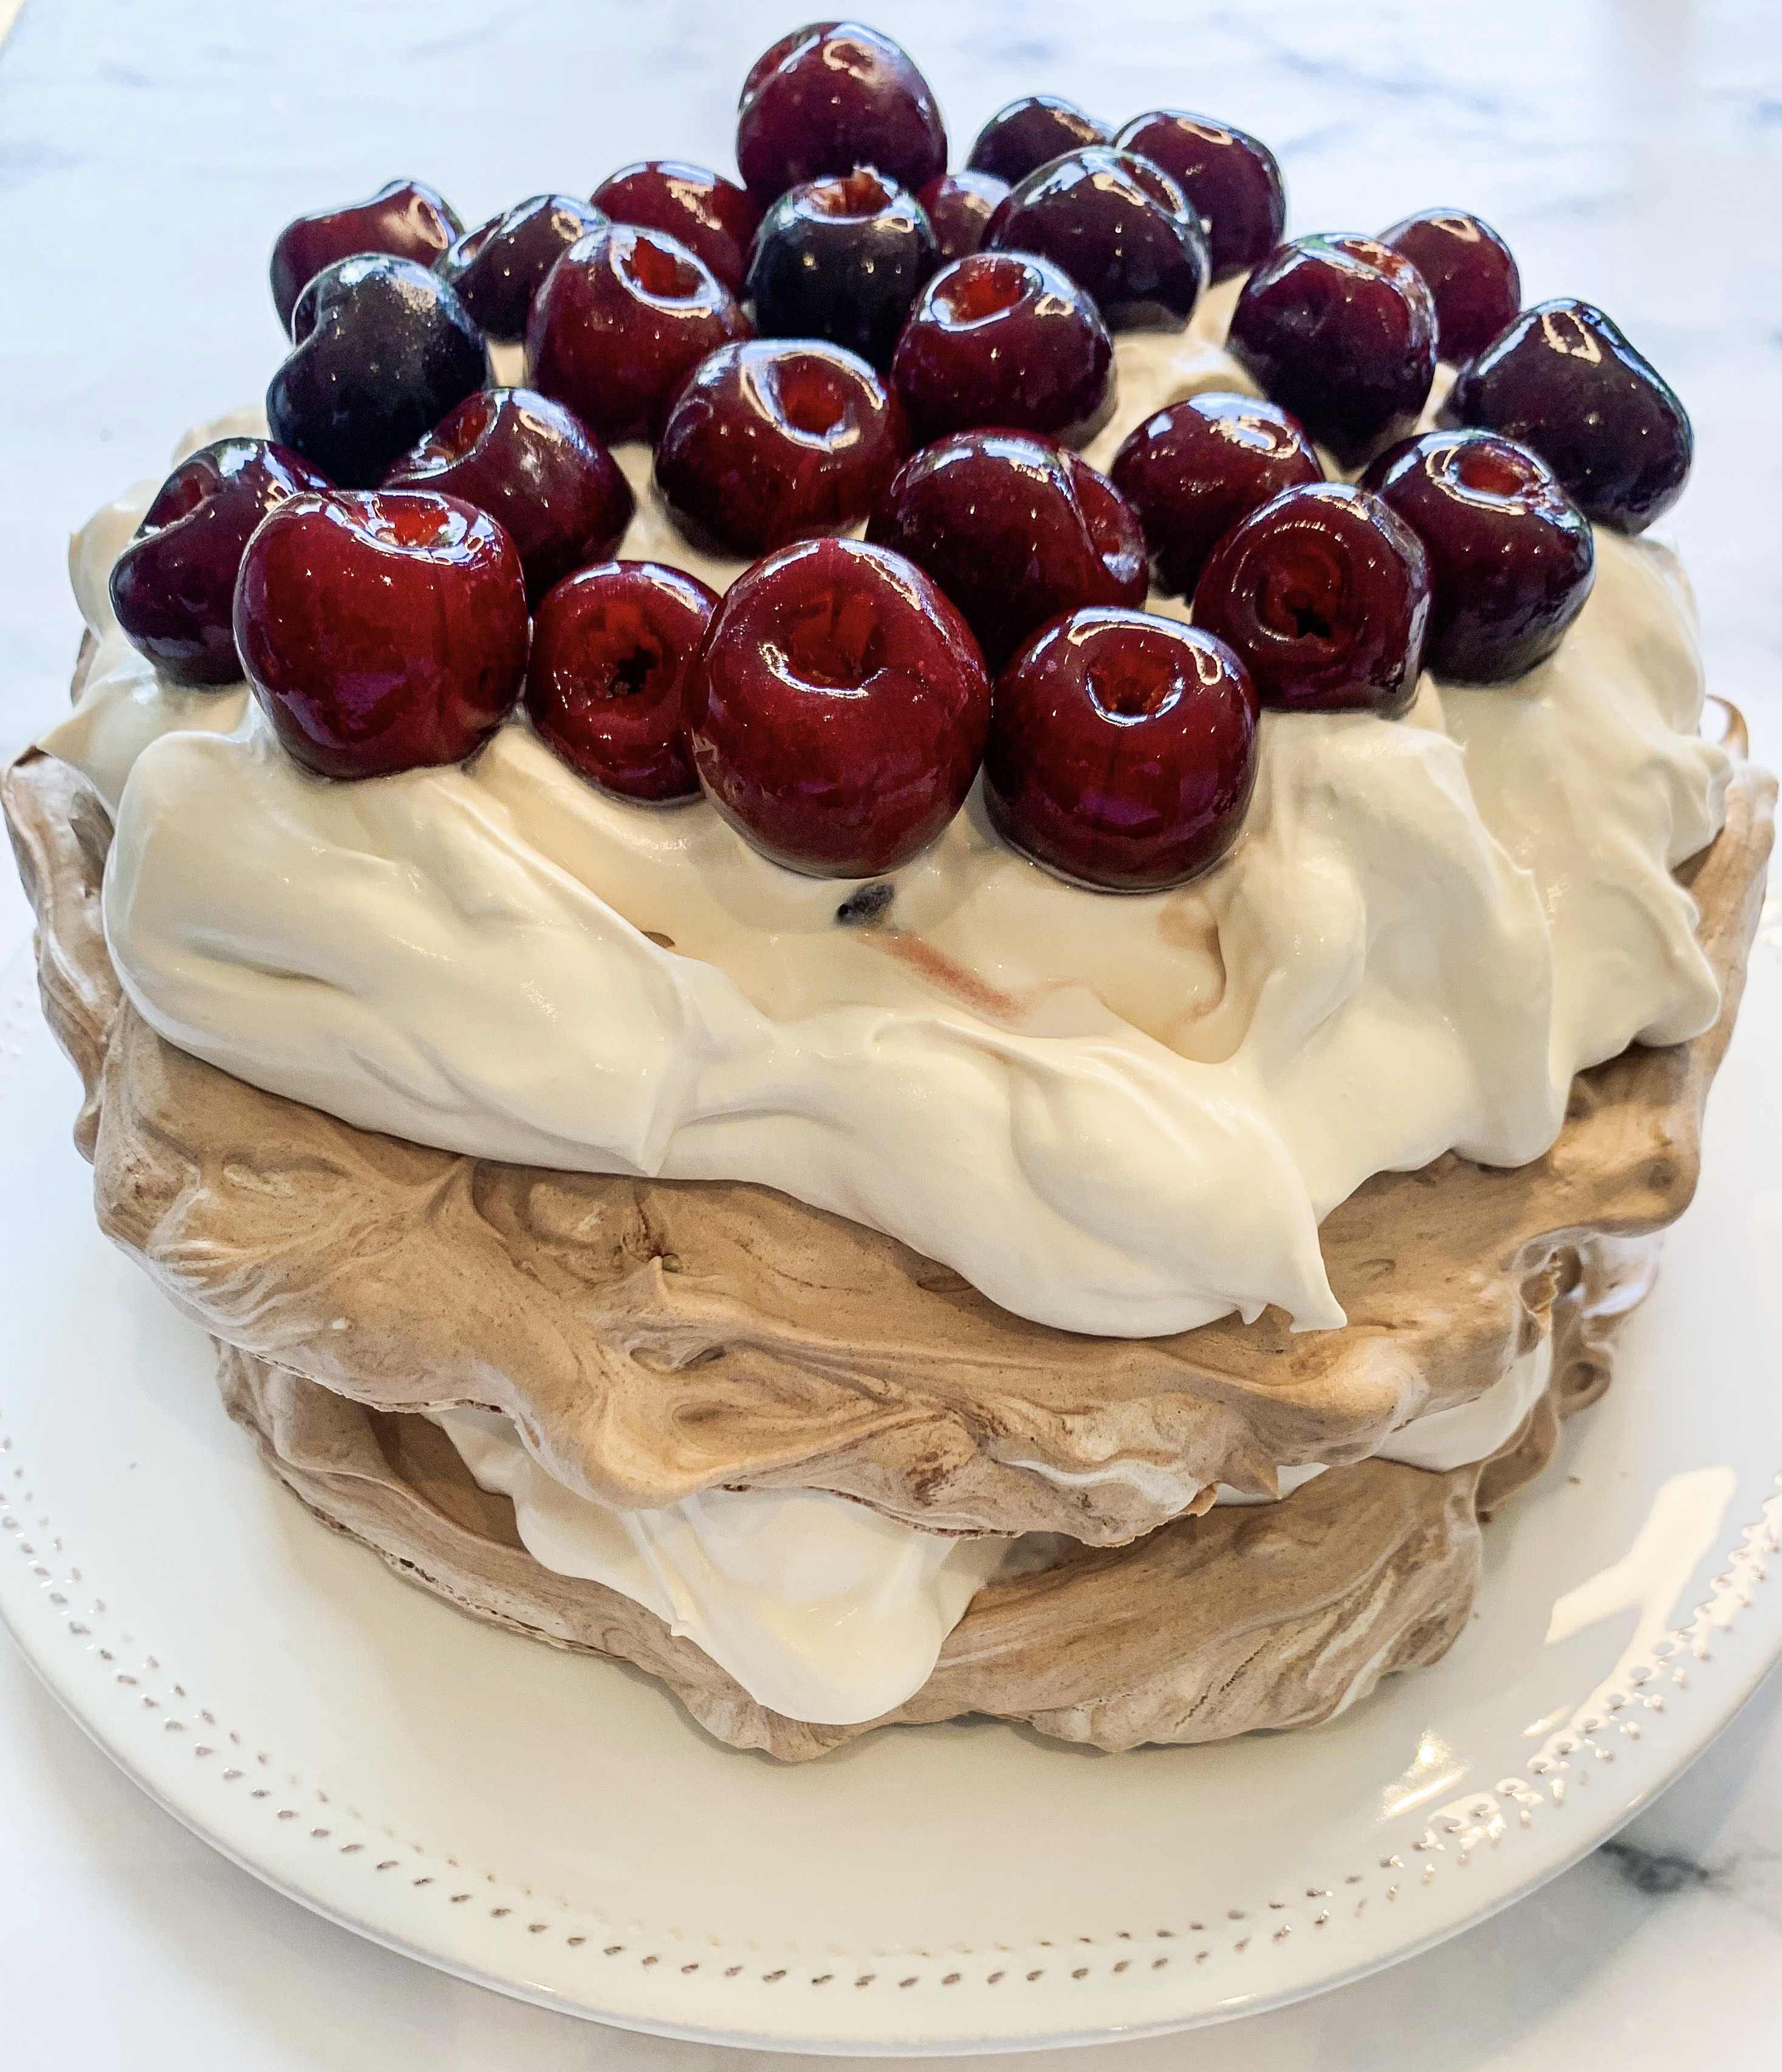
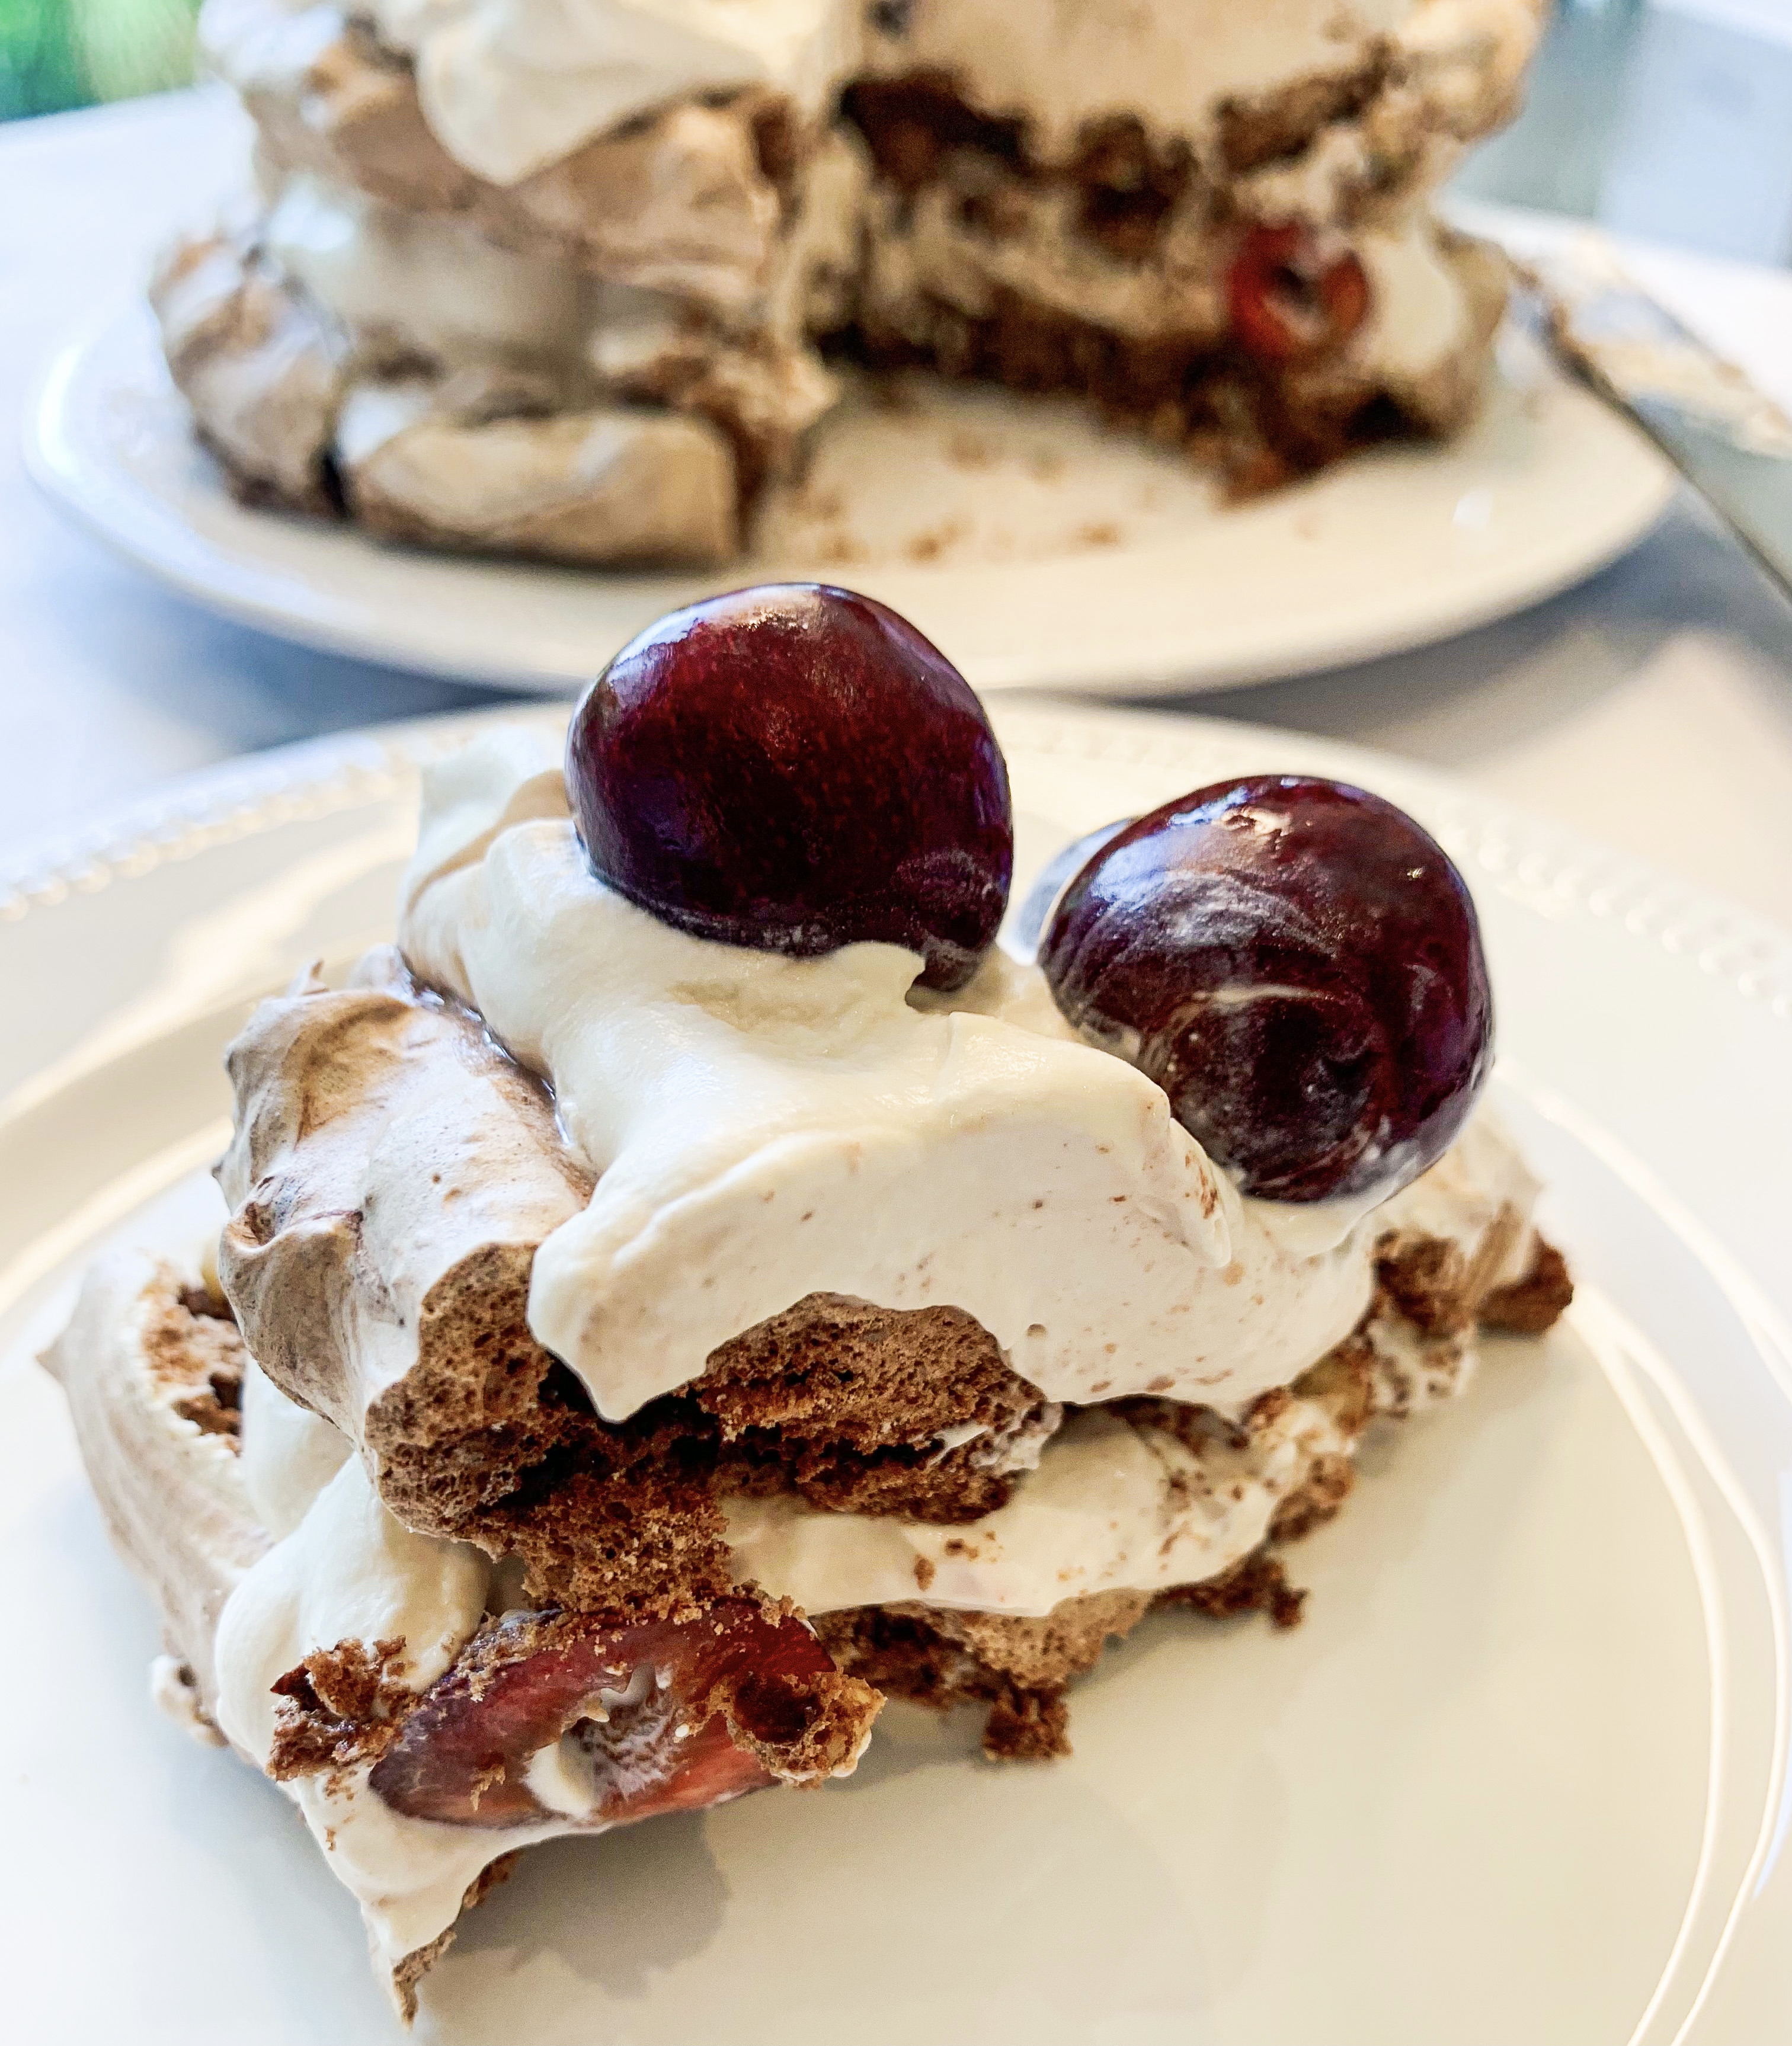
This dessert is inspired by the retro dessert, black forest gateau, but made with chocolate meringue instead of sponge – it’s fantastic. The recipe is from Rosie Birkett’s cookbook ‘The Joyful Home Cook’, and with recipes like this, it truly is a joyous book! This recipe works well year-round, even when cherries are out of season, as they are macerated in Marsala wine which sweetens them. Although it is made with meringue, once made up, this dessert does keep quite well in the fridge as unlike traditional meringues it is mixed with hazelnuts and chocolate which give it a coarser texture that doesn’t dissolve with the addition of cream. Having said that, I do think it tastes better fresh, and there won’t be much leftover once you get started on it!…
100g dark chocolate (I use Lindt Excellence 70% Cocoa Dark Chocolate), roughly broken up
4 egg whites
220g caster sugar
½ teaspoon white wine vinegar
100g blanched, skinless hazelnuts, roughly chopped
500g cherries, pitted
175ml Marsala wine or cherry liqueur
350ml double cream
10g dark chocolate for grating
- First, macerate the cherries. Put them in a bowl and cover with the Marsala wine, tossing them so that they are thoroughly coated. Set aside.
- Melt the chocolate in a bowl over a saucepan of barely simmering water (a bain-marie).
- Whisk the egg whites in a spotlessly clean bowl until stiff peaks form. Gradually, in batches, add the caster sugar, whisking constantly until the mixture is thick and glossy. Whisk in the vinegar. Pour the melted chocolate down the sides of the bowl, turning the bowl to distribute it evenly, then add the nuts and fold them through lightly so that the meringue is marbled with the chocolate.
- Line 2 baking trays with baking parchment, draw a 20cm circle on each and spread the meringue mixture evenly onto each circle – creating two meringue discs.
- Bake in a preheated oven, 110’c fan, for 2 hours. Remove from the oven, lift the meringues and parchment onto wire racks to cool.
- Whip up the cream until it just forms soft peaks – being careful not to over-whip it.
- Drain the Marsala from the macerating cherries and fold it into the cream – it will seem runny at first but will thicken as you incorporate it. Now fold in half of the cherries.
- Peel the baking parchment from the cooled meringues. Place one of the meringues on a serving plate, spread with just over half the cream mixture and top with the other meringue disc. Top with the remaining cream mixture and then the remaining cherries. Grate over the dark chocolate and serve.
Salted Honey Ice-Cream (No-Churn)
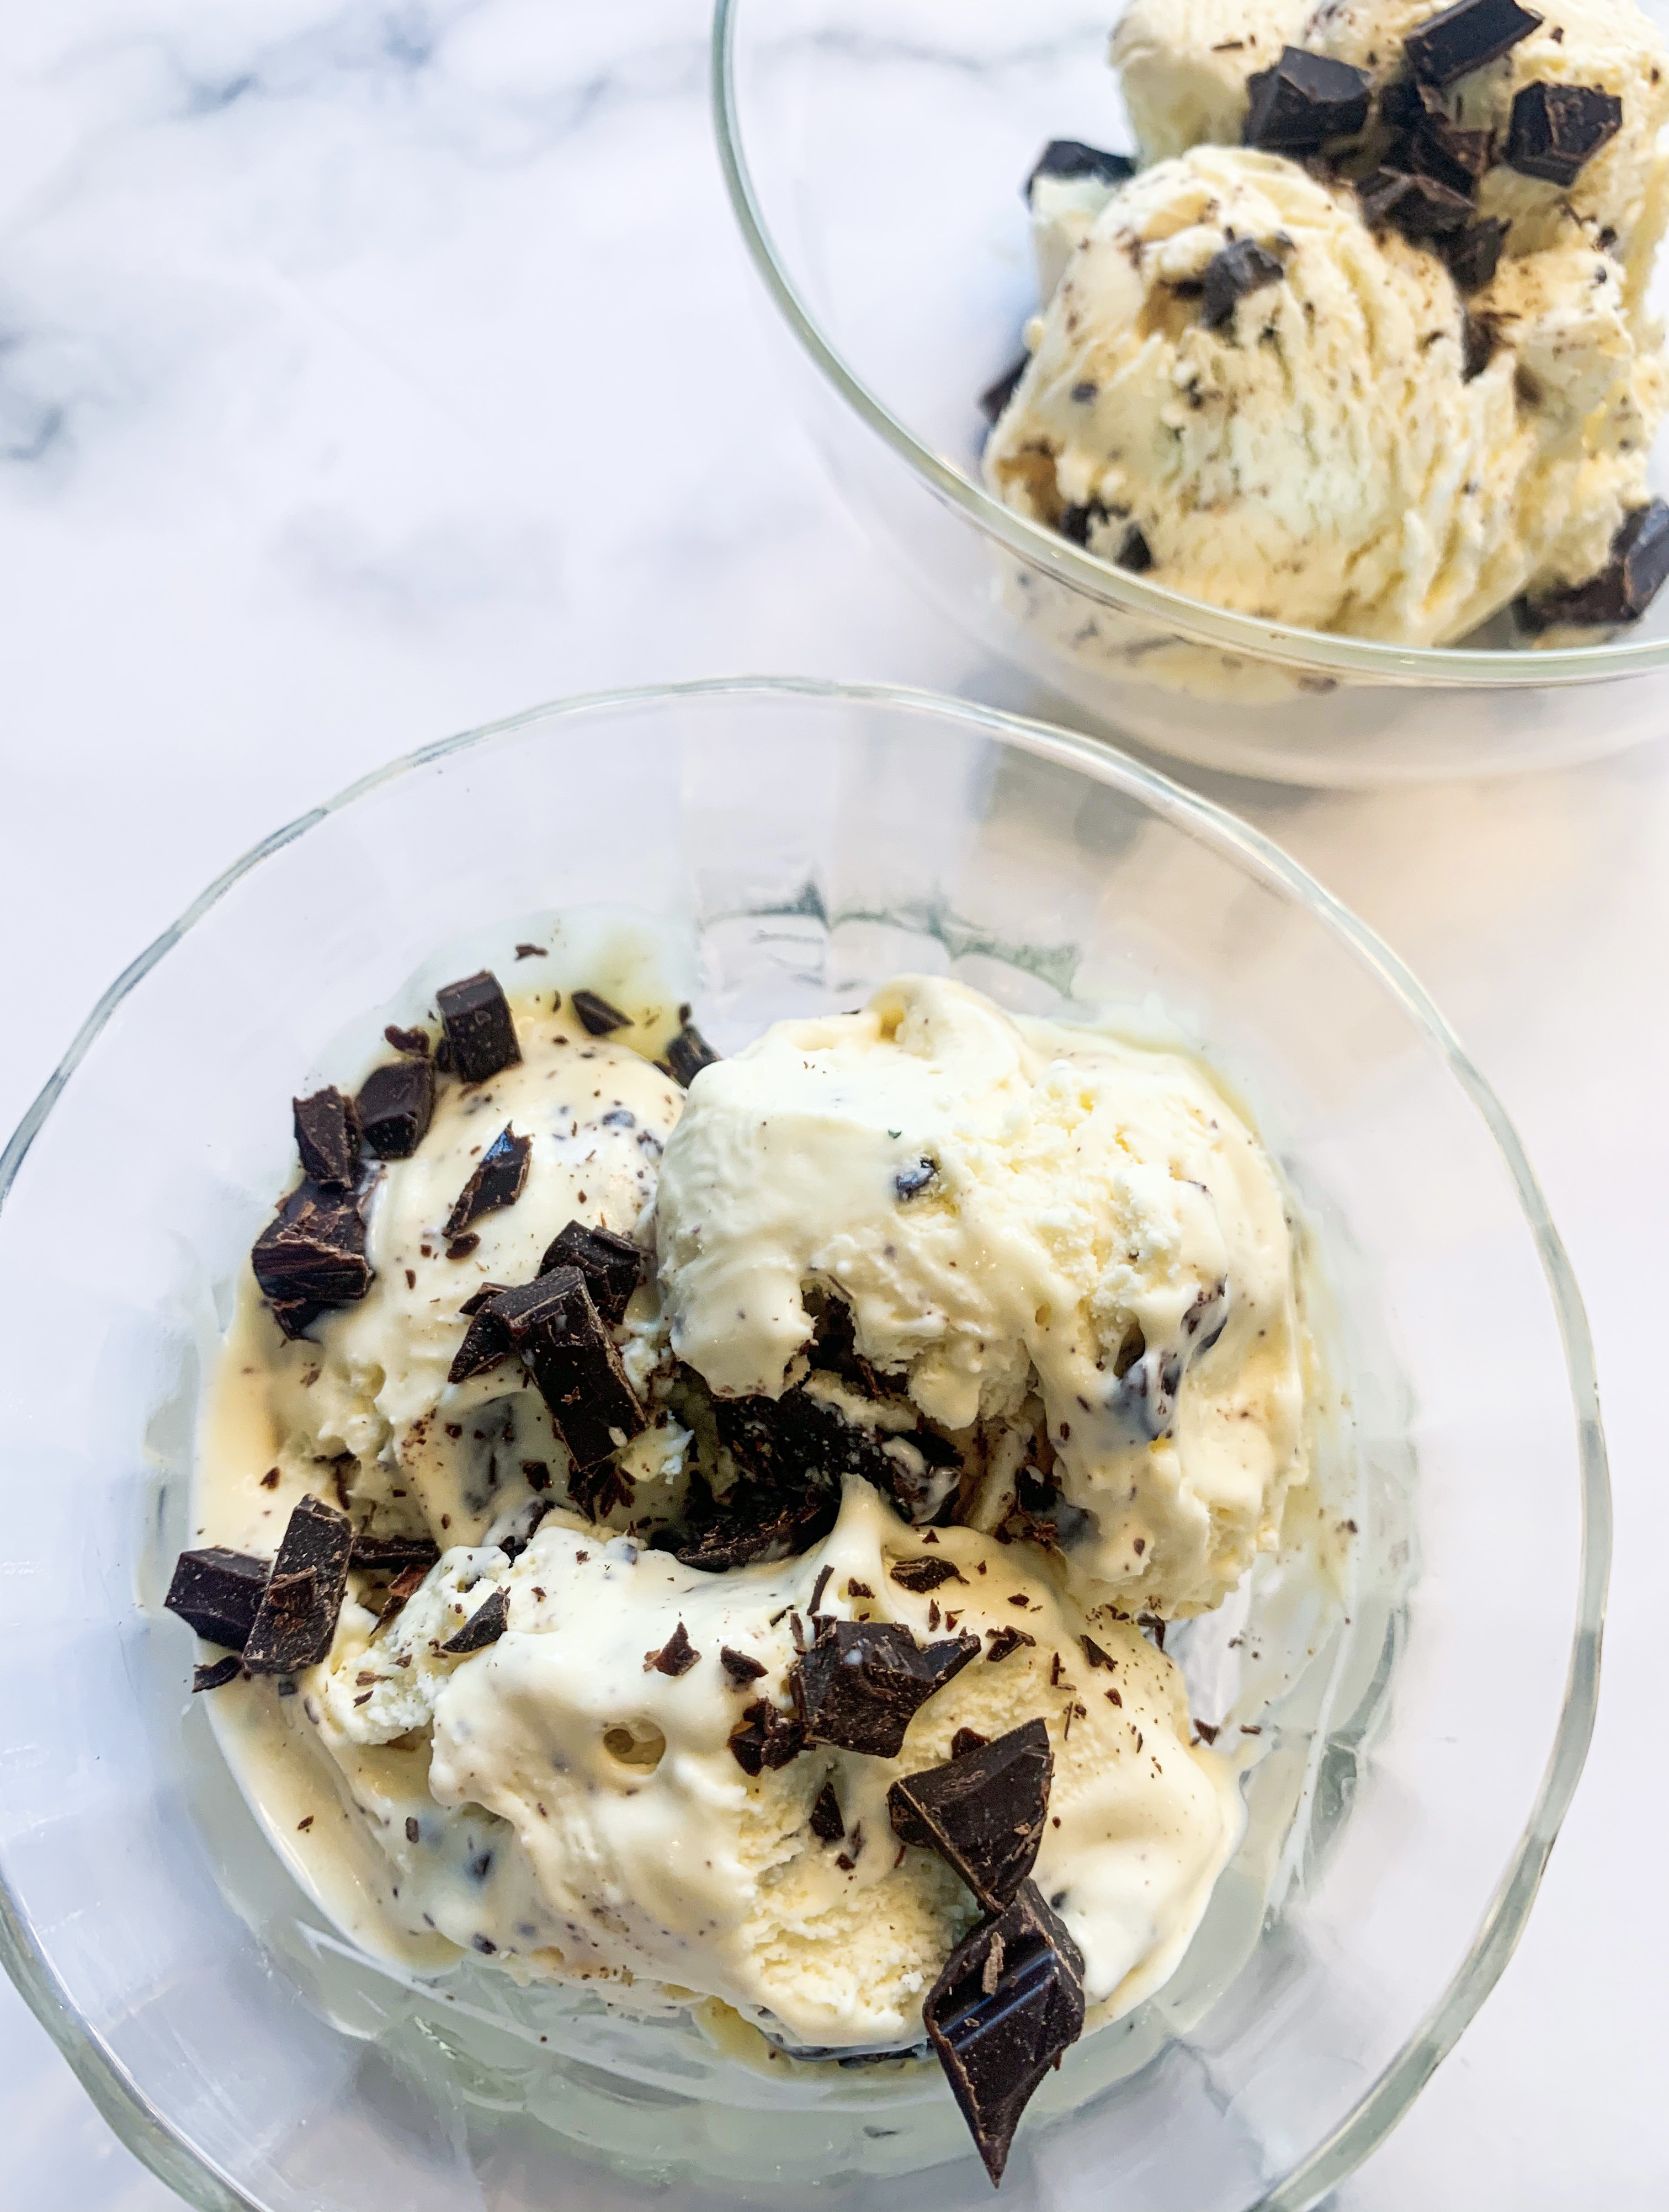
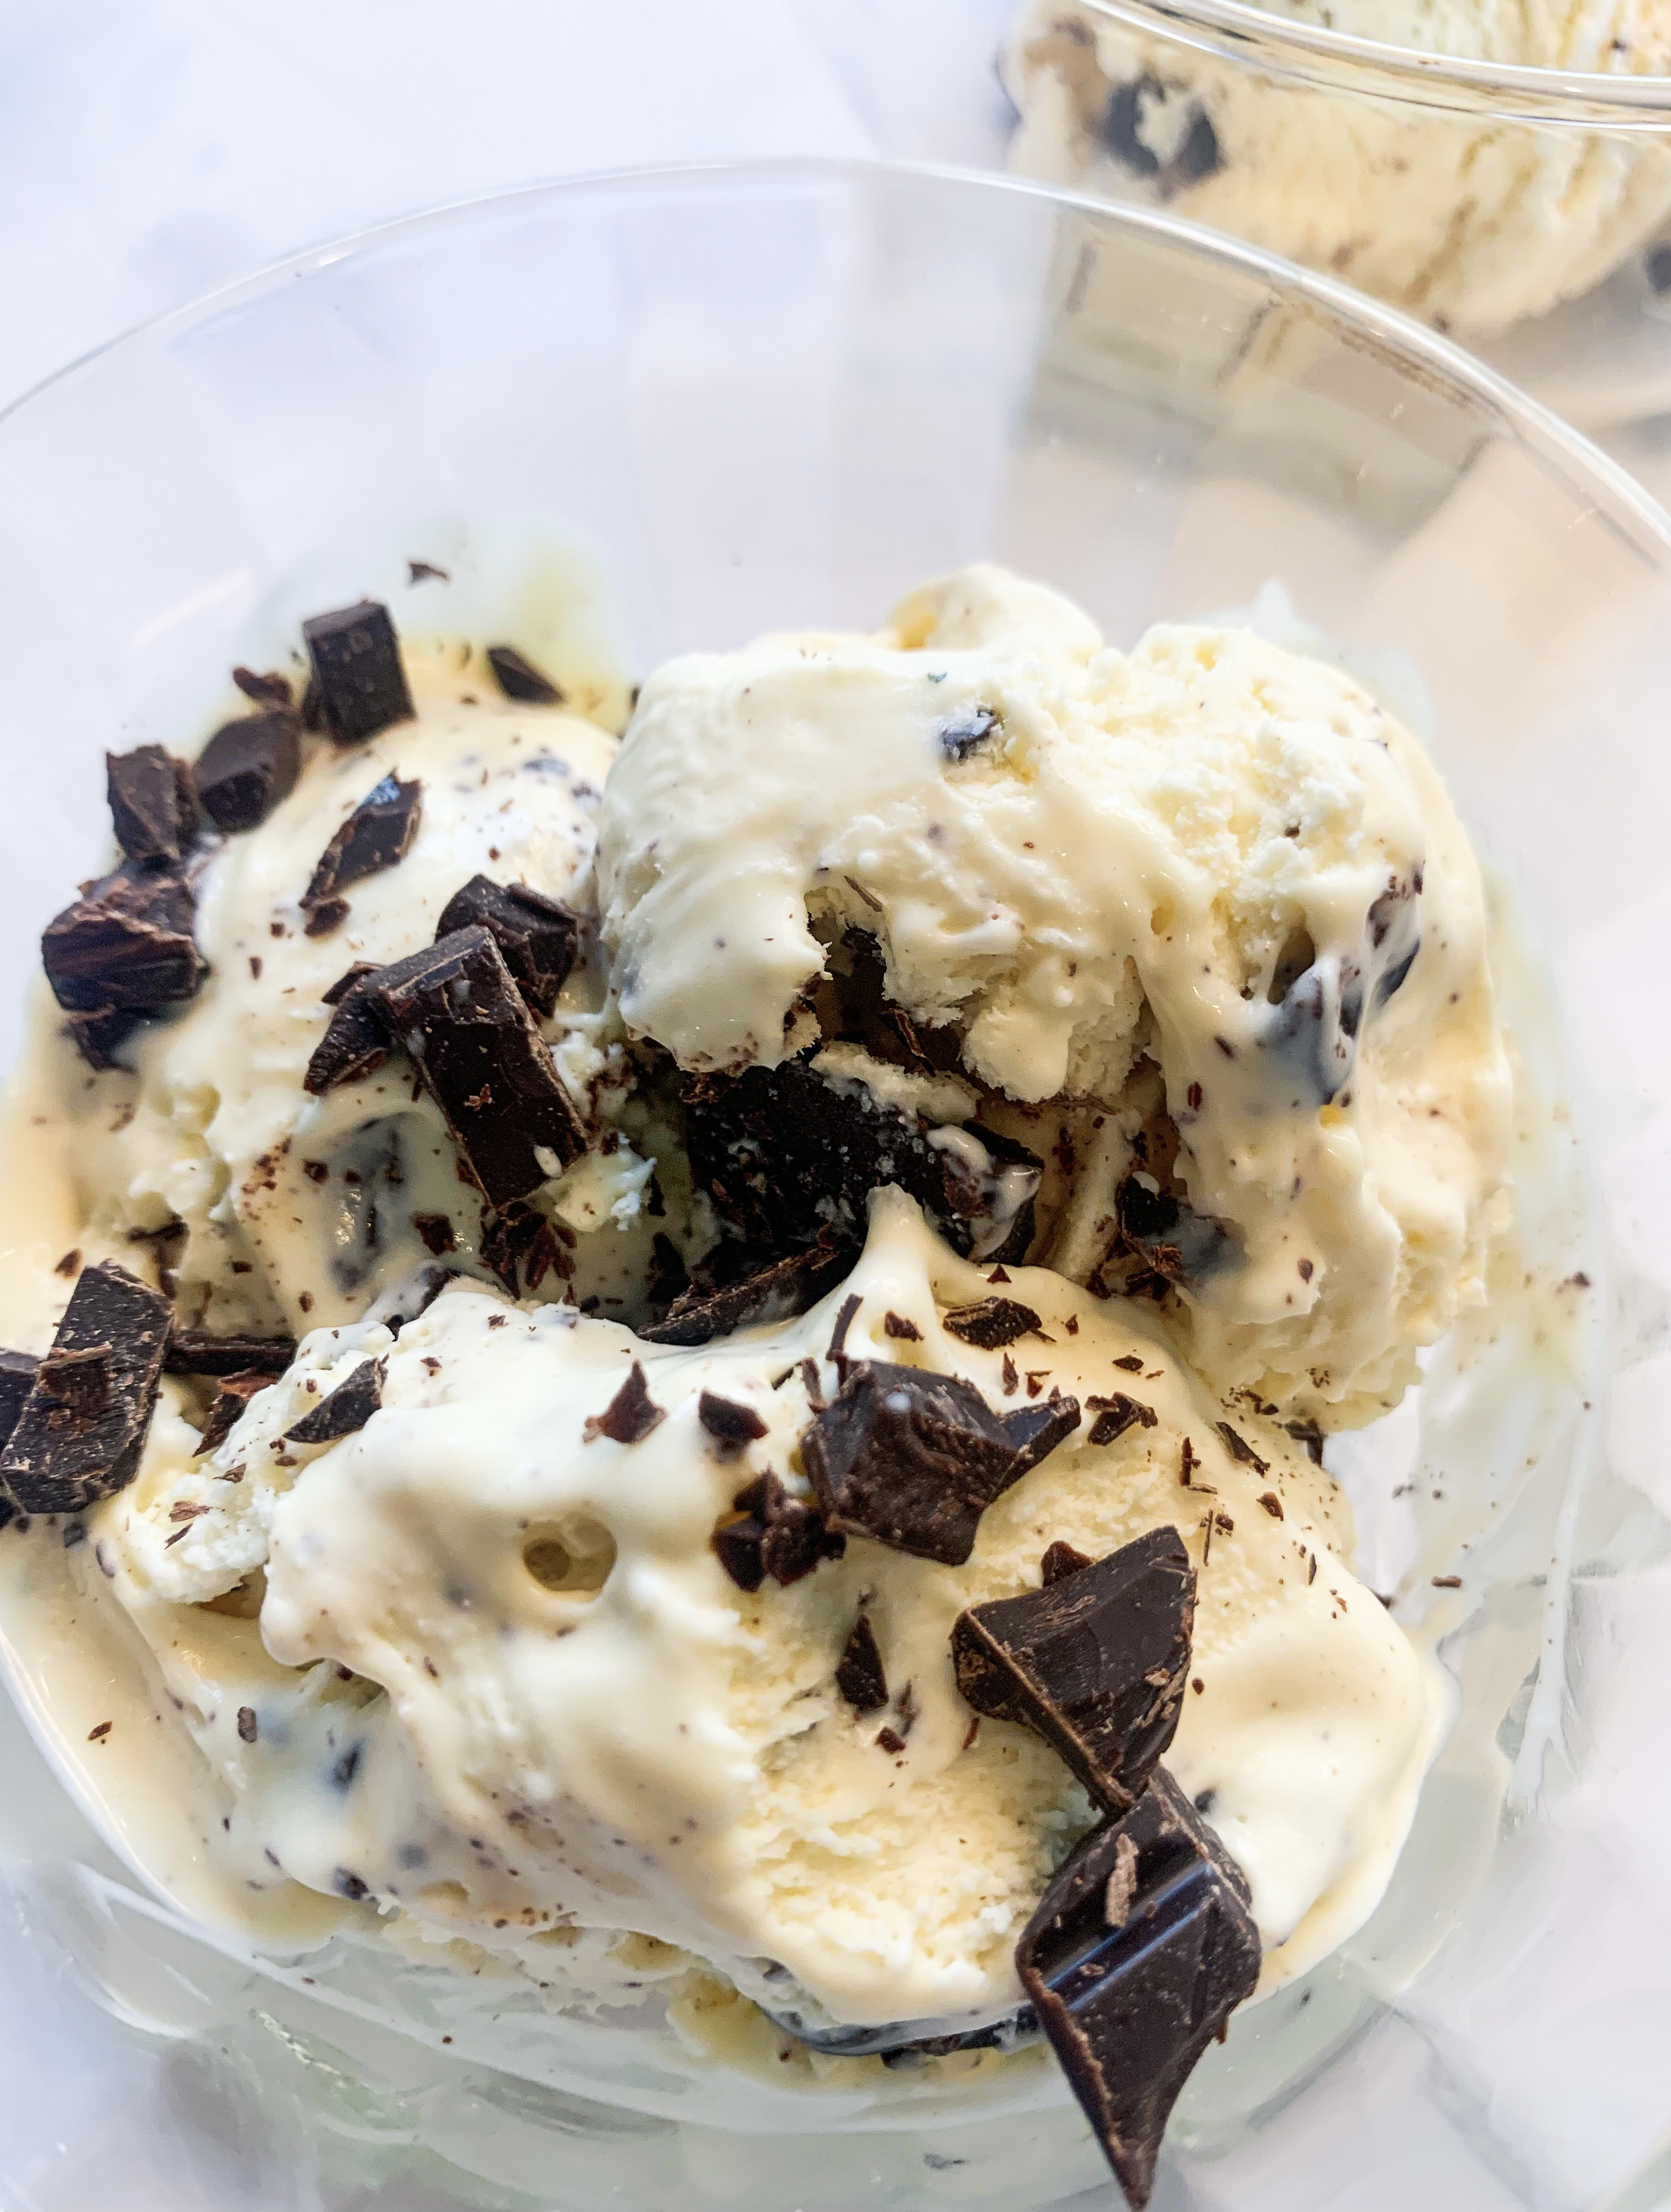
This is my new favourite no-churn ice-cream – it uses condensed milk so does not require an ice-cream maker. It is seriously good! I have taken the recipe from Skye McAlpine’s cookbook, ‘A Table for Friends’, she has completely nailed the balance of flavours – the sweetness of the honey is toned down with the bitterness of dark chocolate and a little sea salt. It really is divine, you must try it!…
(Go to my Desserts Page for Coffee & Cardamom Ice-Cream and Strawberry Ice-Cream – both of these are also easy, no-churn recipes!)
600ml double cream
1 x 397g tin of condensed milk
80g runny honey
½ teaspoon sea salt flakes
100g dark chocolate (I use Lindt Excellence 70% Cocoa Dark Chocolate), coarsely chopped, plus more to serve
- Whisk the cream until stiff peaks begin to form (take care not to over whip as you want the texture to be smooth).
- Gently fold the condensed milk into the cream, then drizzle in the honey, sprinkle with salt and fold all the ingredients evenly together.
- Toss in the chopped chocolate and gently stir through so that it is peppered throughout the mixture.
- Pour the mixture into a freezer-safe container and cover with a lid.
- Freeze for 6-8 hours or overnight. The ice-cream will keep in the freezer for up to 3 months.
- Scoop to serve and sprinkle with chopped chocolate.
Strawberry Meringues (Serves 4)
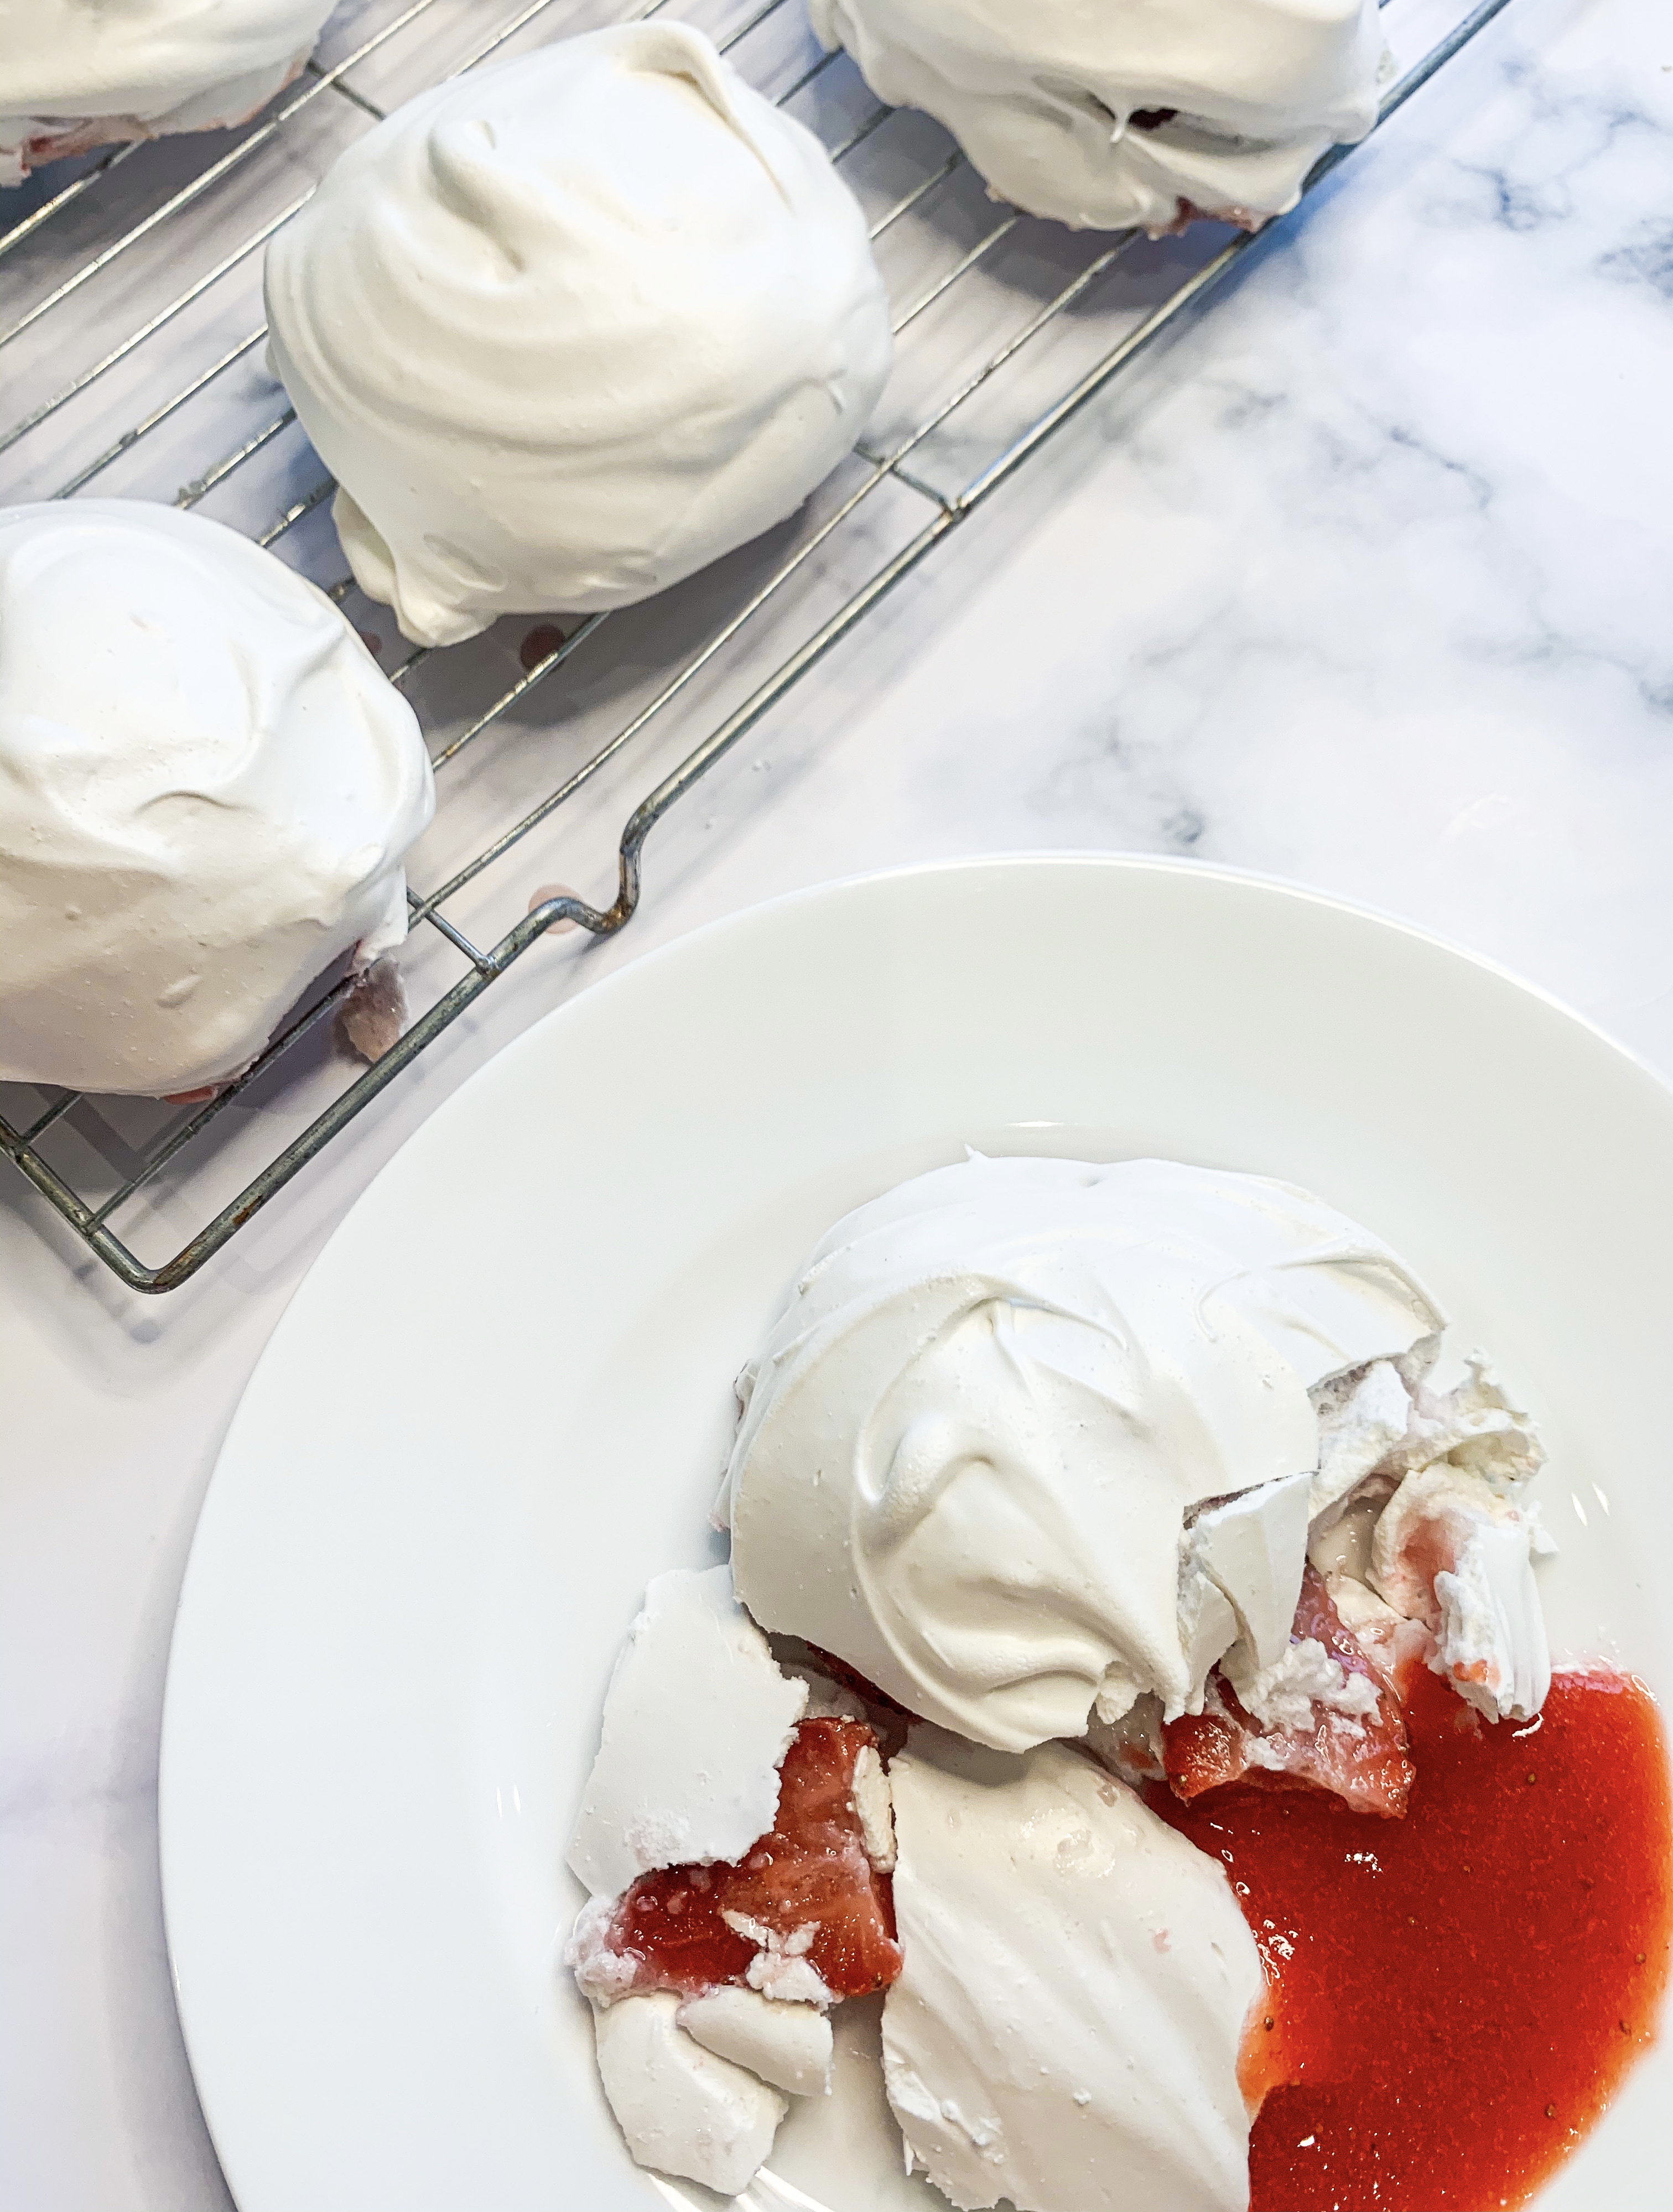
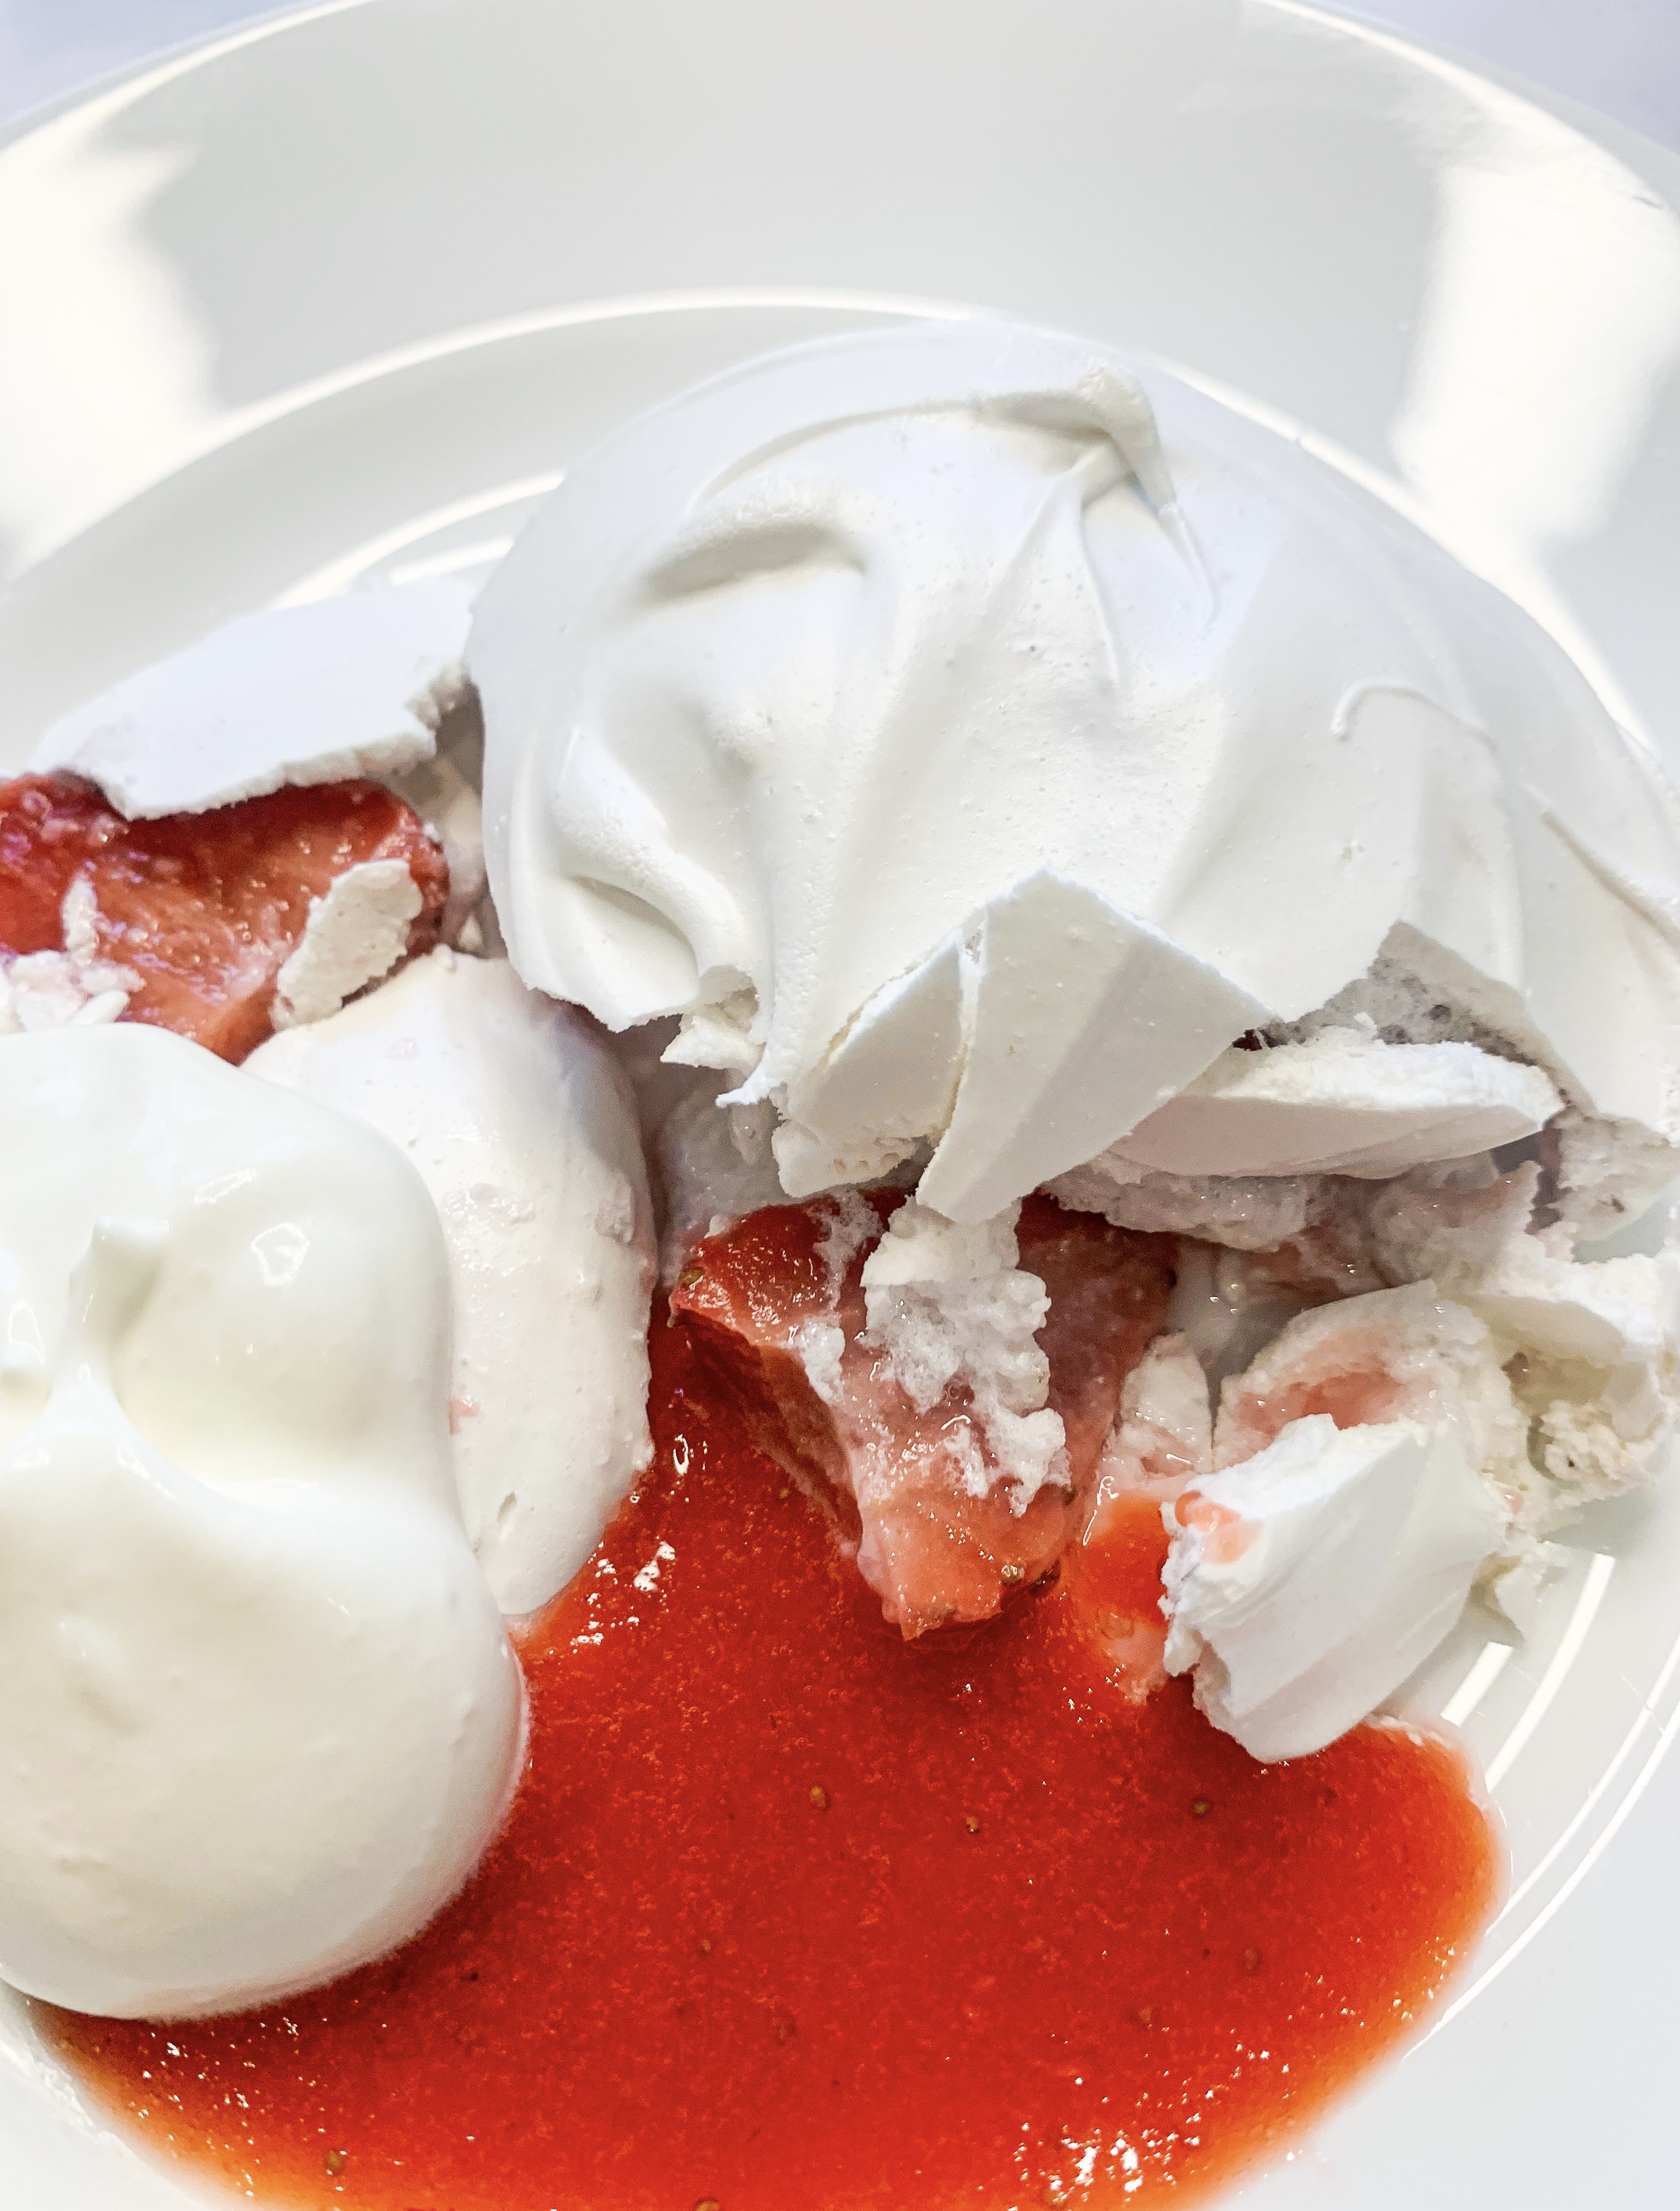
What better way to serve strawberries than combined with meringues?…No, on this occasion I’m not suggesting the classic Eton Mess (you can find that recipe here!)…Instead, in this recipe, the strawberries are actually cooked inside the meringues. By cooking them inside the meringues, the taste of the strawberries becomes more intense – you ‘ripen’ the flavour, so it’s a good recipe for those strawberries which are slightly disappointing. For that reason, it’s worth remembering over the long months after the summer season – when you can only get strawberries that have been flown in from abroad and consequently taste a little bland.
These meringues are best eaten the same day – which I’m sure won’t be a hardship! However, if there are one or two left over they will keep for 24 hrs in the fridge, but no longer. In cooking, you will find that the strawberries will leak out a gooey mixture this just adds to the flavour!
I found this recipe in James Martin’s book ‘Slow Cooking’. The recipes in this book are all simple to prepare yet are cooked or marinated slowly for at least an hour to create show-stopping dishes with little fuss – and this recipe for meringues is definitely one of those!
*You could also make this with raspberries
550g strawberries
4 egg whites
110g caster sugar
110g icing sugar, plus 20g for the sauce
250ml double cream
- Hull the strawberries and cut them in half.
- Beat the egg whites with the caster sugar in a grease-free bowl until stiff peaks form.
- Add 110g of the icing sugar and continue to beat for 4-6minutes until the mixture is smooth and shiny.
- Using a large metal spoon, lightly fold just under half of the strawberries into the meringue mixture.
- Carefully place 8 evenly sized spoonfuls on the mixture onto a baking sheet lined with greaseproof paper.
- Place in a preheated oven, 100’c fan, and bake for 2 hours.
- Whilst the meringues are cooking make the strawberry purée. Place the remaining strawberries in a blender with 3 tablespoons water and the 20g icing sugar, process to a purée, then pass through a sieve to remove the seeds. Set aside.
- Place the cream in bowl and whip until soft peaks form. Set aside.
- When the meringues are cooked, remove from the baking sheet using a palette knife to transfer to a wire cooking rack, allow to cool before serving.
- Serve the meringues with the cream and purée on the side.
Banana Bread with Toasted Coconut
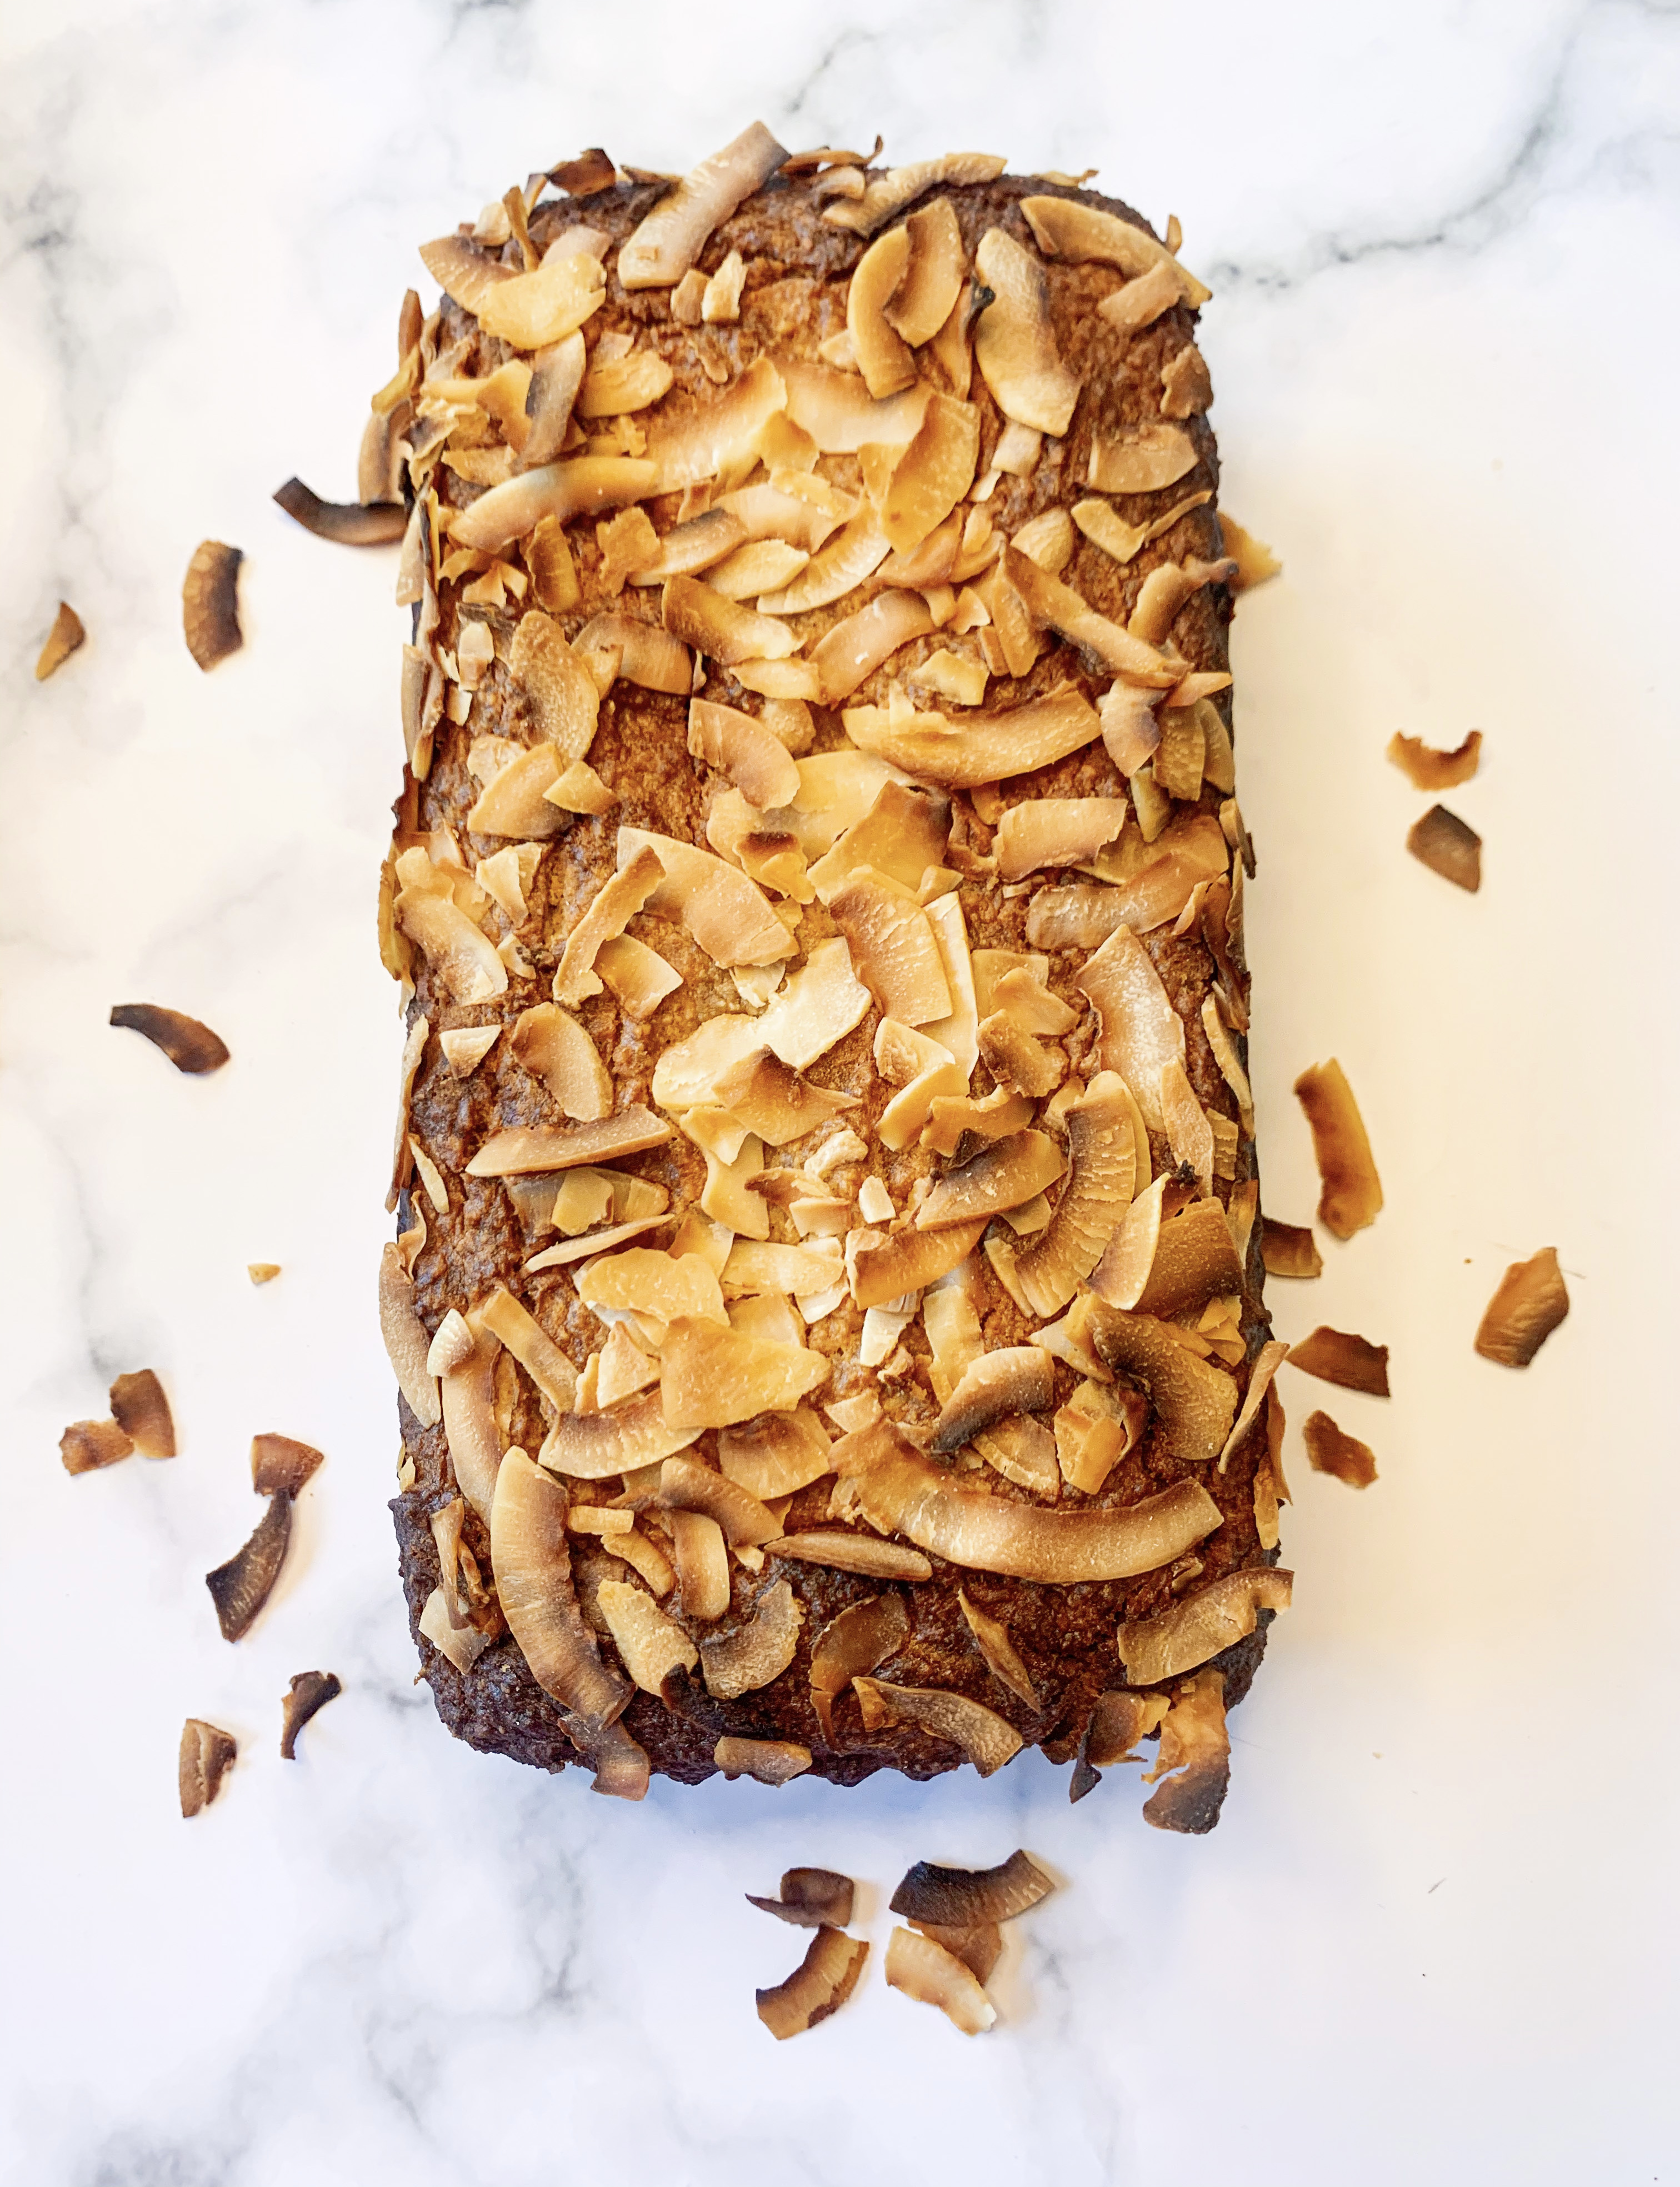
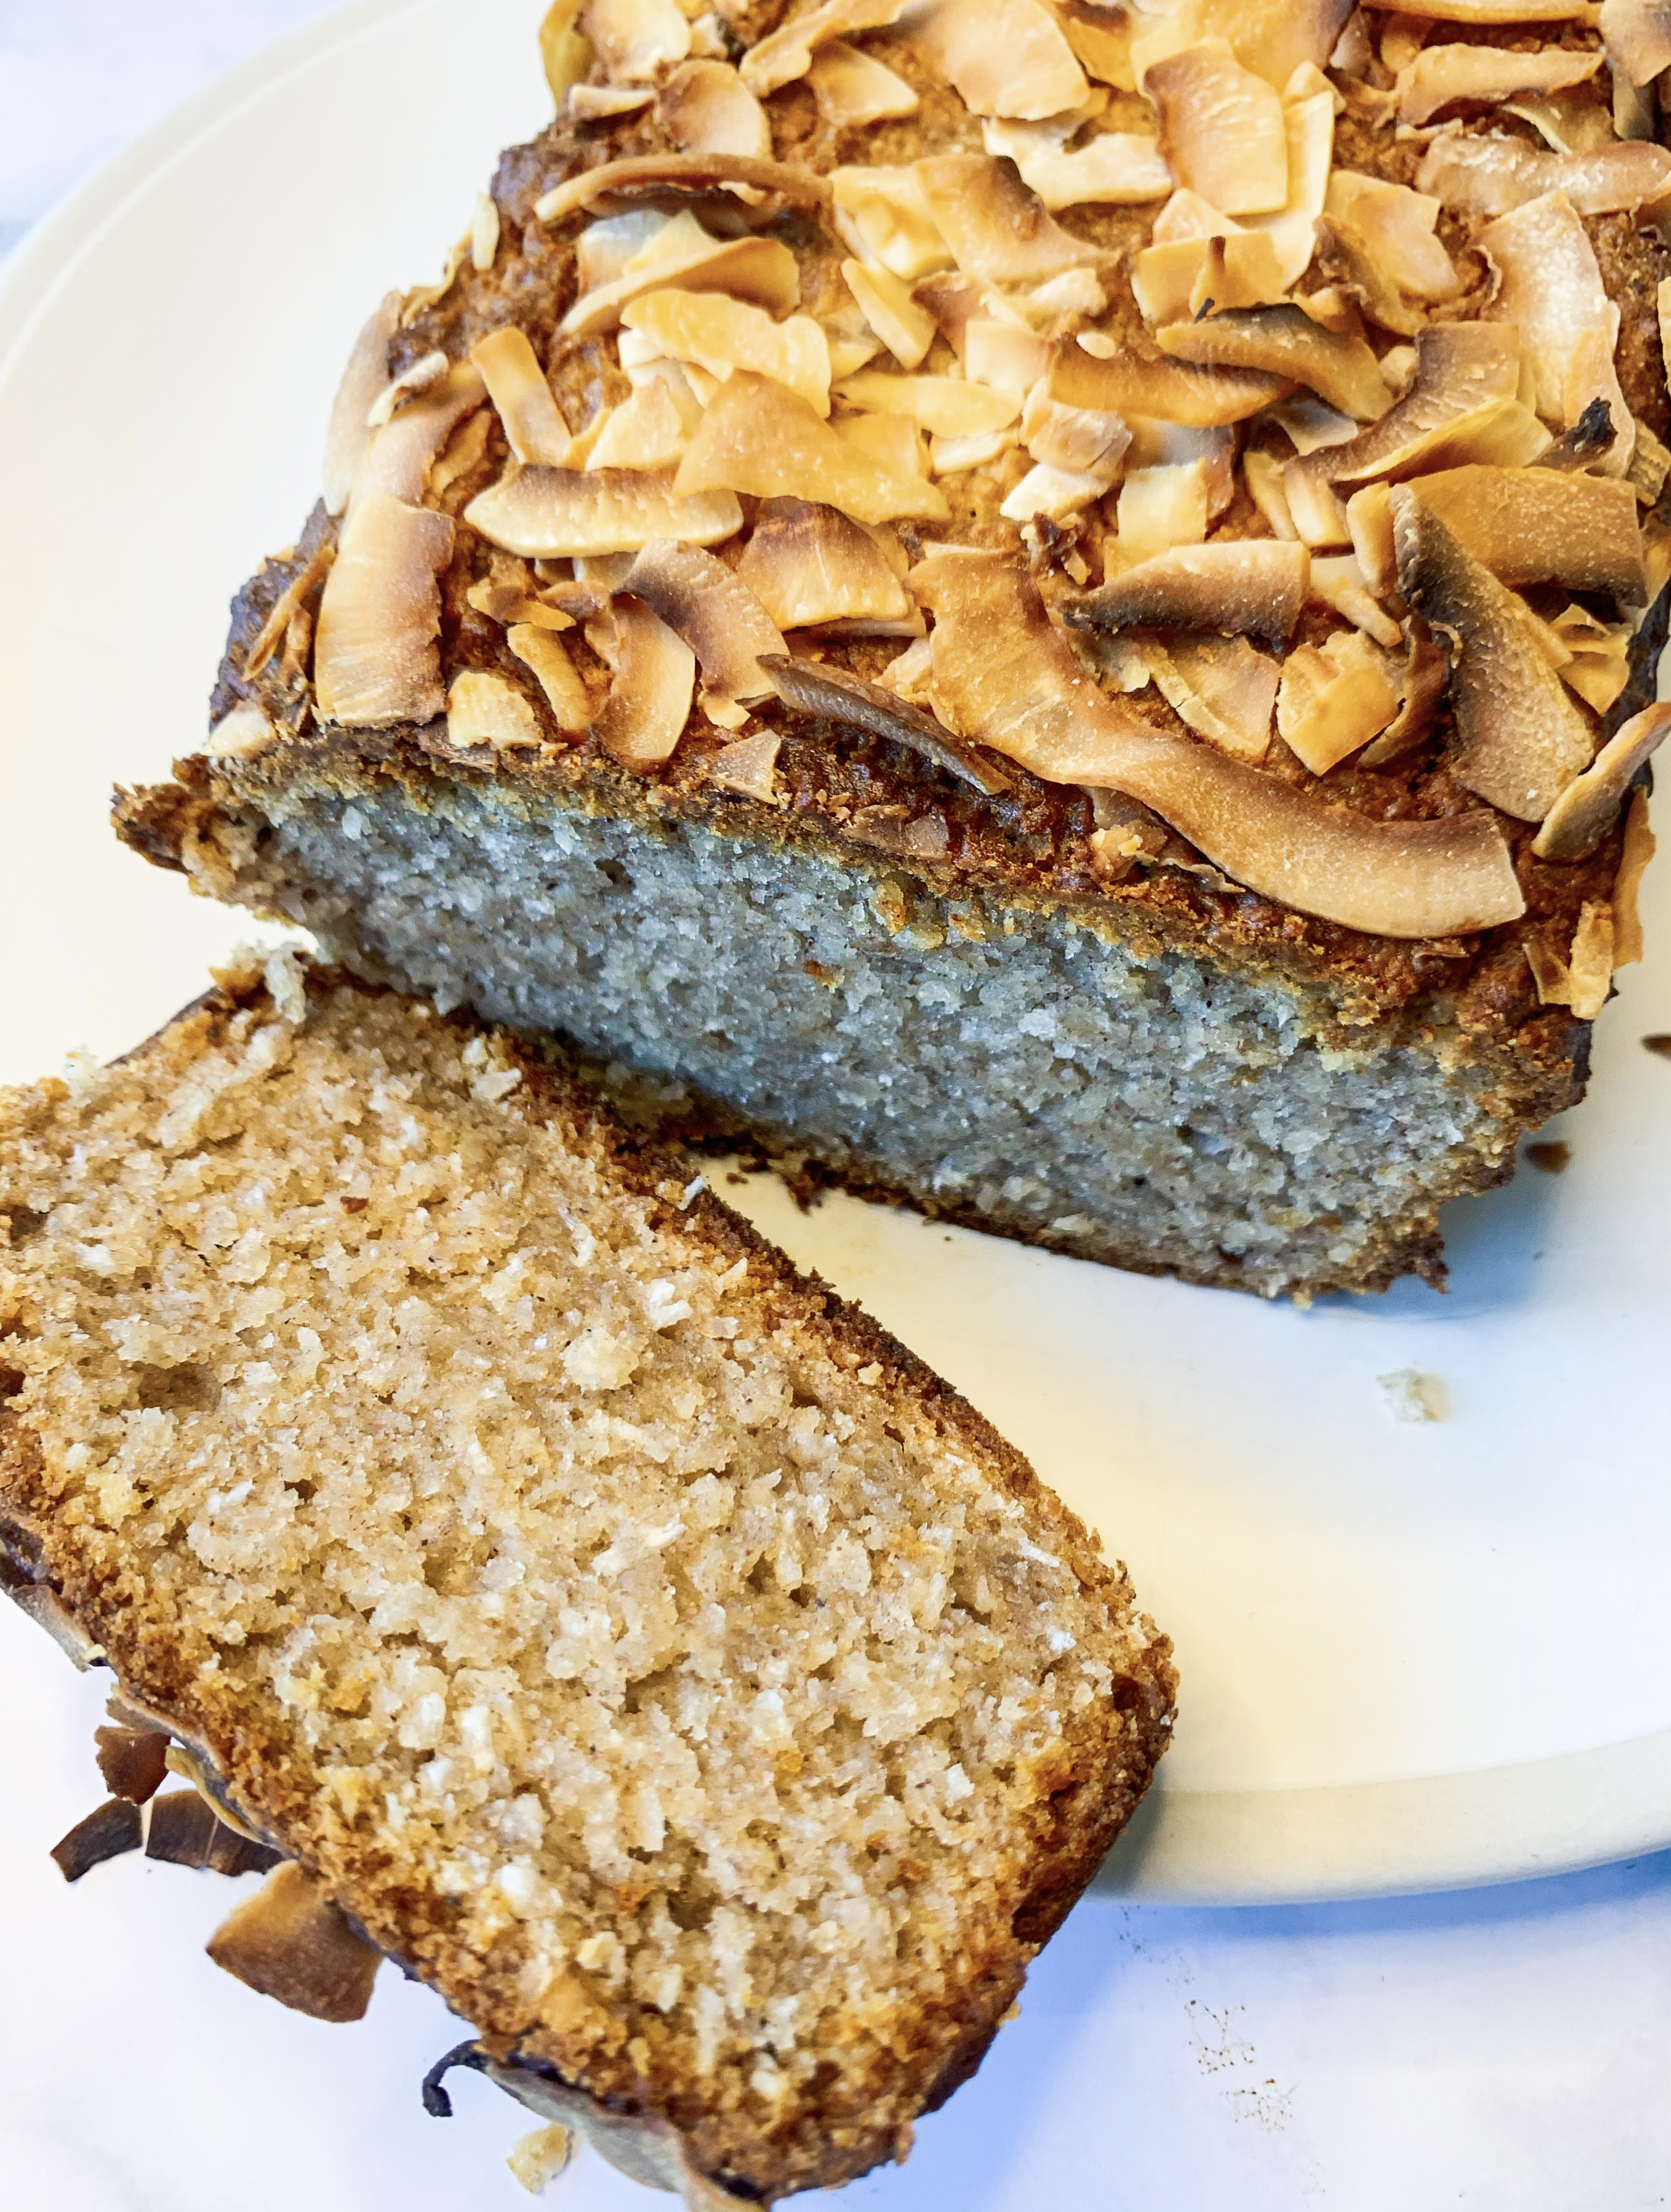
One of the best banana cakes that I have tasted was when I was holidaying in Antigua many years ago. Every morning, the little hotel where we were staying, would serve up an incredible banana bread – I was truly in paradise! Since then I have tried to emulate the recipe for this banana bread, which was deliciously dense and not too sweet – hence not only great for breakfast but also perfect for afternoon tea. However, the recipes which I made, although admittedly very tasty and moreish, never quite matched that one I had in ‘paradise’. I always blamed it on the lack of Caribbean sunshine – perhaps my London kitchen just didn’t have the ambience required?…But just recently, I found this recipe for banana bread in Meera Sodha’s cookbook ‘East’, Sohda uses both coconut and ground almonds in her recipe, I think that they are the secret to the elusive density that I had been searching for. Don’t be put off if you’re not keen on coconut, as the flavour of the banana overshadows it. It is great toasted and, for a really indulgent snack, unbelievably good spread with peanut butter…!! If you are gluten free, you will be pleased to know that it can be made perfectly well using gluten free flour (I use Doves).
100g coconut oil
100ml maple syrup
1 teaspoon vanilla extract
150g plain flour (gluten free if required)
100g ground almonds
150g desiccated coconut
2 teaspoons baking powder
1½ teaspoons ground cinnamon
1 teaspoon ground nutmeg
450g ripe banana flesh (about 4-5 bananas), cut into chunks
40g untoasted coconut chips
You will need a loaf tin, lined with baking paper or a loaf-tin liner
- In a small pan, heat the coconut oil until just melted then remove from the heat and stir in the maple syrup and vanilla, then set aside.
- In a bowl, whisk together the flour, ground almonds, desiccated coconut, baking powder, cinnamon and nutmeg.
- Put the banana chunks in a food processor and blitz to a smooth puree. Add the flour mixture and the oil and process until just combined, scraping down the sides to ensure all the mixture is incorporated.
- Pour the mixture into the lined loaf tin and spread out evenly, then sprinkle over enough coconut flakes to cover the top completely – pressing them lightly into the batter.
- Bake in a preheated oven, 180’c fan, for 1 hour, then turn the cake around and bake for a further 20 minutes.
- Take out of the oven and cool completely in the tin, brushing off any overly scorched coconut flakes.
- Serve in generous slices – it is delicious simply as it is, but do try it spread with peanut butter, or even toasted!
Coffee Crème Brûlée (Serves 6)
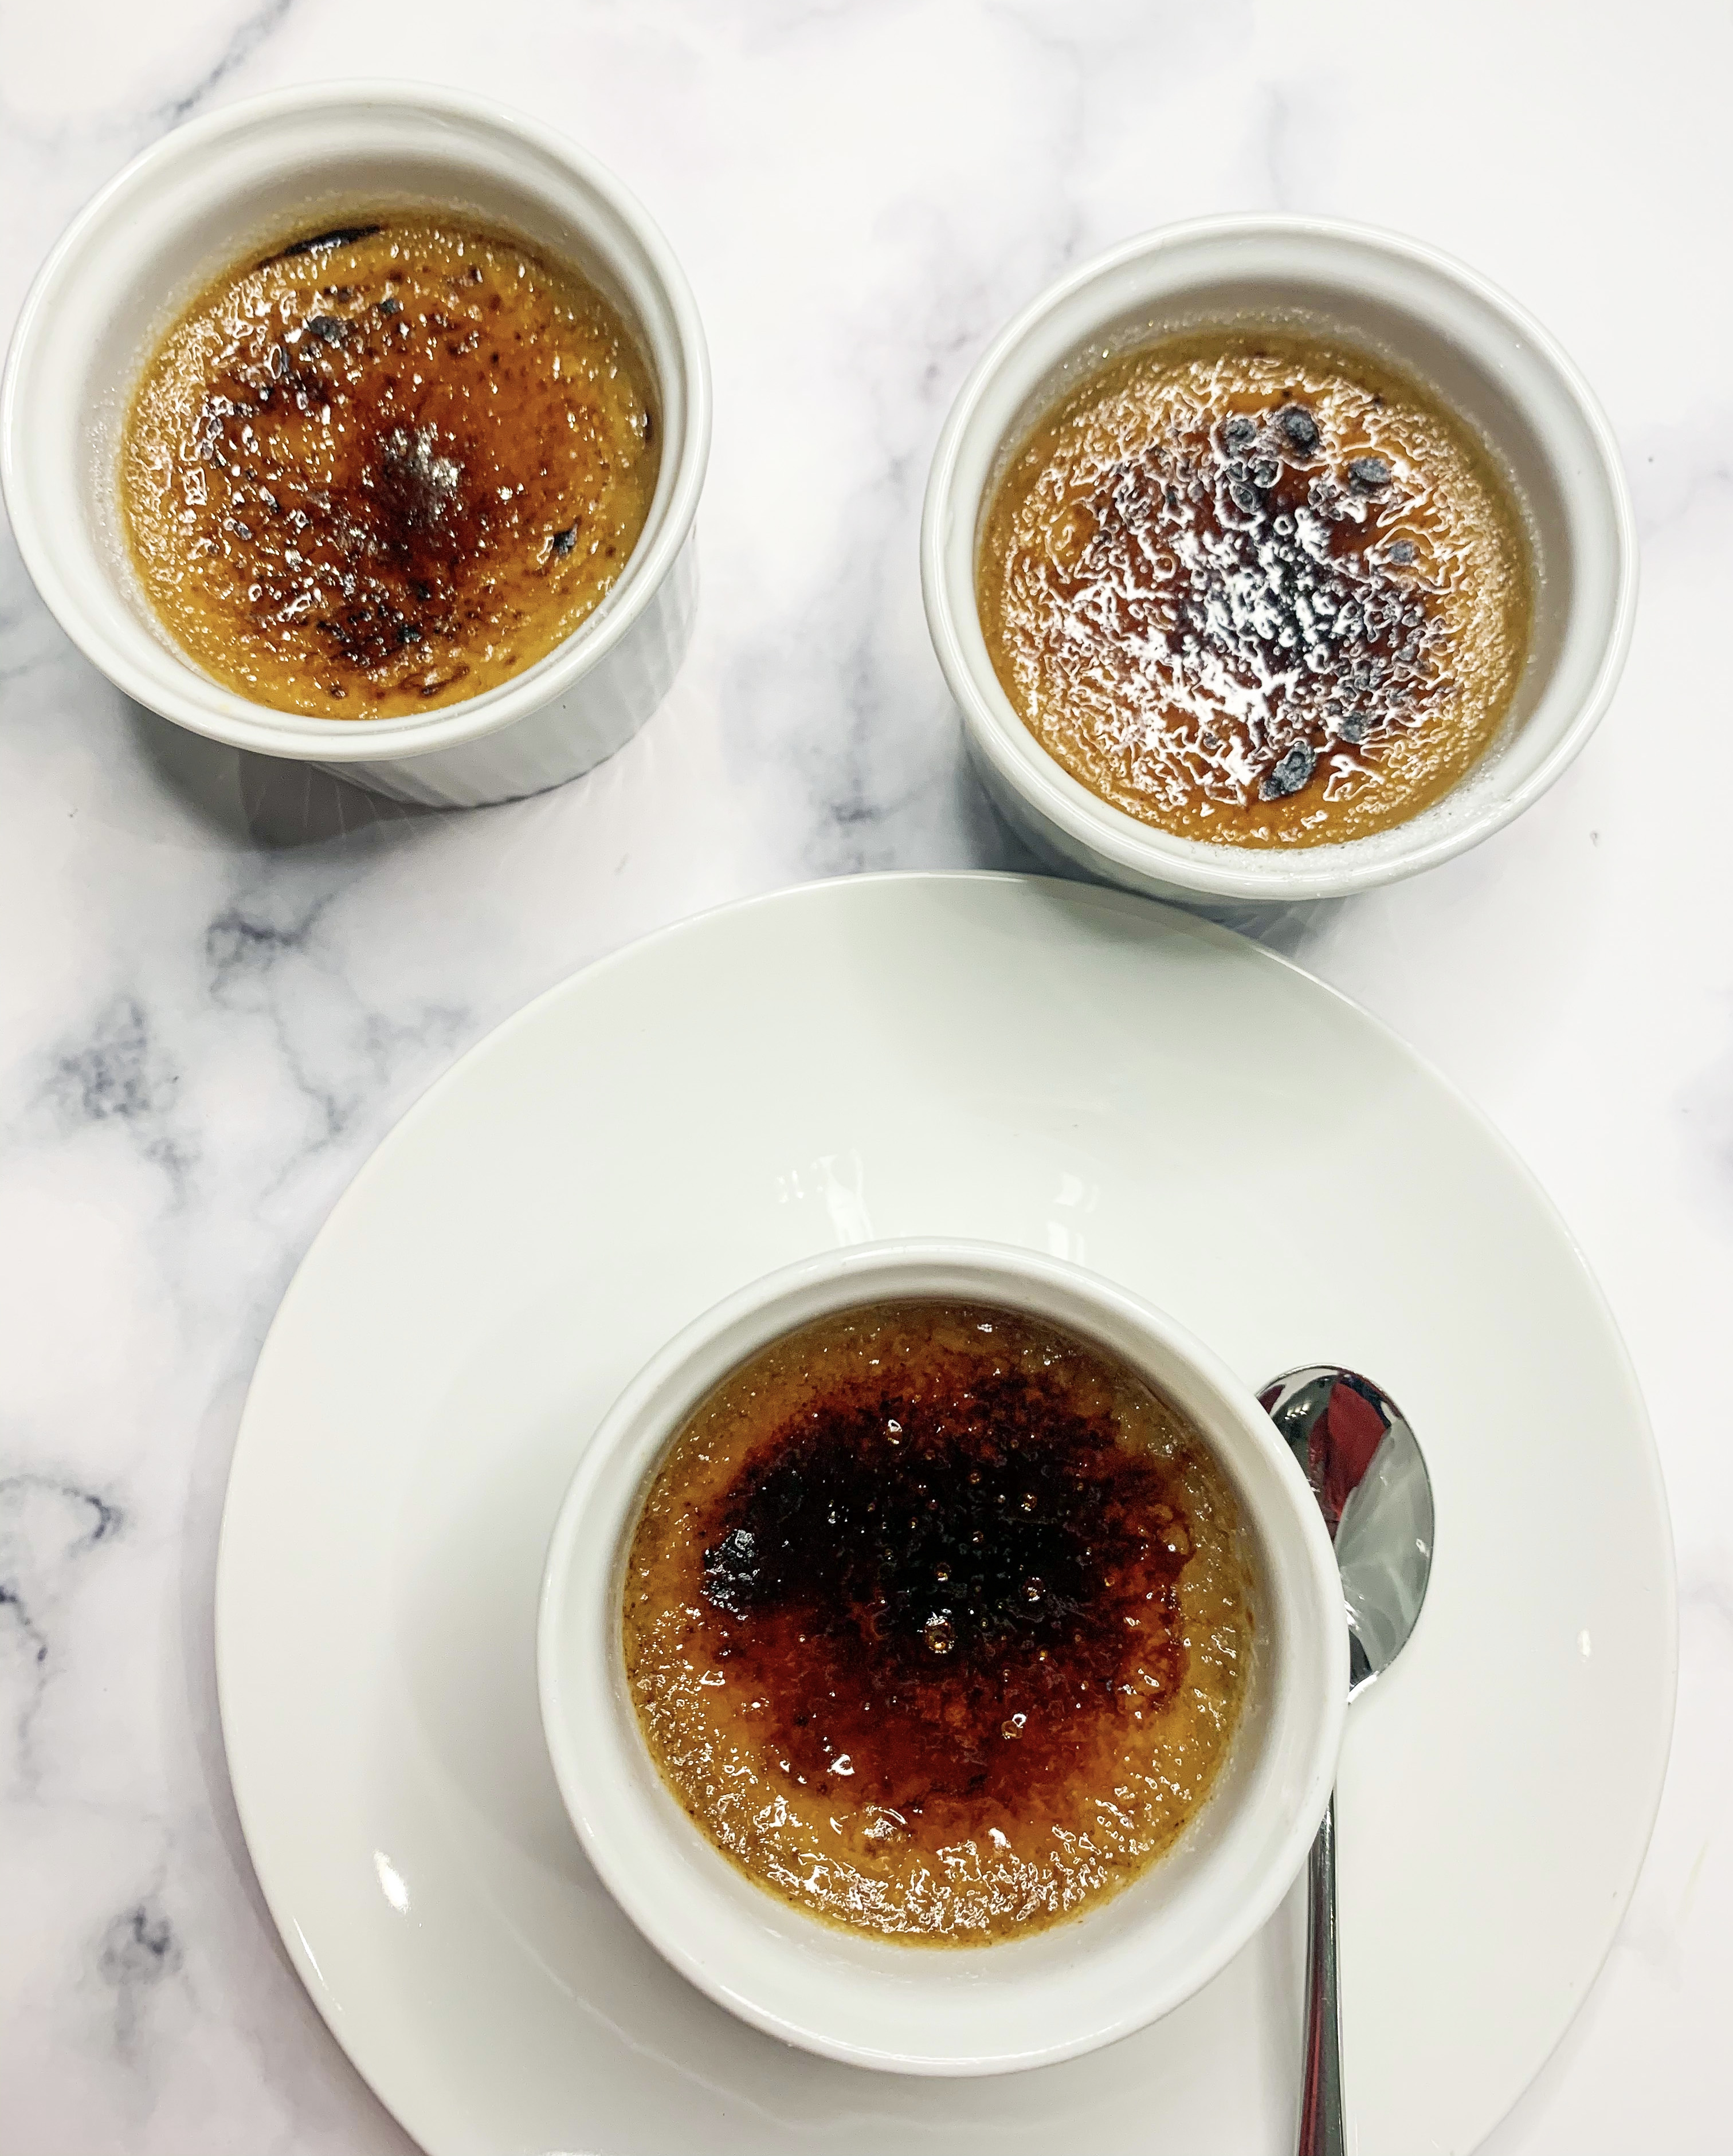
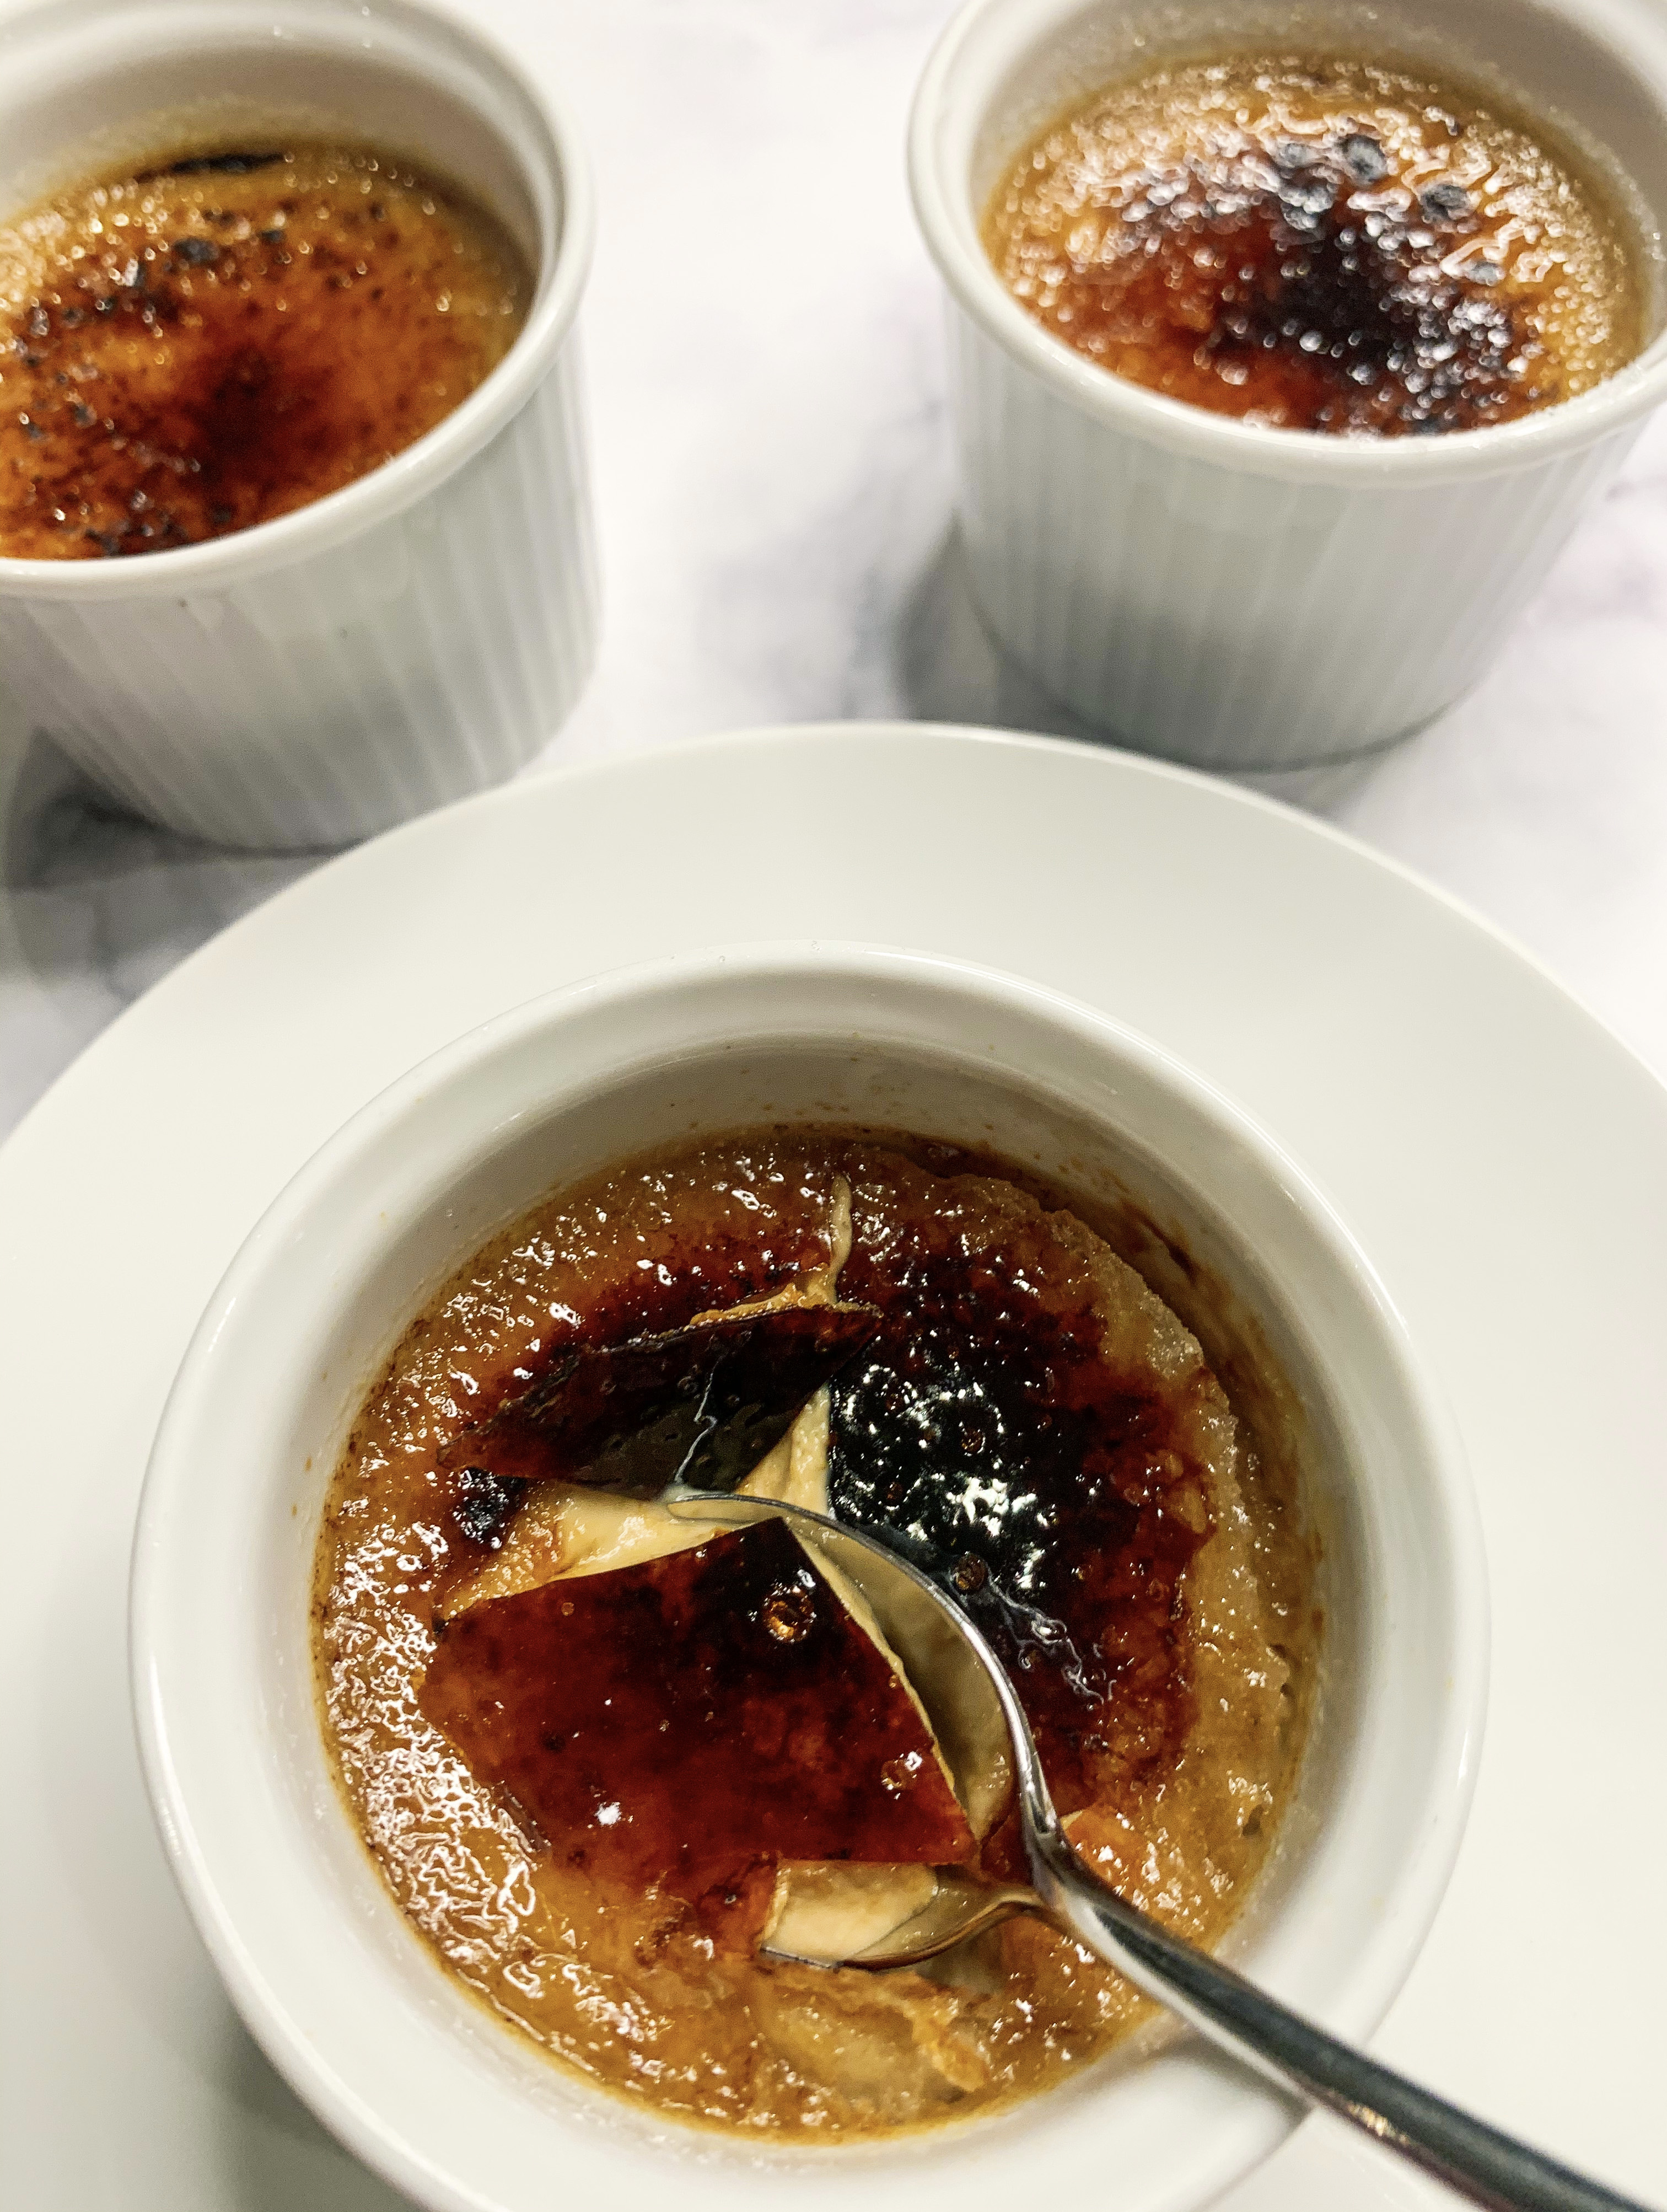
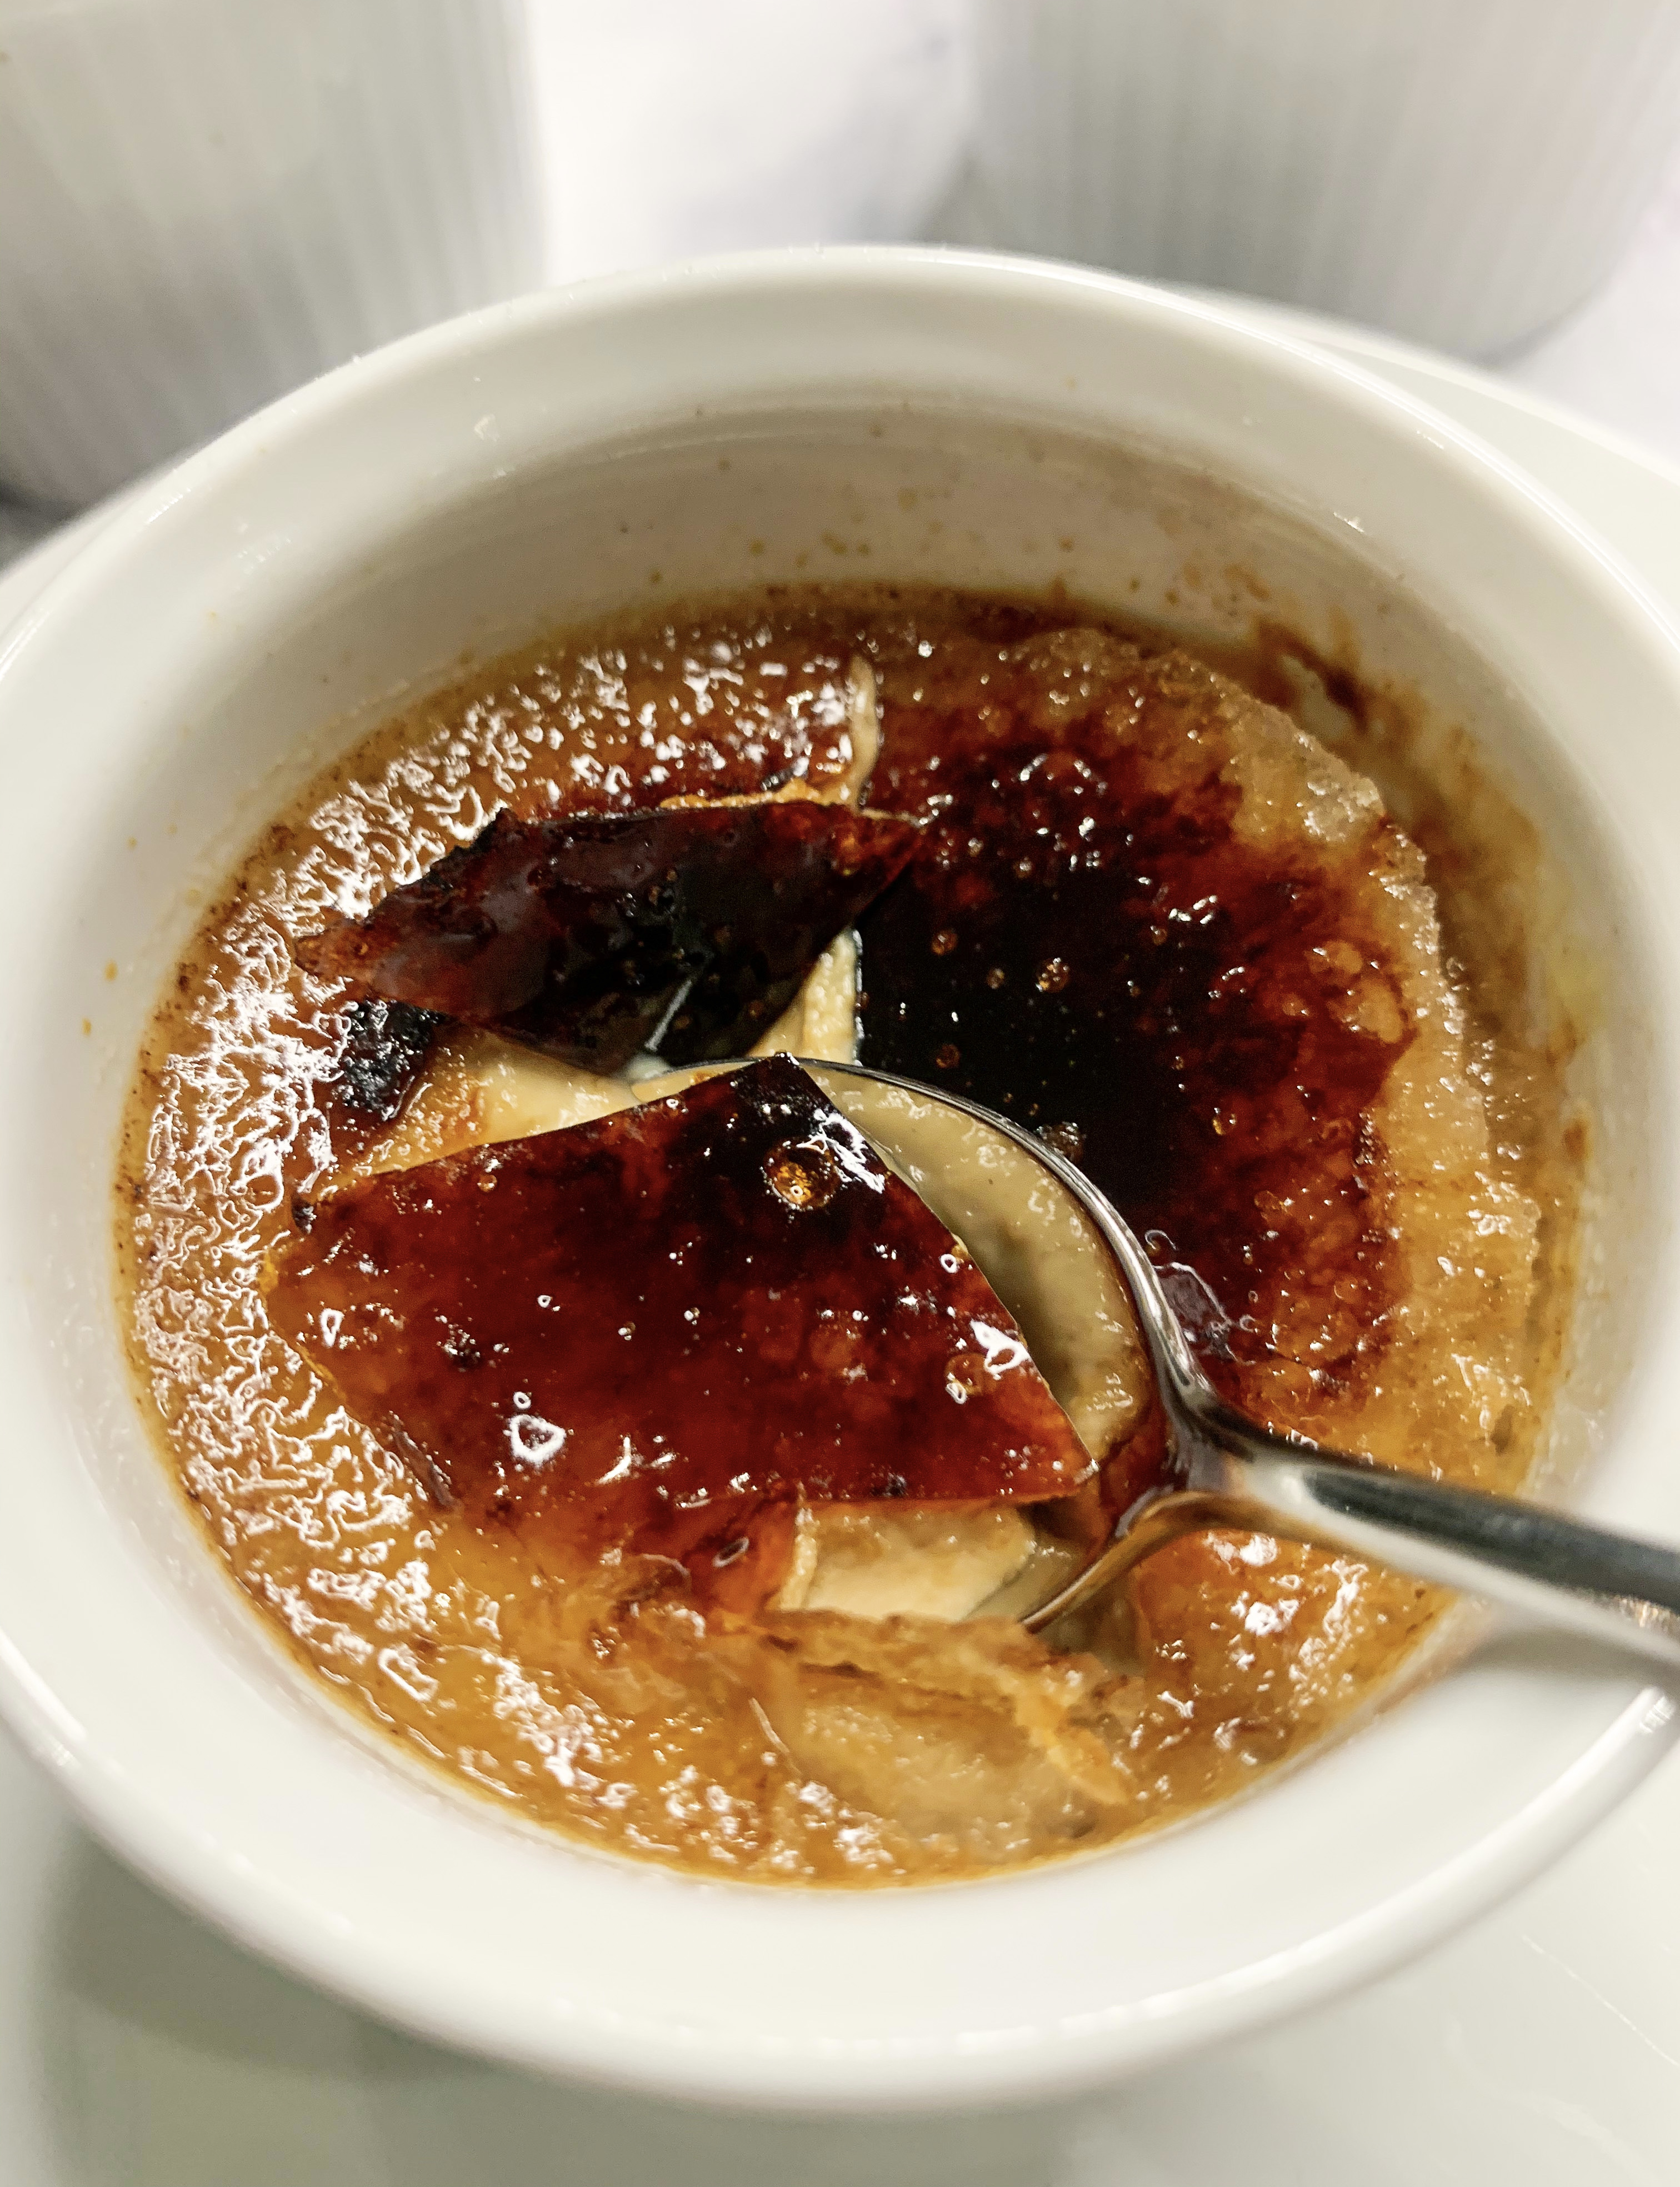
These aren’t just any old Crème Brulées, these are Coffee Crème Brulées, they are the perfect end to any meal; coffee and cream, what’s not to like?! There are quite a few recipes around for créme brûlées, but I think that this recipe from David Lebovitz’s cookbook ‘My Paris Kitchen’ (a book which is hugely entertaining not just for it’s wonderful recipes but also for the anecdotes of his life in Paris), is pretty much one of the best – it’s simple yet stylish, very Parisian!
I suggest you use a kitchen blowtorch to create the caramelised topping as it’s much easier than trying to get your grill hot enough to do it. Dare I mention the ‘Amazon’ word?…kitchen blow torches can be found there for around £12-14; they are a great addition to any kitchen and you will seriously appreciate the wonderful crunch they will give to your Brûlée!
330ml double cream
160ml whole milk
50g caster sugar, plus more for caramelising
Pinch of sea salt
4 large egg yolks
1 tablespoon instant espresso powder
2 teaspoons of Kahlua or other coffee flavoured liqueur
You will need 6 ramekins with 125ml capacity
- In a small saucepan over a medium heat, warm the cream, milk, sugar, and salt until the sugar has melted.
- In a bowl, whisk together the egg yolks. Gradually add the warm cream mixture, stirring rather than whisking, as you don’t want to create too much froth.
- Mix 3 tablespoons of the cream mixture to the espresso powder, then return it to the bowl with the rest of the cream mixture, and mix to fully incorporate (I find that by adding it in this way it is easier to dissolve).
- Use a sieve to strain the coffee and cream mixture into large jug, then stir in the Kahlua.
- Pour the mixture between 6 ramekins (125ml).
- Place a tea towel over the base of a roasting tin (this will stop the ramekins from slipping), then place the ramekins in the tin. Pour enough boiling water into the roasting tin so that it comes halfway up the sides of the ramekins. Cover with foil.
- Place the roasting tin in a preheated oven, 150’c fan, cook for about 40-45 minutes until they are just about set but still a little ‘jiggly’.
- Remove the ramekins to cool on a rack. When cool, refrigerate until ready to serve.
- To serve, sprinkle with a thin, even layer of sugar (about 1½ teaspoons), then use a kitchen blow torch to caramelise the sugar – you may need to lift the ramekin to swirl the caramel evenly across the top. Serve immediately.
Chocolate Nemesis
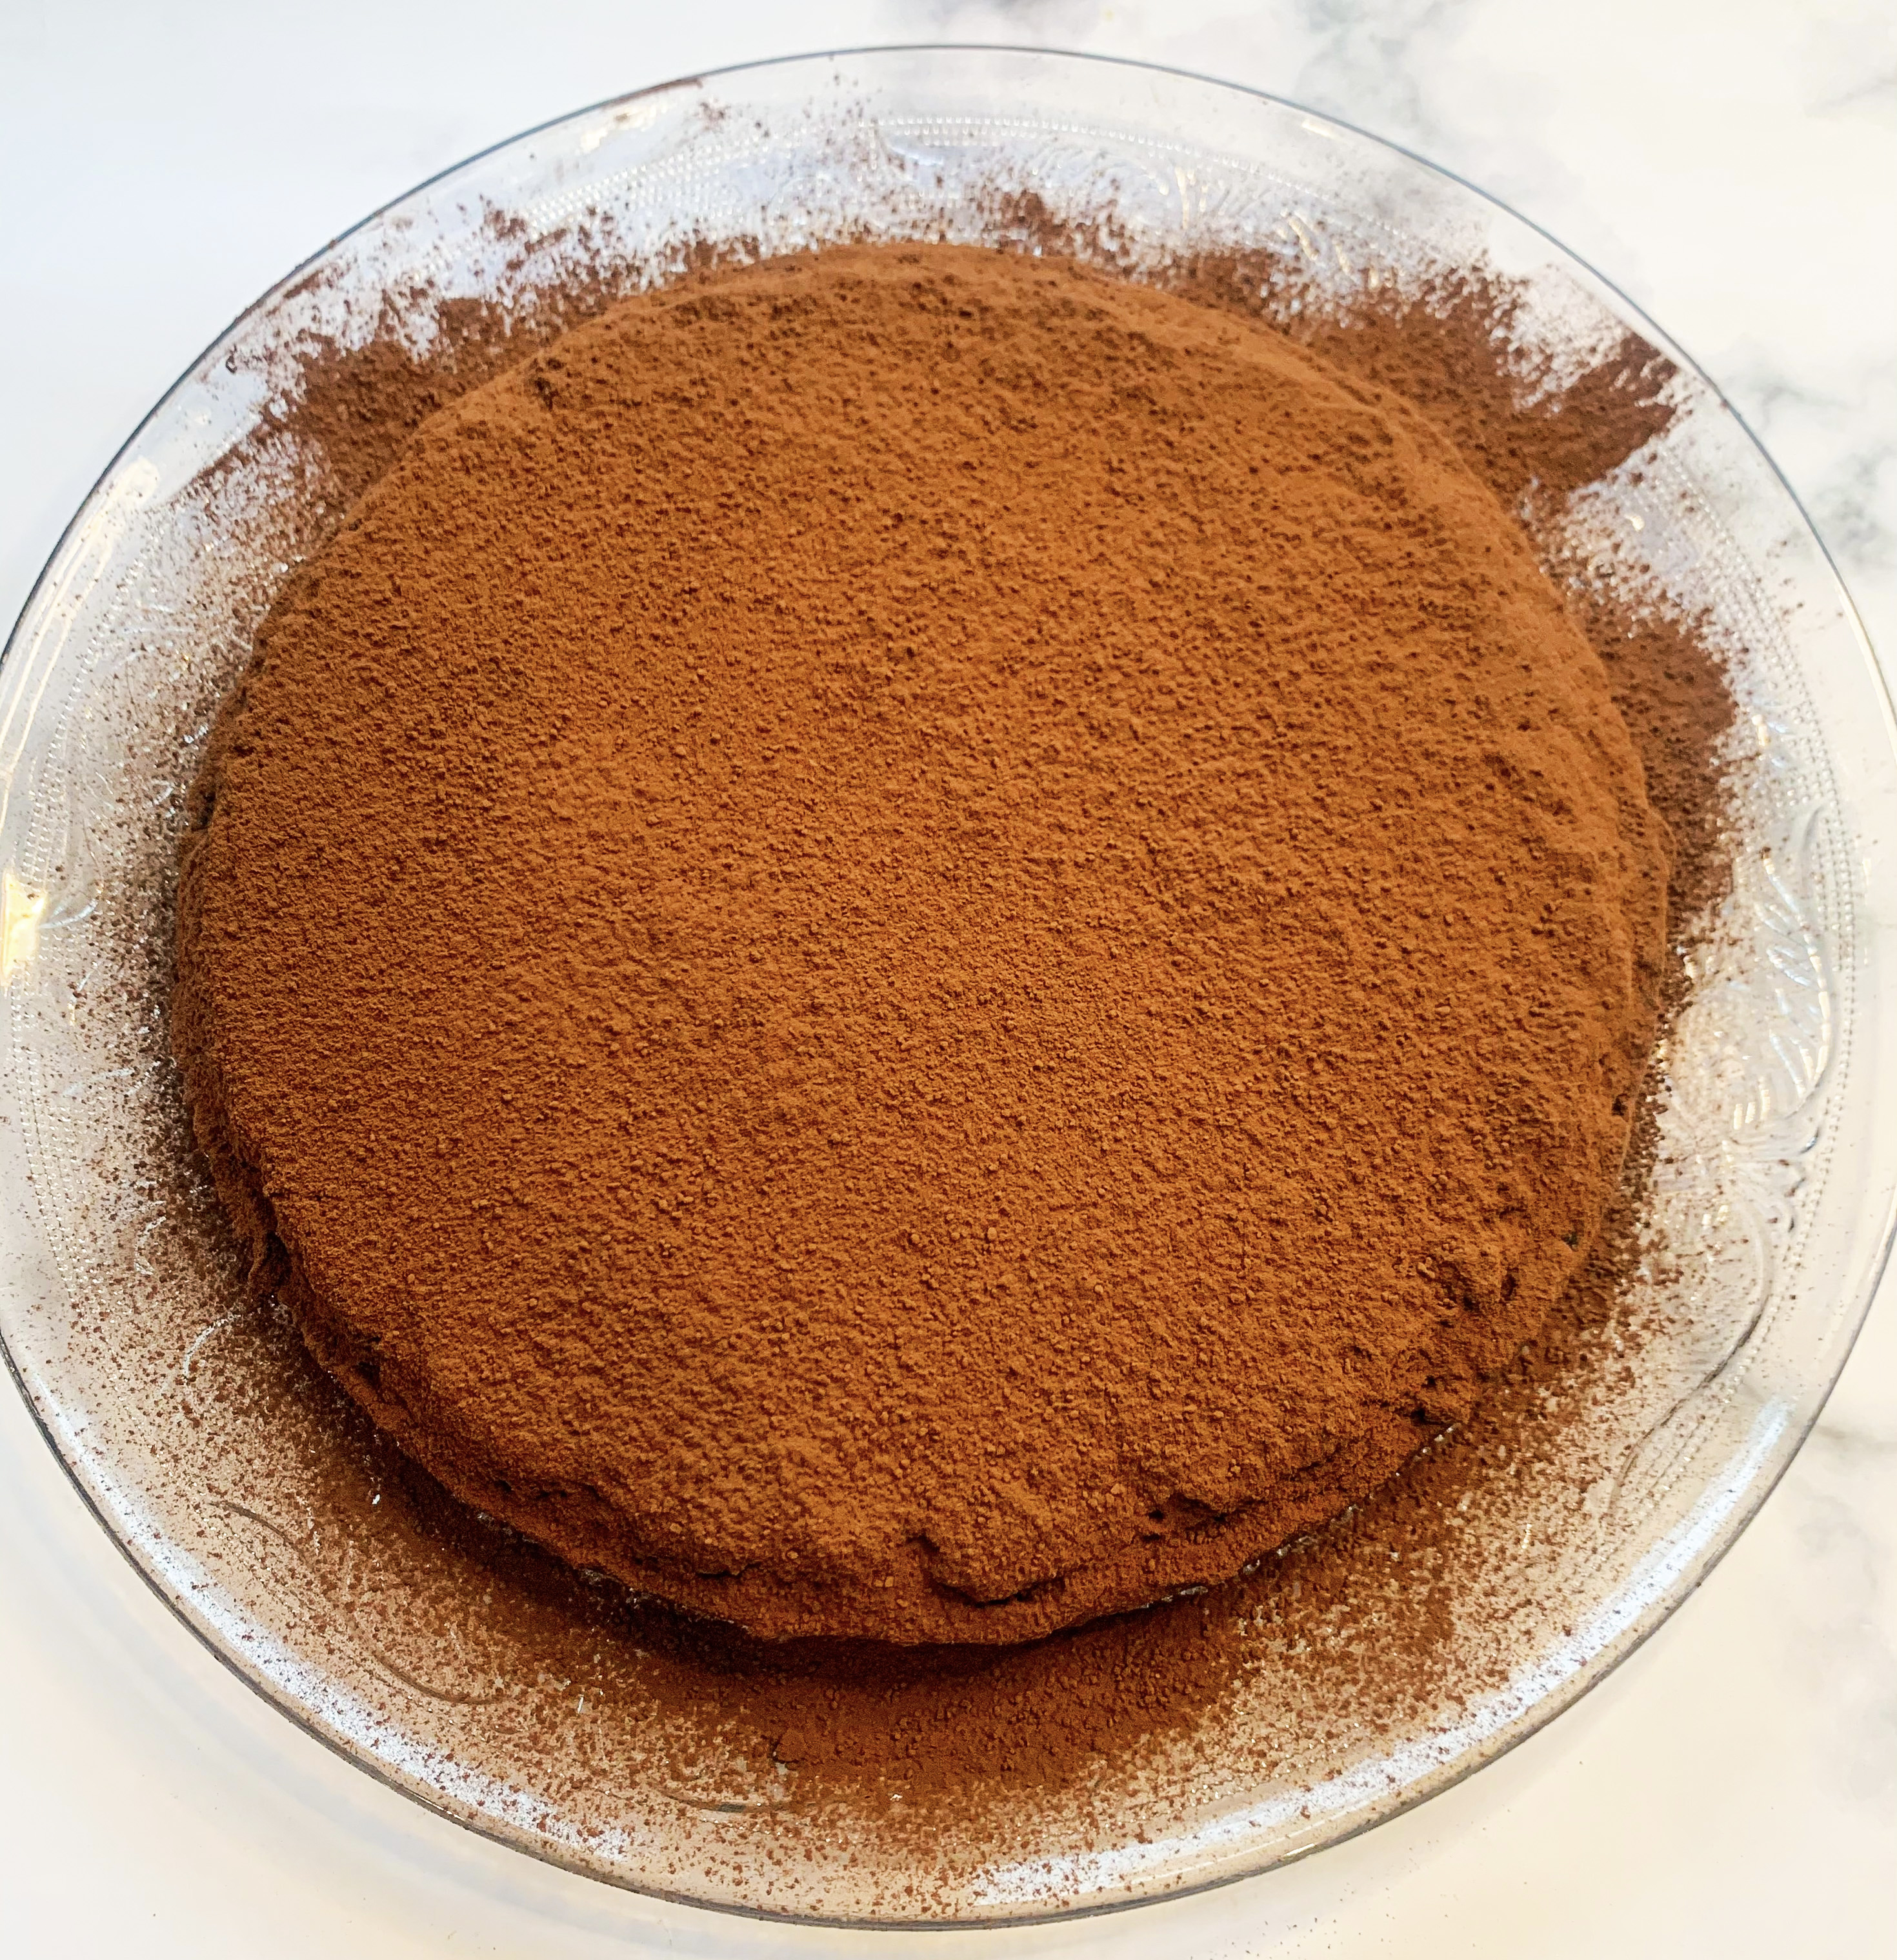
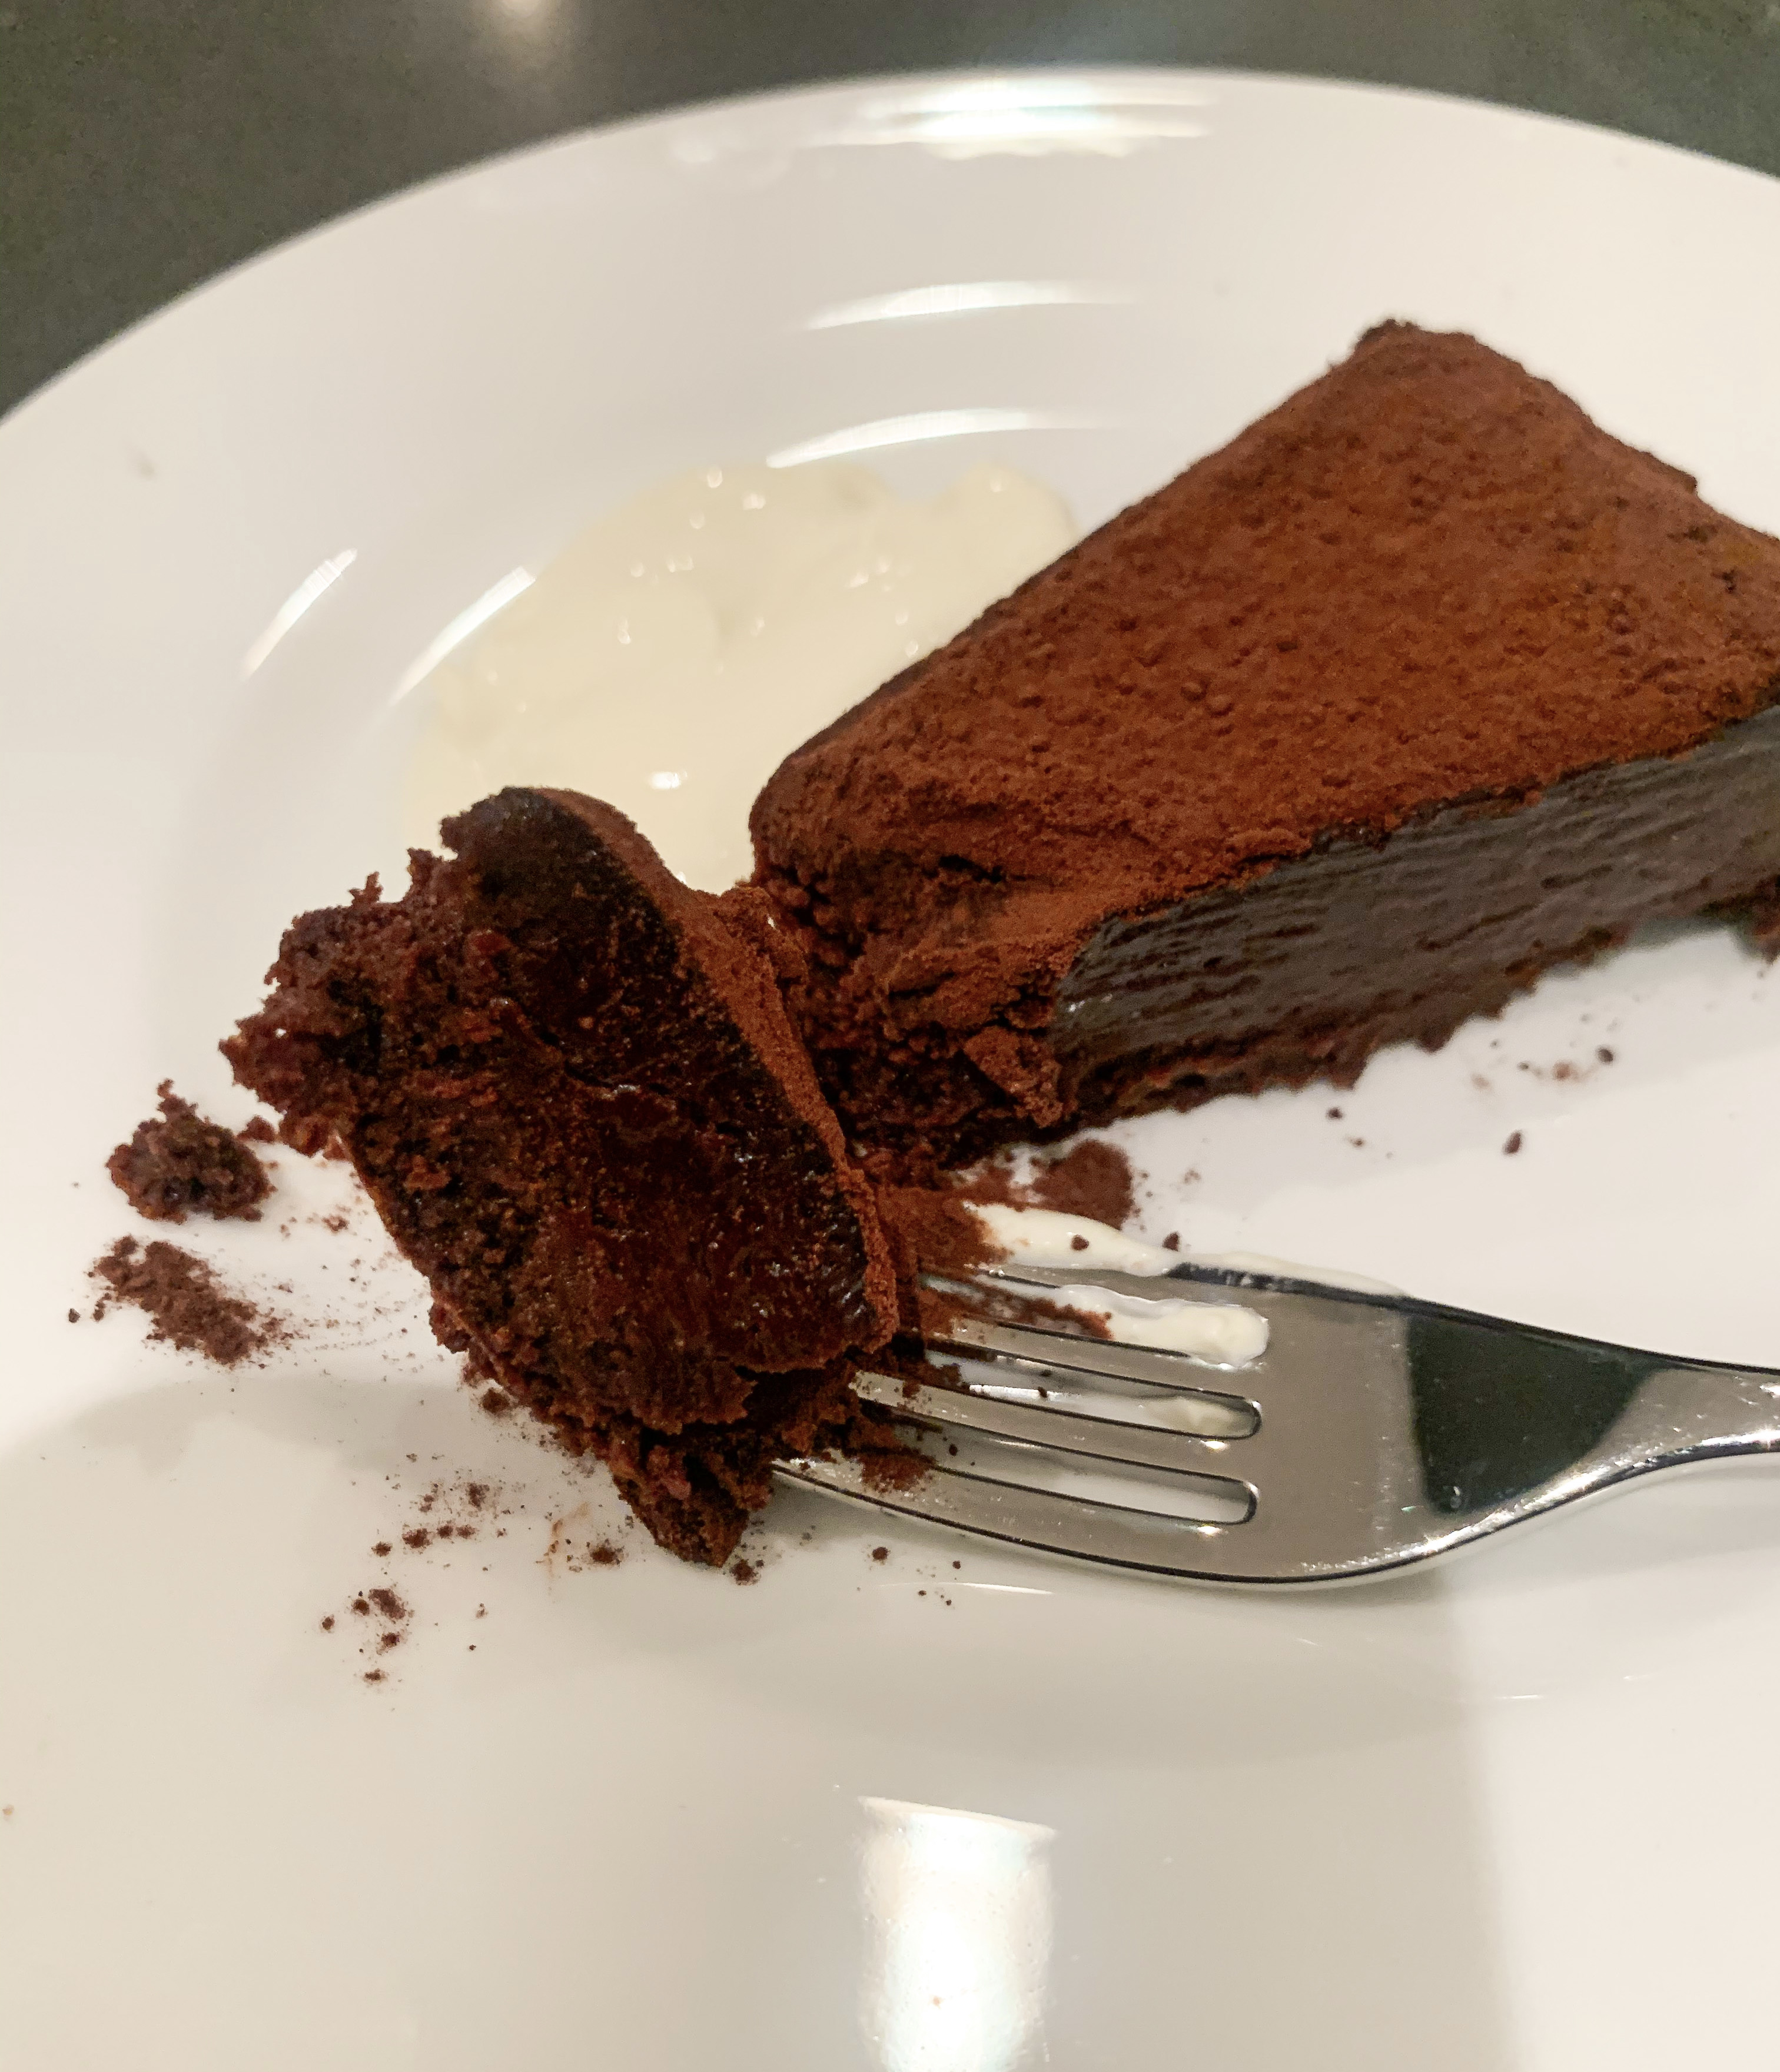
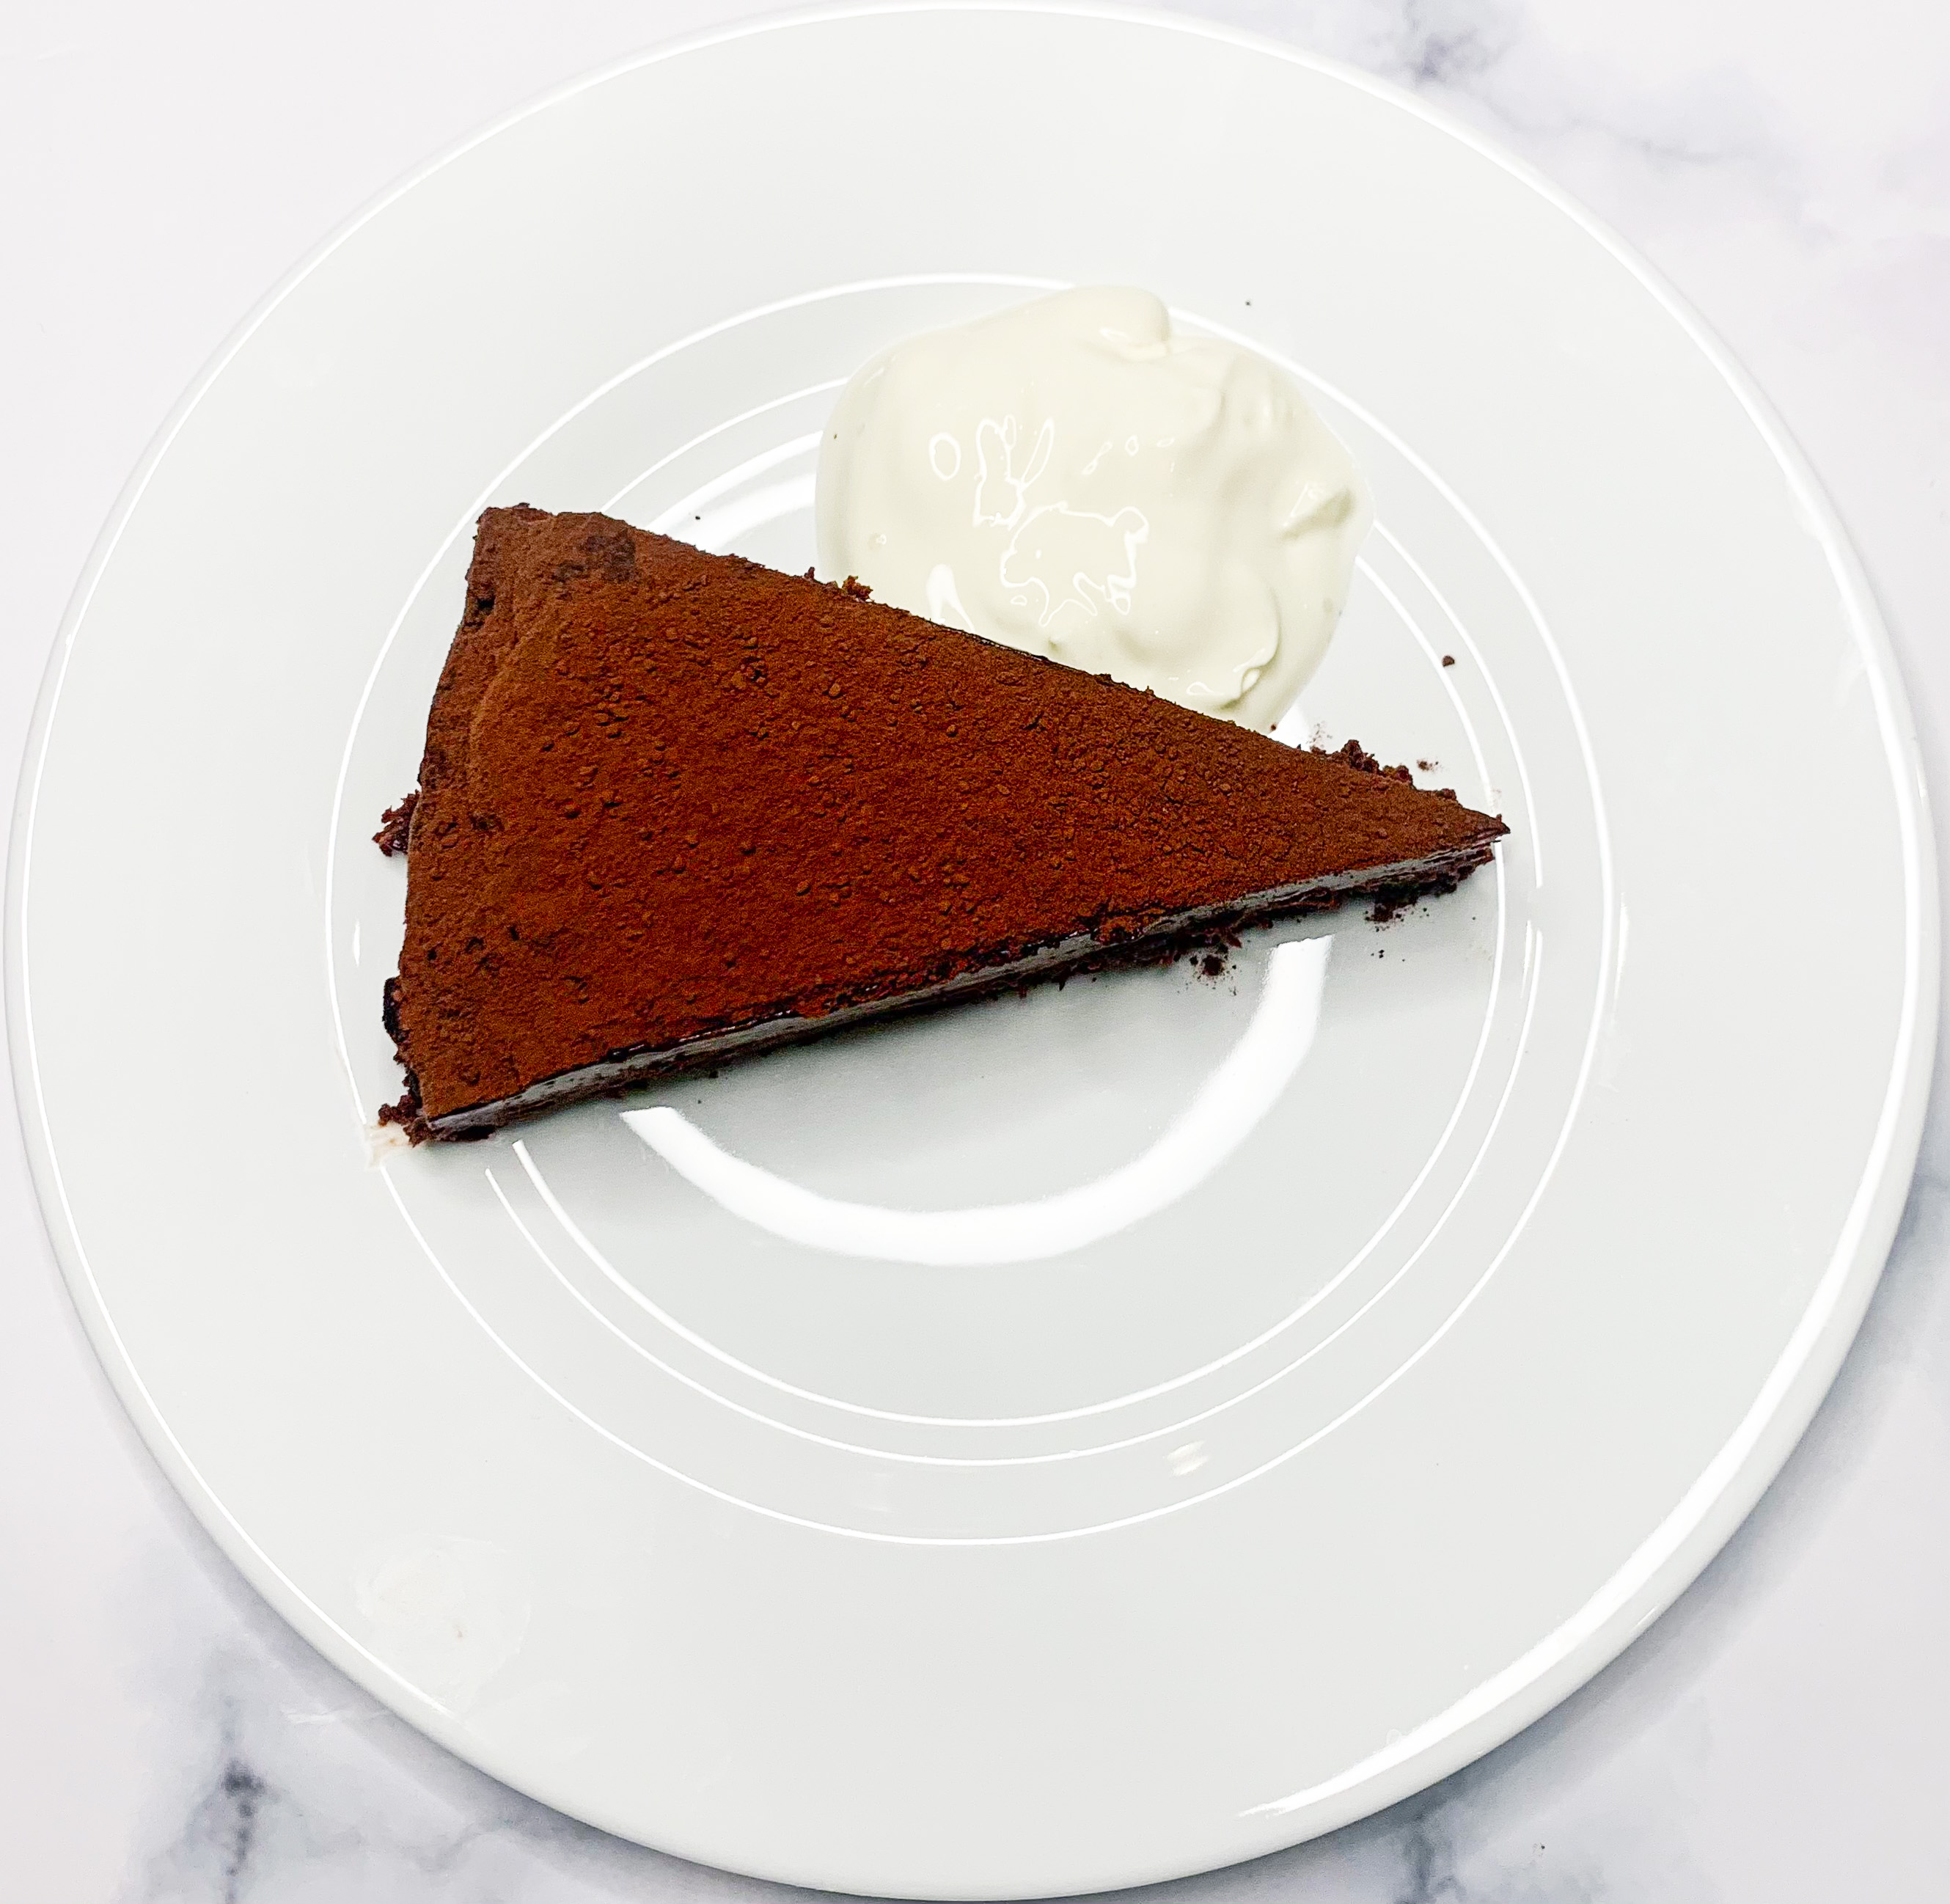
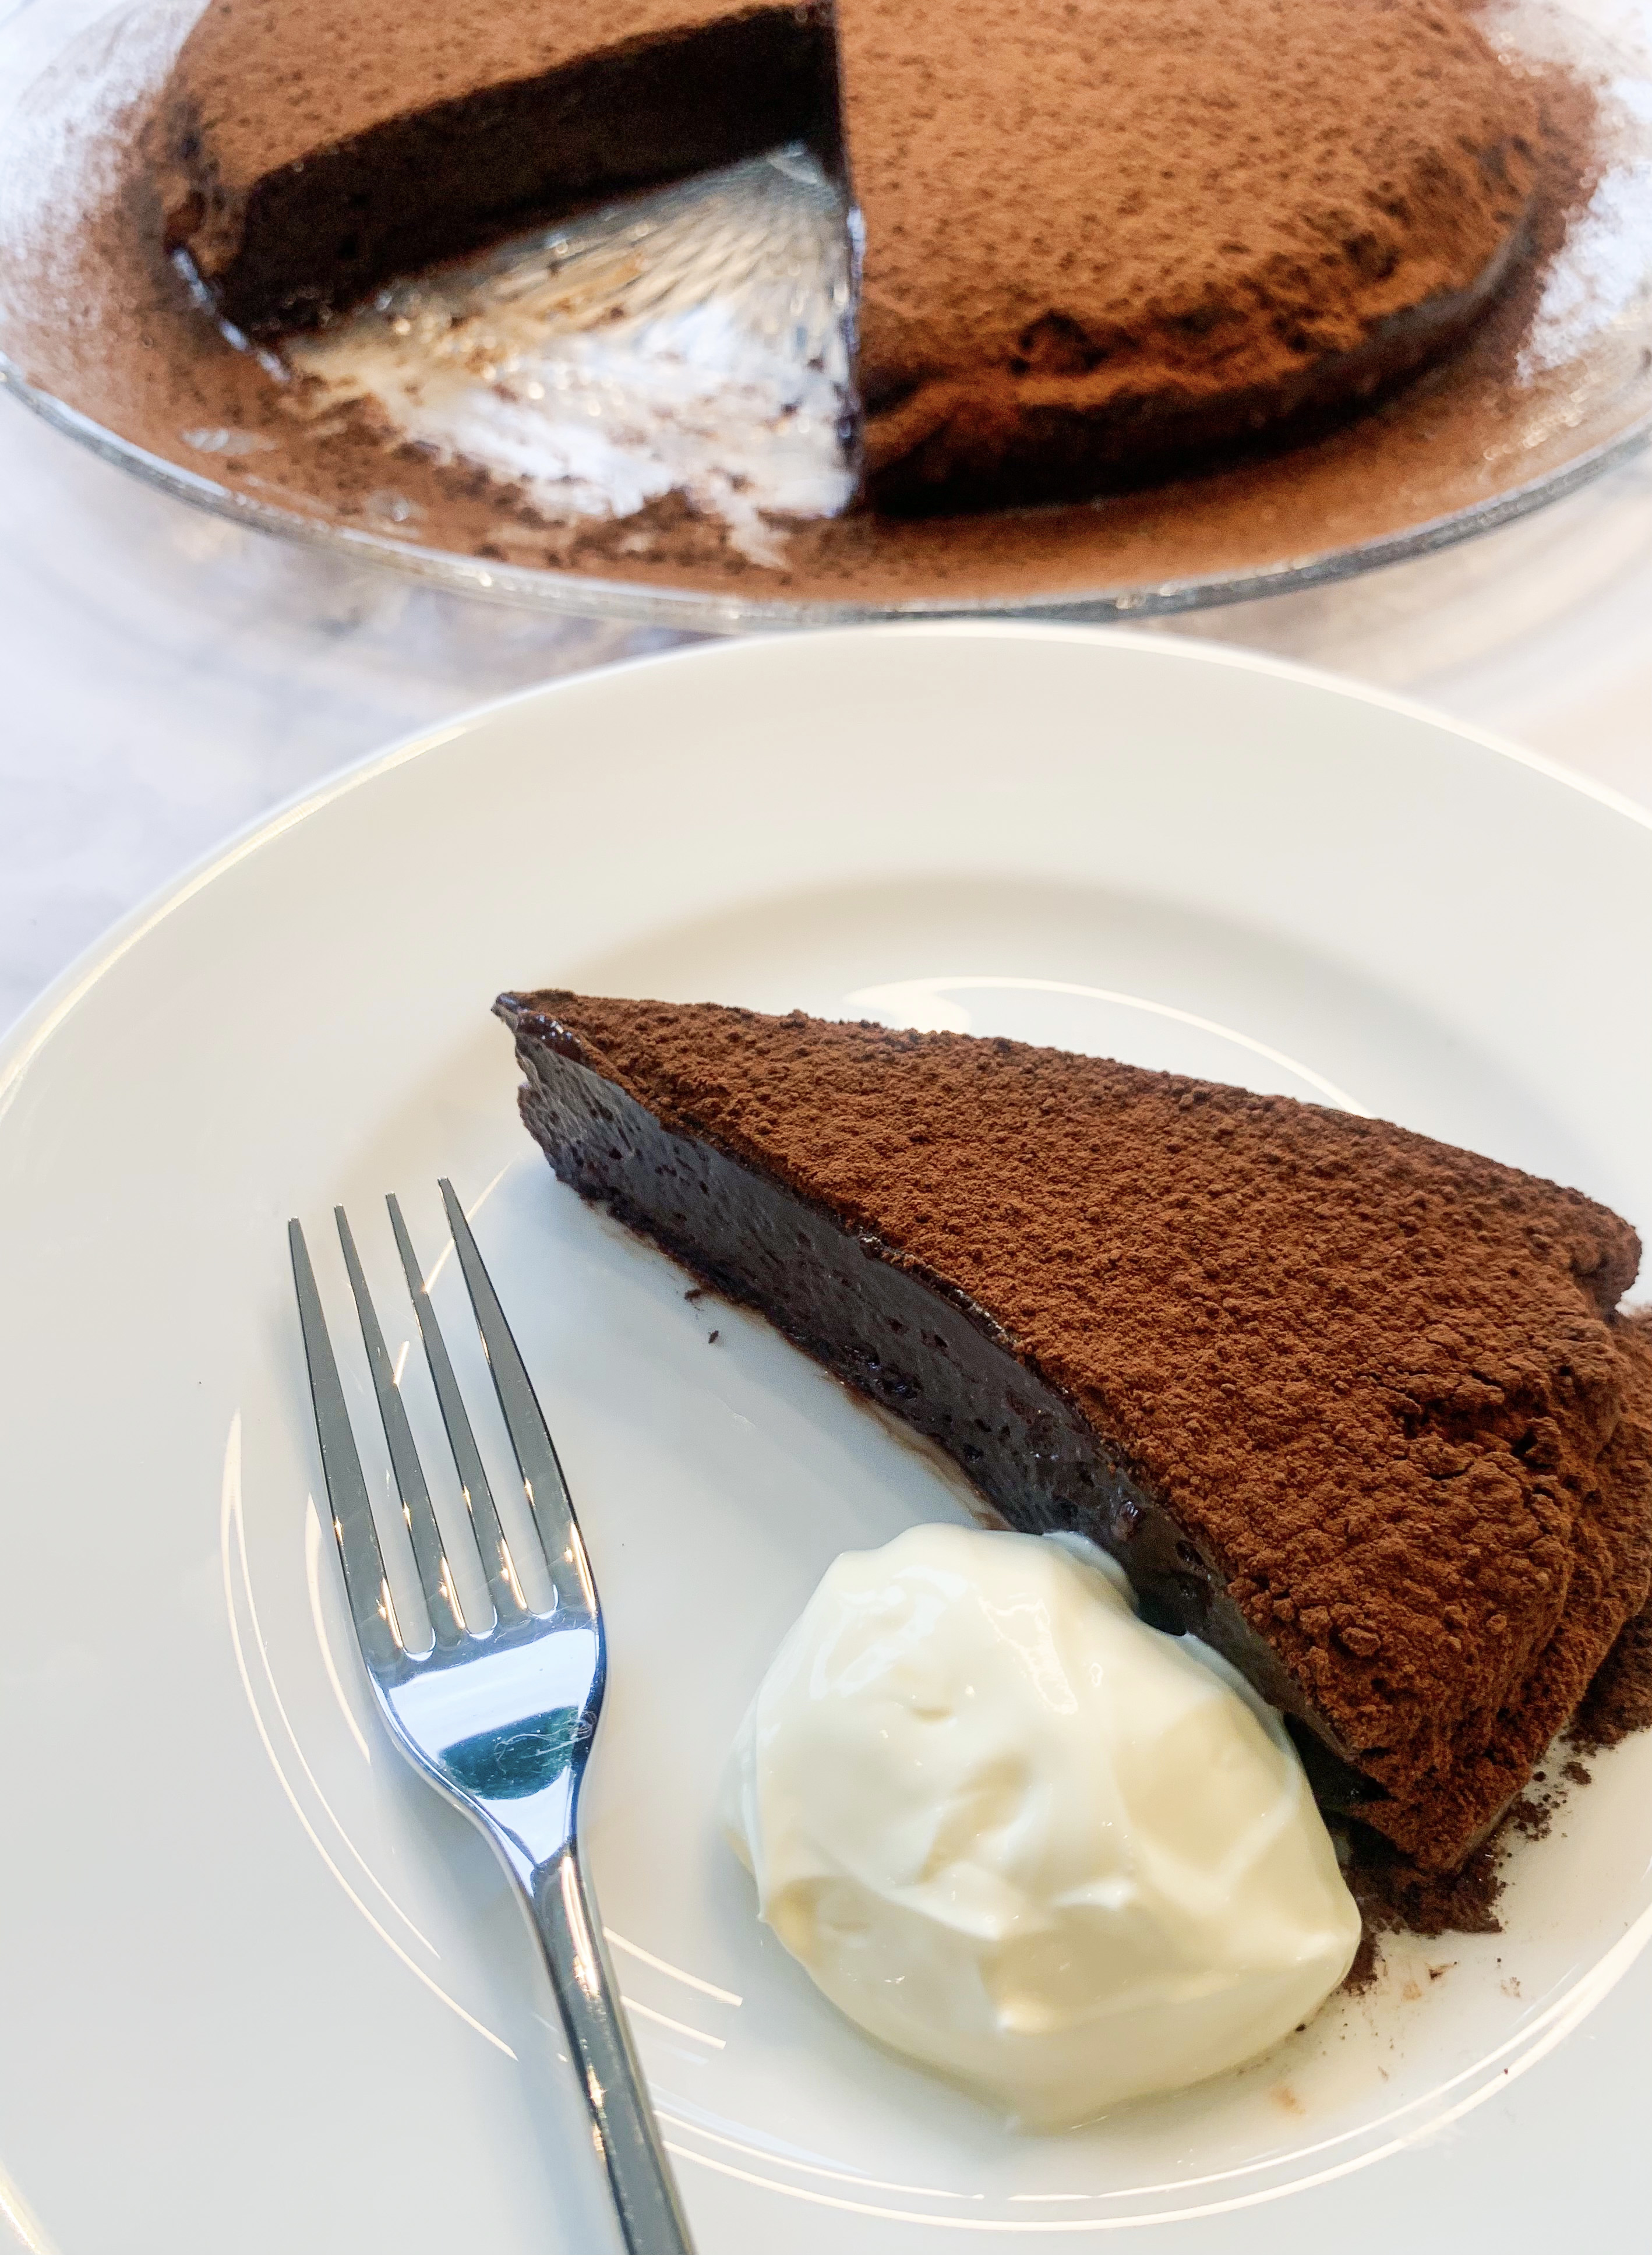
This is the recipe for the River Cafe’s legendary chocolate cake. If you have been fortunate enough to eat at the restaurant, this is probably the dessert you would have chosen, it is famed for its rich mousse-like consistency, believe me you will be in heaven when you taste this! Over the years, I have found various recipes claiming to be the ‘River Cafe Nemesis’ but the discrepancies between the baking times, ingredient amounts and cooking temperatures have made the winning recipe elusive – even the recipe published in their ‘River Cafe Cookbook’ had something ‘missing’ (and called for 10 whole eggs!). So, I must admit that I had given up trying to find it…until just recently, when I discovered that during lockdown the River Cafe was selling the cake online for £60 – yes exactly, not cheap! It was a bit of a ‘red rag to a bull’ – I was determined to find the recipe so I could make it myself. This time, on my google search I discovered a ‘YouTube’ video of a River Café chef making the cake, and although they didn’t exactly give you the ingredients or the cooking times in a straightforward manner, it was enough to be able to copy the recipe – and yes, I think I have absolutely found the winning one, what’s more, it is very easy to make and is gluten free; it only needs four ingredients plus a little water…you will thank me for sharing this!…
The cake, as I mentioned, has a very soft mousse-like consistency, so it is better served from the fridge, in this way it will be firmer and easier to slice. Serve it with a dollop of crème fraiche, you really do need this to cut the chocolate as it is very rich!
350g dark chocolate (I use Lindt Excellence 70% Cocoa Dark Chocolate)
225g butter (plus a good knob to grease the tin)
5 eggs
300g caster sugar
125ml water
Cocoa powder to decorate (optional)
(24cm cake tin and a roasting tin, to use as a bain marie)
- First of all prepare your cake tin, generously butter the tin and line the base with baking paper.
- Place the chocolate and butter in a heatproof bowl over a pan of gently simmering water and melt together until smooth.
- At the same time place 100g of the sugar in a small saucepan with 125ml of water, heat gently to melt the sugar to form a sugar syrup.
- Meanwhile, beat the eggs and 200g of the remaining sugar with an electric mixer until the mixture has quadrupled in size – this can take up to 10 minutes.
- Add the hot syrup to the melted chocolate mixture and stir to combine.
- Now add this chocolate syrup to the eggs, continuing to beat as you do so, until completely combined.
- Pour the batter into the prepared cake tin.
- Put a folded tea towel onto the bottom of the roasting tin (this will stop the cake tin from slipping) and place the cake tin in the roasting tin.
- Pour boiling water around the cake tin, so that it comes half way up its sides.
- Bake in a preheated oven, 120’c fan, for at least 1 hour, until the cake is just set on top and the sides come away from the edge when gently pulled. Leave to go completely cold in the bain marie (about 2 hours).
- Carefully remove from the tin, the base will be the top of the cake. If using, sprinkle over sieved cocoa powder.
- Keep refrigerated, and serve in slices with crème fraiche.
Almond and Apricot Cake


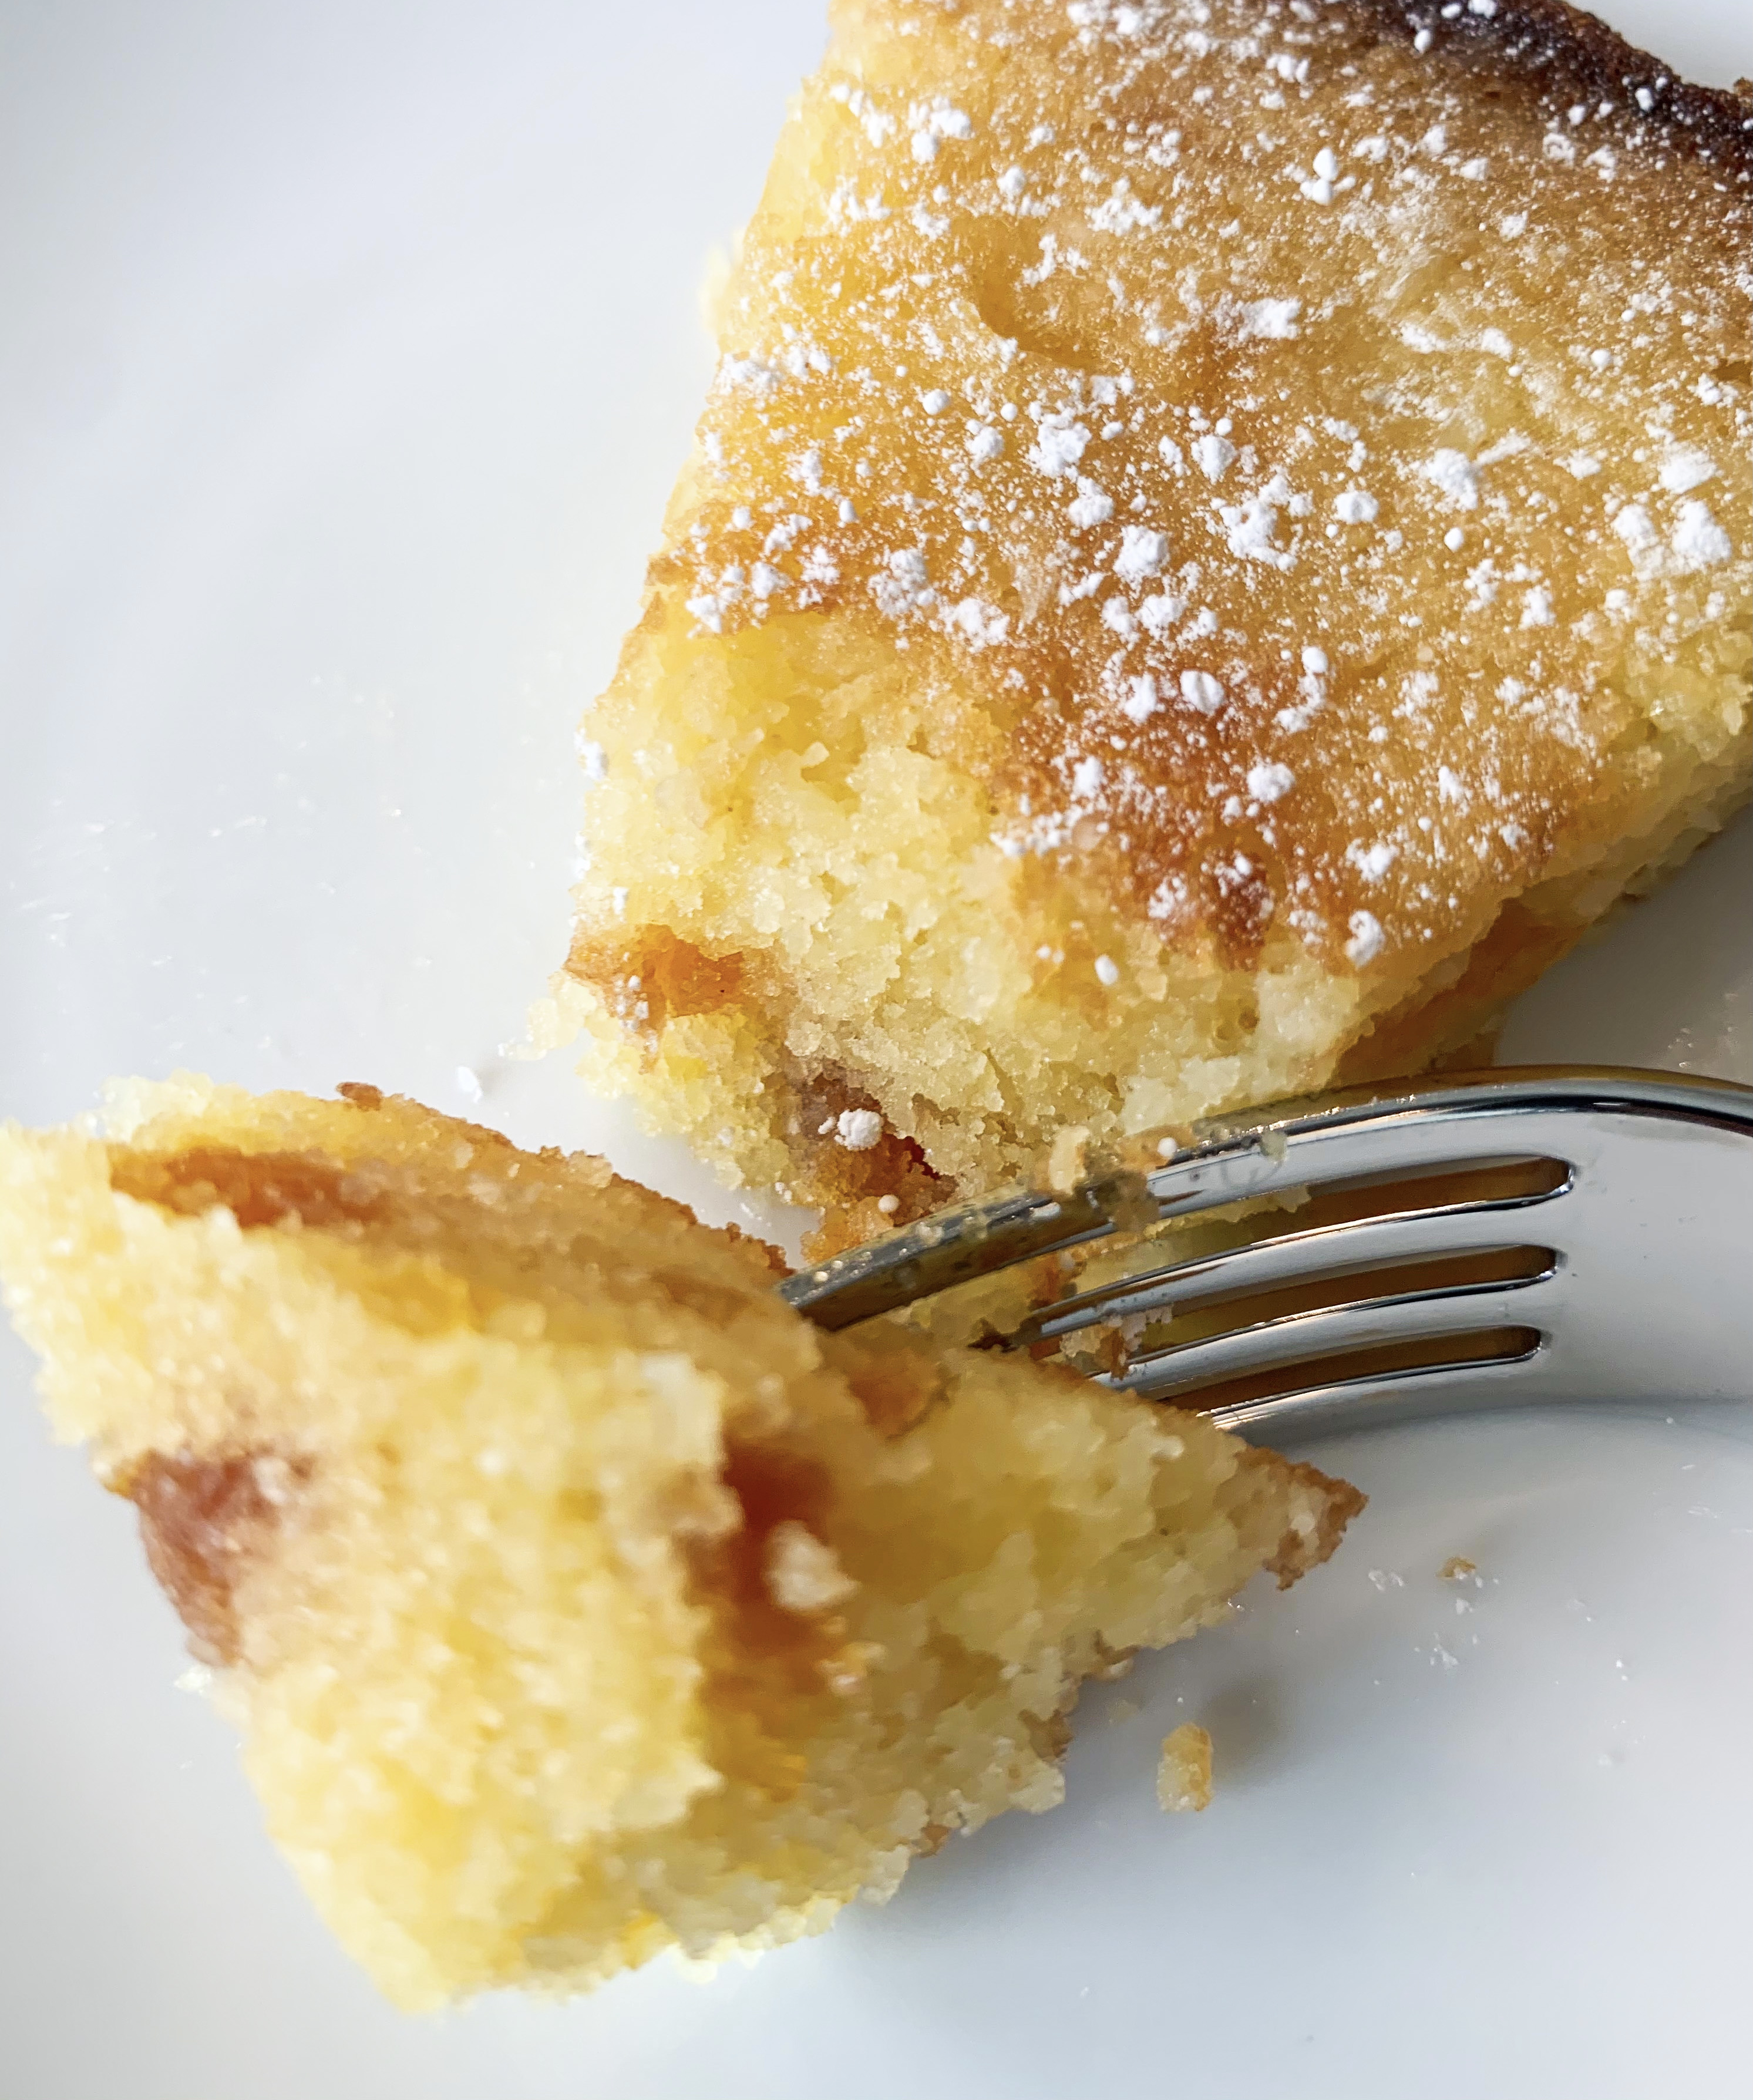
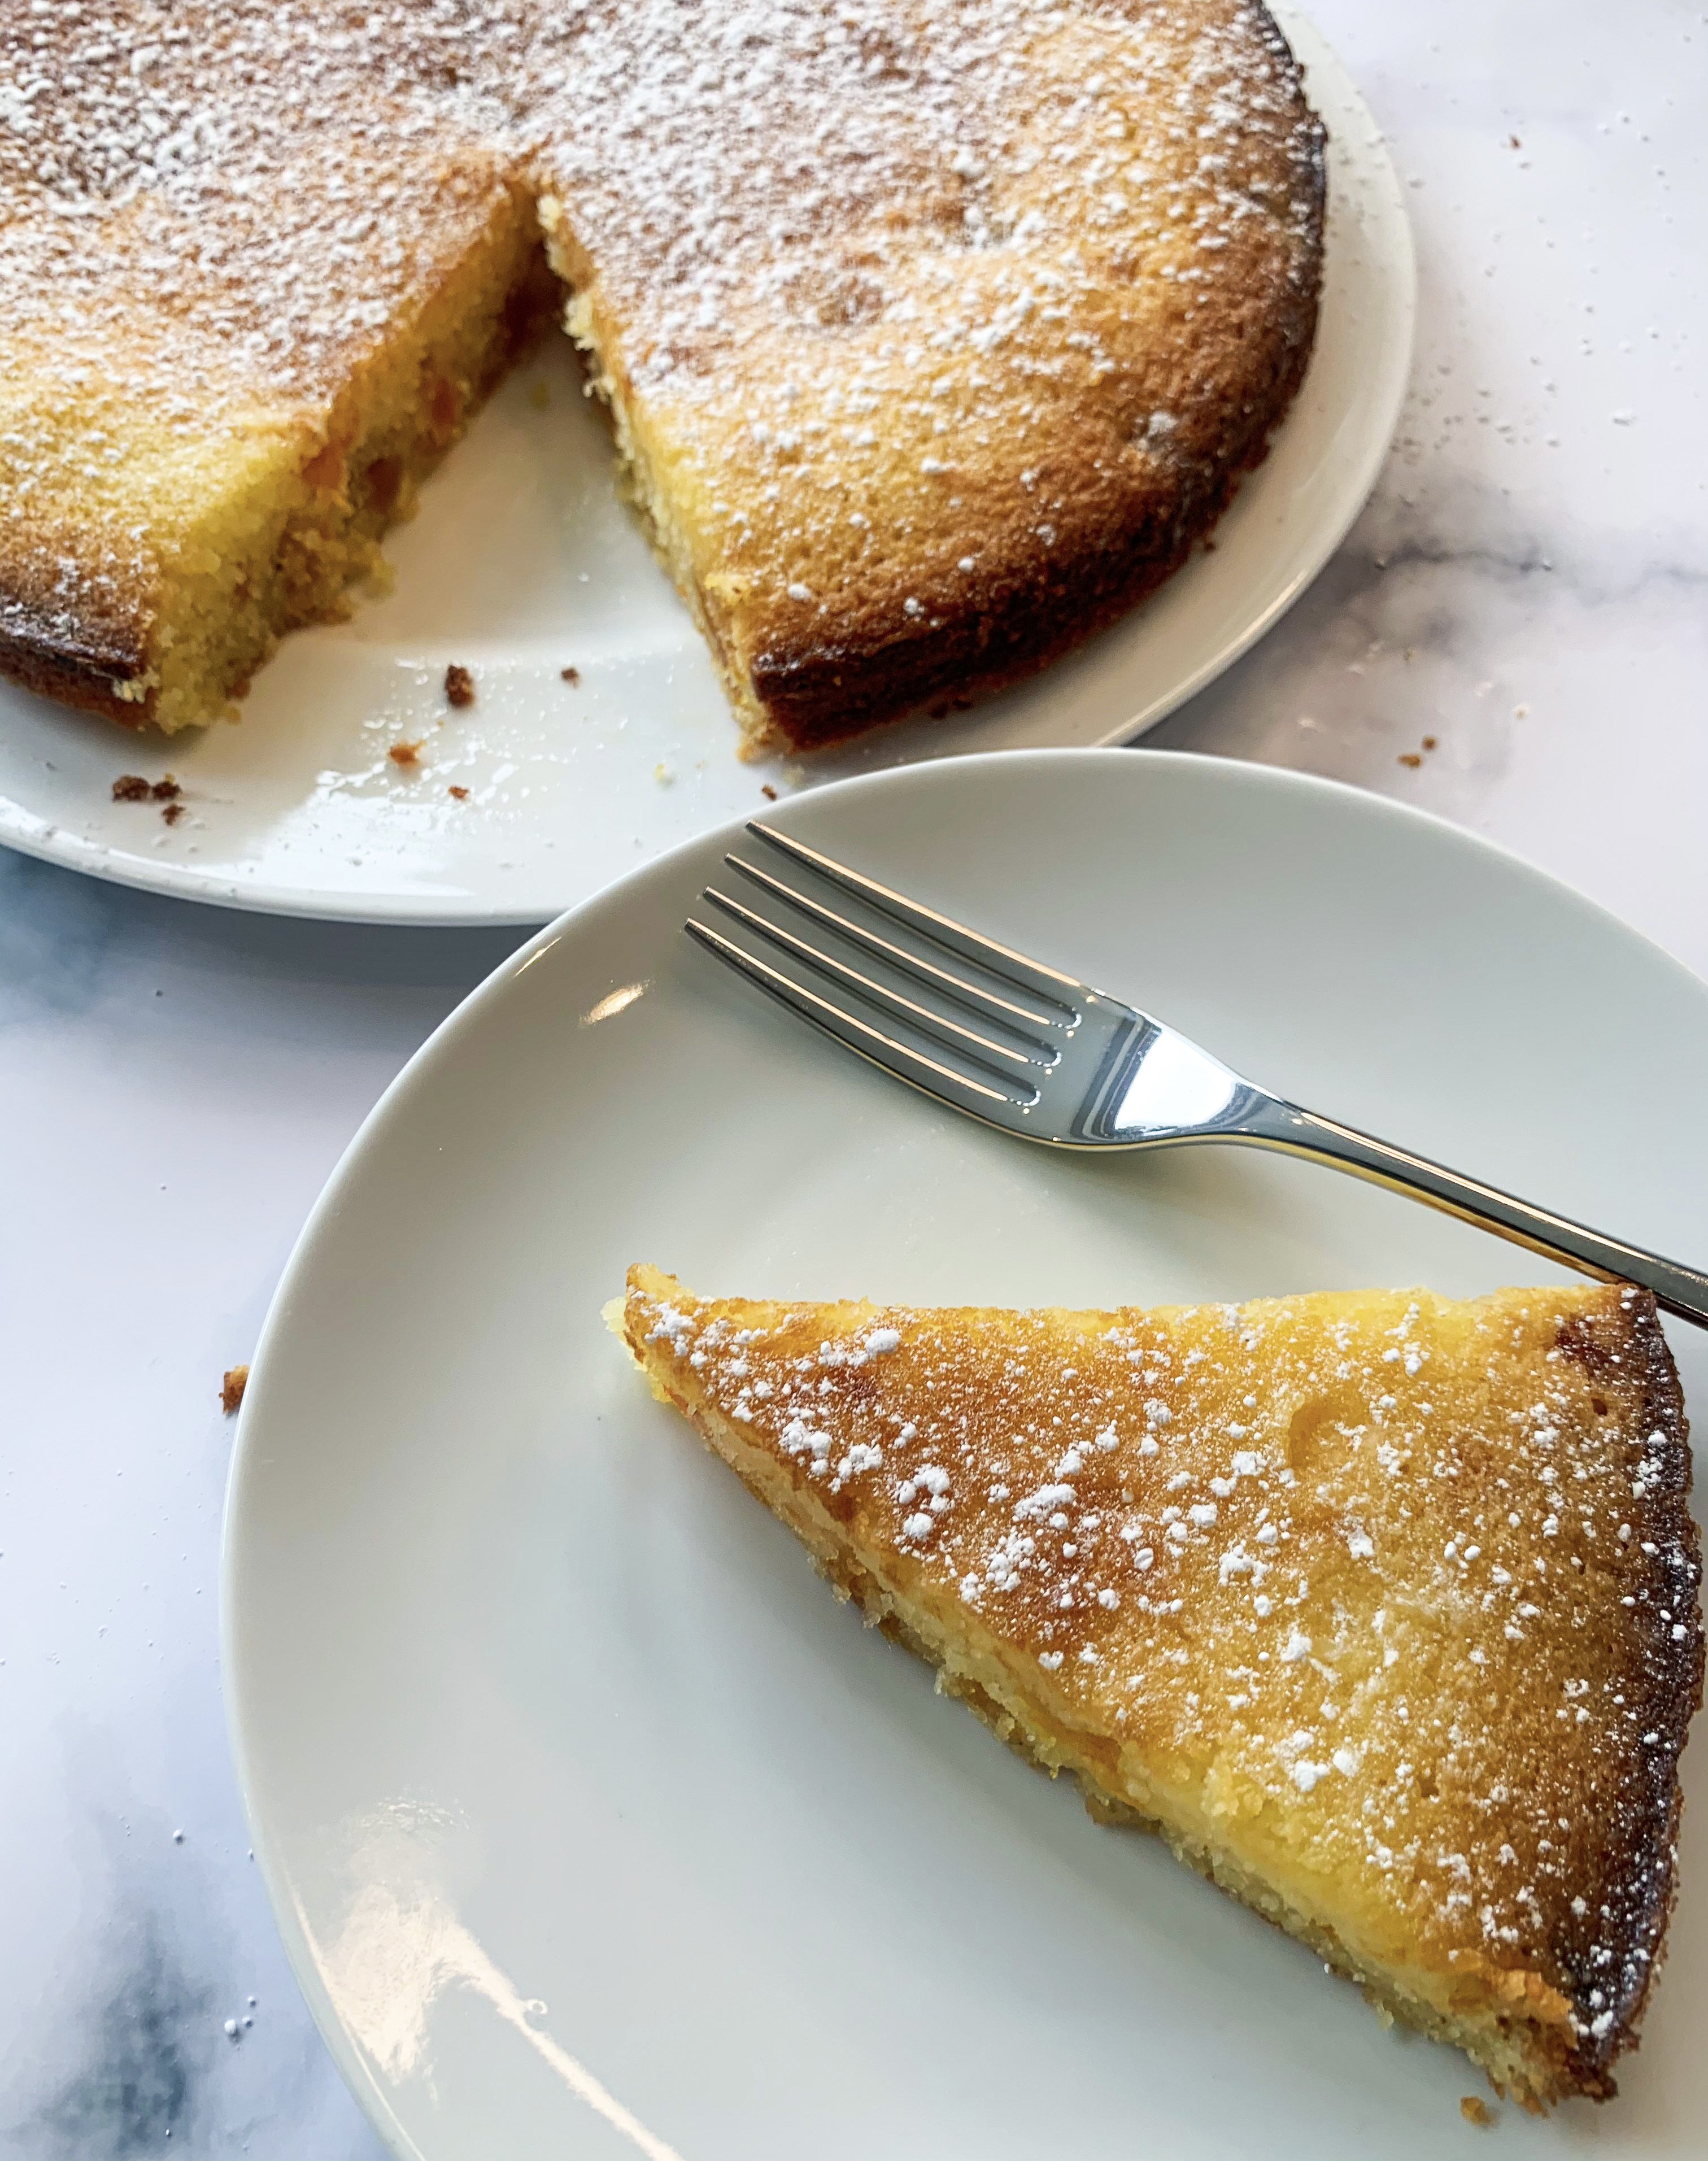
Admittedly this is not the most attractive of cakes, it’s rather flat and tends to go at little ‘golden’ around its edge…but remember, looks can be deceiving! It is a beautifully moist cake, with a slightly chewy crust, the sweet flavour of the apricots is complemented by a lemony syrup which you pour over the cake when it is still warm. It is a recipe that I have taken from an old book, ‘The Gastro Pub Cookbook’. At the time it was published in 2003, the gastropubs from which it takes its recipes, were some of the best in the UK, although some of these pubs might not have survived the recipes are still as delicious. Interestingly, the book was researched by Diana Henry who these days is a very successful cookery book writer in her own right. Henry described this cake as ‘one of the most delicious cakes I have ever tasted’, and I’m not going to argue with her! It was a recipe which she took from ‘Ballymore Inn’ in Co.Kildare, Ireland, which in fact, is still a very successful gastropub – one which I have on my bucket list to visit…!
If you are gluten free, like me, this cake can be easily adapted by using gluten free flour (I used Doves) – the cake in the photo is gluten free!
225g butter, plus extra to grease the tin
100g dried, ready to eat apricots
225g caster sugar
1 lemon, juiced
80g ground almonds
3 large eggs, beaten
100g plain flour (gluten free if required – see note above)
For the Lemon Syrup:
1 tablespoon caster sugar
1 lemon, juiced
To serve: crème frâiche or whipped cream
- Butter a 23cm round cake tin and line the base.
- Roughly chop the apricots.
- In a large bowl, beat the butter and sugar together until light and fluffy. Add the lemon juice, ground almonds and beaten eggs, then mix thoroughly. Finally, fold in the flour and apricots.
- Put the mixture into the prepared cake tin and bake in the oven, 180’c fan, for about 35 minutes until the cake is firm and golden and leaving the sides of the tin.
- Leave to cool in the tin for a few minutes then lift out onto a plate.
- To make the lemon syrup, gently heat the sugar and lemon juice in a small saucepan until the sugar has dissolved. Pour over the cake while it is still warm.
- Serve warm or cold with whipped cream or crème fraiche.
Chocolate Meringue Cake
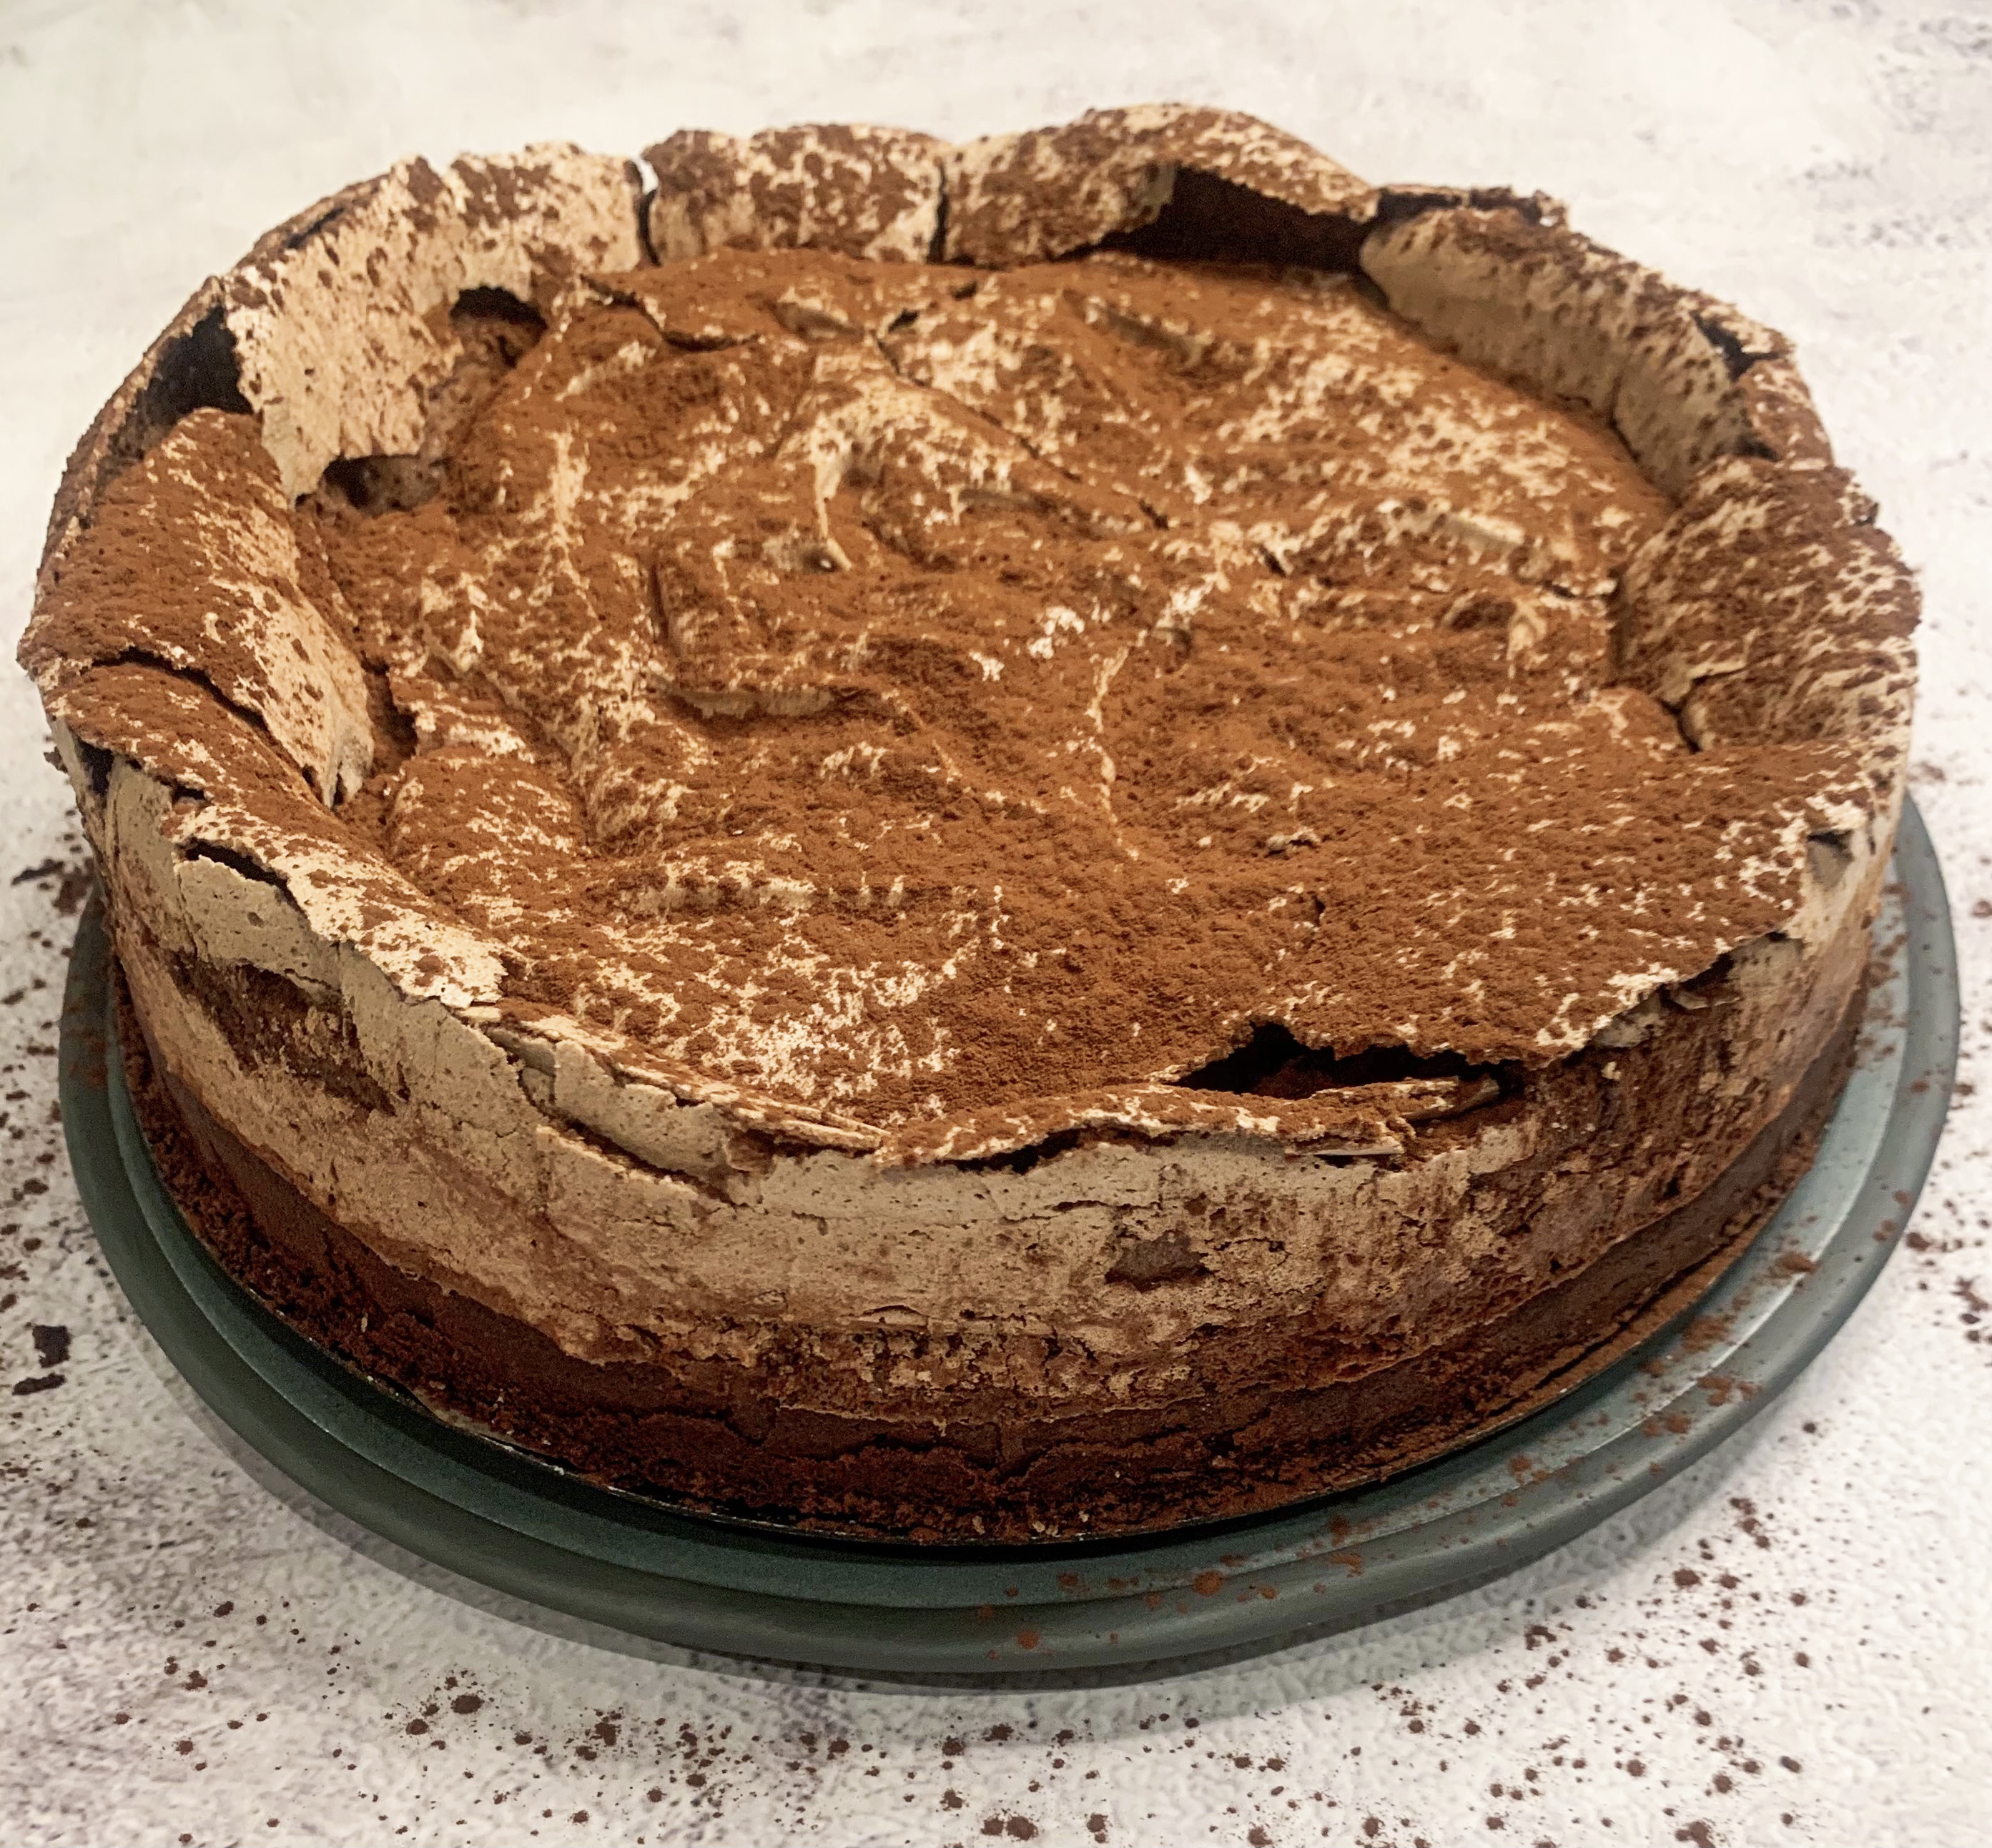
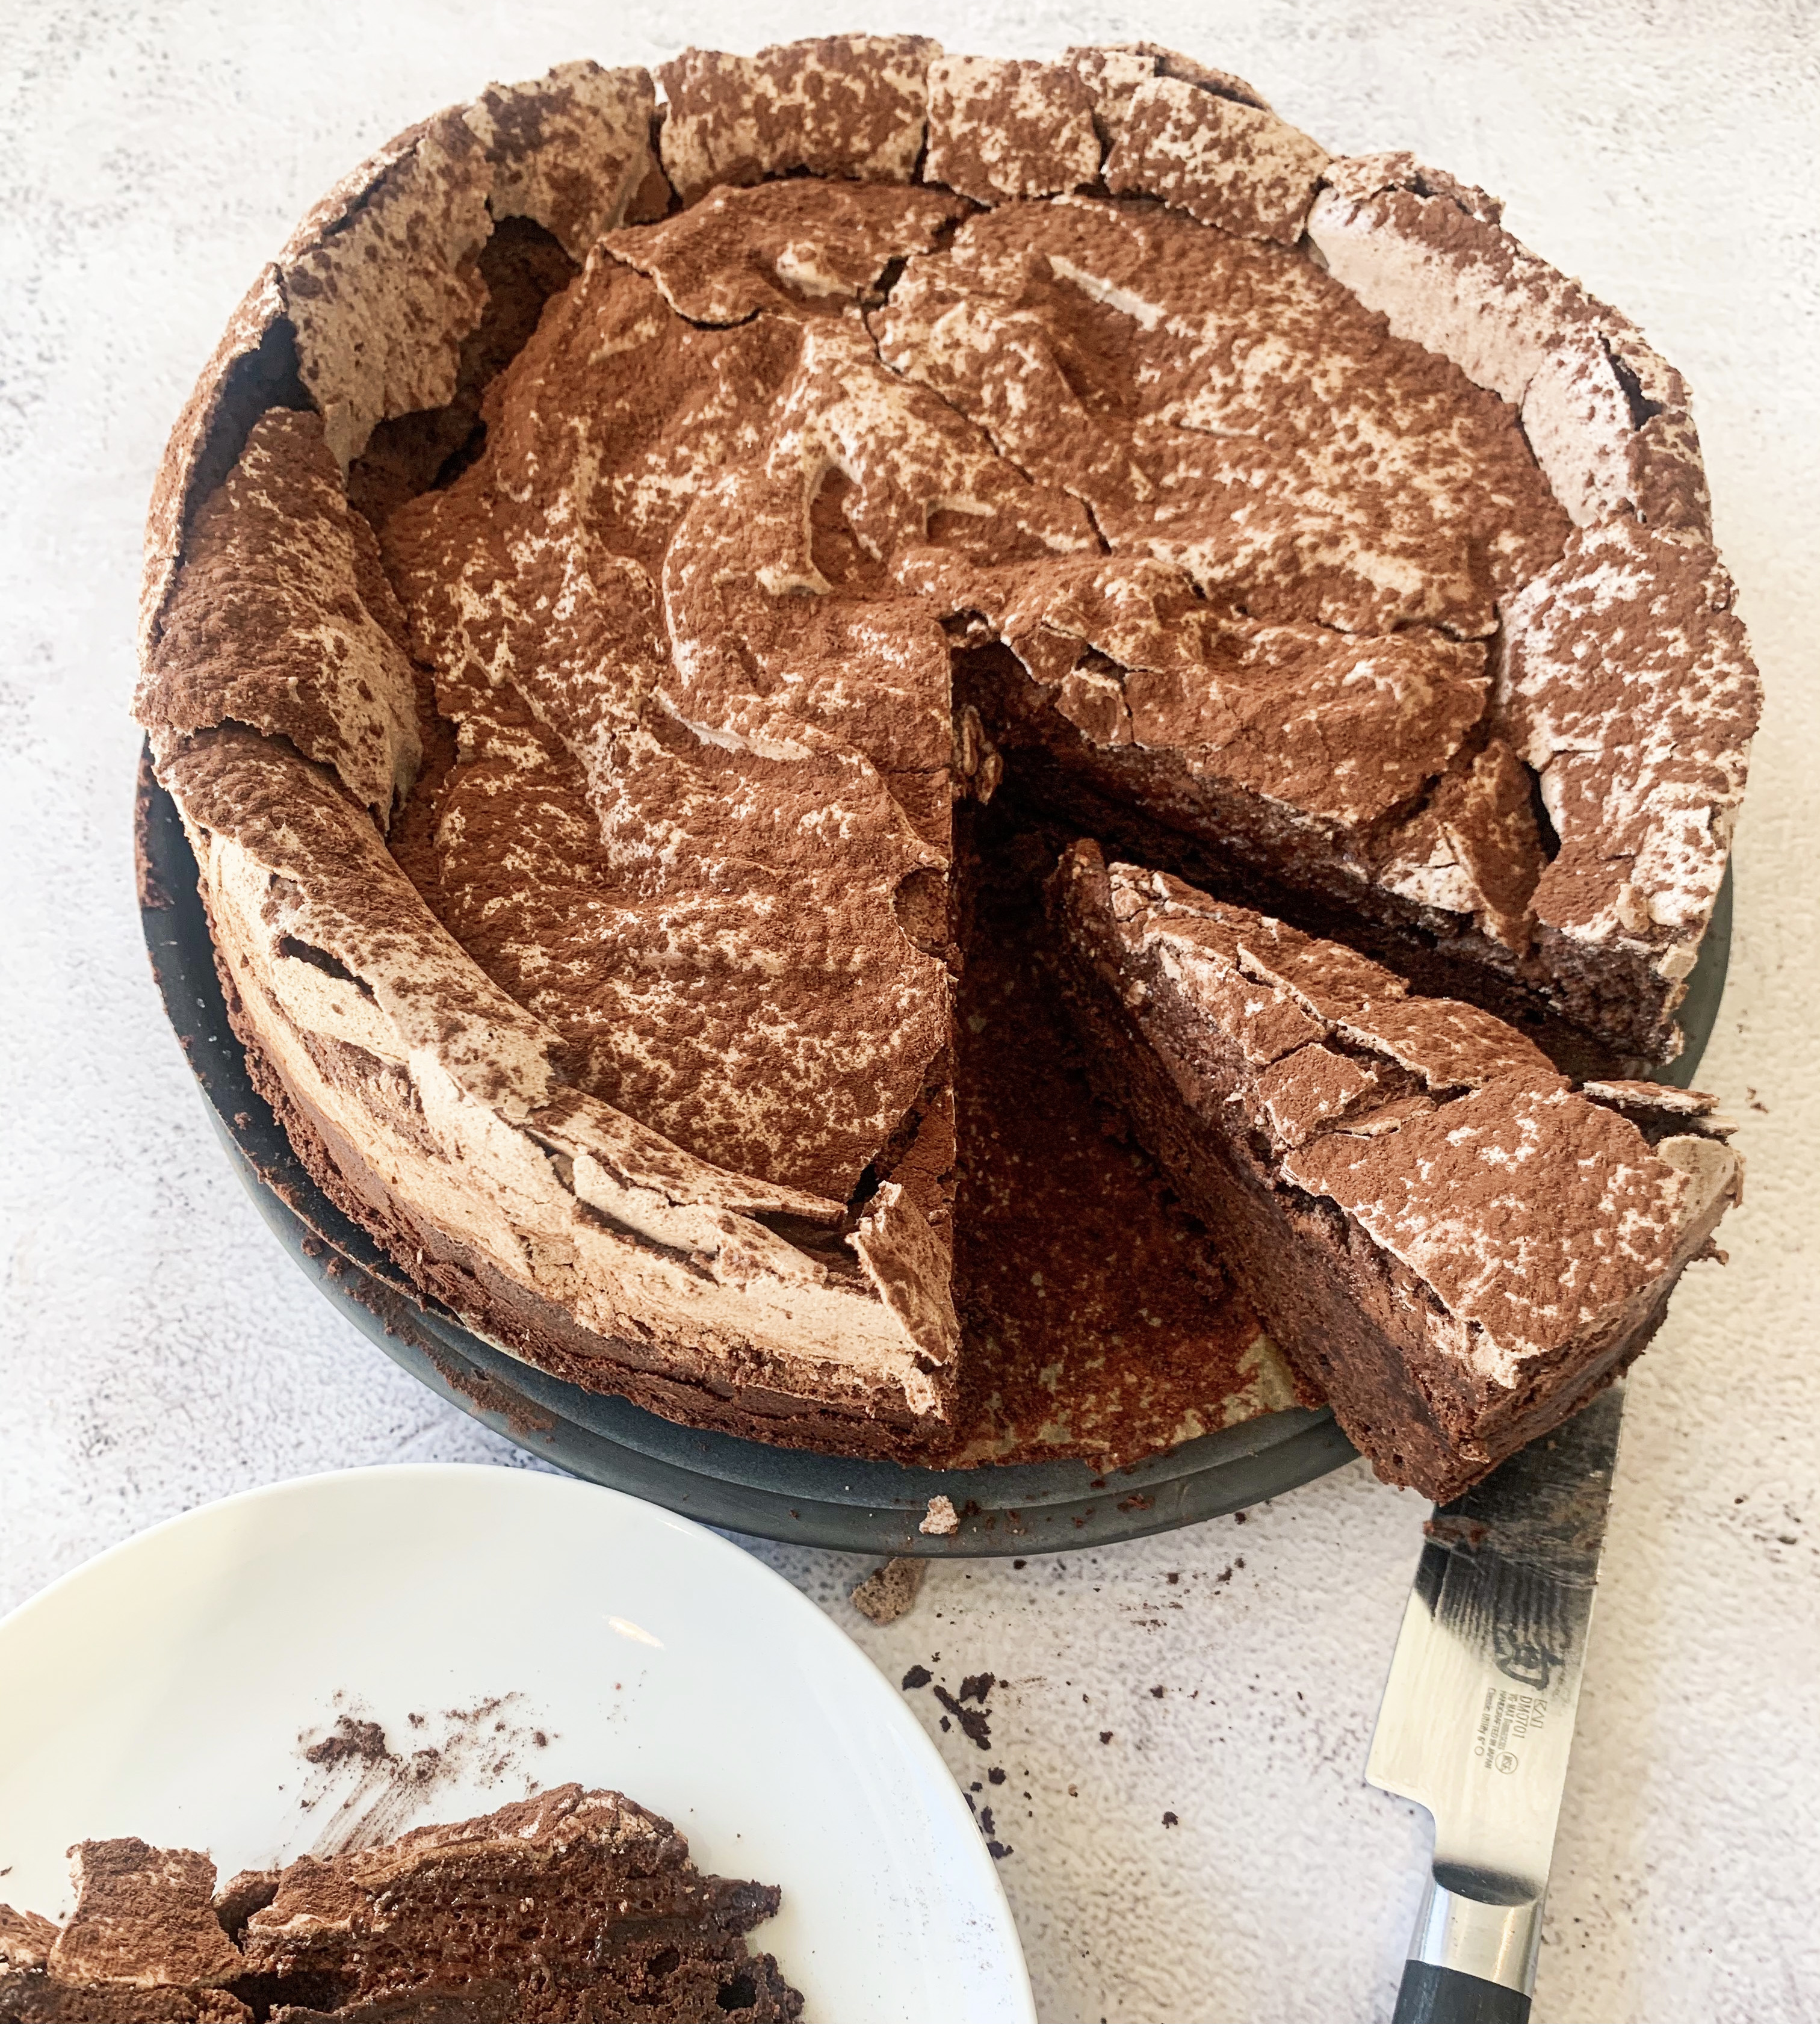
This is one of those cakes that, if you are a lazy cook like me, you look at and think ,‘that looks complicated, it will take far too much energy to cook’ and you dismiss it…But, this cake is in fact quite straight forward to make, admittedly it requires a bit more time in the oven and you have to wait for it to cool properly before you can eat it, but it’s definitely worth the wait! What’s not to like…chocolate and meringue! I found this recipe some years ago in a magazine, it’s a recipe from Donna Hay.
This cake is supposed to look rustic – it will crack and collapse a bit!
240g dark chocolate, roughly chopped (I use Lindt Excellence 70% Cocoa Dark Chocolate)
180g unsalted butter, roughly chopped
2 eggs
4 eggs (extra) separated
90g brown sugar
1 teaspoon vanilla extract
50g plain flour (use gluten free if required – I use Doves)
½ teaspoon baking powder
40g ground almonds
220g caster sugar
1 teaspoon white vinegar
3 teaspoons cornflour
25g cocoa powder, sifted (plus extra to dust)
- Lightly grease and line the base of a 24cm round springform cake tin.
- Place the chocolate and butter in a medium saucepan and melt over a low heat. Allow to cool slightly.
- Place the 2 eggs and the 4 extra egg yolks, brown sugar and vanilla extract in a bowl and use an electric whisk to whisk until pale and thick – 3-4 minutes.
- Add the chocolate mixture, the flour, baking powder and ground almonds and fold gently to combine. Pour the mixture into the prepared tin and cook in a preheated oven, 160’c fan, for 35-40minutes – it will only be partially cooked. Remove and set aside.
- Increase the oven temperature to 180’c fan.
- Place the 4 egg whites in a bowl and using an electric whisk, whisk until they form soft peaks. Gradually add the caster sugar, followed by the vinegar. Continue to whisk until the meringue is thick and glossy.
- Sift the cornflour and cocoa together and add to the meringue, folding through to combine. Spread the meringue over the partially cooked cake .
- Return to the oven (180’c fan) for 20 -25 minutes until the meringue is crisp and golden.
- Allow the cake to stand in the tin for 15-20 minutes, before gently running a knife around the edge and removing it from the tin.
- Refrigerate for 2 hours before serving to allow the flavours to meld together. Dust with cocoa powder to serve. It is best served at room temperature – allow 30 minutes for it to warm up – it will become deliciously ‘fudgy’.
Chocolate Easter Nests
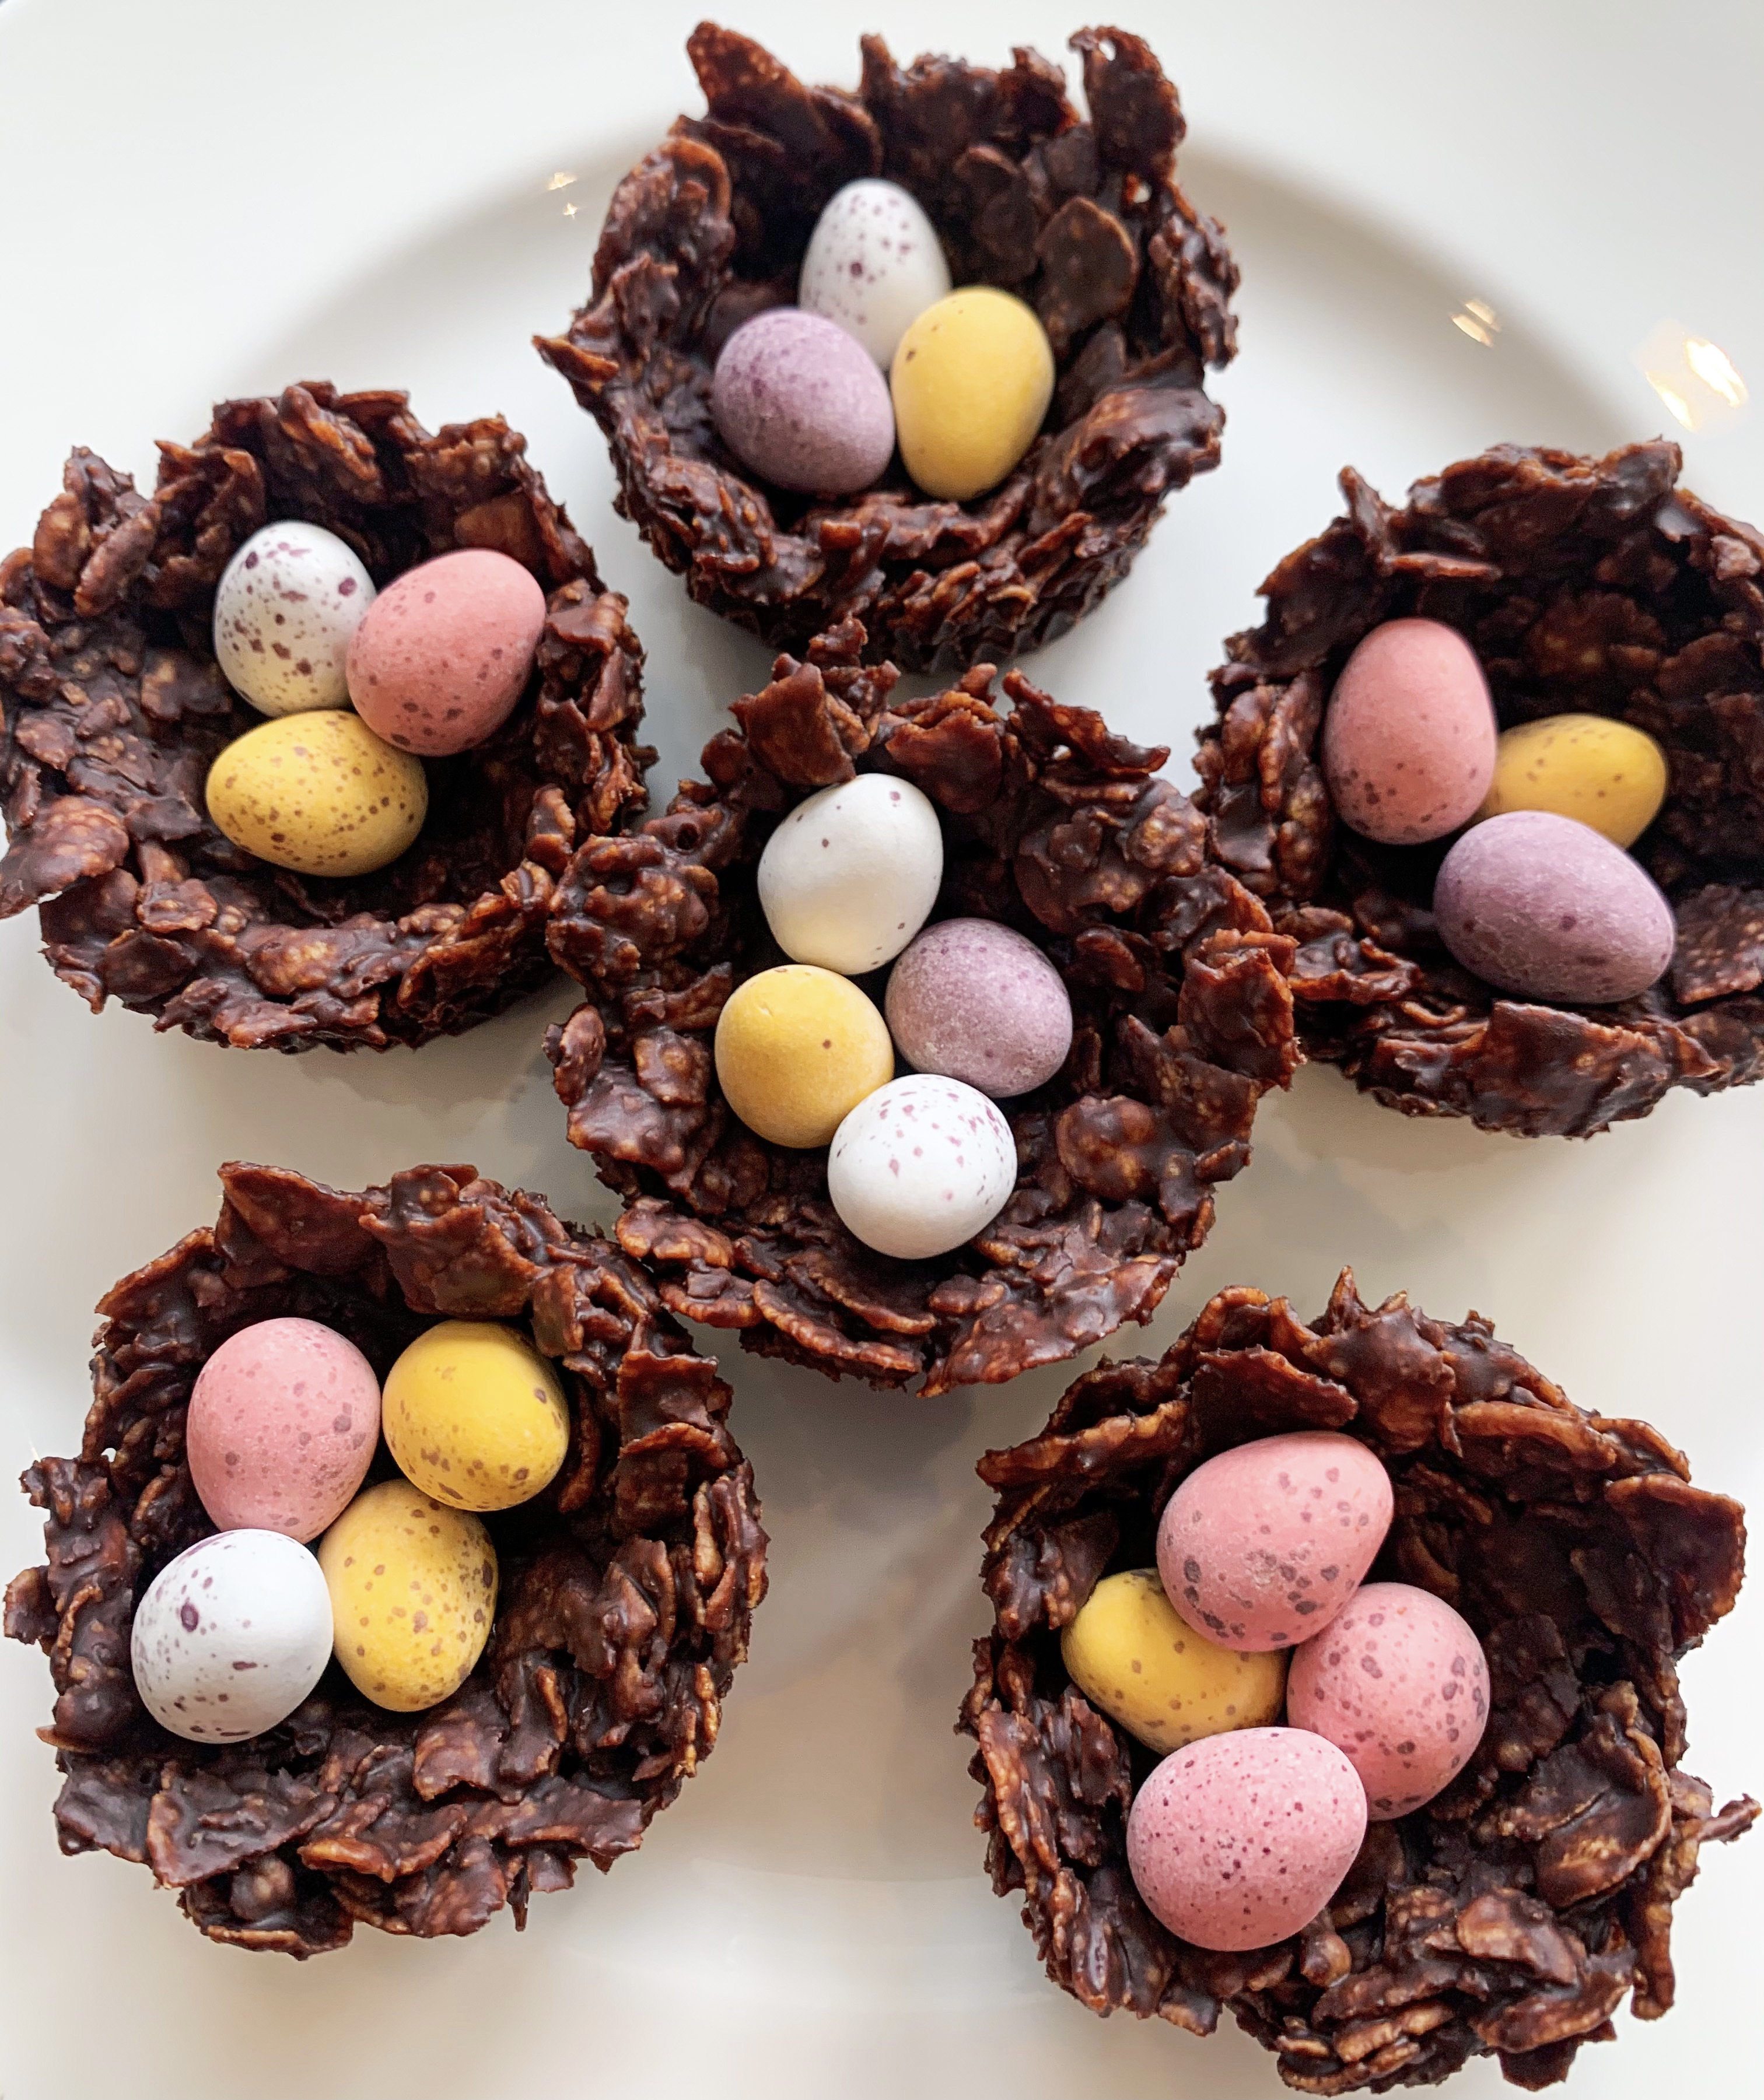
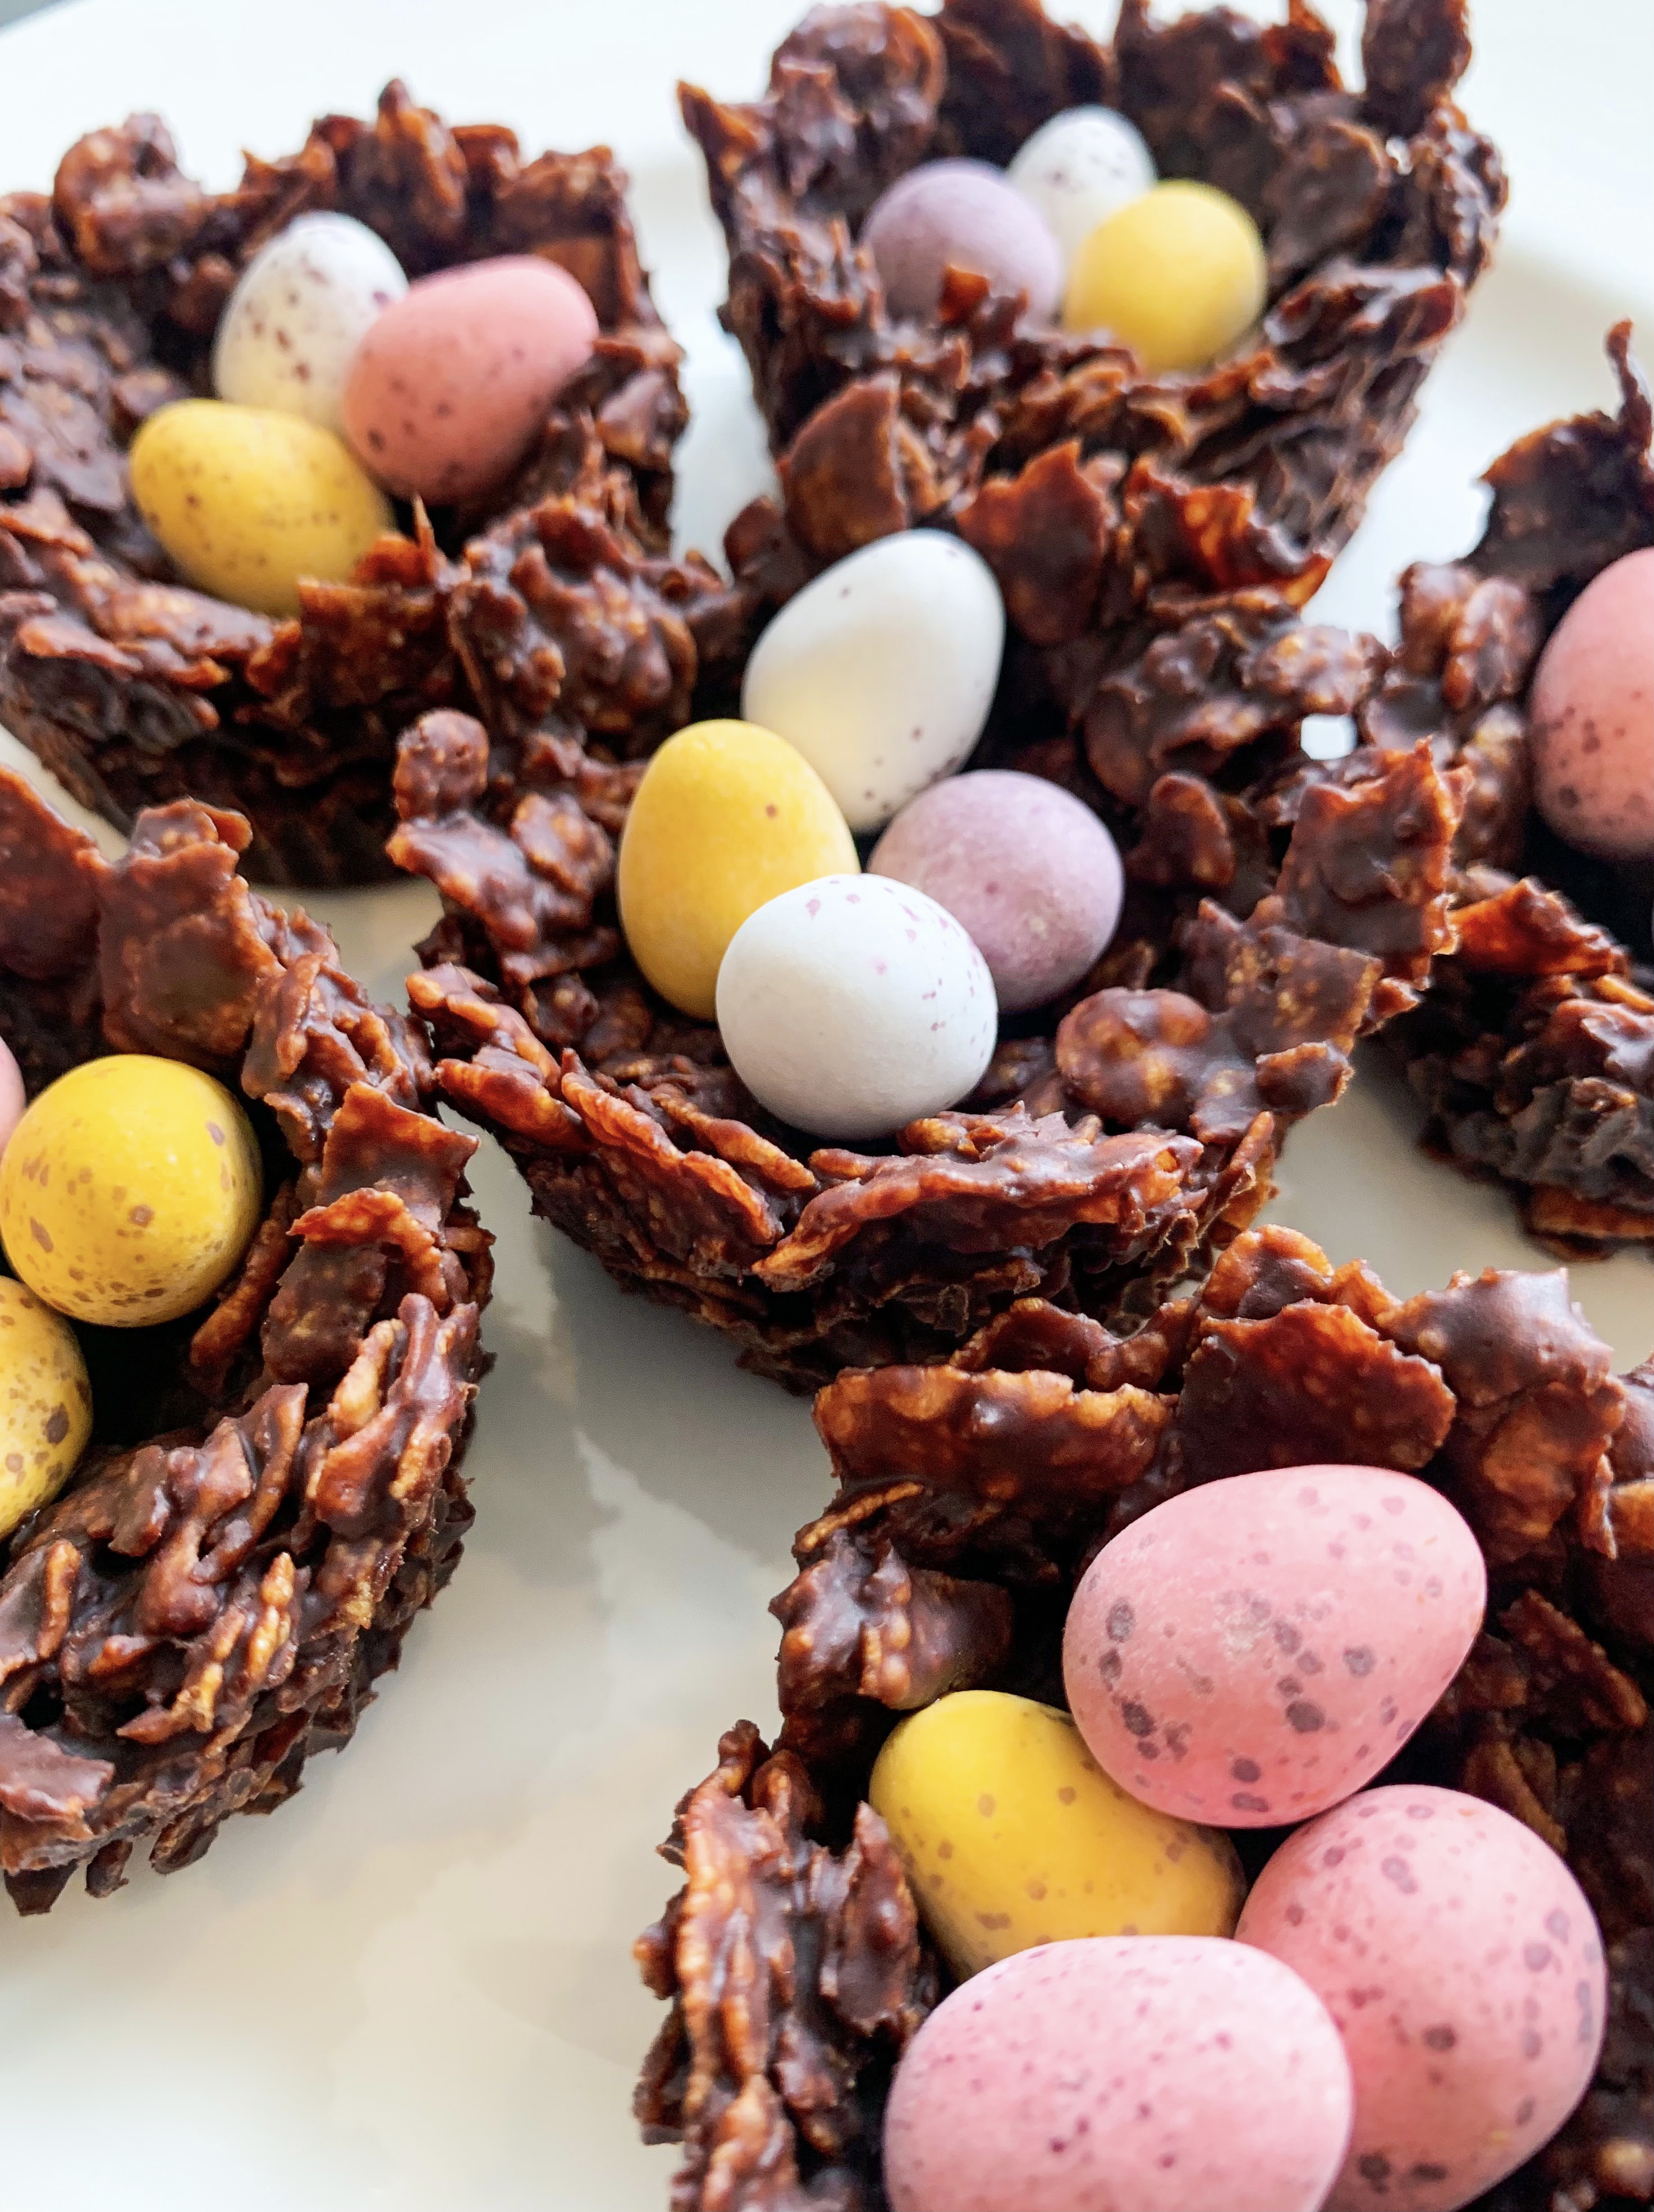
I initially recreated our family favourite, Chocolate Crispy Cakes (recipe below), into these nests as a special treat for Easter, however they are good at anytime of the year! With the addition of the Mini Eggs, you get a double dose of chocolate – how can anyone resist?! They literally take 15 minutes to make, although admittedly you will have to wait for them to set in the fridge before eating…
50g unsalted butter
4 tablespoons golden syrup
100g dark chocolate (I use Lindt Excellence 70% Cocoa Dark Chocolate)
75g cornflakes
About 20-30 Mini Eggs
- Gently melt the butter, syrup and chocolate in a bowl suspended over a pan of barely simmering water (a bain marie).
- In another bowl, gently crush the cornflakes into smaller pieces – this makes them easier to mold into a nest shape.
- Add the cornflakes to the chocolate mixture, stirring gently so that they are evenly coated.
- Spoon the mixture into muffin cases, using the back of the spoon to create a nest shape. Place three or four Mini Eggs into the ‘nest’, and place in the fridge until set.
Lemon Surprises (Serves 4)
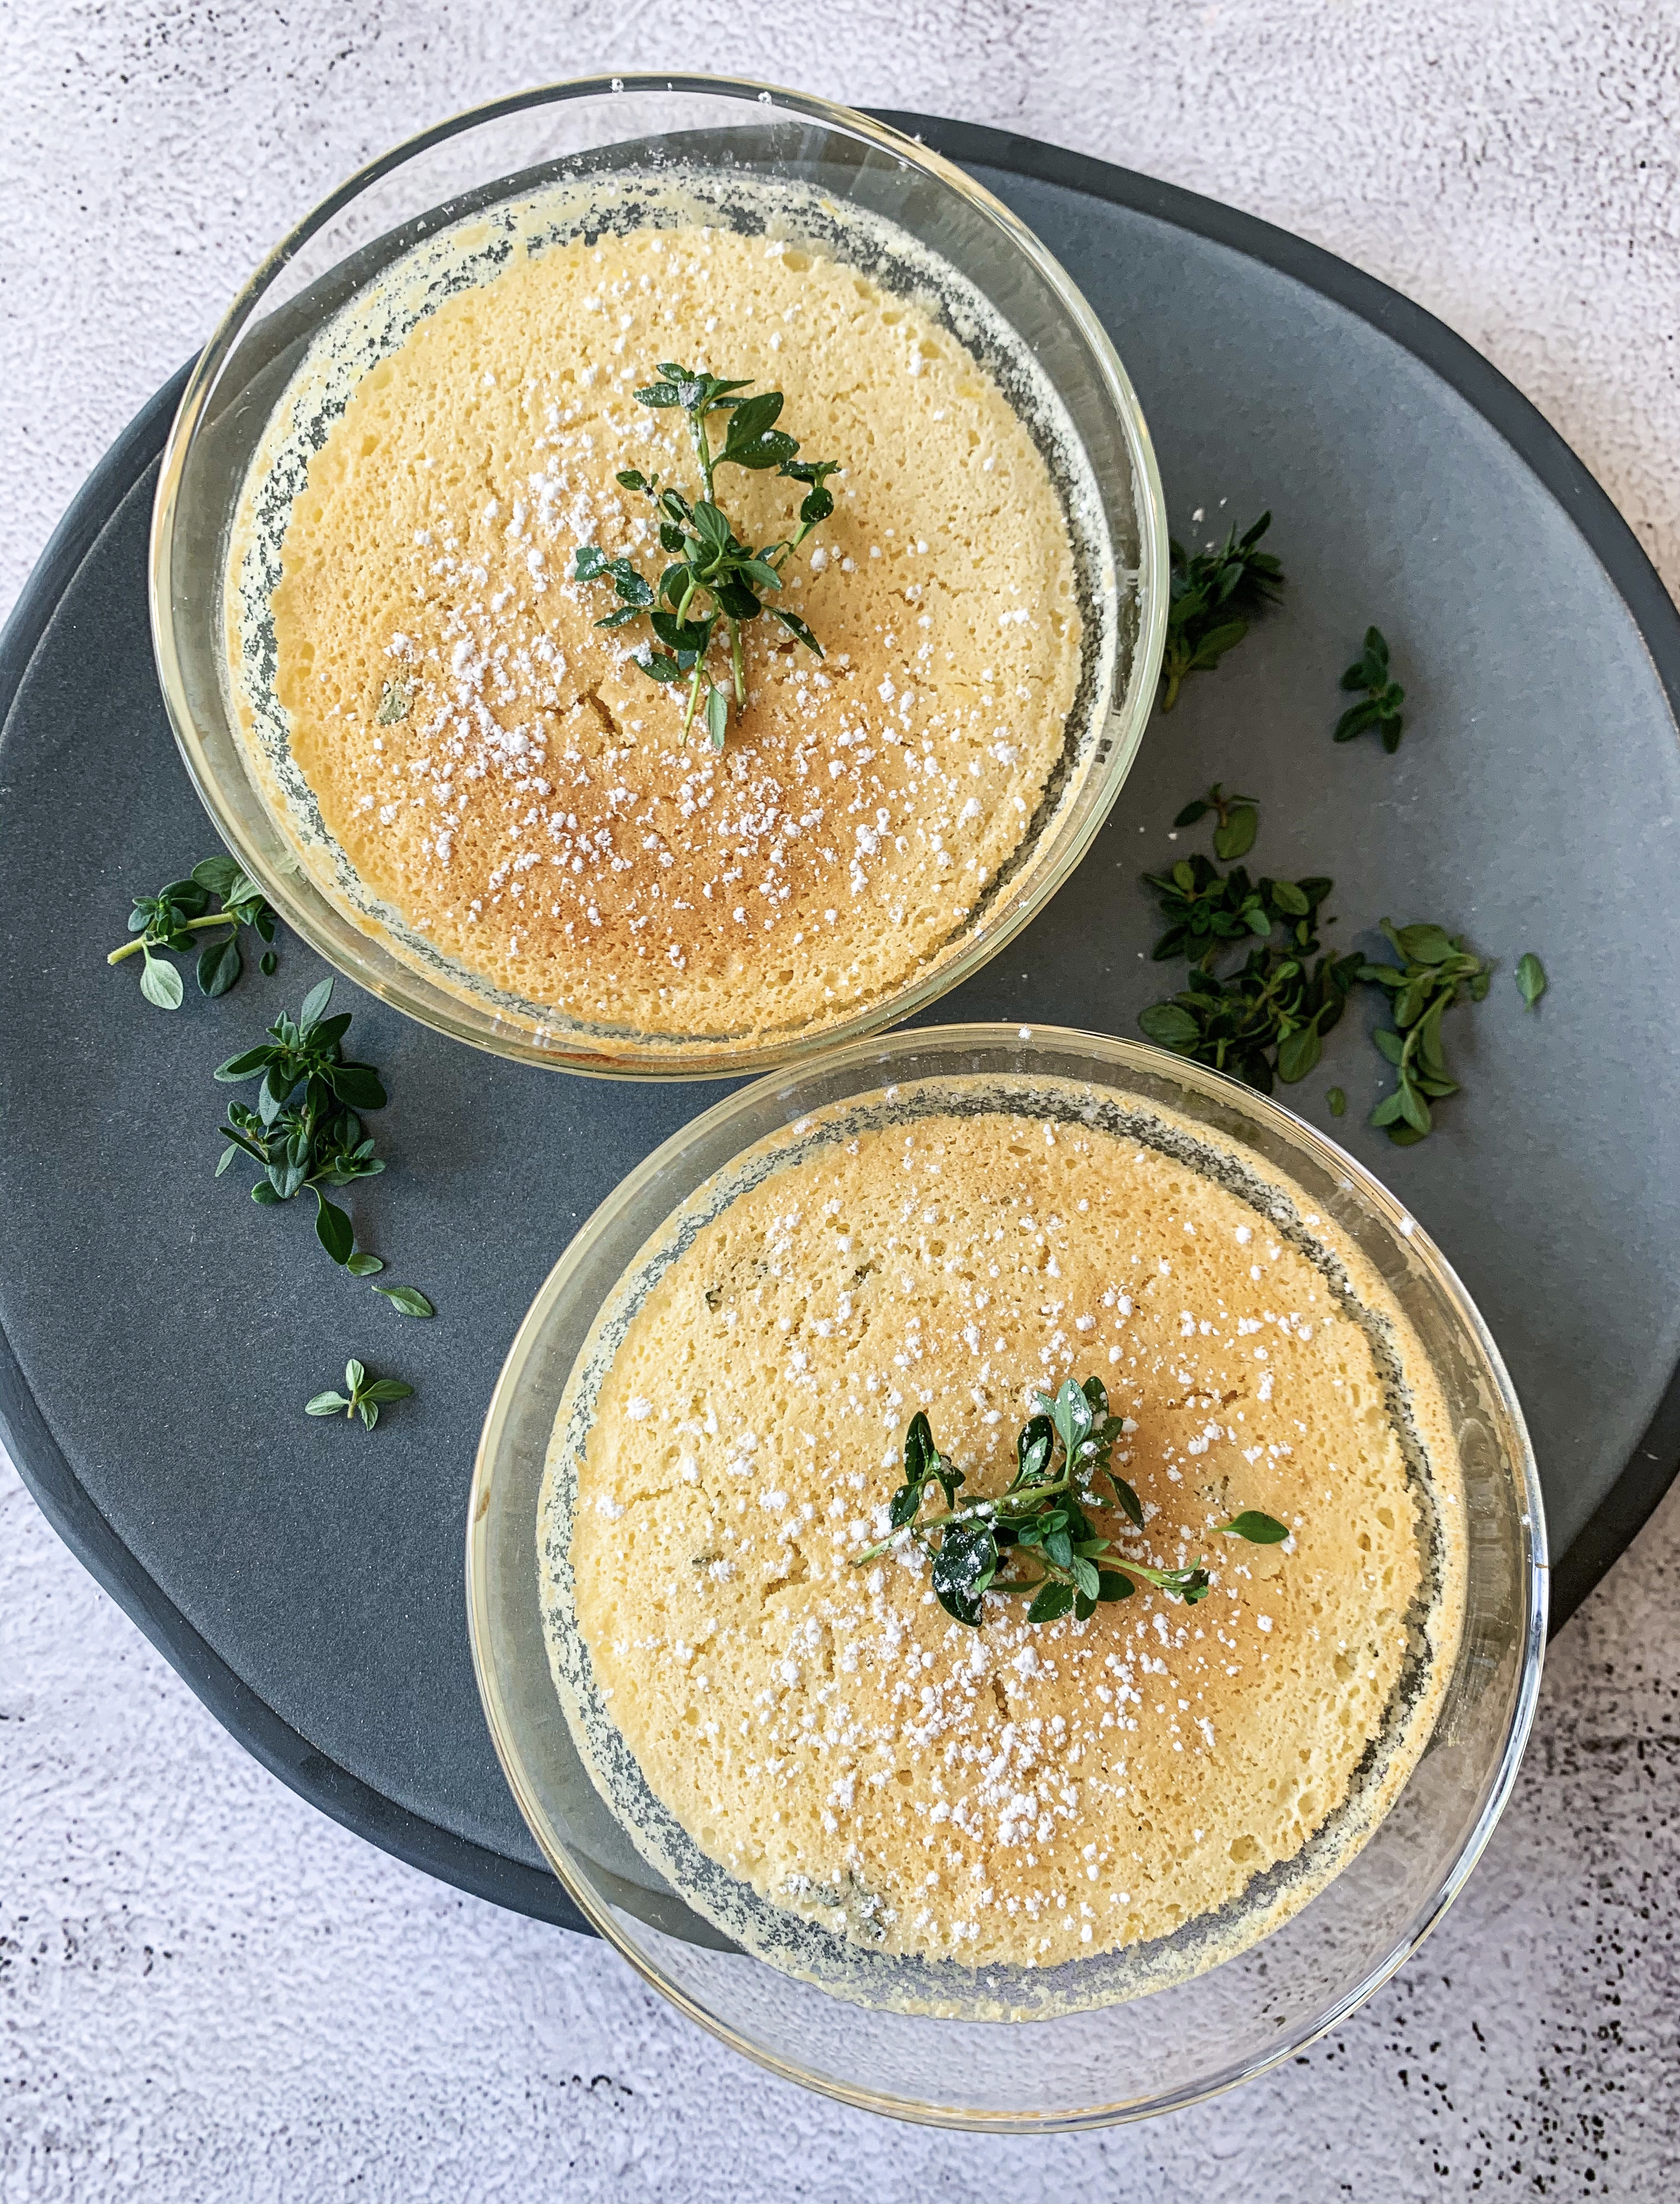
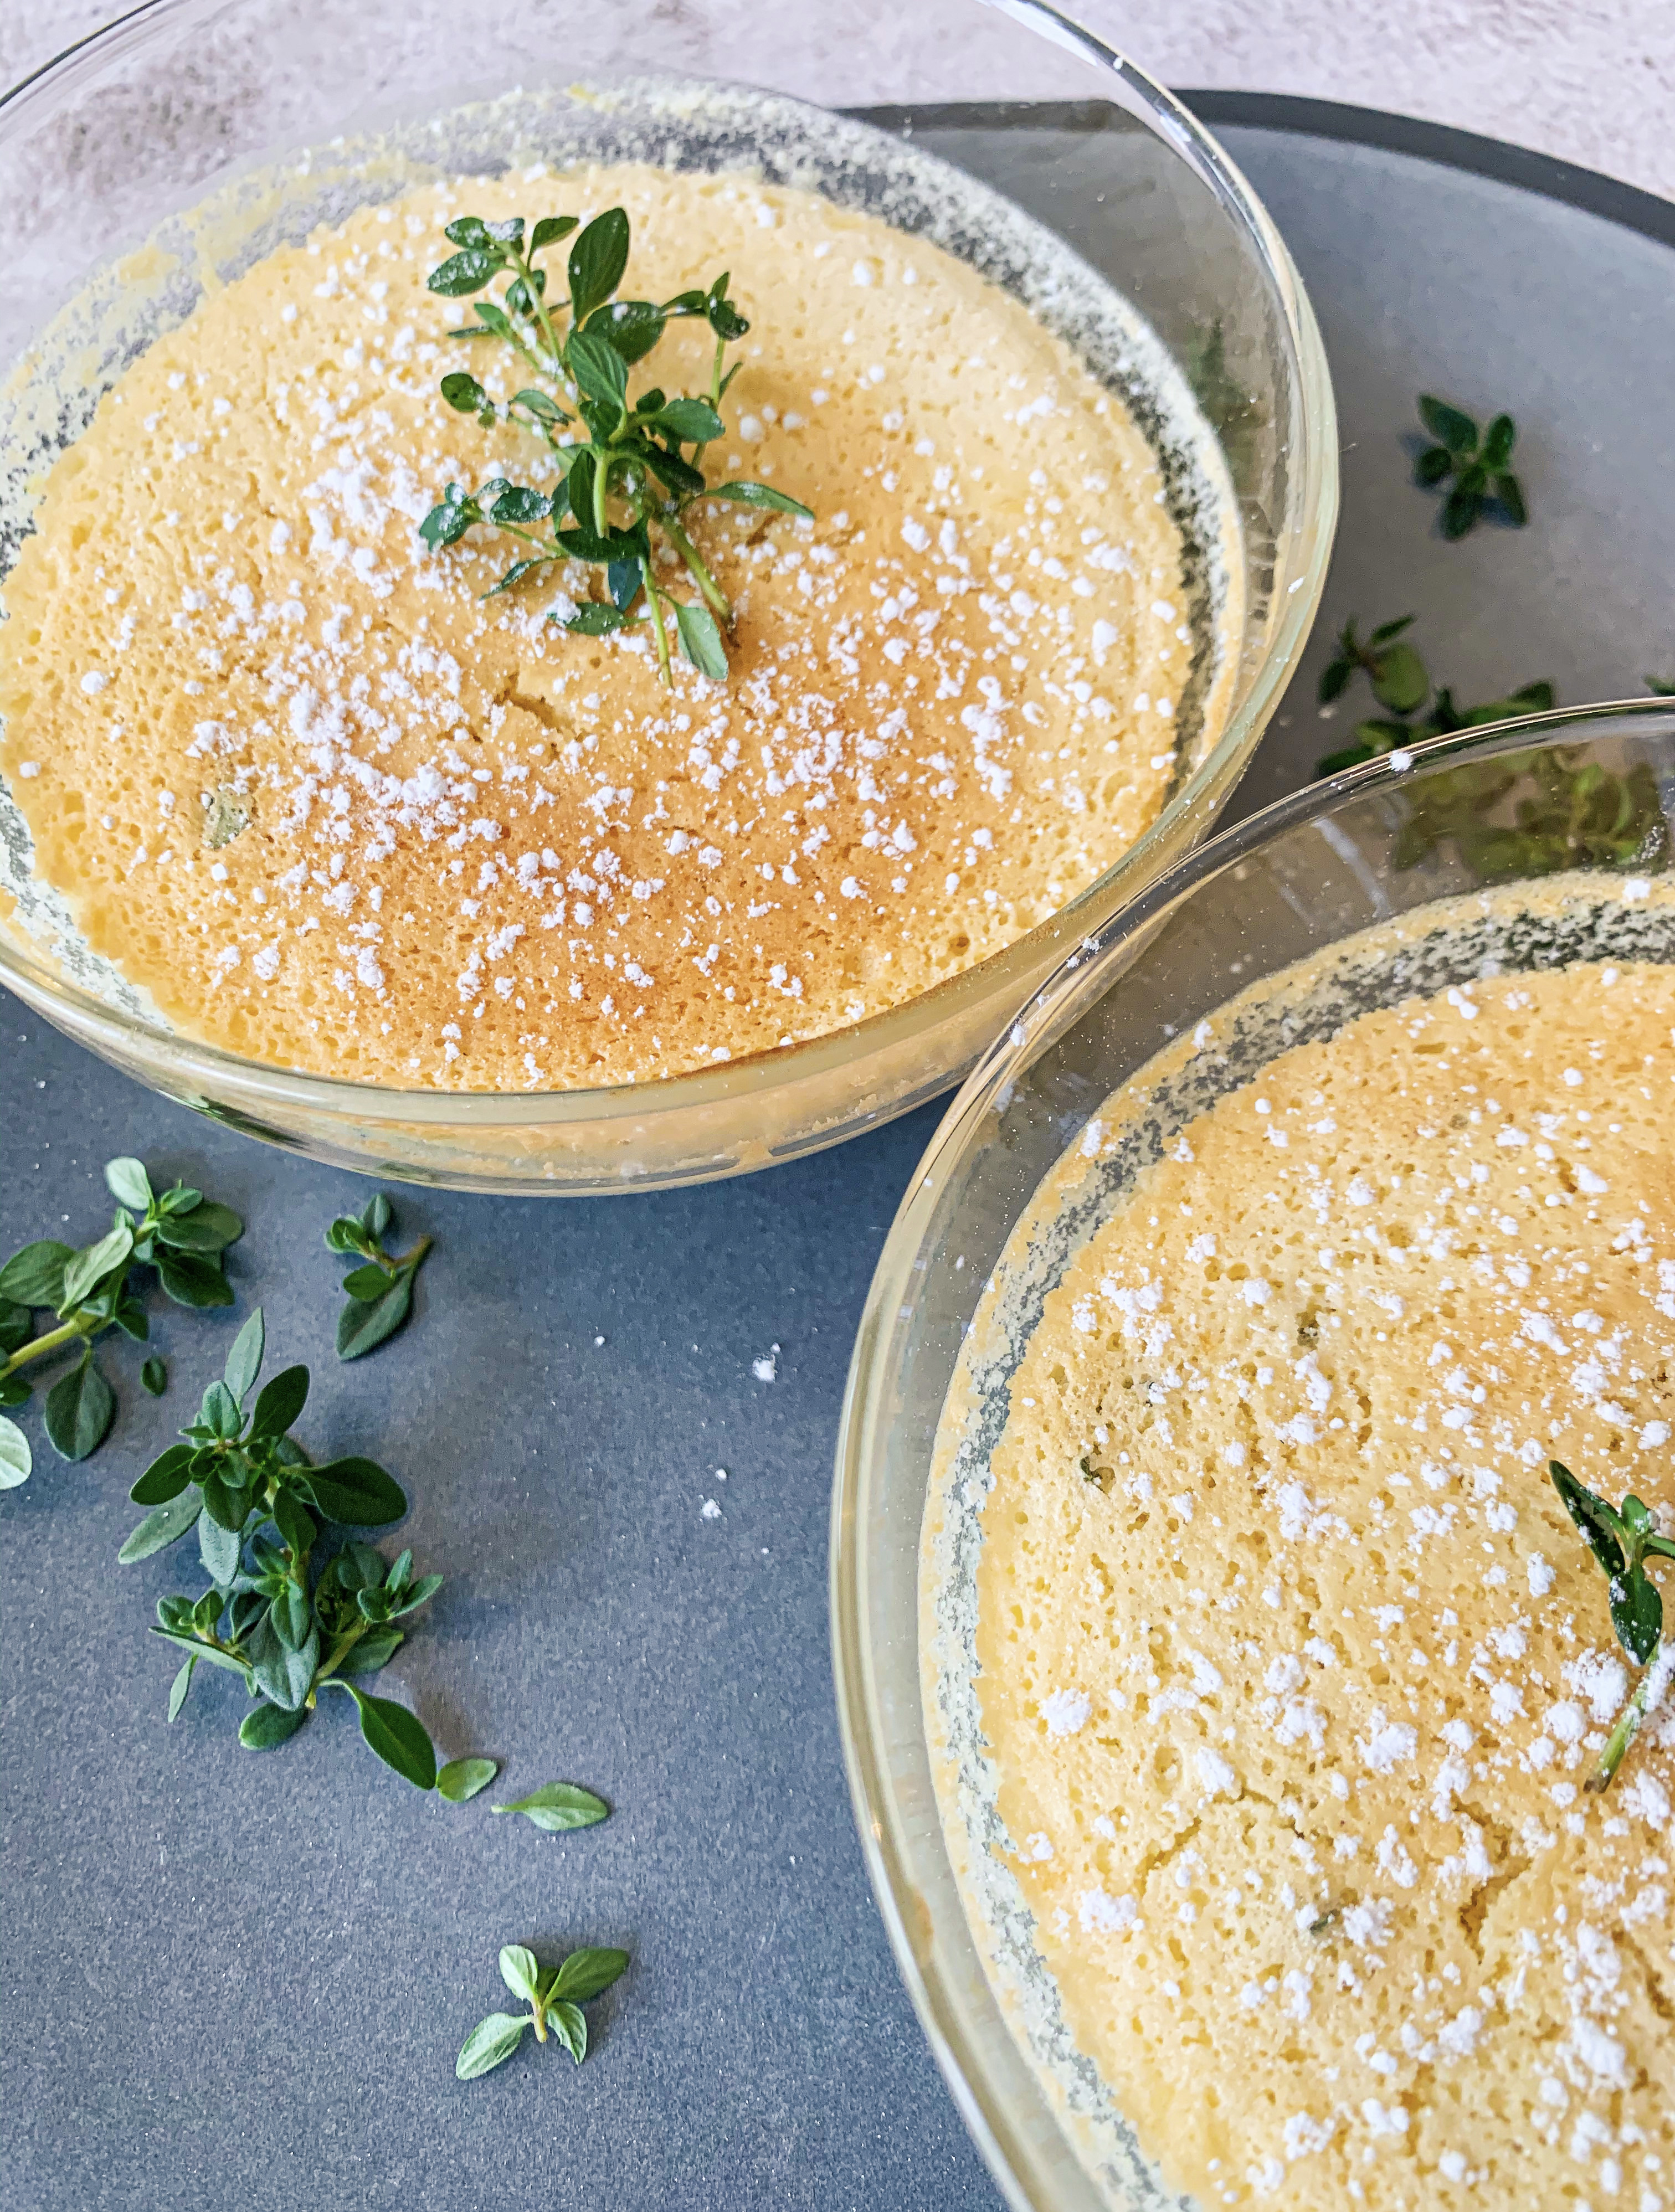
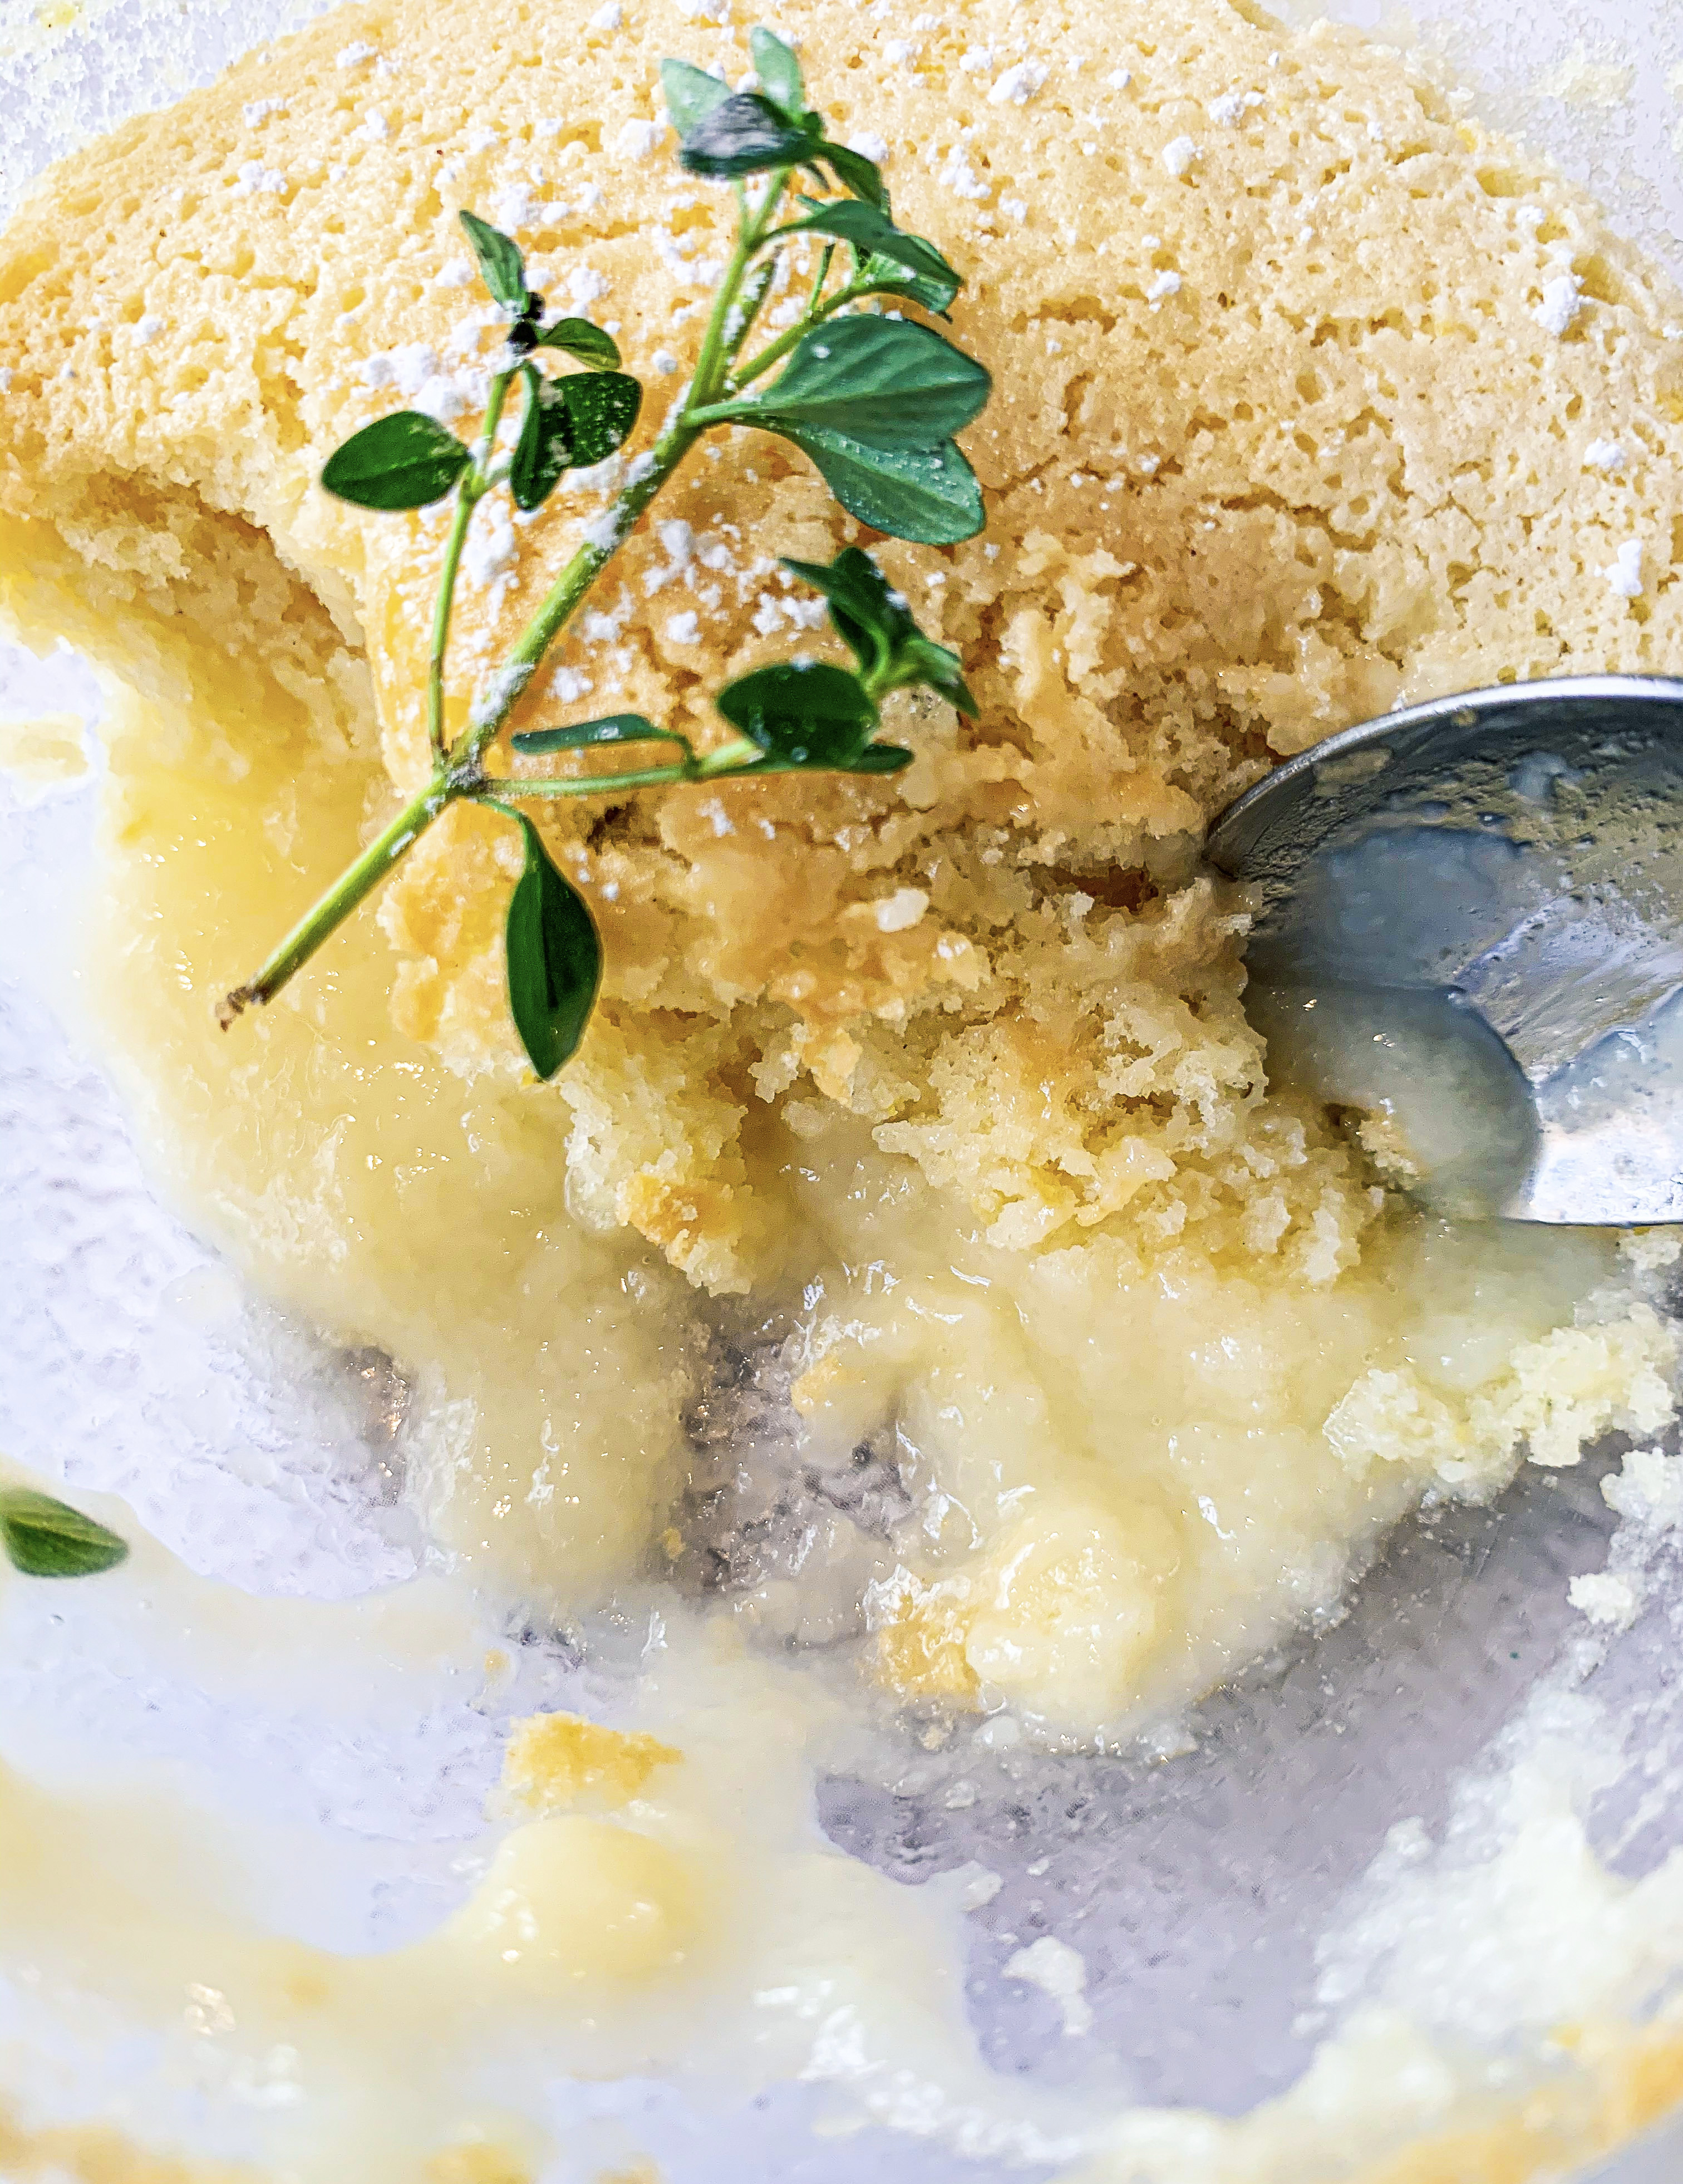
Many of you will be familiar with ‘Lemon Surprise Pudding’, it’s one of those gratifying recipes which you put in the oven as a batter and it comes out not only as a soft sponge, but miraculously with a pool of lemony sauce underneath! You may already have a recipe for it, but I urge you to try this one, as the sponge really is the lightest that I have come across! The addition of lemon thyme is optional, it slightly lifts the flavours and, of course, makes a lovely decoration!
I like to make this dessert in individual bowls or ramekins, but you can make it in one dish.
45g soft butter
150g caster sugar
2 lemons, finely grated zest & juiced
2 eggs, separated
200ml milk
50g self-raising flour (gluten free if required – I use Doves)
4 sprigs lemon thyme (optional)
Icing sugar, for dusting
Double cream to serve
- Use an electric mixer to cream the butter and 100 g of the caster sugar with the lemon zest until pale and fluffy. Beat in the egg yolks. Gradually add the milk, lemon juice and flour in turns, mixing well between each addition to make a smooth batter.
- Place the egg whites in a clean bowl and whisk with the remaining 50g caster sugar to soft peaks, add the picked leaves from two sprigs of thyme, then gently fold through the batter.
- Divide the batter among four individual bowls/ramekins with the capacity for about 175ml or put in one dish. Place in a roasting tin, lined with a tea towel (this will stop them slipping), and pour in enough boiling water to come about halfway up the sides of the ramekins or dish.
- Carefully transfer to a preheated oven, 160’c fan, and bake for 20 minutes or until golden on top and springy to touch. Turn the oven off and let the puddings rest in the oven for another 20 minutes, so the custard firms slightly.
- Decorate with the remaining thyme sprigs, dust with icing sugar and serve with cream.
Creamy Rice Pudding with Armagnac & Earl Grey Prunes (Serves 4 -6)
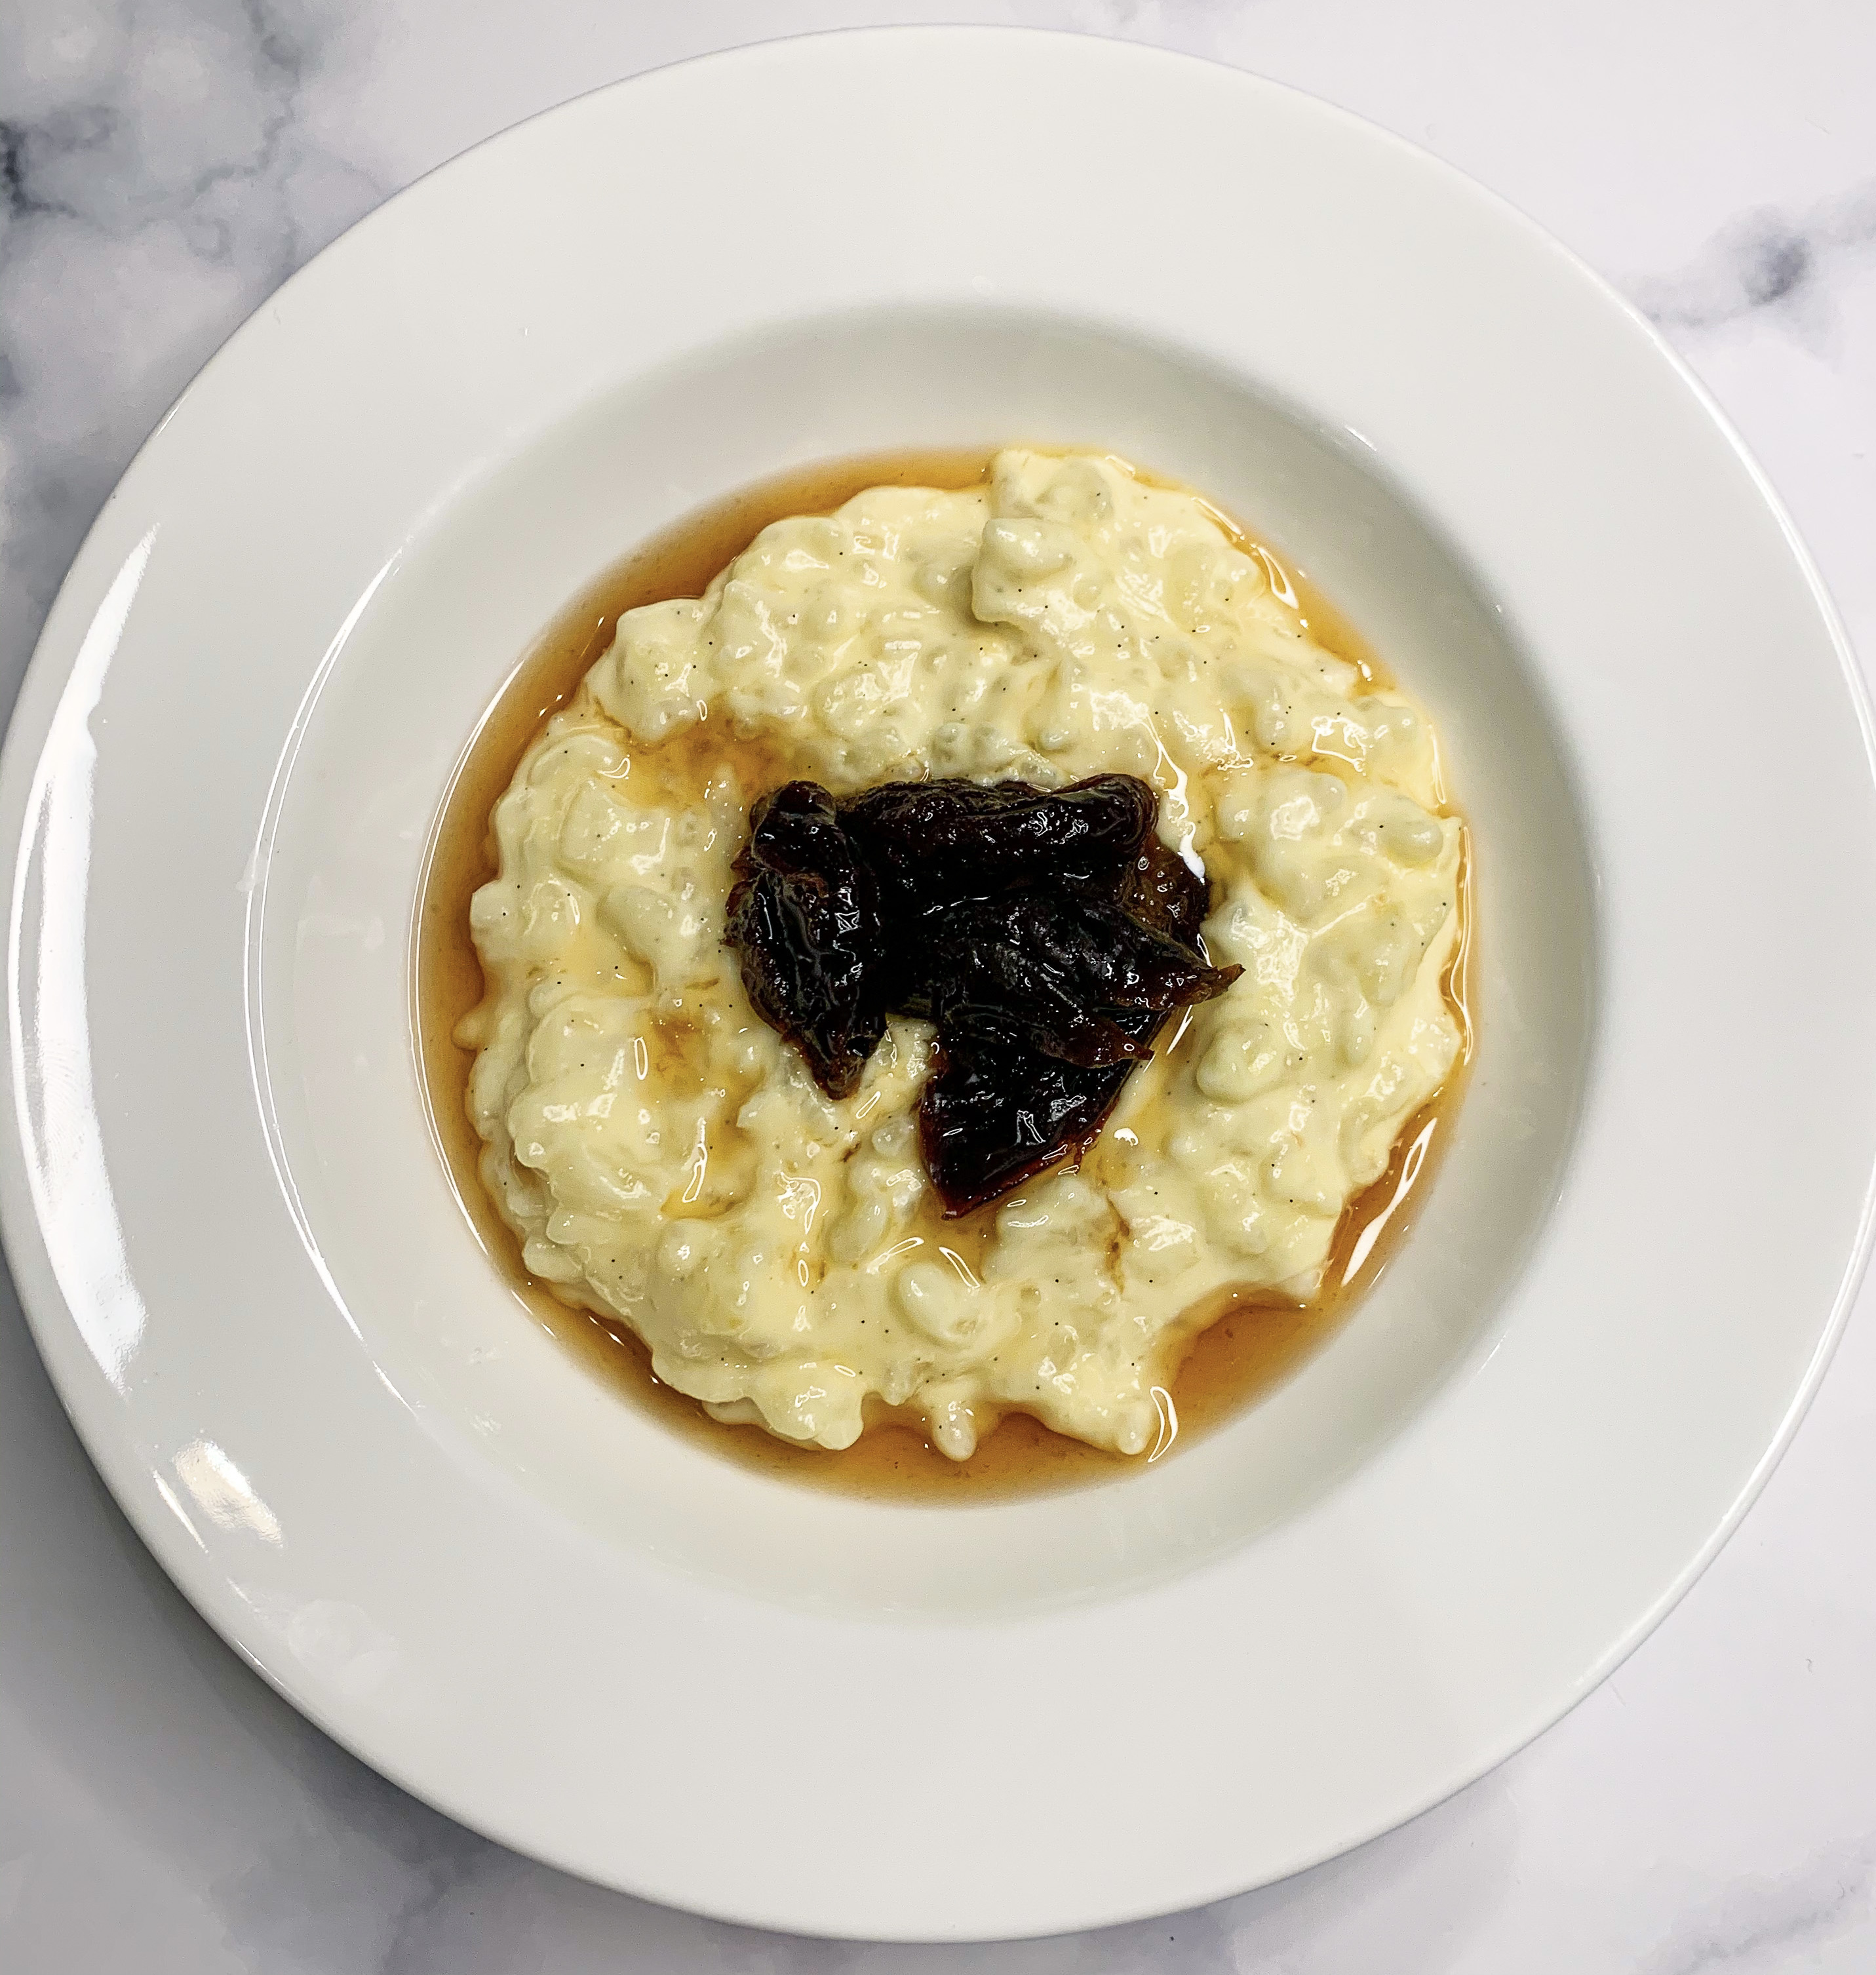
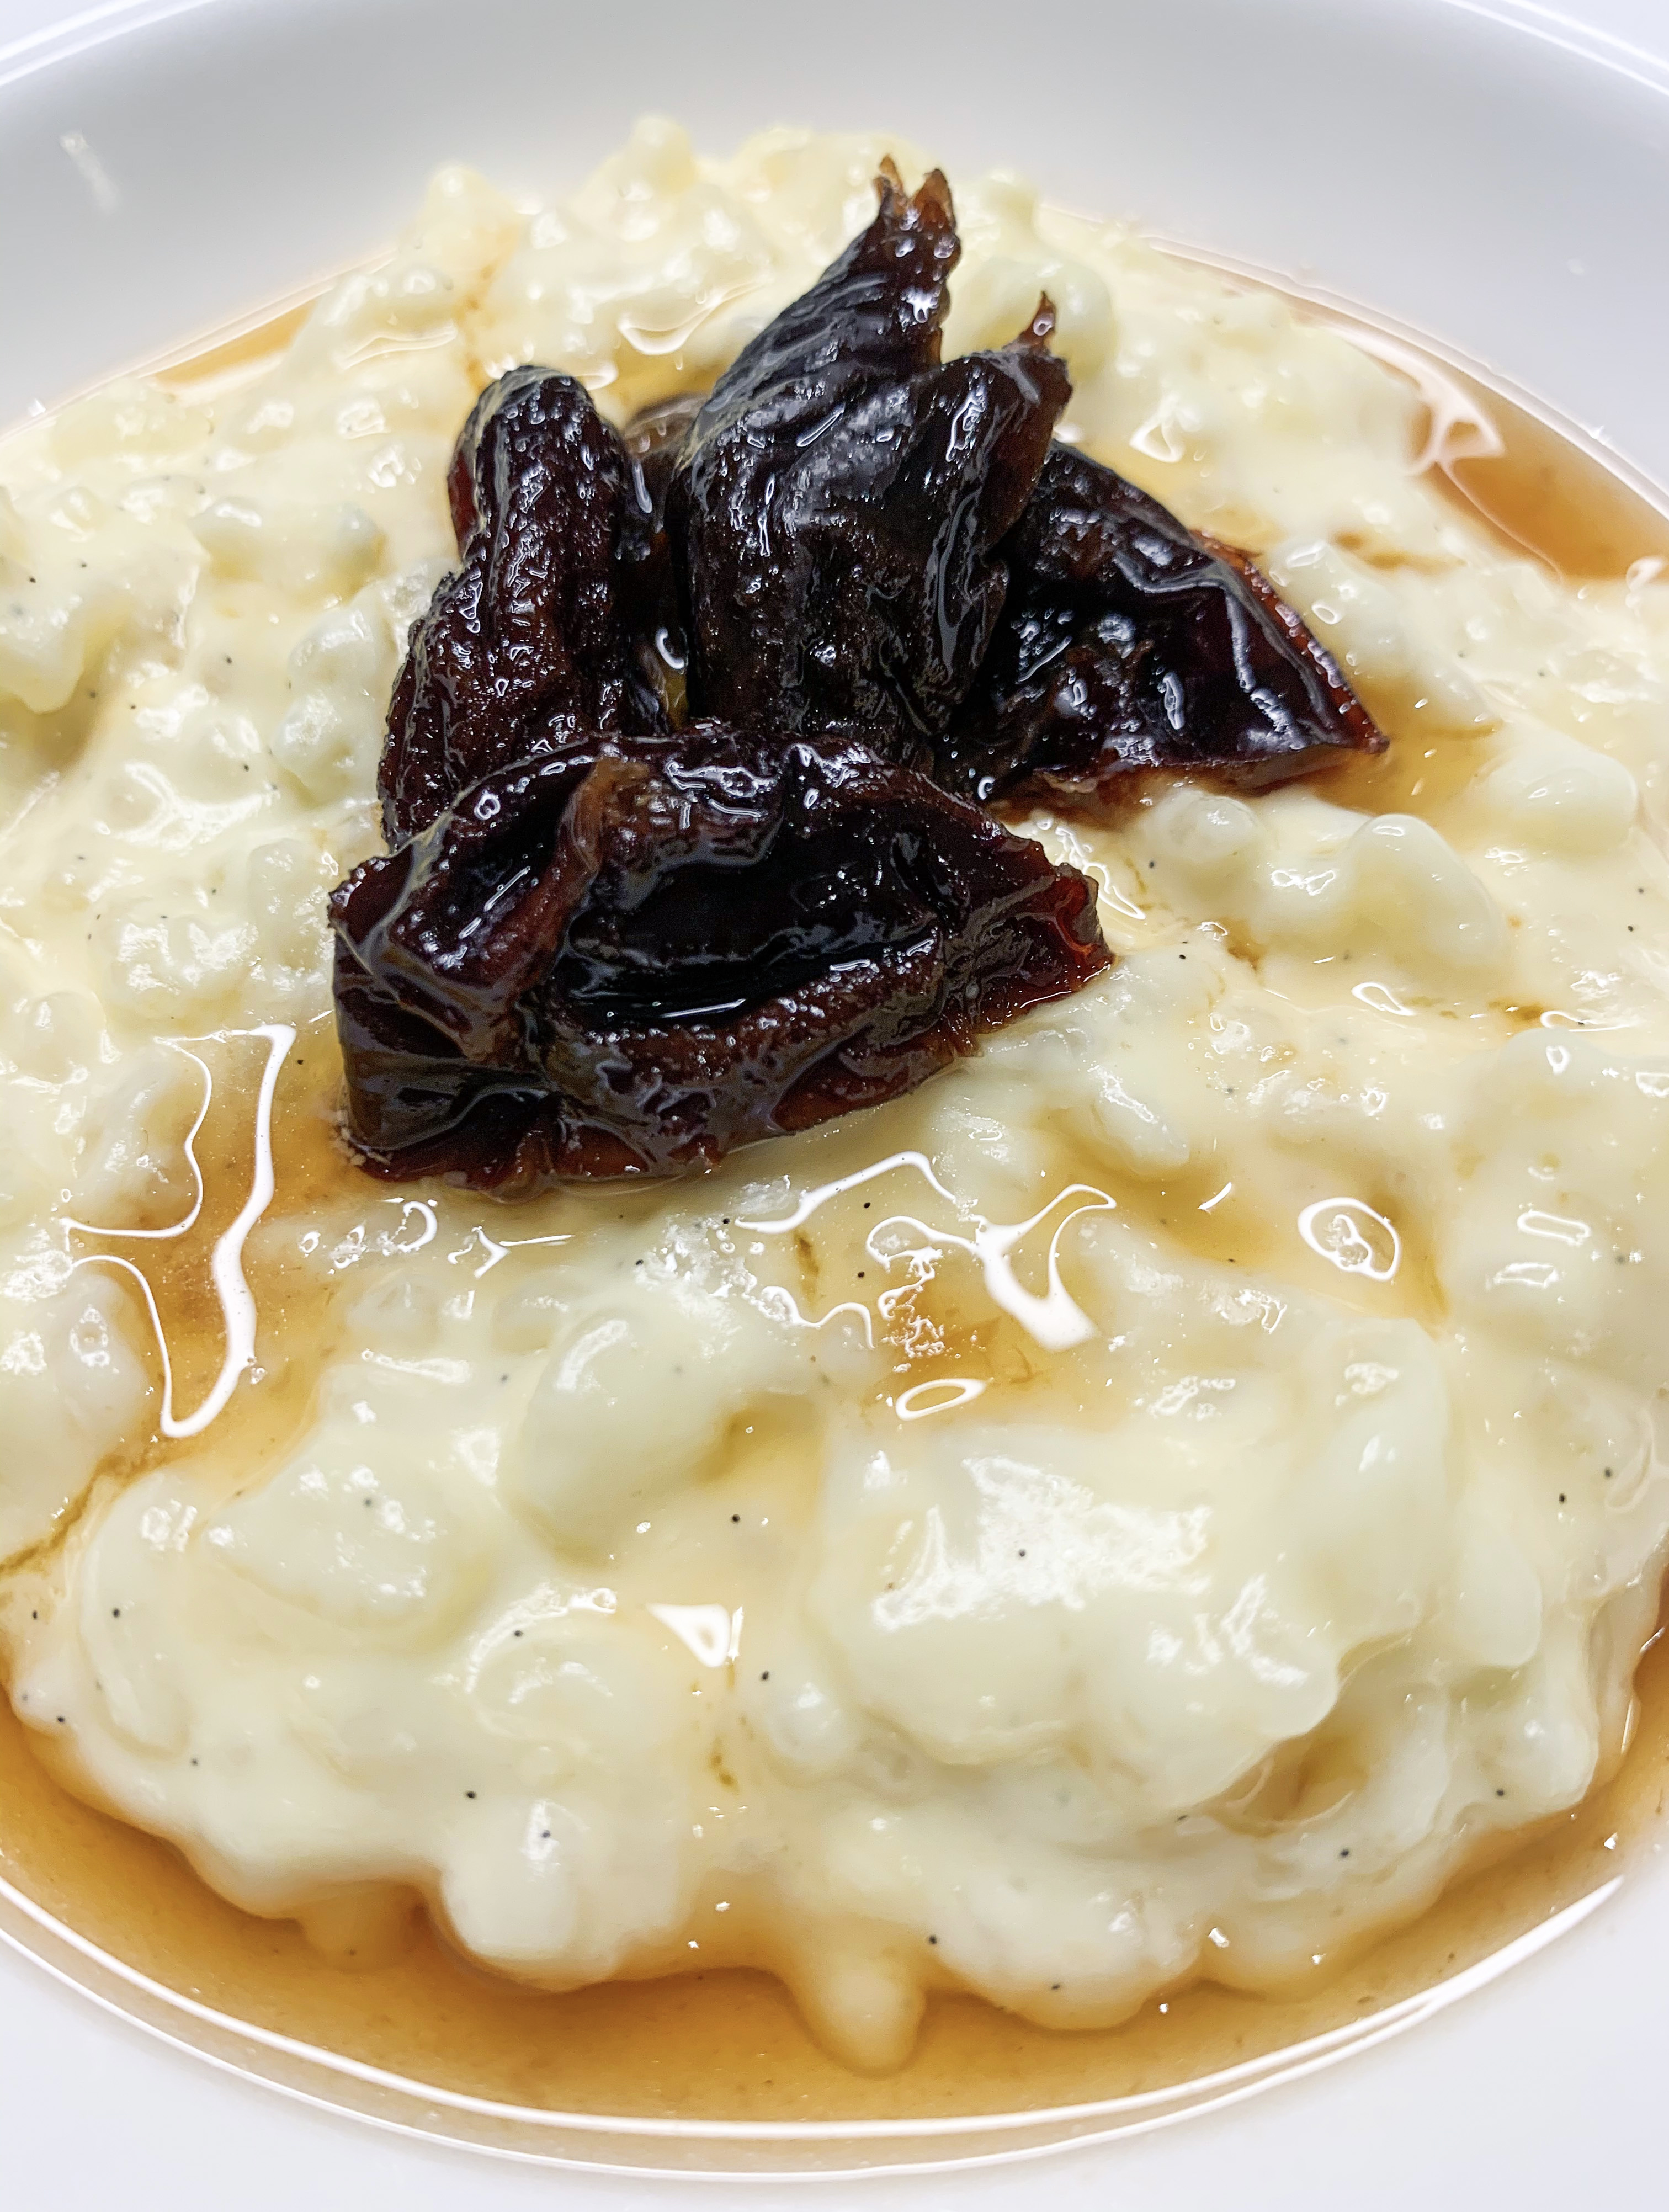
Ok, I must admit that I haven’t always been a lover of rice pudding. When I was a child I absolutely hated it; most of my memories of this pudding, probably fuelled by my school dinners, are of a tasteless, milky mush. I was only converted years later, when Nick, who loves rice pudding, urged me to try it in a restaurant – it was a revelation! Since then, I have been on a mission to find the very best, creamiest rice pudding recipe…and I think this is definitely it. The prunes in Armagnac are the ‘icing on the cake’! I hate skin on my rice pudding, so I stir it every 15 minutes whilst it is baking to stop a skin from forming, but if you prefer, you can leave it to skin over.
For the Pudding:
500ml whole milk
500ml double cream
1 vanilla pod
100g Arborio rice
75g caster sugar
For the Armagnac Prunes:
50g caster sugar
50g clear honey
1 earl grey teabag
100ml Armagnac
16 Agen prunes, pitted and cut in half
- Firstly prepare the prunes. Put 100ml water, the sugar and honey in a small saucepan and bring to the boil. Remove from the heat, add the teabag and allow to infuse for 2-3 minutes. Remove the teabag, then pour in the Armagnac and add the prunes. Set aside to marinate whilst you make the rice pudding.
- Slice the vanilla pod lengthways, scrape out the seeds, and mix in a bowl, with the milk, cream, rice and caster sugar. Put in a 1.5 litre ovenproof dish and bake in a preheated oven, 130’c fan, for 1½ hours until all the liquid has been absorbed; stir every 15 minutes to prevent a skin from forming.
- When you are ready to serve, gently warm the prunes in a small pan. Serve the rice pudding in bowls with the prunes and their delicious syrup spooned over the top!
Rhubarb and Ginger Meringues (Serves 4)
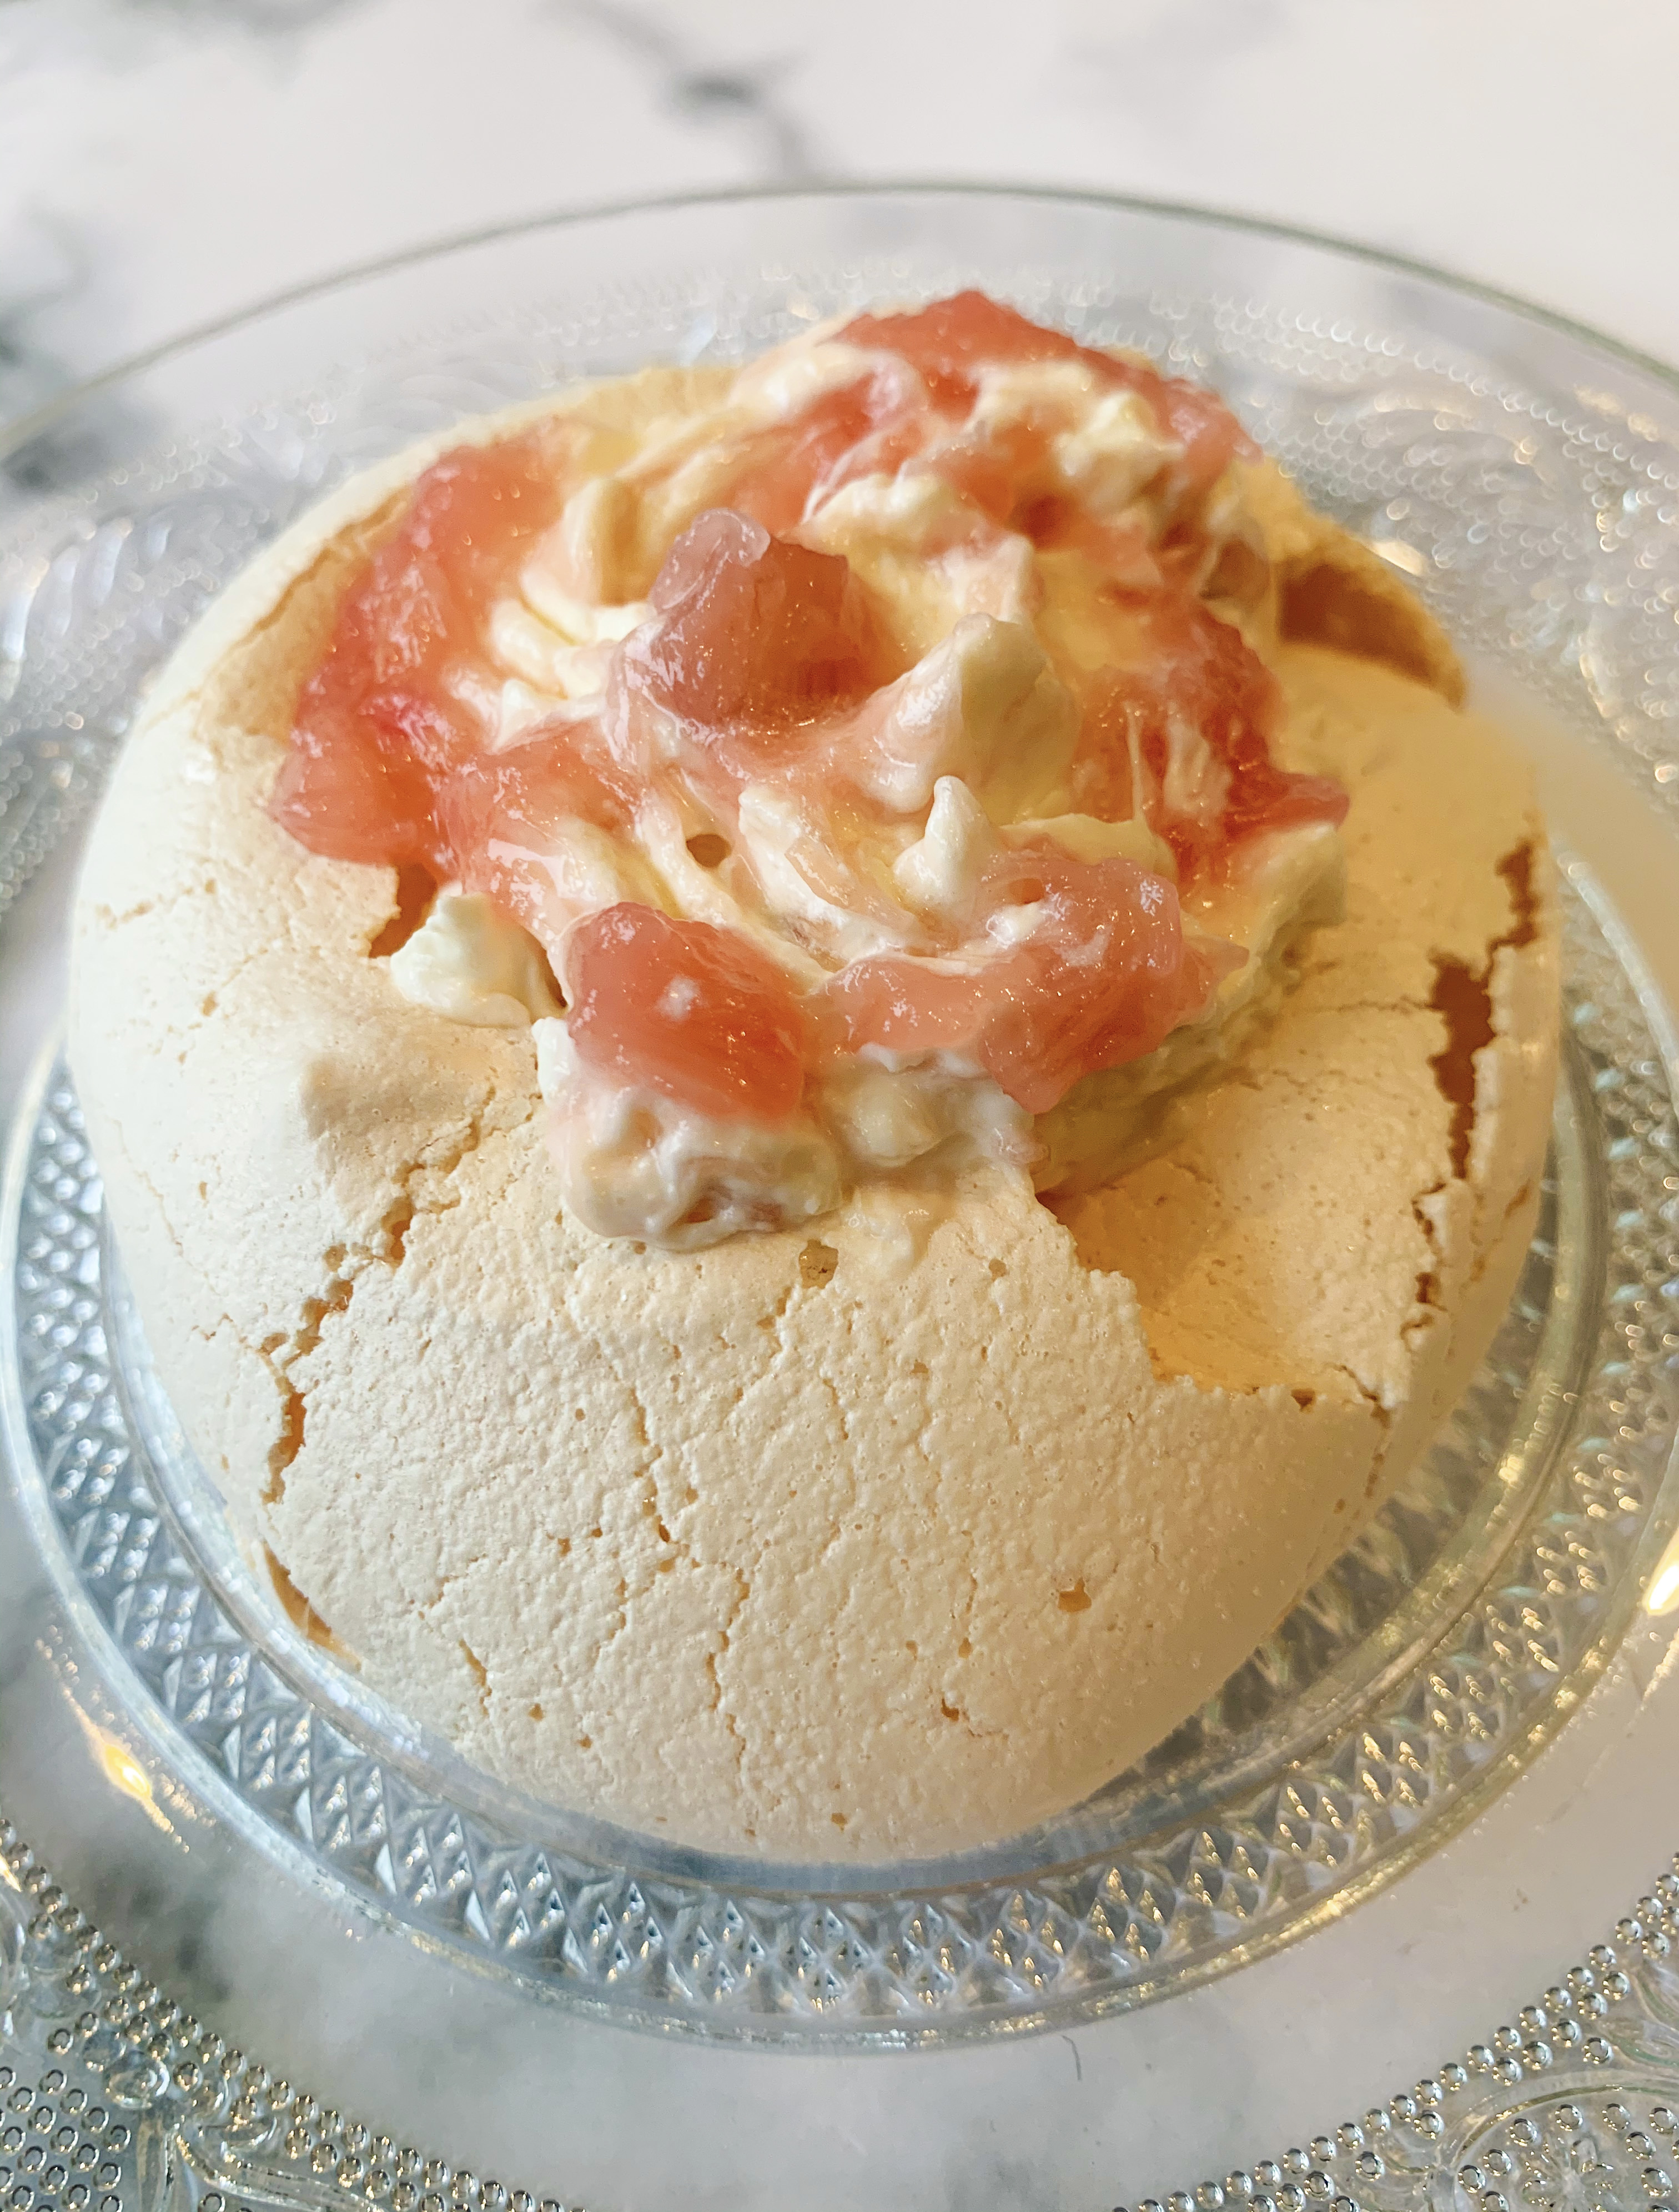
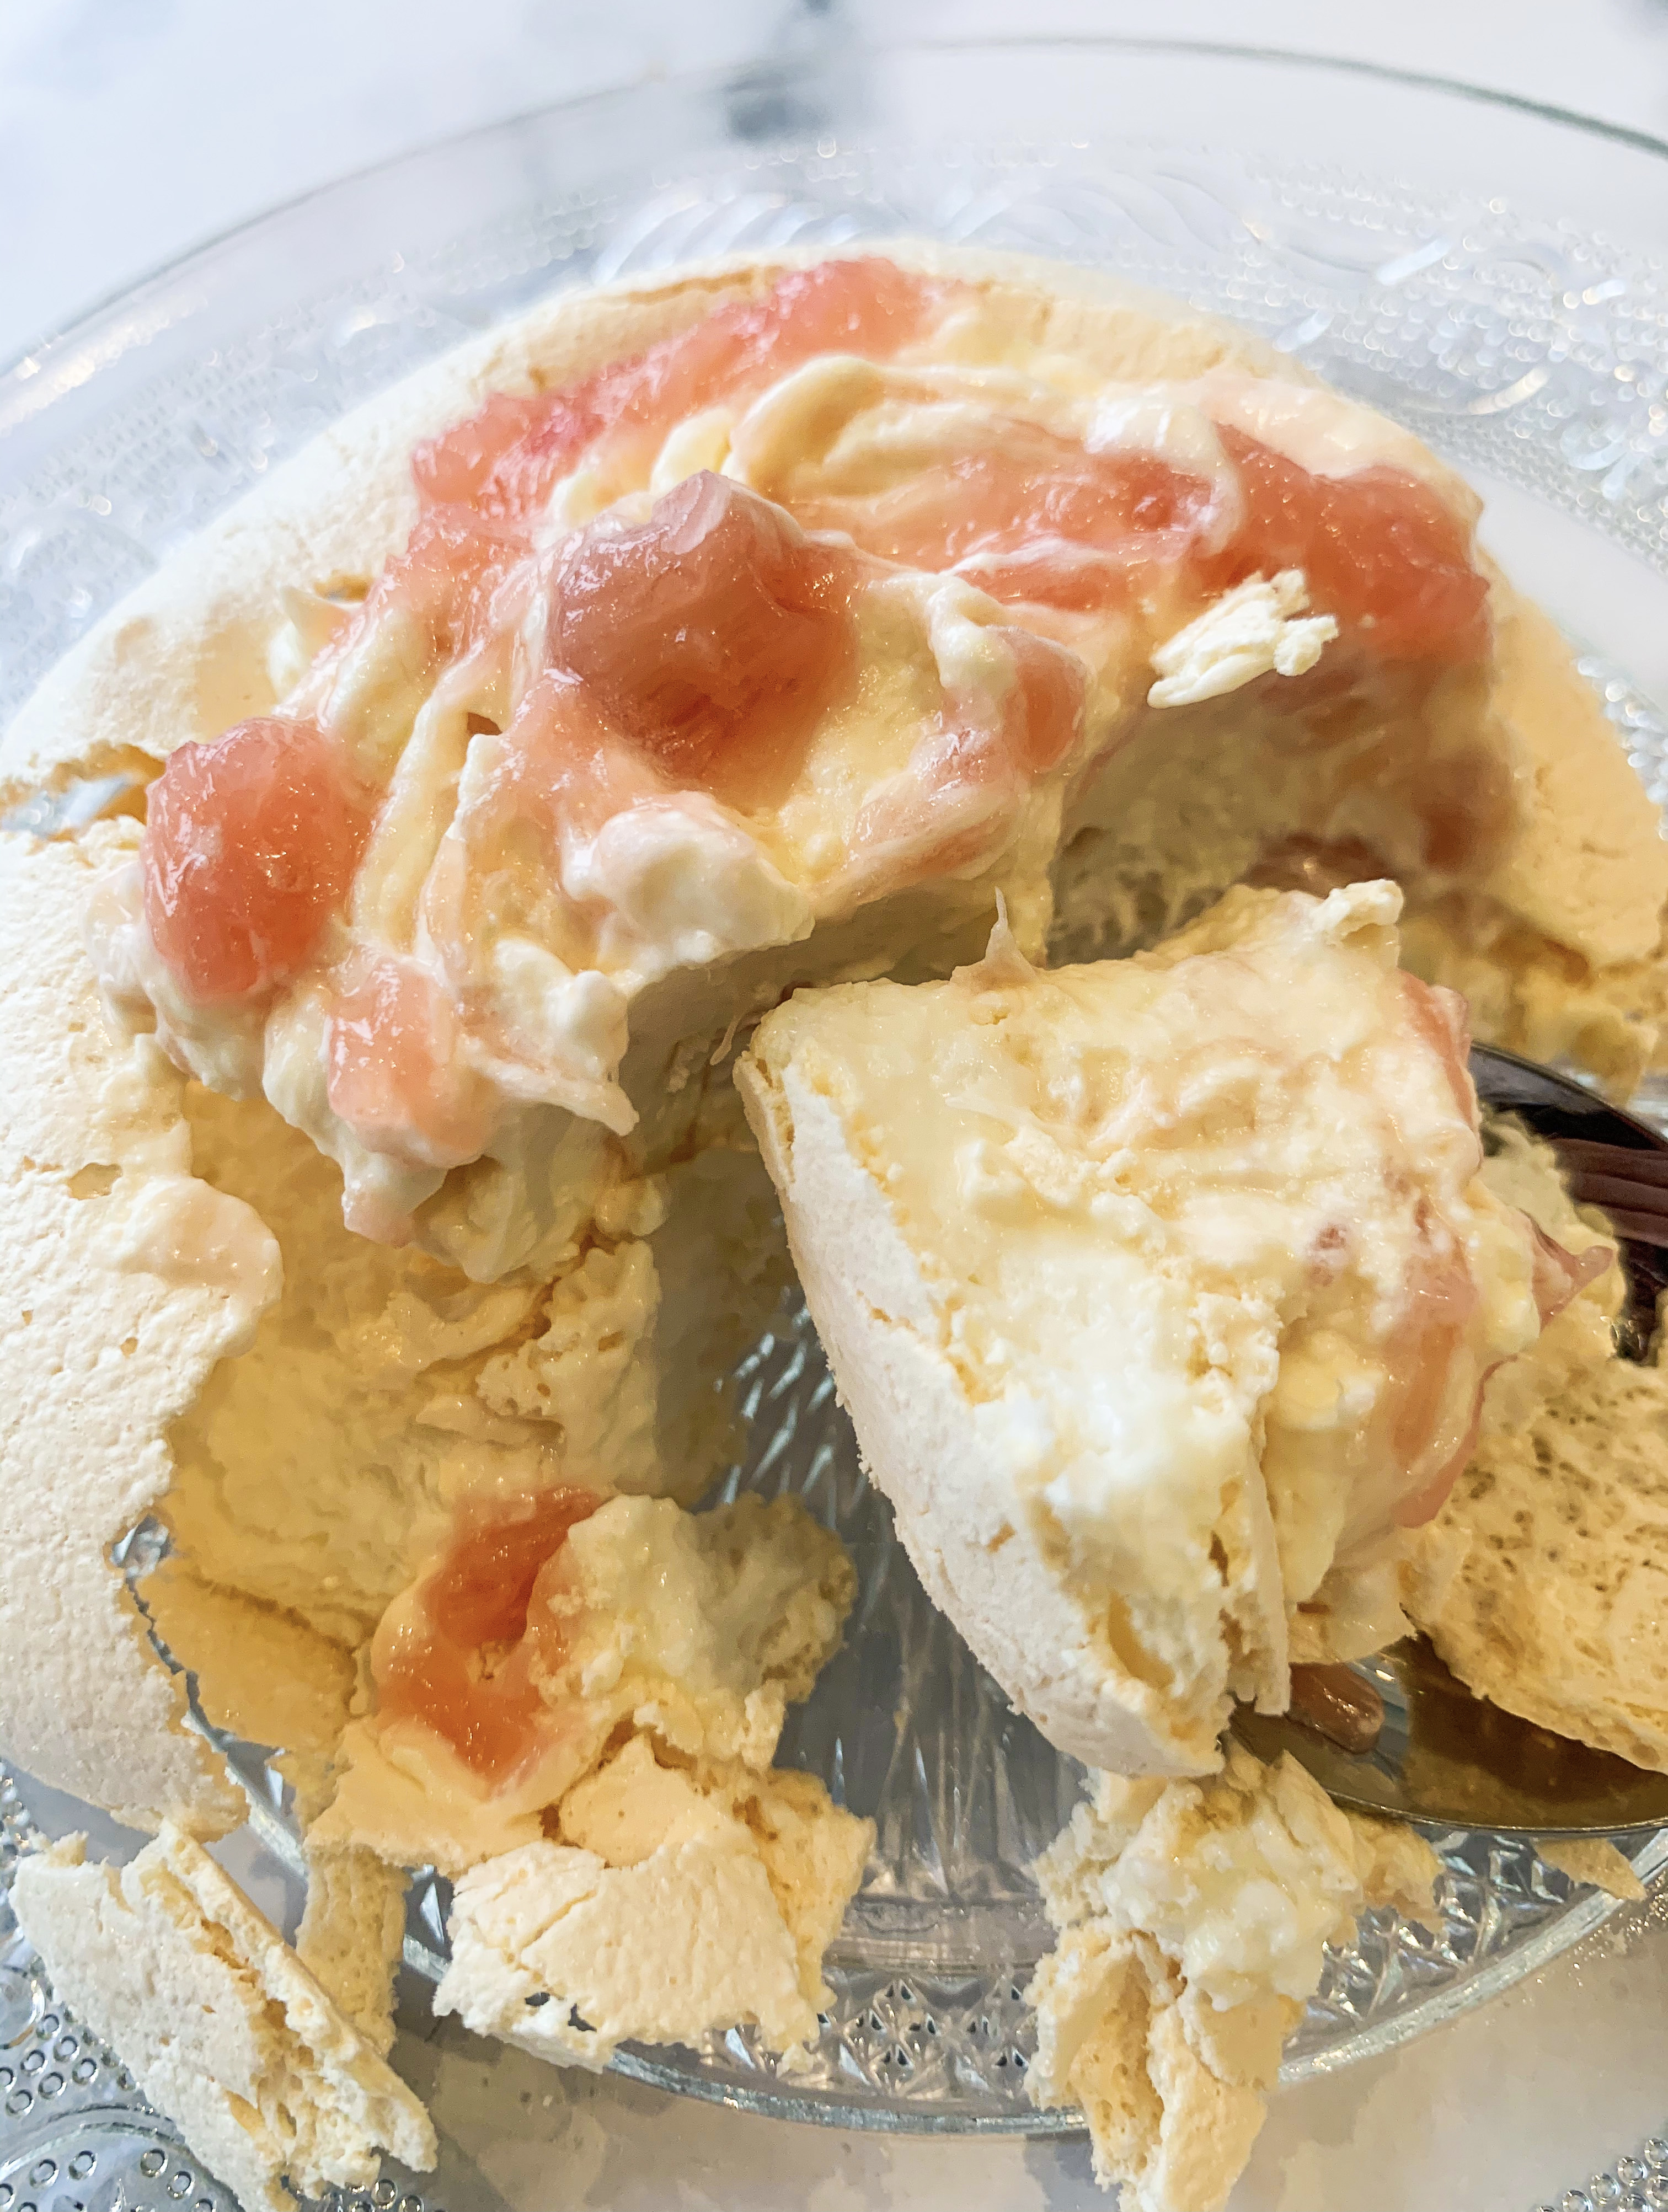
I love the tart nature of rhubarb; this recipe for Rhubarb and Ginger Meringues has been a favourite of mine for some years now. These individual meringues are not the crunchy type, but are lovely, marshmallowy, soft meringues – you only cook them for 10-15 minutes. They do tend to crack a bit around the edges, so don’t be alarmed when they do, but this adds to their charm, and they still look impressive with the creamy rhubarb and ginger fool that sits in the middle of them. It really is a delicious dessert, the sharp rhubarb is perfectly balanced by the sweetness of the meringue. What’s more, it is the simplest of desserts – I found the recipe in Rachel Allen’s cookbook ‘Easy Meals’ – so enough said!…
Watch the video of this dessert being made here!
2 large egg whites
125g caster sugar
For the rhubarb fool:
175g rhubarb, cut into 1cm lengths
75g caster sugar
1 teaspoon grated root ginger
125ml double cream, softly whipped
- Place the egg whites in a bowl and using a hand-held electric whisk, whisk until they form soft peaks. Gradually whisk in the caster sugar and continue to whisk until the meringue mixture is stiff and glossy.
- Spoon 4 large blobs of the mixture onto a baking tray lined with greaseproof paper. Using the back of a spoon create a well in the centre of each meringue (this is where the rhubarb fool will sit).
- Place the meringues in a preheated oven, 160’c fan, for 10-15 minutes until they are crisp on the outside but still marshmallowy in the middle. Remove from the oven and carefully lift them from the greaseproof paper to cool on a wire rack.
- Meanwhile make the rhubarb fool. Place the rhubarb, sugar and ginger in a saucepan with 25ml of water. Cook over a medium heat for 5-10 minutes until the rhubarb is stewed to a mush and the syrup has thickened. Allow to cool, then fold into the whipped cream.
- To serve, place the meringues onto individual plates and spoon a dollop of rhubarb fool over the top of each one.
Chocolate Gourmandise (Serves 4)
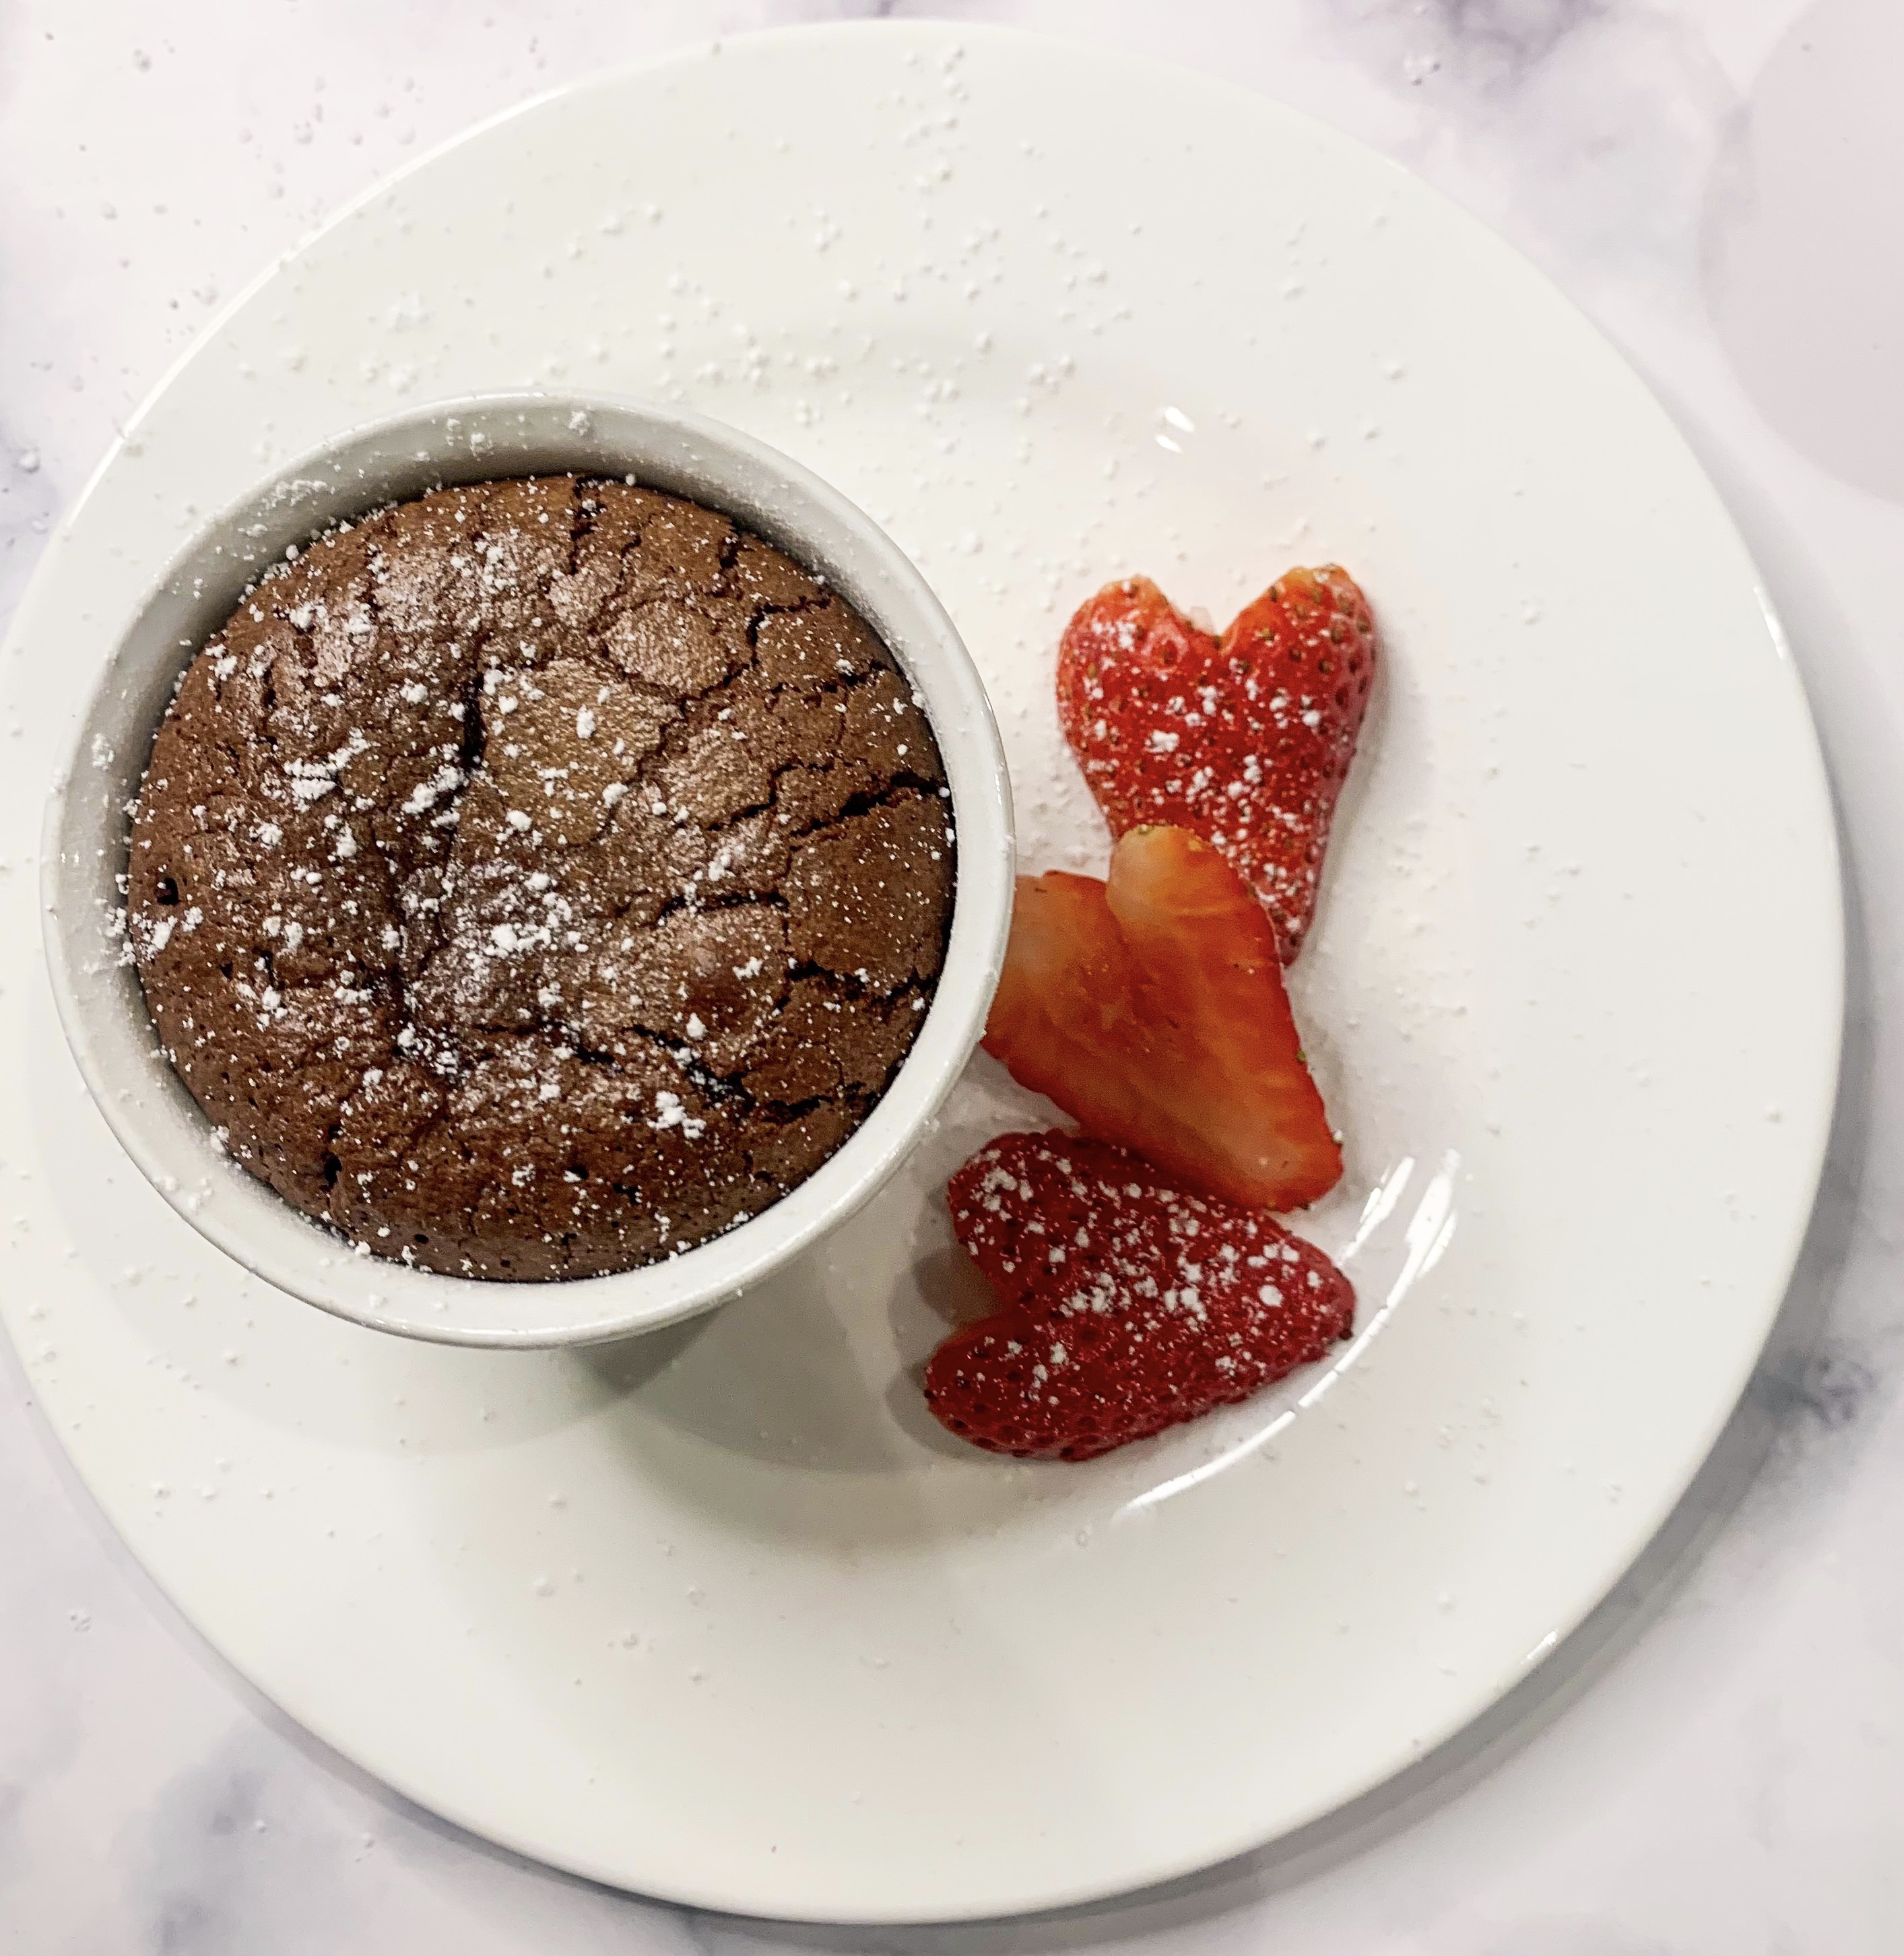
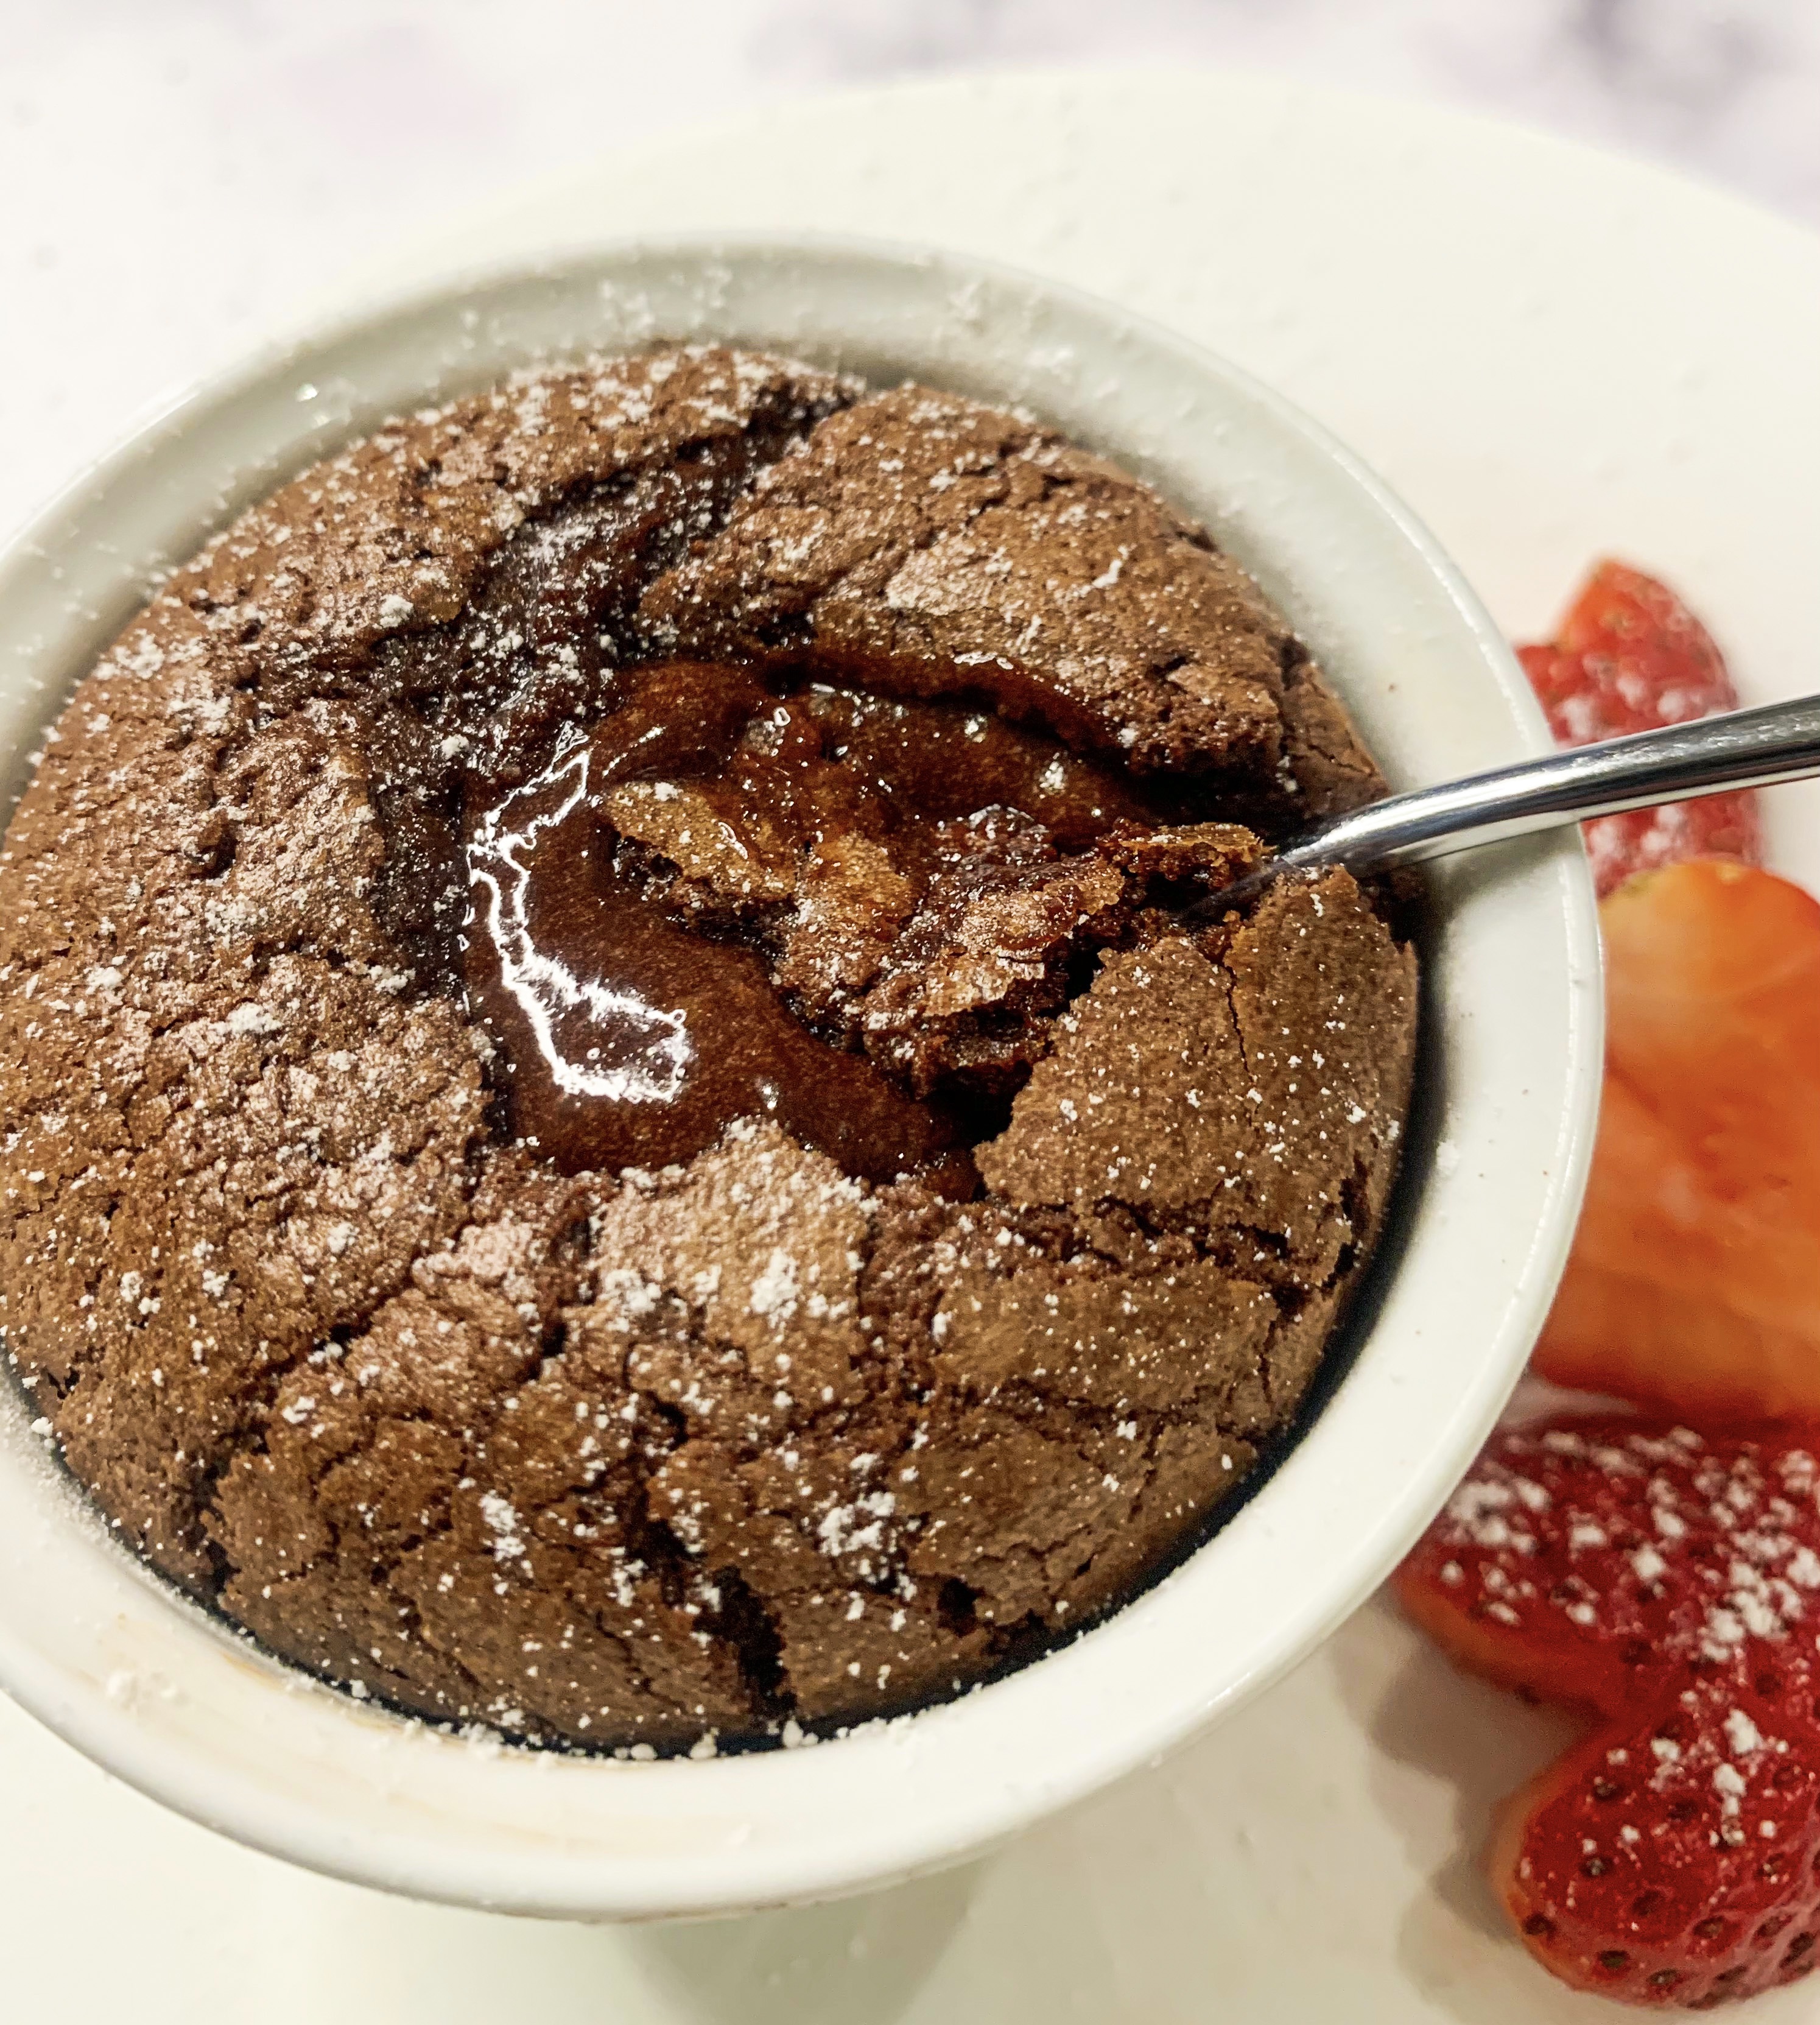
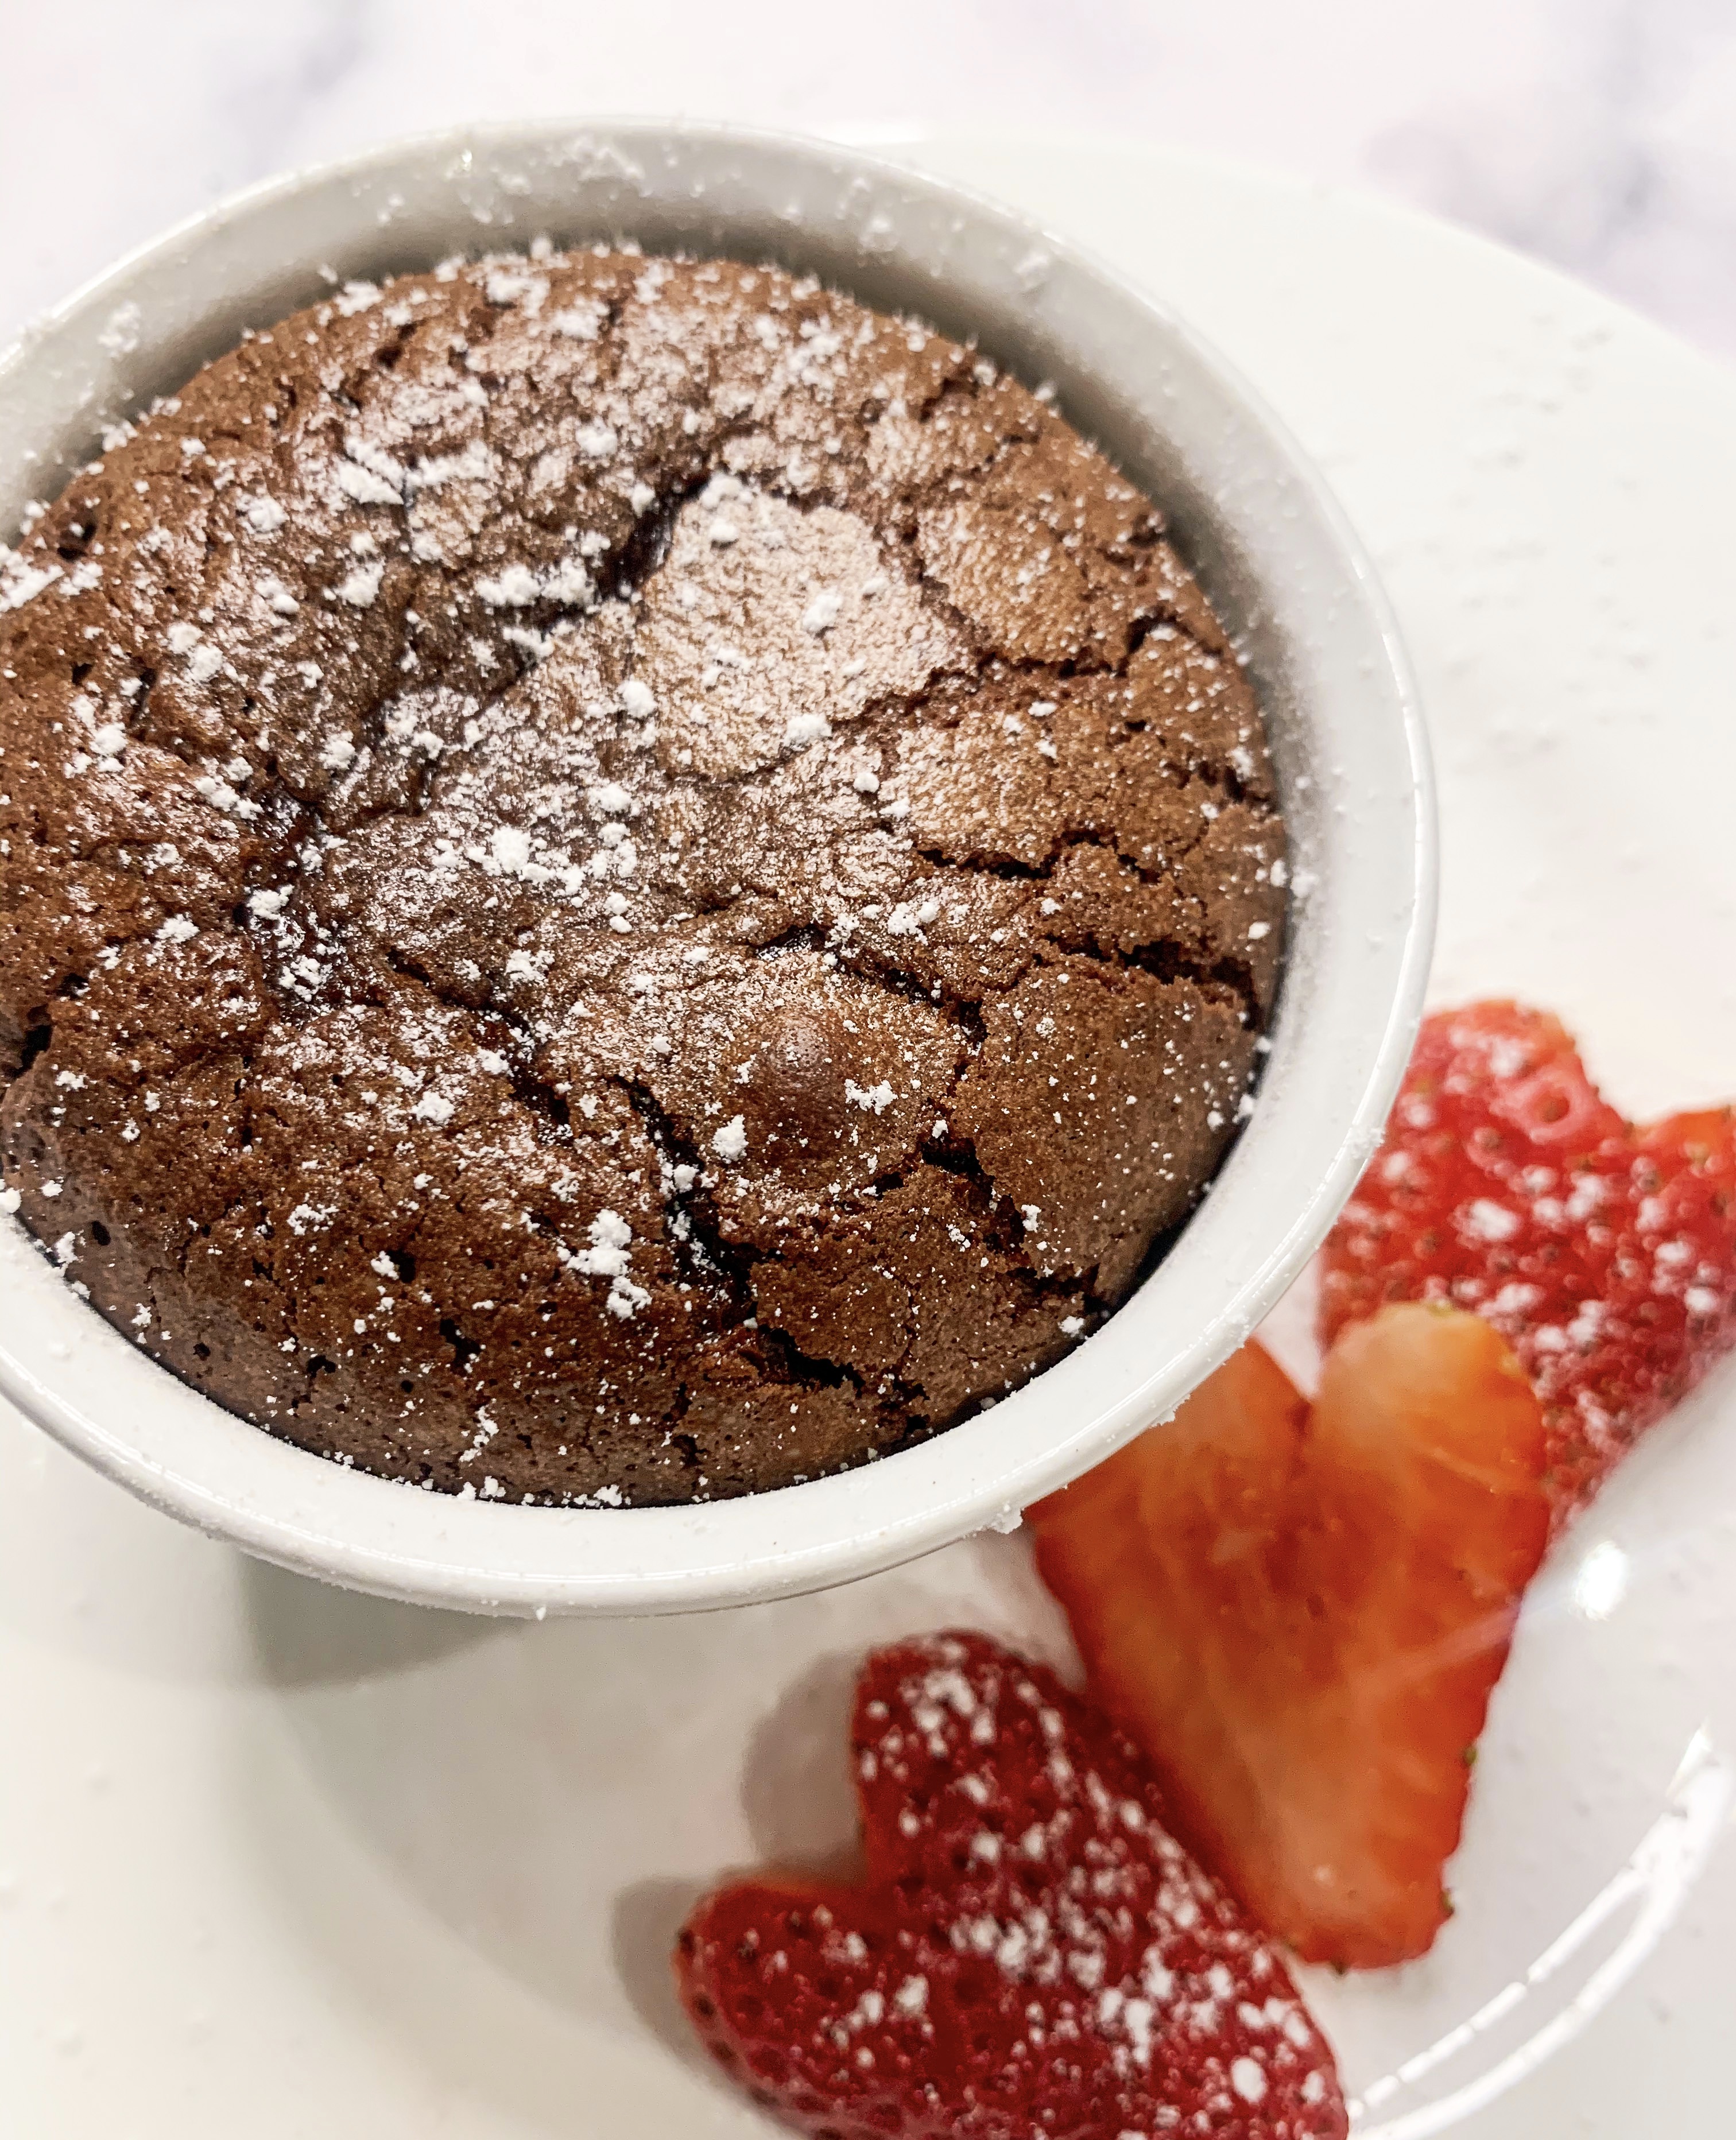
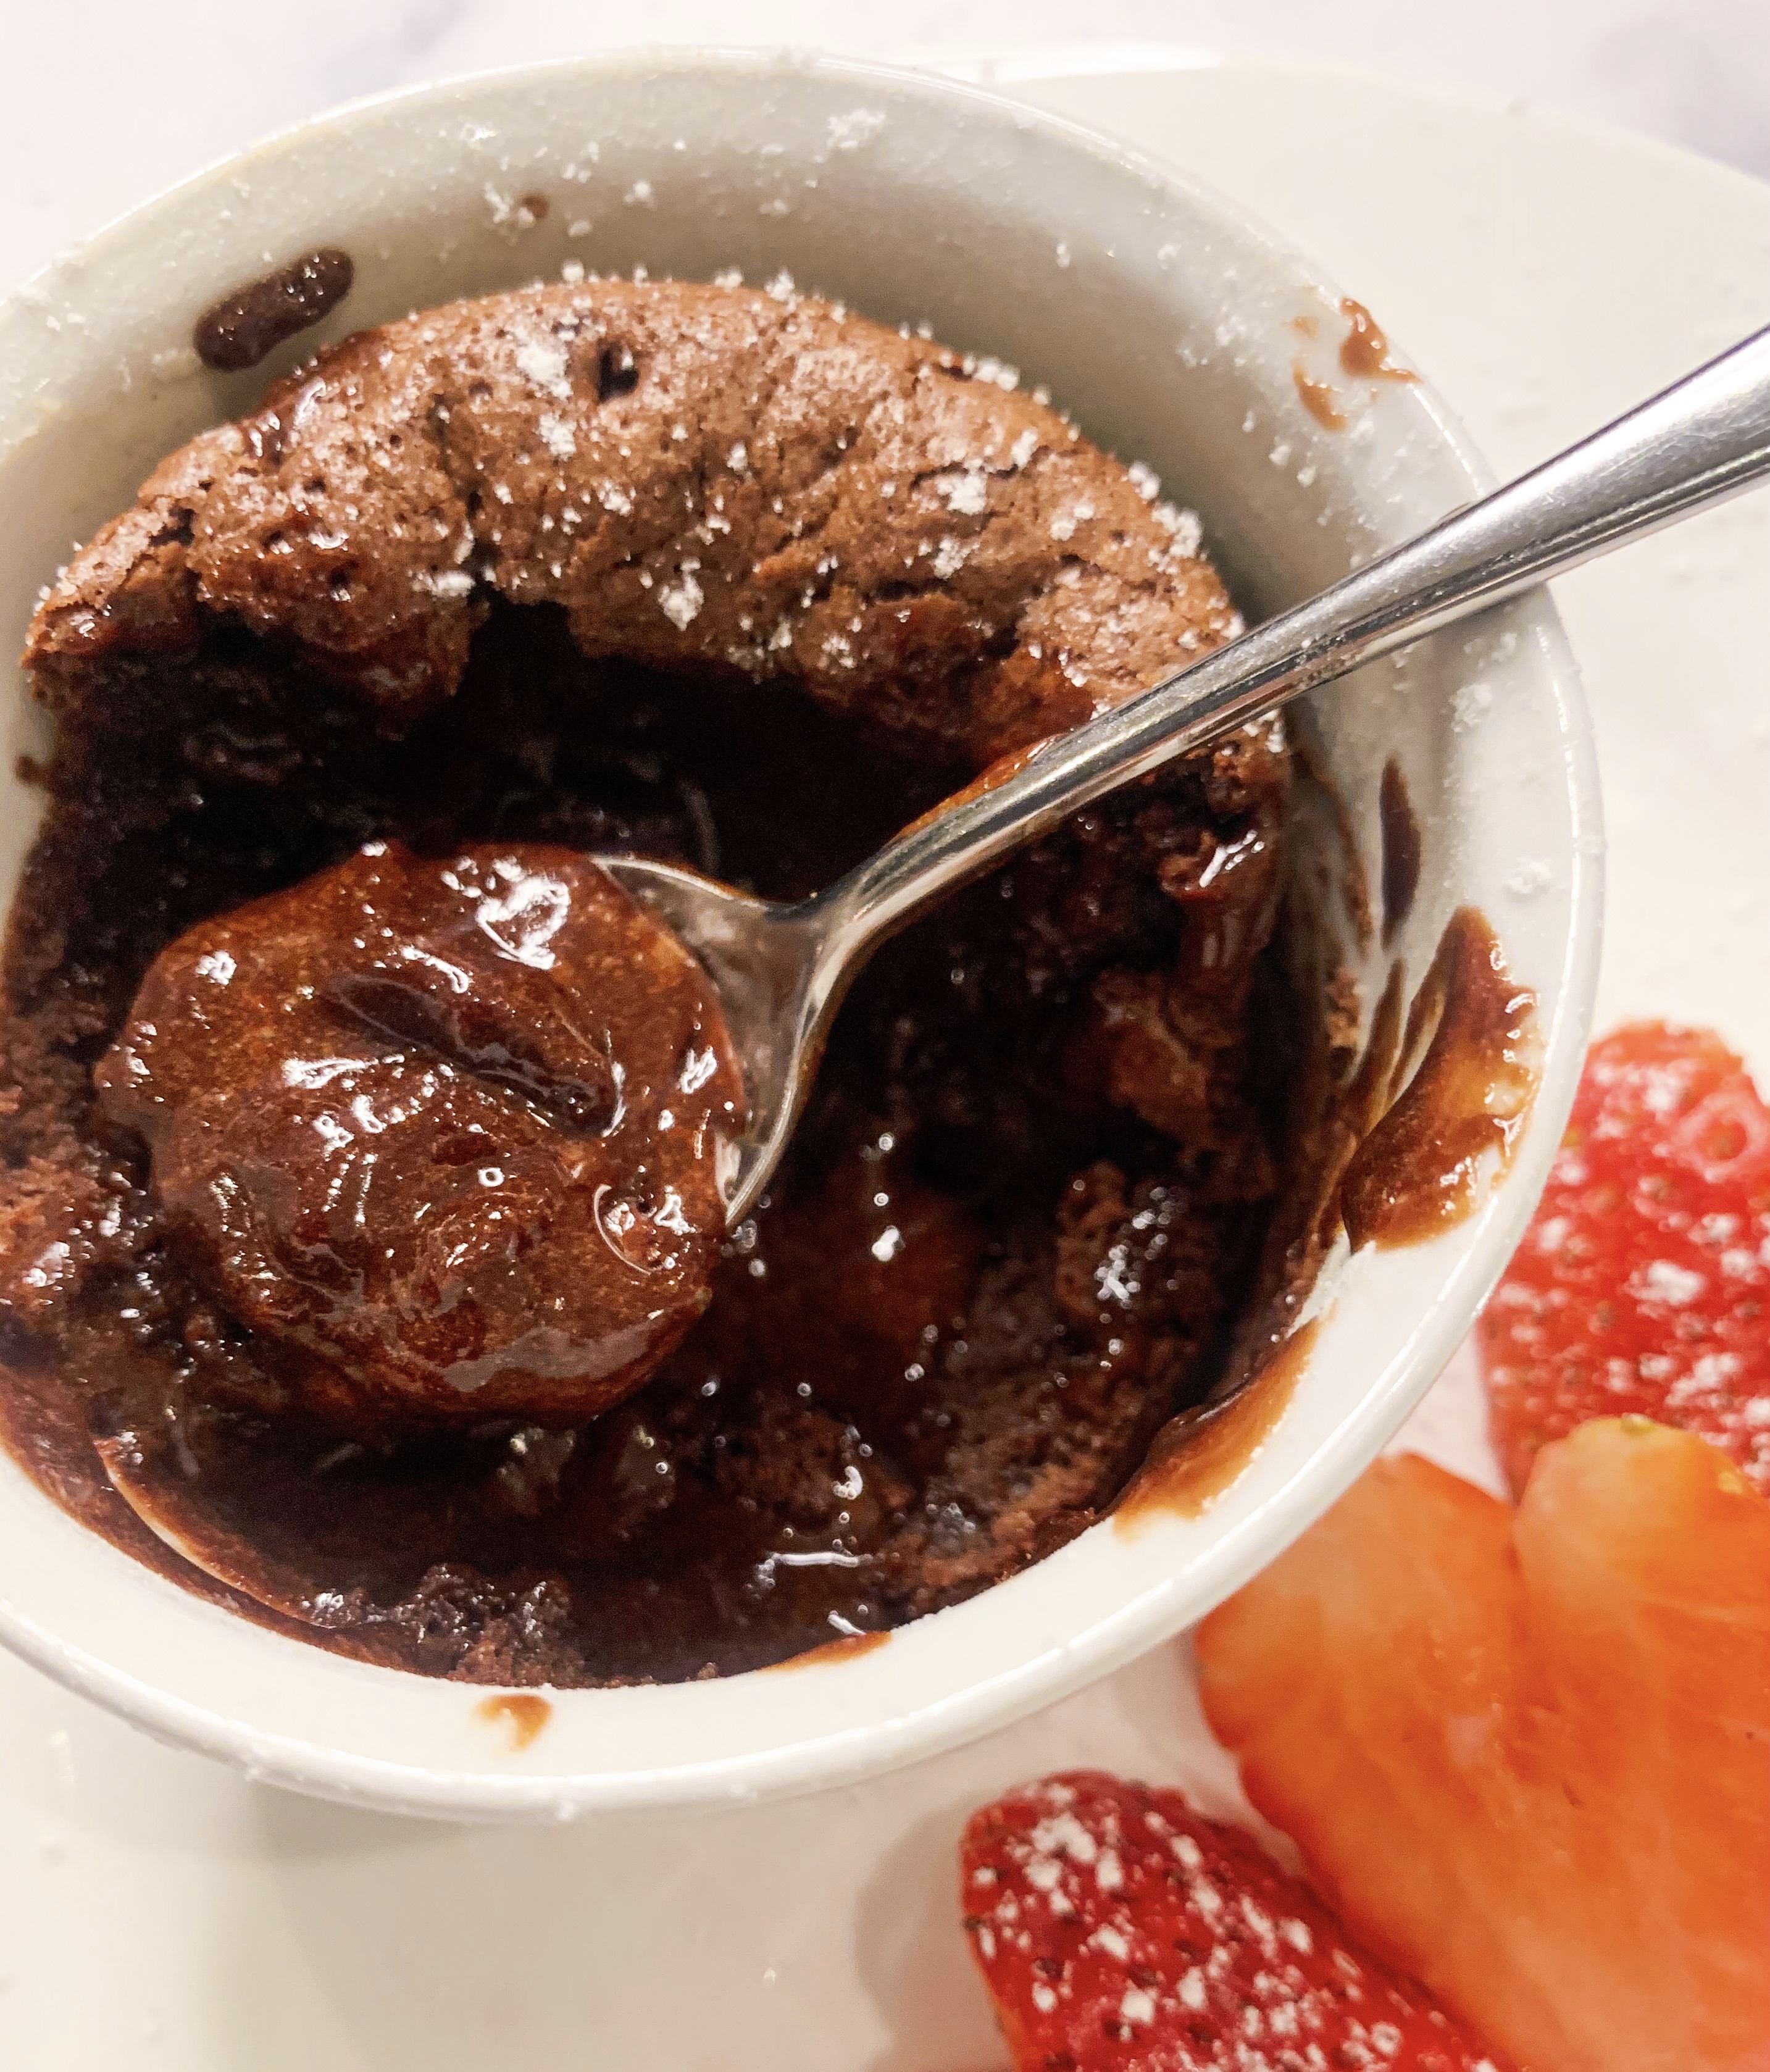
‘Chocolate Gourmandise’ is one of those desserts that everyone, yes, everyone loves! On first appearance it seems to be a little sponge in a cup, but when you dip your spoon into it, you get the wonderful surprise of a molten chocolate centre. What really will steal your heart, is that this recipe, is not only delicious but incredibly easy to make, and so, it is not only the perfect midweek family treat, but also the perfect dessert to end a dinner party… It must be baked at the very last minute, but can be prepared several hours in advance. And the other good news is that, it works perfectly well with gluten free plain flour (I use Doves). This recipe is from a cookbook which I have had for over 20 years, ‘Patricia Wells at Home in the Provence’. Whilst there are other recipes in this book that I have enjoyed, it always naturally falls open onto the page for Chocolate Gourmandise (with all its cooking stains)!
Watch the video of this dessert being made here!
125g dark chocolate, roughly chopped (I use Lindt Excellence 70% Cocoa Dark Chocolate)
125g butter
3 large eggs
150g caster sugar
35 g plain flour (gluten free if required – I use ‘Doves’)
Butter and flour for preparing the ramekins
(you will also need 4 small ramekins with 150ml capacity)
- Place the chocolate with the butter in a bowl over a pan of barely simmering water, stir until melted.
- In another bowl, whisk the eggs with the sugar and flour, mixing just to blend.
- Gradually whisk in the melted chocolate mixture.
- Leave the mixture to rest for an hour, to allow the flavours to mellow.
- Generously butter and flour the ramekins. Place on a baking sheet. Spoon the mixture into the ramekins.
- Bake in a preheated oven, 200’c fan, for 12-14 minutes, they should be still wobbly.
- Transfer the ramekins to sit on dessert plates and serve immediately.
‘Flapjack’ Plum Crumble

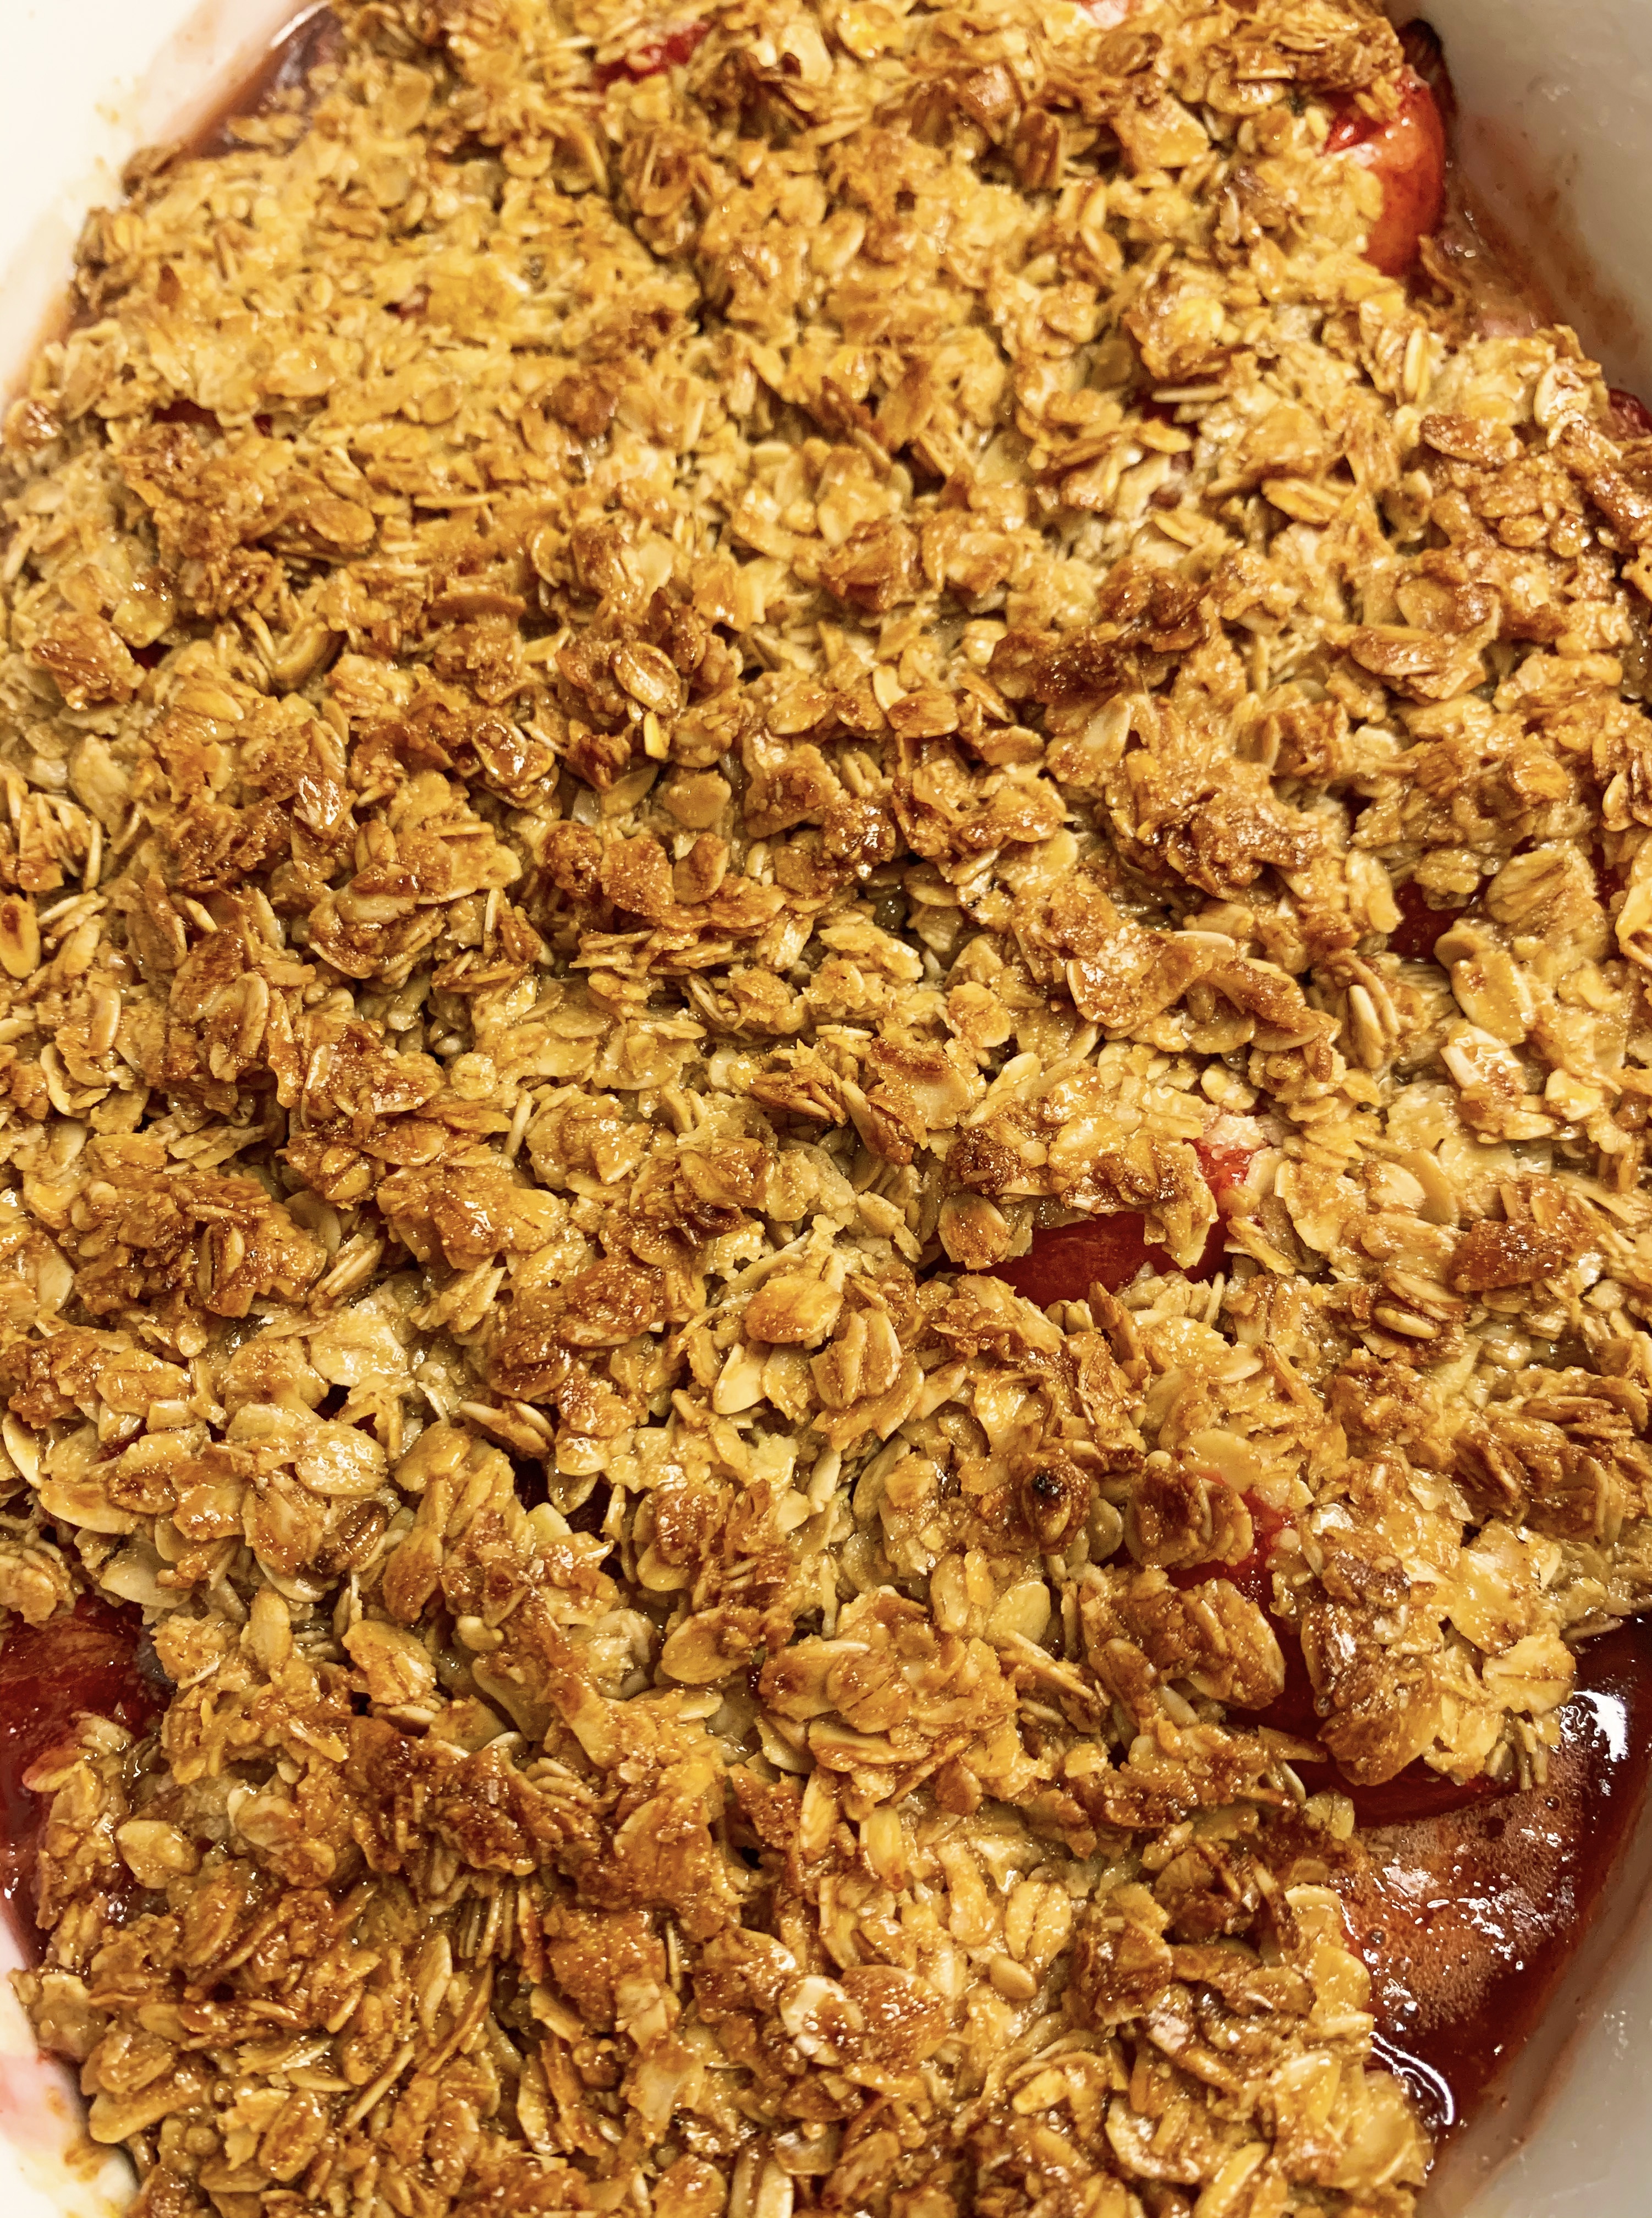
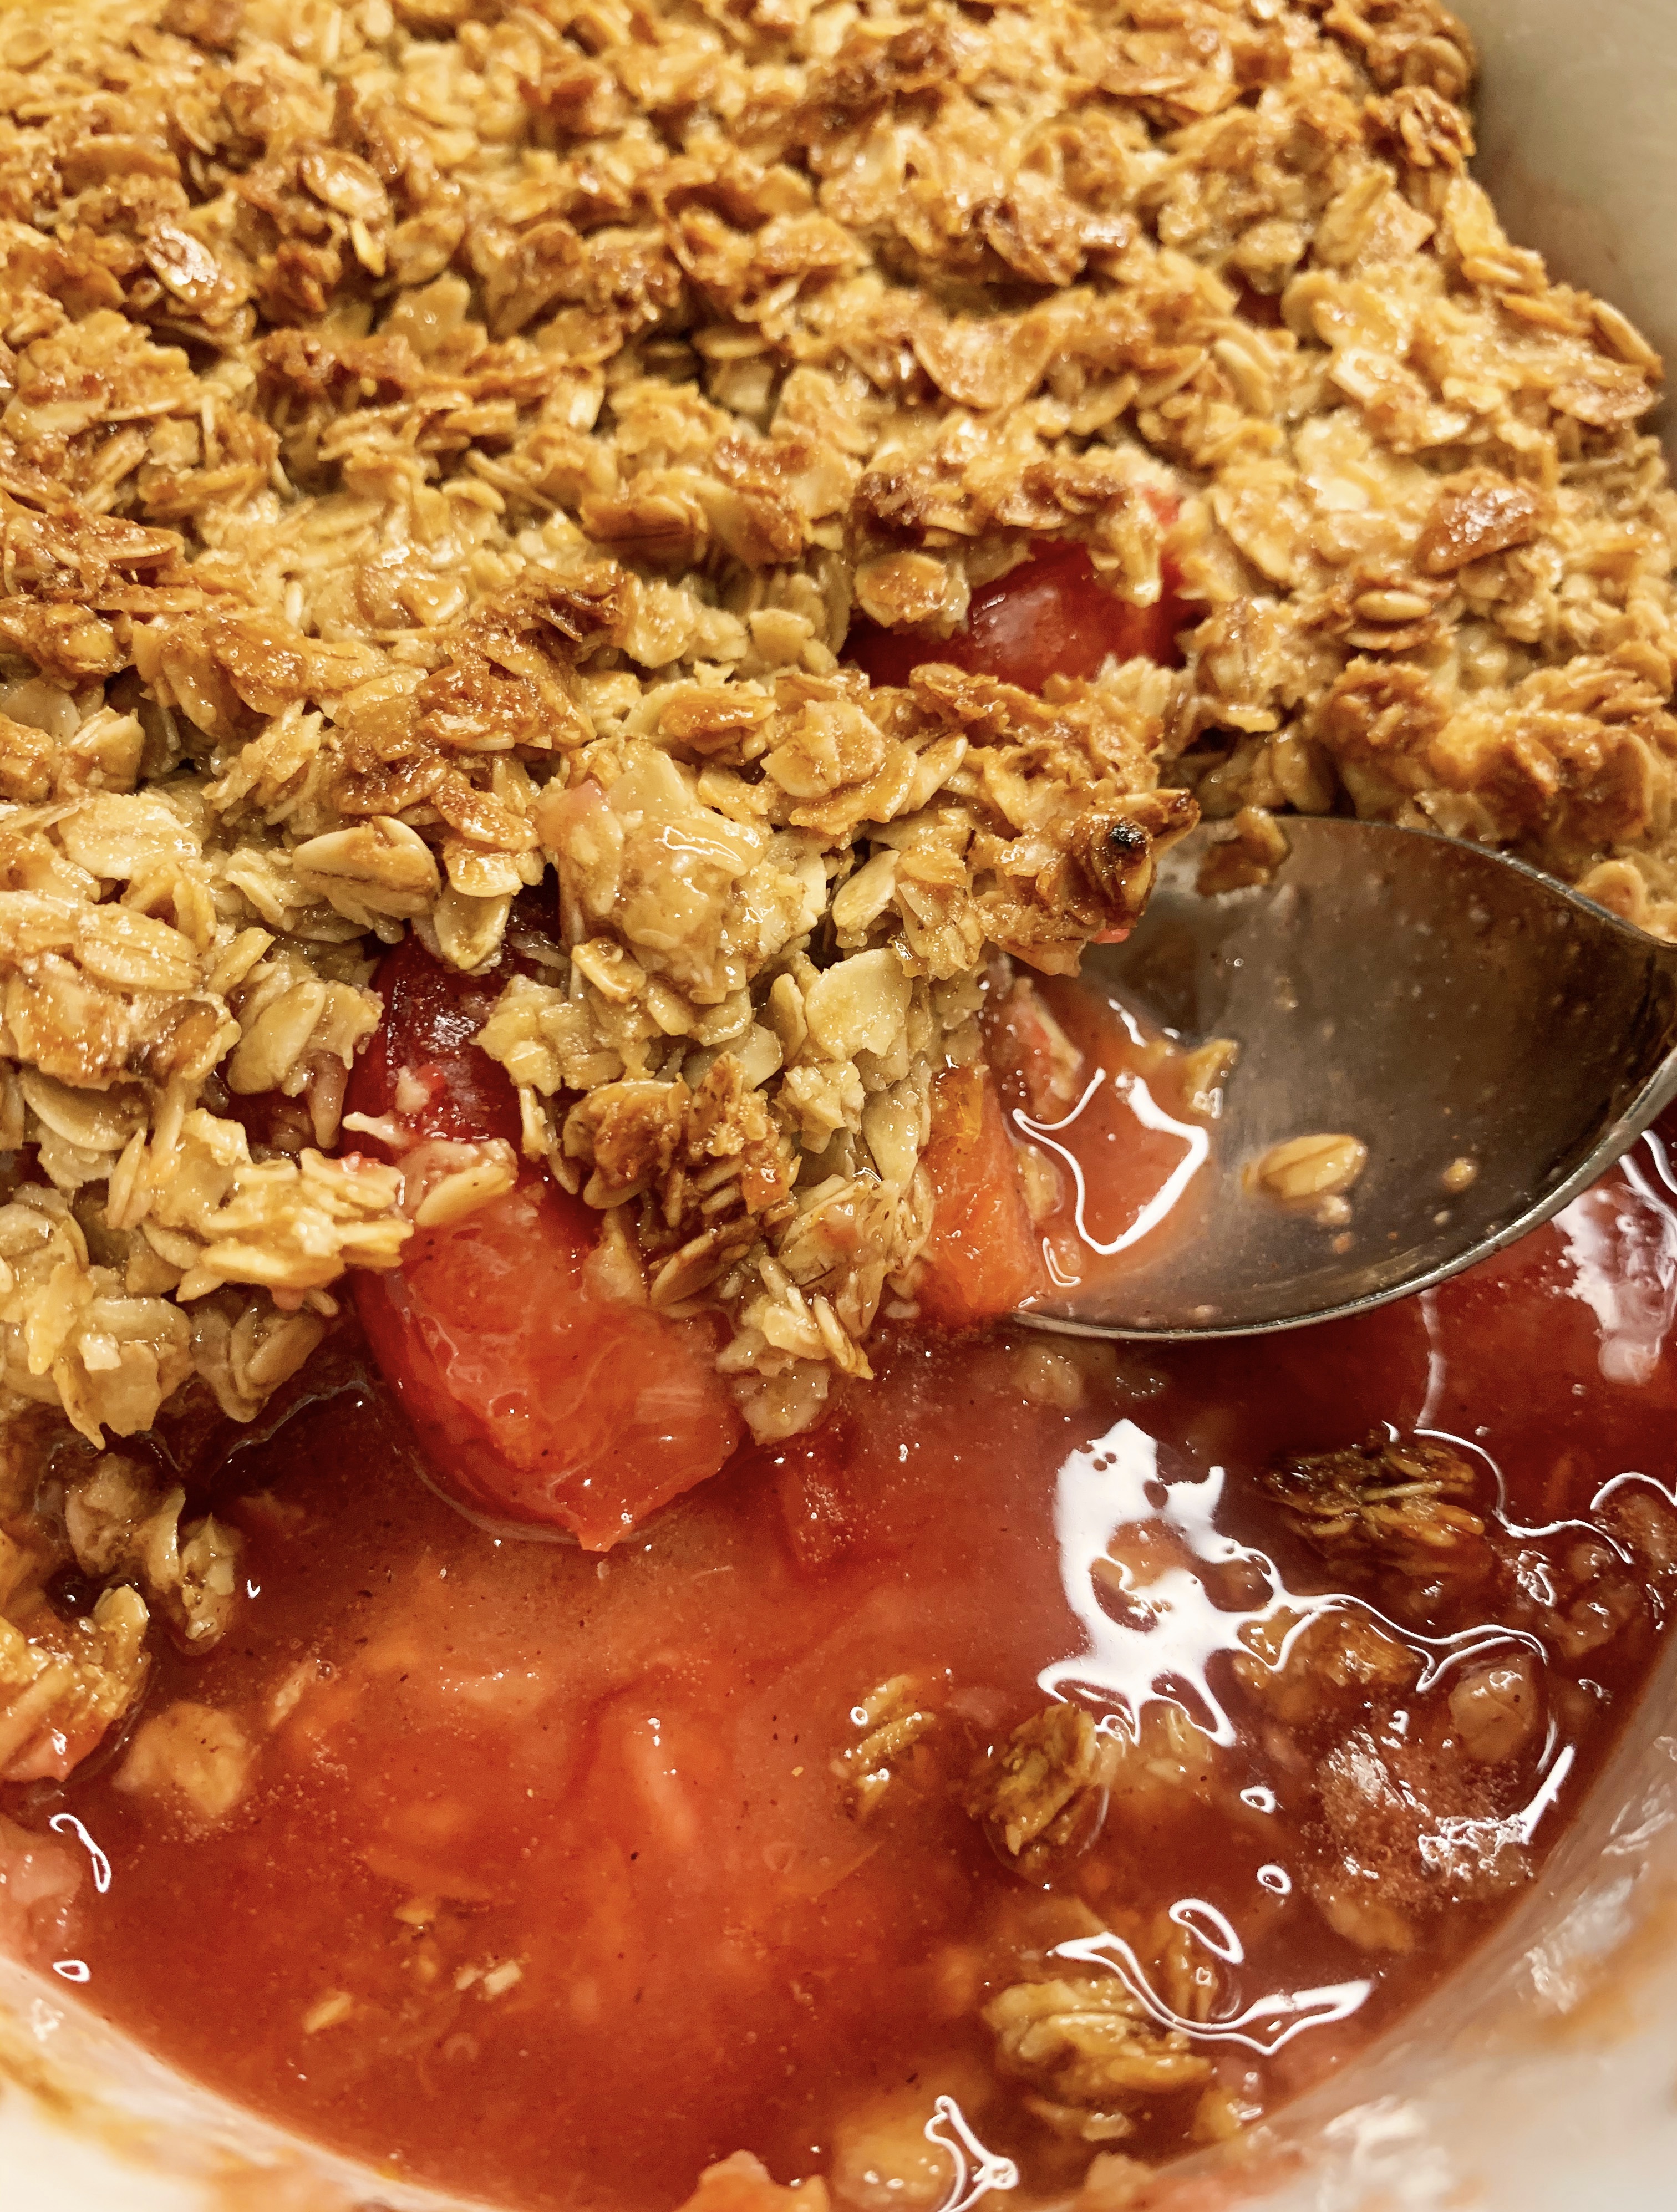

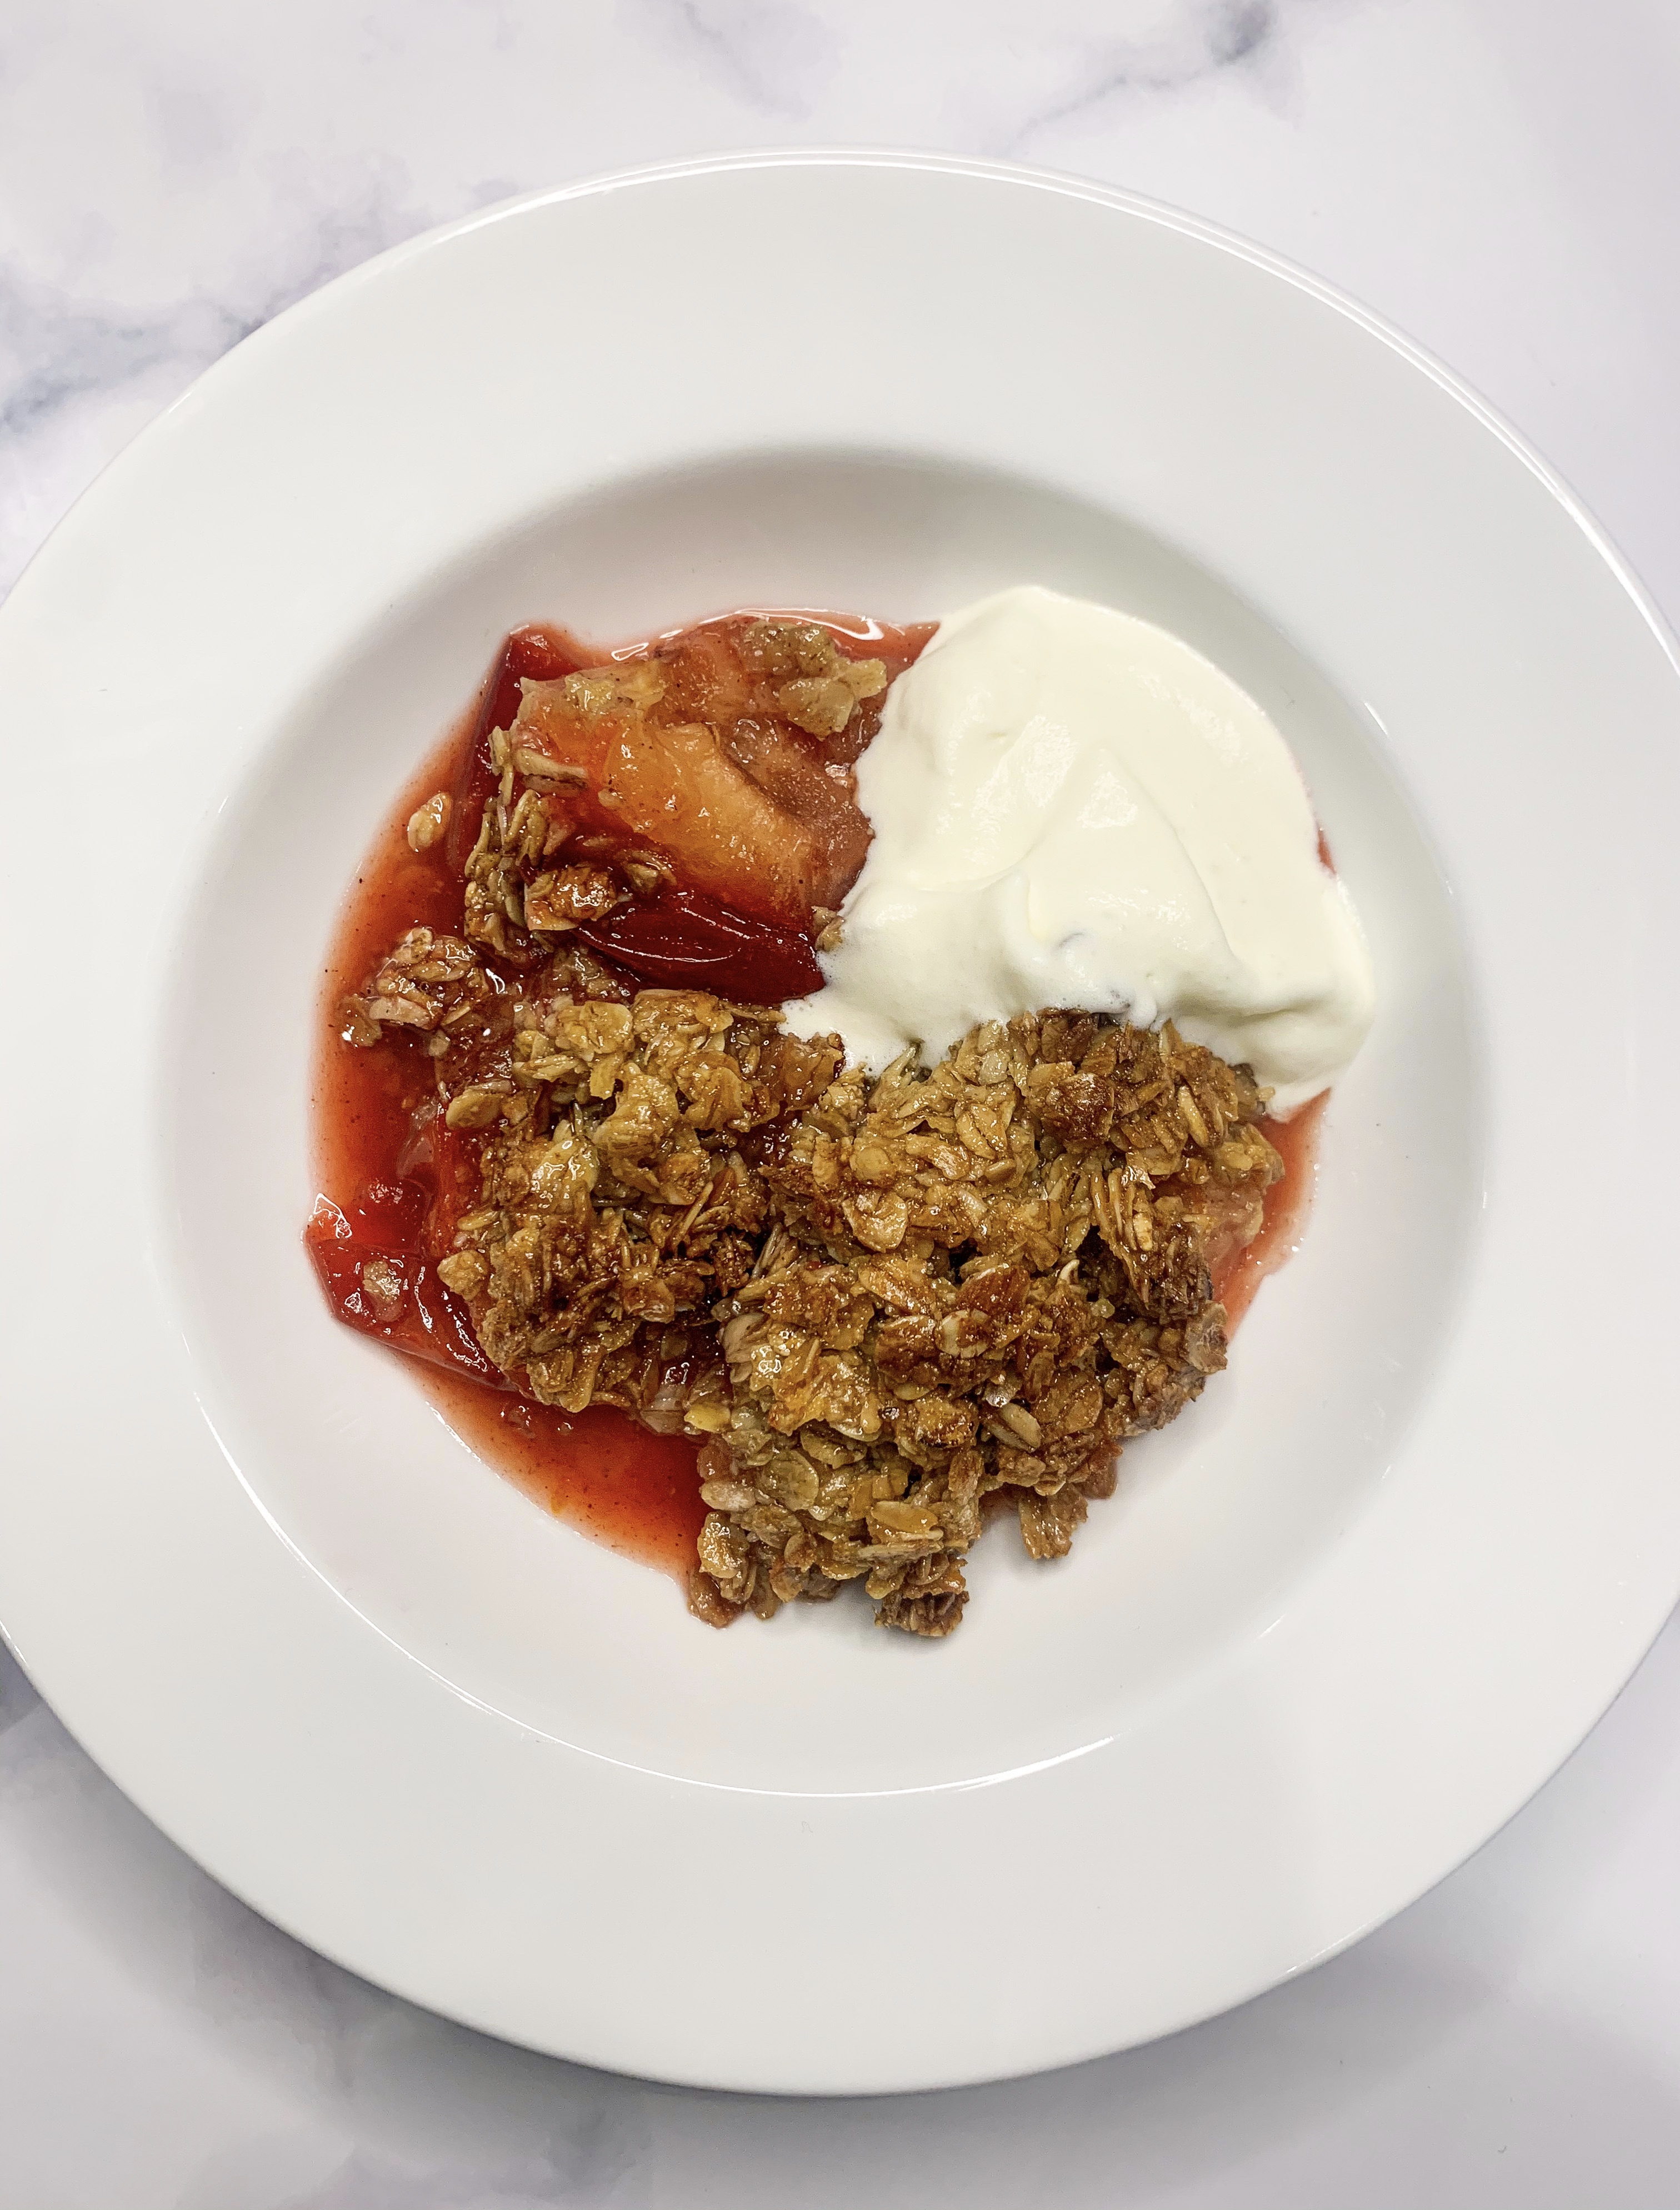
This comforting crumble has sophisticated flavours – the combination of plums with orange and a touch of cinnamon, beautifully cuts the sweetness of the oat crumble. Serve it with a dollop of cream, custard or a good quality vanilla ice-cream.
The great news is, is that it’s completely gluten free! As you may know, I am gluten free, and so finding ‘carbohydrate’ comforting desserts can be difficult, as I can’t eat wheat. A traditional crumble calls for flour, so it has been some years since I have been able to enjoy this English pudding in the traditional sense, but over the years I have perfected this ‘flapjack crumble’ by combining various recipes for toppings and fillings. Even if you don’t need to eat gluten free, I think that it will become your new favourite crumble!!…
This recipe is perfect for the plums we get in our supermarkets during the winter months, those that never seem to ripen but are perfect for baking with. The oats are best ‘toasted’ before making the topping, this makes their flavour nuttier, so it is worth doing if you have the time.
For the Crumble:
250g porridge oats
125g butter
100g light muscovado sugar
100g golden syrup
For the Plum Filling:
800-900g plums, cut in half, stones removed
1 large orange, zested and juiced
50g light muscovado sugar
1 teaspoon ground cinnamon
- Firstly, spread the oats on a large baking tray and bake in a preheated oven, 150’c fan, for 10-15 minutes, stirring once, until they are toasted and slightly golden.
- For the topping: melt the butter, sugar and syrup in a large saucepan (big enough to take the oats) over a medium heat until the sugar has dissolved. Add the toasted oats and stir to combine.
- Spread the plums out in a baking dish, cut side up – they should fit snuggly into the dish, covering the base completely. Spoon the orange juice over them.
- Mix together the orange zest and cinnamon with the sugar (50g), sprinkle over the plums.
- Spread the oat ‘flapjack’ mixture evenly over the plums. Place in a preheated oven, 180’c, for 30-35 minutes until the crumble is golden brown and bubbling.
- Serve with a dollop of cream, custard or vanilla ice-cream – Delicious!!
Orange Almond Cake
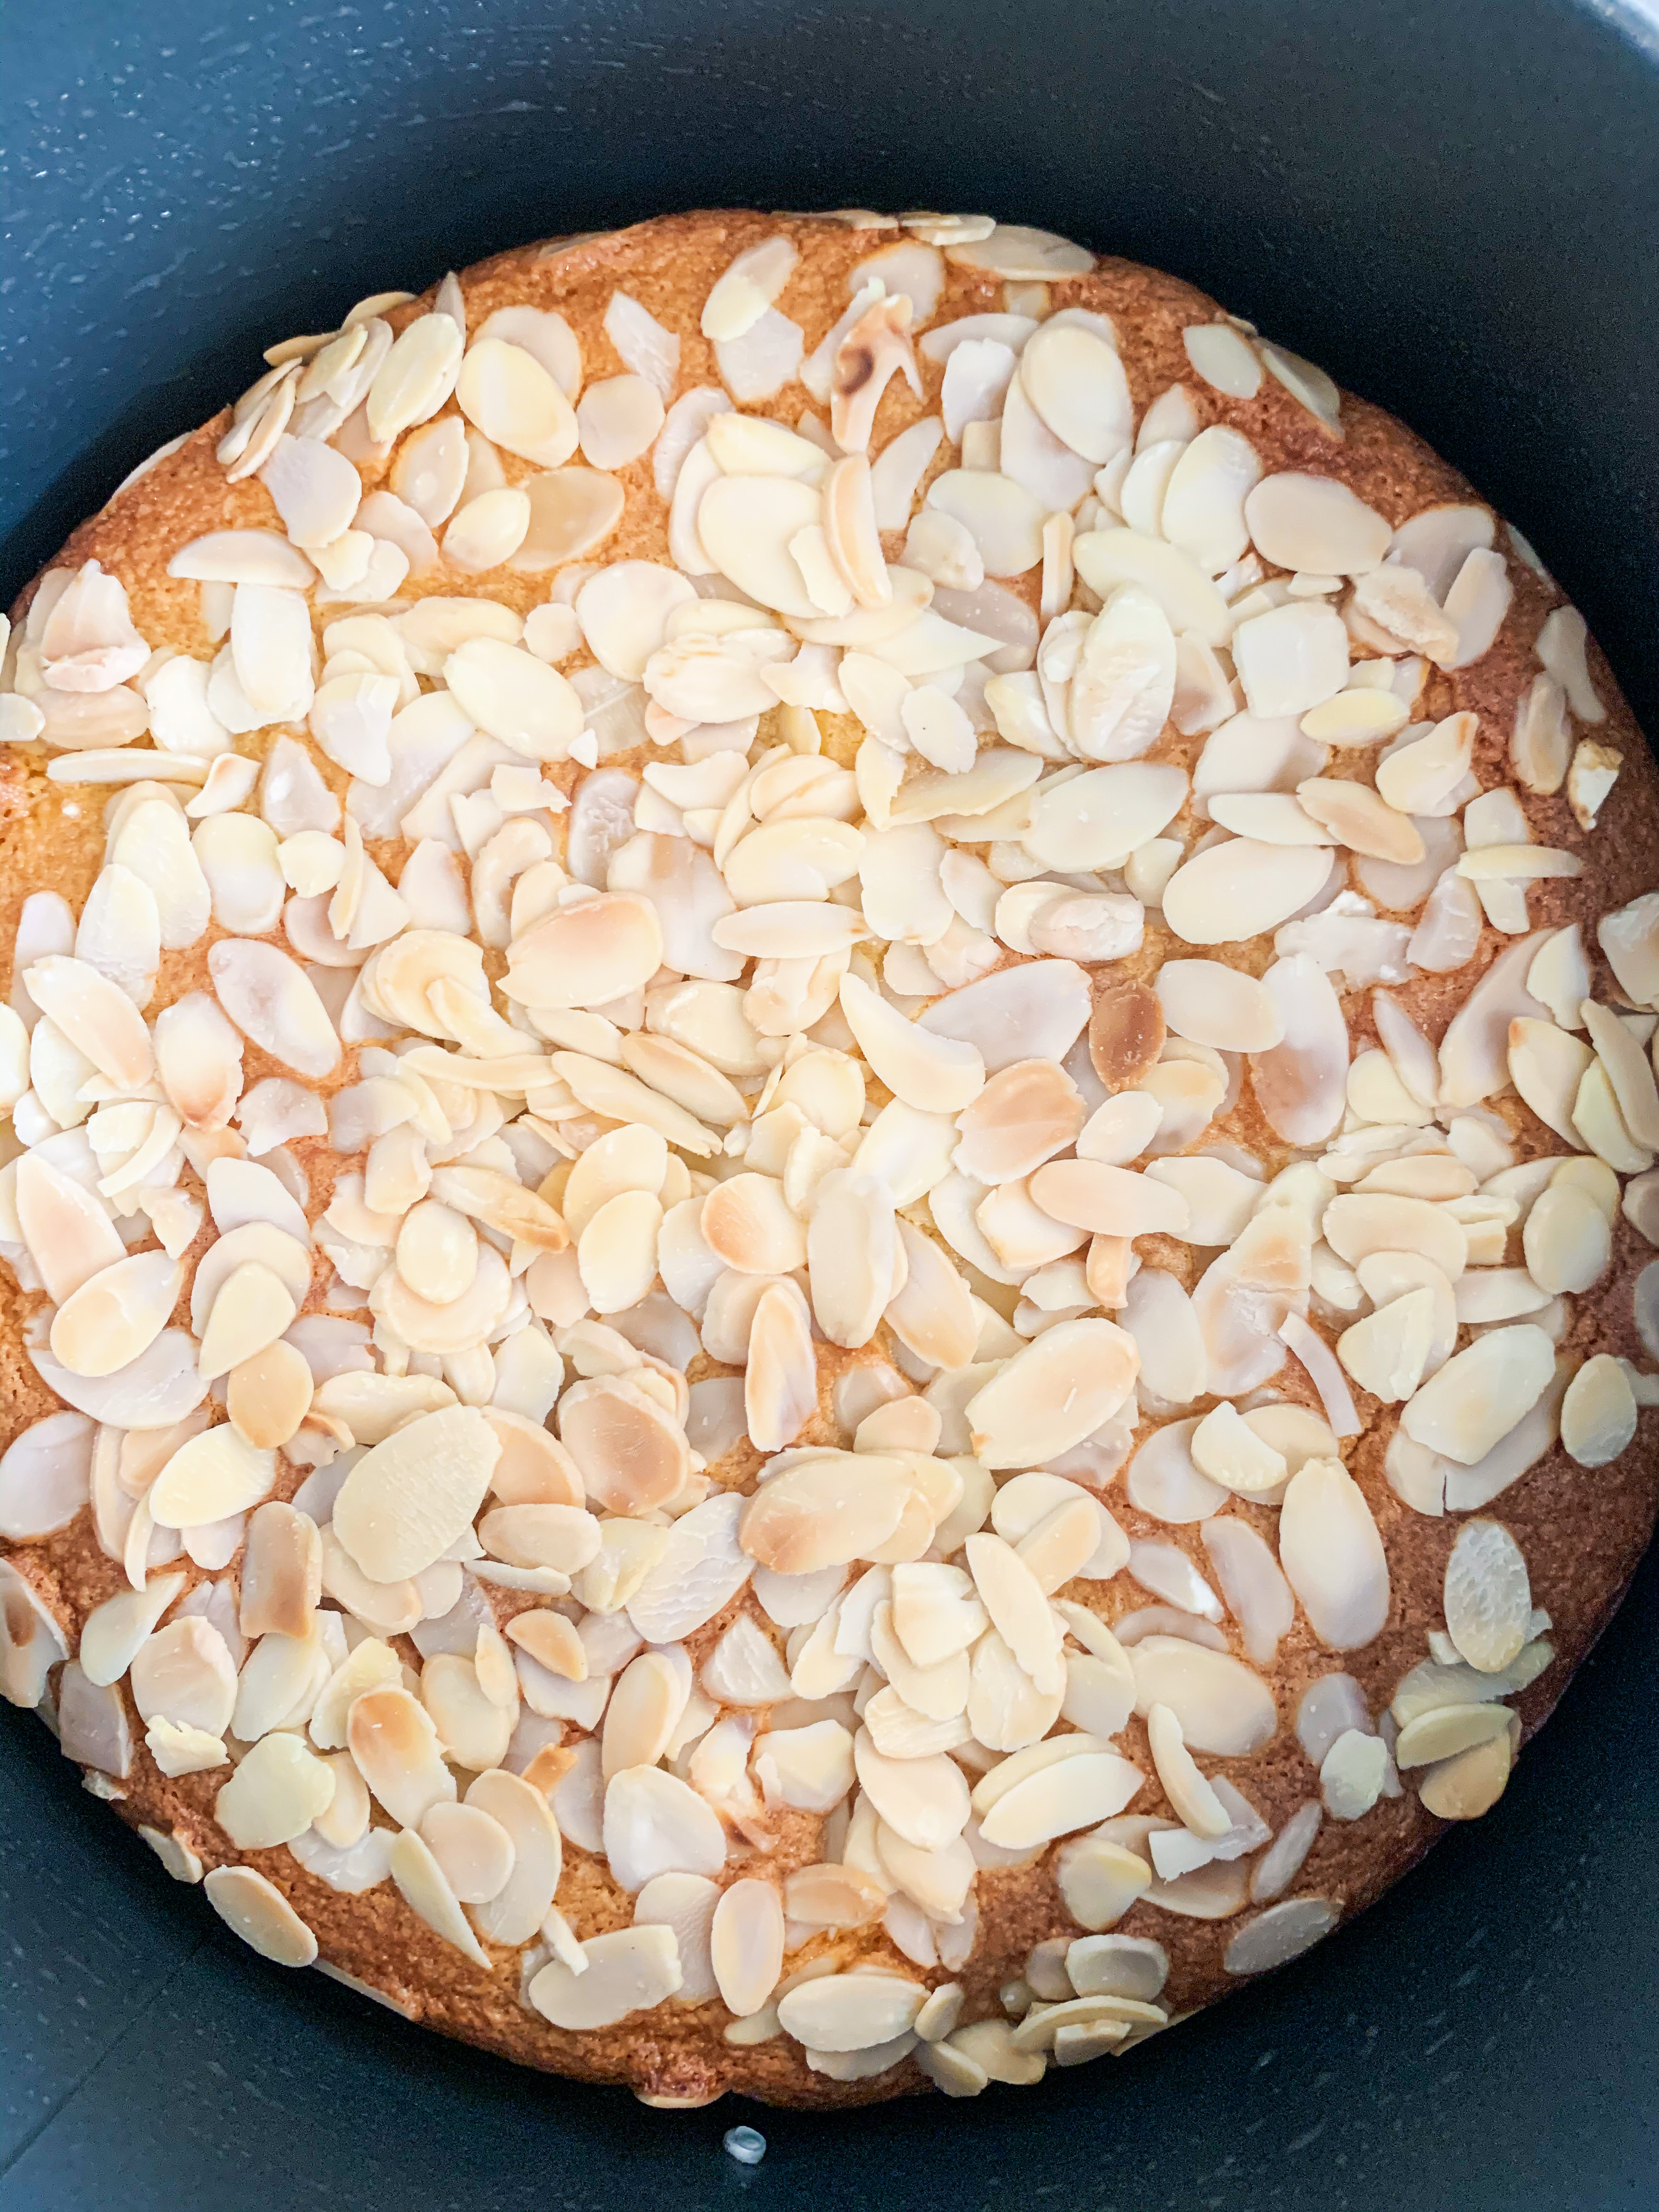
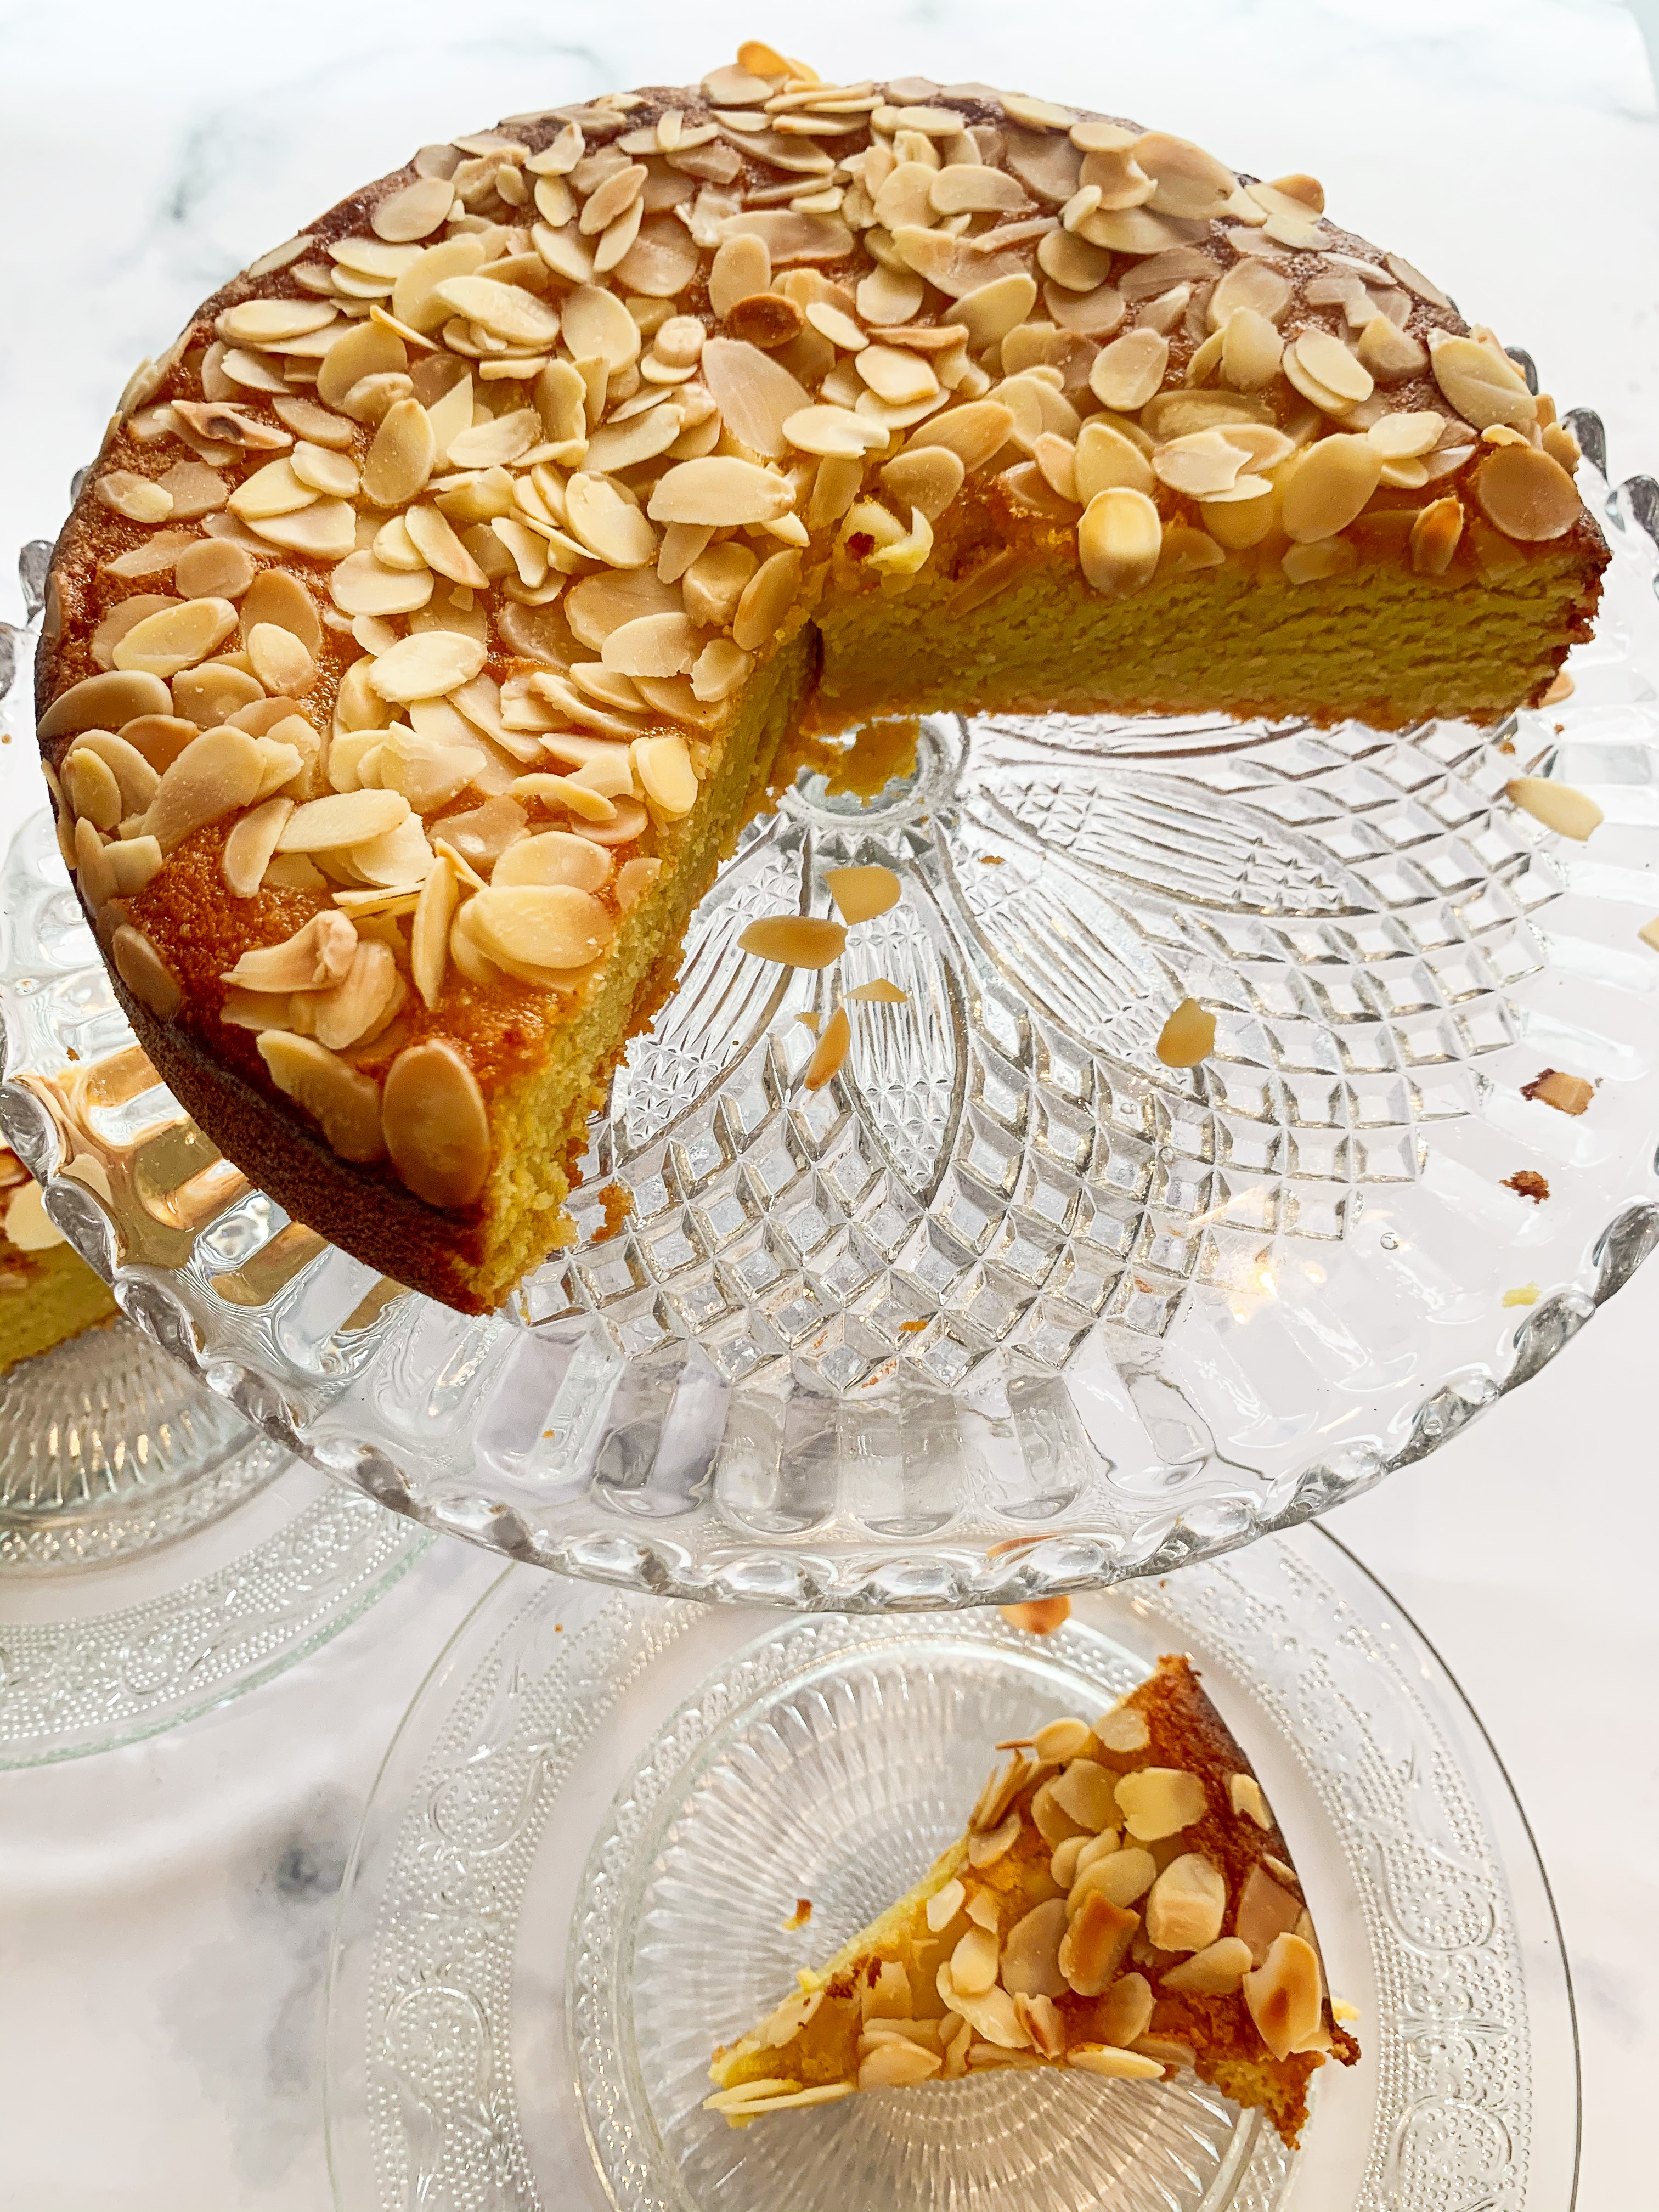
When my good friend, Sophie, first gave me this recipe, I was hesitant to try it, as being a self-confessed ‘lazy cook’ when I discovered that I had to boil the oranges for an hour before even starting the recipe, I wasn’t sold on it. But, fortunately she insisted that it was worth the effort… and she was definitely right, this is one of the most moist orange cakes I have tasted – it truly is delicious. In fact, it is also very easy, the boiling of the oranges is something that pretty much takes care of itself and to make the cake it’s simply a matter of pureeing the oranges in a food processor, adding them to the whisked eggs and sugar, and stirring in the other ingredients – done!…Try it!…
2 seedless oranges
6 eggs
250g caster sugar
250g ground almonds
1 teaspoon baking powder
50g flaked almonds
2 tablespoons icing sugar
(To serve: double cream lightly whipped with a touch vanilla paste)
A 22cm springform tin: grease and line the base and sides
- Wash the oranges and cut off the ends (discard), place the oranges into a large saucepan, cover with water and bring to the boil. Boil for 2 hours (topping up with water as required).
- Remove the oranges from the water and allow to cool completely before cutting into pieces and pureeing in a food processor until completely smooth.
- Use an electric whisk to beat the eggs and caster sugar in a large bowl until pale and frothy.
- Add the orange puree, stir through, then add the ground almonds and baking powder, and combine.
- Pour the mixture into the prepared tin. Sprinkle the flaked almonds over the top of the cake.
- Place in a preheated oven, 160’c fan, and bake for 60 minutes or until a skewer inserted in the middle comes out with just a few crumbs on it.
- Allow to cool completely in the tin.
- Sprinkle with icing sugar. Serve with a dollop of cream (flavoured with a touch of vanilla paste).
Madeleines (with a gluten free option!)

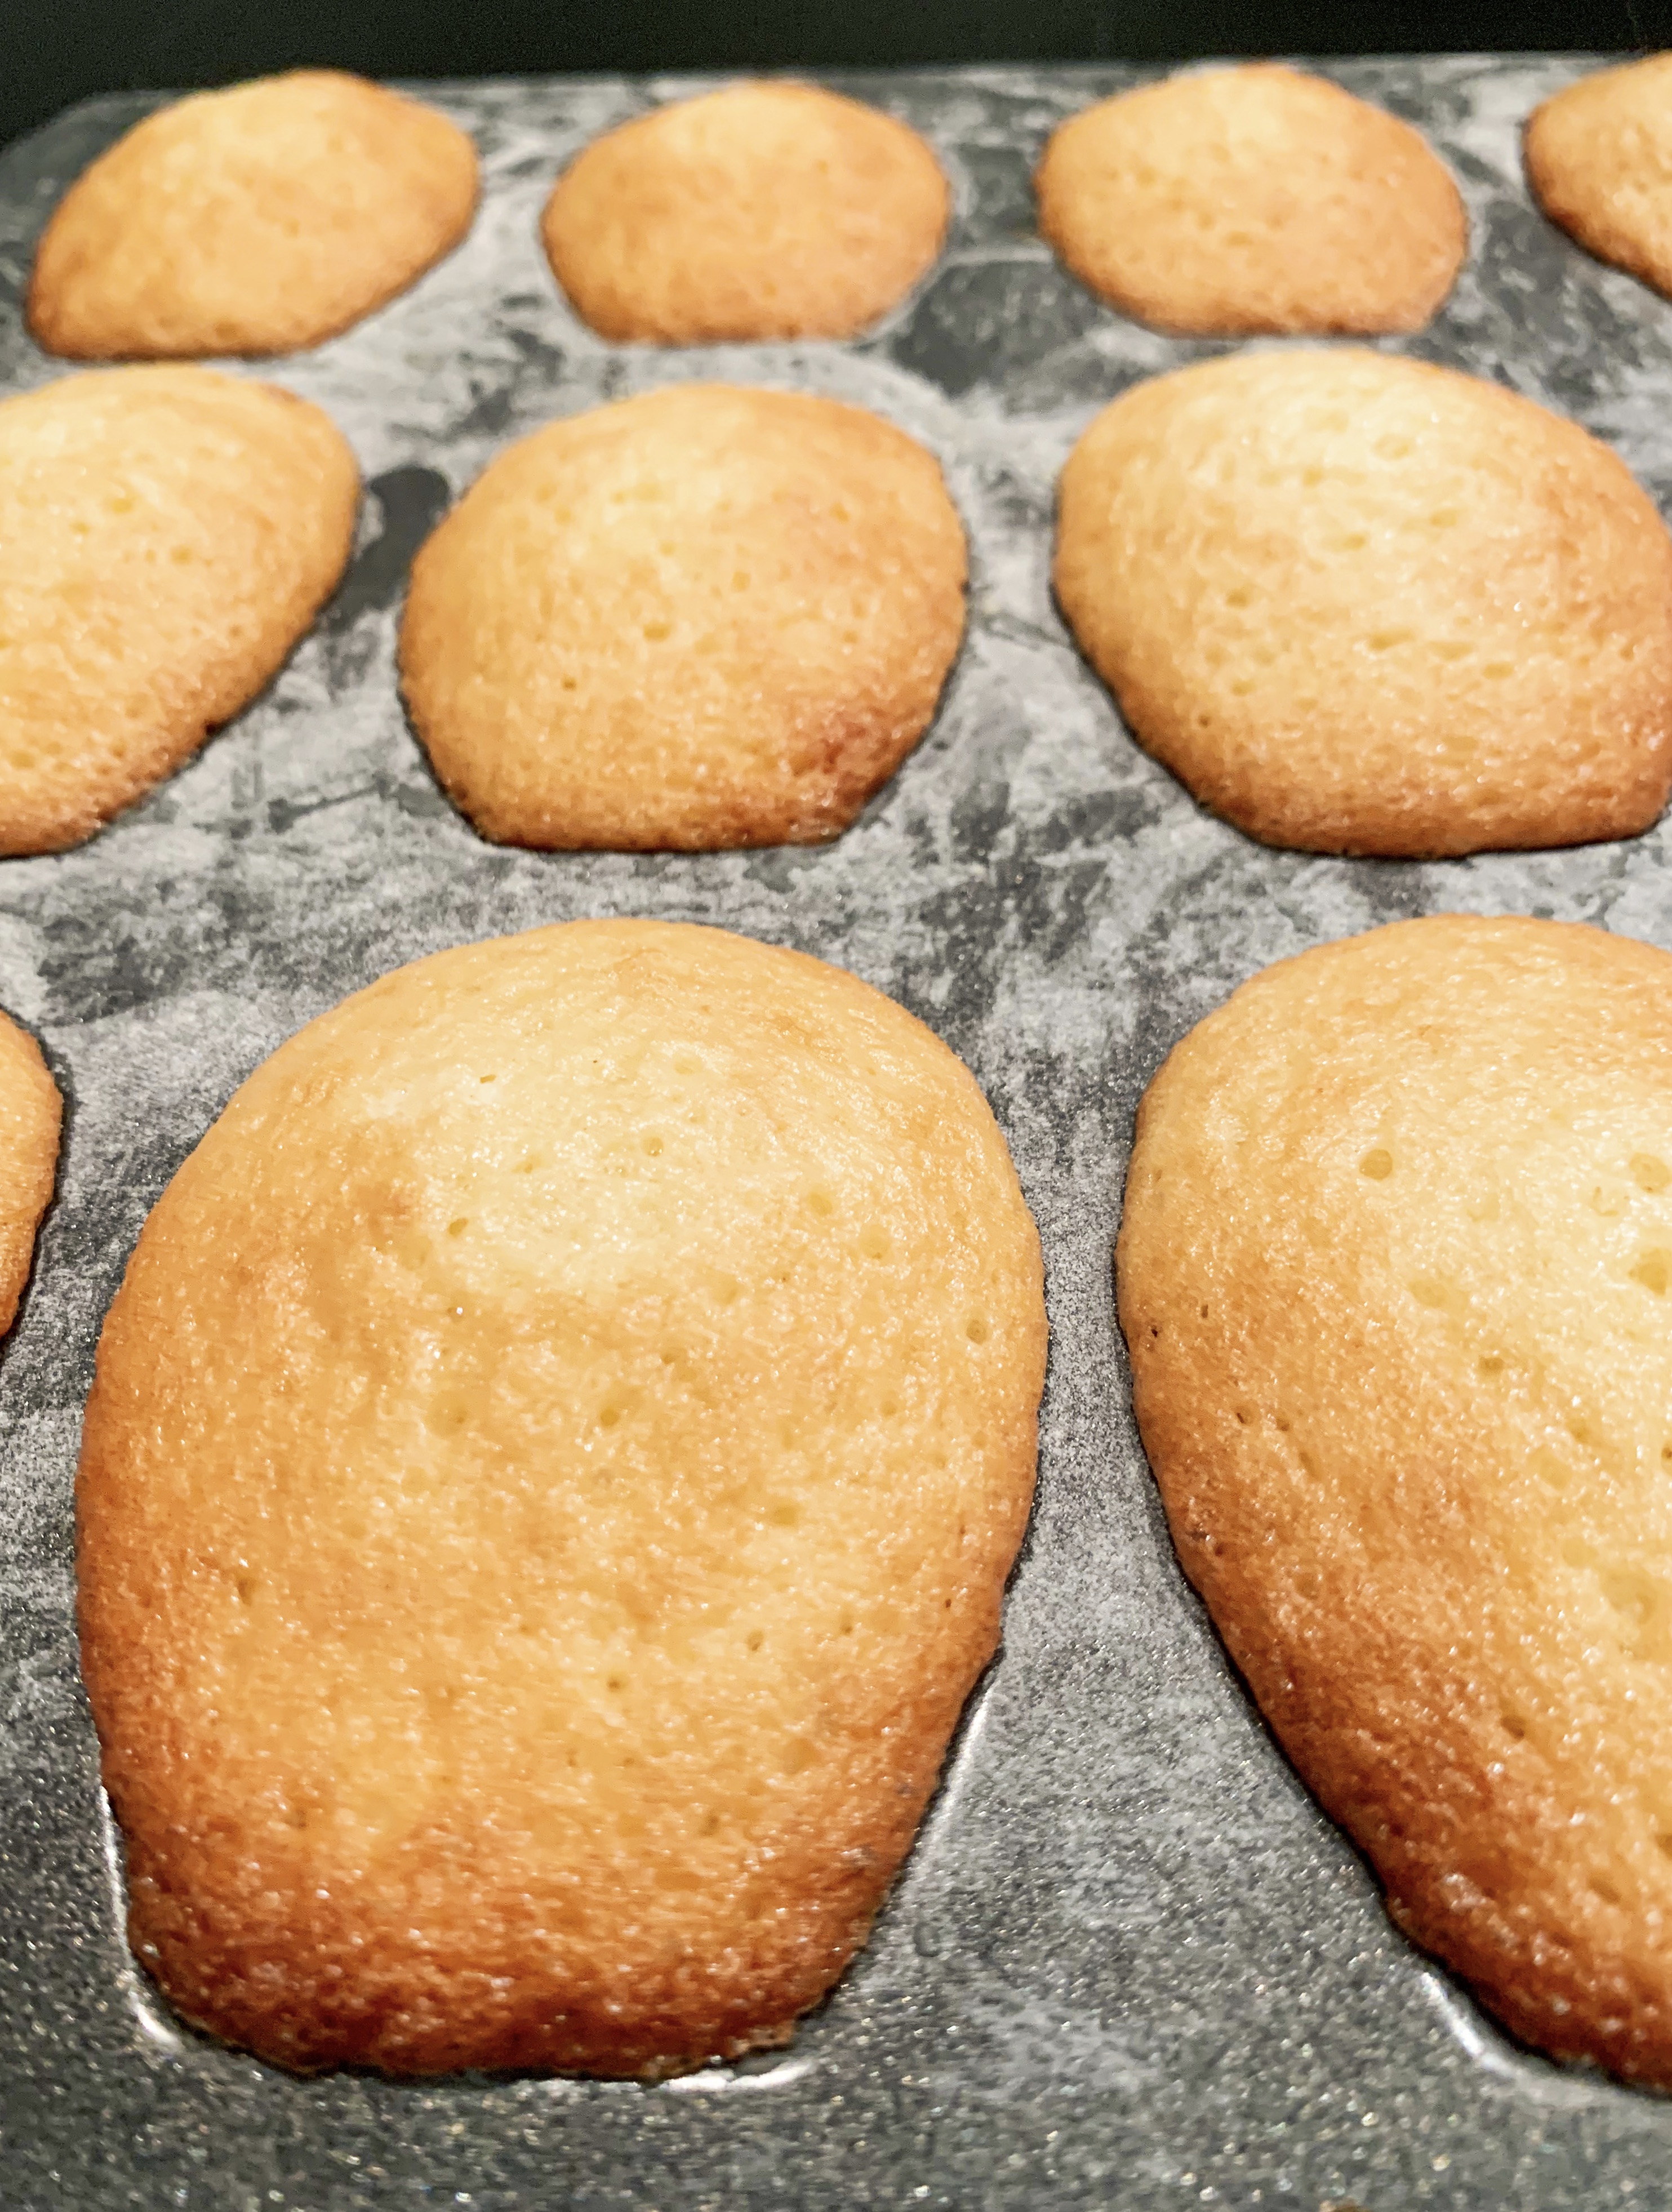
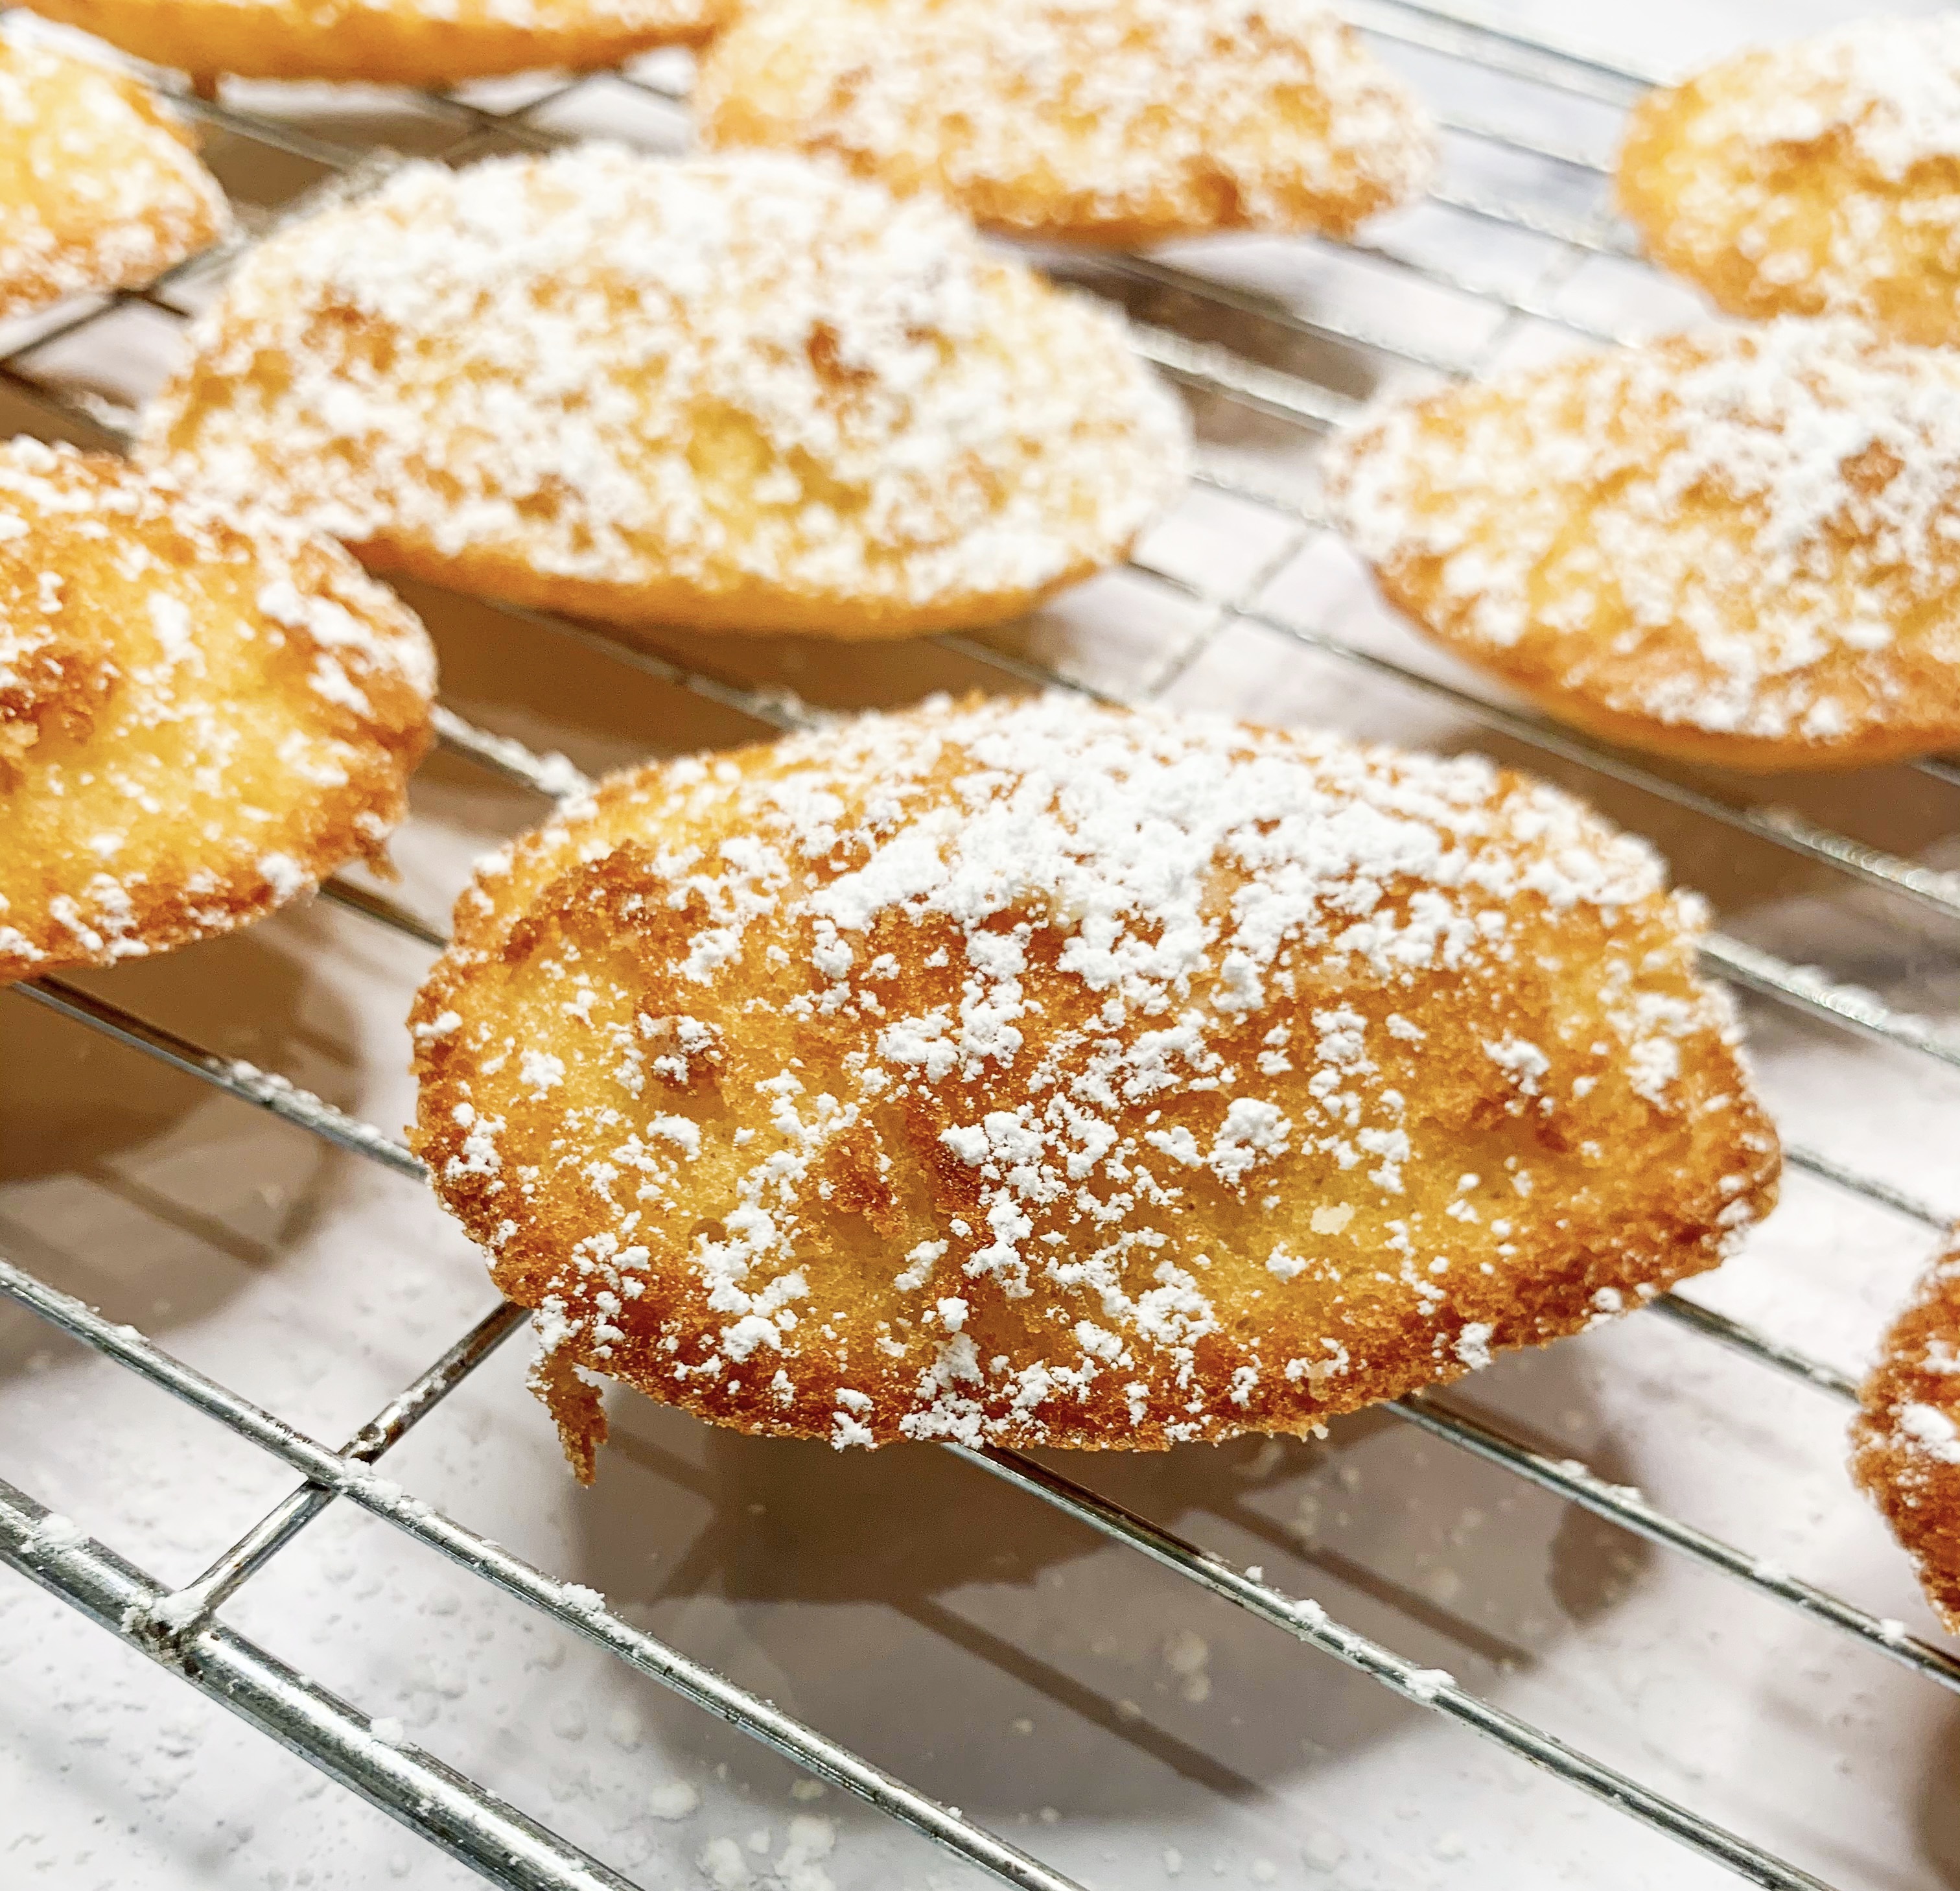
I adore Madeleines, particularly as the mixture, once made will keep in the fridge for a couple of days, and there is enough for at least 3 or 4 batches, so it’s great to have at hand – they only take 10 minutes to cook! They are best eaten when still warm, they do not keep well, so you should eat them straightaway (they tend to go a little sticky if kept overnight). Eating them quickly is no hardship – they are very light, I can almost eat one batch myself!! The best news is, is that if you are gluten free, like me, they can be made just as well with gluten free plain flour (I use Doves). You can add either orange blossom water or lemon juice and zest for flavouring – I must admit I prefer the delicate flavour of orange blossom.
I find that buttering the tin with melted butter and then dusting it with flour stops them sticking to it, likewise allowing them to sit just 5 minutes after cooking and then removing them whilst they are still hot, stops them sticking to the tin.
135g unsalted butter, plus extra to butter tray
2 tablespoons honey
3 large eggs
130g caster sugar
135g plain flour (gluten free if required – I use Doves)
2 level teaspoons baking powder
2 teaspoons orange blossom water or 1 lemon, zest and juice (see note above)
Icing sugar to sprinkle
- Melt the butter with the honey in a small saucepan over a low heat until the butter browns. Set aside to cool.
- Whisk the eggs with the sugar in an electric mixer, until the mixture is light and fluffy and triples in size, this can take as much as 10 minutes.
- Fold in the flour, baking powder, orange blossom water (or lemon zest and juice), and the butter and honey mixture. Leave to rest in the fridge for at least three hours.
- Melt a large knob of butter in a pan and use to butter a madeleine tray, then dust with a little flour, tipping off the excess.
- When ready to serve, fill the moulds with the mixture to two-thirds full.
- Place in a preheated oven, 170’c fan, for about 10 minutes until they are golden brown and firm to touch.
- Allow to sit in the tin for five minutes, then remove from the moulds before they cool otherwise they will stick!
- Sprinkle with icing sugar and serve whilst still warm – delicious!
Chocolate Slab & Drunken Cherries
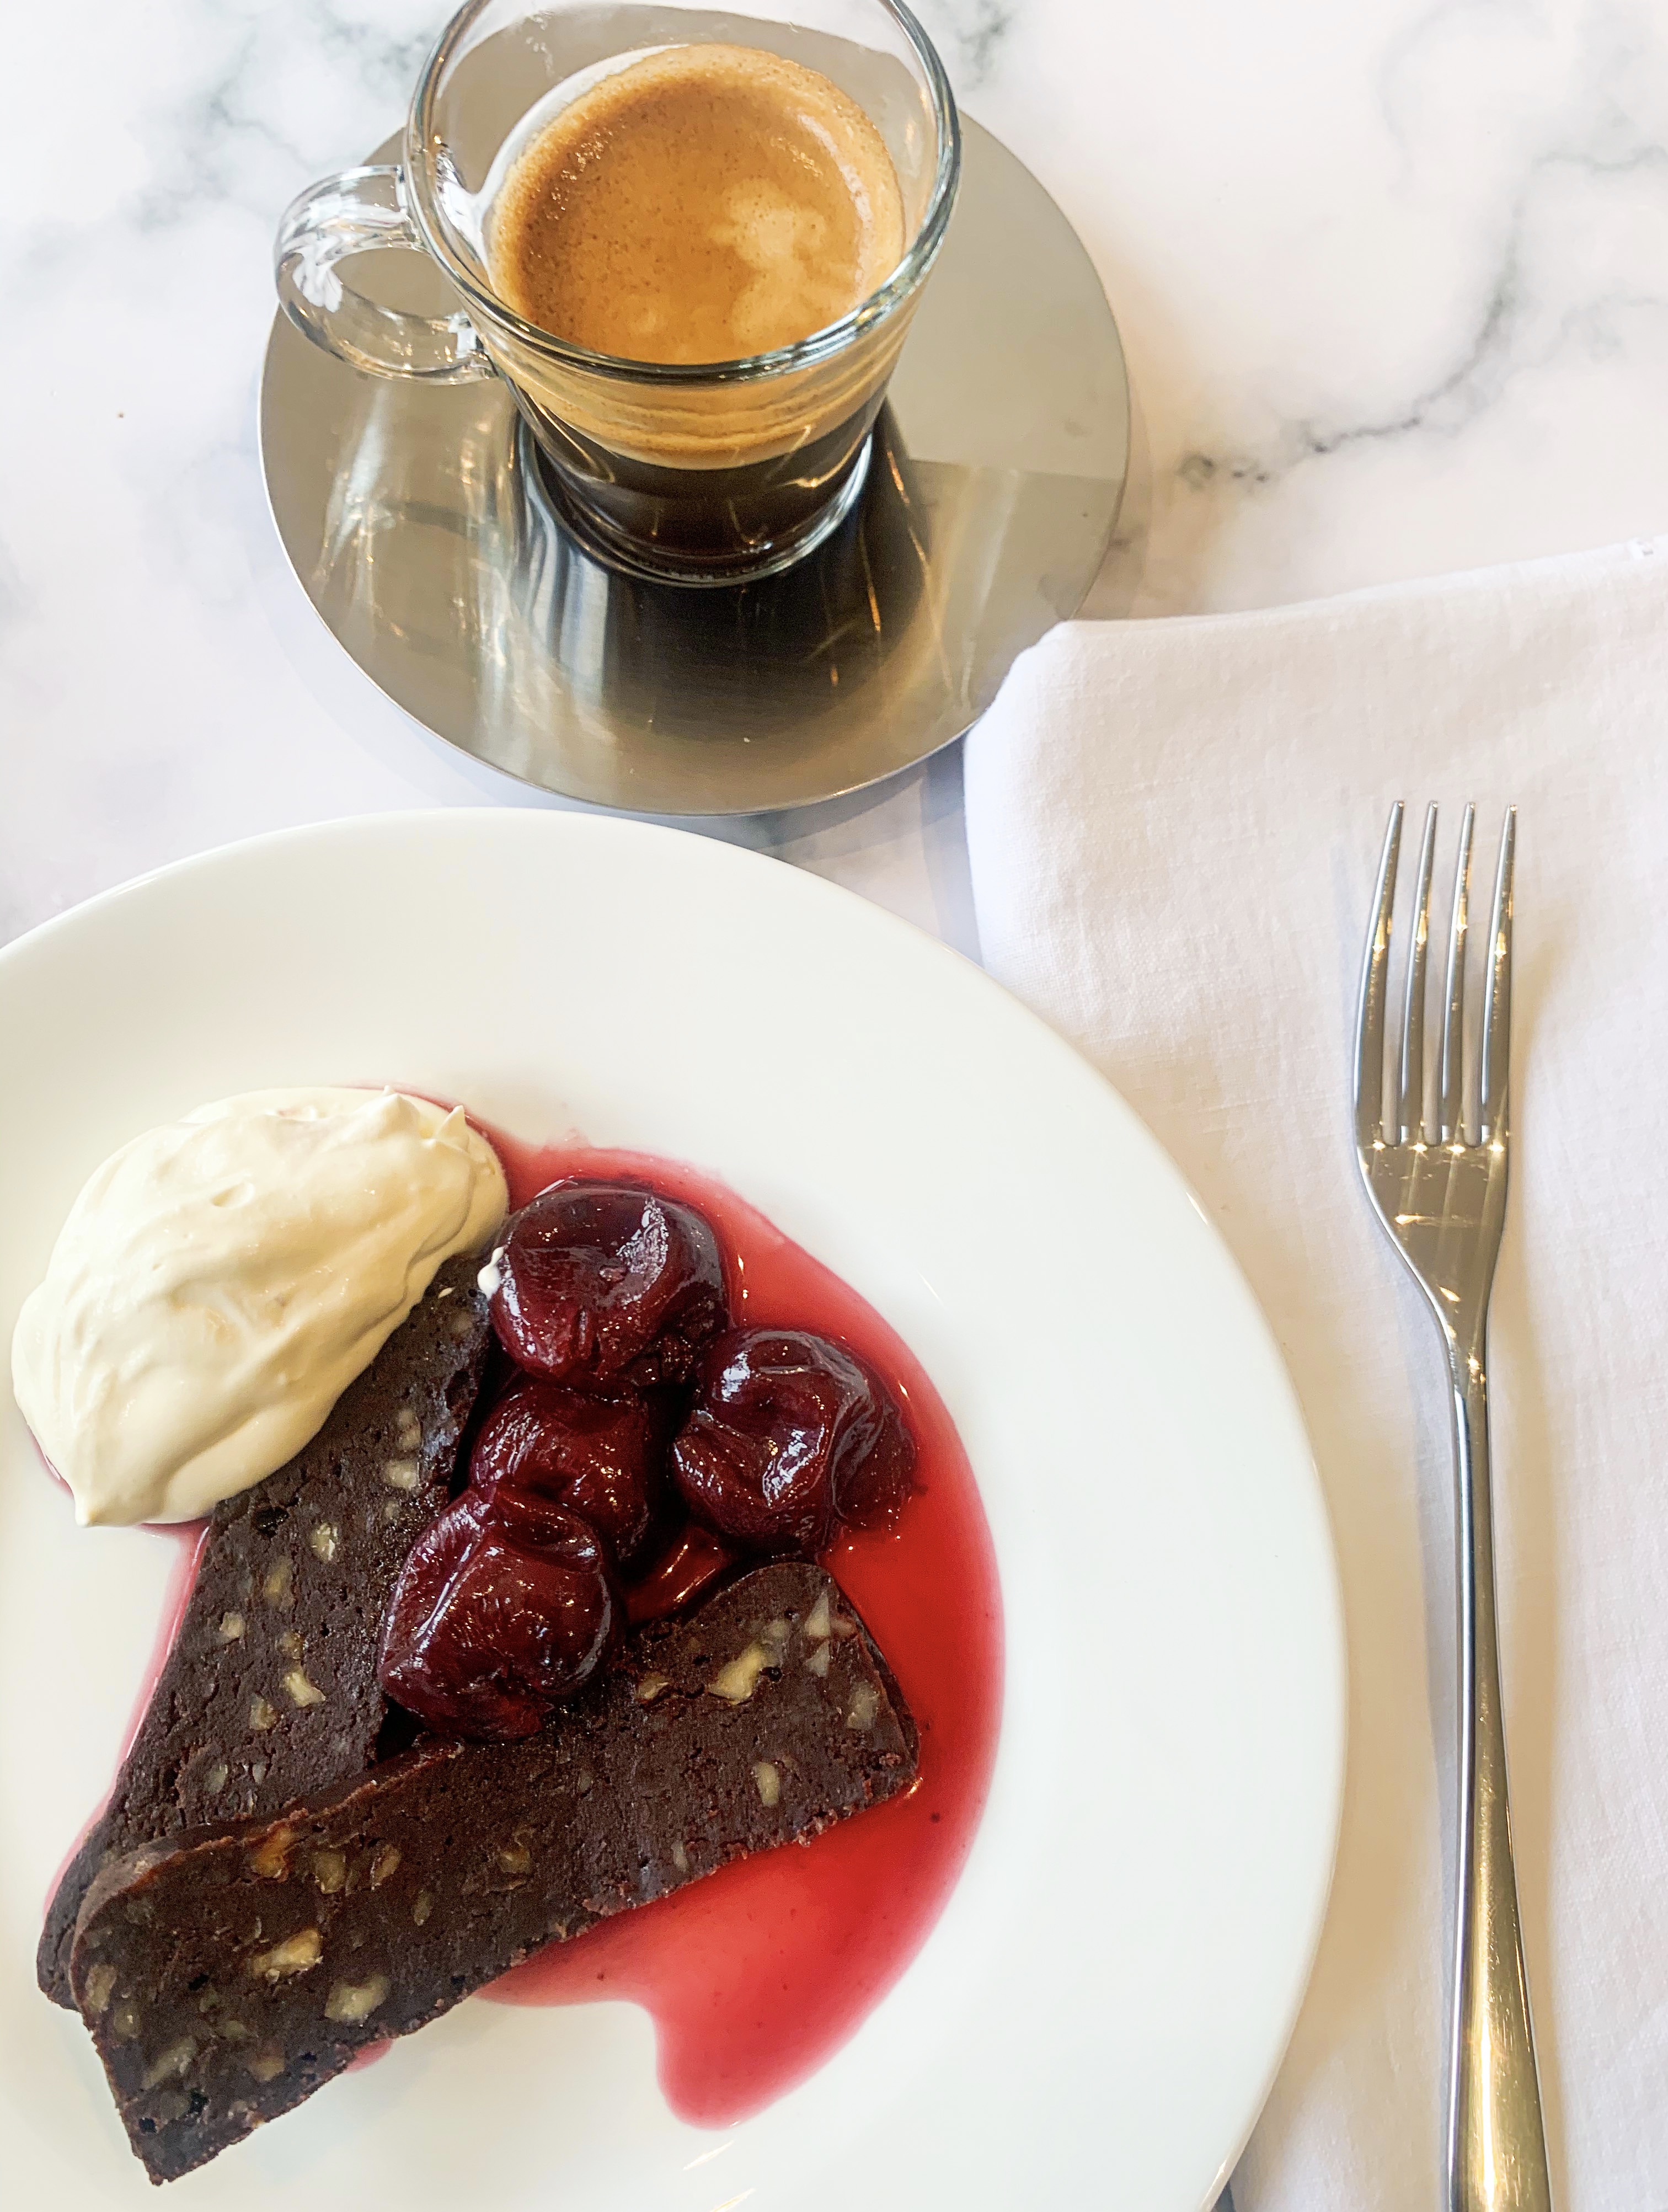

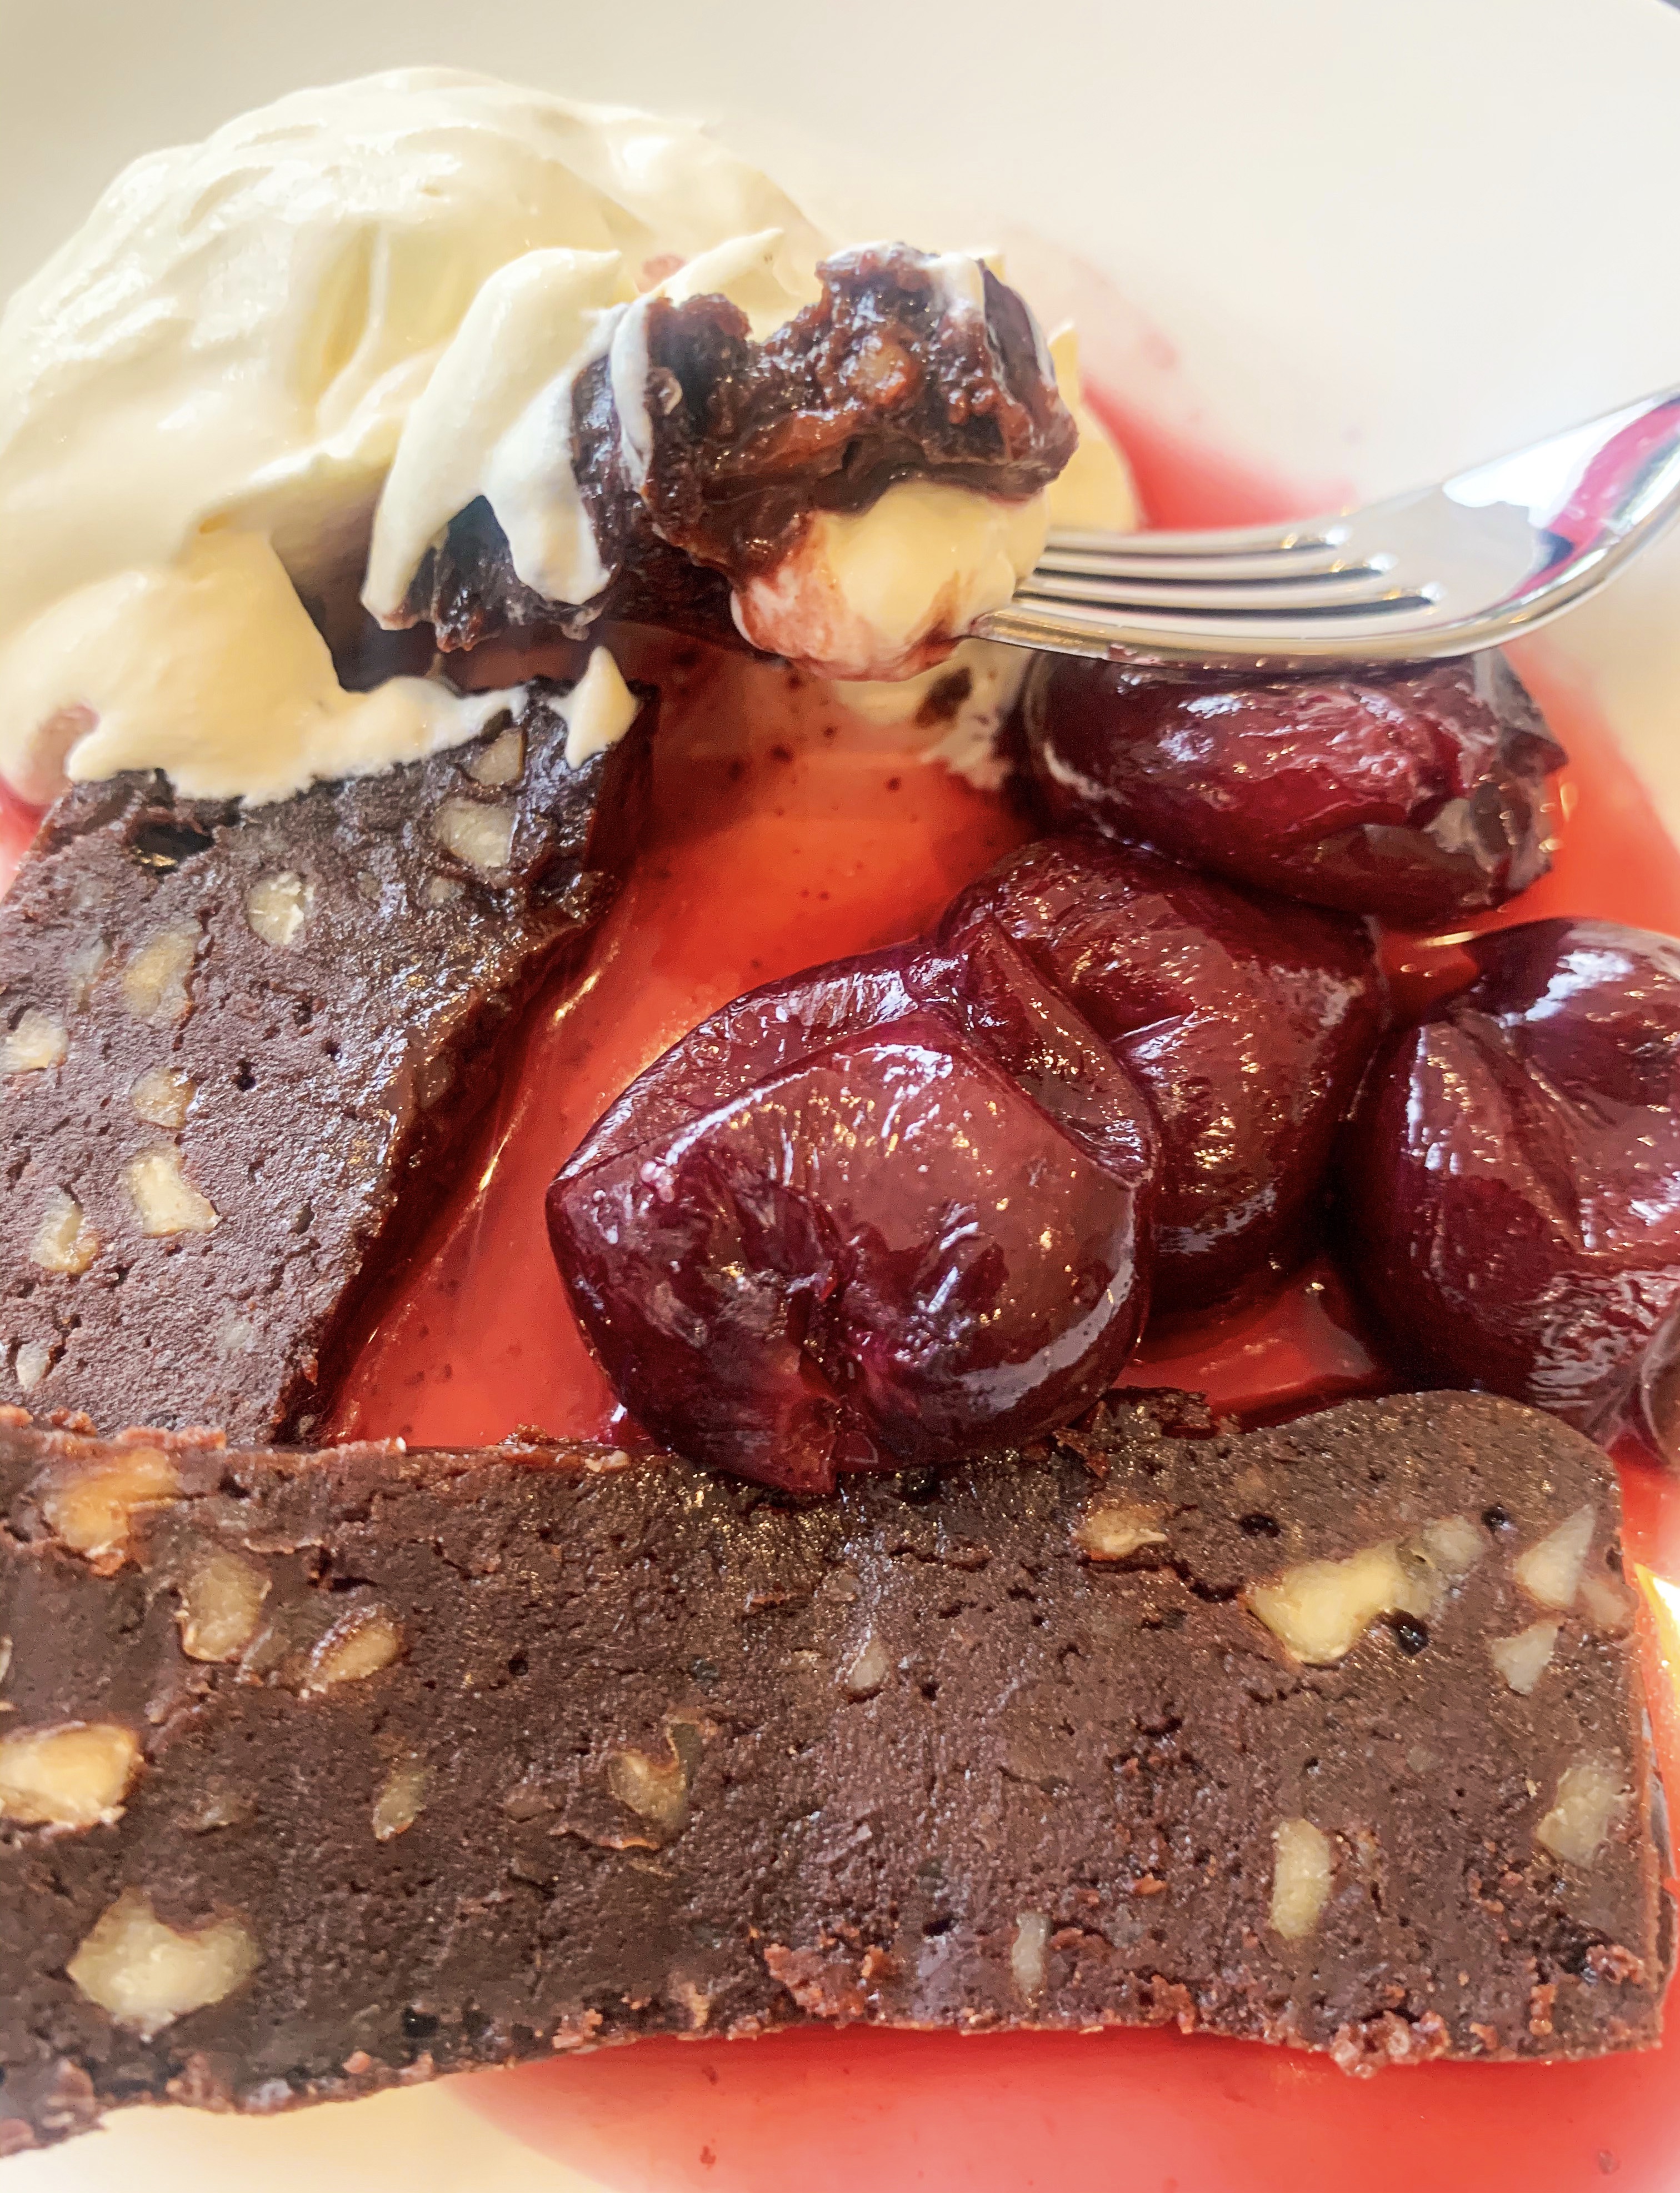
I found this dessert in a magazine many years ago, it’s simplicity caught my eye – it is a simple case of melt and mix. It keeps in the fridge, so it can be made well in advance. It is quite rich so you only need a small slices. The ‘drunken cherries’ are in a light winey compote – it’s an ideal recipe for cherries which are out of season. You could, and I have done this myself in the past, serve cherries in Kirsch from a jar, the taste will be different as the ‘drunken cherries’ in this recipe are made with red wine, however they do work well – giving the dessert a more ‘black forest gateau’ flavour. Serve with lightly whipped cream.
75g walnut pieces, finely chopped
75g butter
100g caster sugar
1 tablespoon golden syrup
150g dark chocolate, roughly chopped (I use Lindt 70% cocoa chocolate)
2 eggs, lightly beaten
35g plain flour (gluten free if required)
Generous pinch of sea salt
For the Cherries
400g cherries, stalks removed, pitted or left whole
300ml red wine
25g caster sugar
Whipped Cream to serve
- Line a small loaf tin with greaseproof paper.
- Spread the walnuts on a baking sheet and toast in a preheated oven, 150’c, for about 6 minutes until golden.
- Meanwhile put the butter, sugar and syrup into saucepan and melt over a low heat, stirring.
- Remove from the heat and add the chocolate, stirring until it has melted. Add the eggs stirring vigorously until combined. Fold in the flour, salt and nuts, then pour into the prepared loaf tin.
- Bake for 20 minutes in the preheated oven, 150’c fan. Leave to cool in the tin before transferring to the fridge for at least 2 hours.
- Meanwhile make the cherries. Tip the cherries, red wine and sugar into a small saucepan and bring to the boil. Reduce the heat slightly and allow to bubble for about 20 minutes until the cherries have begun to collapse and the liquid is syrupy. Leave to cool.
- Turn out the chocolate slab and cut into slices. Serve with a spoonful of cherries and a dollop of whipped cream!
Raspberry Clafoutis (Serves 4)
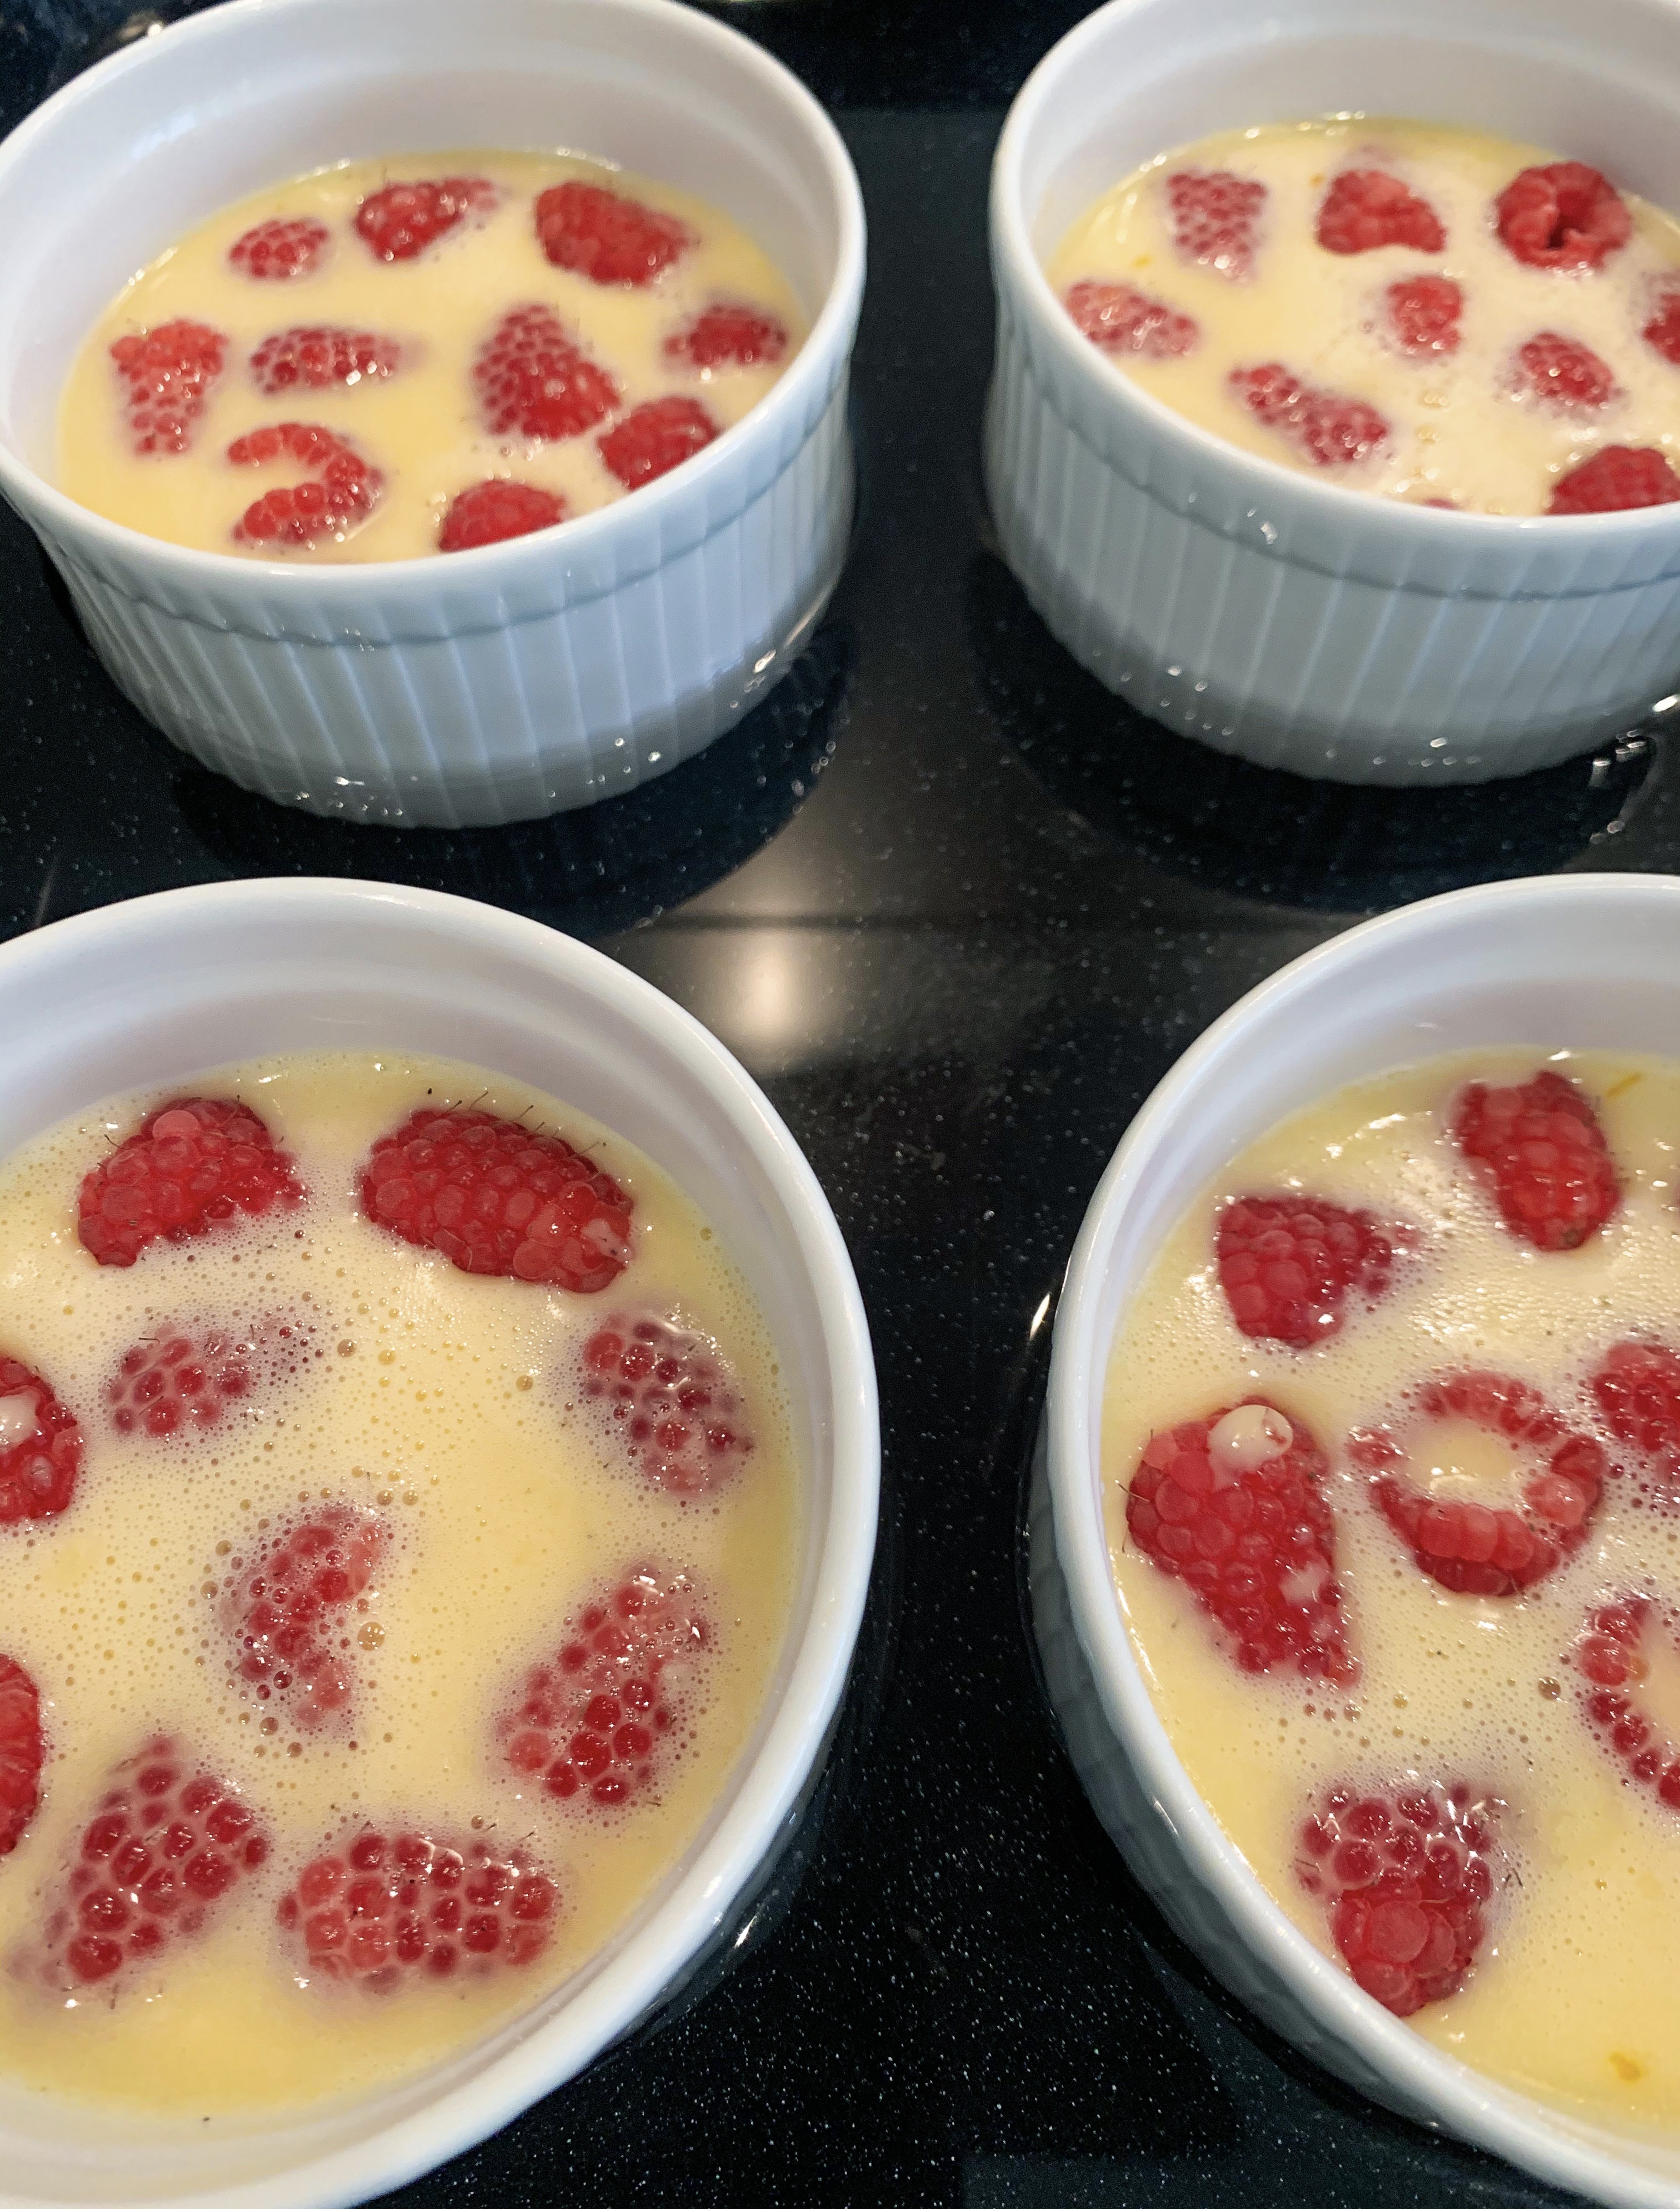
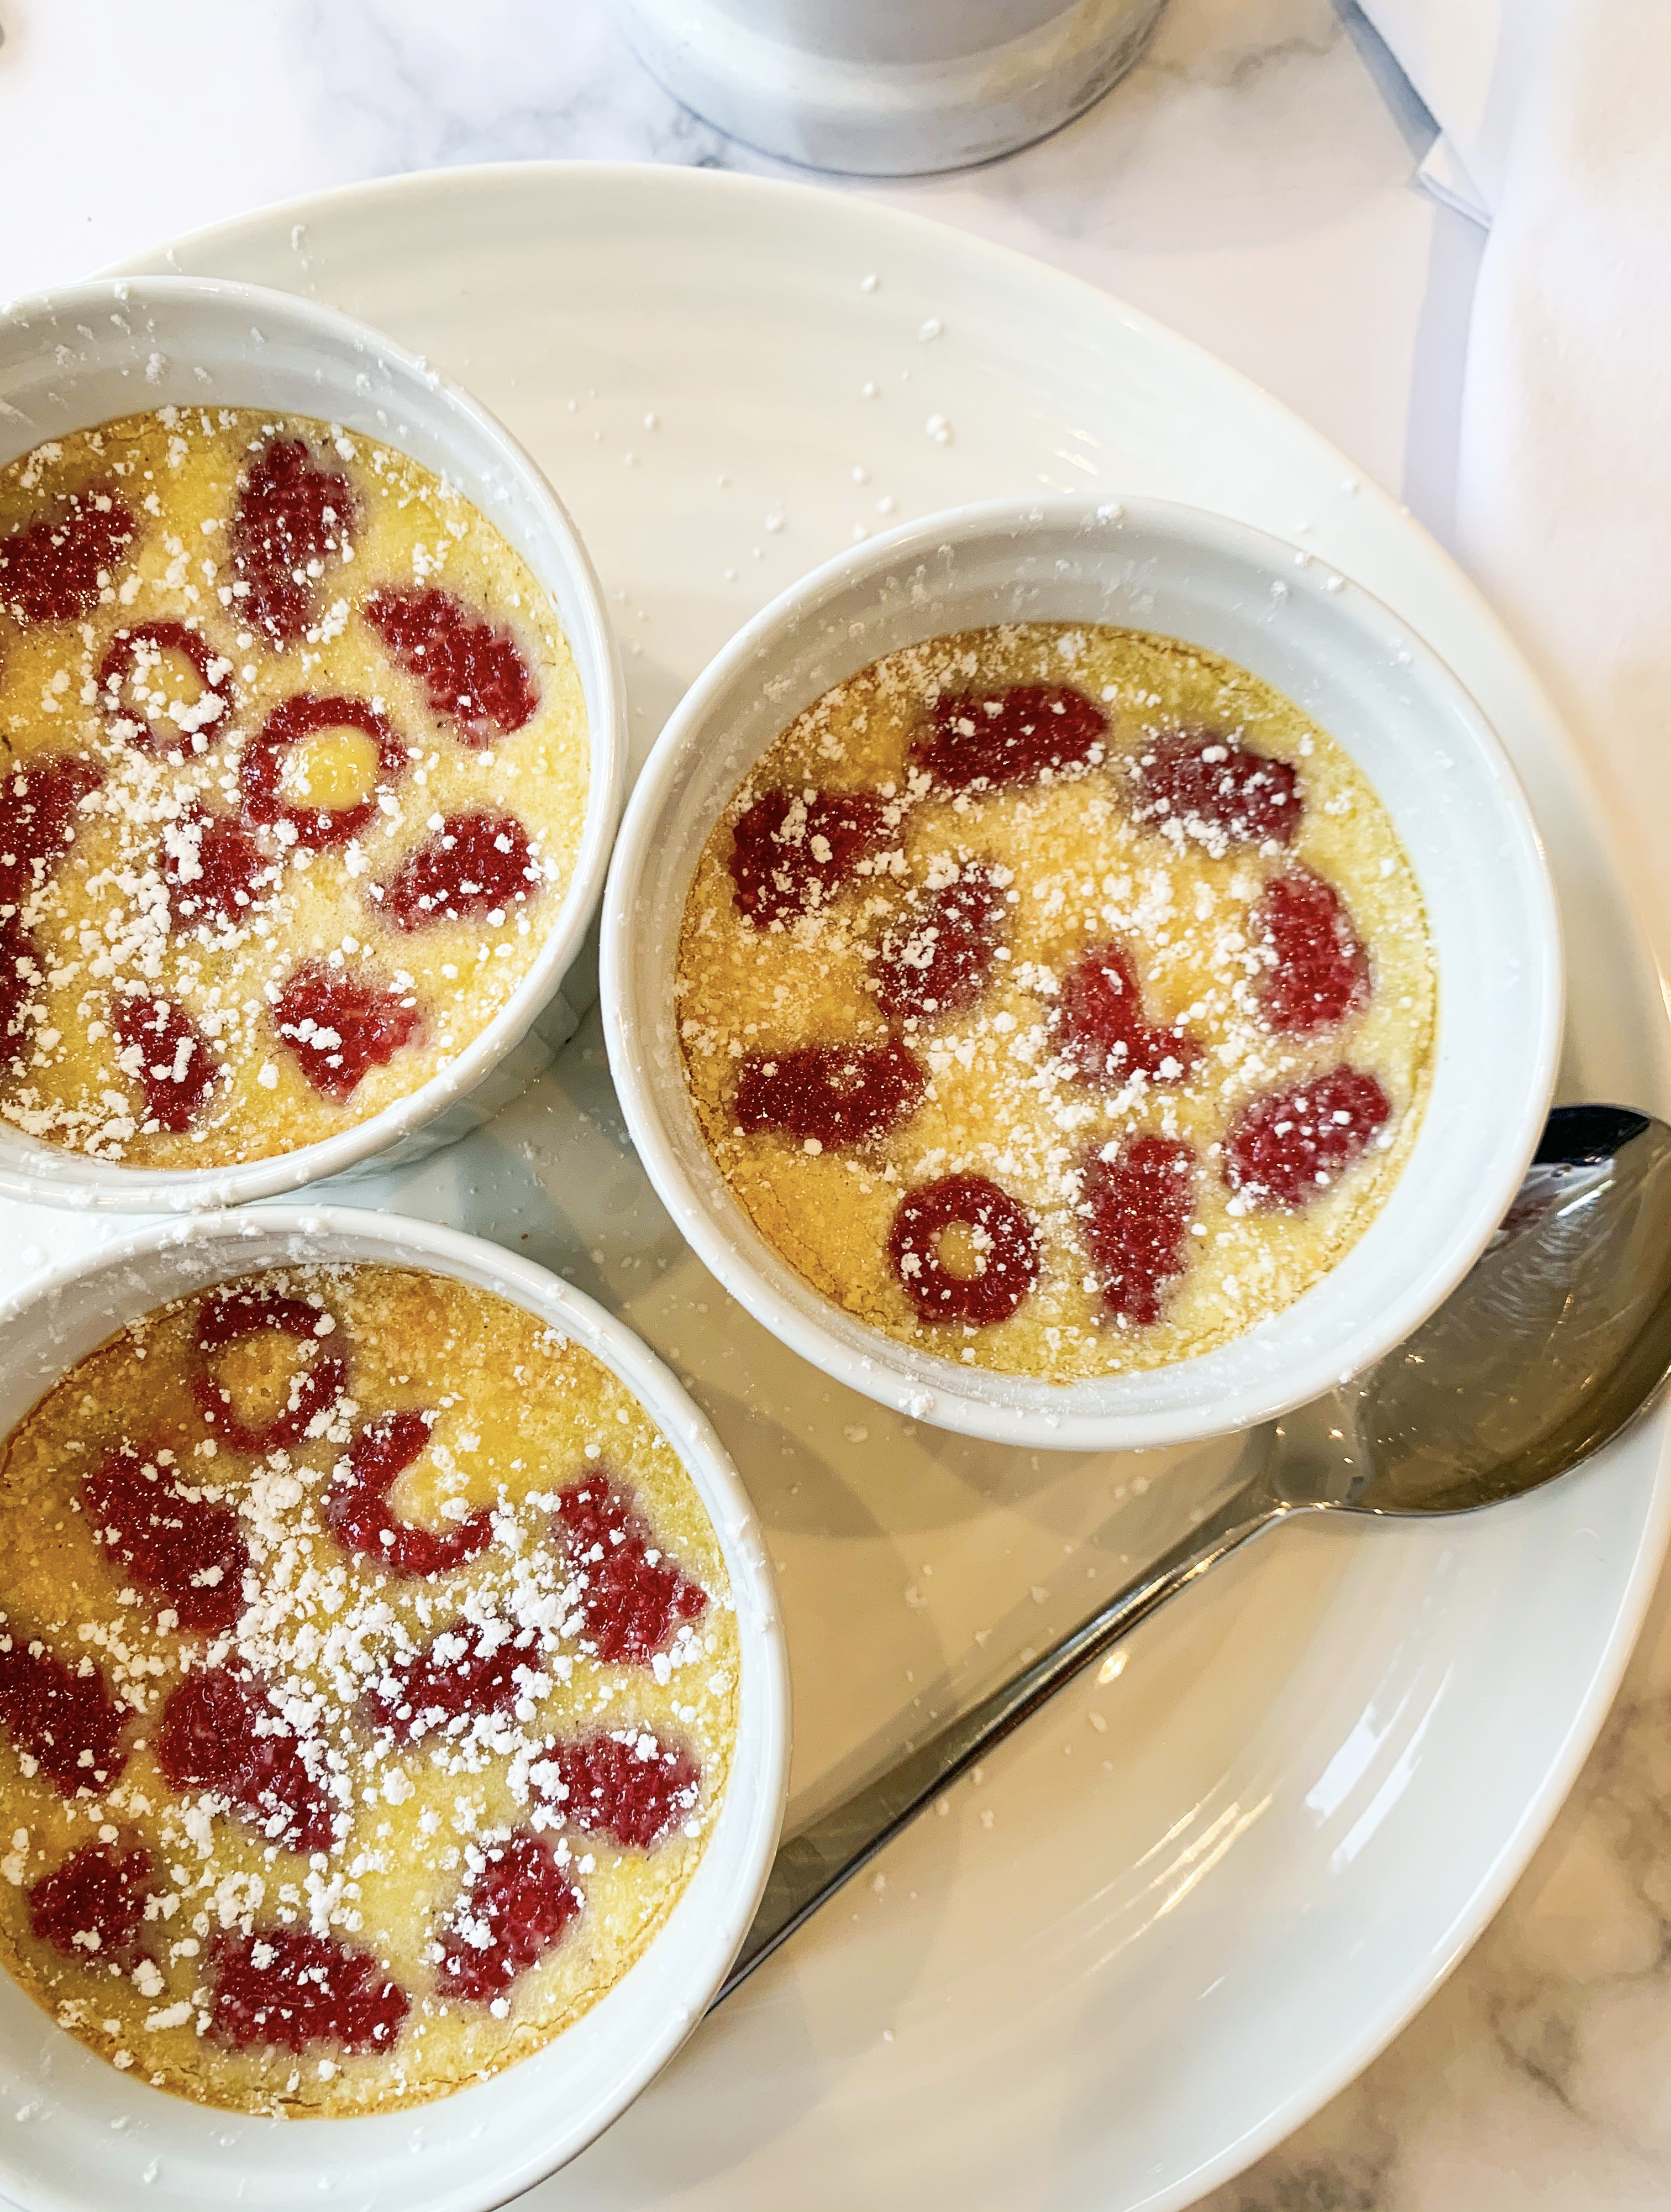
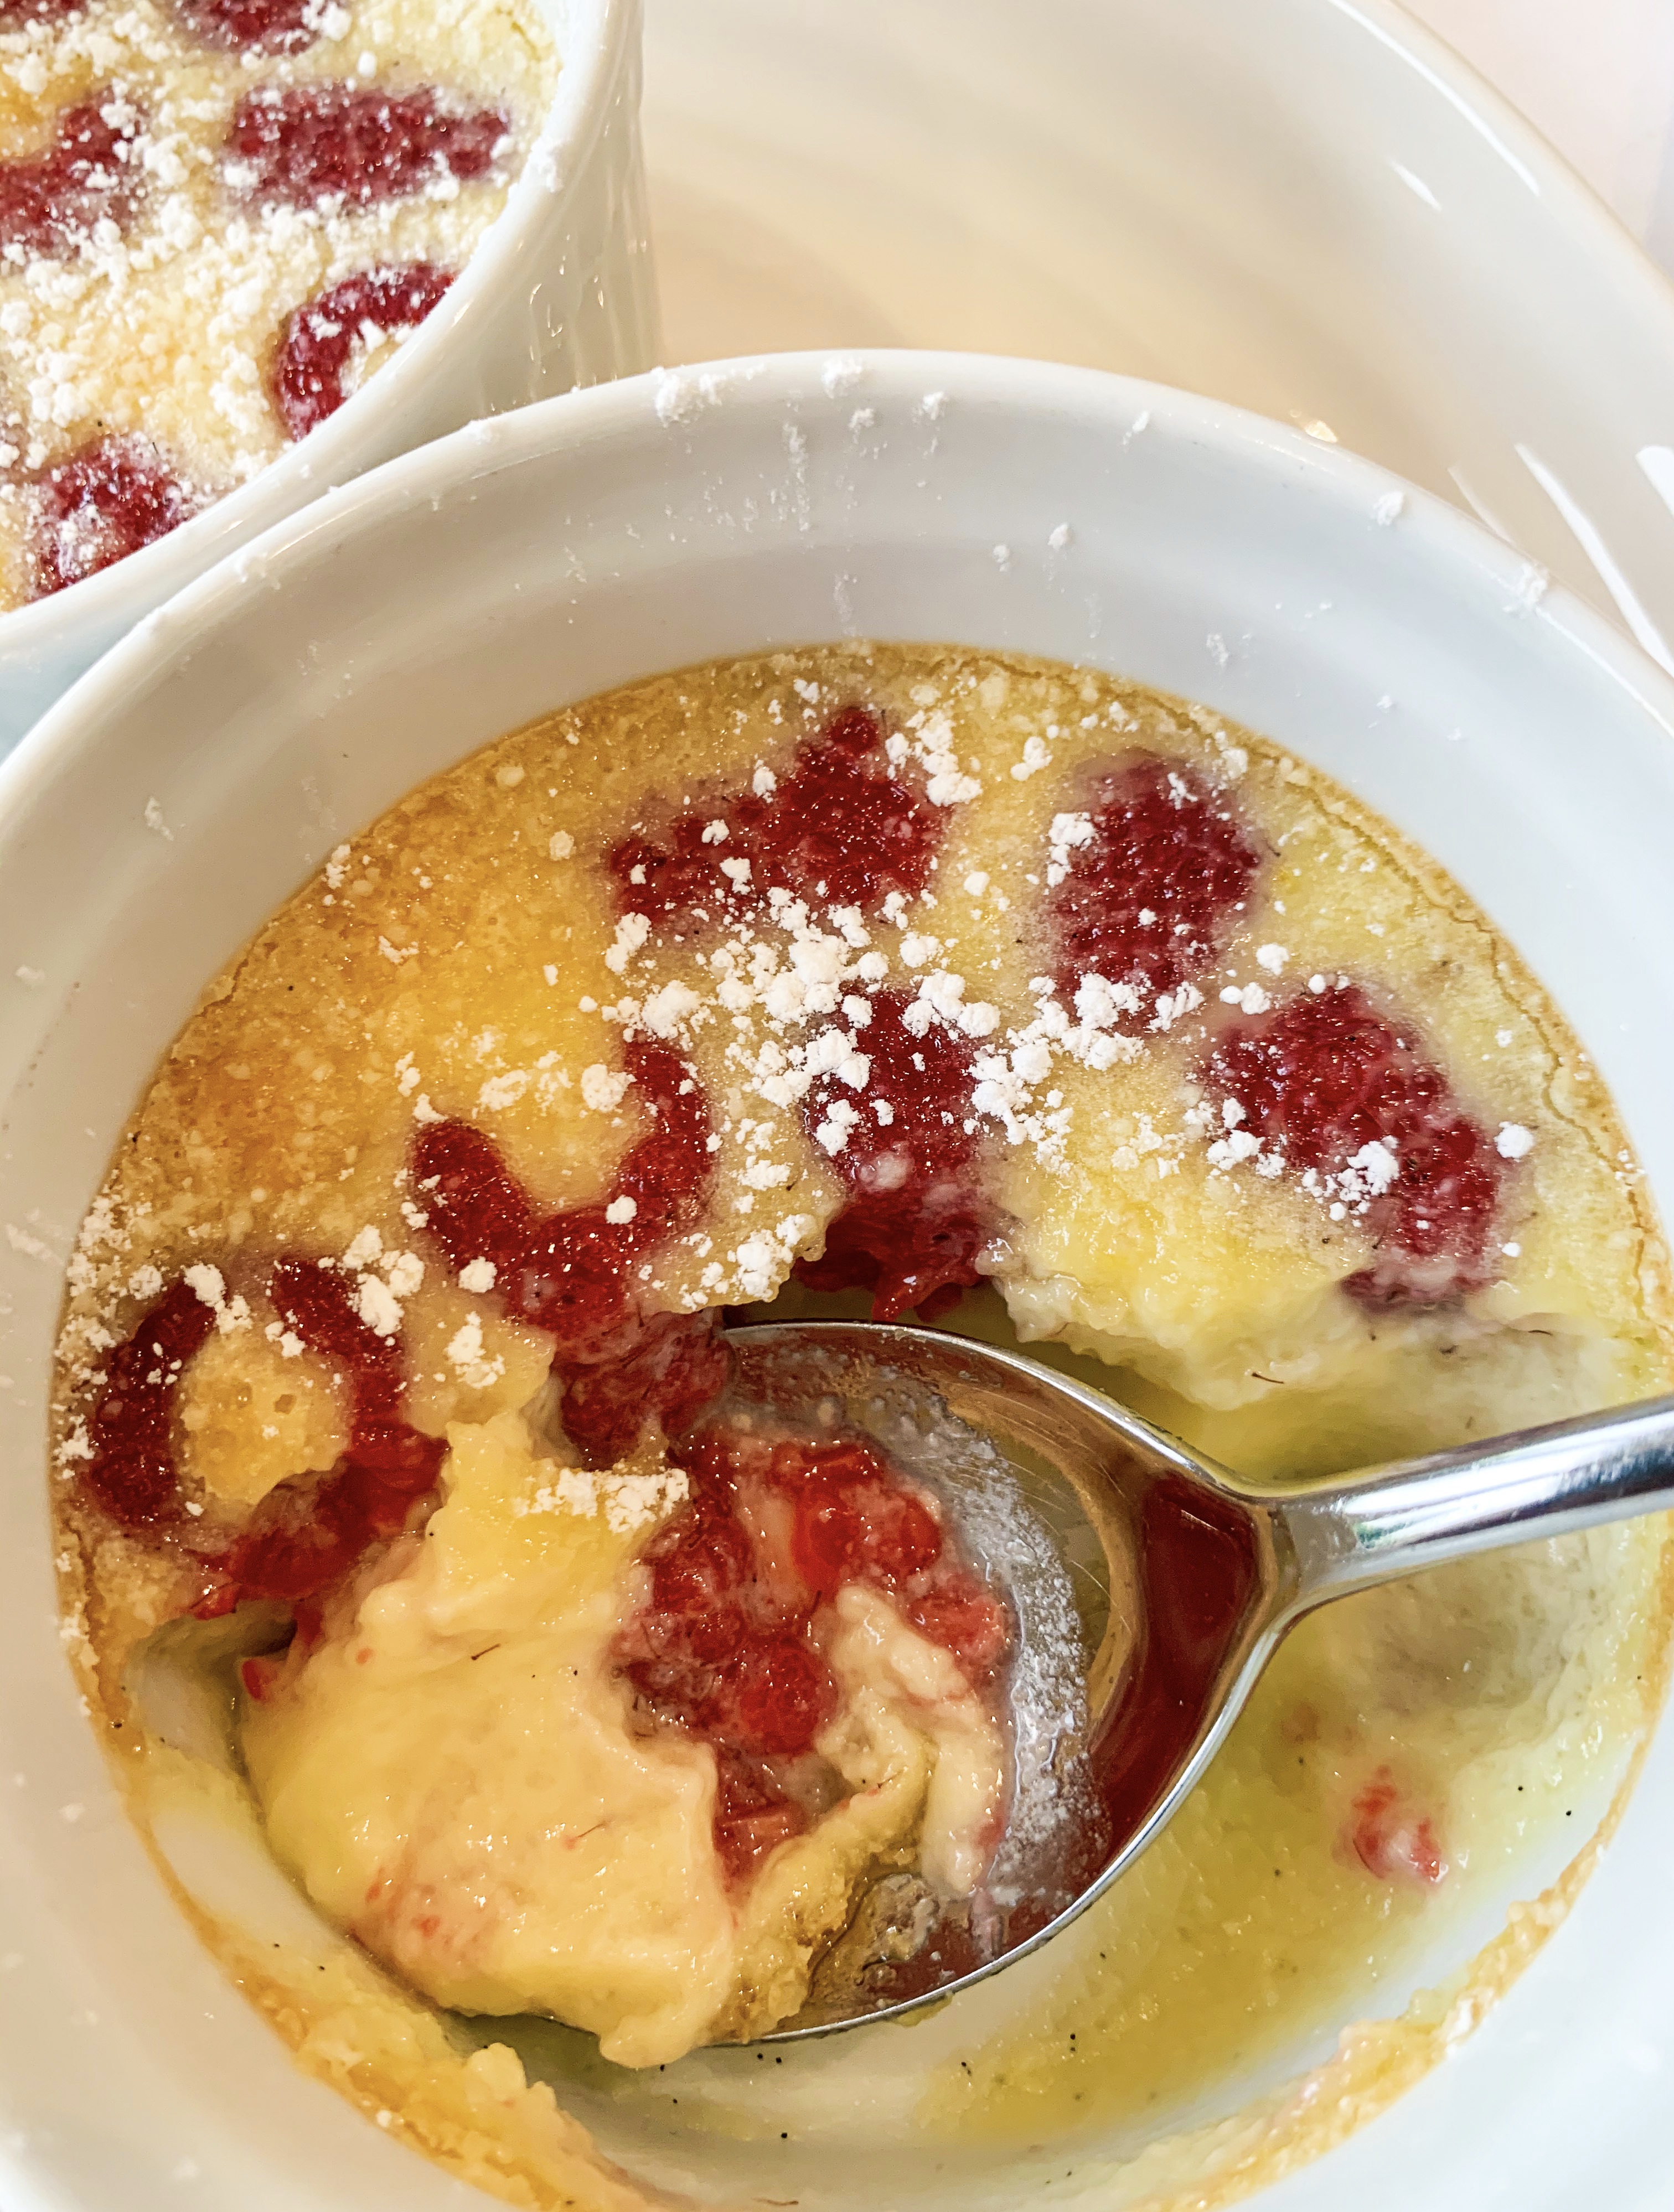
This recipe for Clafoutis is wonderfully light and rather like a baked custard, it is definitely the best clafoutis recipe I have tried. I found the recipe in Simon Hopkinson’s wonderful cookbook, ‘Roast Chicken and Other Stories’. I have been known to eat this dessert cold for breakfast!!…
(I think it is perfect served on its own, but in his cookbook, Simon Hopkinson does suggest a dollop of whipping cream if you fancy!)
1 vanilla pod, split lengthways
250ml whipping cream
A tiny pinch of salt
250g raspberries
1 egg
2 egg yolks
100g caster sugar
1 teaspoon potato flour (fécule de pommes de terre)
A little sifted icing sugar
Softened butter to grease dishes
Whipping cream to serve (optional)
- Put the vanilla pod in a small pan with the whipping cream and salt. When just coming to the boil remove from the heat and whisk carefully to dislodge the vanilla seeds from the pod into the cream. Cover and leave to infuse for 30 minutes or so.
- Take four ovenproof dishes – I use small individual soufflé dishes – or you could use one large dish if you like, either way butter the dish(es) and arrange the raspberries evenly in them.
- Beat together the egg and egg yolks, caster sugar and potato flour, then incorporate the cream and whisk together.
- Carefully pour over the raspberries, so as not to dislodge them. Then place the dishes in a roasting tin. Fill the tin with water so that it comes at least halfway up the sides of the dishes then sift a little icing sugar over their surface.
- Carefully place in a preheated oven, 180’c fan, for 25-30 minutes until slightly puffed and a little wobbly – if using a larger dish you may need to increase the cooking time by 10 minutes or so.
- Switch off the oven and open the door. Leave them like this, in the oven for a further 5 minutes before removing. Take the dishes out of the roasting dish and allow to cool to lukewarm before serving with a little more icing sugar sifted over (and with some whipped cream if you fancy!).
Chocolate Almond Torte
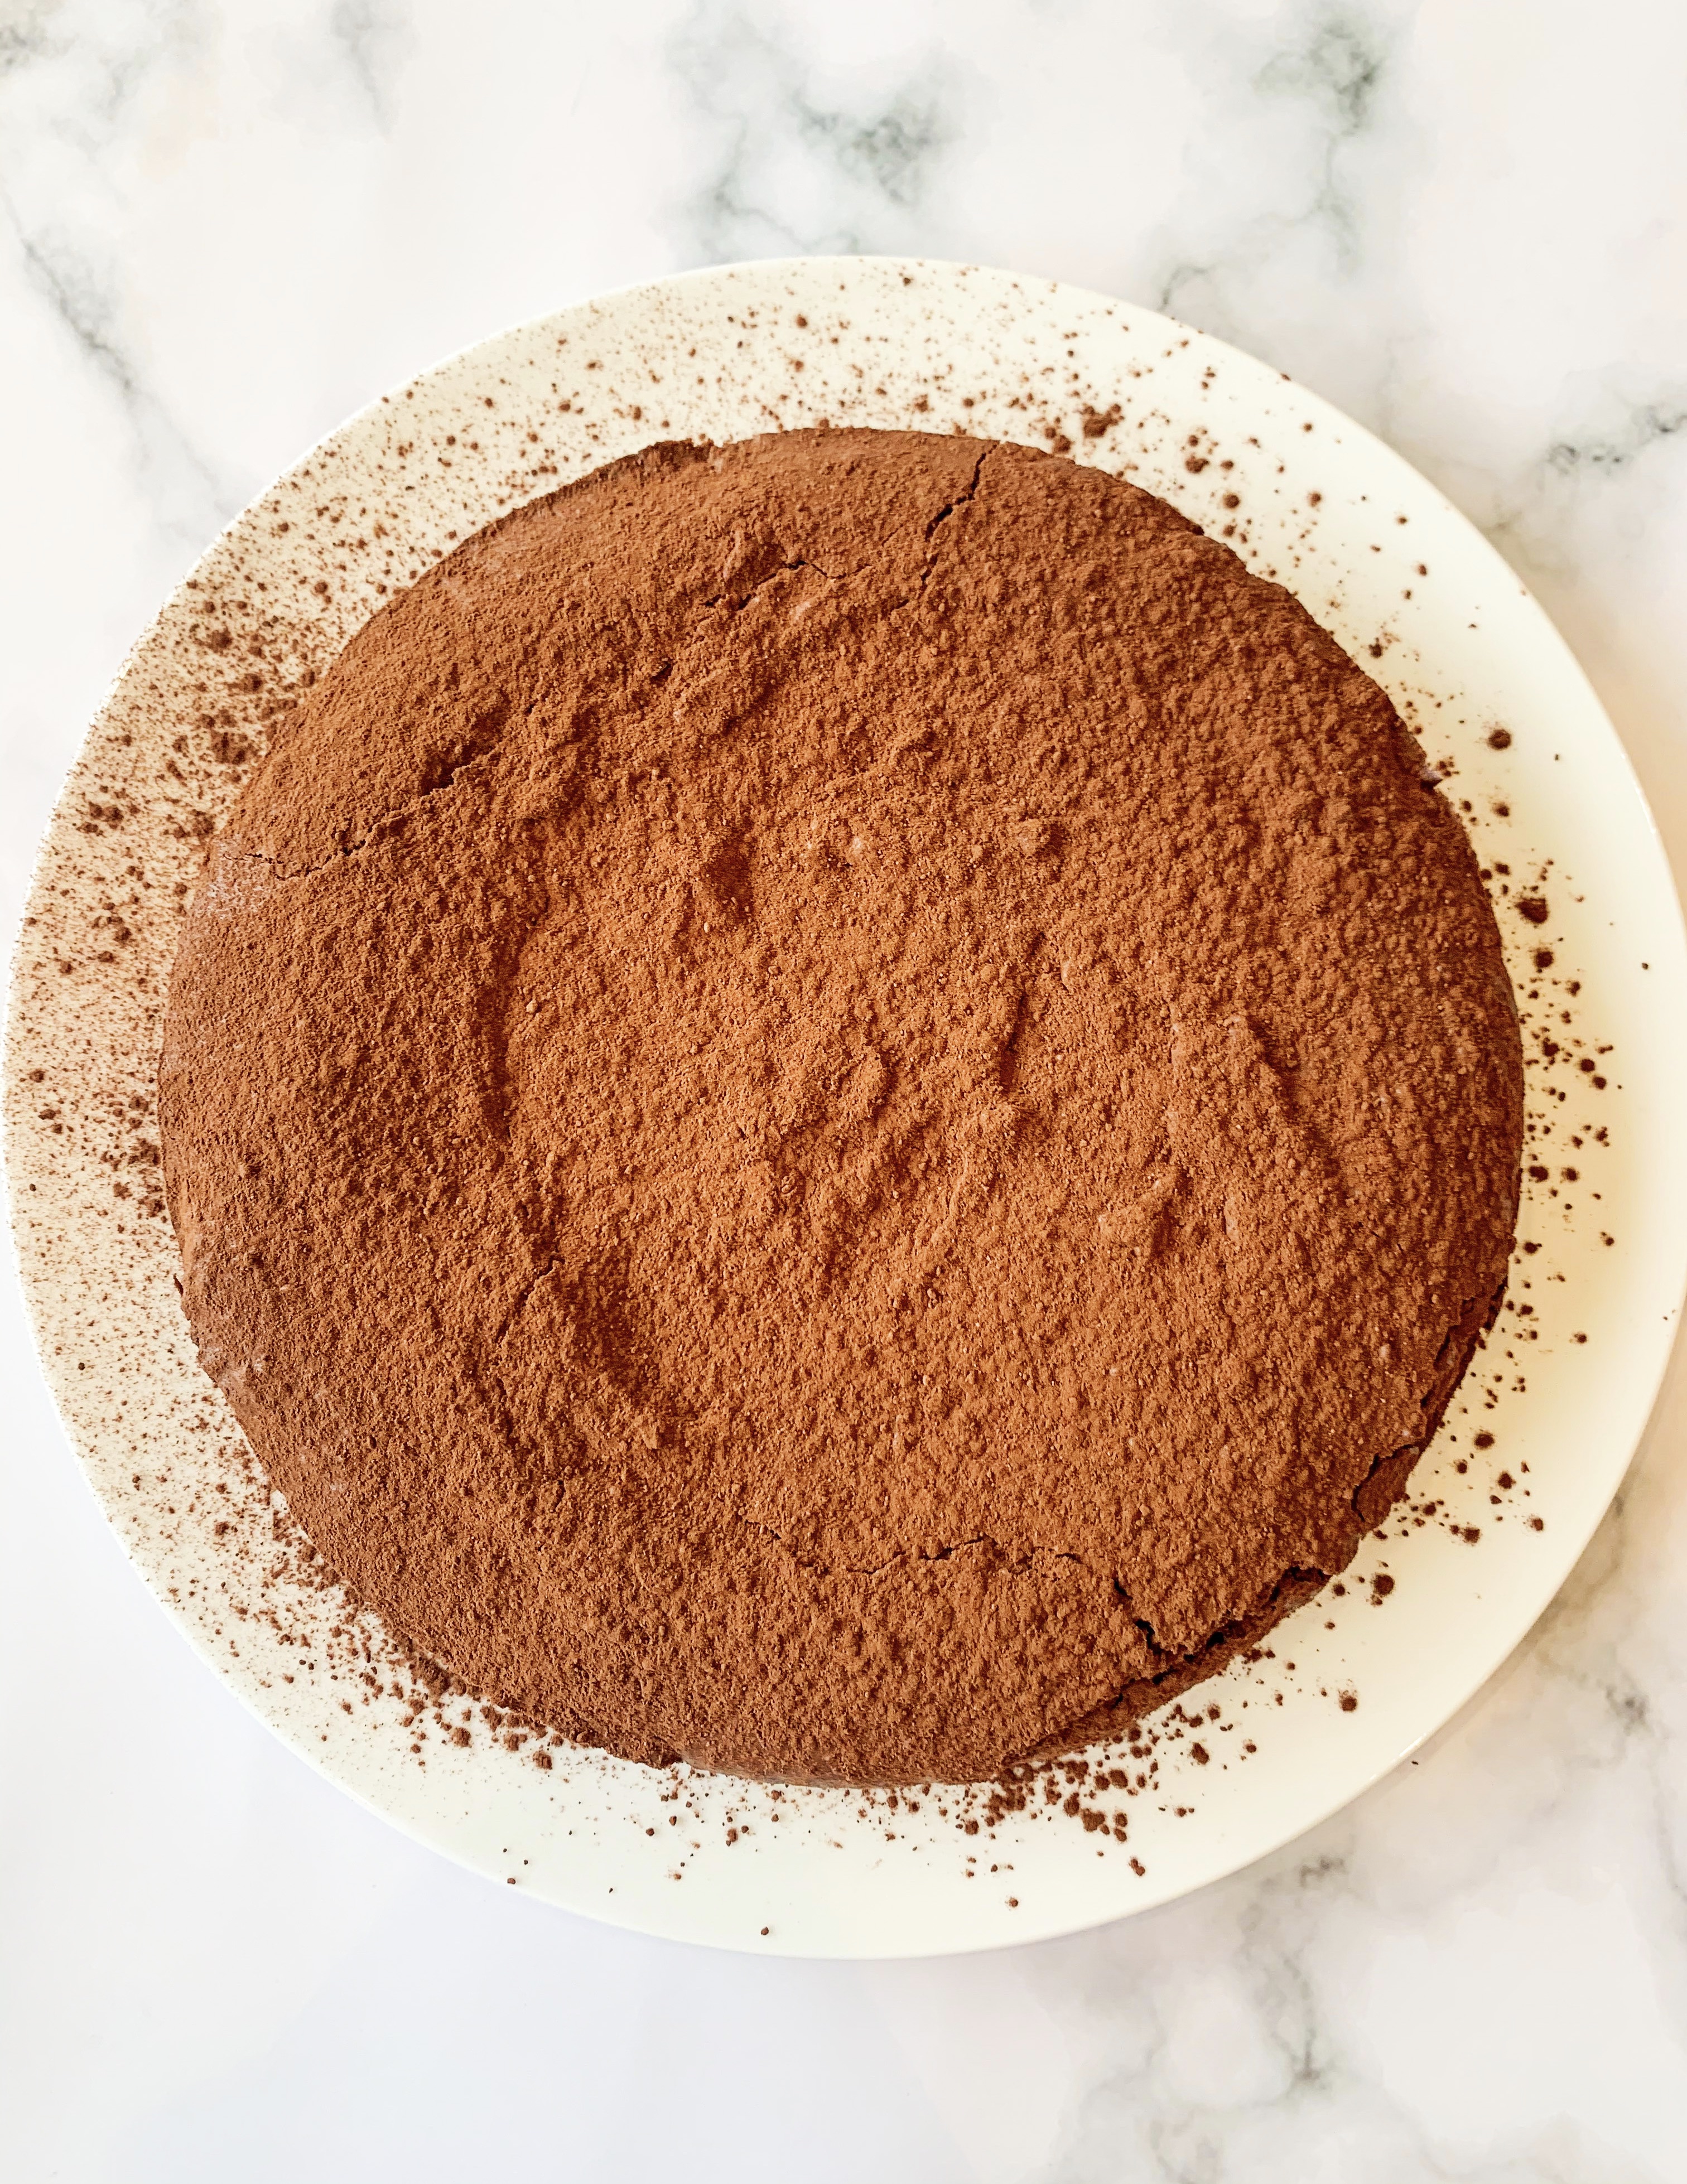
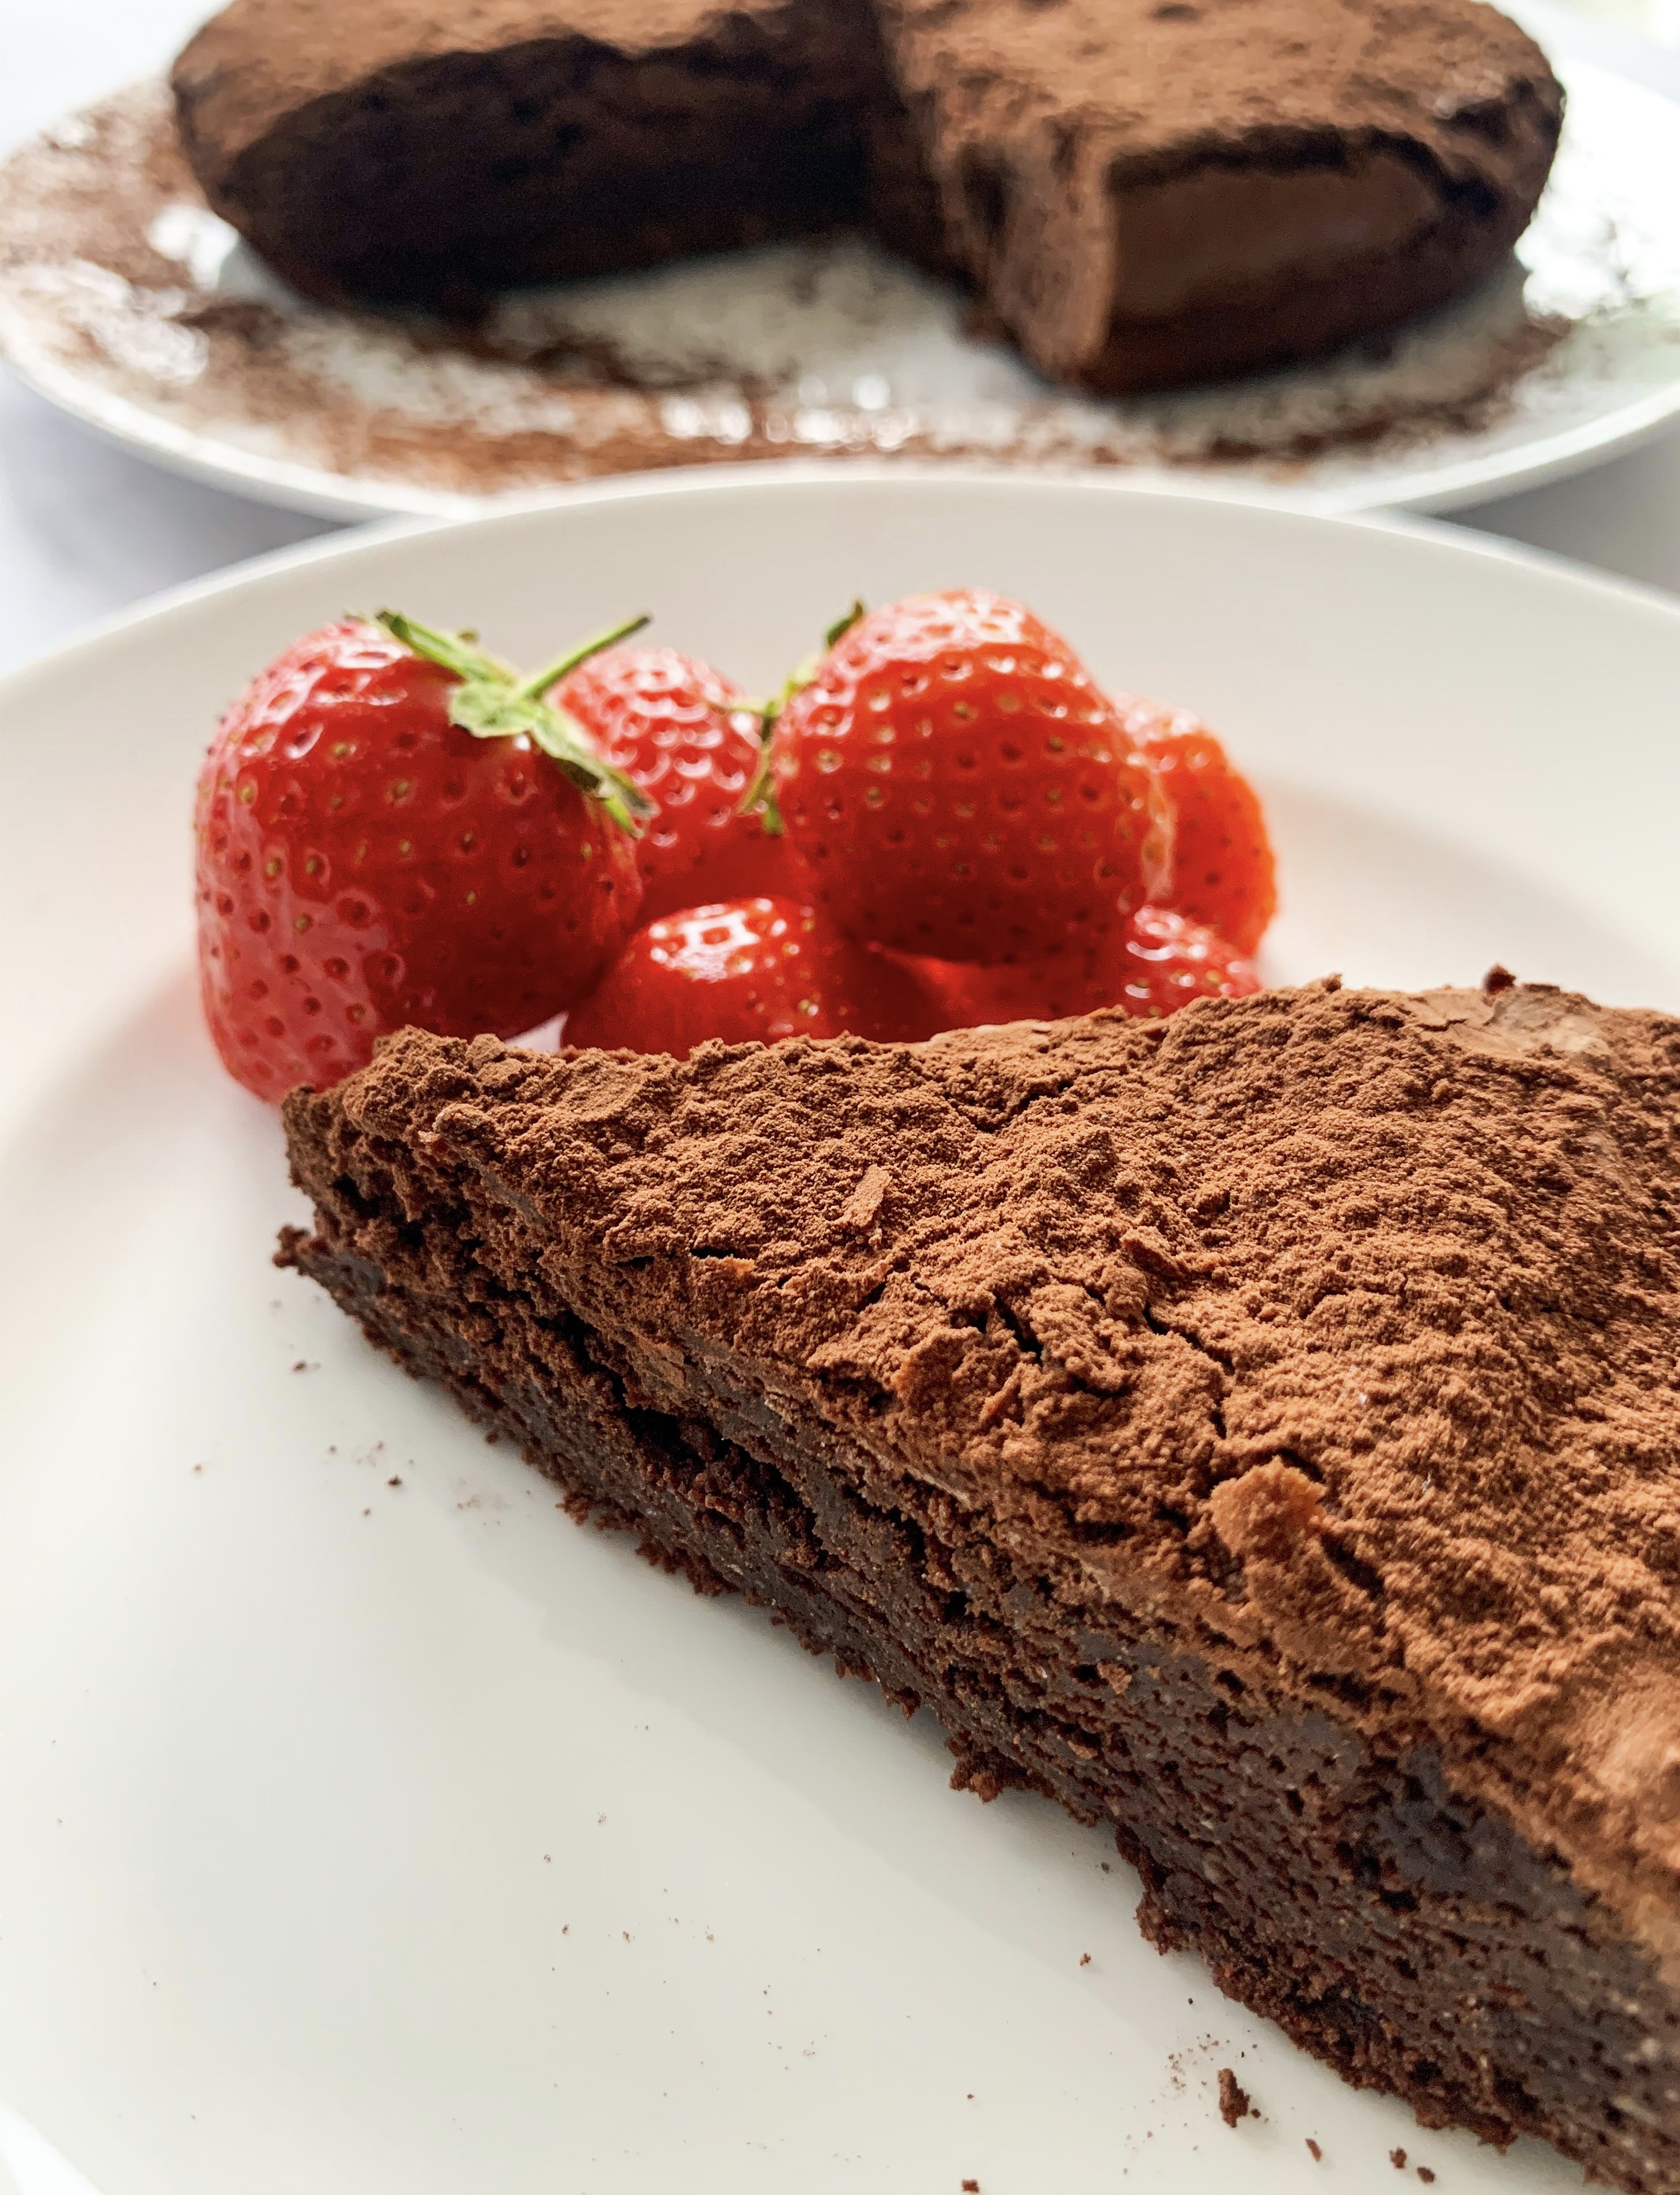
This is a delicious chocolate cake and the best news is, is that it’s completely gluten free! It has a slightly chewy texture if served straight from the fridge, which I rather like, whilst at room temperature it has a more fudgy consistency – either way it is divine! You could omit the brandy, but I recommend you use it, as it does intensify the chocolate flavour.
200g dark chocolate (I use Lindt 70% cocoa plain chocolate)
200g unsalted butter, chilled and chopped
4 large eggs, separated
1½ tablespoons brandy (optional)
200g caster sugar
100g ground almonds
¼ teaspoon salt
Cocoa powder for dusting
Clotted cream or Crème Fraïche to serve (optional)
Strawberries or raspberries to serve (optional)
(You will need an 8 or 9 inch springform cake tin, buttered and the outside bottom and sides wrapped with foil to prevent leaking)
- Place the chocolate and butter in a medium heat proof bowl over a saucepan of bowling water (baine marie), making sure that the bottom does not have contact with the water, stir until melted. Set aside.
- Place the egg yolks and 100g of the sugar in a large bowl and whisk until pale and thick (about 1 minute), stir in the chocolate mixture, brandy, almonds and salt.
- Use an electric hand whisk to whisk the egg whites with the remaining 100g sugar until they form thick, shiny soft peaks.
- Using a spatula fold in one-third of the egg white mixture into the chocolate mixture, mix gently until well combined, then fold in the remaining egg whites in a further two additions.
- Pour the mixture into the prepared tin, smoothing over the top. Bake in a preheated oven, 180’c fan, for 30-35minutes until an inserted skewer comes out with moist crumbs – the edges will be set but the middle will still be wobbly. Allow to cool on a wire rack and then refrigerate for at least 4 hours until completely set.
- Before serving sift over cocoa powder, serve chilled or at room temperature, with clotted cream or crème fraiche (it is also good with strawberries or raspberries).
- It will keep well in the refrigerator for up to 4 days and also freezes well!!
Roasted Raspberries with Vanilla Ice Cream (Serves 4)
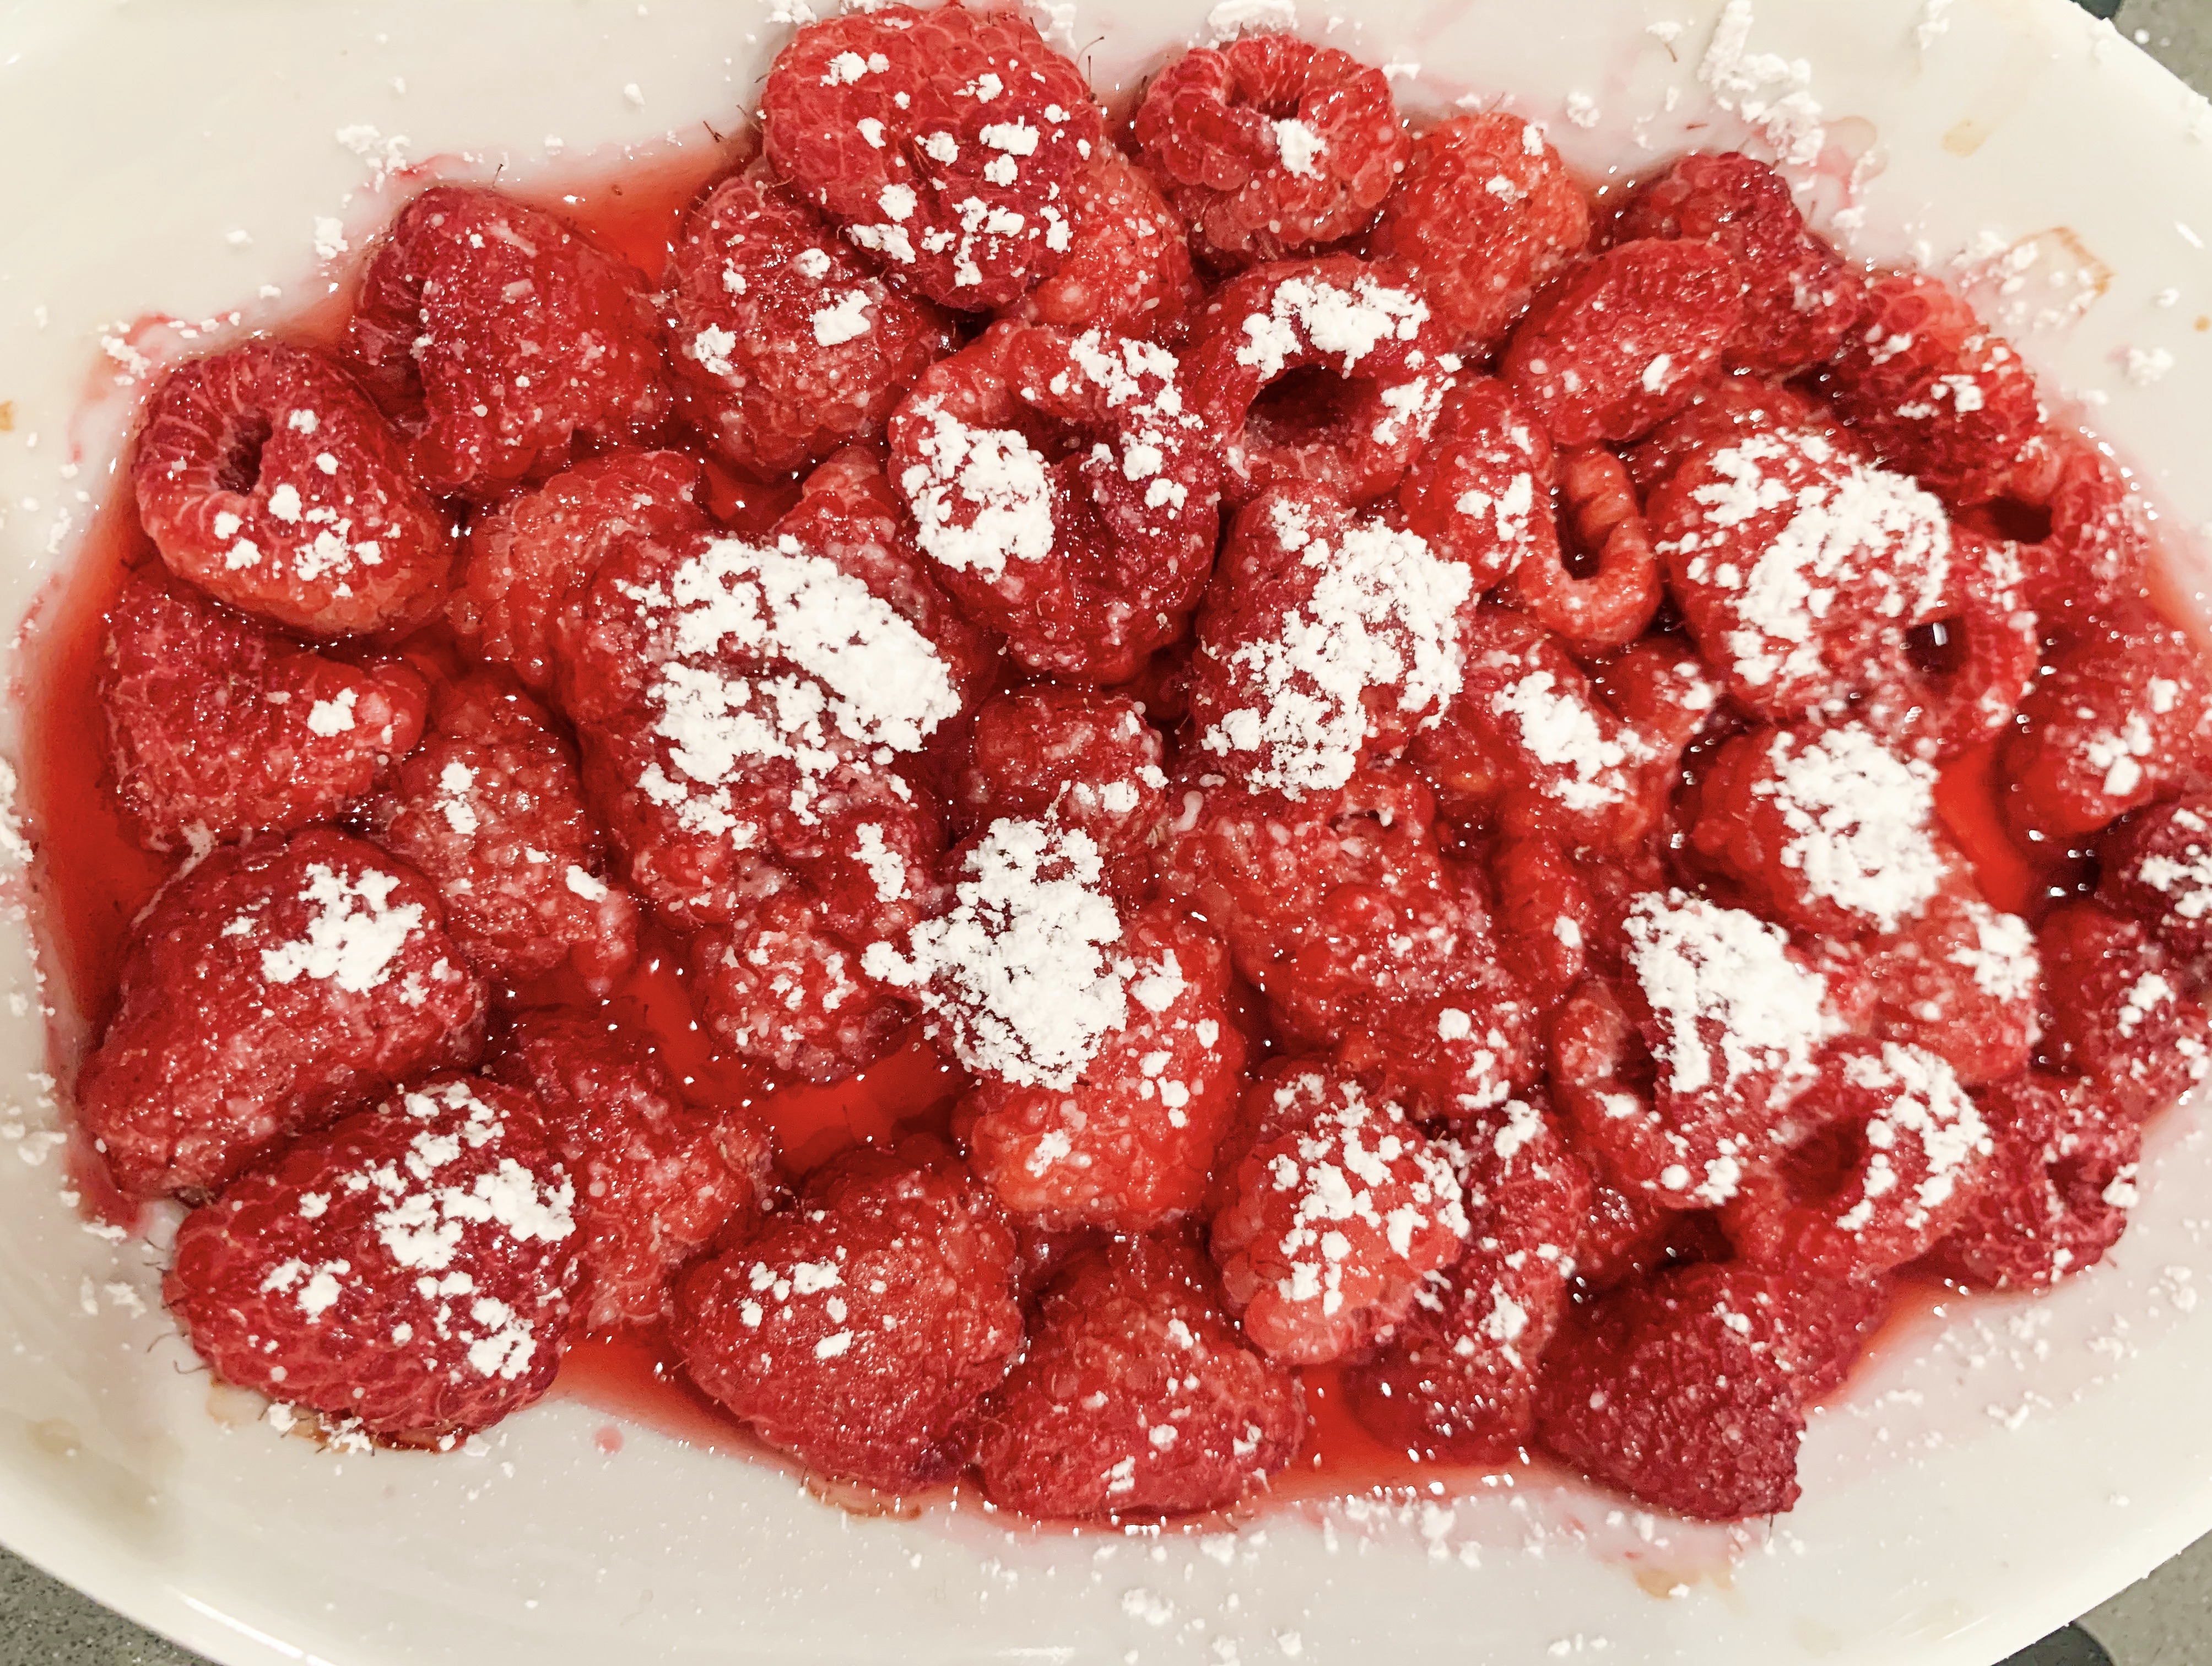
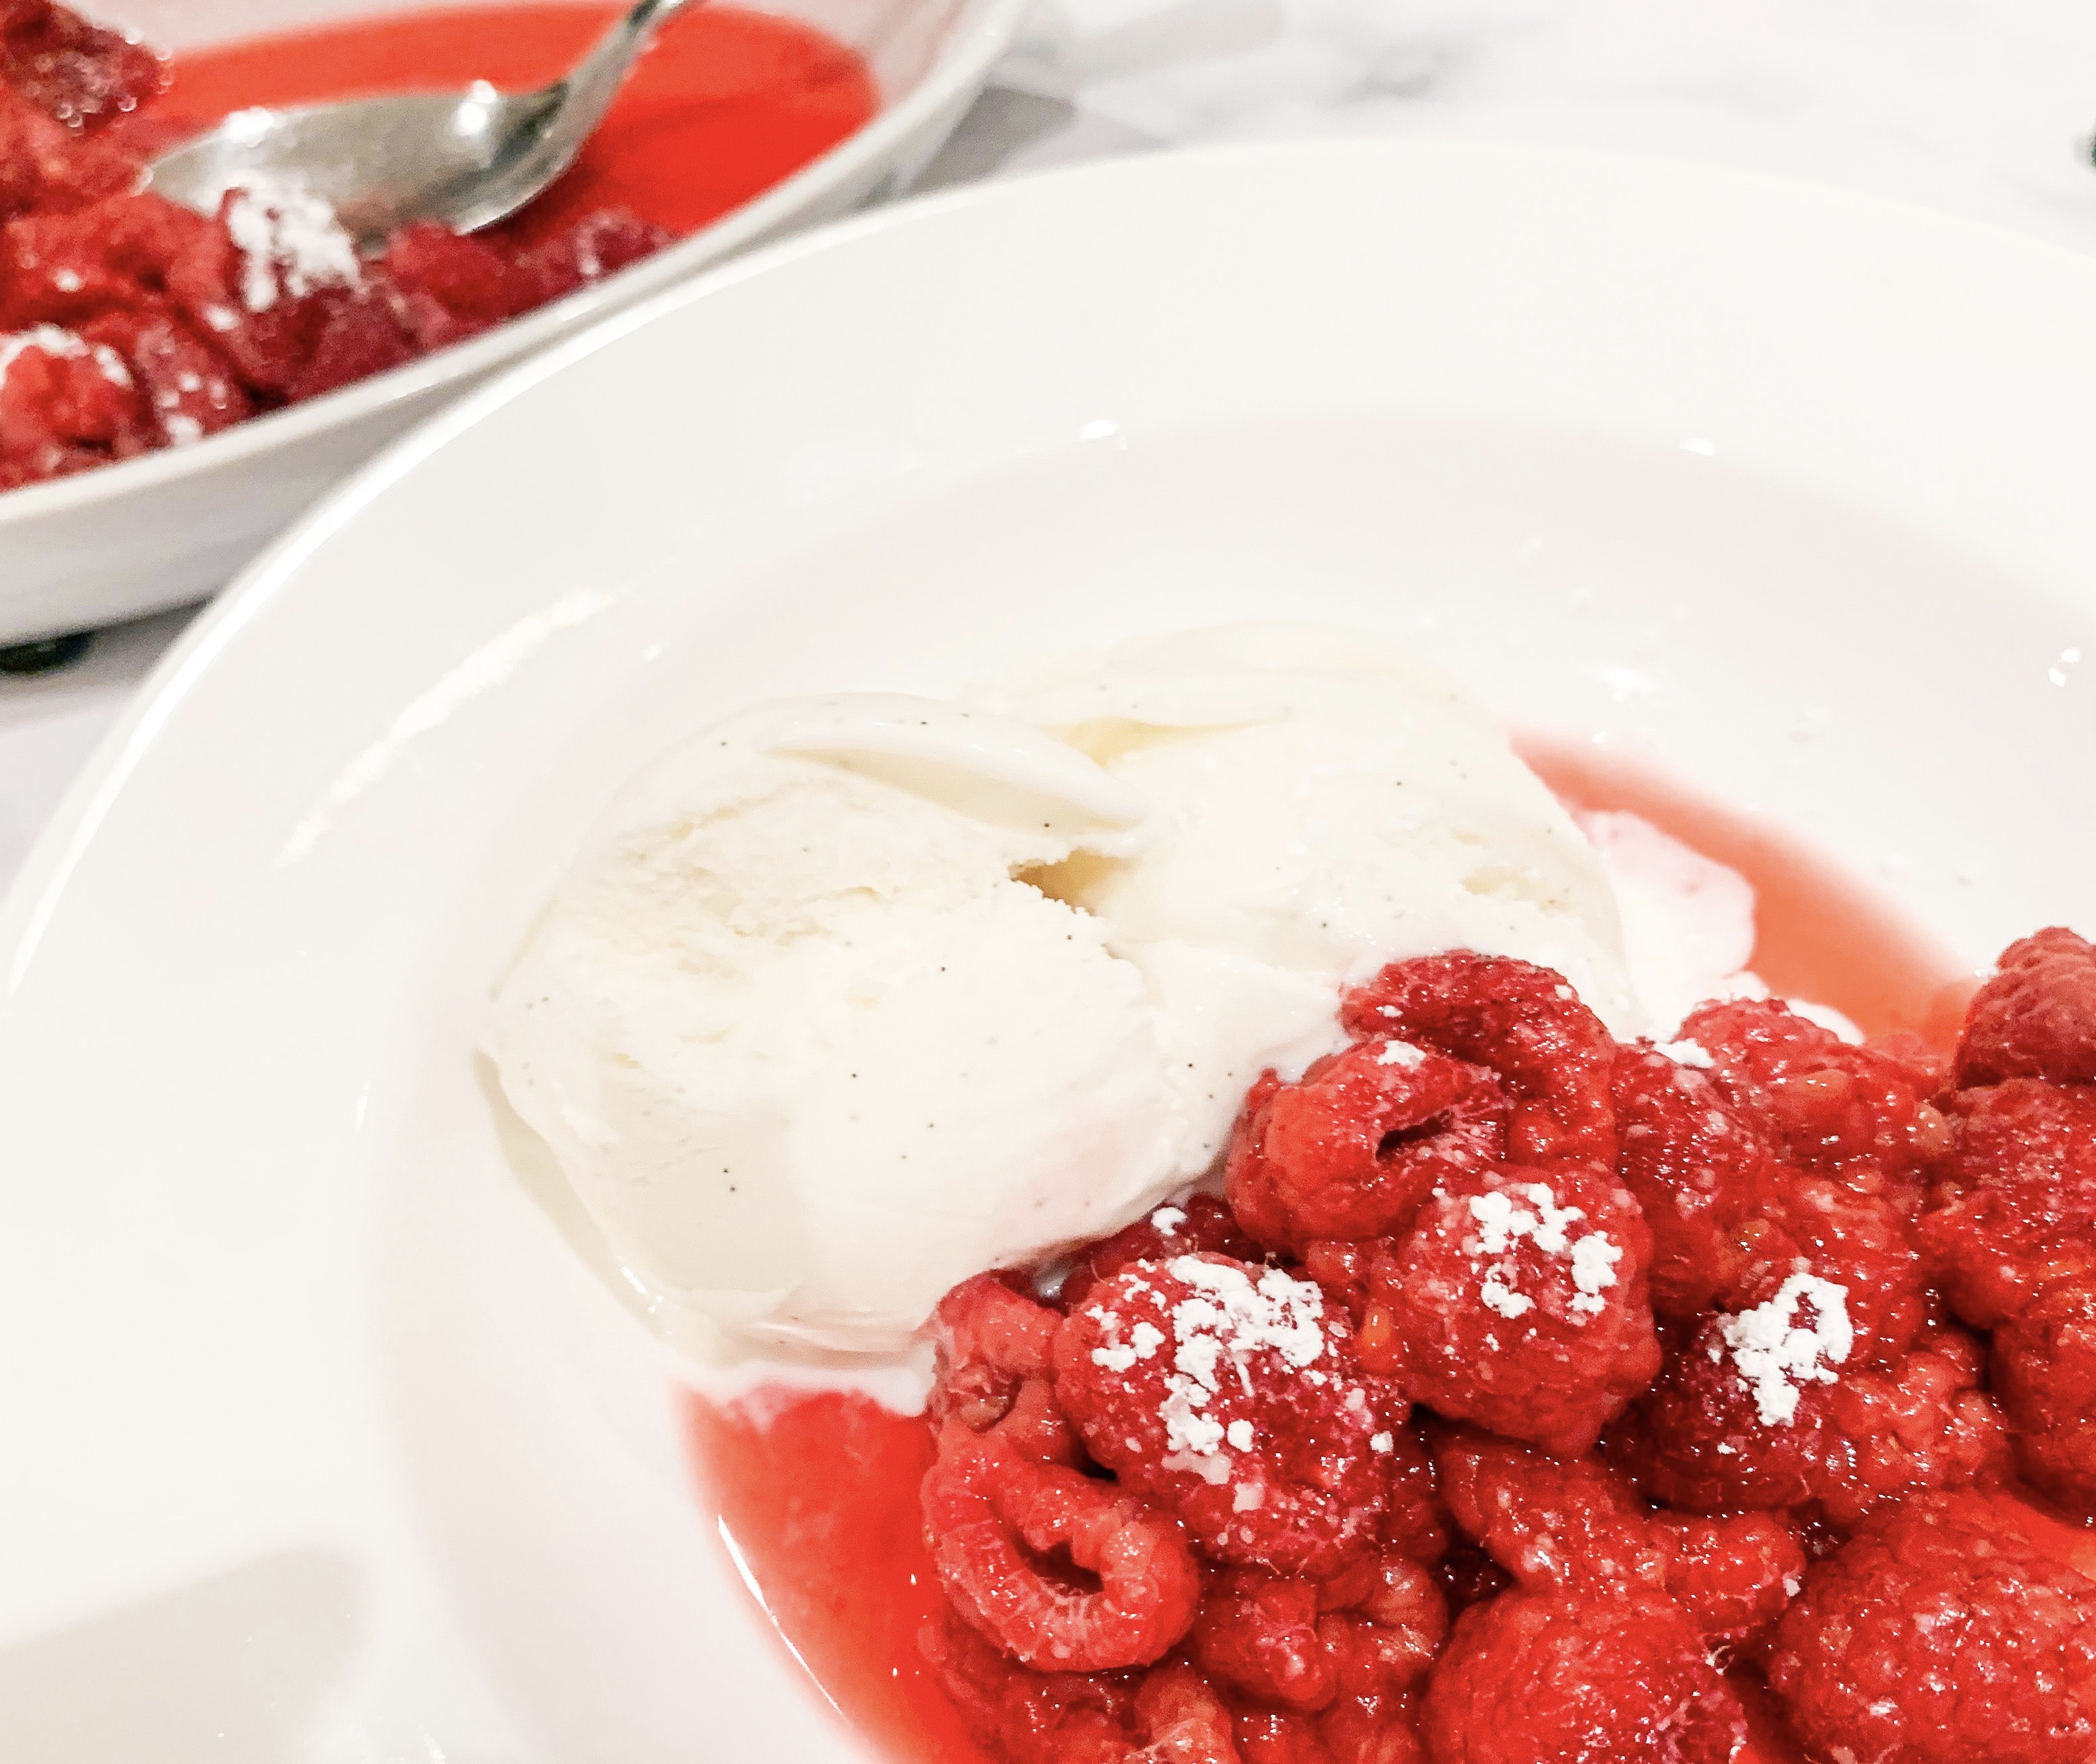
You will thank me for this simple recipe!! It’s such an obvious idea, I wonder why I never thought of it until I saw the recipe in a magazine some years ago. Winter raspberries often lack flavour, but by roasting them you can intensify the flavour and produce a lovely warming treat at the same time!
400g raspberries
2 tablespoons caster sugar
A dusting of icing sugar (2-3 teaspoons)
4 scoops of vanilla ice-cream
- Put the raspberries in an ovenproof dish. Sprinkle with caster sugar. Cook in a preheated oven, 200’c fan, for about 15 minutes until the juices have come out of the raspberries but they are still keeping their shape.
- Remove from the oven, either serve at the table in the oven proof dish or transfer to individual bowls – either way sprinkle with icing sugar before serving.
- Serve with vanilla ice-cream.
‘Crumbles in a Cup’
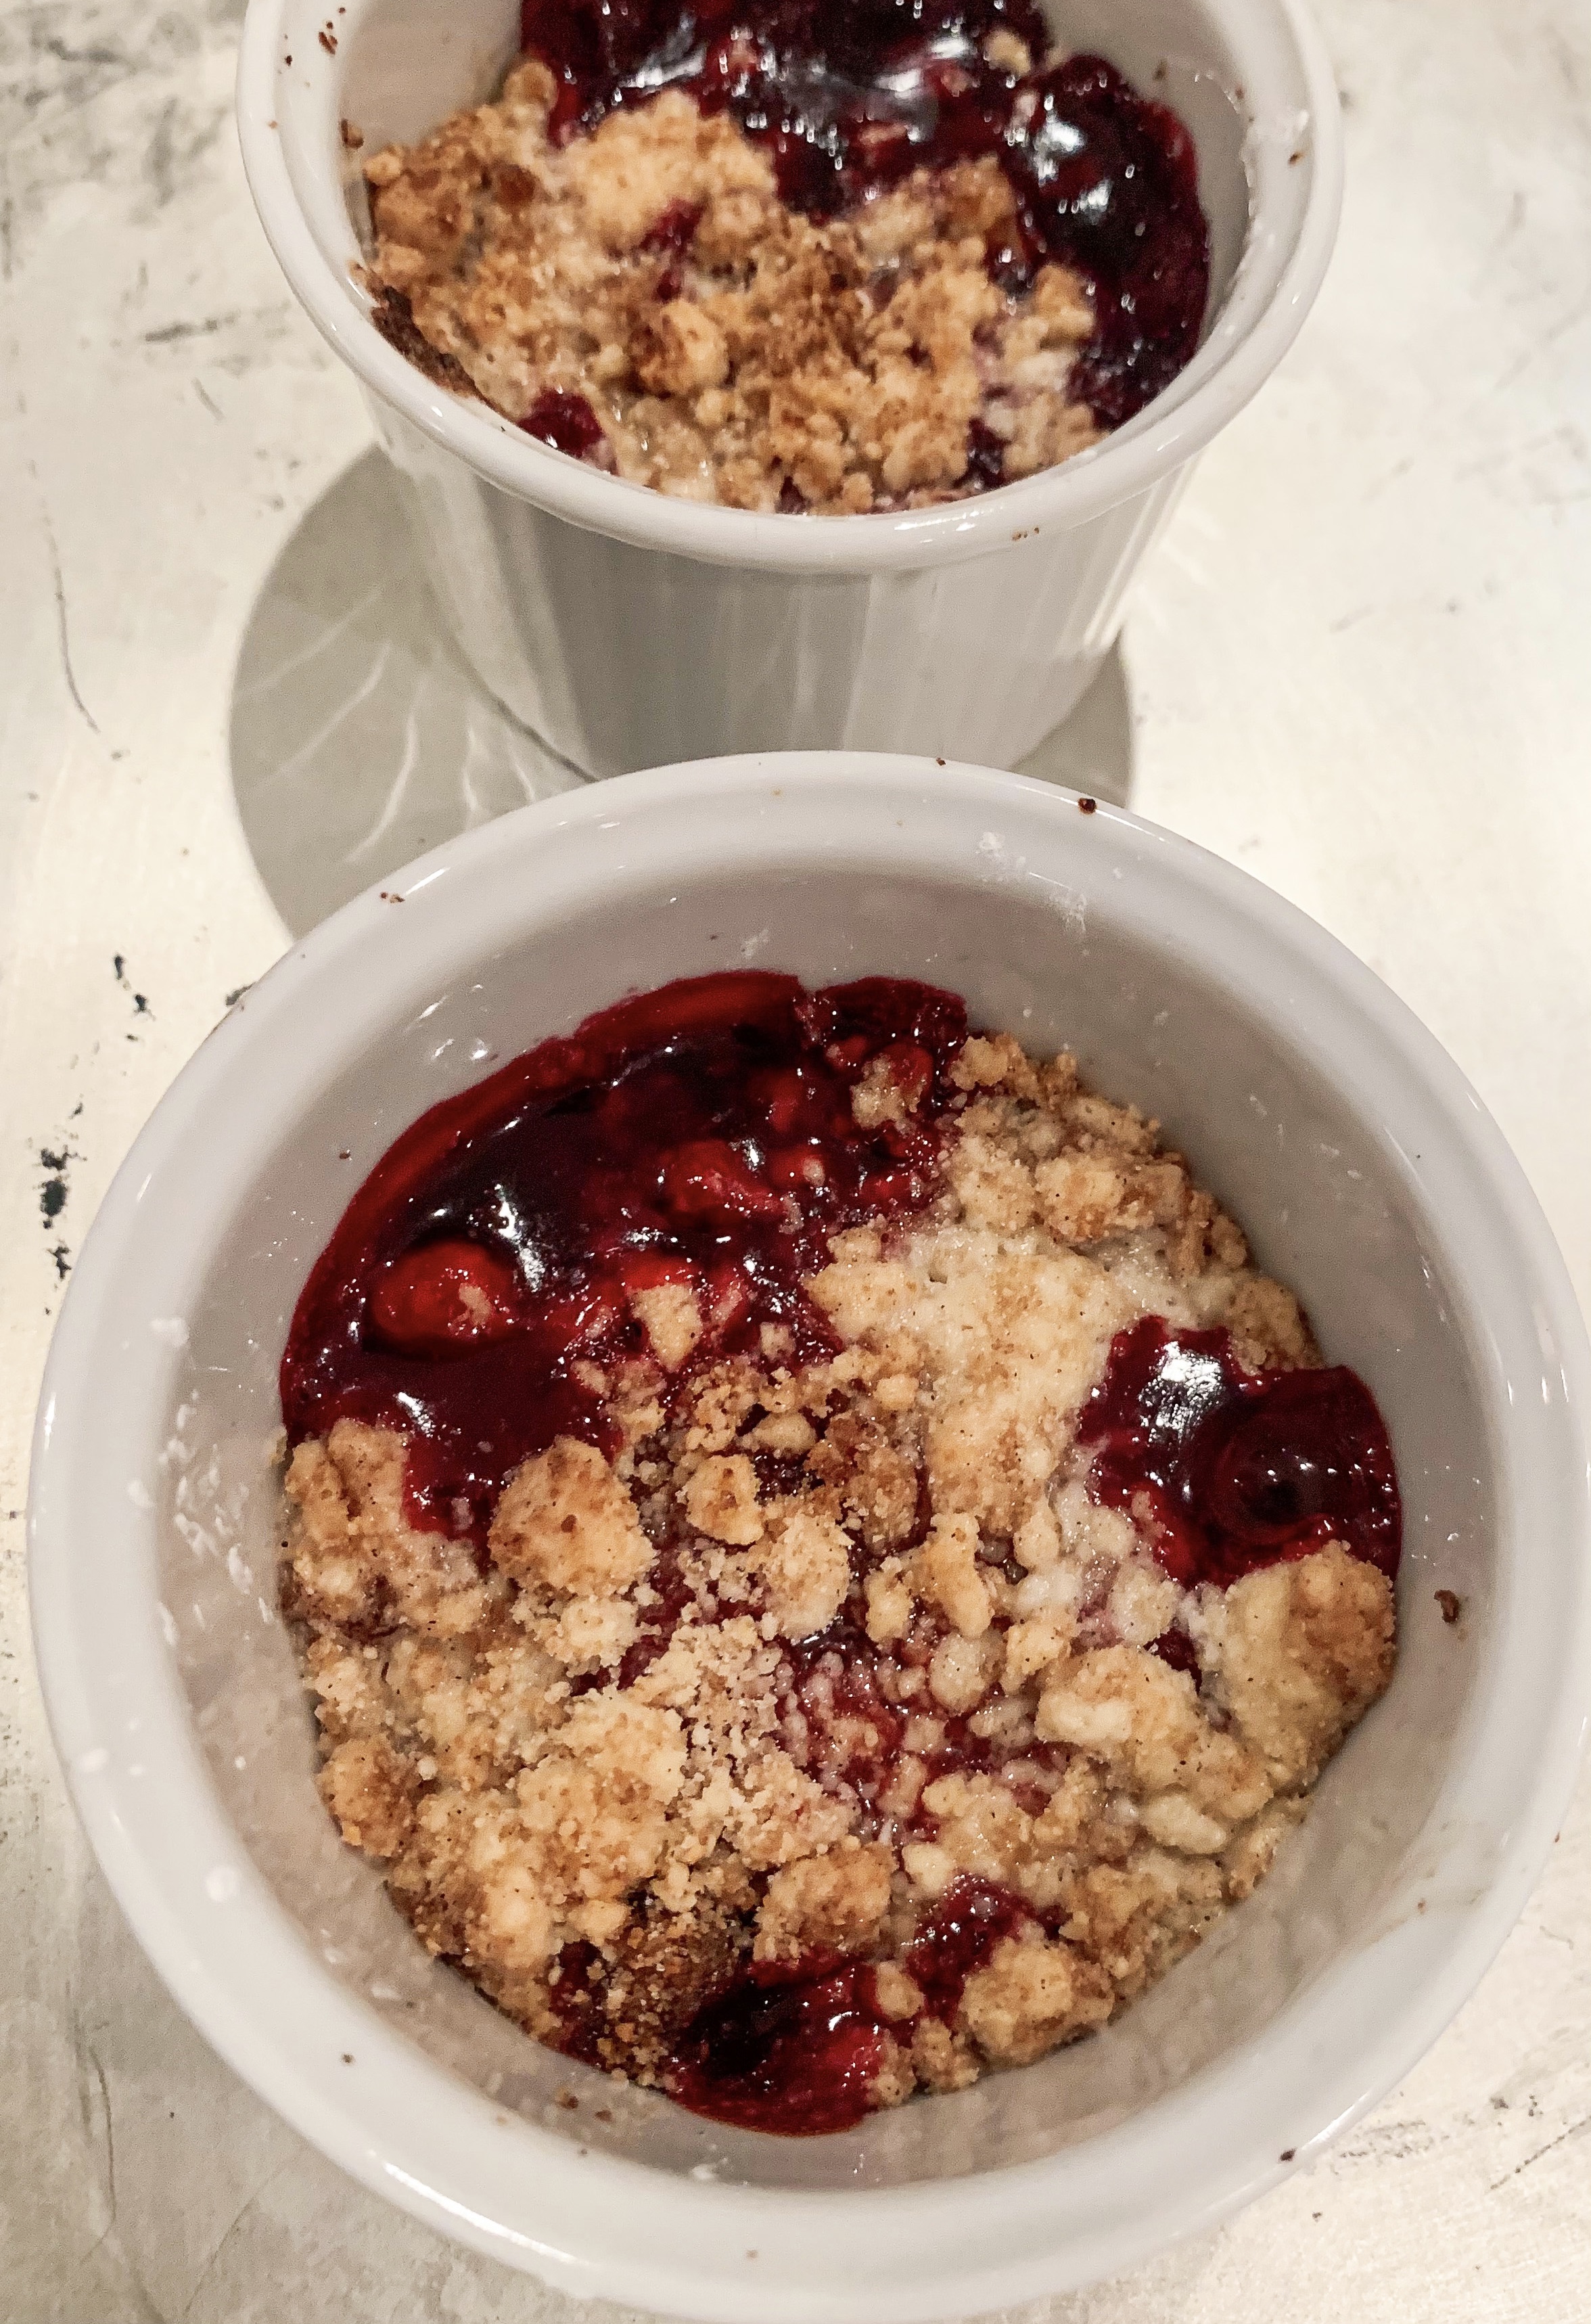
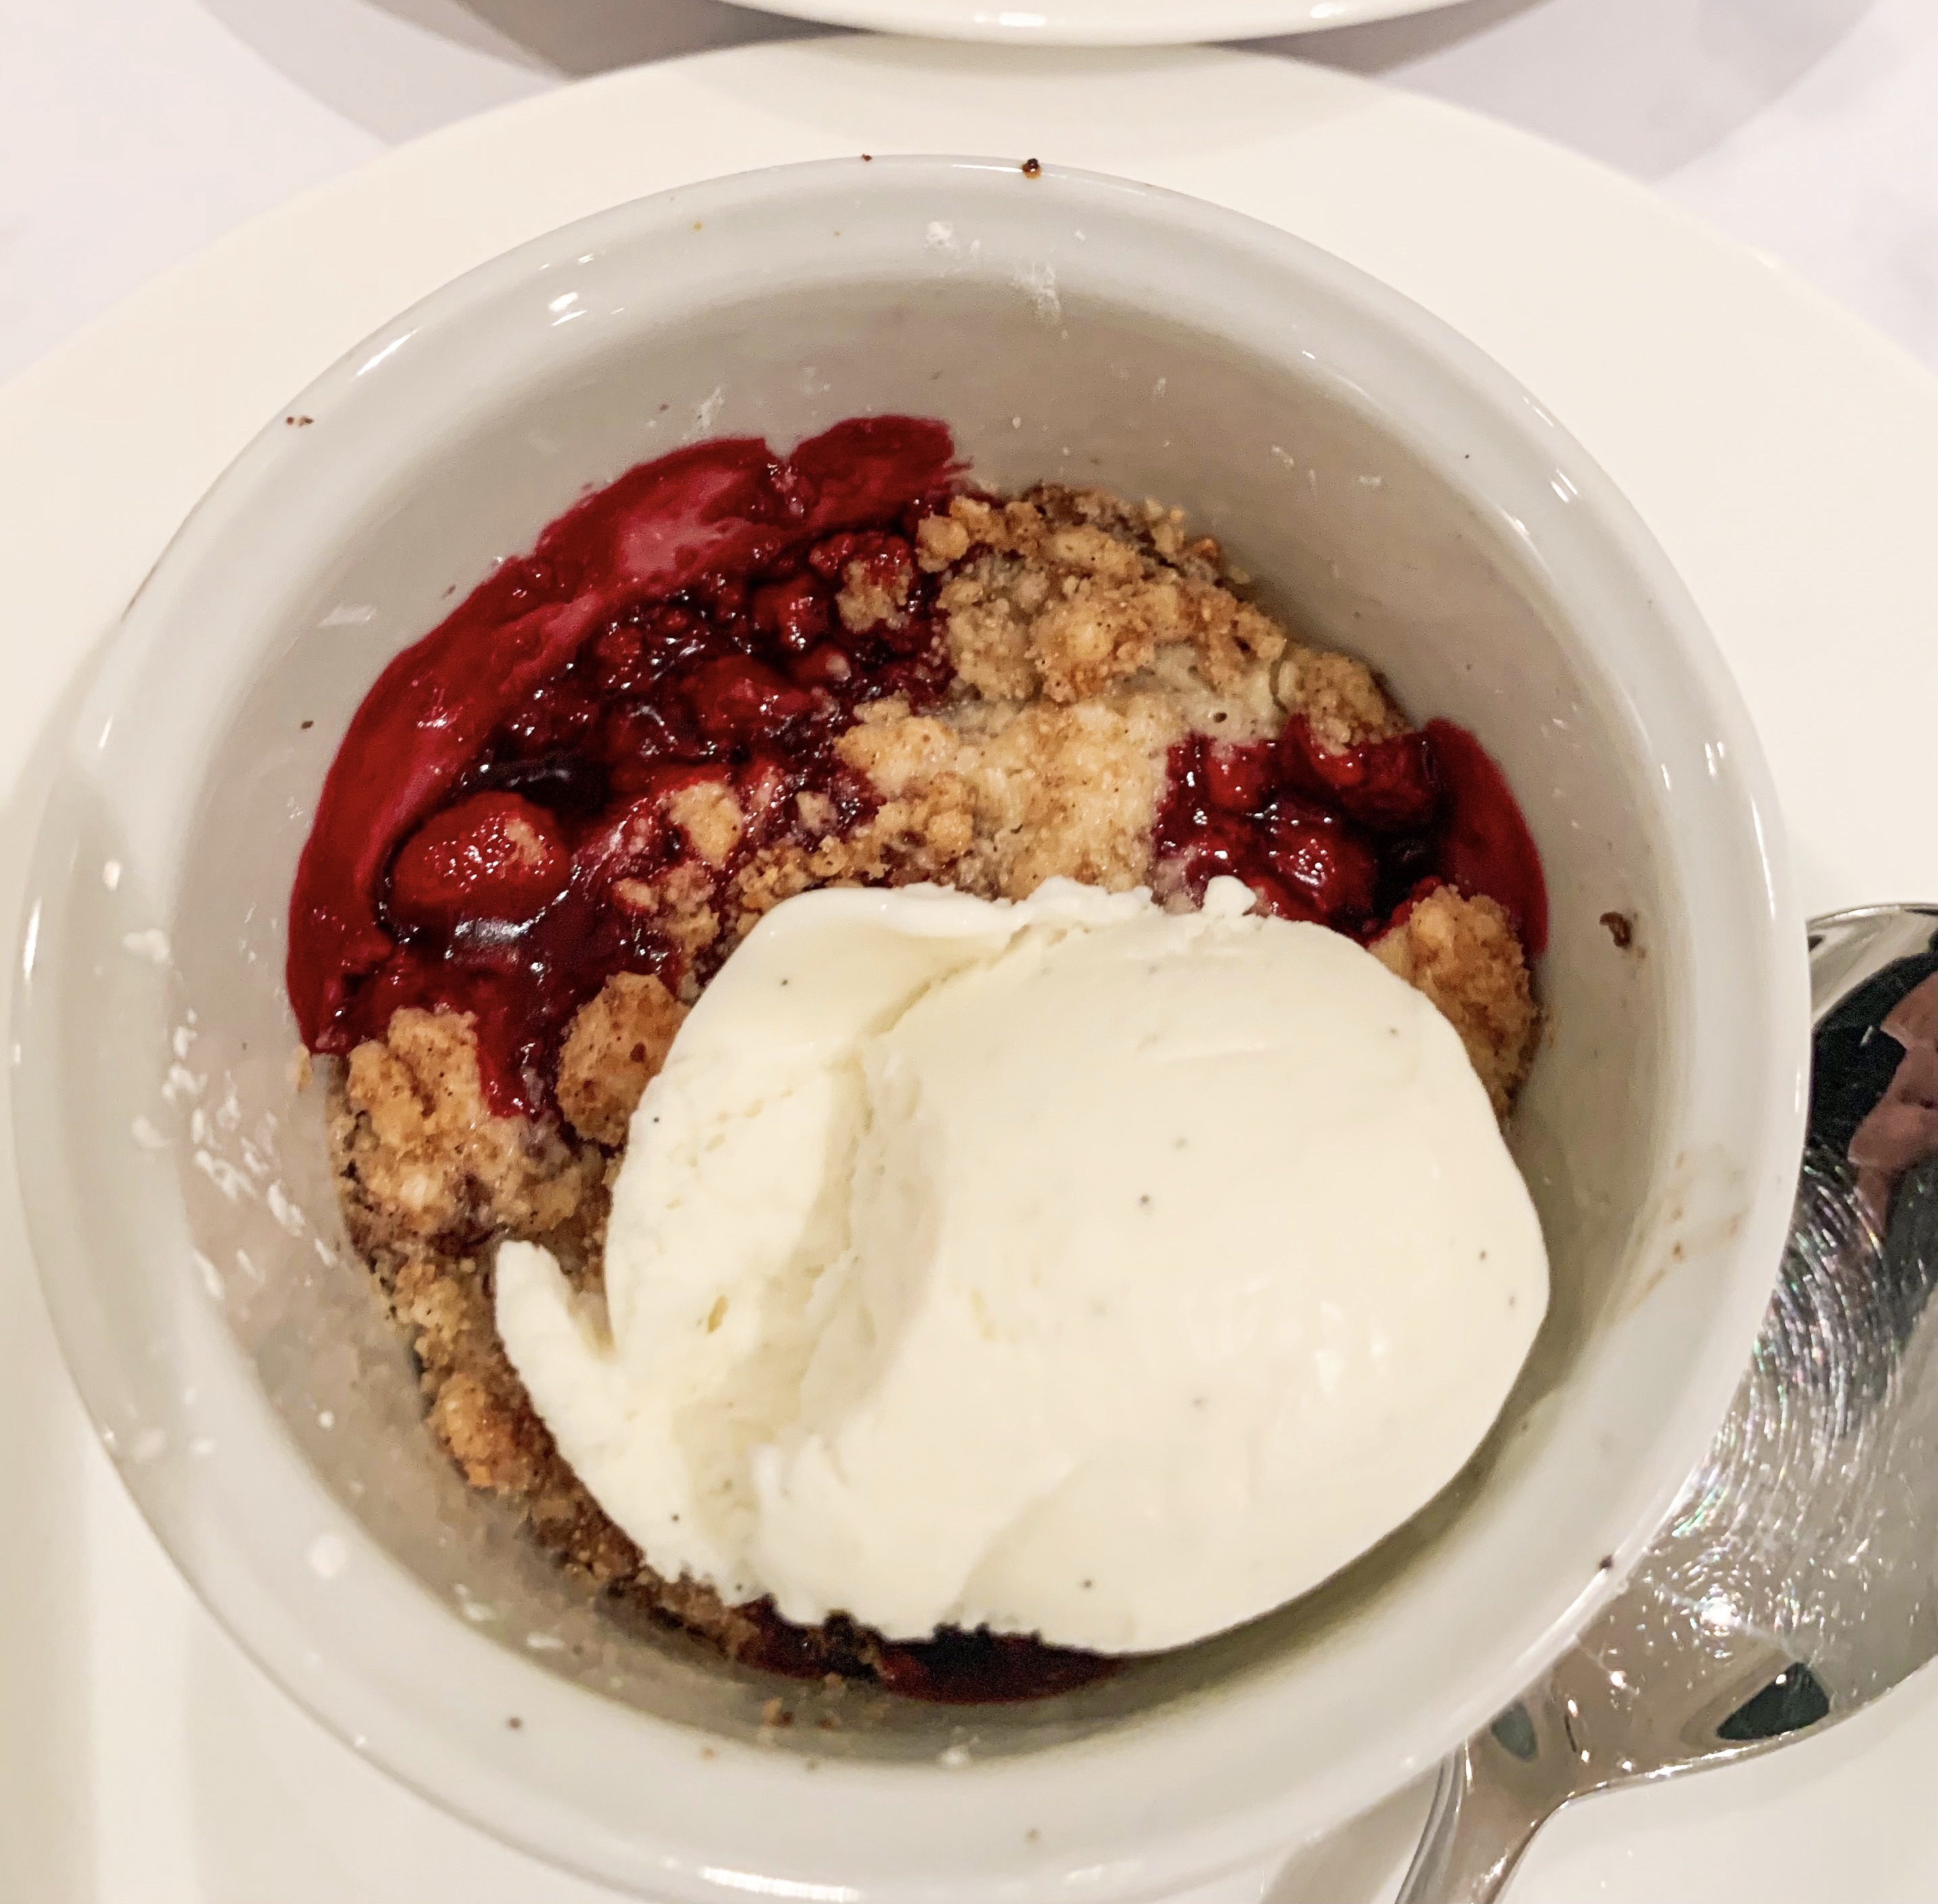
This is a great idea that I have taken from Nigella Lawson’s cookbook, ‘Nigella Express’. The idea is to freeze the crumble topping and some summer berries, then at any given time you can quickly make up a ‘Berry Crumble in a Cup’! You just need to cook them from frozen for 15 minutes! I have changed the recipe slightly; I make my crumble topping with the addition of ground almonds as I think it improves the flavour. You can either make the crumbles in a cup/small mug or in a ramekin, the measurements of the ingredients will differ slightly depending on which you choose – see below
For the Crumble Topping
200g plain flour (gluten free if required)
125g butter, cold and cubed
50g caster sugar
50g ground almonds
50g soft brown sugar
1 teaspoon ground cinnamon
- Place the flour and butter in a large mixing bowl and rub together with your fingers until the mixture resembles breadcrumbs.
- Add the caster sugar, ground almonds, soft brown sugar and ground cinnamon – stir to combine.
- Place in a freezer bag and freeze until needed for a ‘Crumble in a Cup’ – see below.
‘For a Crumble in a Cup’ (approx. 300ml capacity)
100g summer fruits (see note above)
1 teaspoon corn flour
2 teaspoons vanilla sugar (or regular sugar and a drop of vanilla essence)
75g frozen crumble topping
‘For a Crumble in a Ramekin’ (approx. 125ml capacity)
50g frozen summer fruits
½ teaspoon cornflour
1½ teaspoons of vanilla sugar (or regular sugar and a drop of vanilla essence)
30g frozen crumble topping
(To serve – ice cream or thick cream)
- Put the summer fruits in either the cup or ramekin, sprinkle with the cornflour and sugar – stir gently.
- Sprinkle the frozen crumble topping over the fruit (if desired you can add a little more topping)
- Bake in a preheated oven, 220’c fan; for the cups 20 minutes, and for the ramekins 15 minutes.
- Serve with a scoop of ice-cream or a dollop of thick cream.
‘Proper’ Homemade Hot Chocolate (Serves 2)
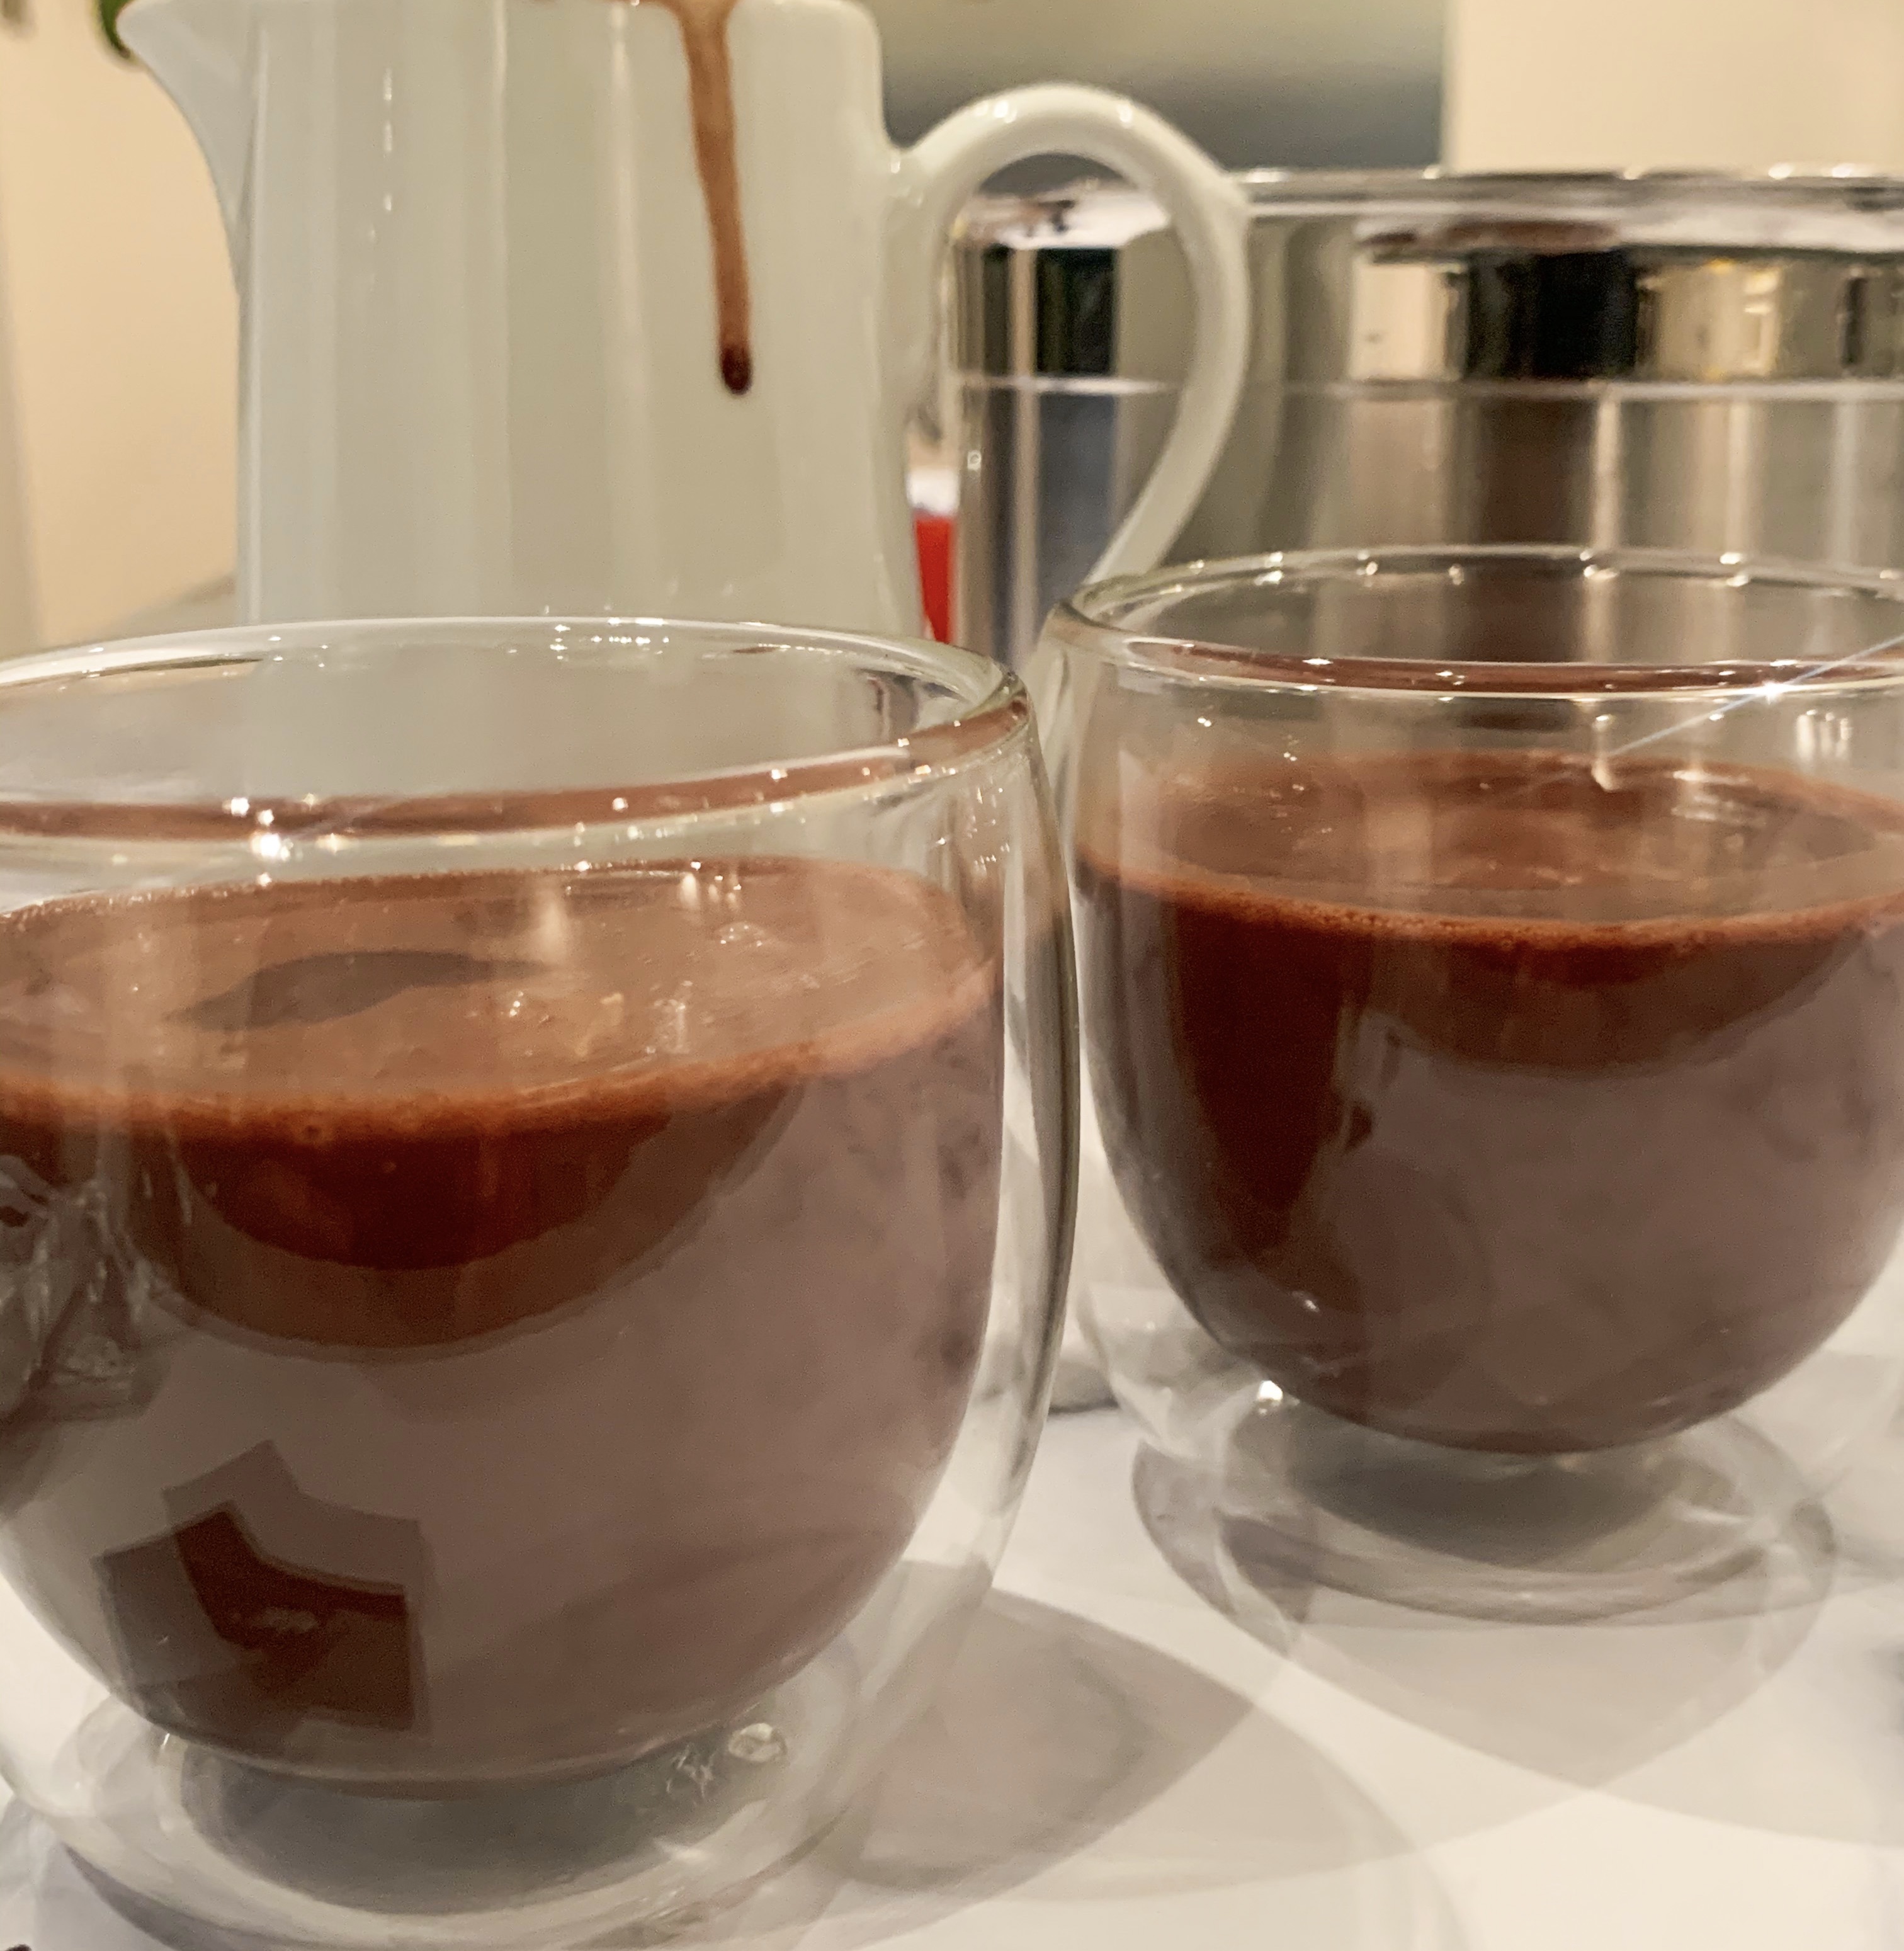
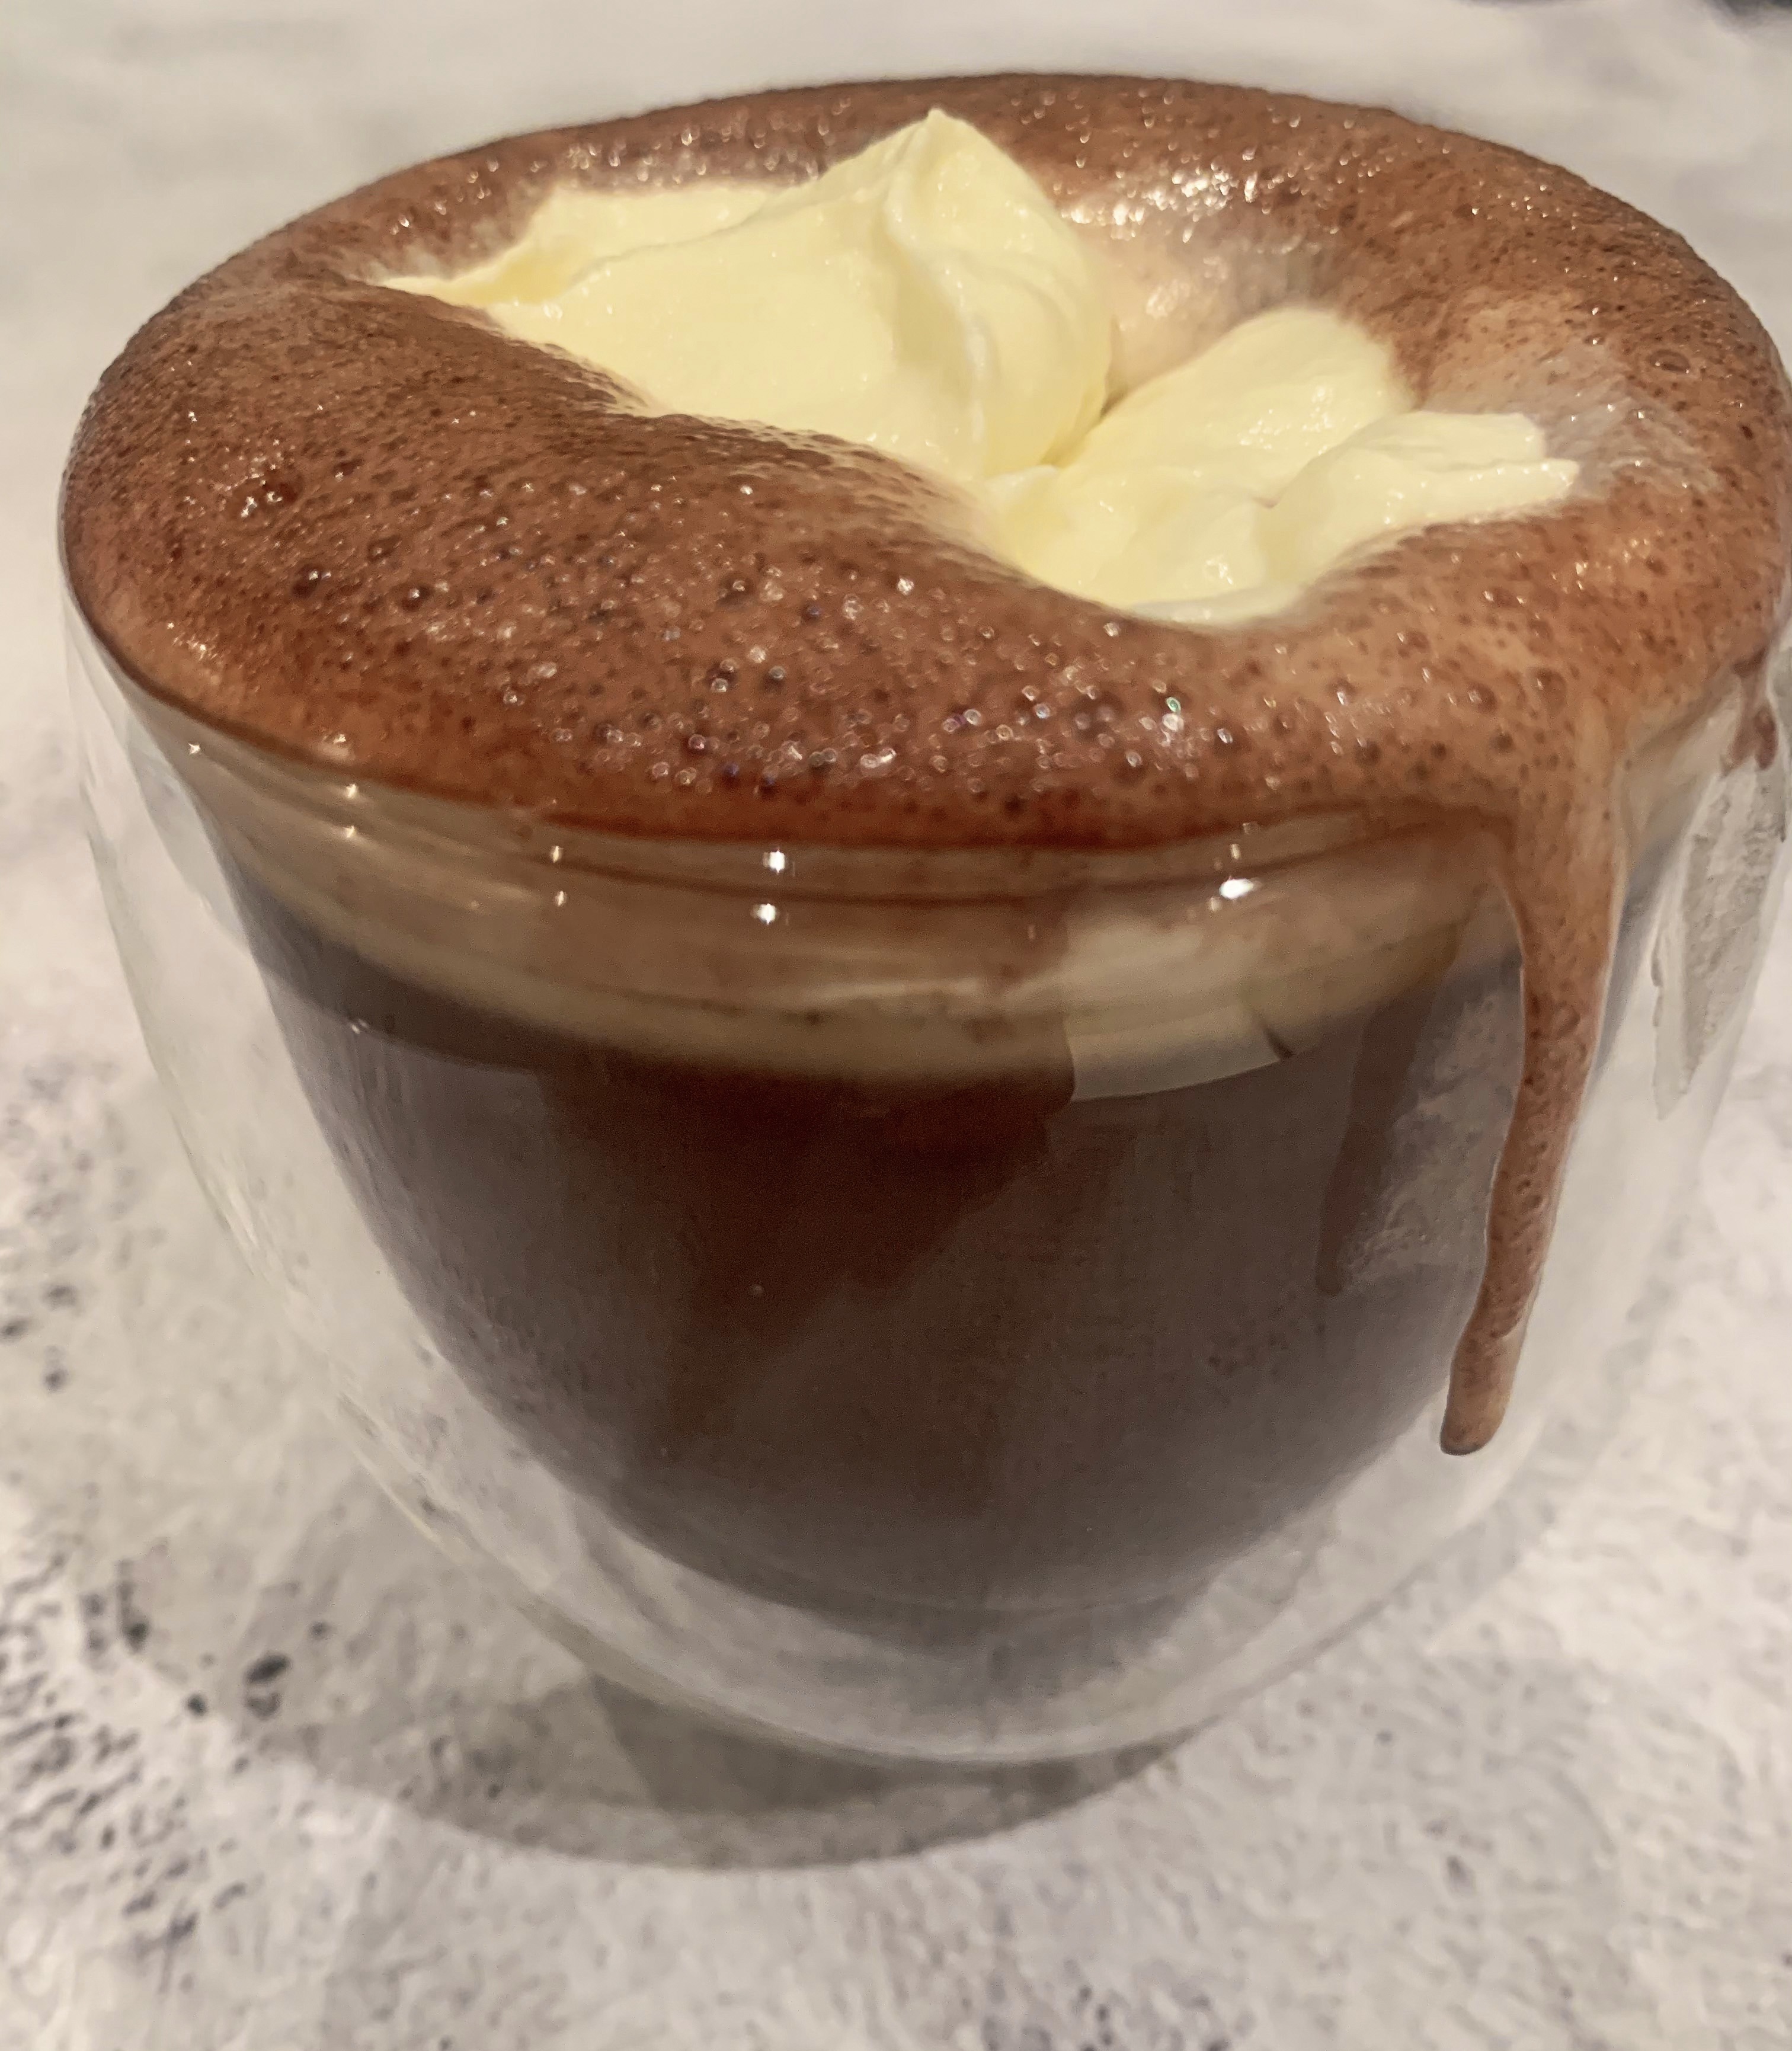
This is more of a dessert than a drink – it is seriously the best hot chocolate you will ever have – it is a ‘hug in a mug’!!…I warn you it is rich and indulgent, but hey, we all deserve a treat now and again. I would definitely serve it with a little whipped cream if you have some!
See the video of this Hot Chocolate being made here!
300ml full fat milk
125g dark chocolate (I use Lindt 70% cocoa dark chocolate), roughly chopped
3 teaspoons good quality cocoa (I use Green & Blacks)
Pinch of salt
2 – 3 drops vanilla extract
Whipped cream to serve (optional)
- Put the milk in a saucepan and bring just to boiling point.
- Remove from the heat and stir in all the ingredients until melted.
- Return to the heat, whisk vigorously until it returns to a gentle simmer.
- Pour into mugs and if using add a dollop of whipped cream!
Apple Gingerjack (Serves 6)
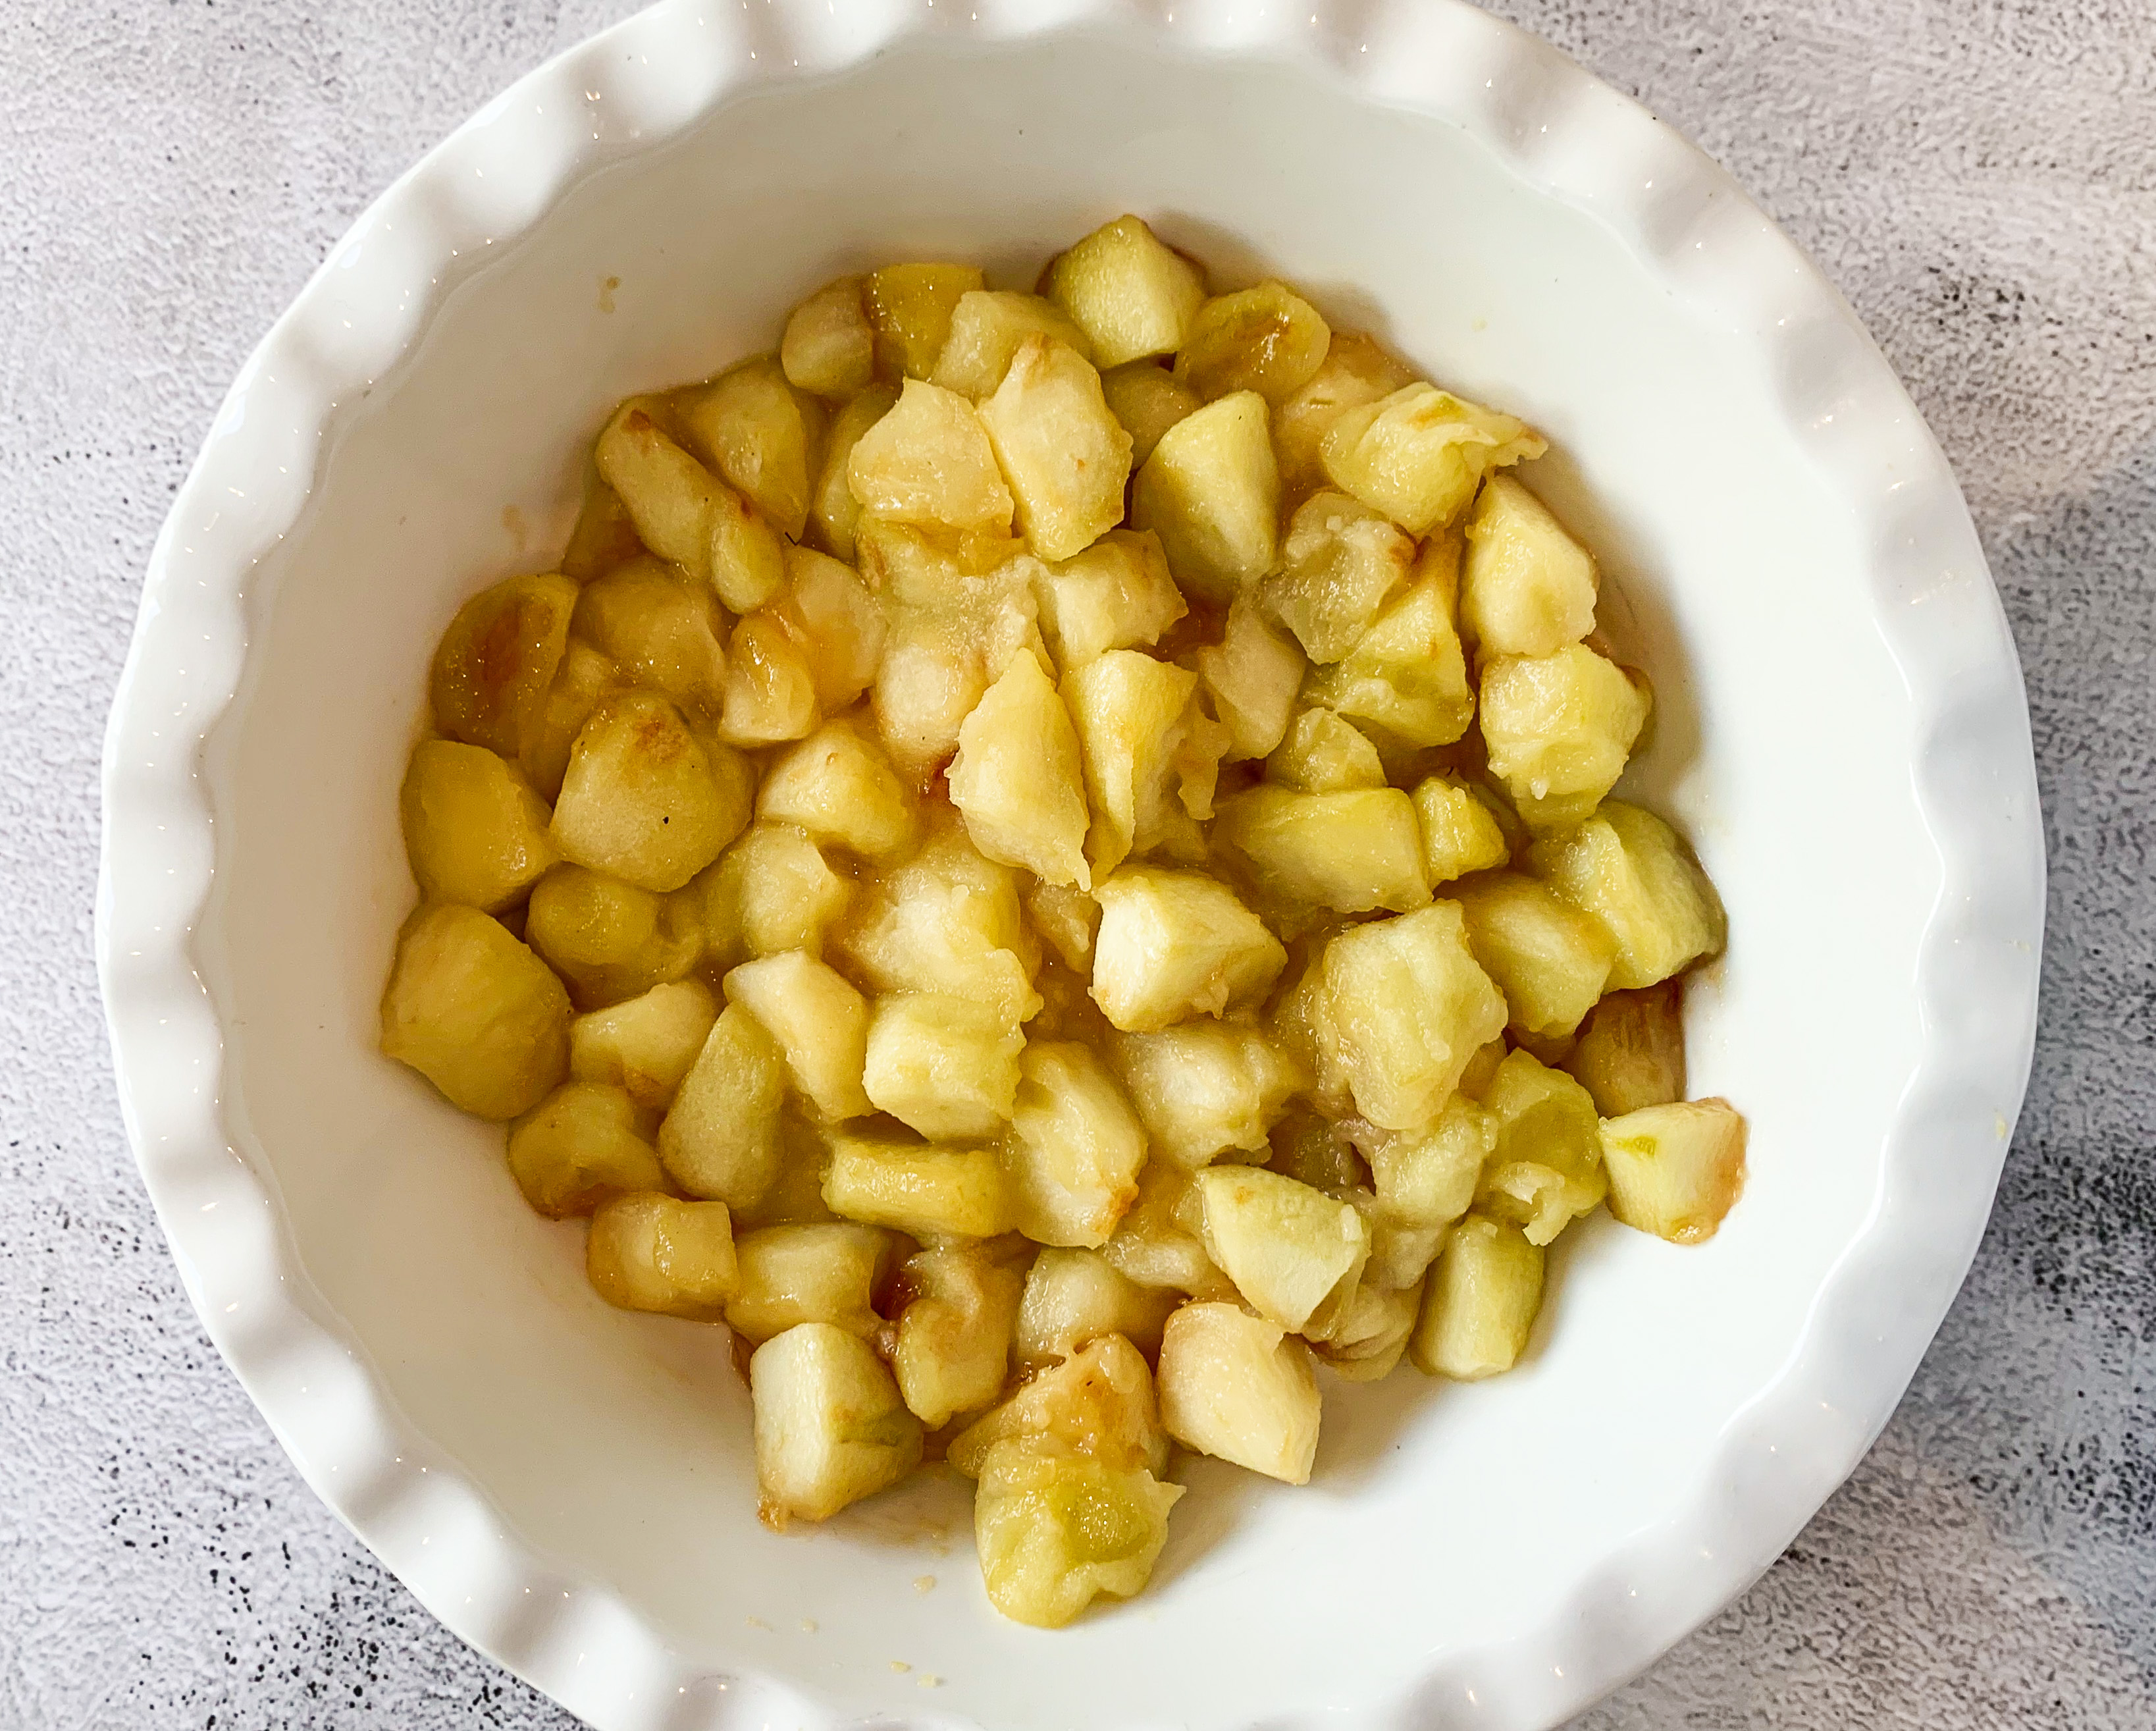
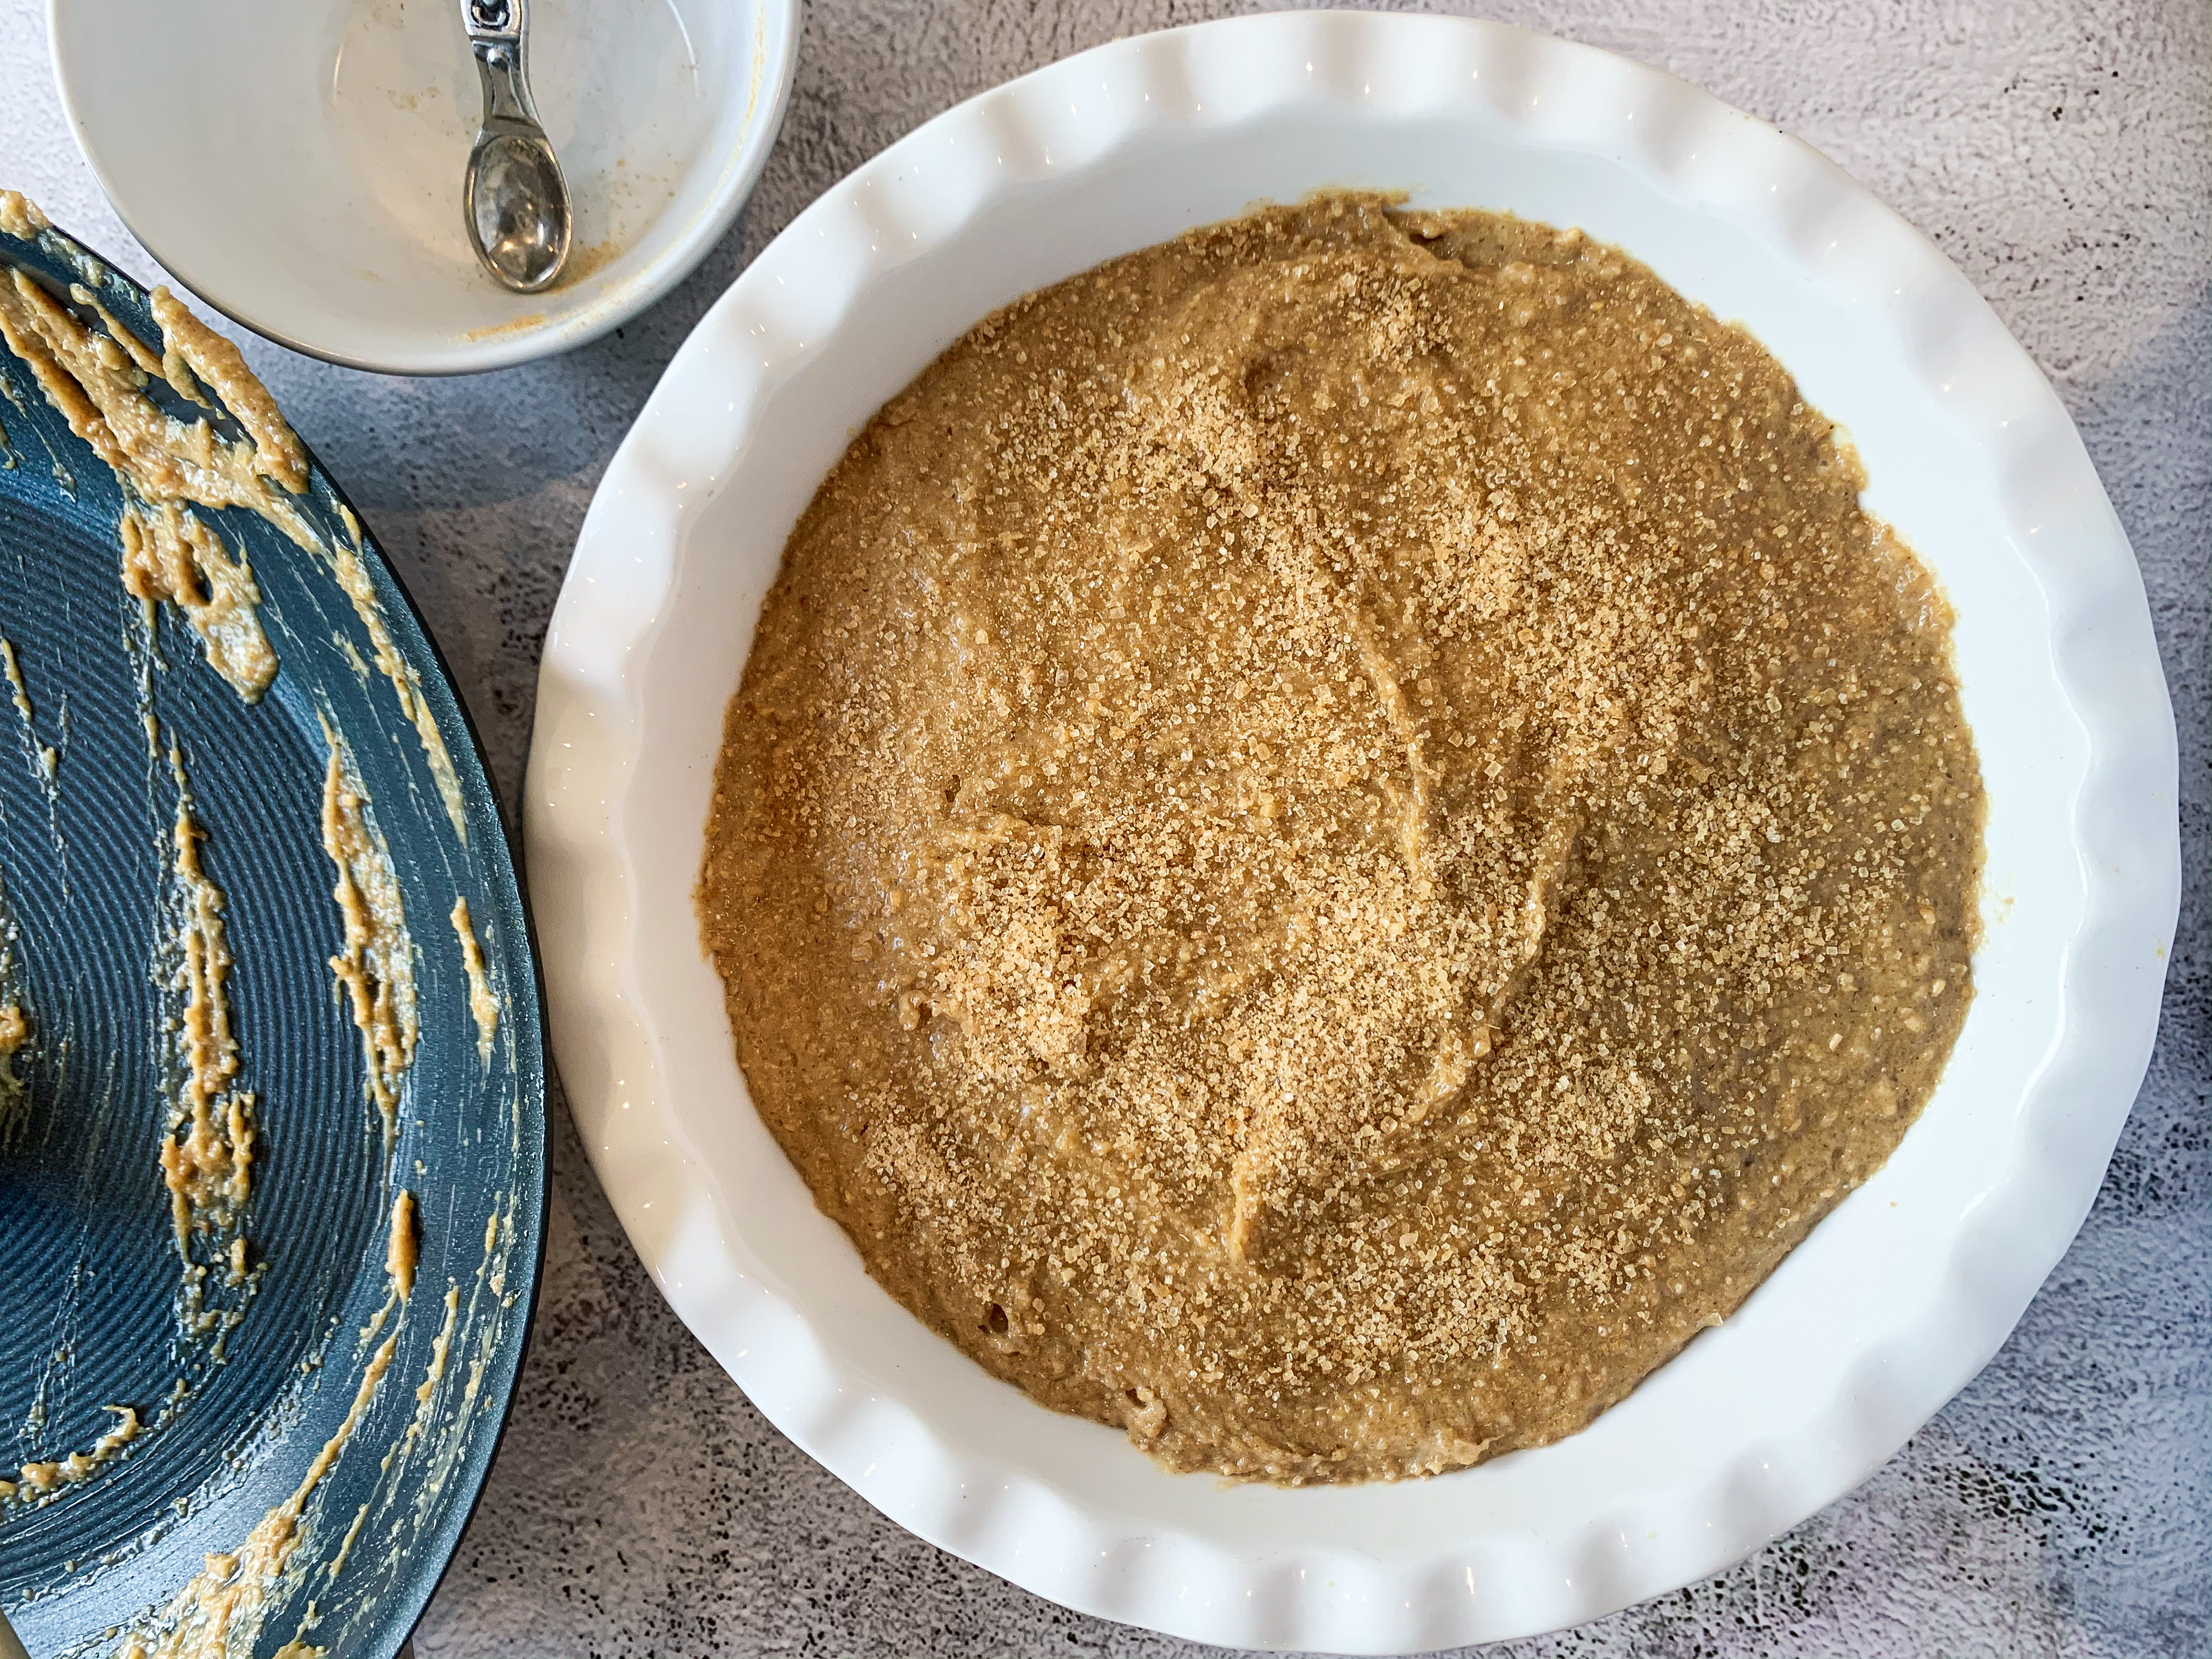
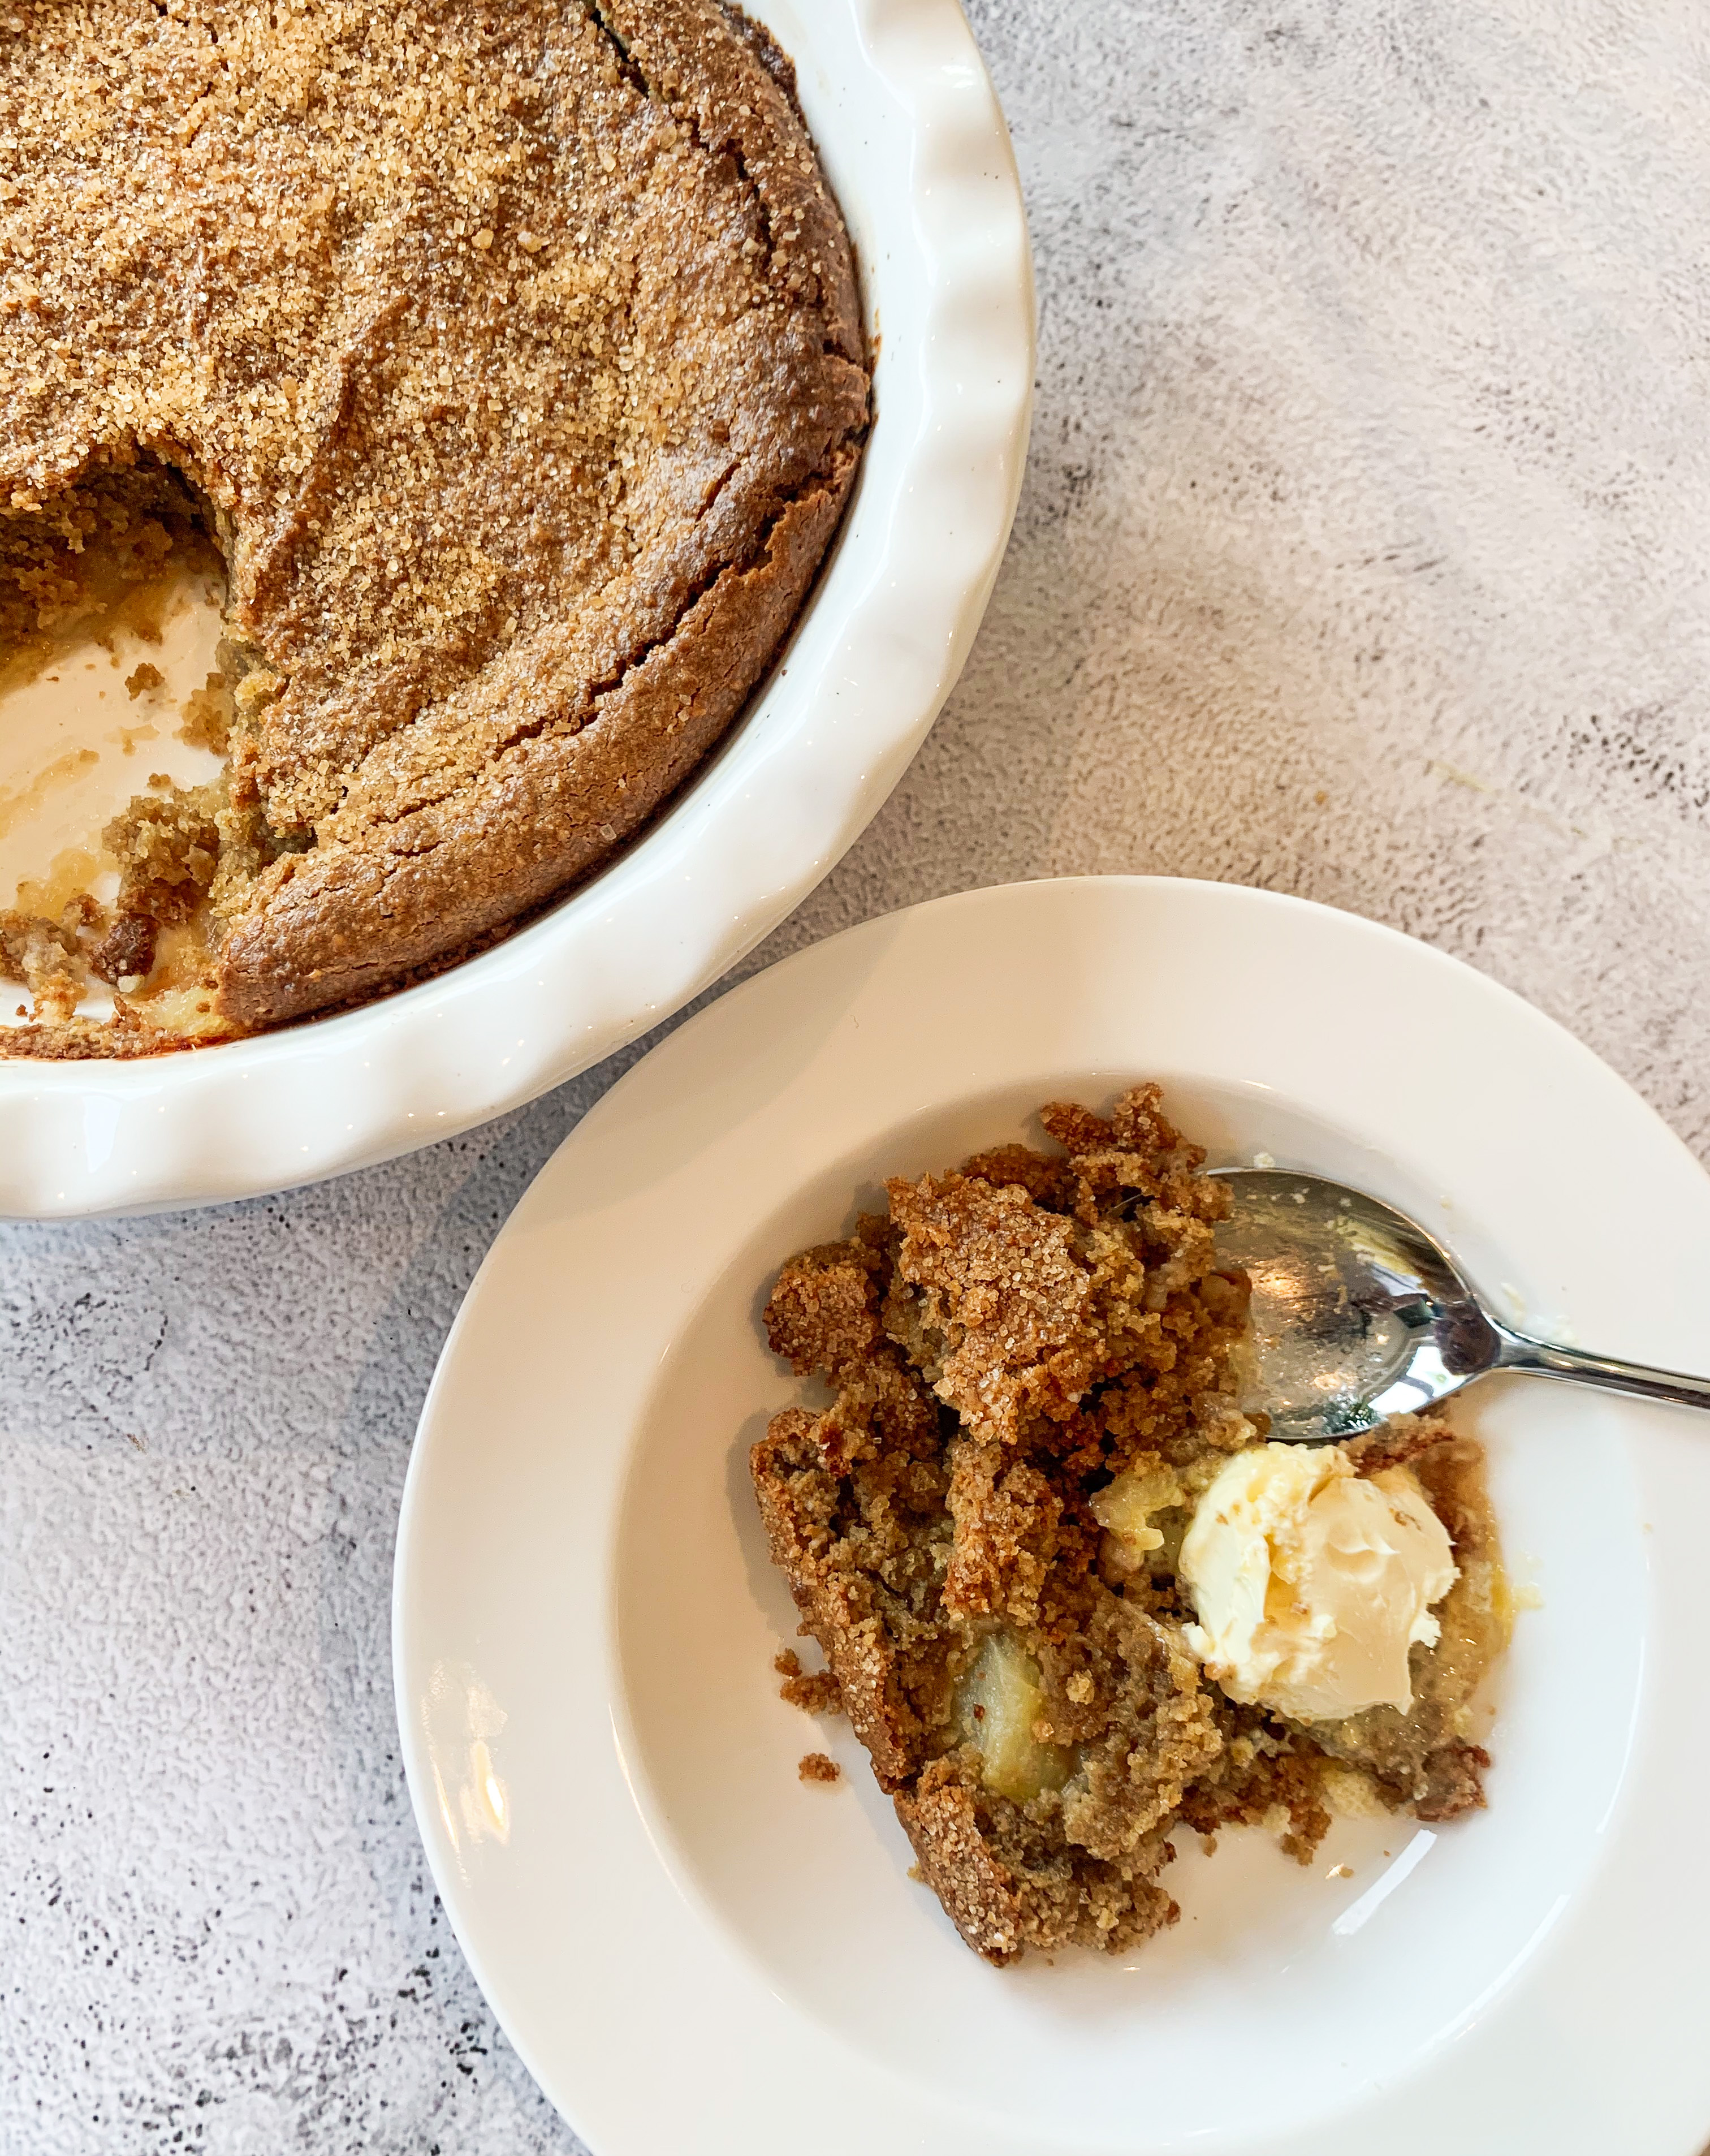
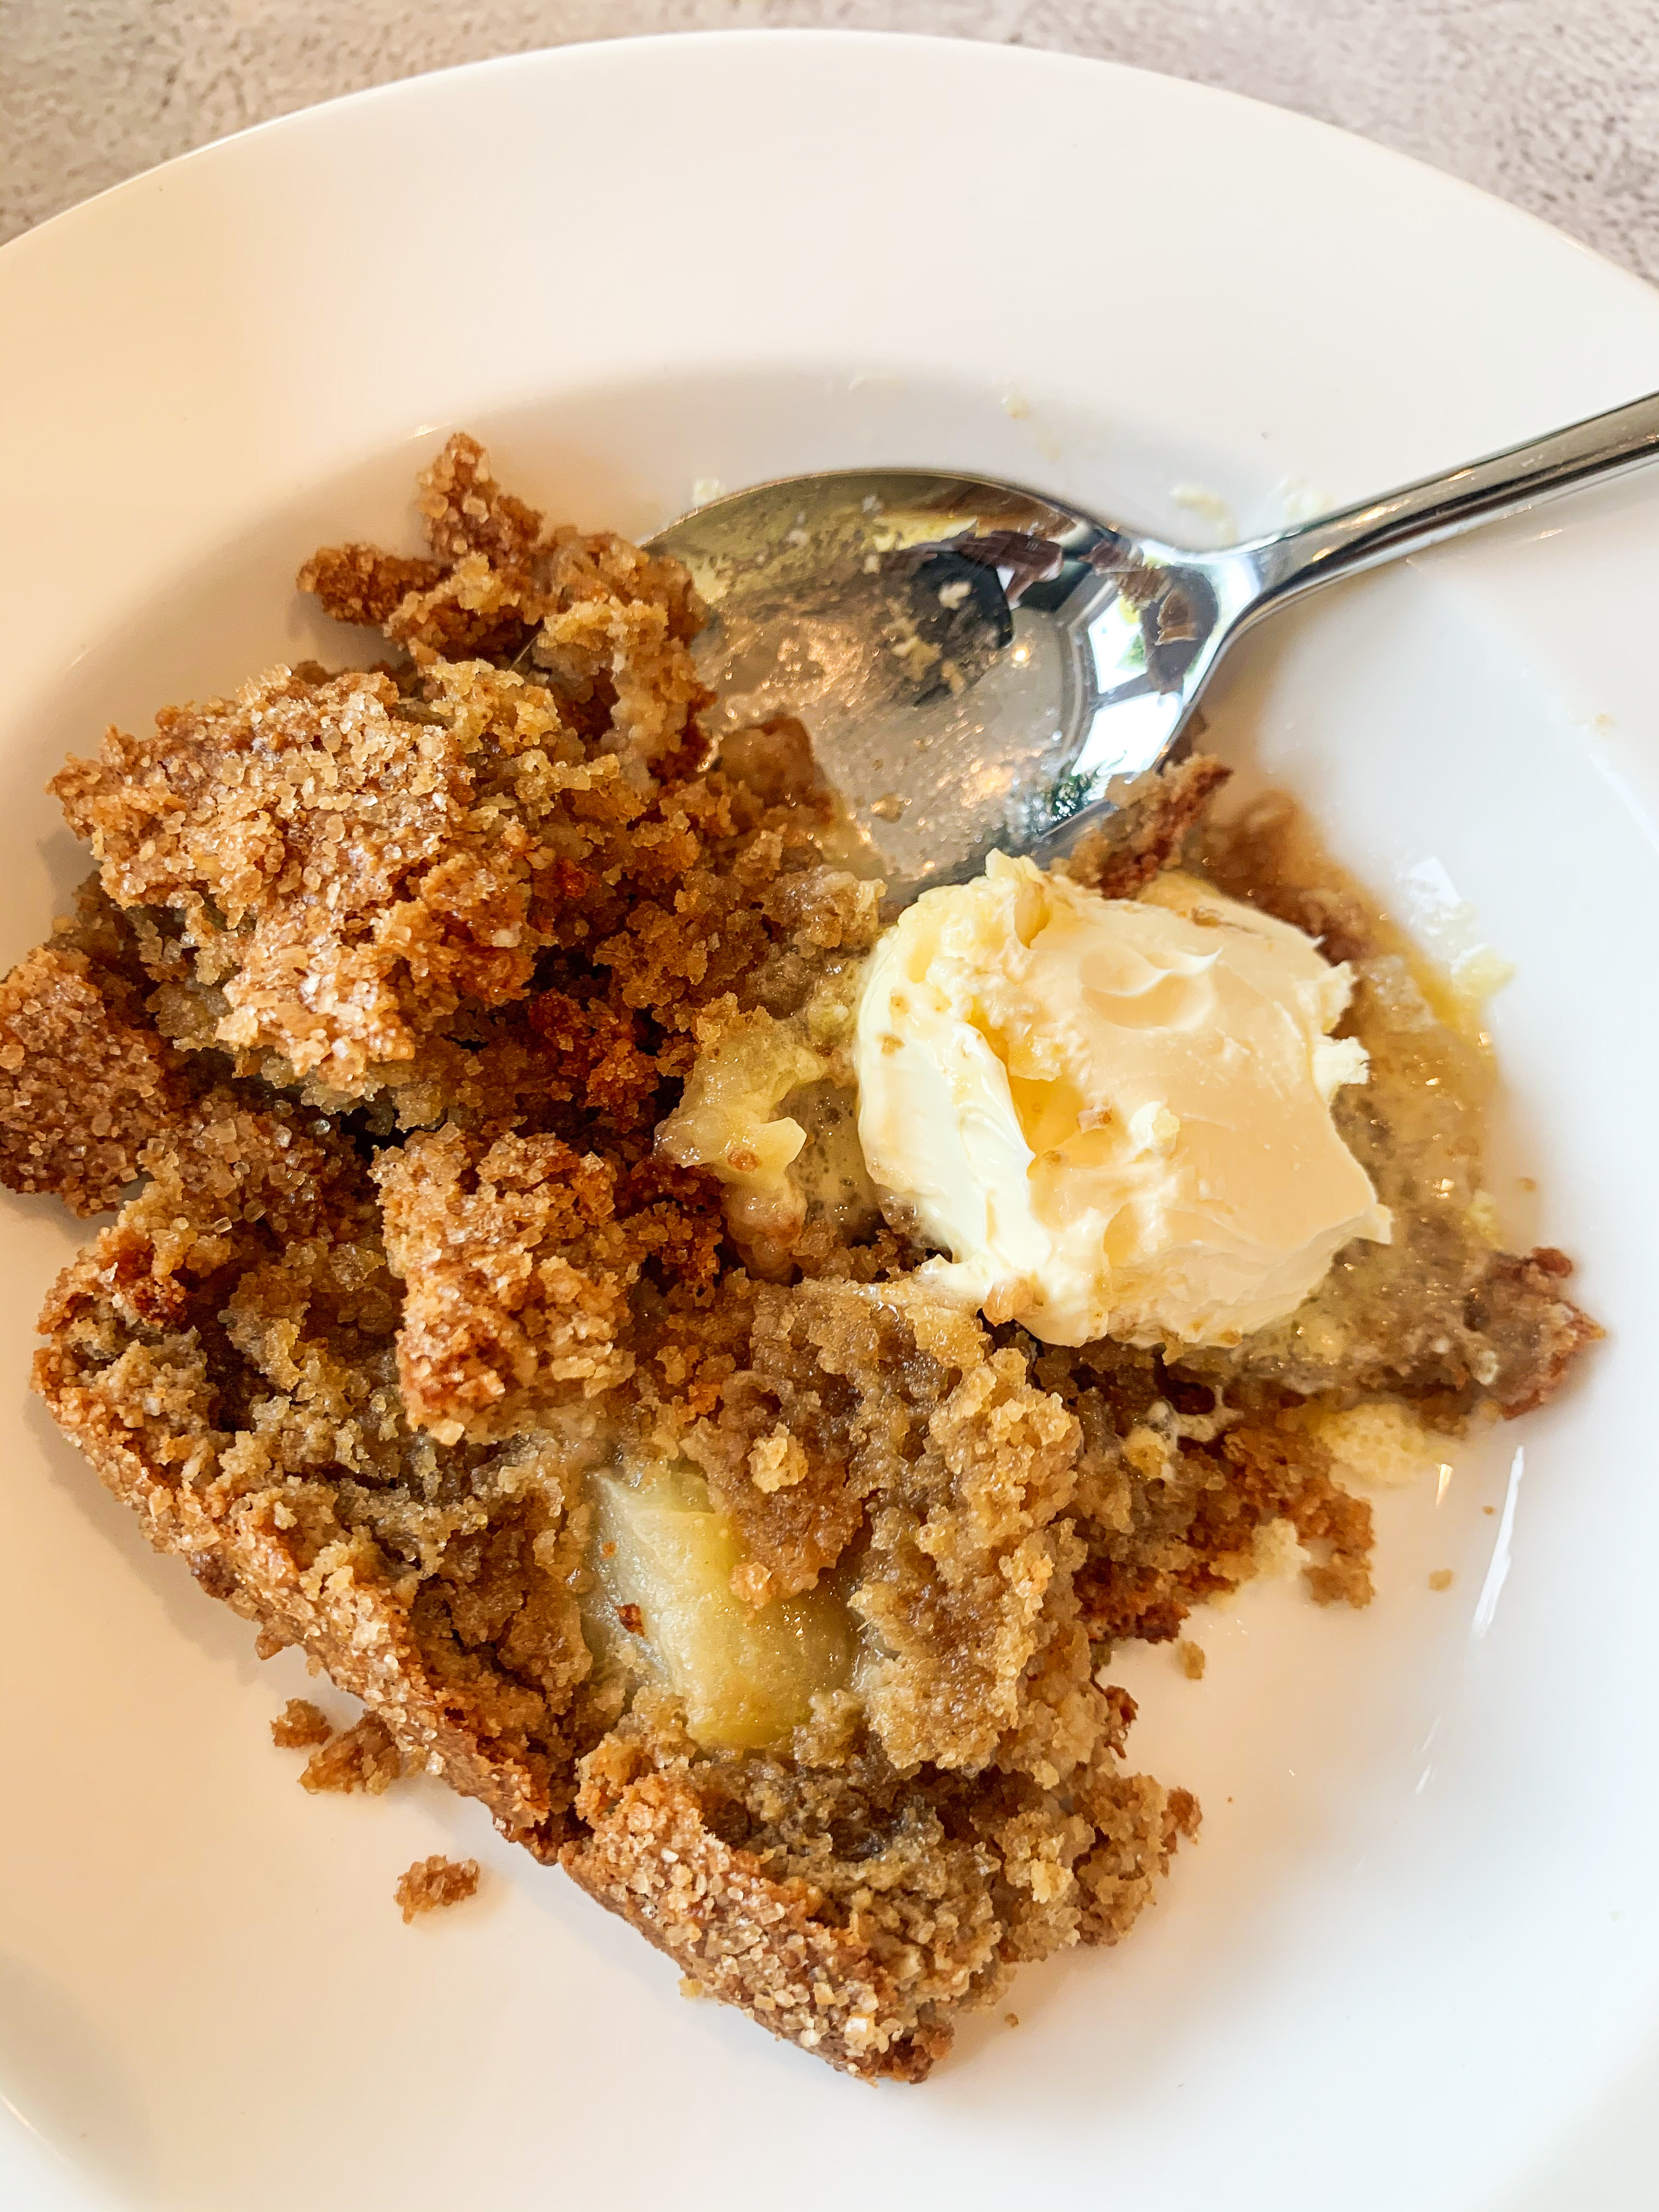
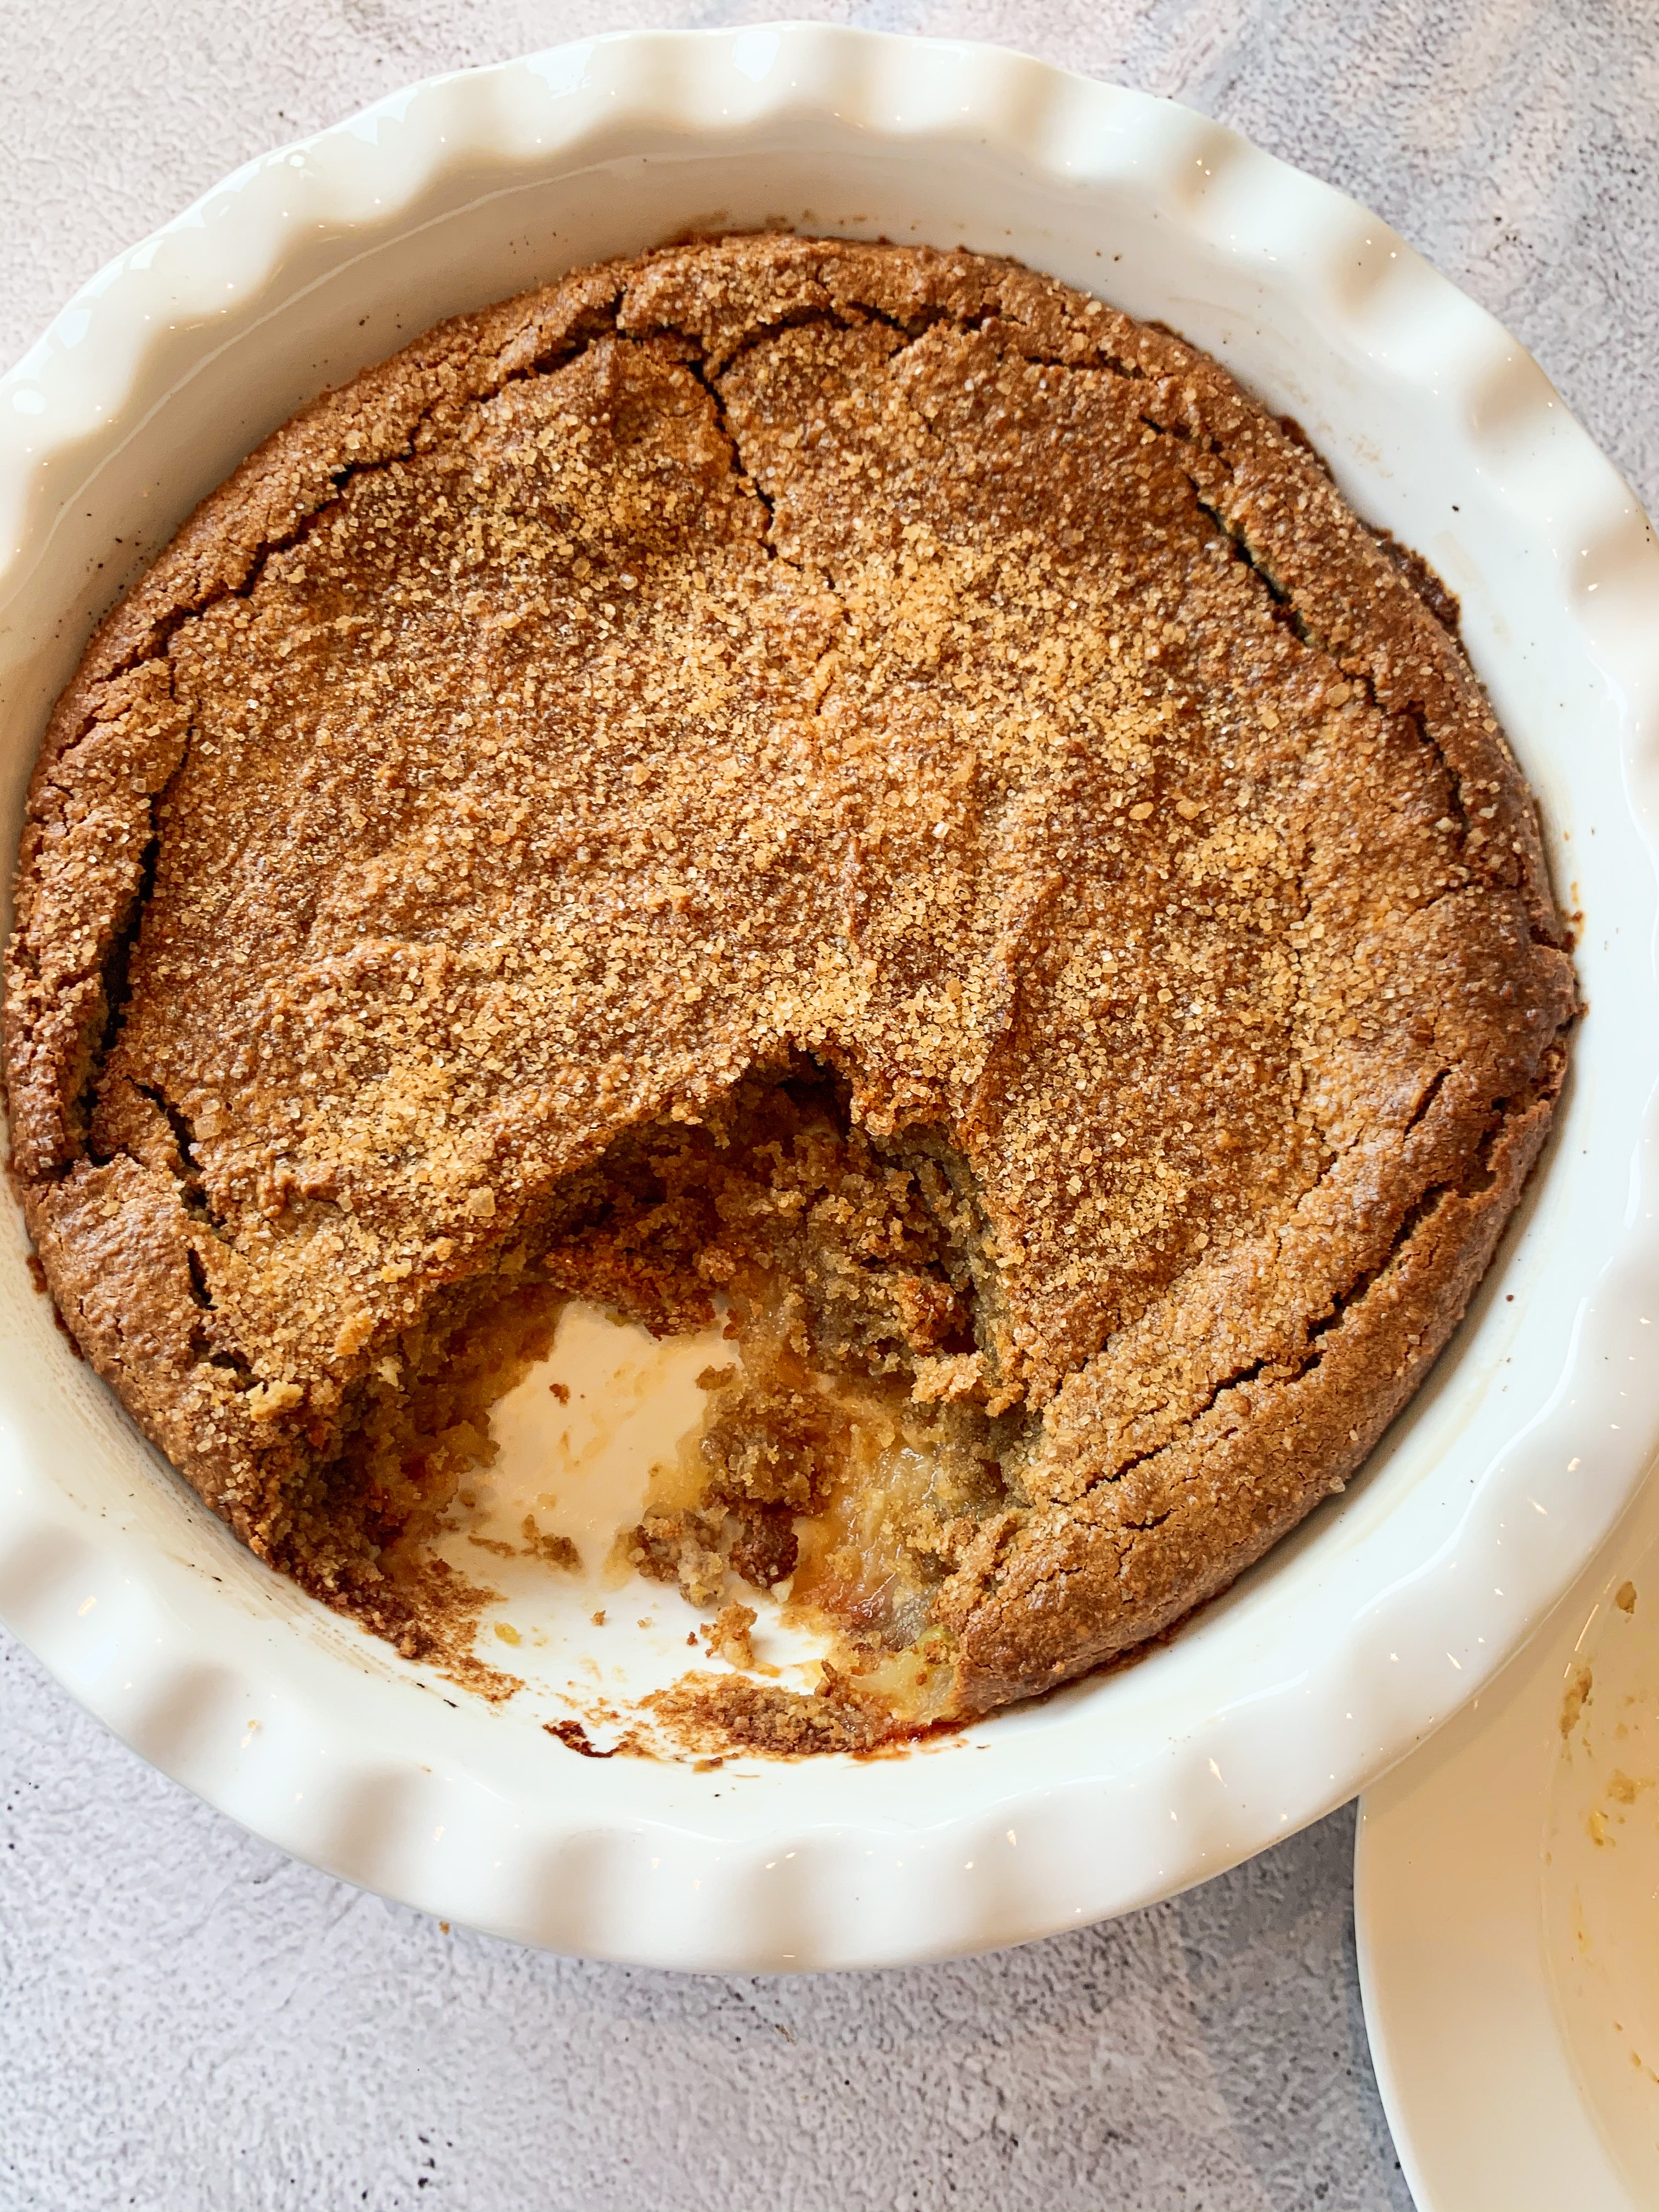
This is a great pudding from Nigella Lawson’s cookbook, ‘At My Table’. Being gluten free, I often find it difficult to find wheat free ‘cosy, cake- like’ puddings but this recipe uses oatmeal for the topping so is totally gluten free! It is best served warm or at room temperature rather than hot – I’ve even eaten the leftovers cold for breakfast – delicious!!
I like to serve this with either double cream or clotted cream, but of course custard would be good too!
For the base:
15g unsalted butter
2 tablespoons golden syrup
750g Bramley apples, peeled, cored and cut into 3cm chunks
For the topping:
200g Fine oatmeal (if required make sure it’s totally gluten free)
75g soft light brown sugar
4 teaspoons ground ginger, plus a extra ¼ teaspoon for sprinkling
½ teaspoon bicarbonate of soda
250ml full-fat milk
125g unsalted butter, soft, cut into cubes
1½ tablespoons demerara sugar
Double or clotted cream, or custard (to serve)
- Gently melt 15g butter in a large saucepan (in which the apples will fit – not too heaped up), once melted add the syrup, stir well and then add the apples. Cook over a high heat for about 5 minutes, stirring frequently , until the apples start to soften around the edges – have a fuzzy appearance. Pour into a pie dish.
- Meanwhile, mix the fine oatmeal, soft light brown sugar, 4 teaspoons of ginger and the bicarbonate of soda together, using your fingers to break up any lumps in the sugar.
- Using the same saucepan that you used to make the apple mixture, heat the milk and 125g butter together gently, until the butter is melted and the milk is almost at boiling point. Remove from the heat and, using a wooden spoon, stir in the oatmeal mixture beating until smooth – it will thicken a little.
- Pour the oatmeal mixture over the apples, spreading it out to cover them evenly.
- Mix the ¼ teaspoon of ginger with the demerara sugar and sprinkle over the top.
- Place in a preheated oven, 180’c fan, and bake for about 30 minutes until the apple is soft and the top has firmly set.
- Let it stand for about 30 minutes or more and serve warm at room temperature with double or clotted cream, or custard.
Emergency Chocolate Brownies
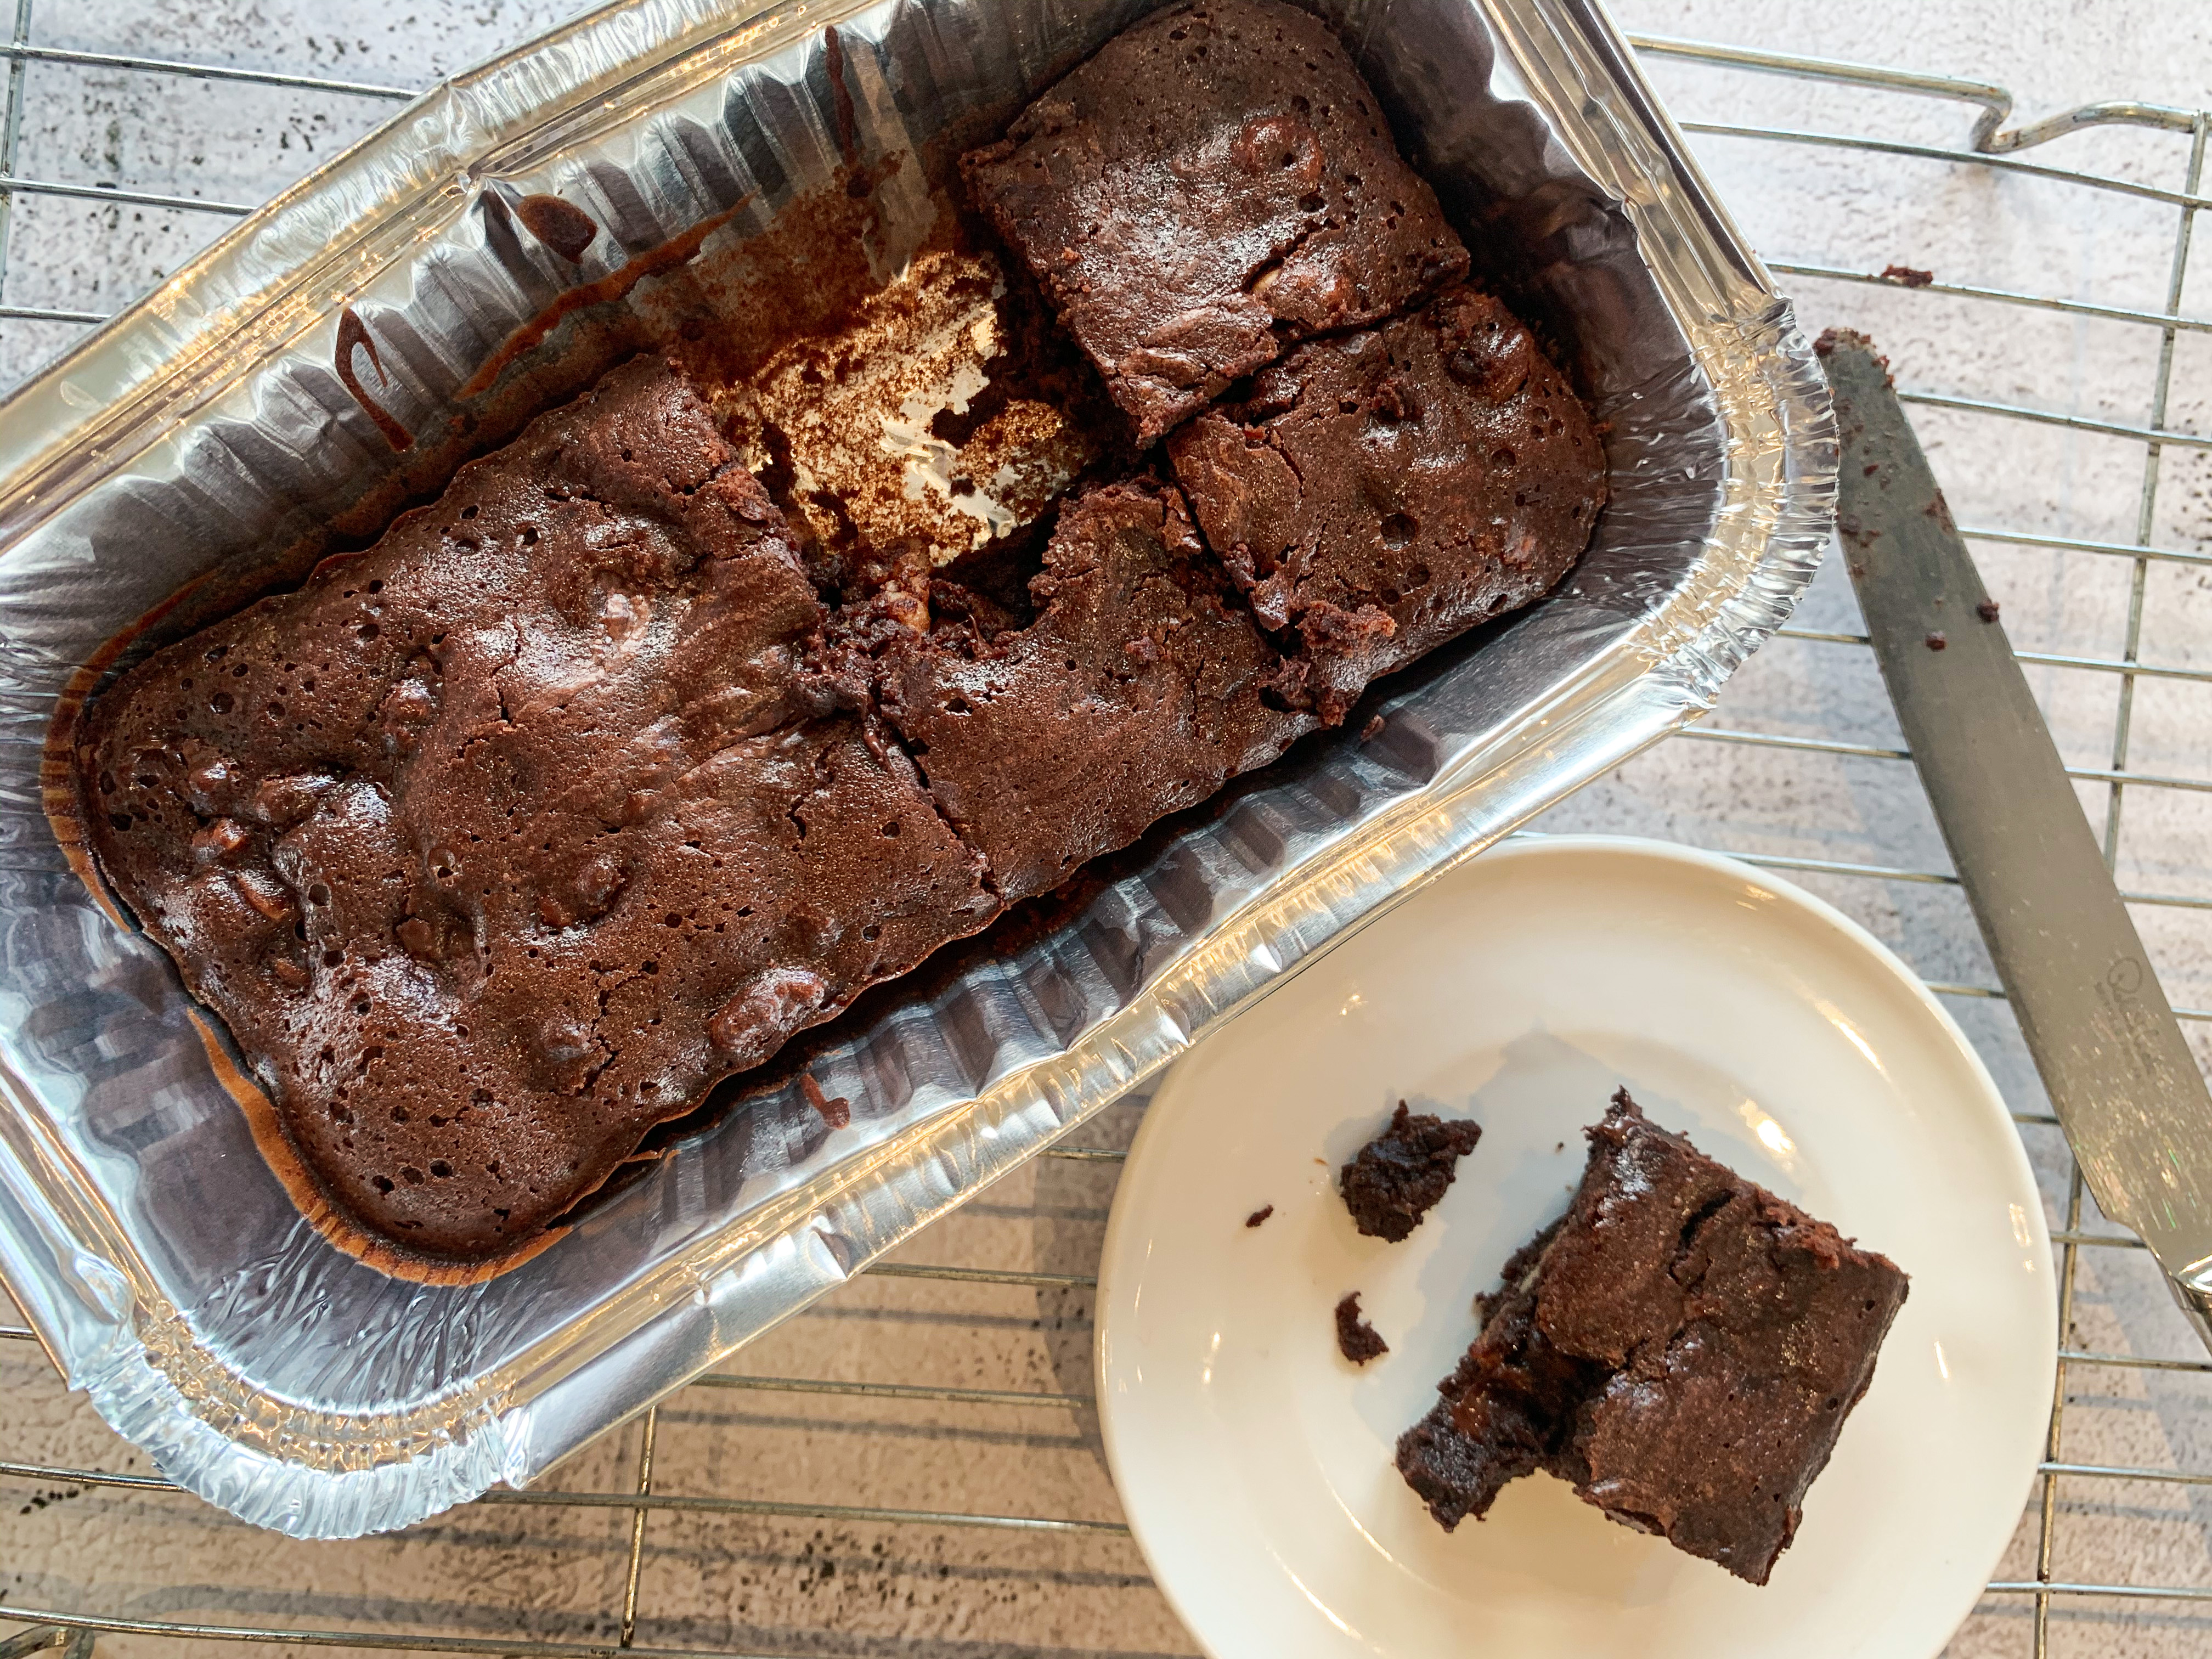
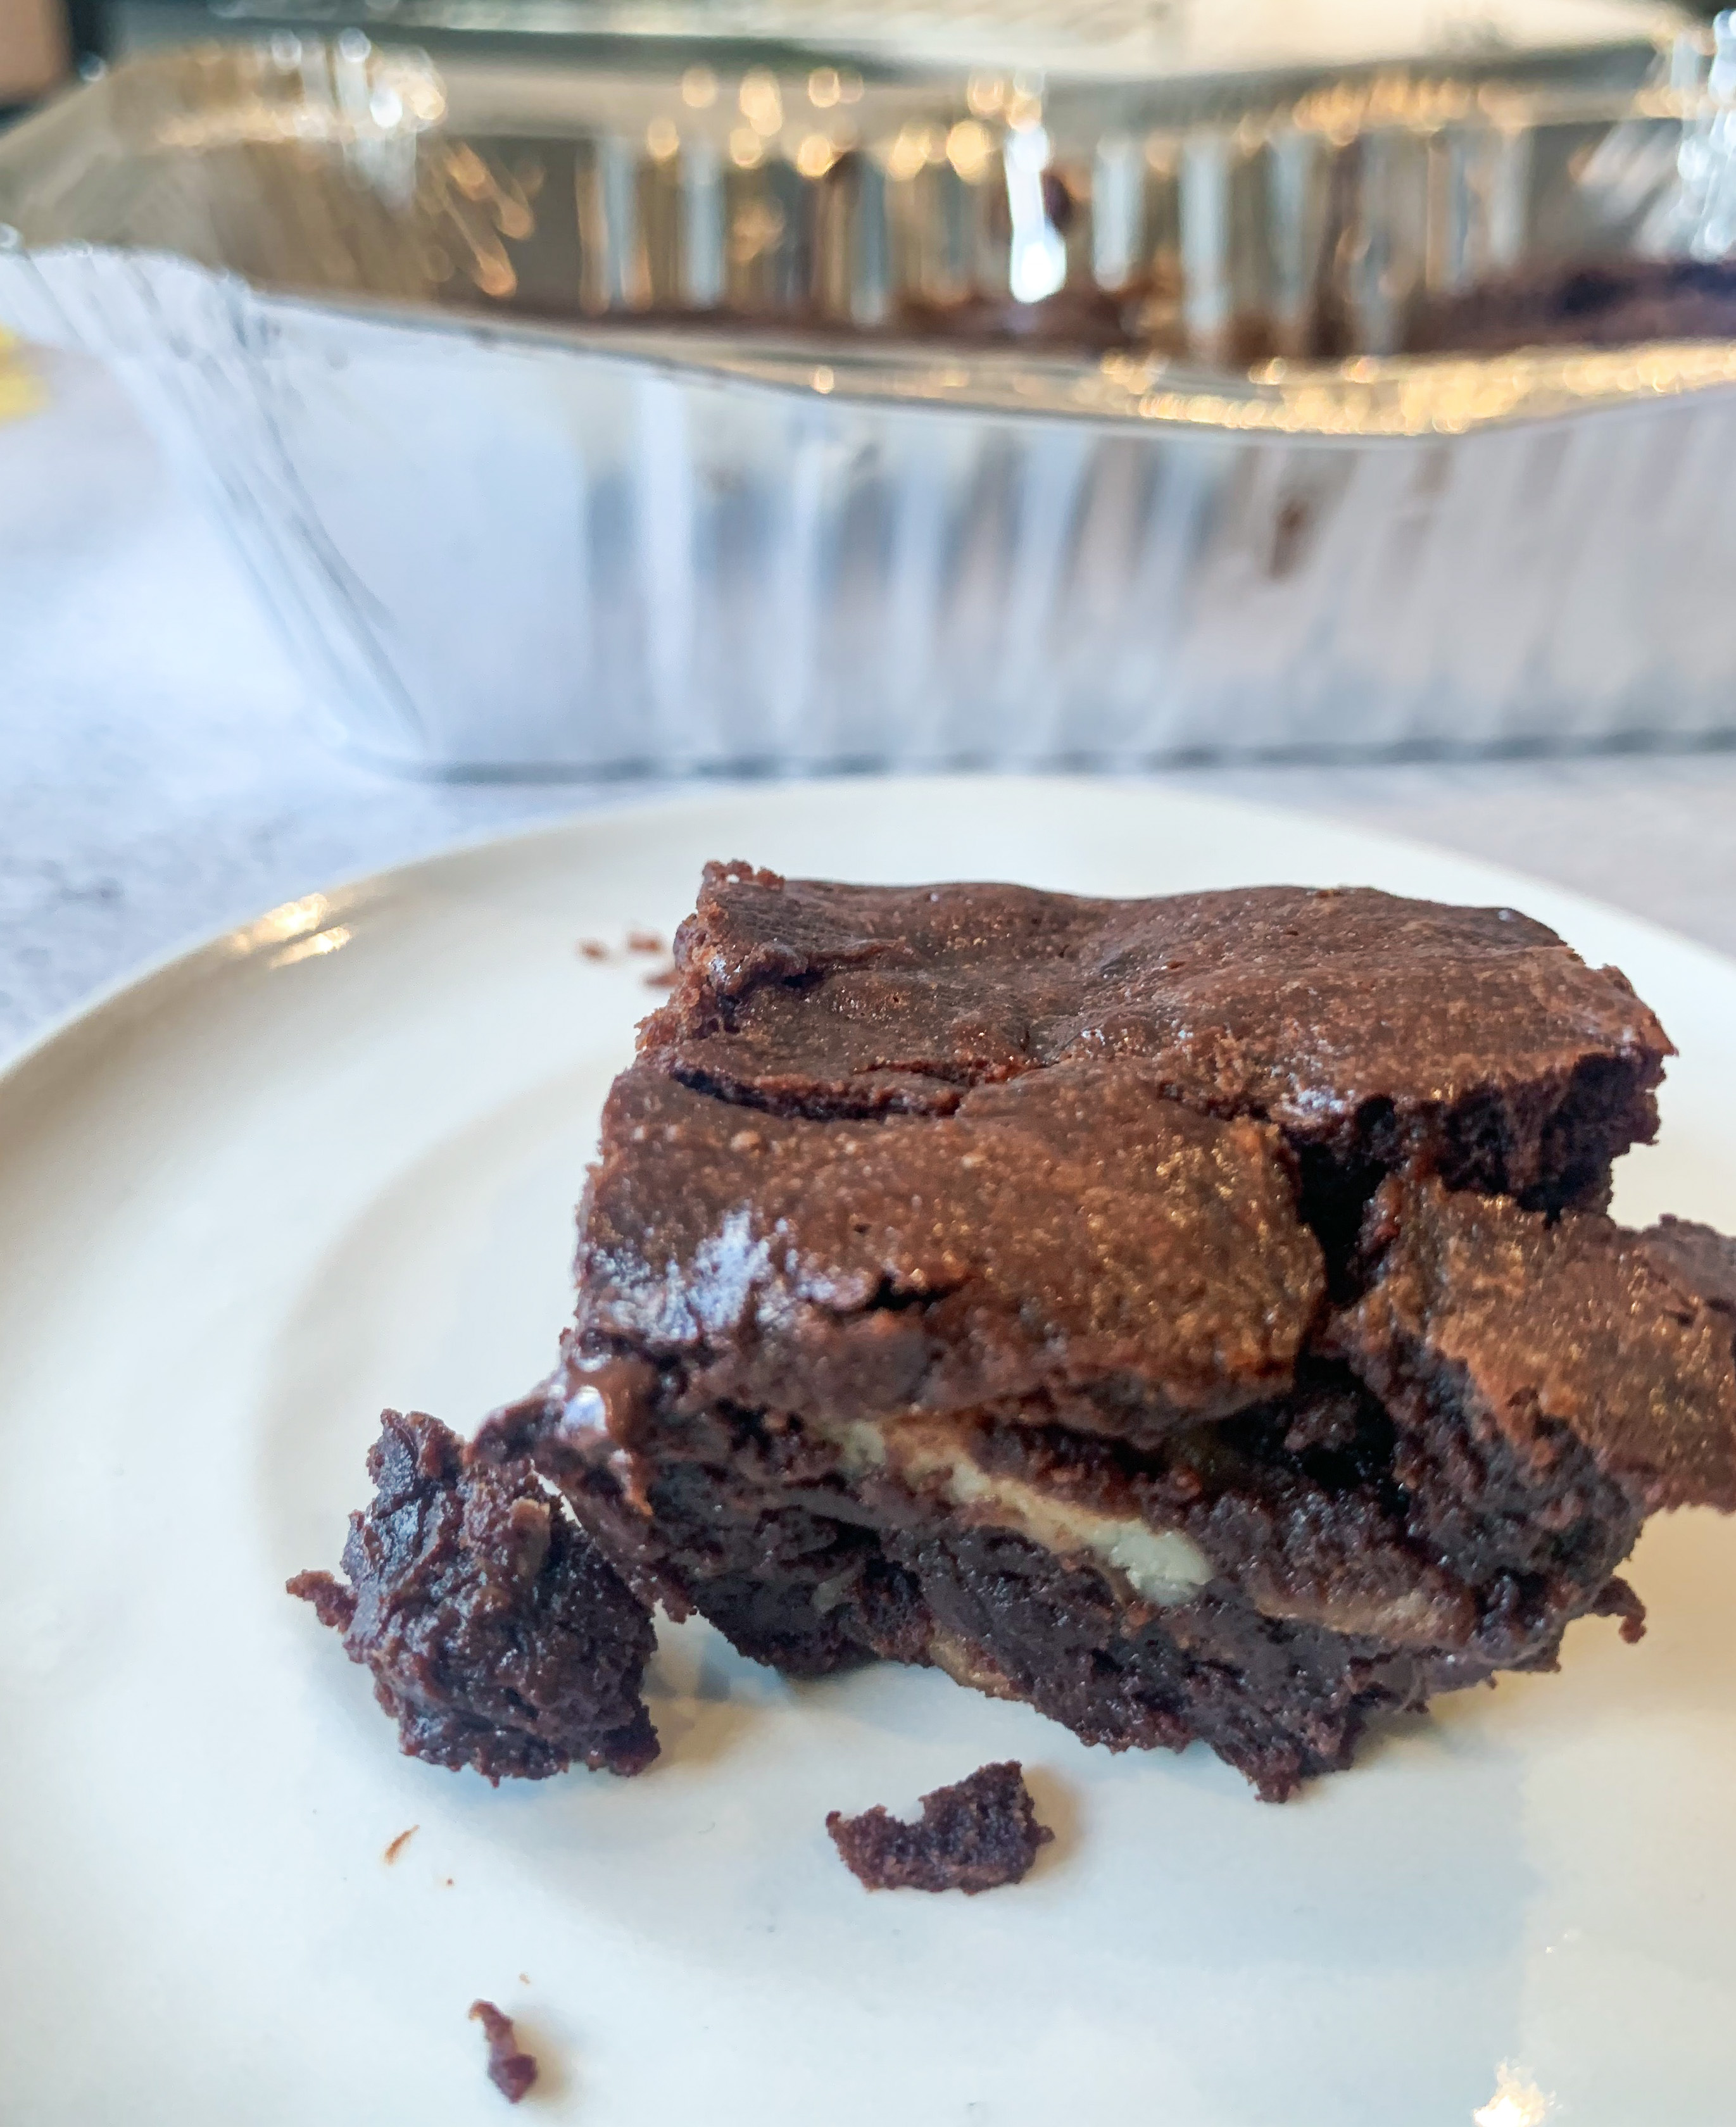
This is a brilliant recipe from Nigella Lawson – only she could have come up with the idea of ‘Emergency Brownies’ – the idea of a small batch for those days when you urgently need a chocolate fix! This recipe makes 2 very generous brownies, so on a good day you’ll get 4!
This recipe is cooked in a foil tin appox. 18 x 11 x 5cm, so there is no need to line or grease it!
50g unsalted butter, softened
50g soft light brown sugar
1 tablespoon golden syrup (or maple syrup)
3 tablespoons plain flour, gluten free if required
3 tablespoons cocoa powder (I use Green&Blacks)
¼ teaspoon sea salt
1 large egg
1 teaspoon vanilla extract
50g walnut pieces (optional)
50g chocolate chips (dark or milk)
1 x foil tin approx. 18 x 11 x 5cm
- Put the butter, sugar and golden syrup into a small saucepan and gently heat, stirring, until the butter is melted and the sugar has dissolved. Remove from the heat.
- Mix together the flour, cocoa and salt, then beat into the butter mixture in the pan, until smooth.
- Whisk the egg with the vanilla and then stir it thoroughly into the pan mixture. Finally fold in the chocolate chips and walnut pieces (if using).
- Pour the mixture into the foil tin.
- Bake in a preheated oven, 150’c fan, for 15-20 minutes until it is beginning to come away from the sides and the top has dried a little around the edges.
- Transfer to a wire rack in the tin and leave to cool for 20-30 minutes.
*Click here to see the video of this Brownie recipe!
Chocolate Mousse – Pot au Chocolate (Serves 6-8)
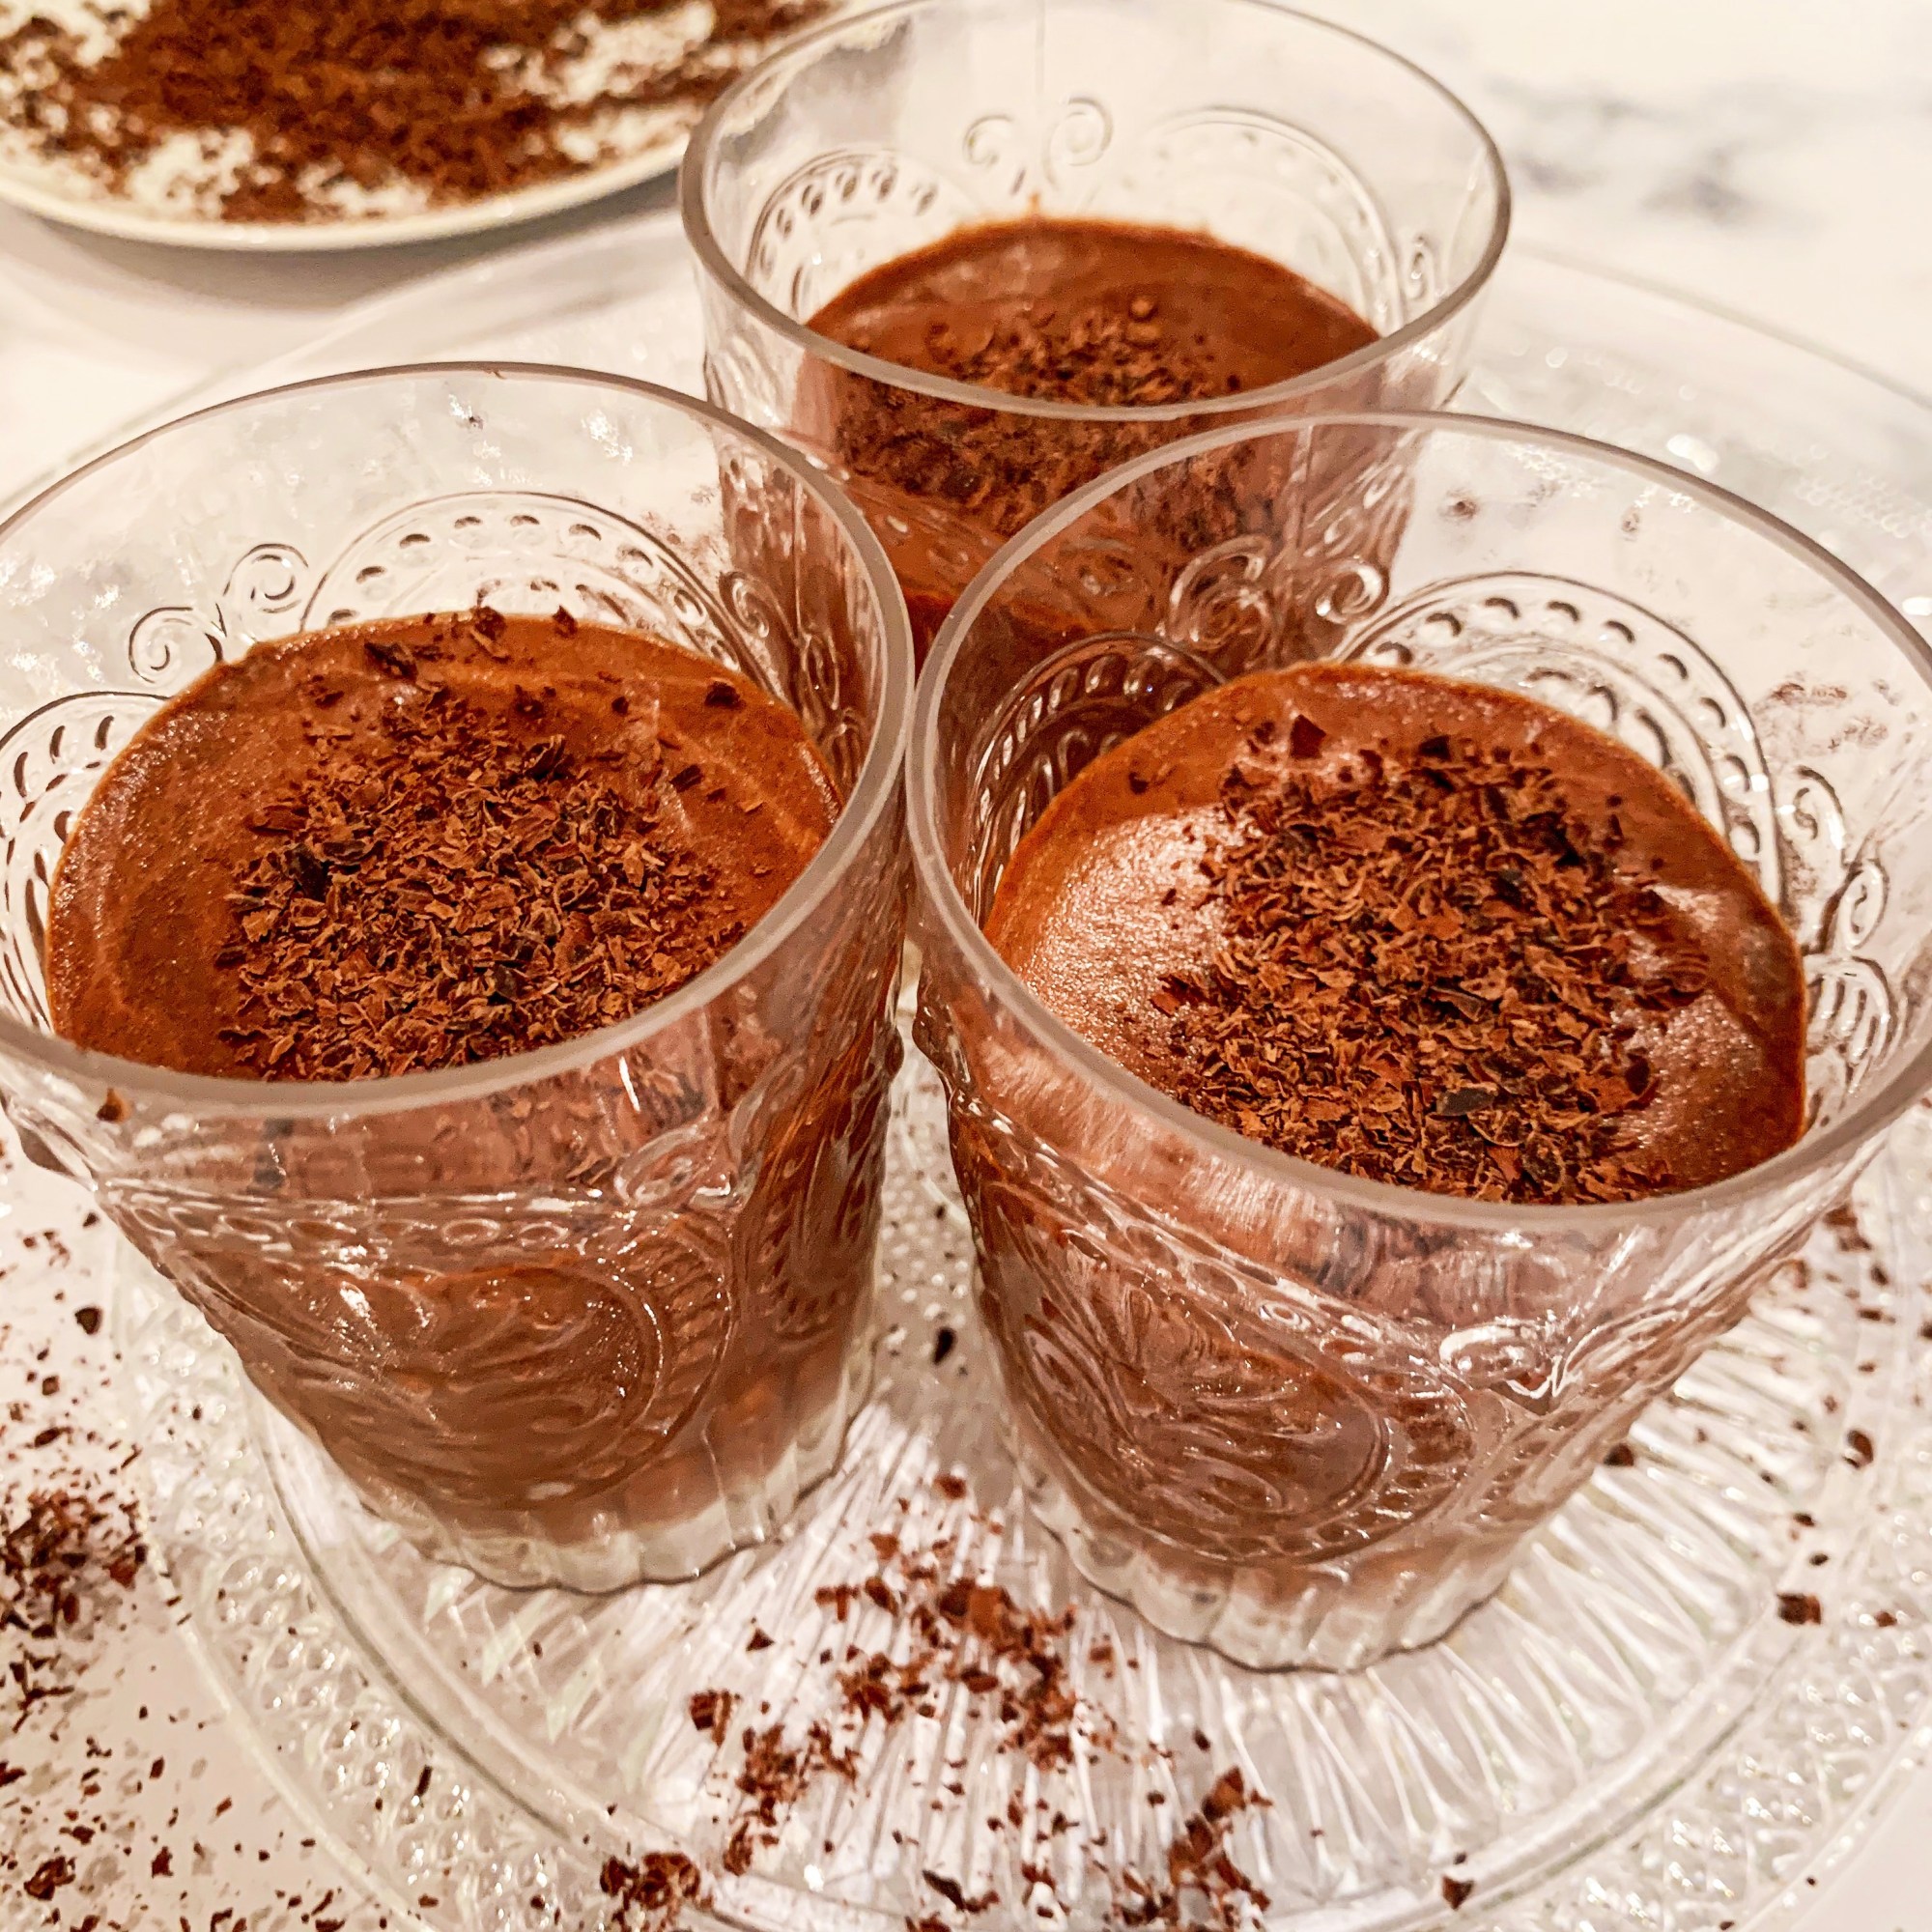
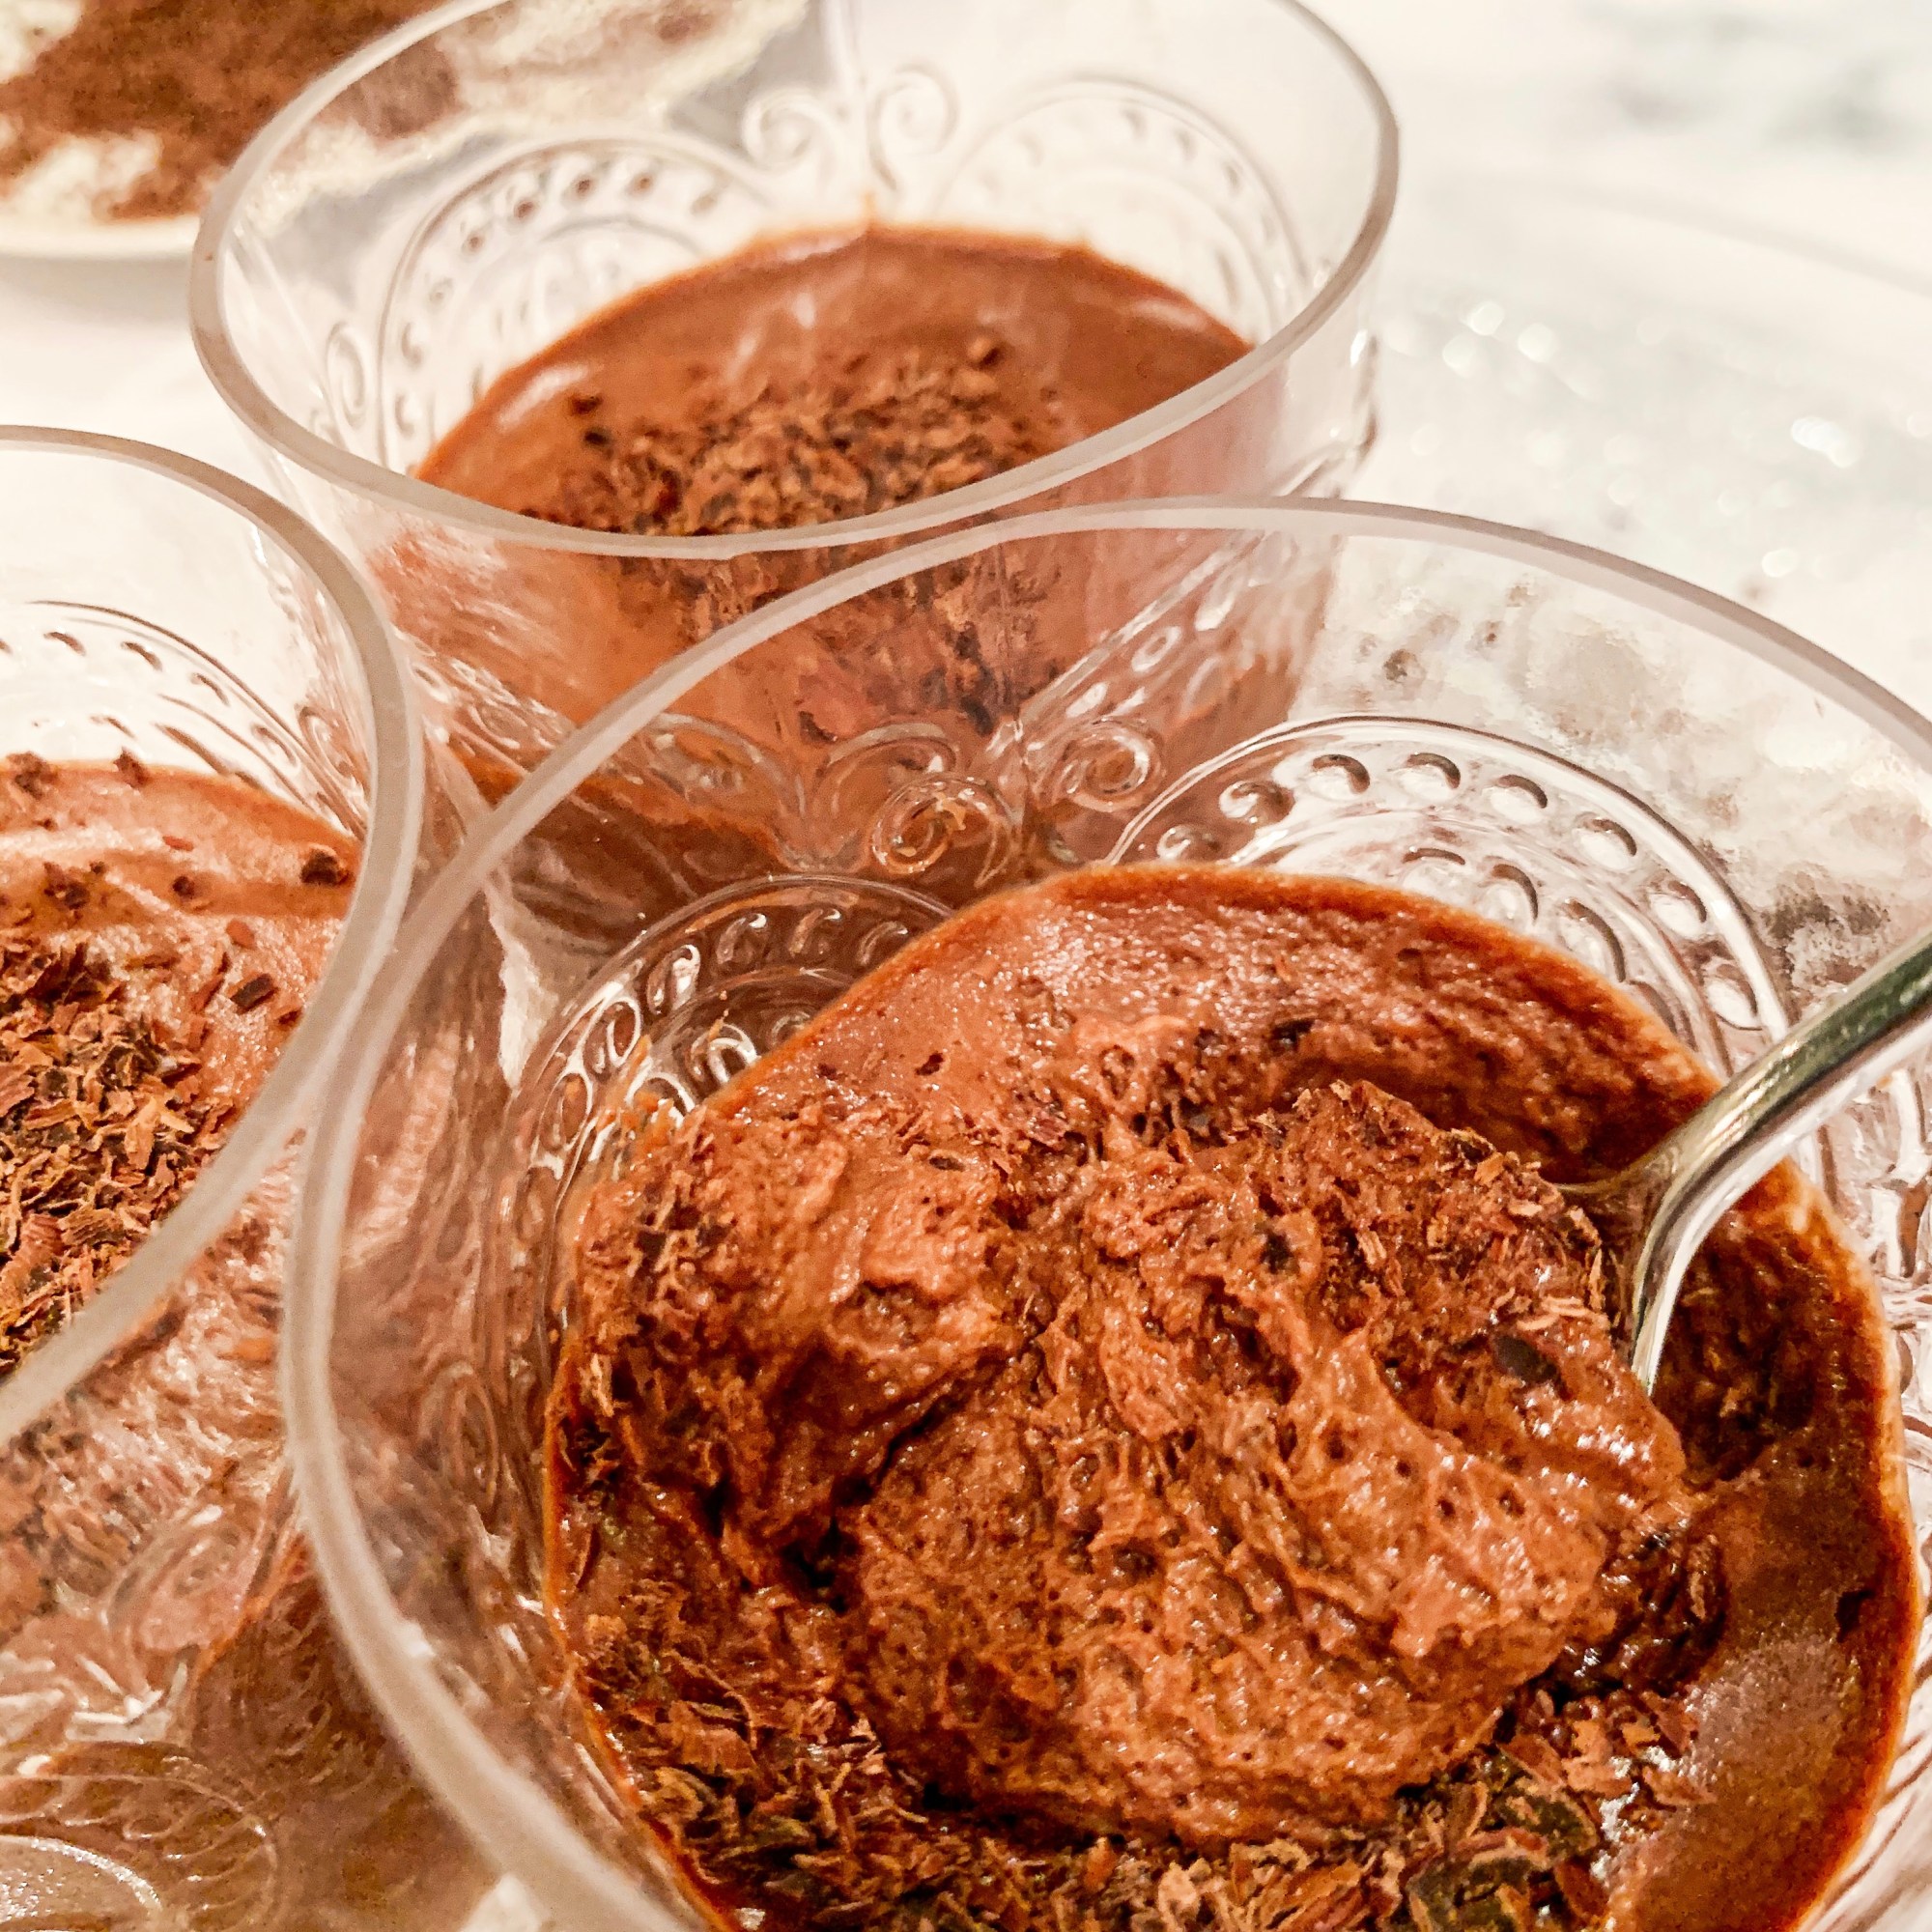
In my opinion, this is absolutely the best recipe for chocolate mousse, it is extremely light with the perfect balance of chocolate – not overly rich. The recipe calls for brandy, don’t be put off by this, as you really can’t taste it, it just balances the chocolate. This recipe serves 6-8, which may be more than you need, but believe me you will eat it (and it will keep in the fridge), so I wouldn’t bother to half the recipe!..
300g dark chocolate (I use Lindt 70% cocoa), broken into small pieces
30g unsalted butter
2 eggs, lightly beaten
3 tablespoons brandy
4 egg whites
5 tablespoons caster sugar
500ml double cream
25g dark chocolate, grated to serve
- Put the chocolate in bowl over a pan of simmering water, making sure that the bowl doesn’t touch the water (a Bain Marie). Gently melt the chocolate.
- Stir in the butter, until melted. Remove the bowl from the saucepan, allow to cool for a few minutes.
- Add the eggs and brandy, stir (the mixture may look a little scrambled at this point, but don’t worry it will smooth out later with the egg whites!)
- In a separate bowl, whisk the egg whites, adding the sugar gradually, until they form soft peaks.
- Whisk one third of the egg whites into the chocolate mixture to loosen it, then fold in the remaining whites.
- Whip the cream to medium peaks and fold into the mousse mixture.
- Pour into glasses or small bowls, cover and refrigerate for at least 4 hours.
- To serve sprinkle with some grated chocolate.
Chocolate Crispy Cakes
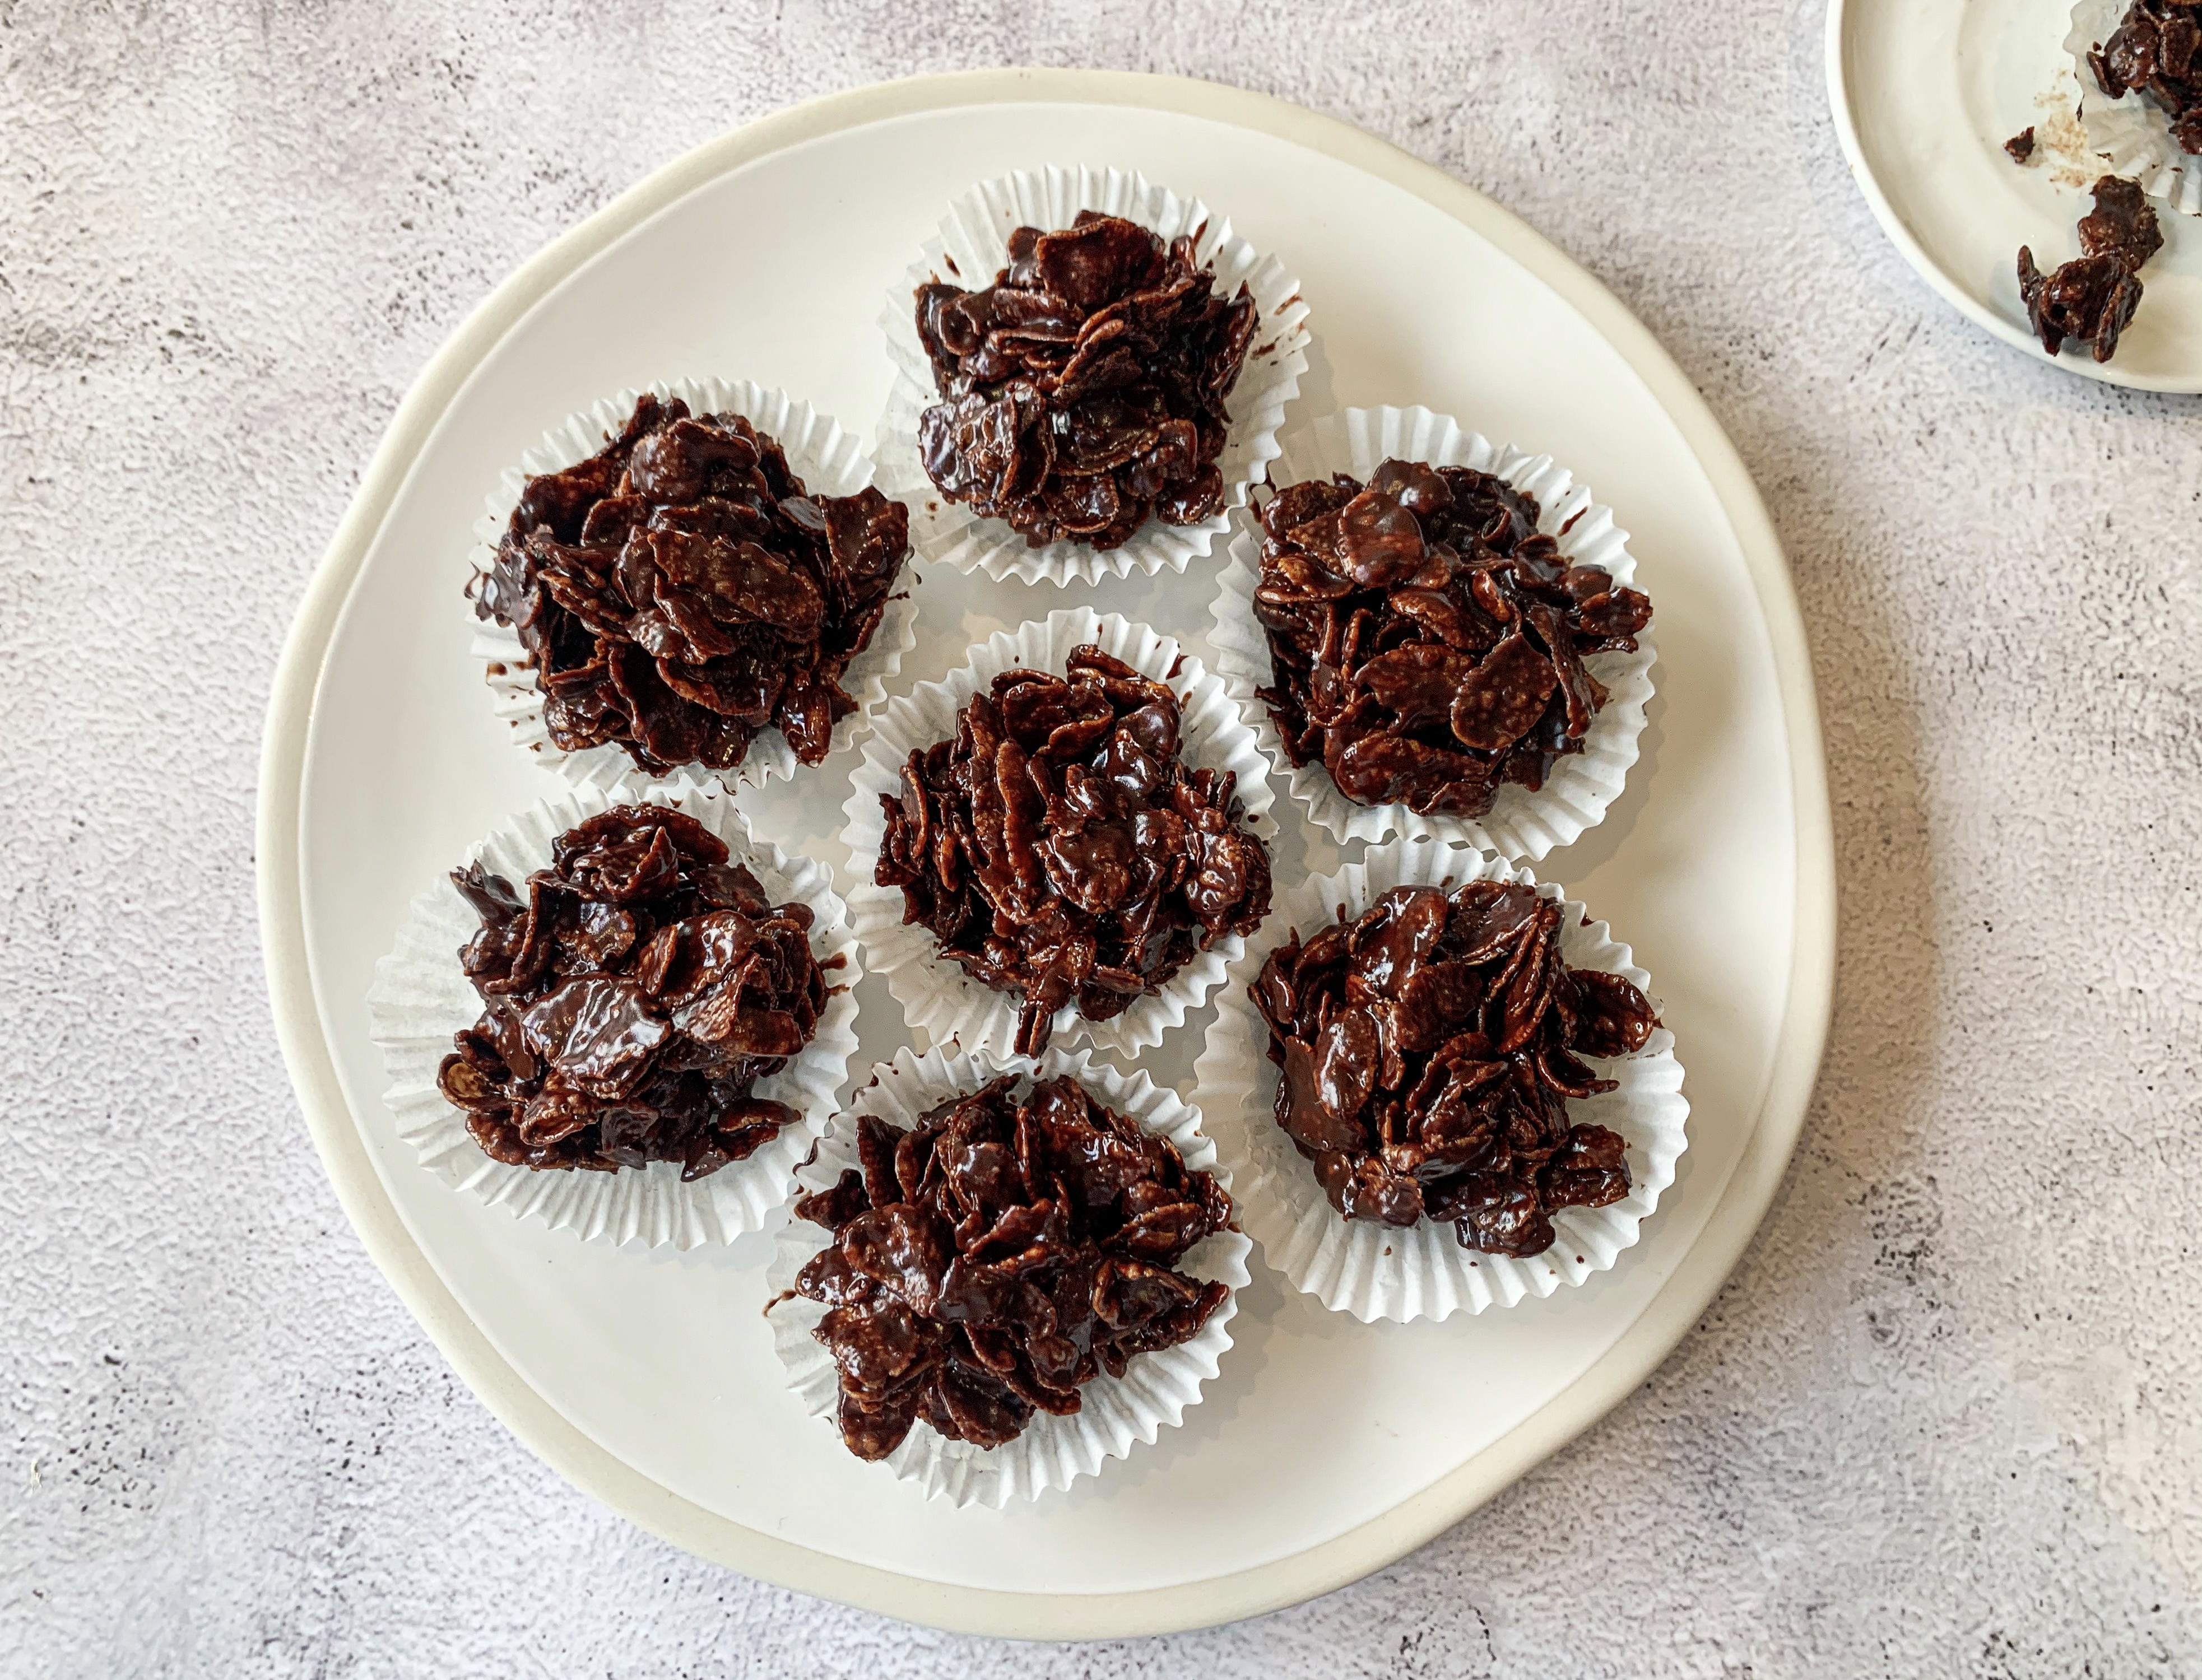
An all-time favourite in my house, these were the staple children’s birthday party food when my son, Felix, was a toddler. However, they really shouldn’t only be for children – everyone deserves these! I make mine with Lindt 70% cocoa chocolate, which gives them a more adult flavour, they are certainly not a childish treat – I have been known to serve mini ones as petit fours at dinner parties!
50g unsalted butter
4 tablespoons golden syrup
100g dark chocolate (I use Lindt Excellence 70% Cocoa Dark Chocolate)
75g cornflakes
- Gently melt the butter, syrup and chocolate in a bowl suspended over a pan of barely simmering water (a bain marie).
- Stir in the cornflakes.
- Spoon the mixture into cupcake cases (or smaller ones to make petit fours!), or if you don’t have cases, just spoon large spoonfuls onto a buttered baking tray, and place in the fridge until set.
Wreath Pavlova with Summer Berries
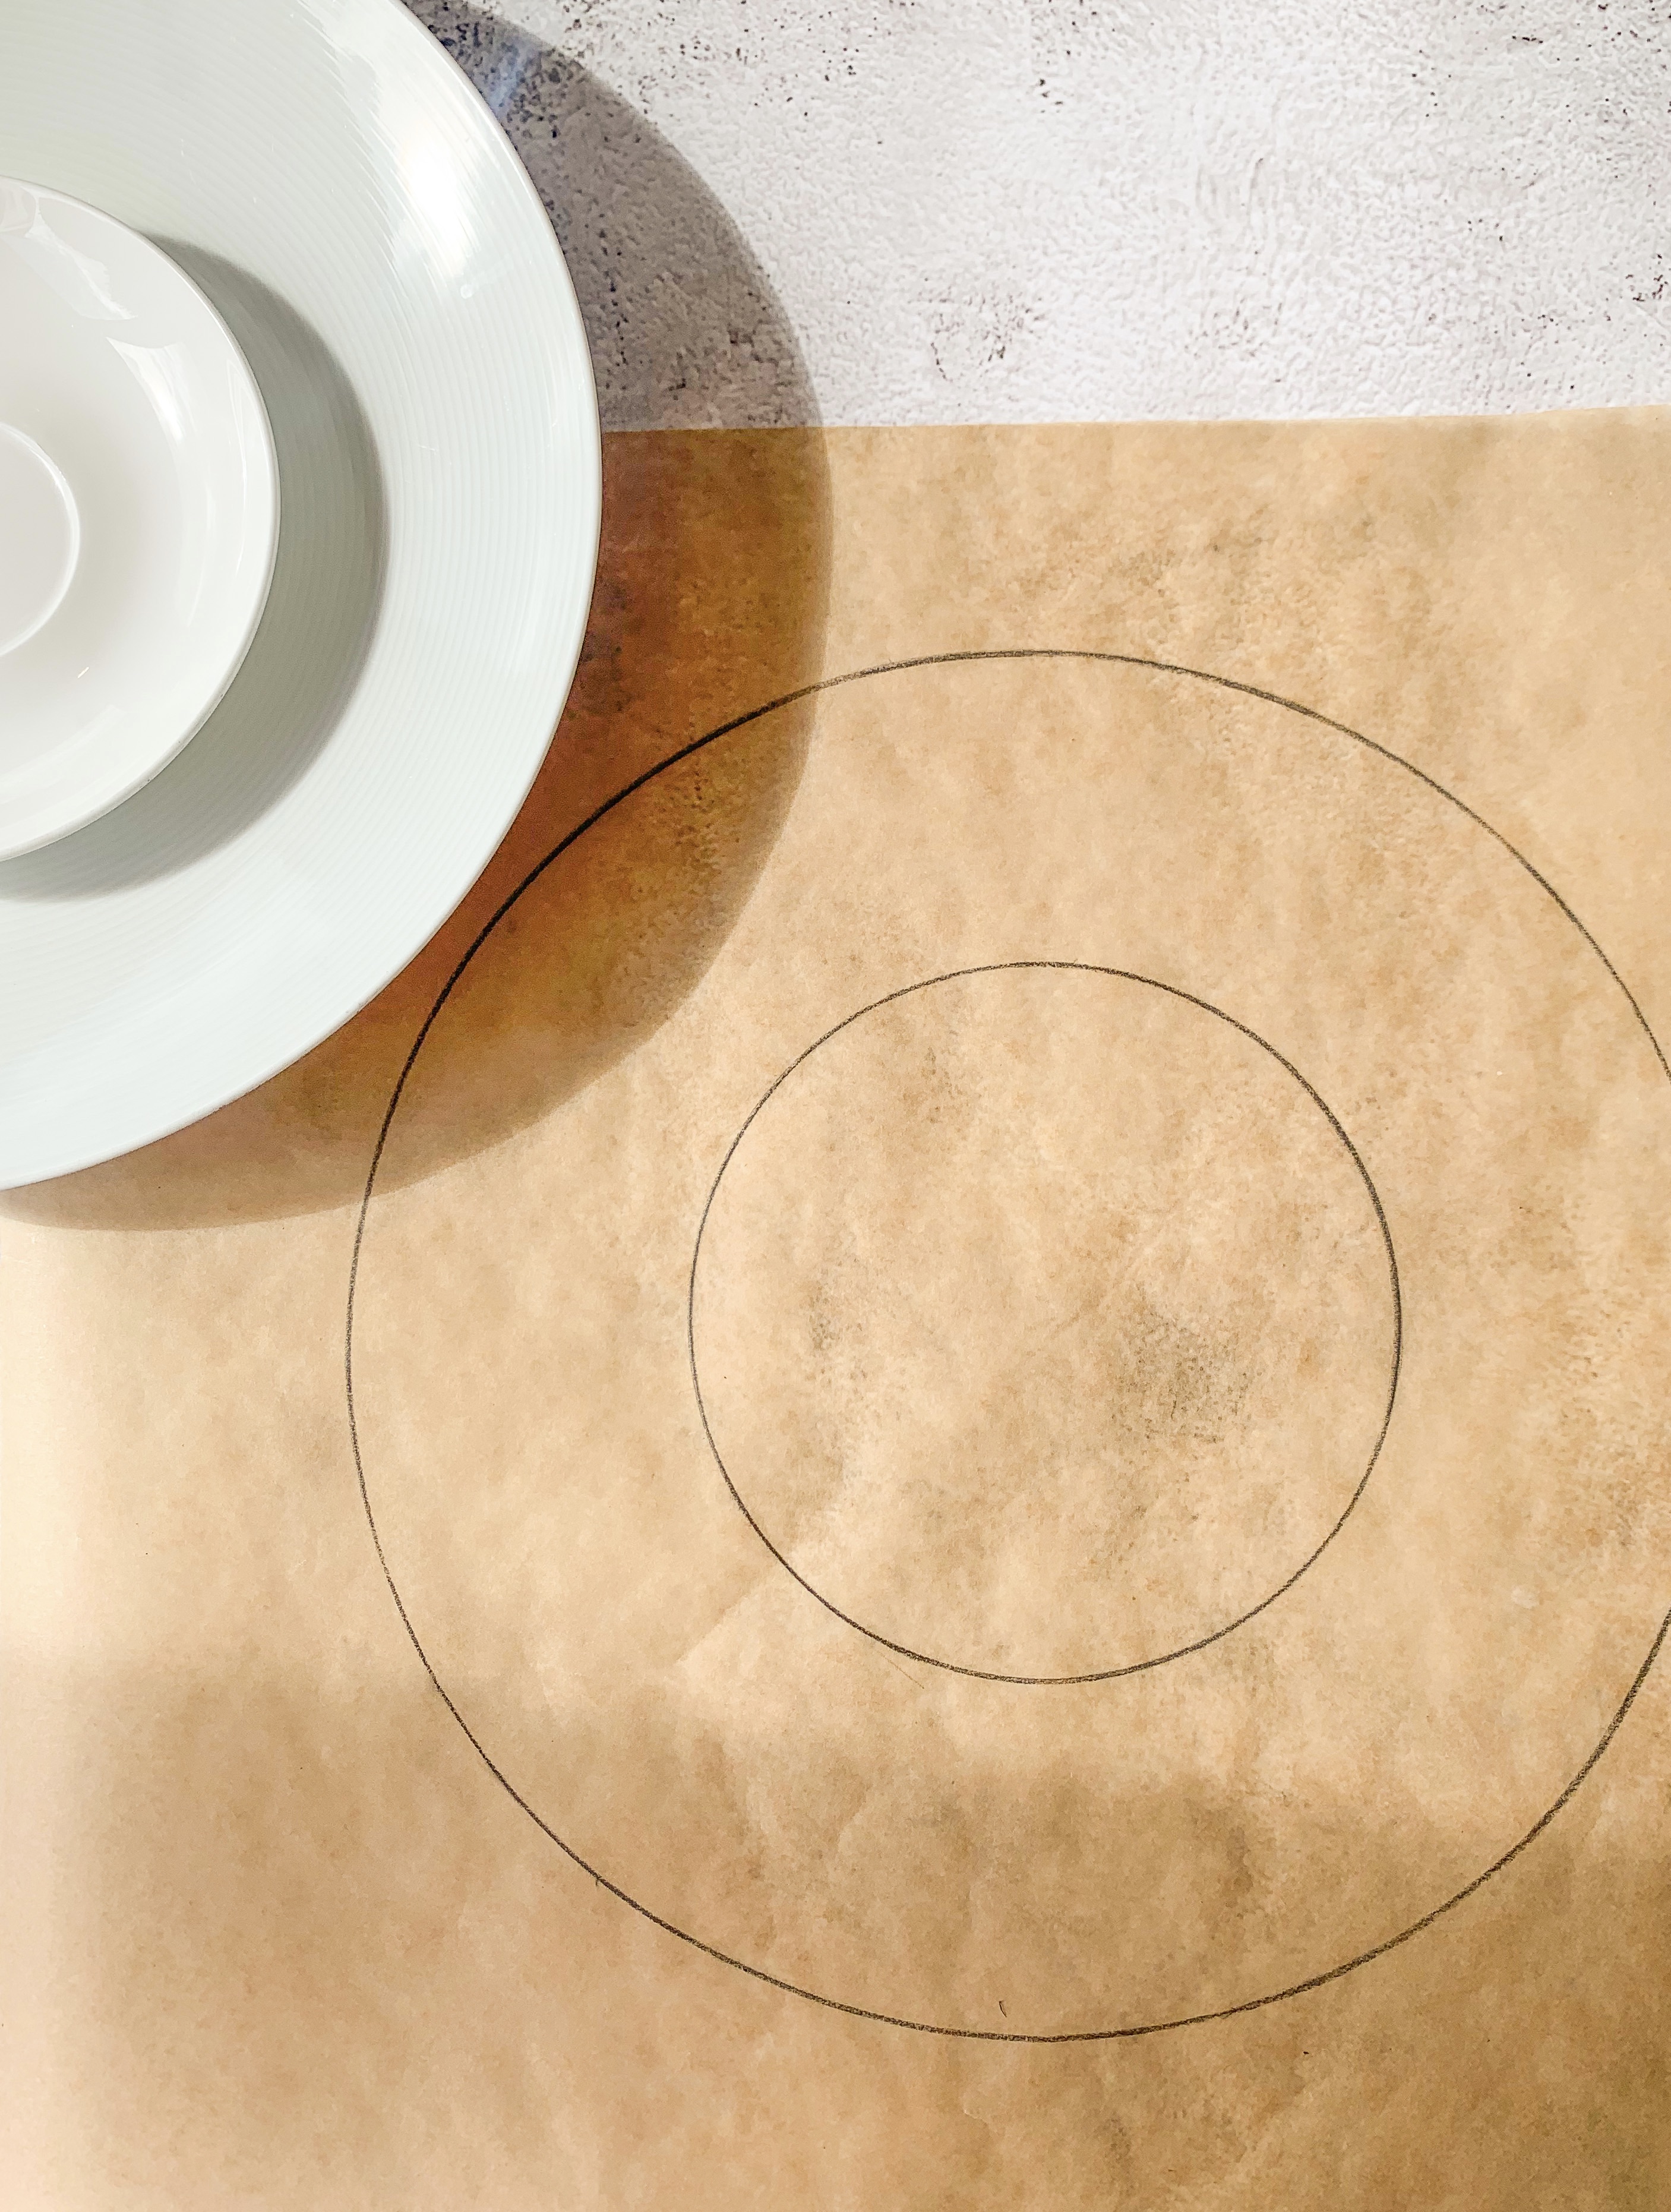
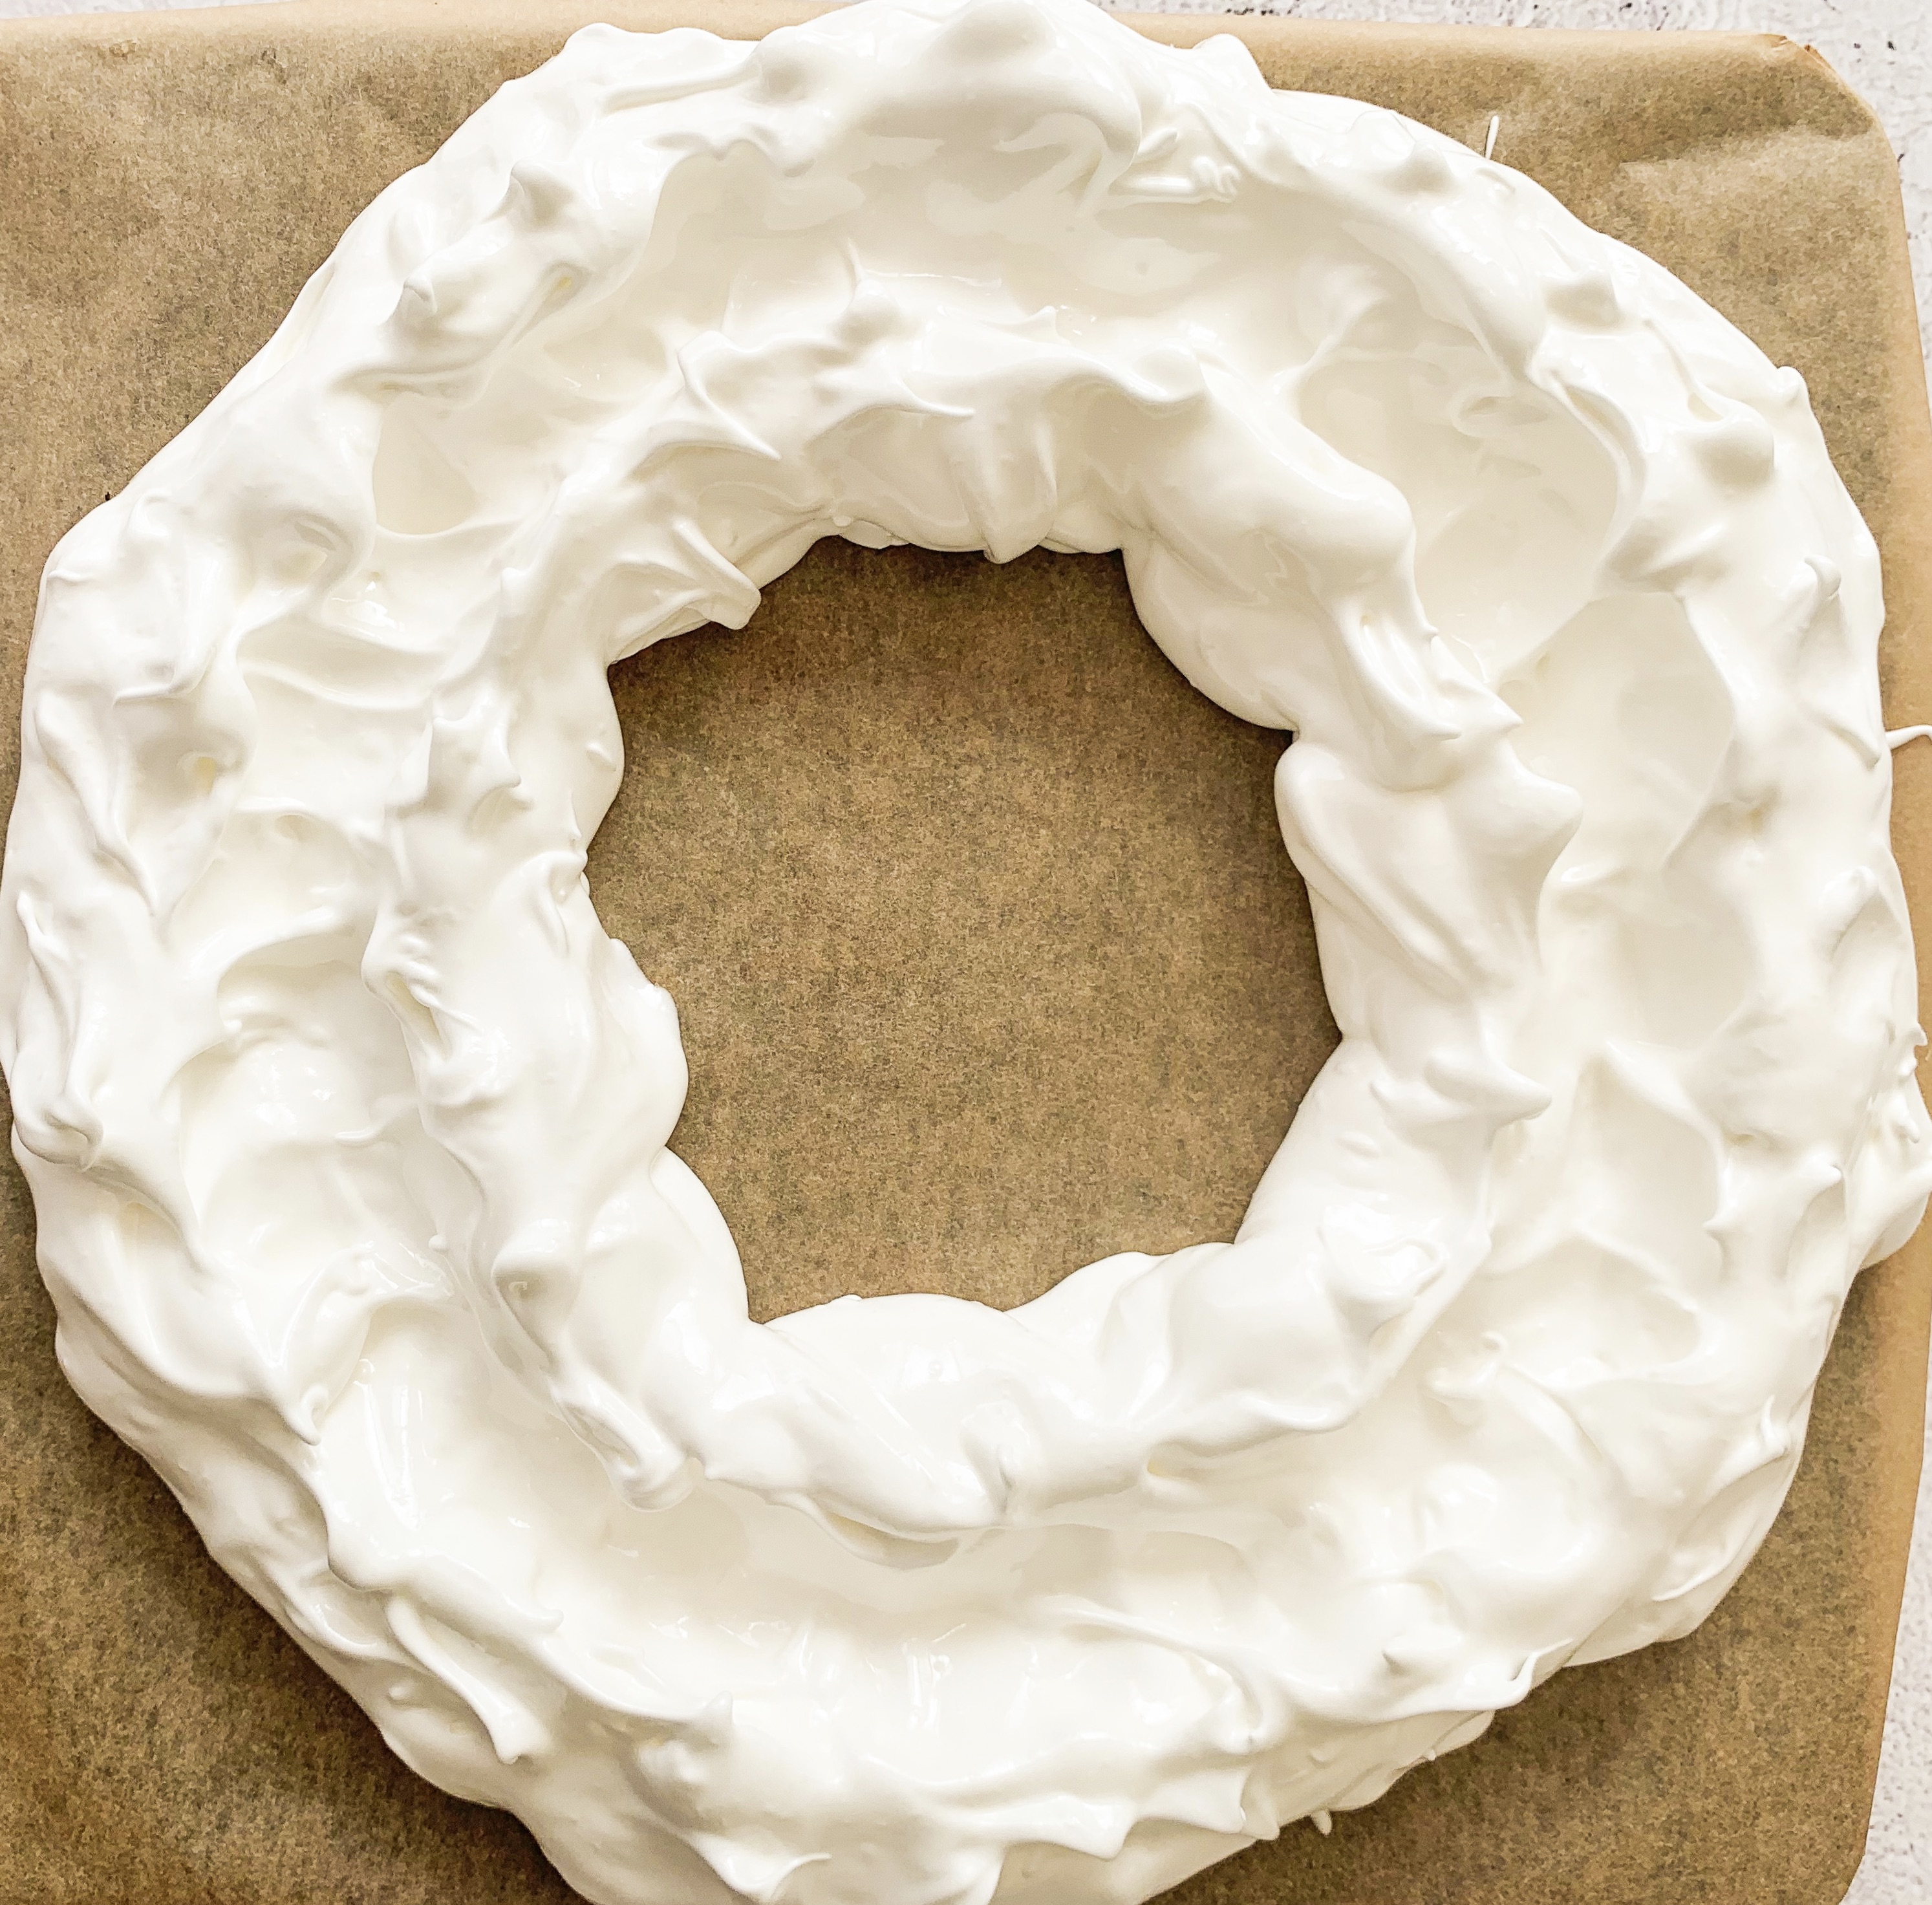
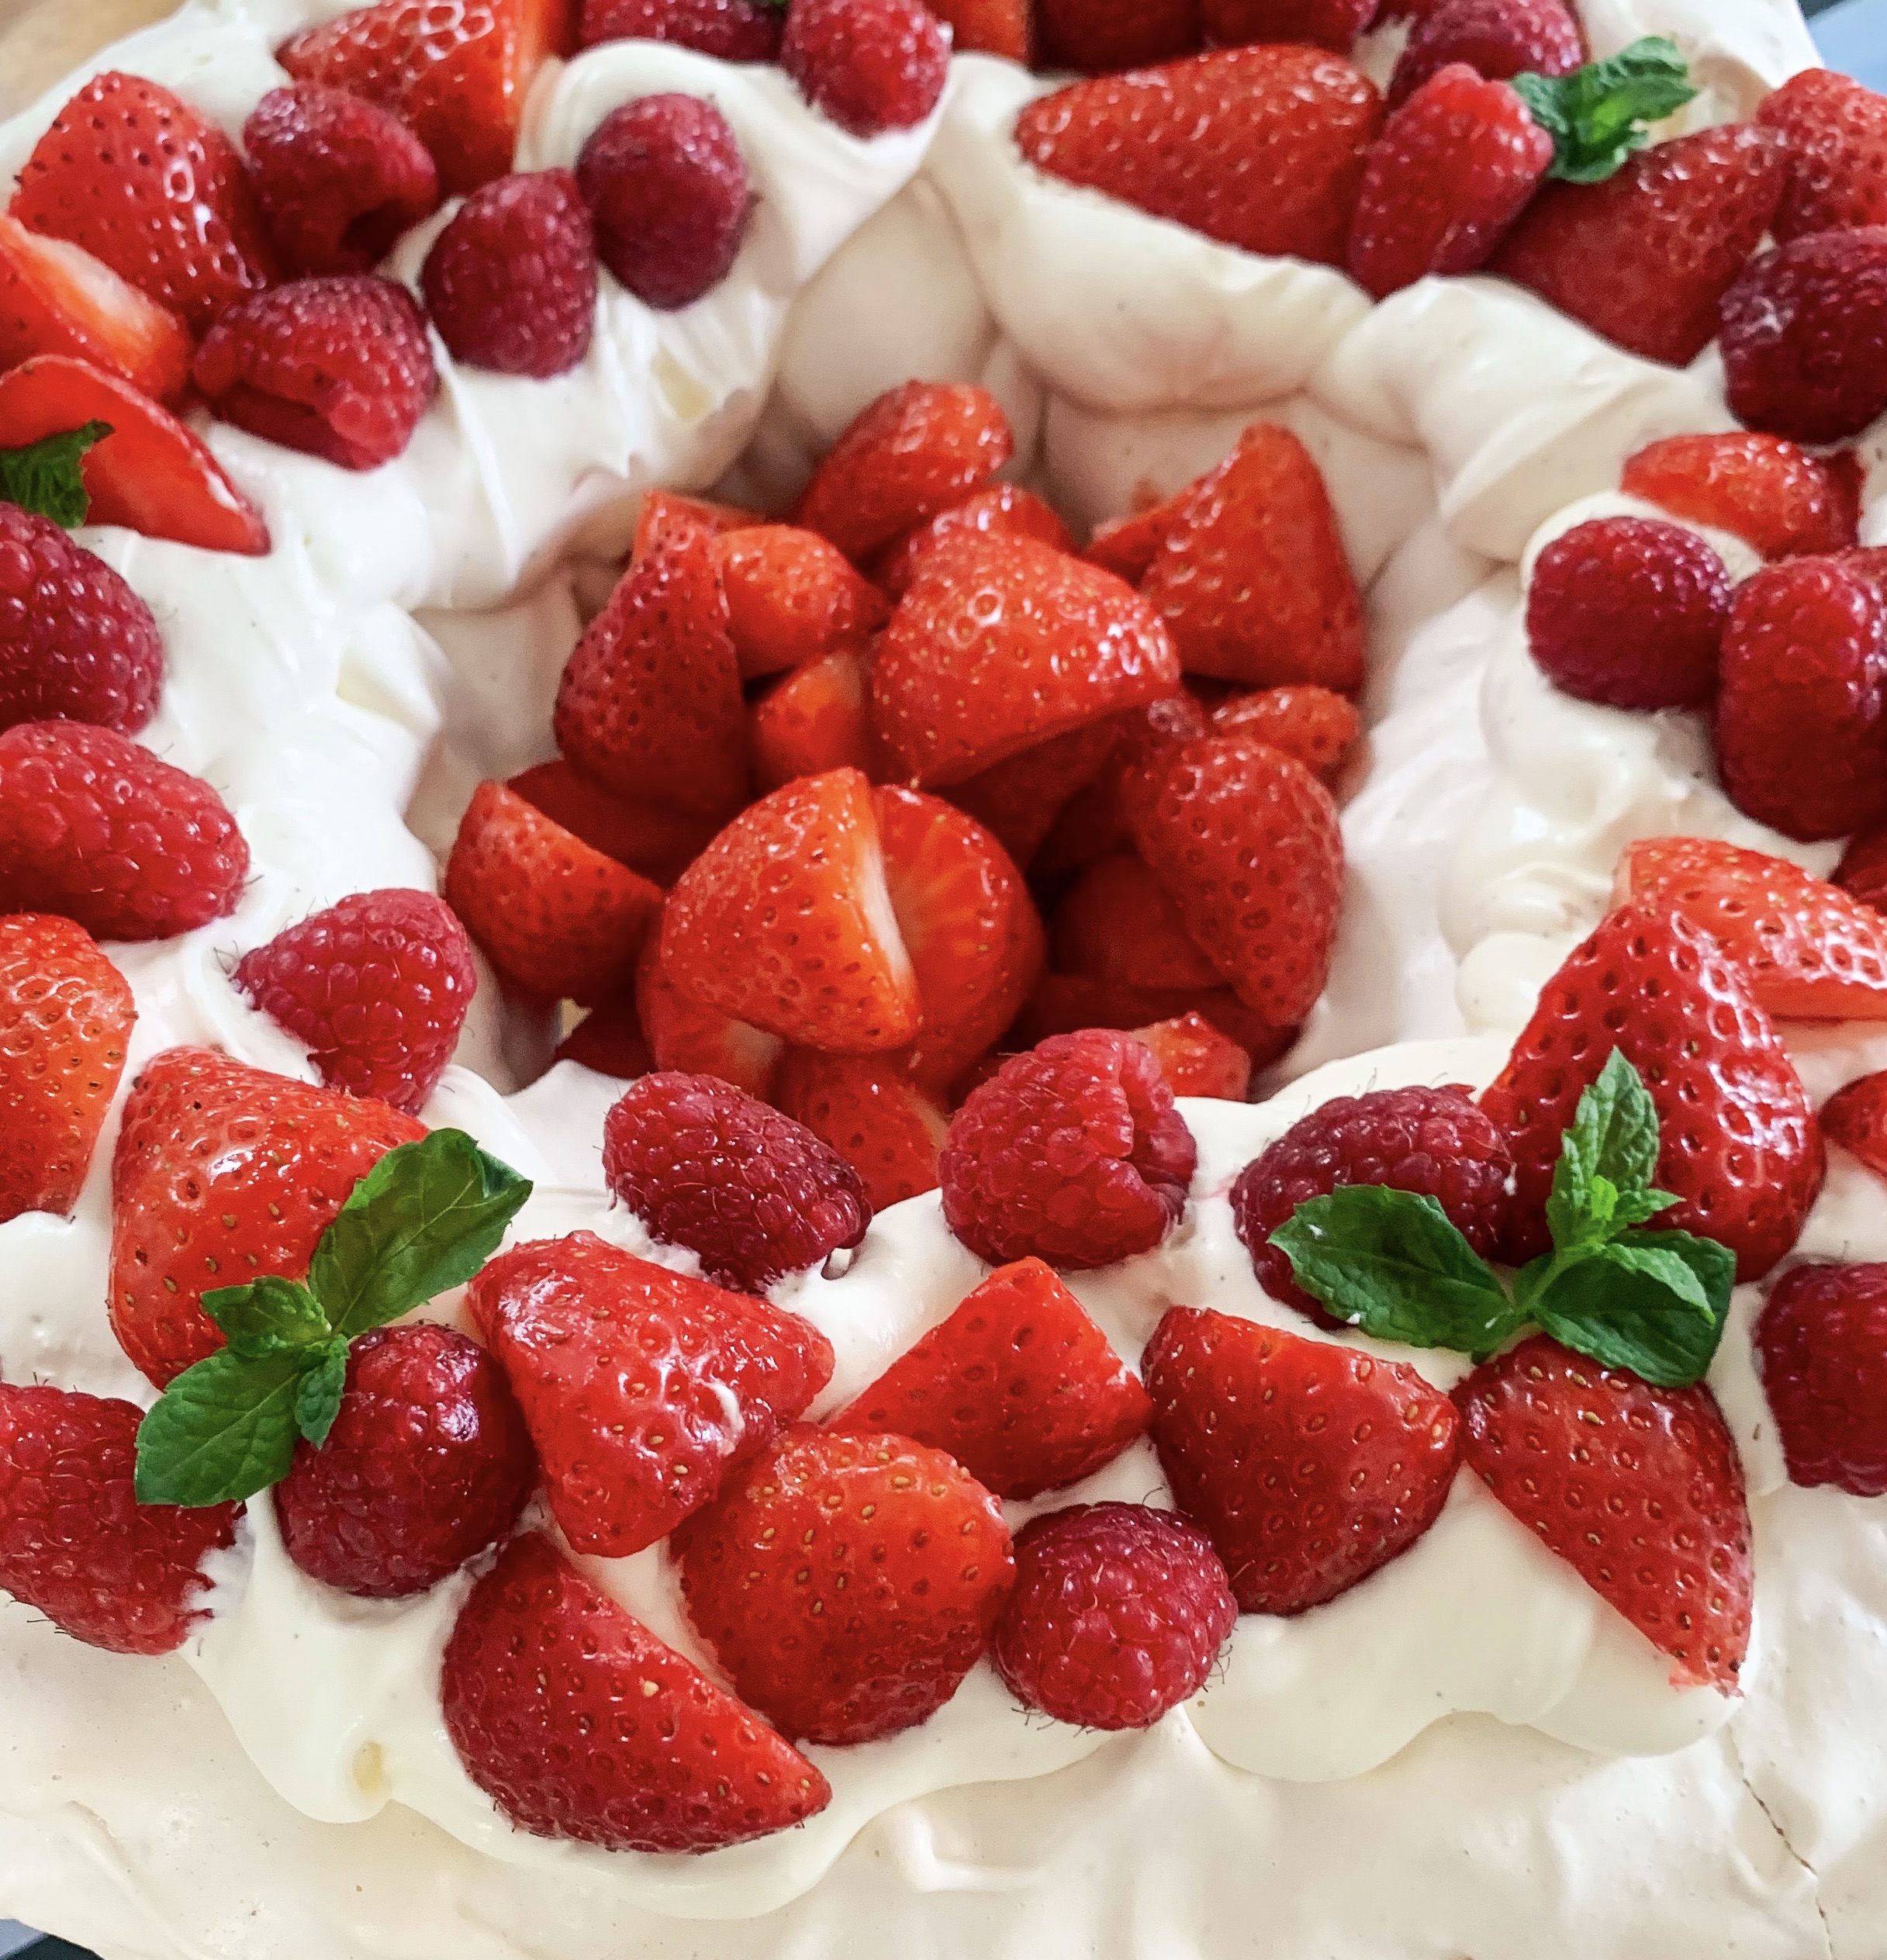
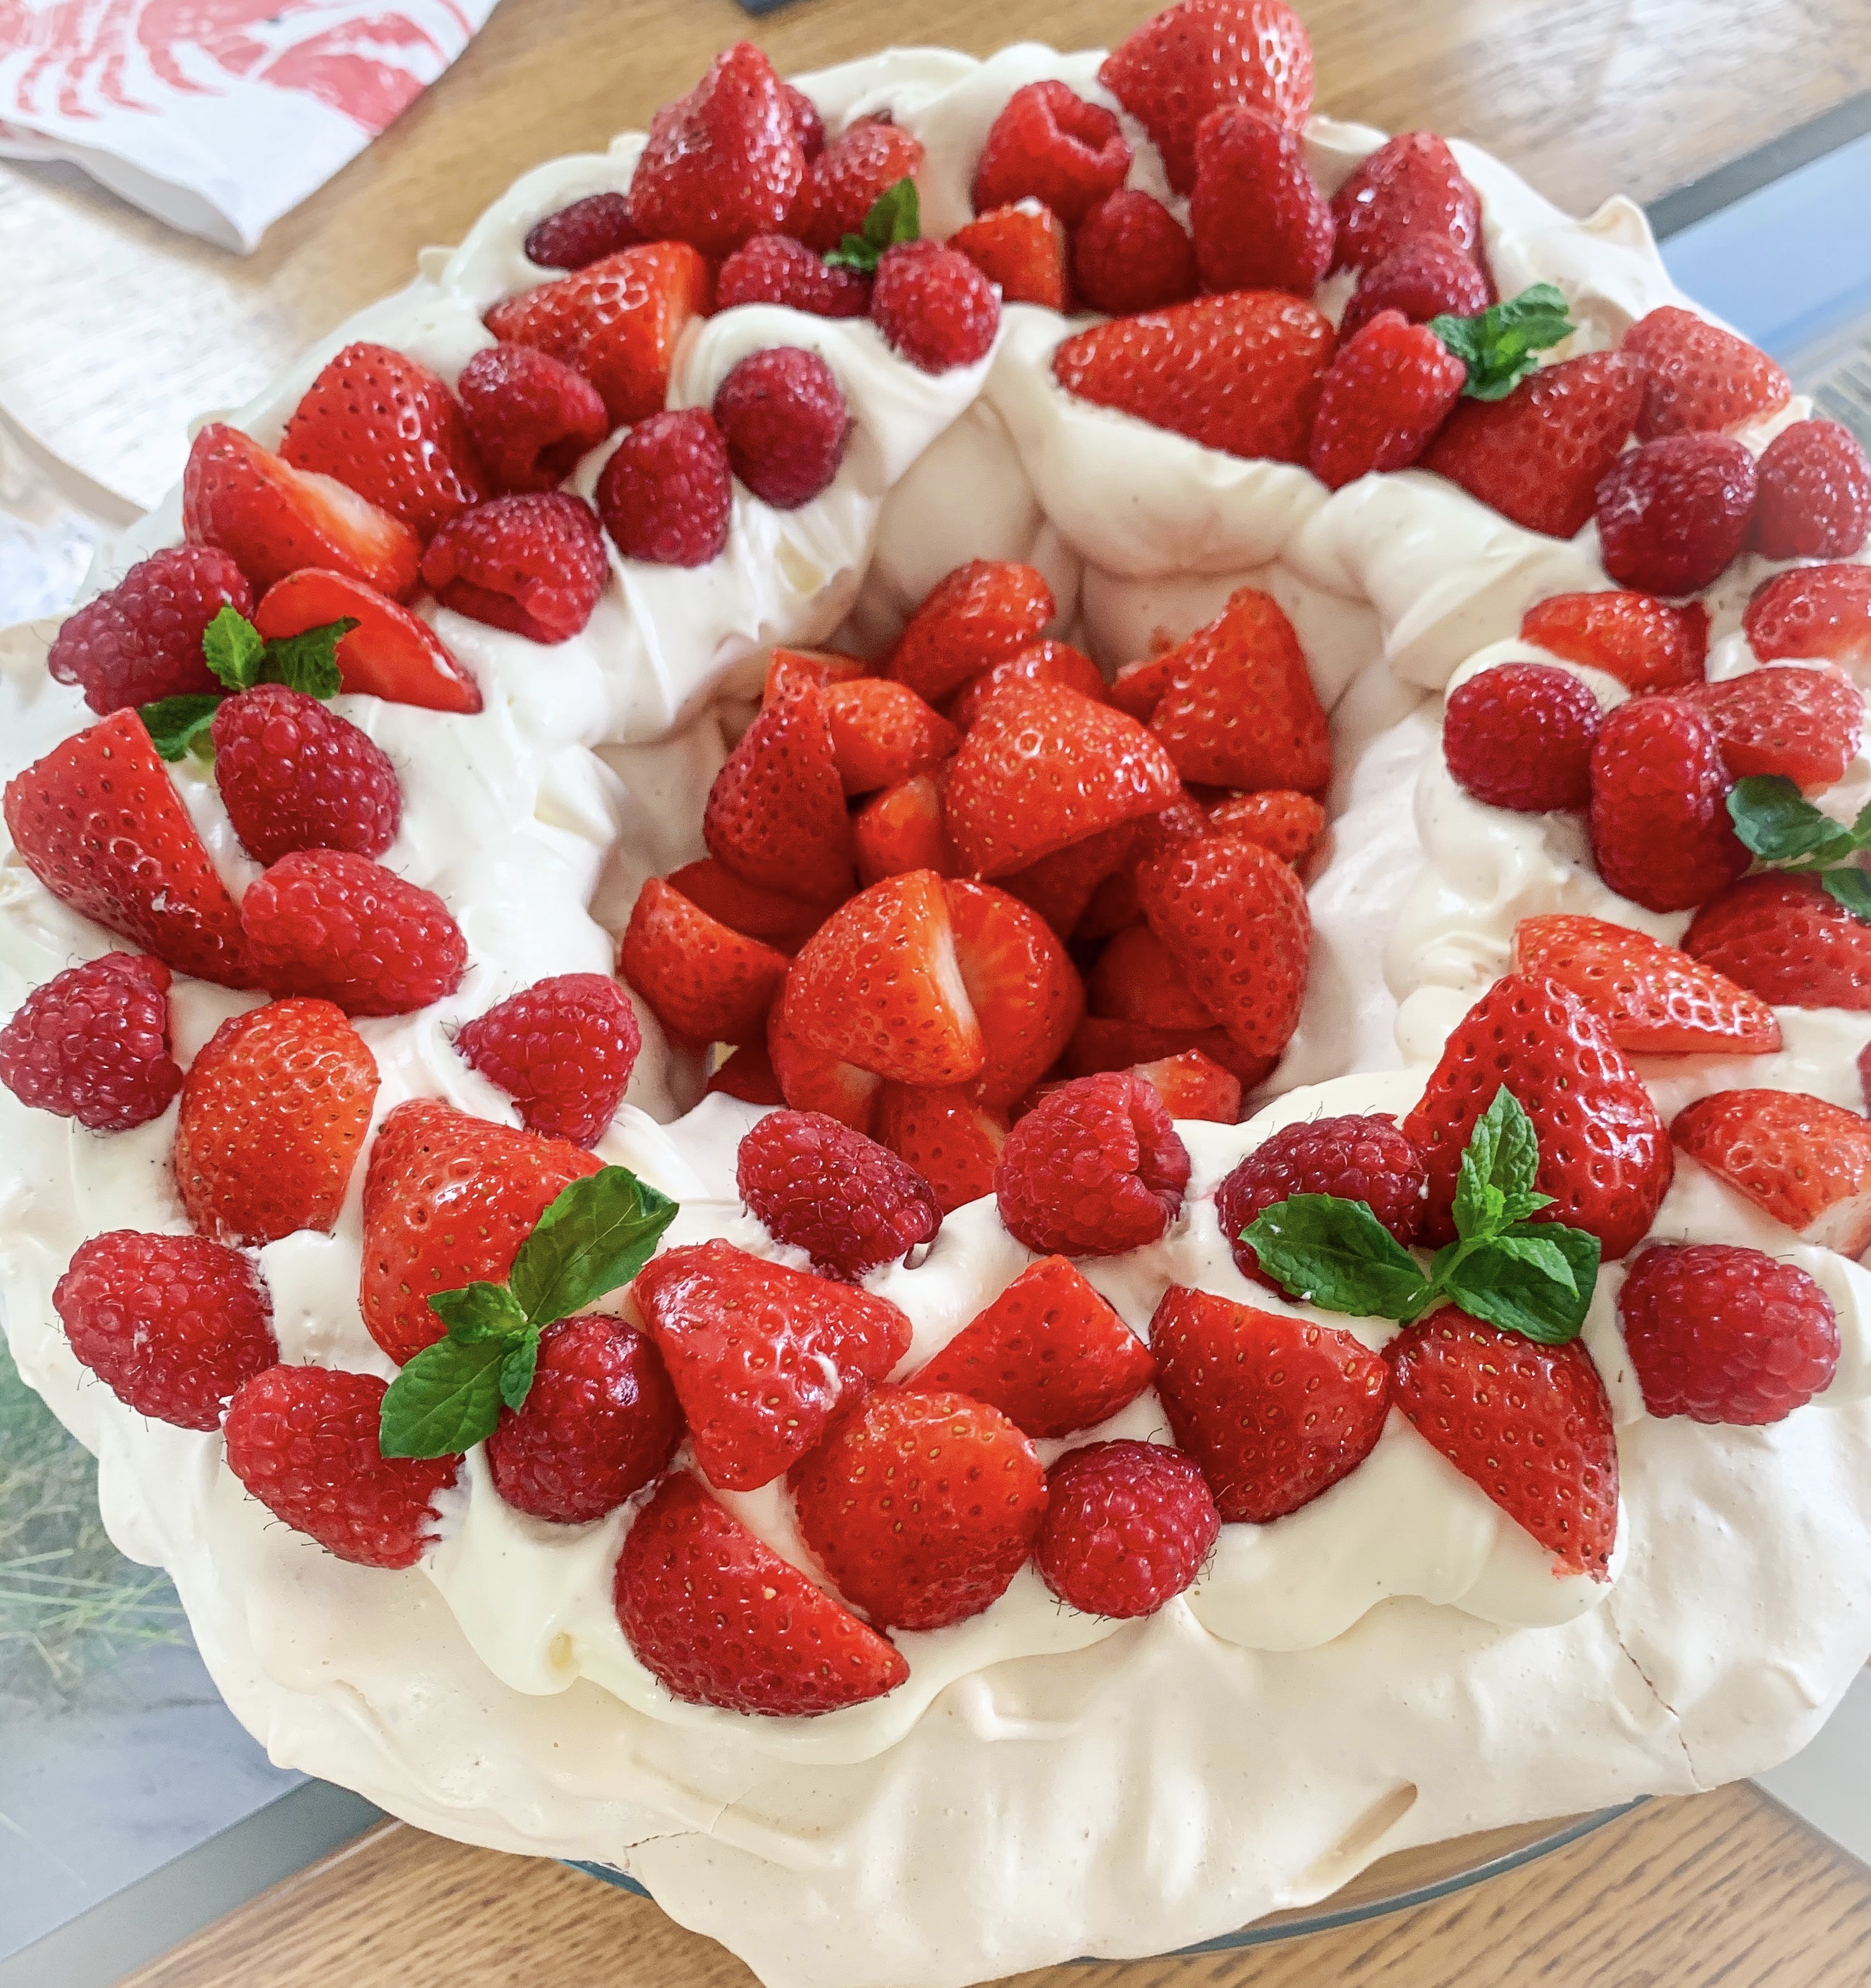
I make this pavlova in the shape of wreath, having seen the recipe by Mary Berry for a Christmas pavlova in this wreath shape some years back. I find that this shape is not only stunning to look at but also easier to slice. I use a mixture of summer berries, but most fruits work well, so you can use whatever you have to hand. You will need to draw out the shape of the wreath on baking parchment – I find that at large plate and a saucer are about the right size – see photo above.
For the Pavlova:
6 large egg whites
350g caster sugar
1 teaspoon white wine vinegar
1 teaspoon cornflour
For the Filling:
600ml double cream
1 teaspoon vanilla paste
50g icing sugar, sifted
300g strawberries, hulled and quartered
300g raspberries
200g blueberries
A few mint leaves to decorate (optional)
Icing sugar to dust
- Preheat the oven to 140’c fan.
- First place a large piece of baking parchment on a baking sheet and draw 30cm circle (you could use a large dinner plate) and inside this circle an inner circle of 15cm (you could use a saucer) – thus creating a wreath shape.
- Put the egg whites in a mixing bowl and with an electric whisk, whisk until soft peaks form. Gradually whisk in the caster sugar a little at a time until the whites are stiff and glossy. Mix the cornflour and vinegar together in a small cup and then whisk into the whites.
- Spoon the meringue mixture onto the ring drawn on the parchment. Using a spoon to make a shallow trench in the meringue for the cream to sit in – see photo above.
- Place in the oven and immediately reduce the temperature to 120’c. Bake for 1 hour- 1 hour 15 minutes until the outside is hard but still white. Turn off the oven and leave the pavlova inside for at least an hour or overnight to cool and dry (don’t forget it’s in the oven!)
- To assemble, whip the cream, vanilla paste and icing sugar together until stiff peaks form. Spoon the cream in the trench of the pavlova and top with the berries and decorate with the mint leaves (if using). Finally sprinkle with icing sugar. Delicious!!
Caramelised Rum Bananas with Vanilla Ice-Cream (Serves 4)
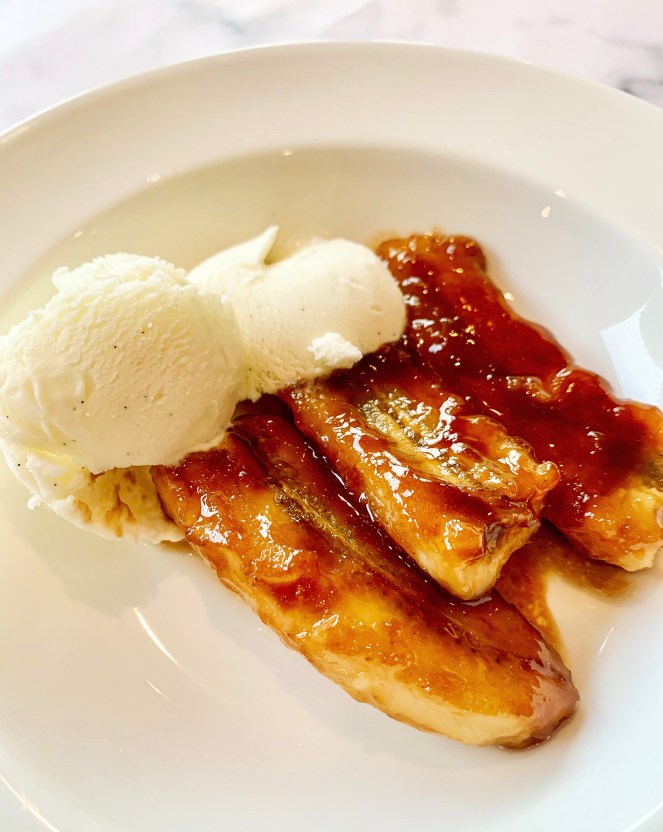

A super quick and a very delicious dessert!…
*you could make this without the rum for an alcohol free option
60g unsalted butter
6 tablespoons dark brown sugar
4 ripe bananas, cut in half and sliced lengthways
3 tablespoons dark rum (optional)
Vanilla ice-cream to serve
- Place the butter and sugar in a frying pan over a low heat, stir until the sugar dissolves and begins to bubble. Simmer for about 2 minutes then add the bananas, continue to simmer for another minute or so.
- Add the rum, stir and remove from the heat.
- Serve with a scoops of vanilla ice-cream.
*You can see the video of this dessert being made by clicking on this link to my Instagram Page
Marsala Fried Figs with Vanilla Mascarpone (Serves 4)
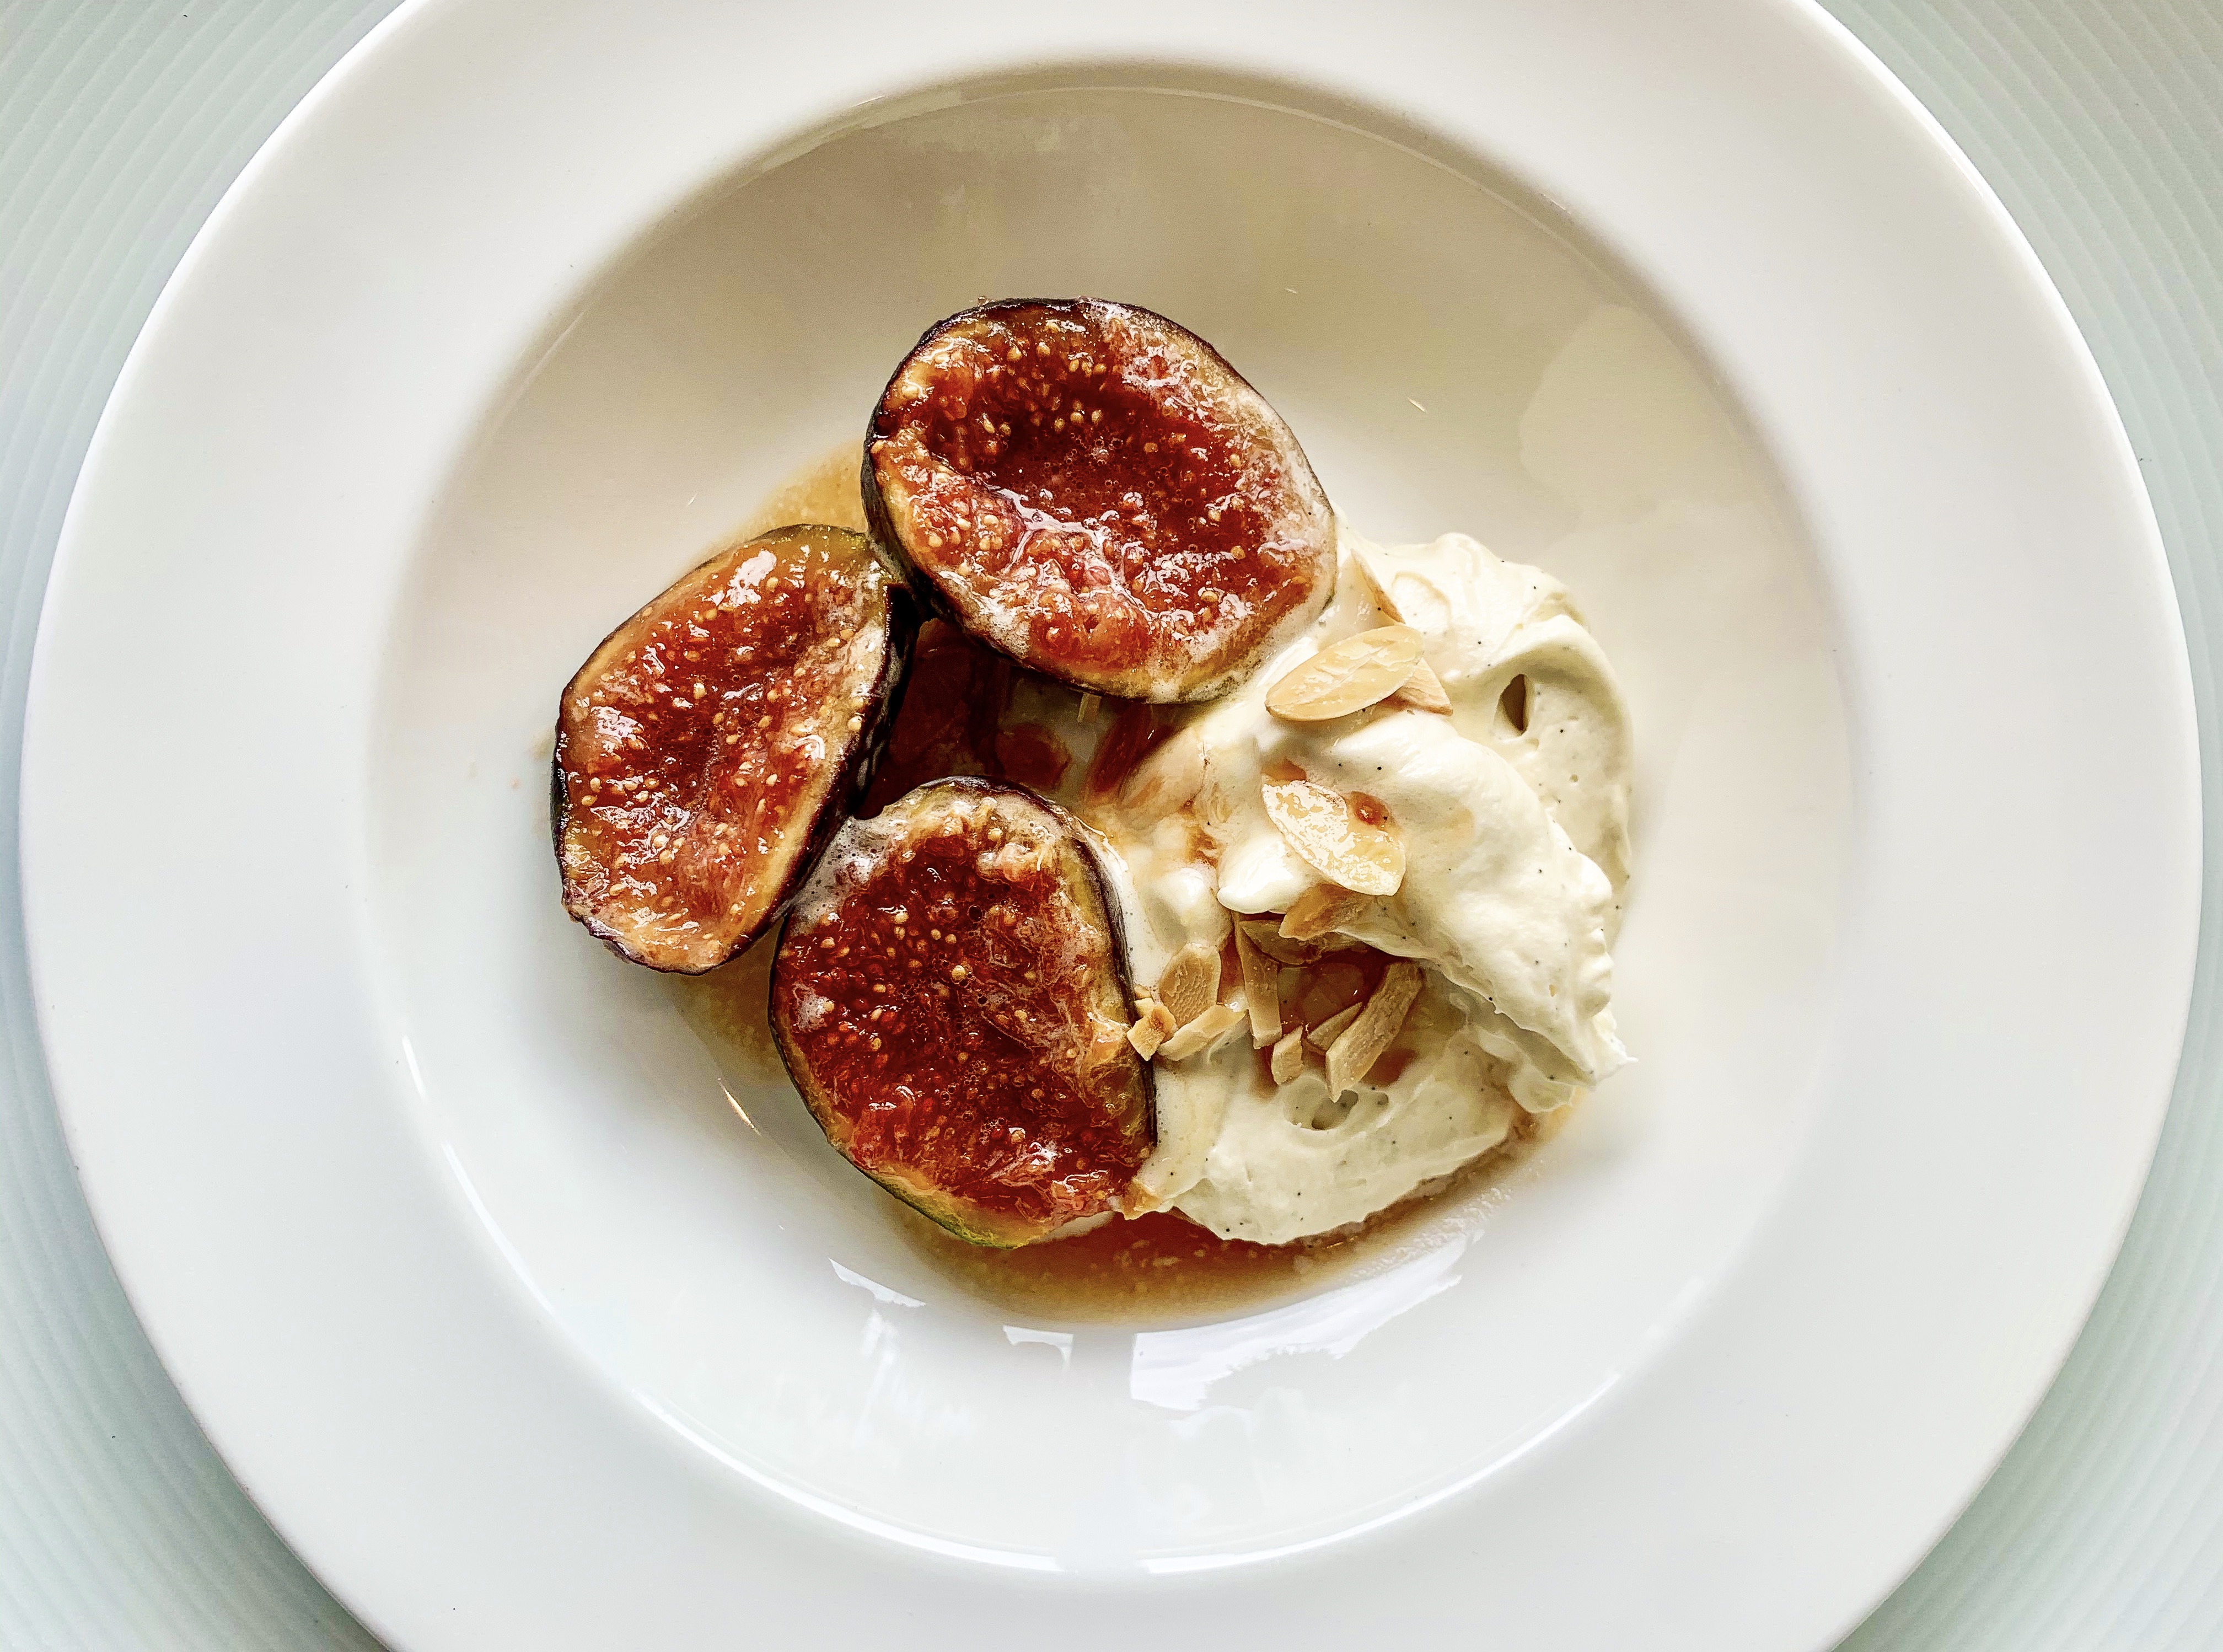
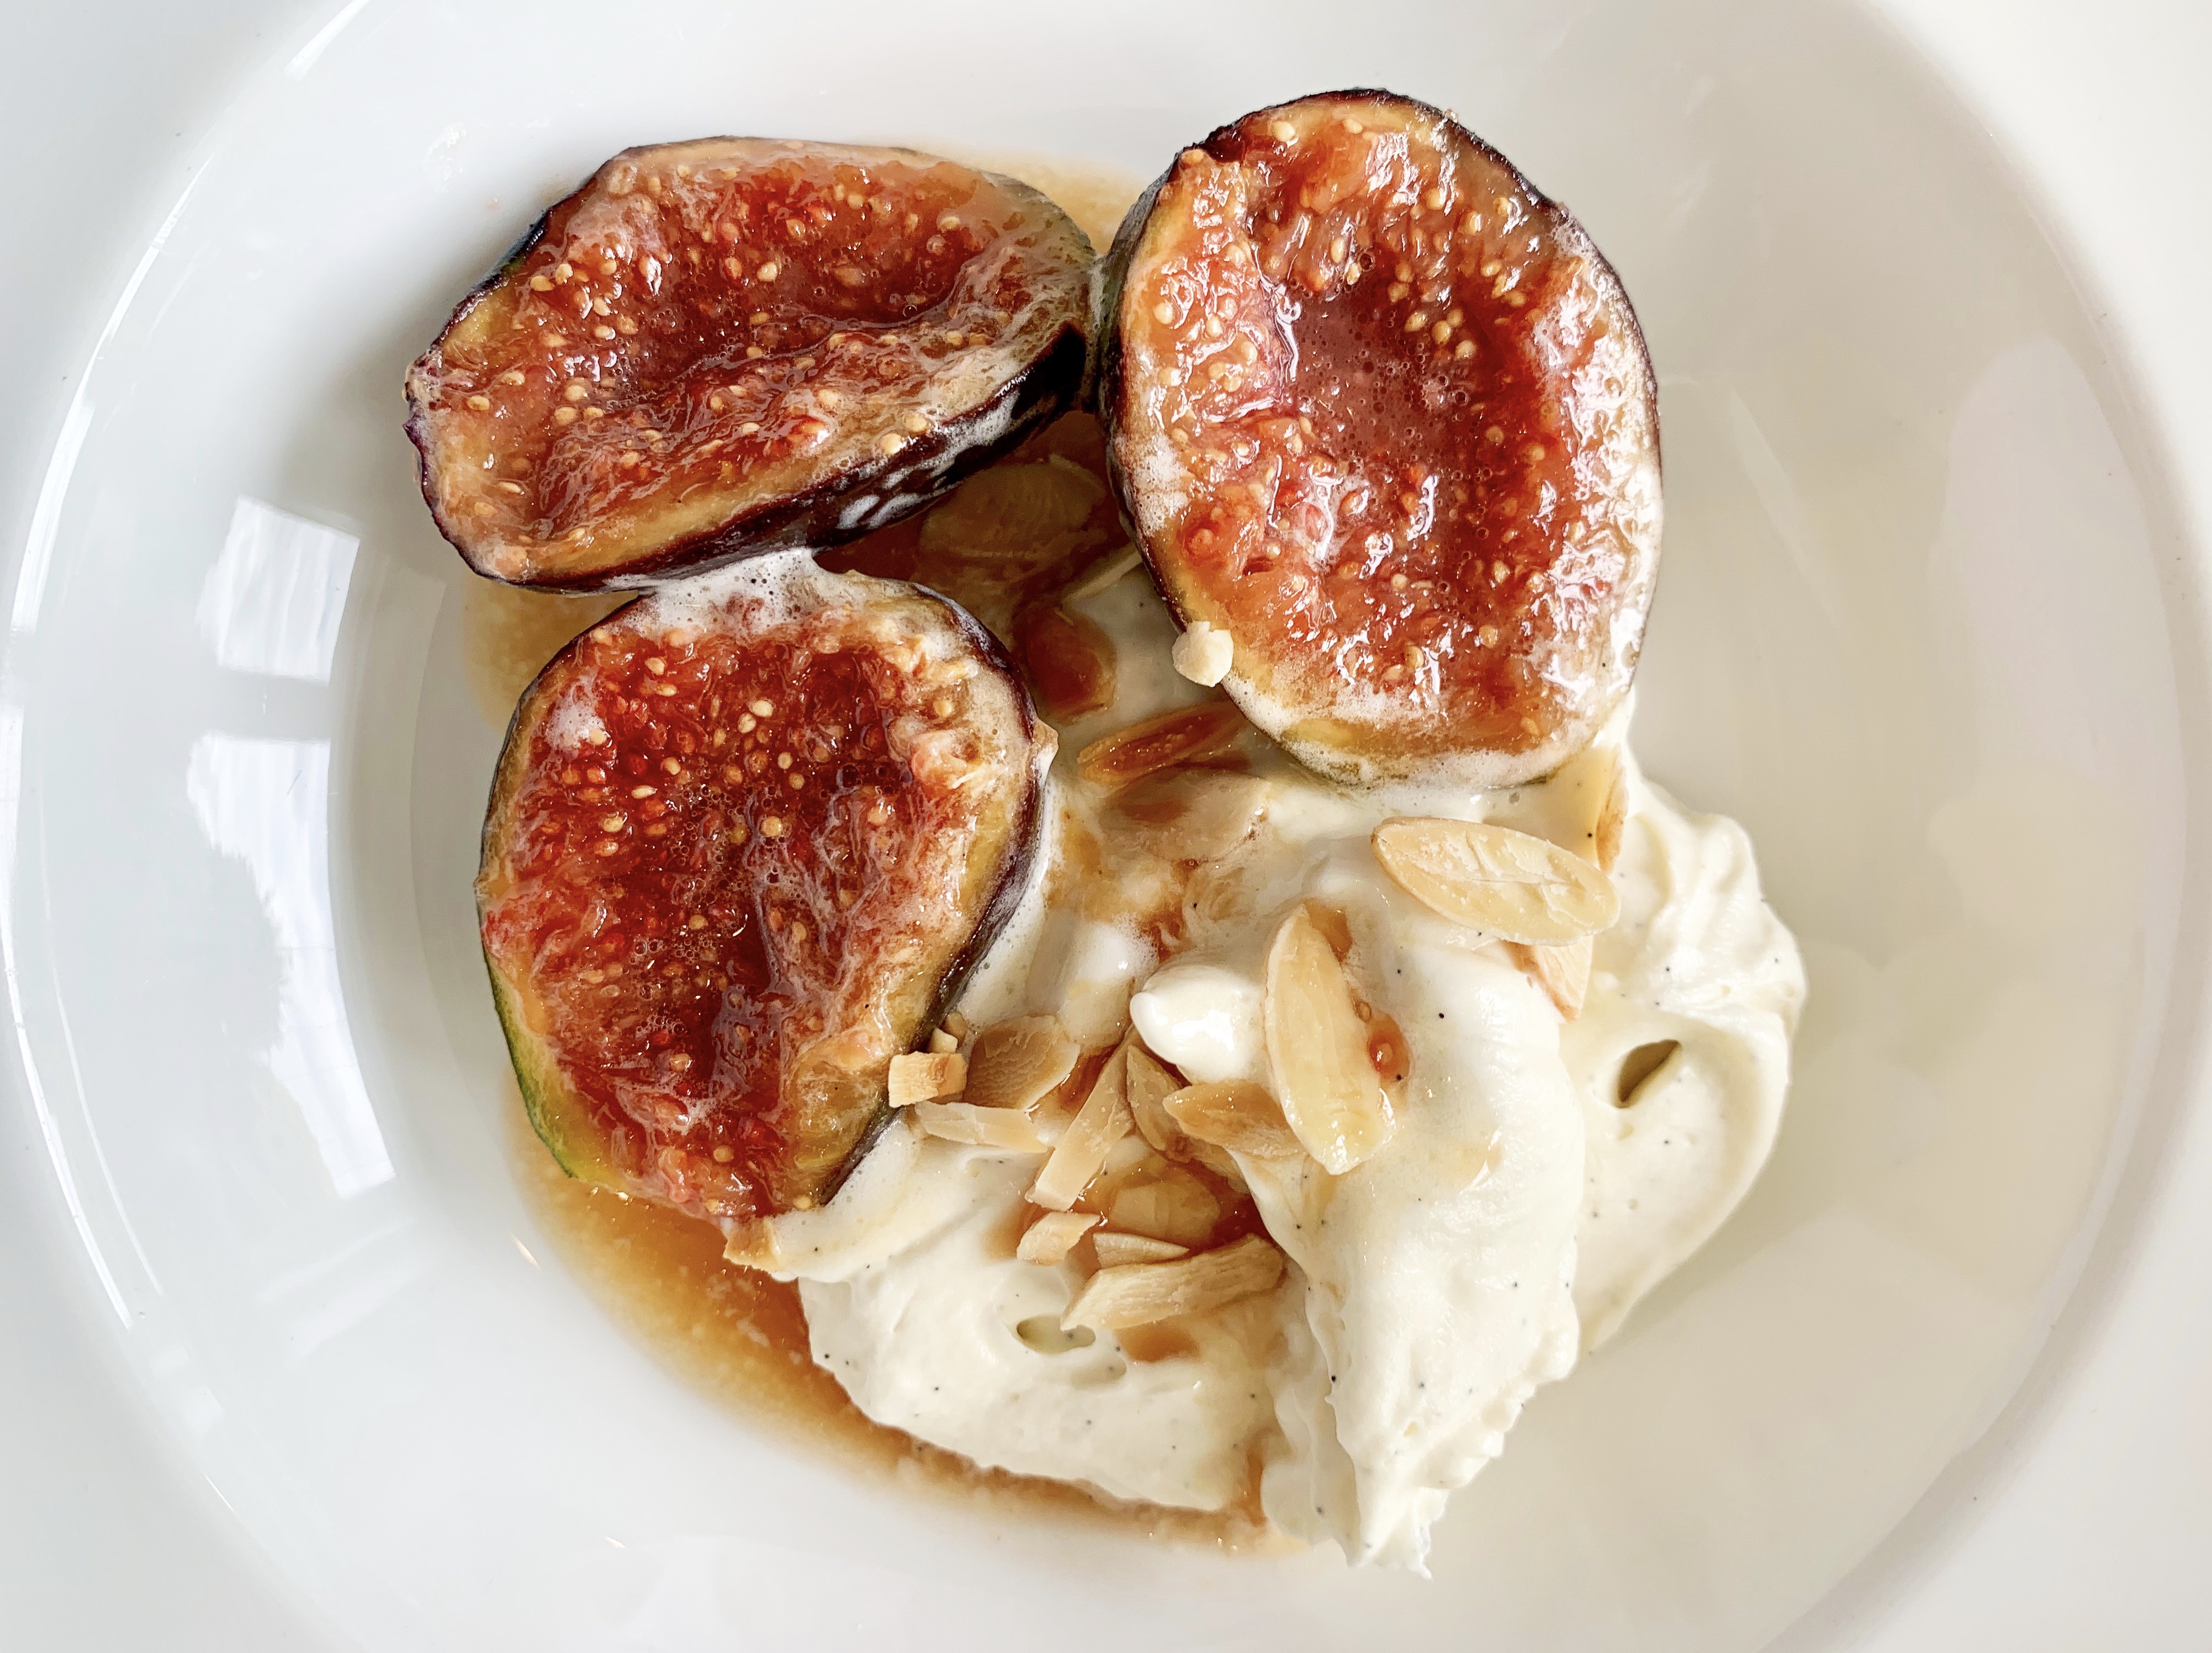
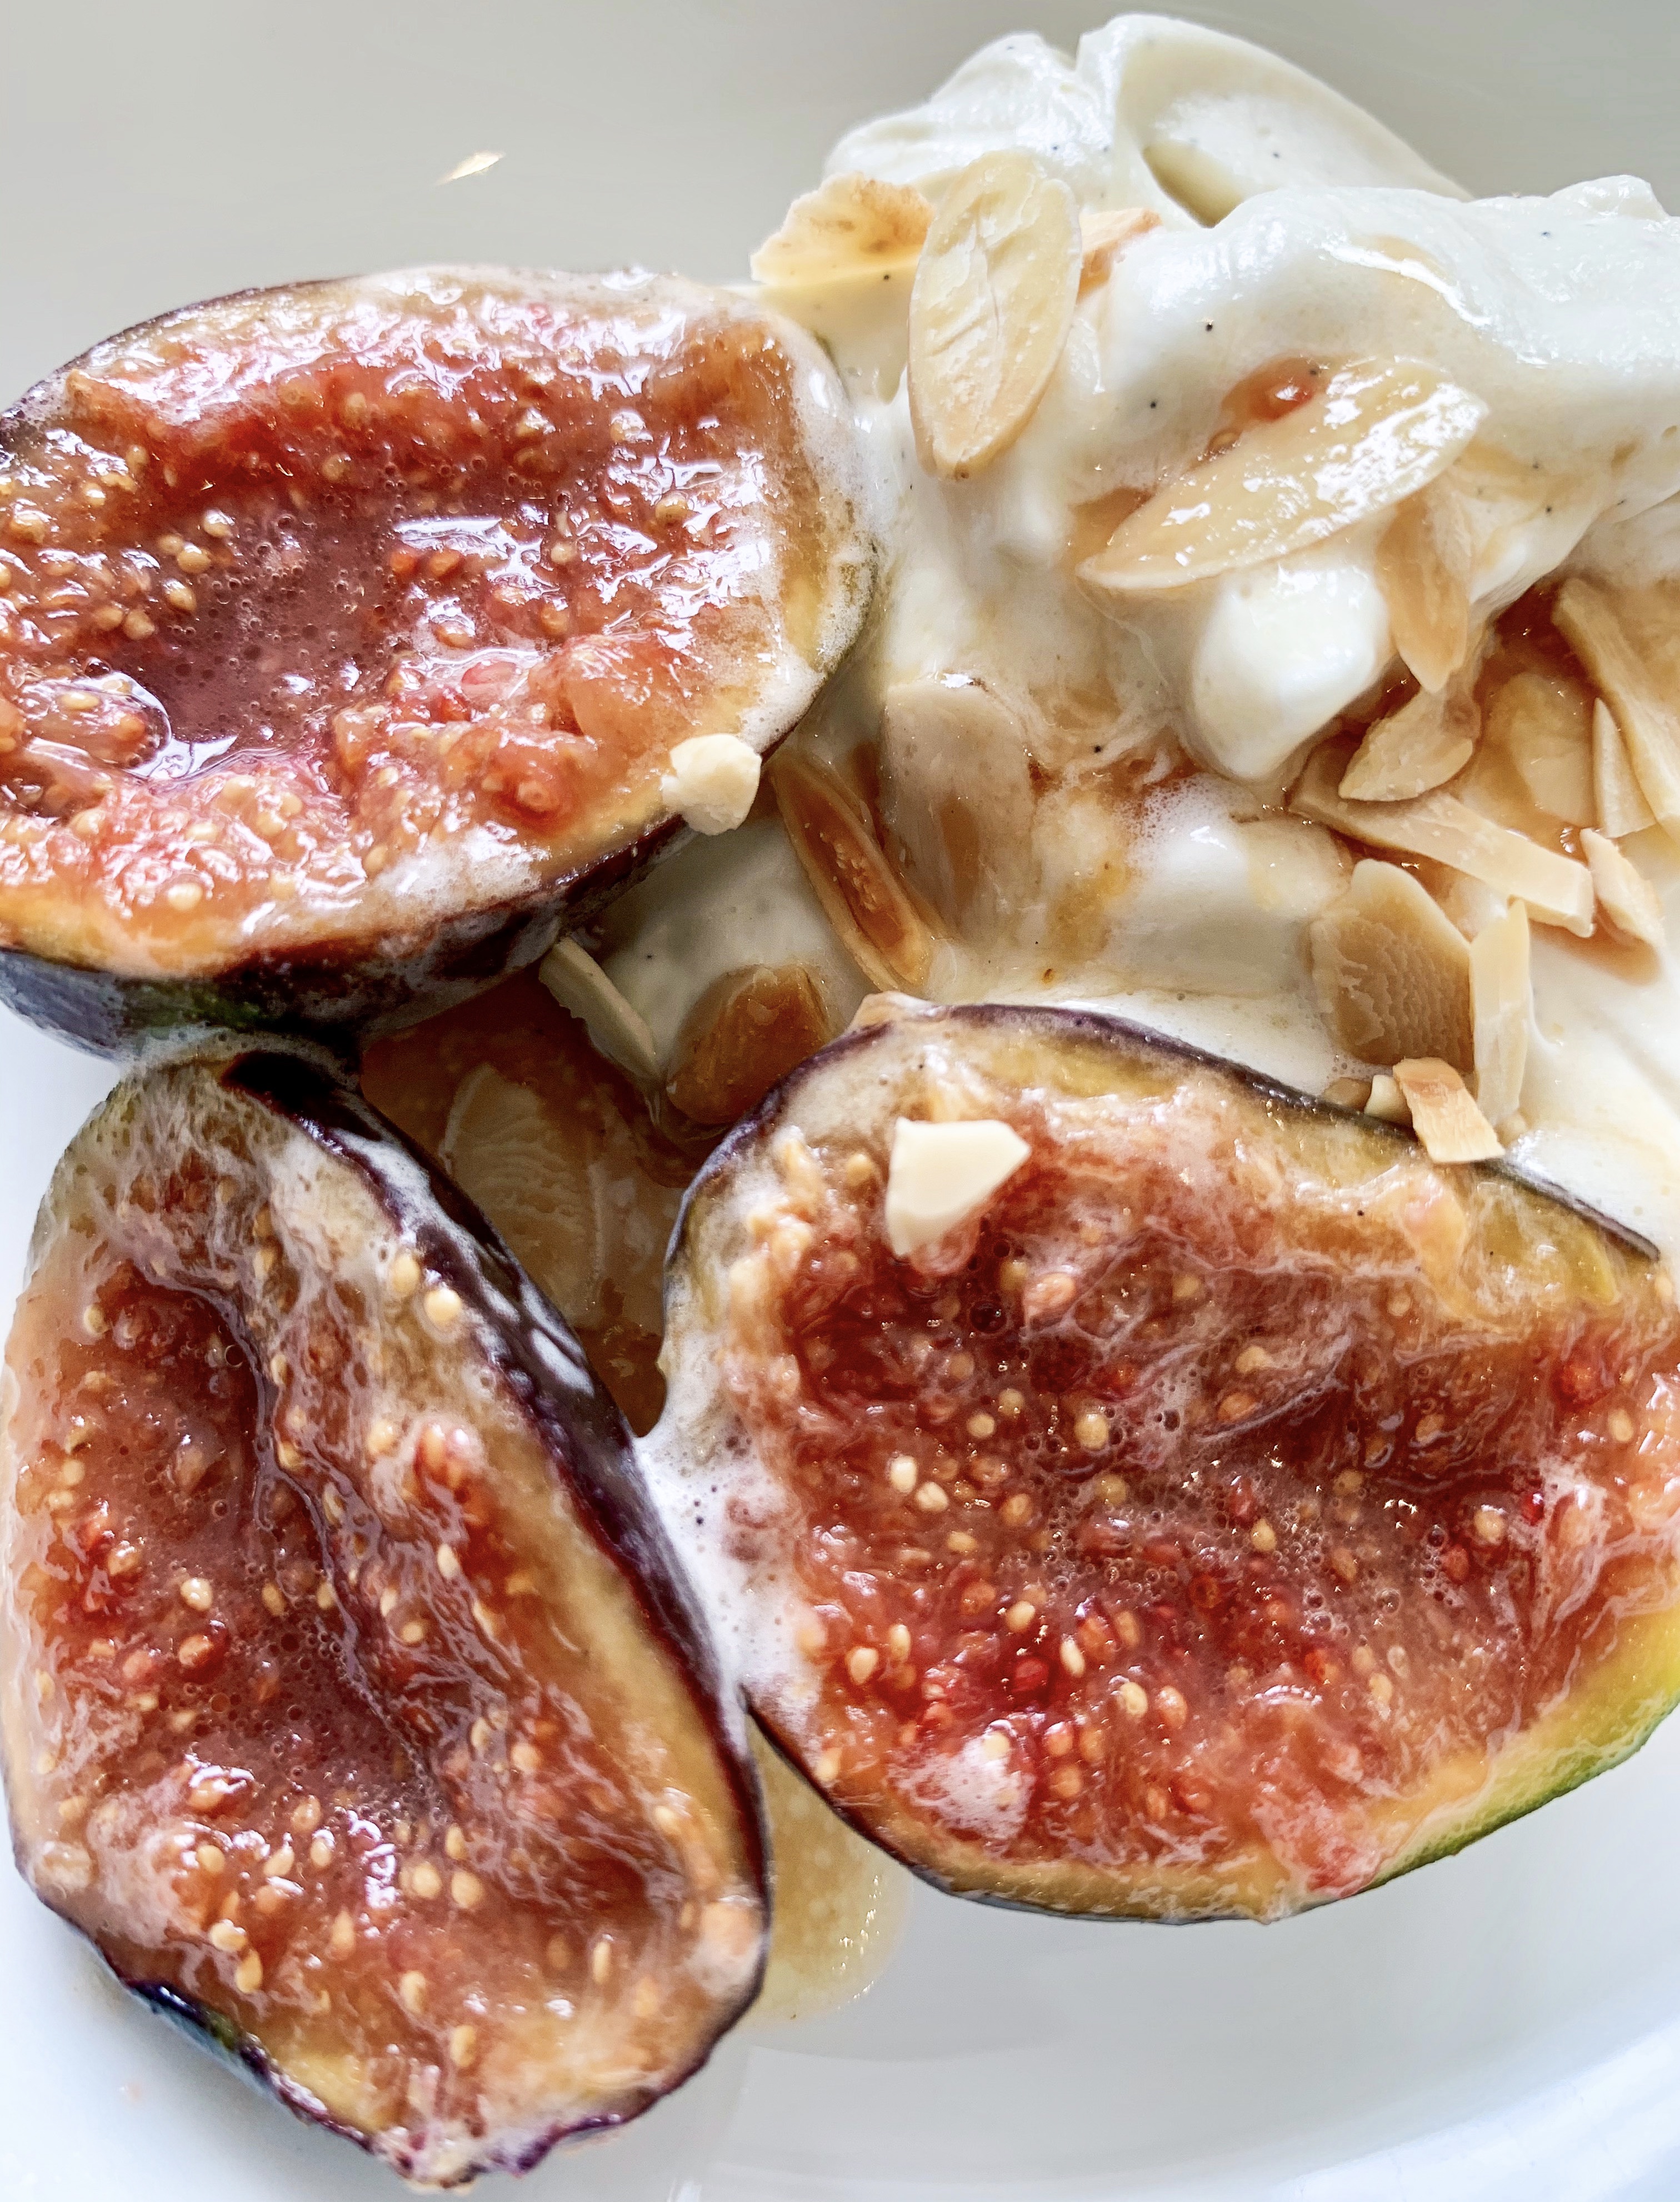
This must be one of the quickest desserts – perfect for a midweek treat…(and it almost feels healthy as it’s fruit!!). Like Maderia wine, Marsala wine, once opened can be kept refrigerated for some months without deteriorating, it is great to have around as just a splash will often lift a simple sauce – try it!…
200g mascarpone cheese
2 tablespoons icing sugar
2 teaspoons vanilla paste
20g unsalted butter
8 ripe figs
1-2 teaspoons honey
4 tablespoons Marsala wine
30g sliced almonds, toasted in dry frying pan (optional)
- Place the mascarpone, sugar and vanilla paste in a bowl and use an electric beater to whip for 2 minutes until light and fluffy.
- Melt the butter in a frying pan, once foaming add the figs, rounded side down. Fry for 1 minute. Add the honey and turn the figs over, fry for another minute then pour over the Marsala, allow it to bubble for a minute or so until syrupy.
- Spoon the mascarpone into bowls and top with the figs and some of the sauce. To finish sprinkle with the toasted almonds.
- Enjoy!
Coffee and Cardamom ‘No-Churn’ Ice-Cream
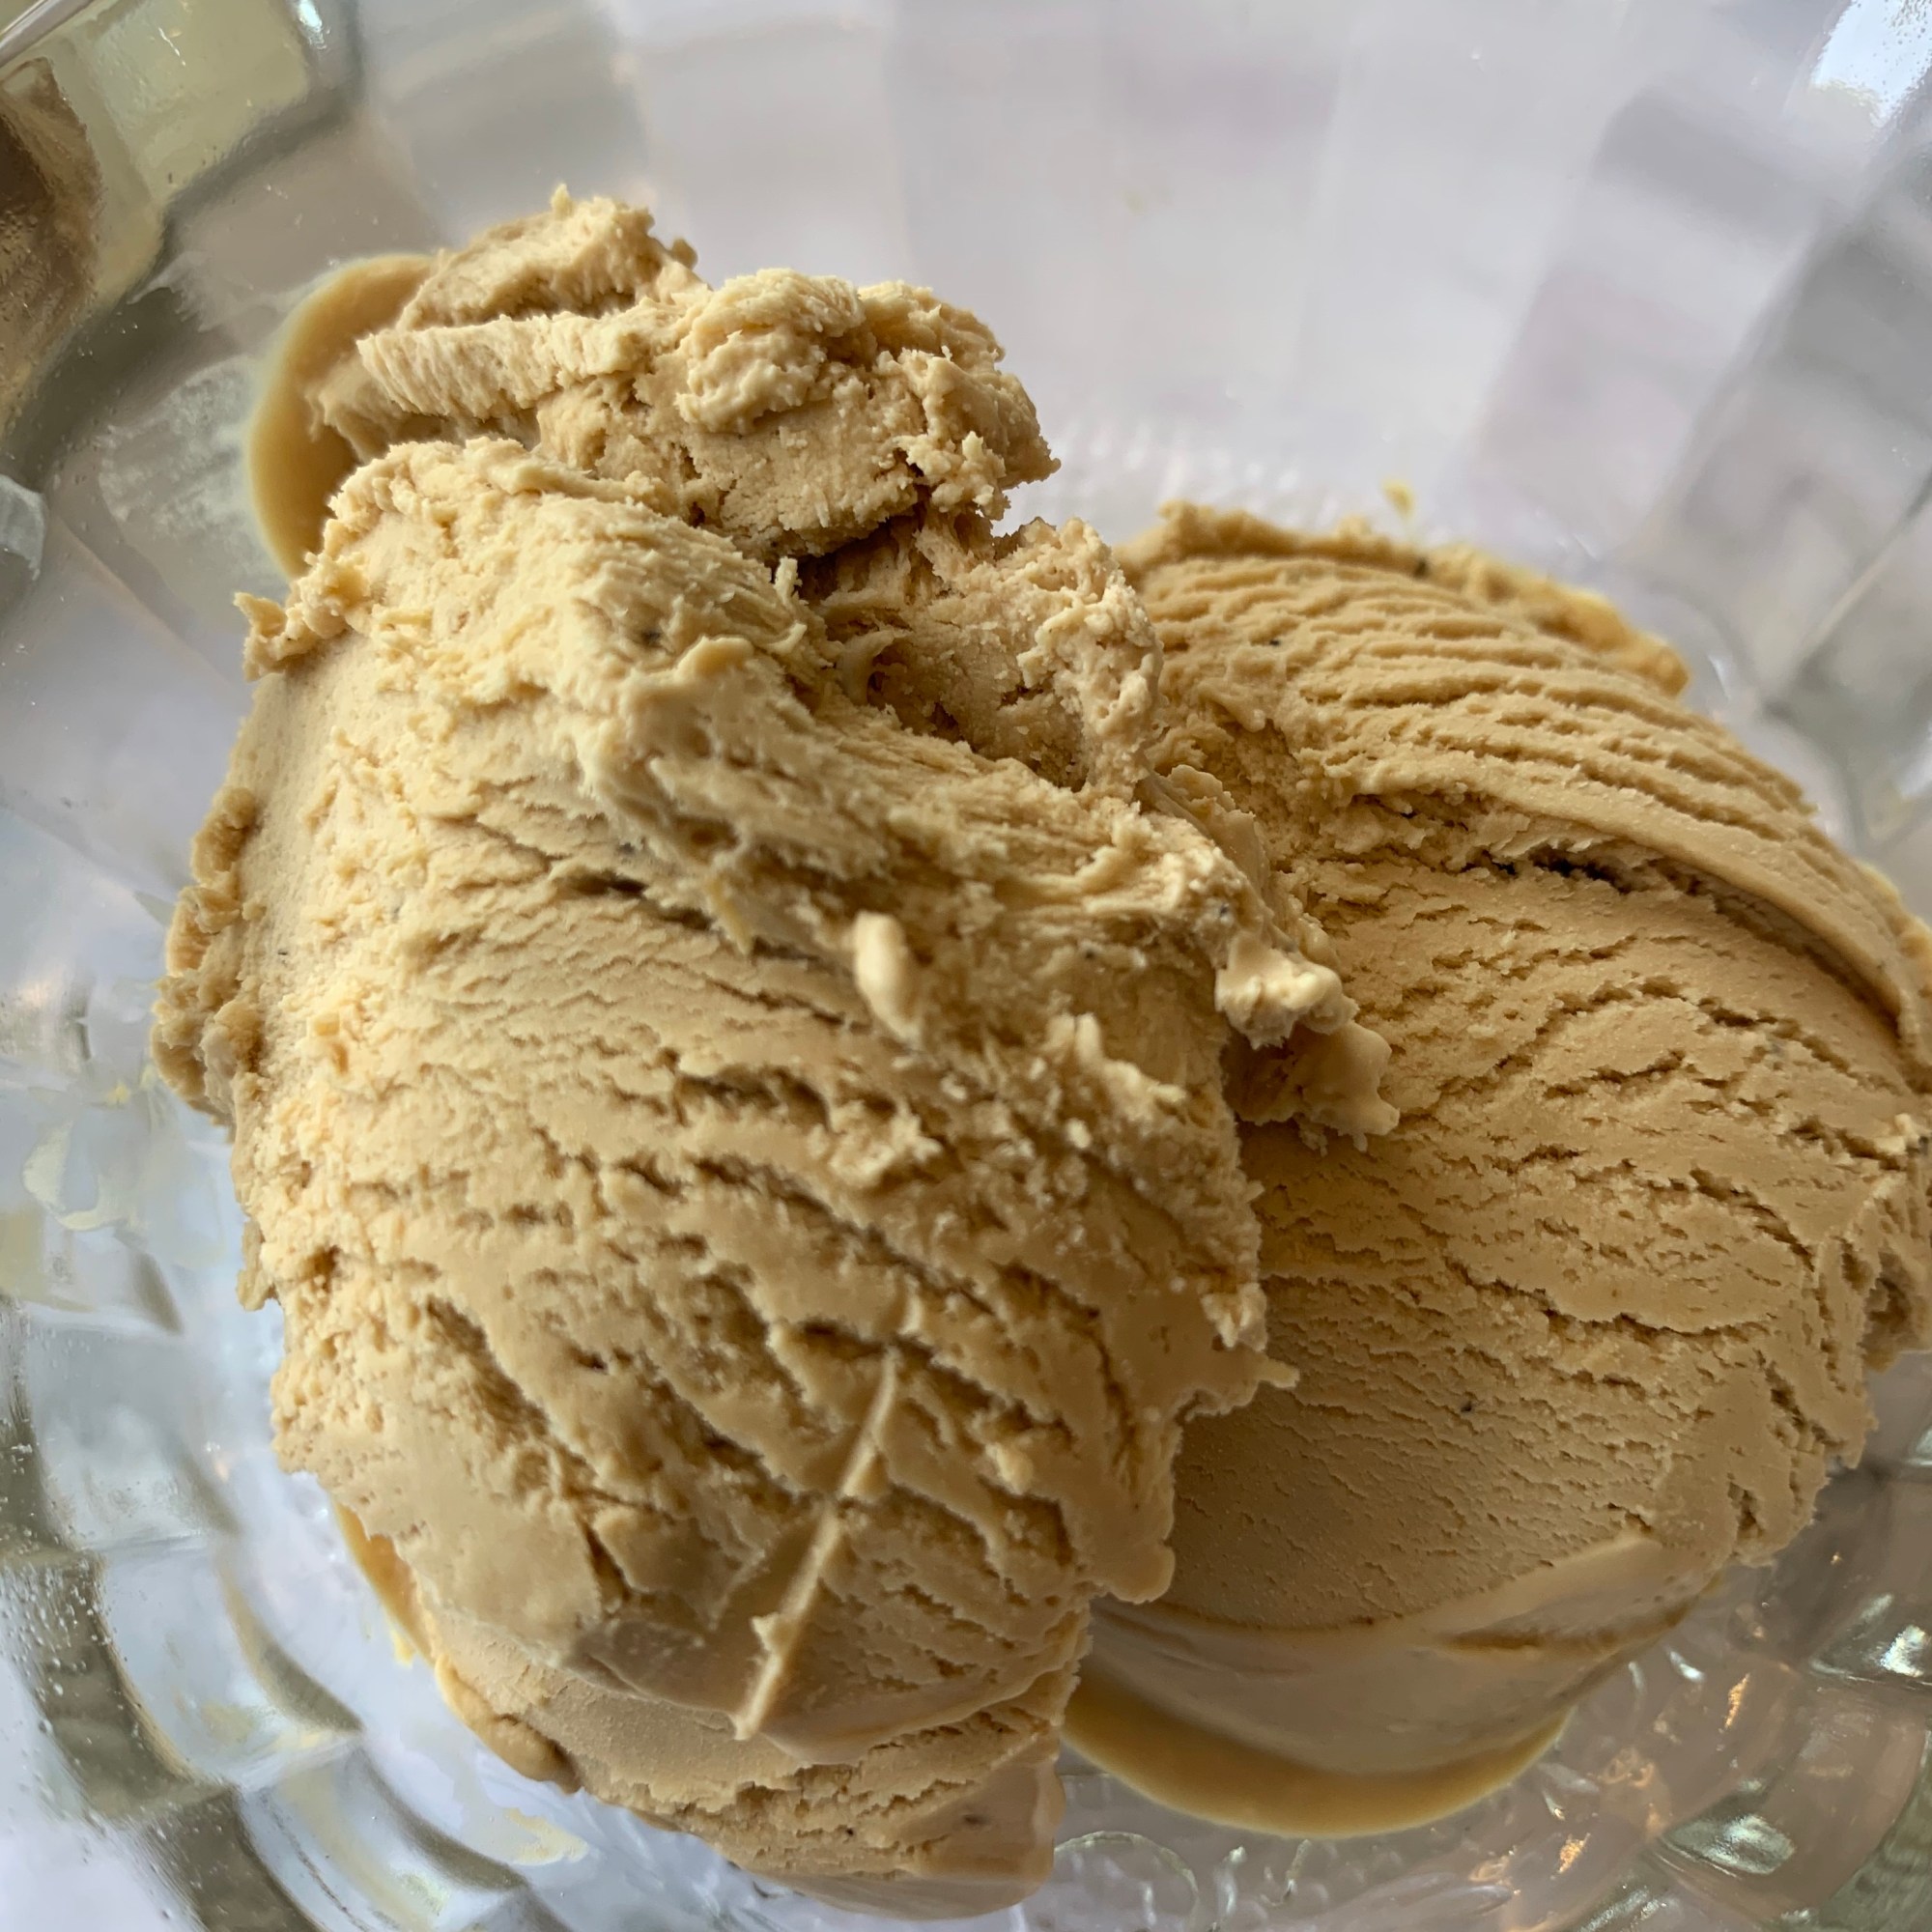
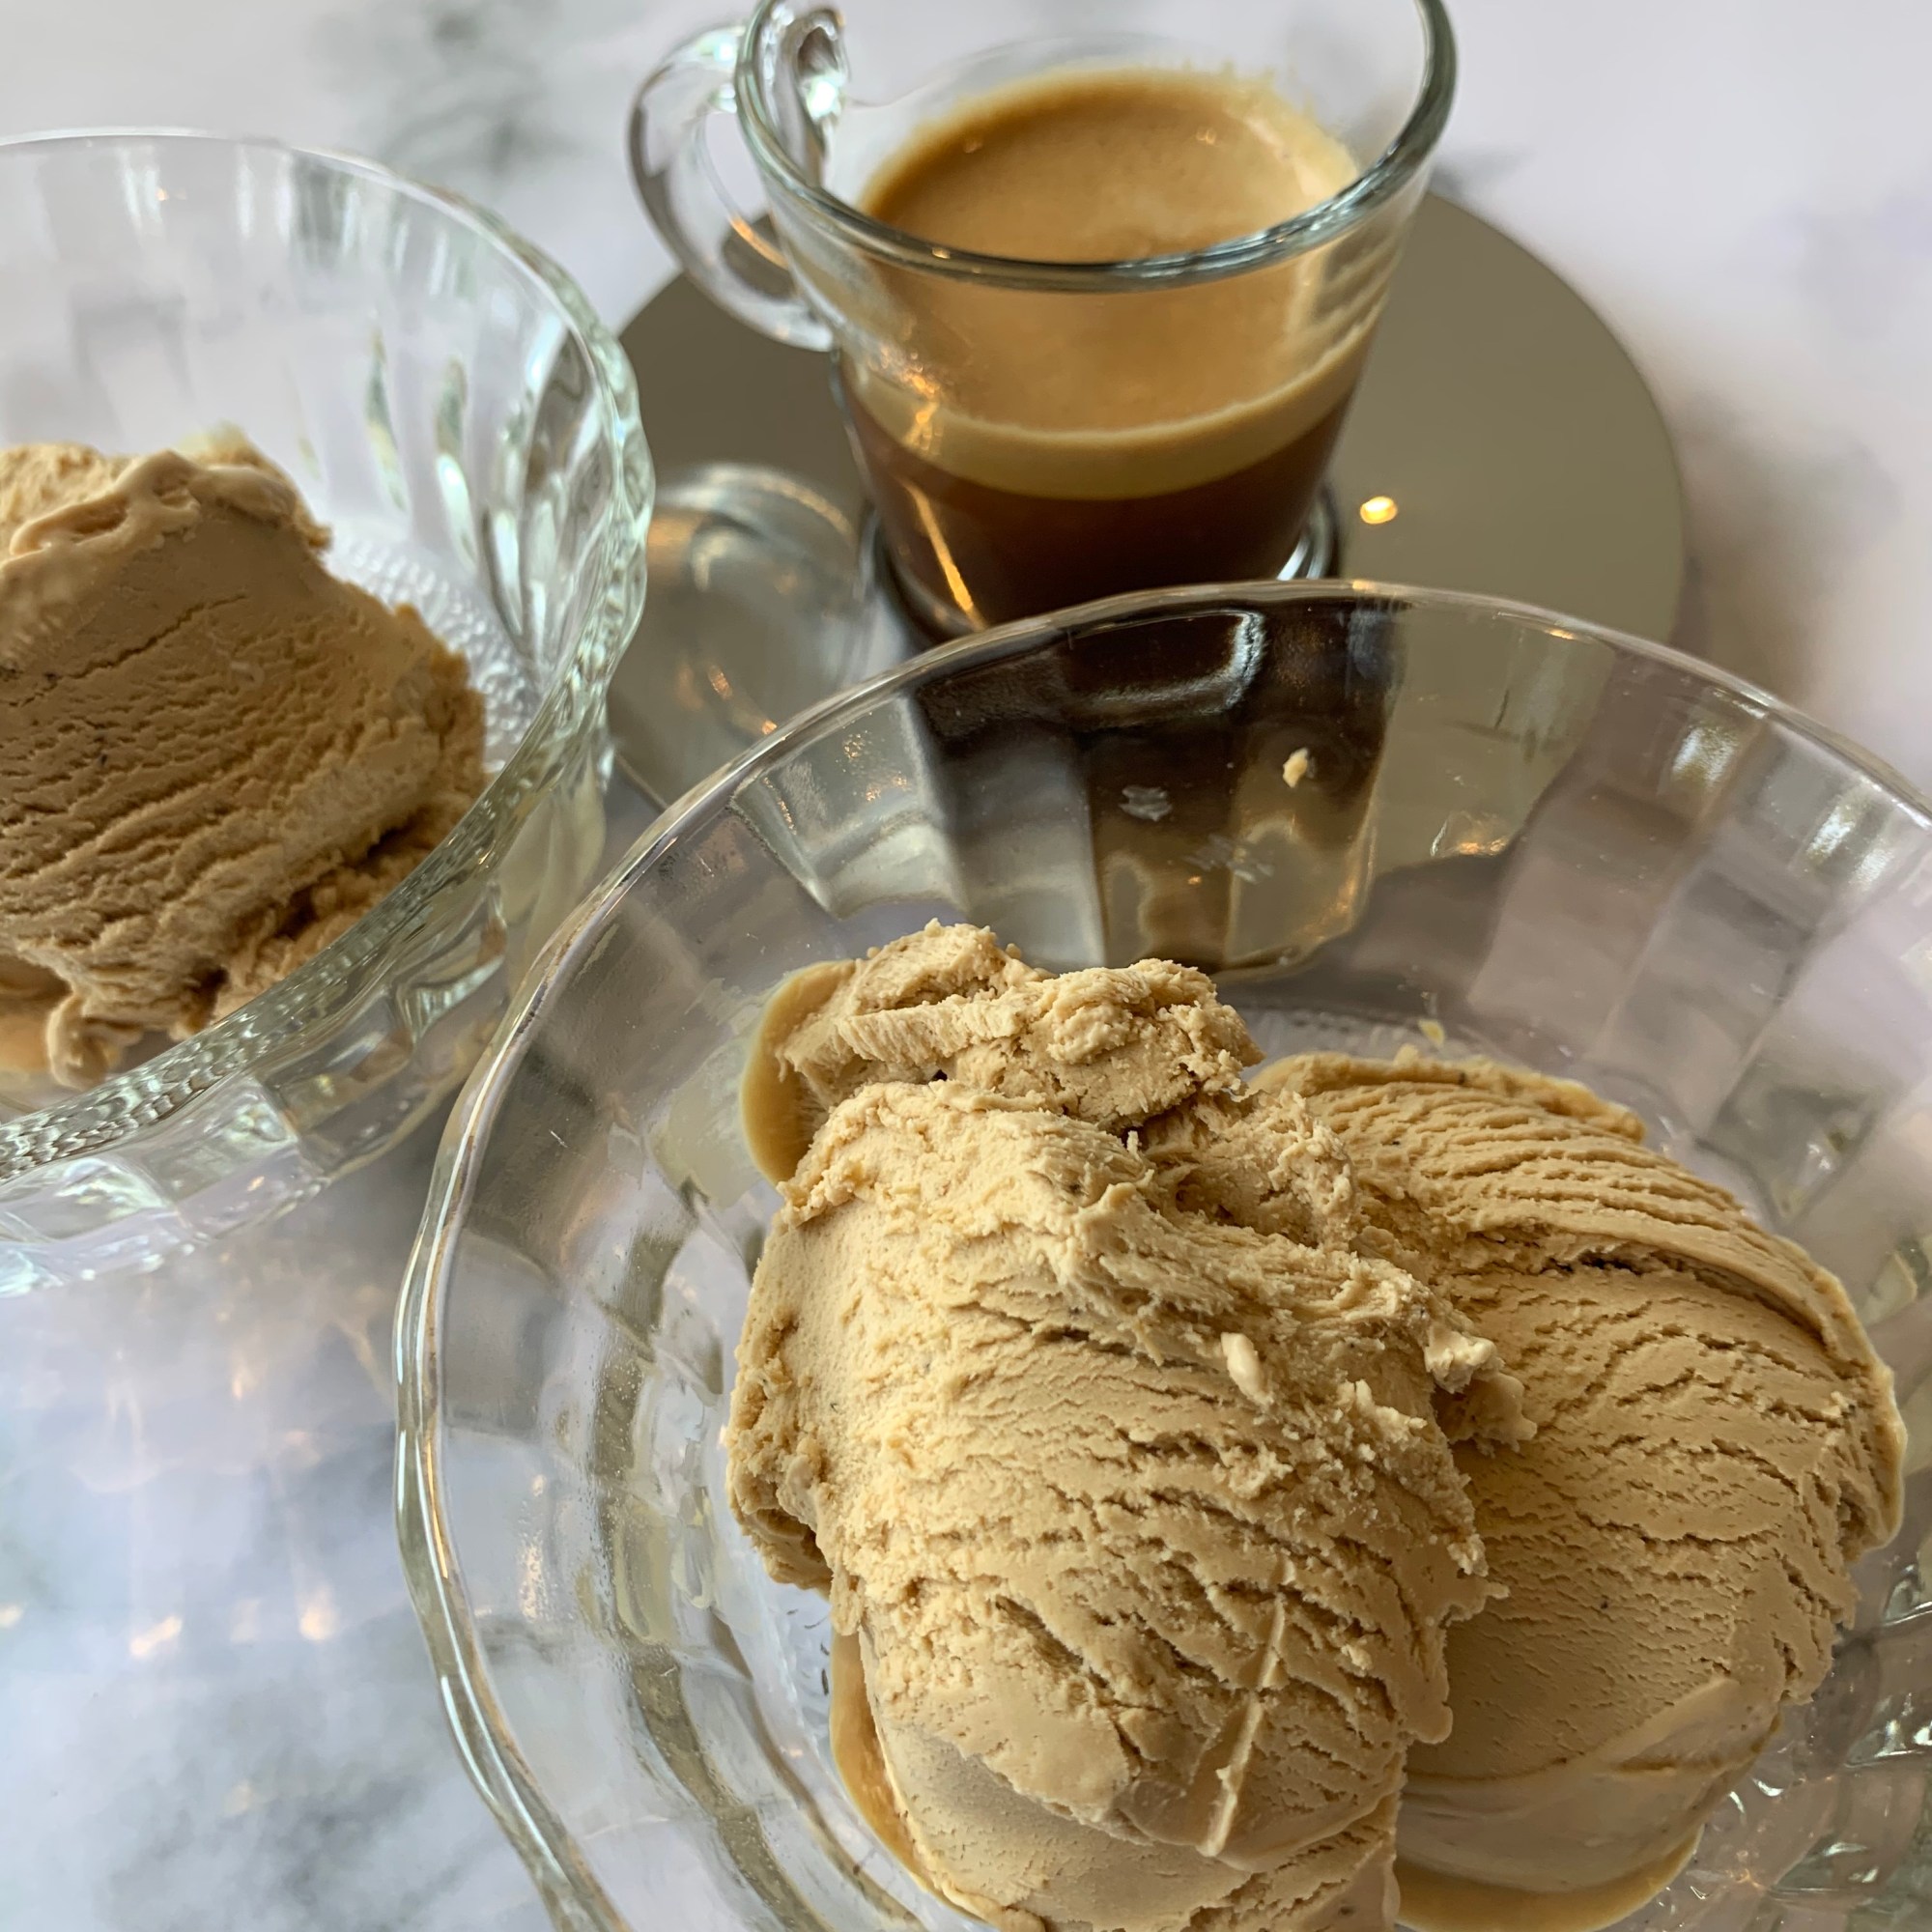
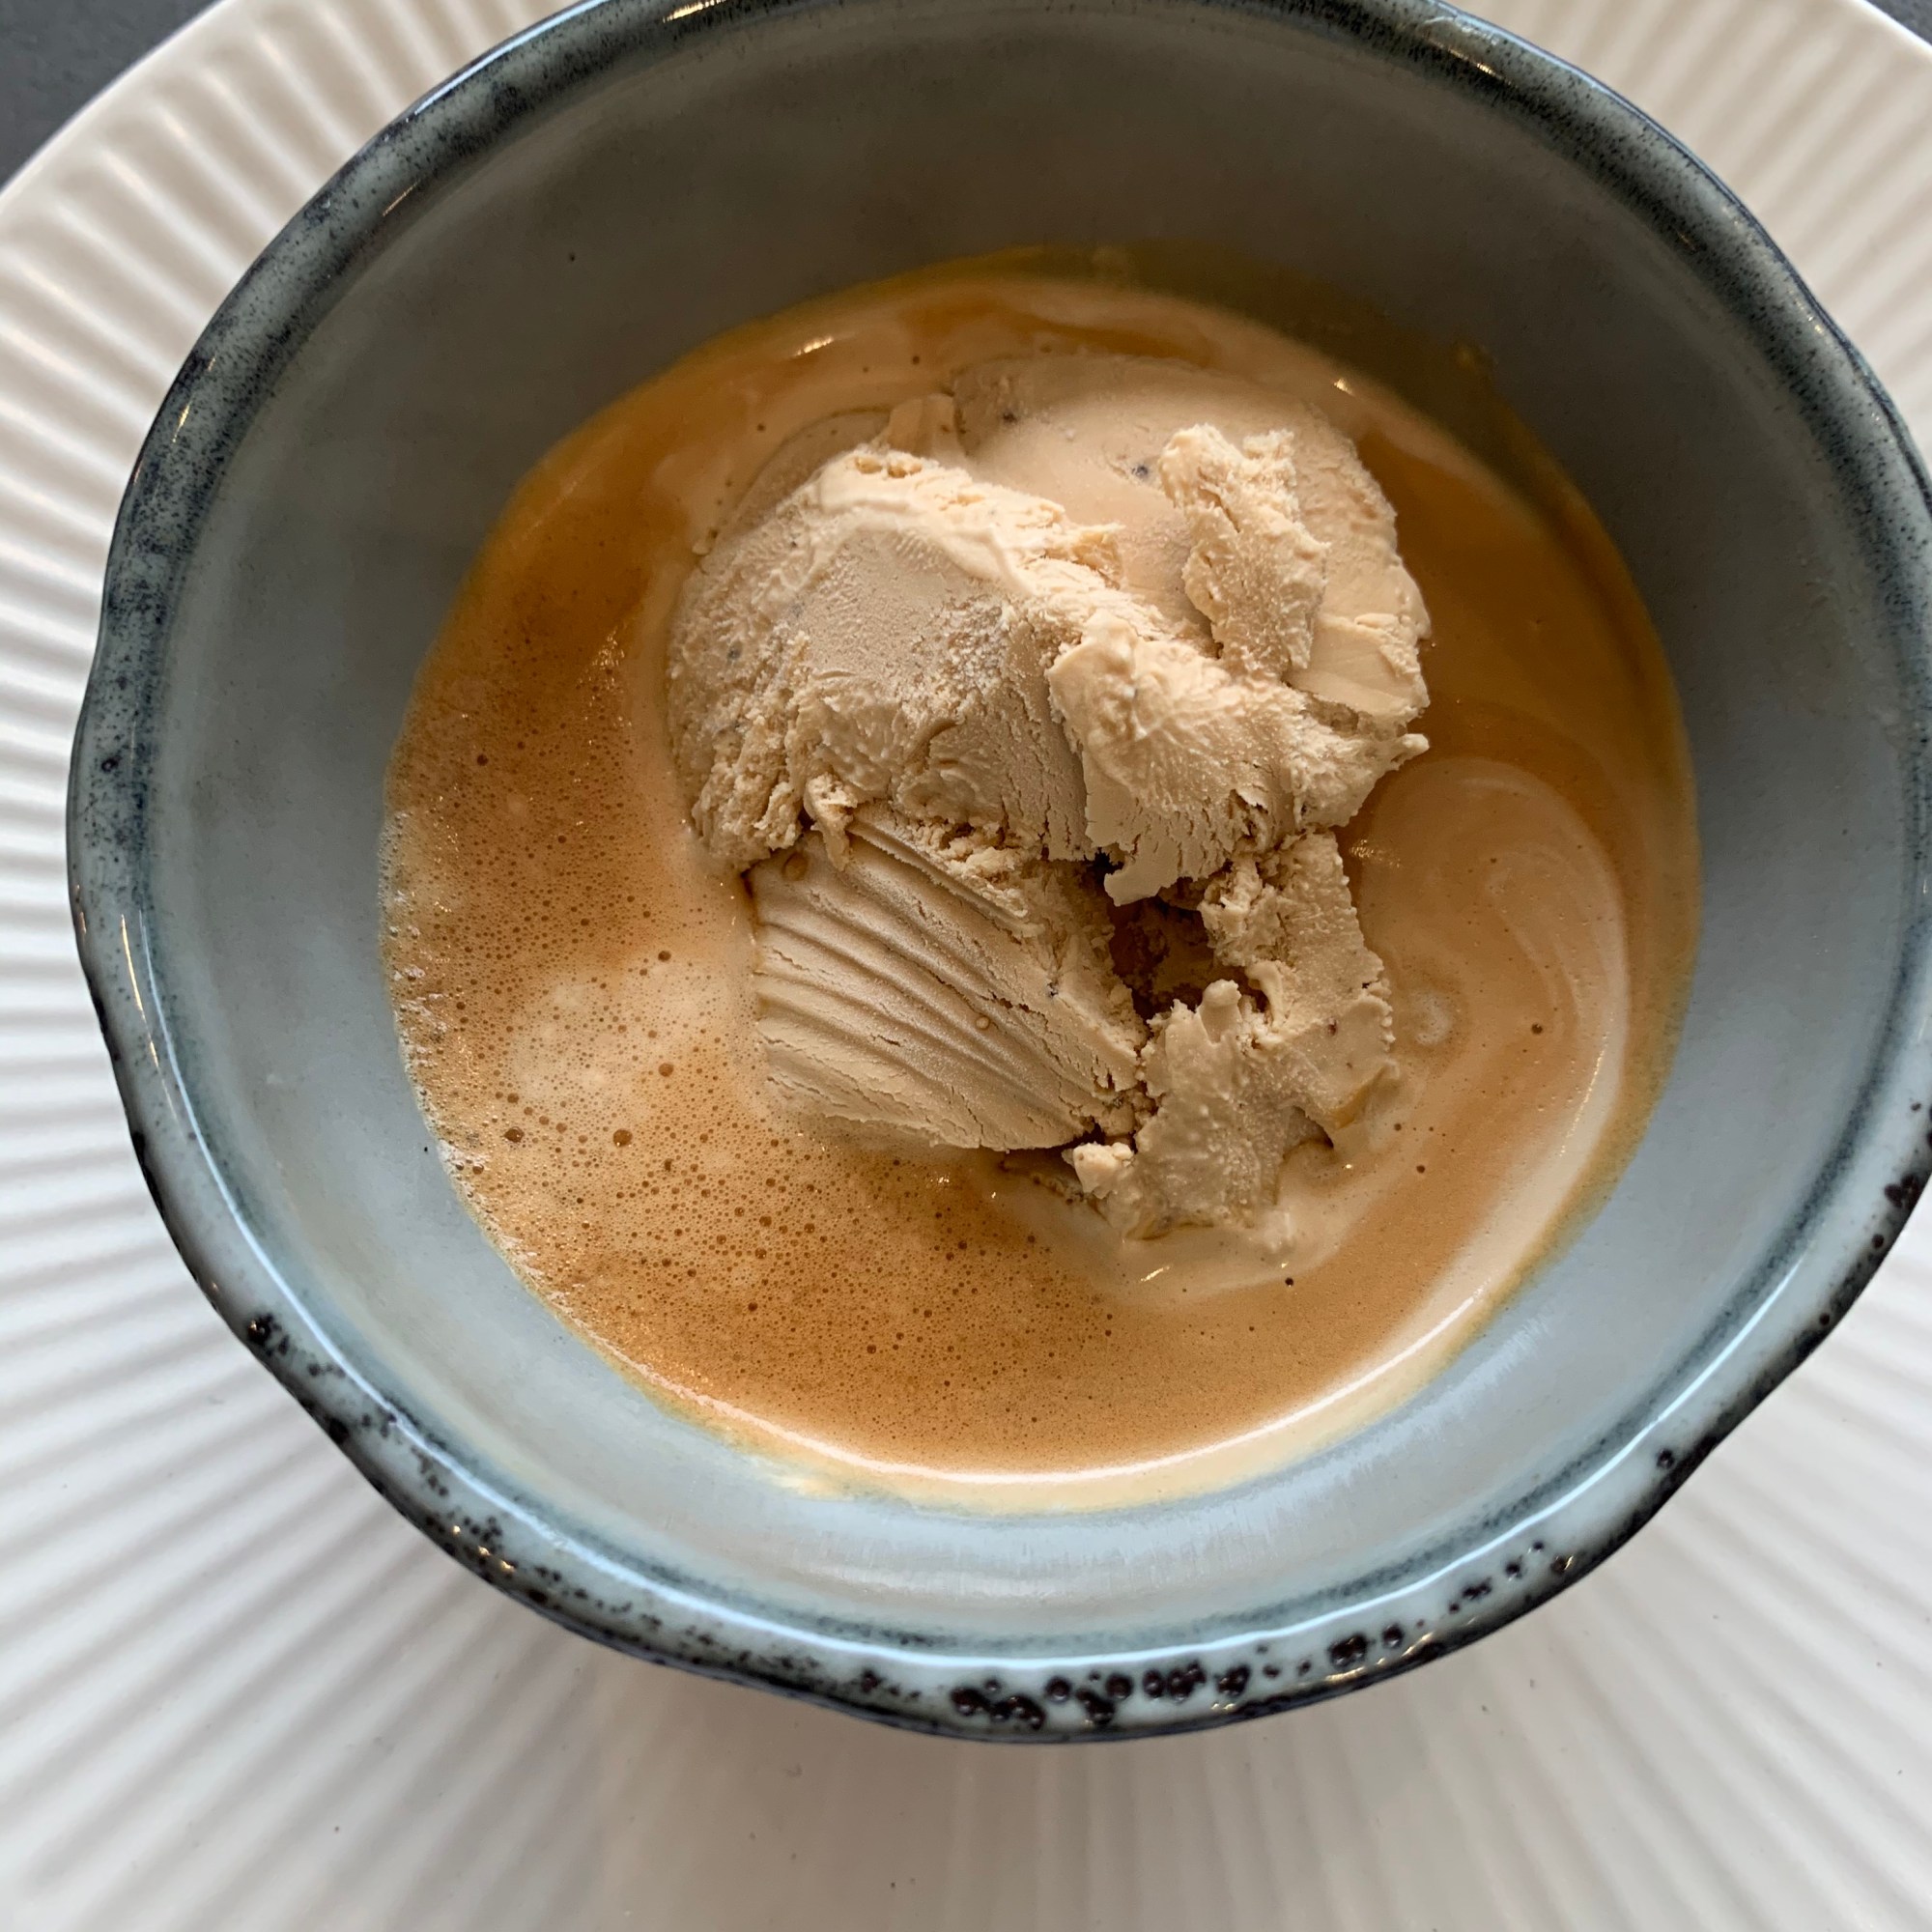
Condensed Milk Ice-Cream has become very popular in recent years, and it is no surprise considering how very easy it is to make – no need for an ice-cream machine! I first came across ice-cream made with condensed milk some years ago, in a cookbook by Nigella Lawson, I have since tried many different versions and this recipe with coffee and cardamom is one of my favourites. It is great served alone or as an ‘affogato‘ (with a shot of espresso poured over it – as pictured above)
2 tablespoons instant espresso
10 green cardamom pods
300ml double cream
175g condensed milk
- Remove the seeds from the cardamom pods and grind with a pestle and mortar.
- Mix the instant espresso and the ground cardamom seeds with 2 tablespoons of boiling water, leave to cool.
- Beat the cream and condensed milk together using electric beaters until the mixture is quite thick, then stir in the spiced coffee.
- Pour the mixture into a freezer-safe container and cover with a lid. Freeze for 6-8 hours or overnight. The ice-cream will keep in the freezer for up to 3 months.
- To serve, remove from the freezer about 5-10 minutes before serving so that it softens.
Strawberry ‘No-Churn’ Ice-Cream
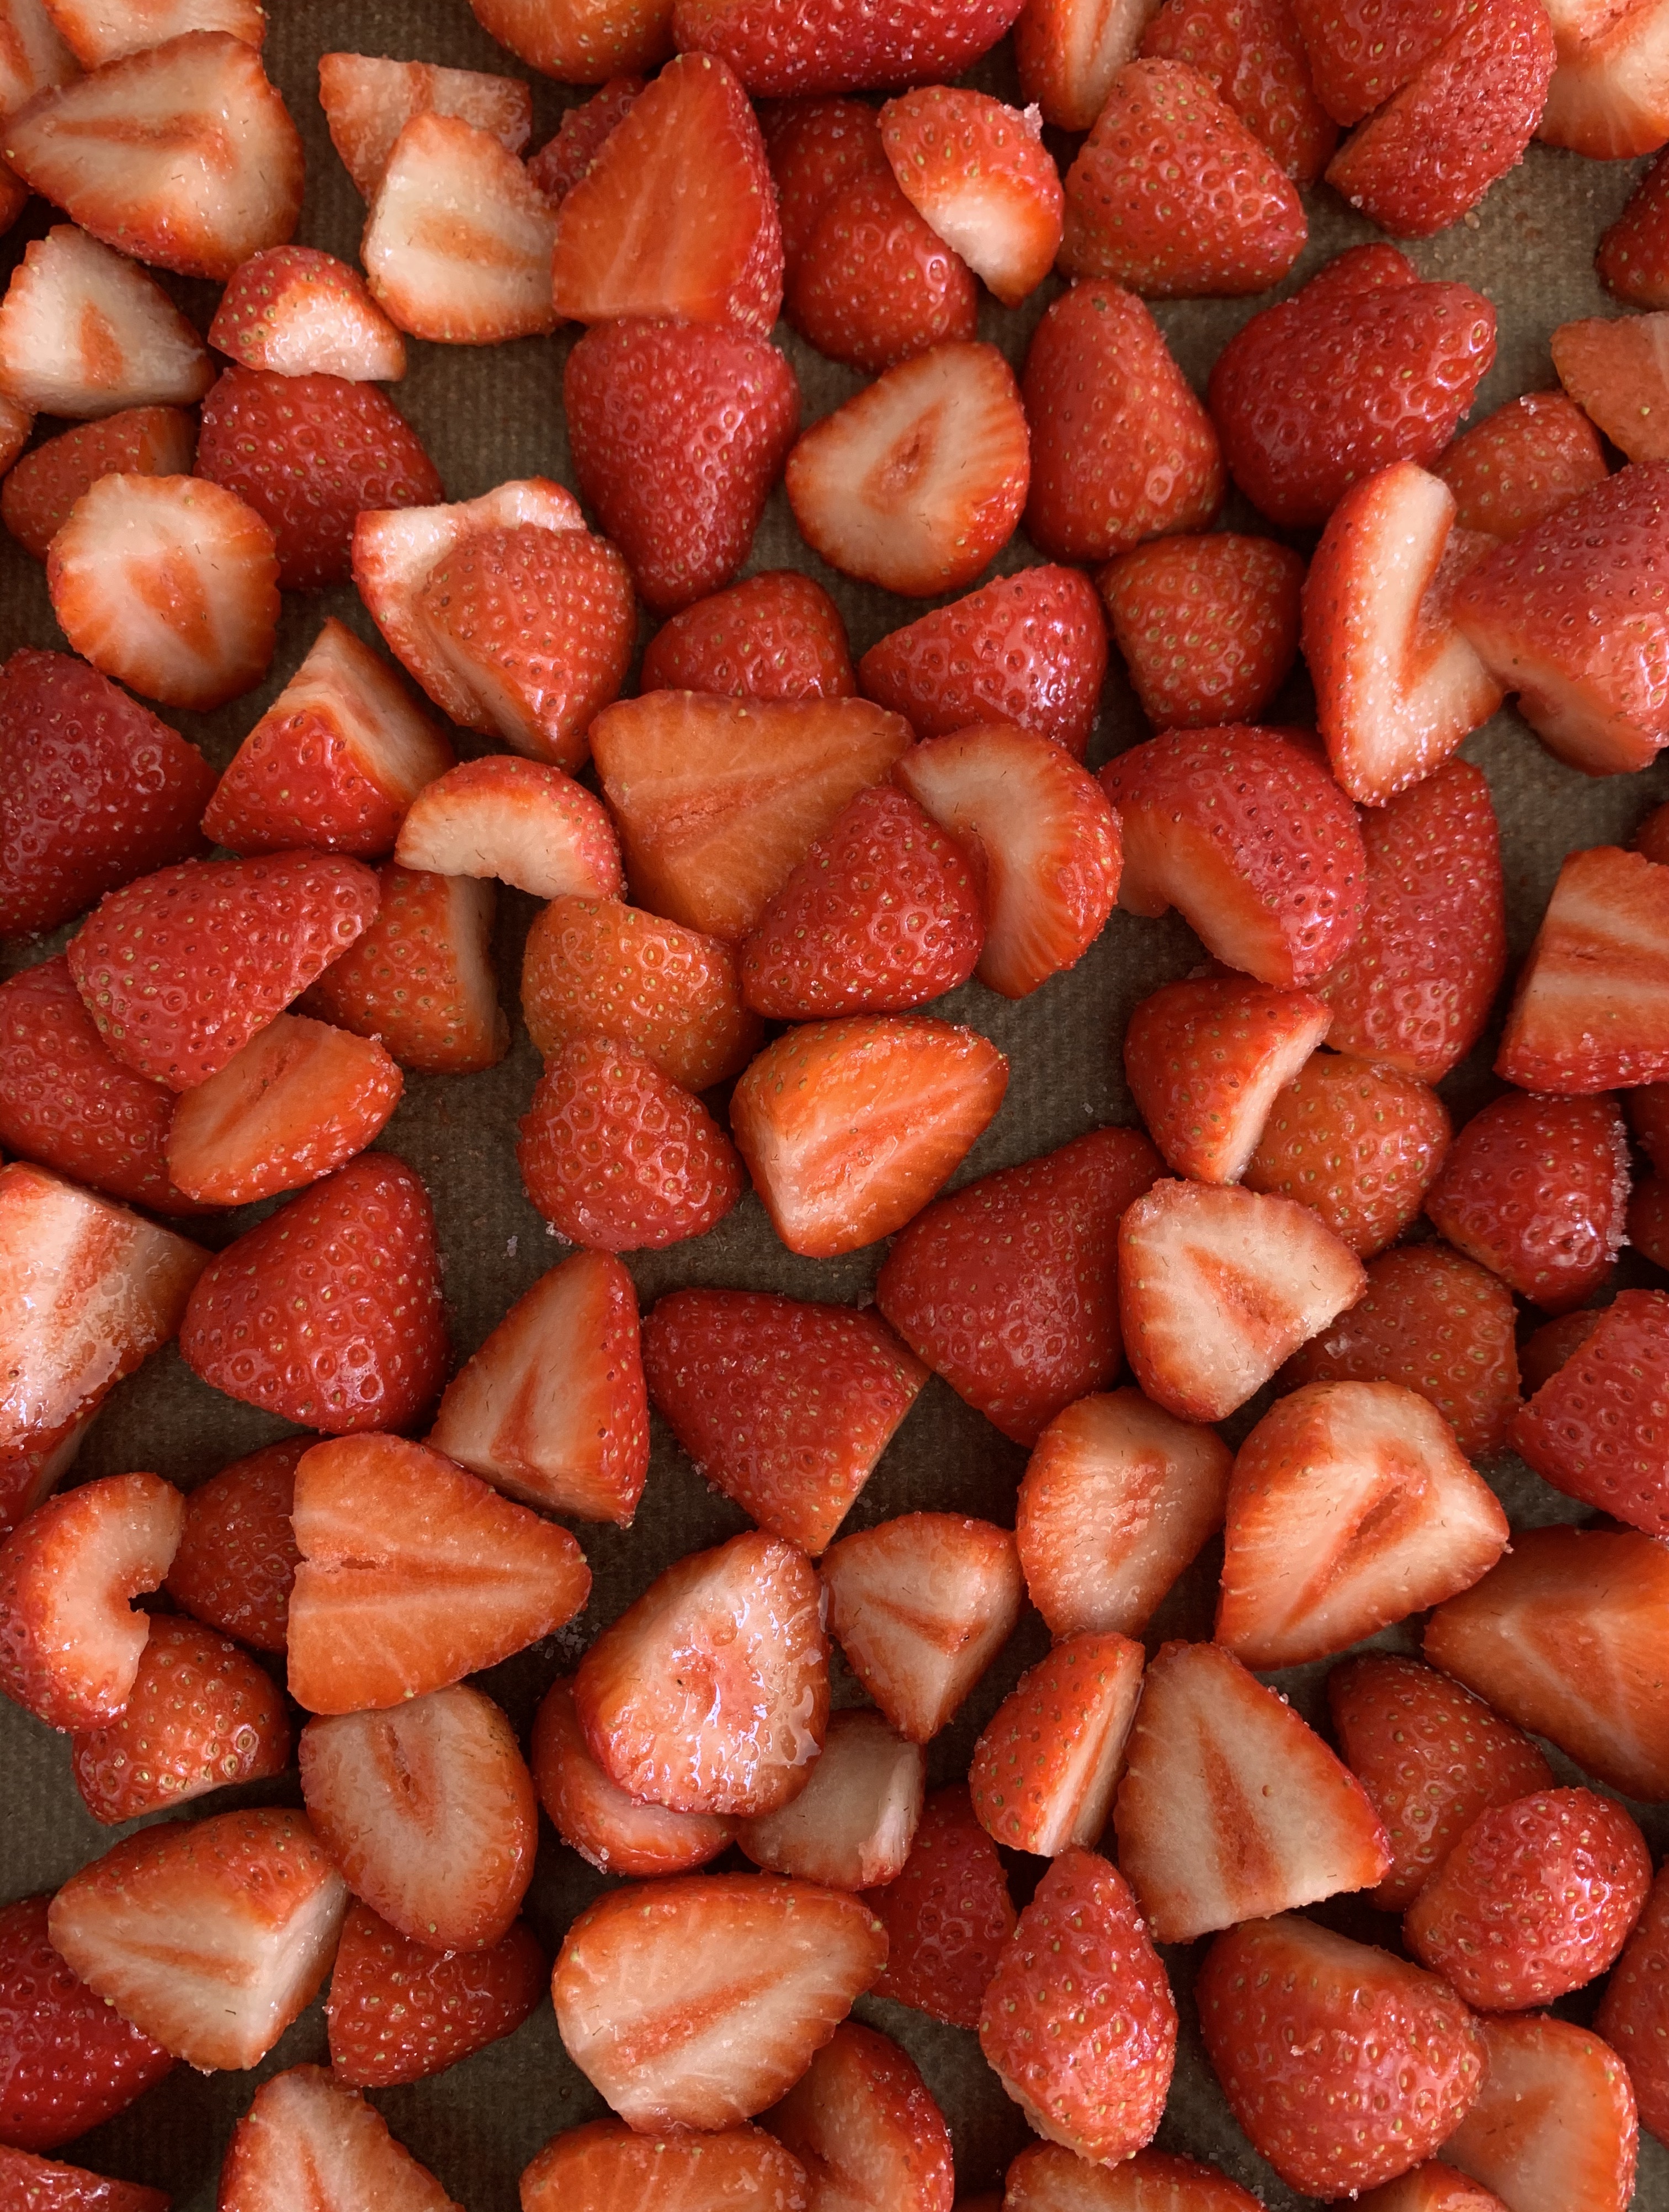
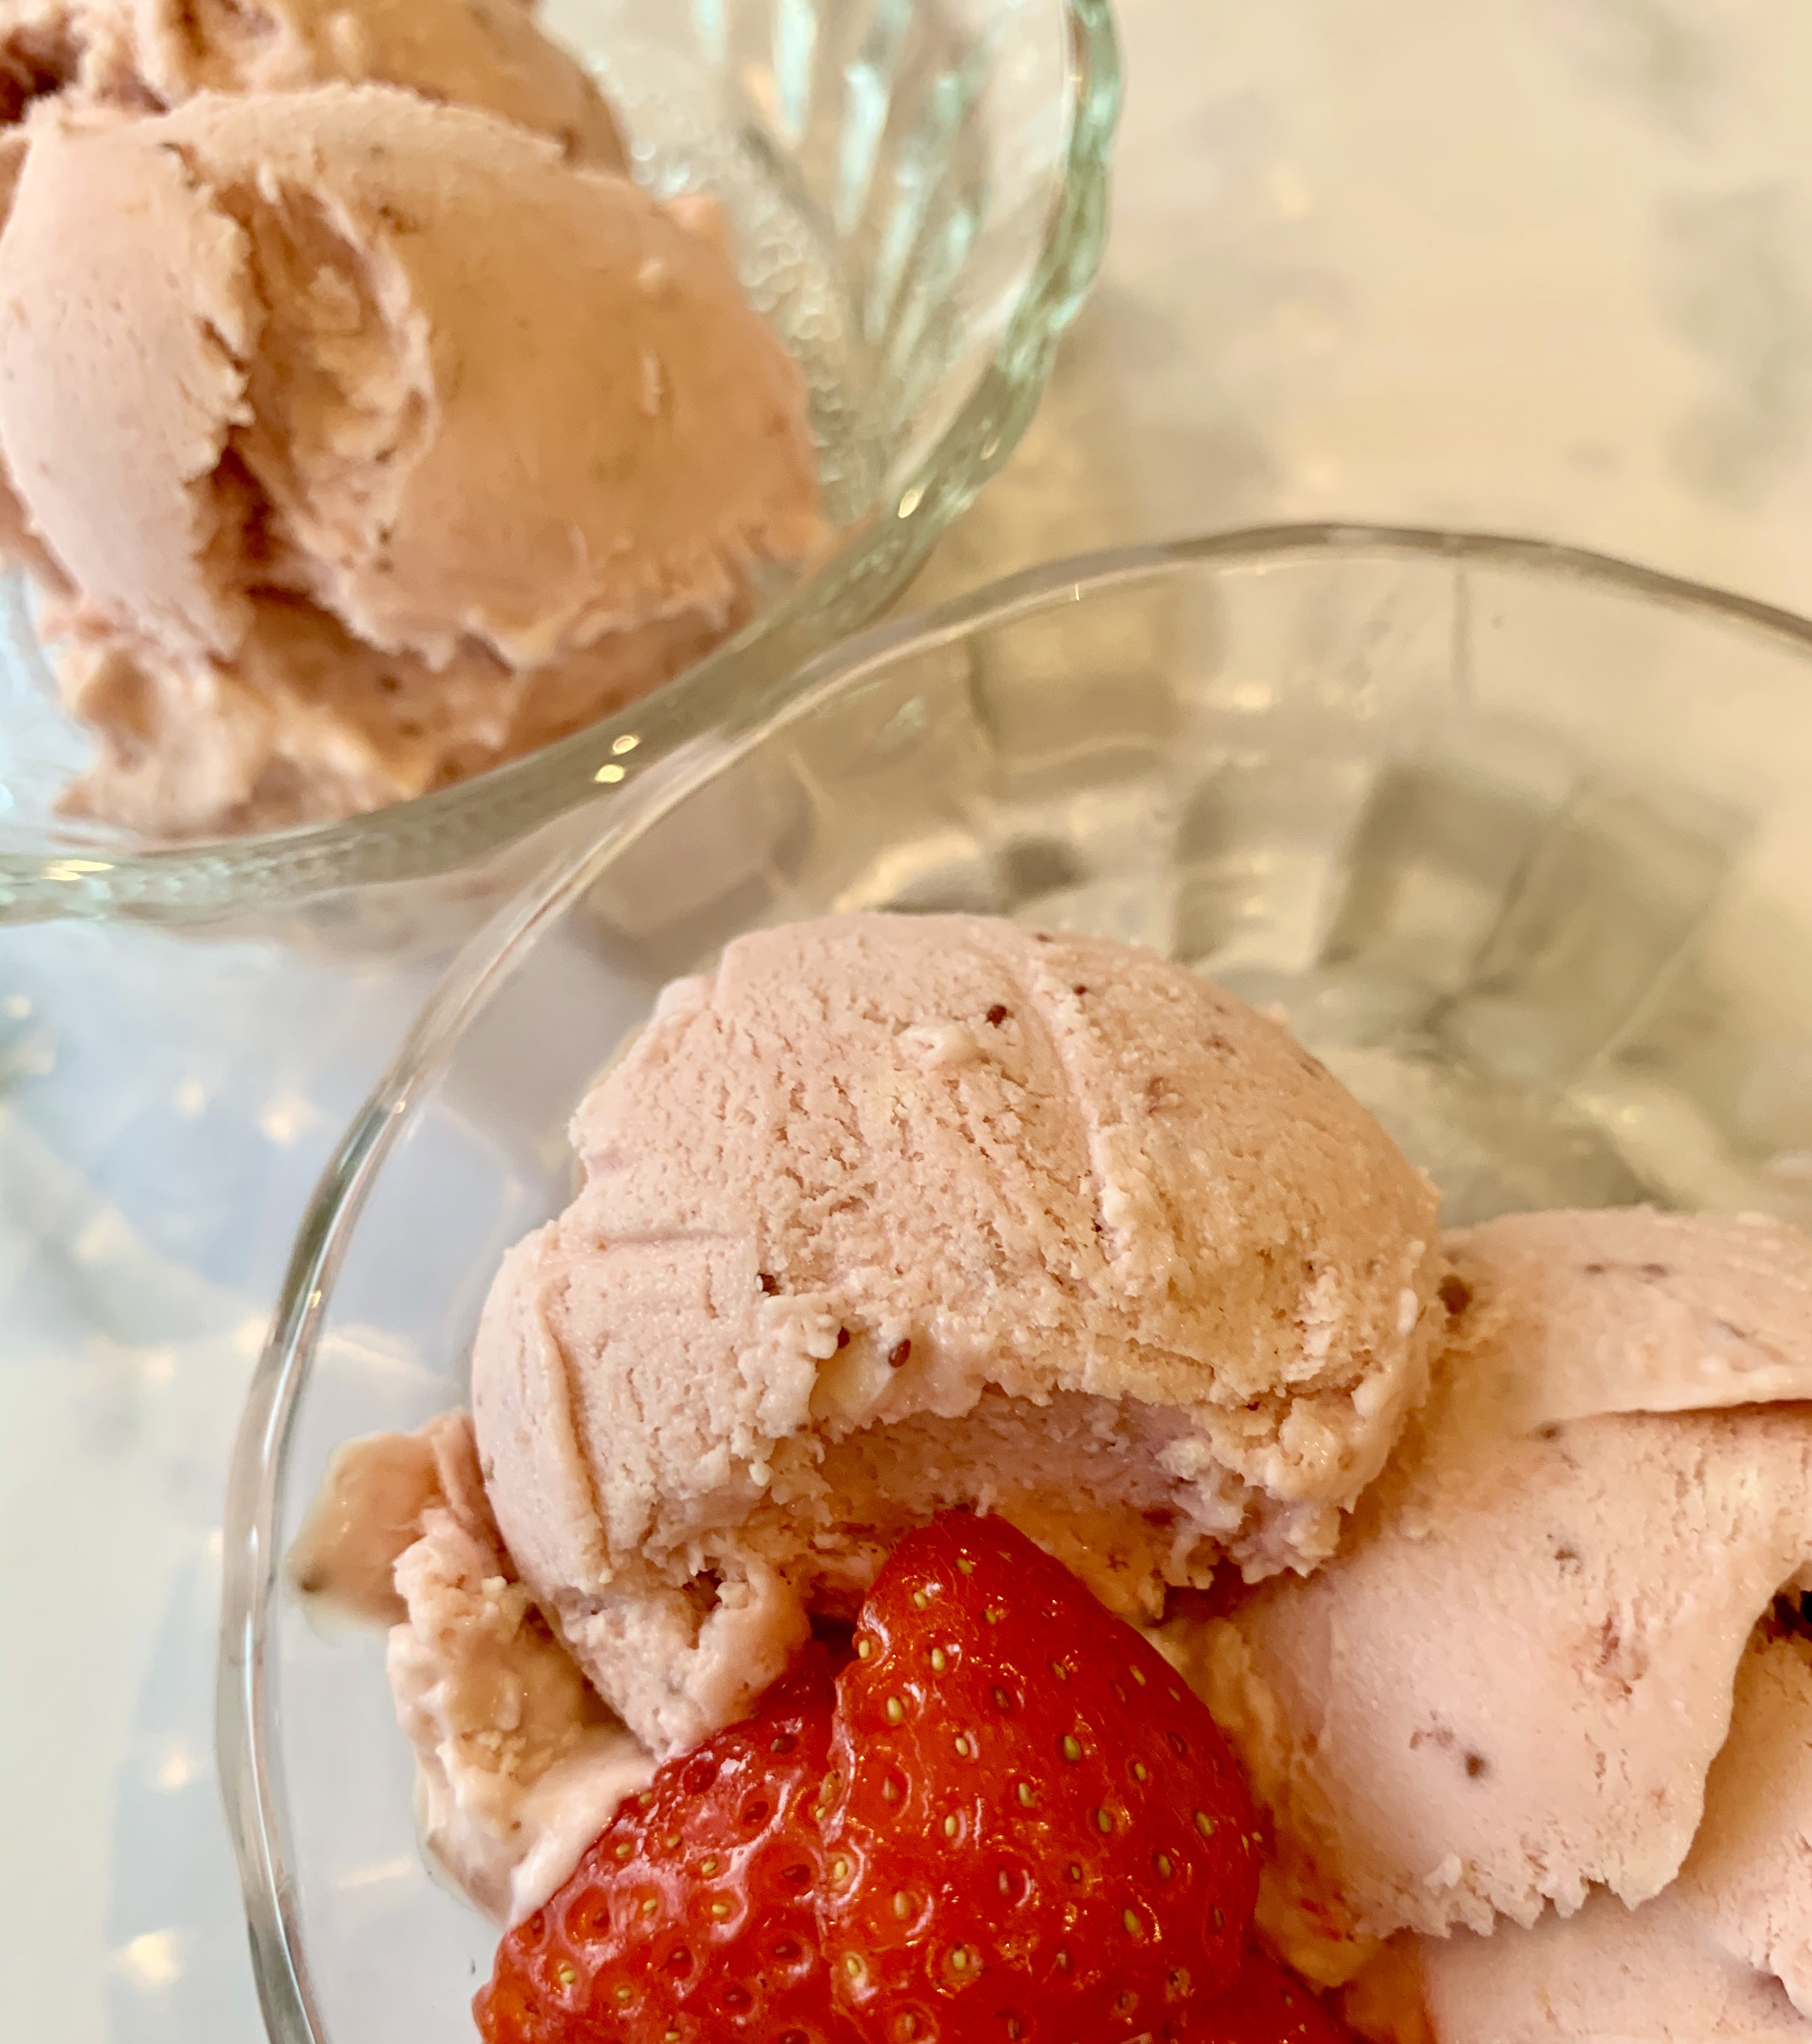
Another ice-cream recipe using condensed milk, so once again super easy – no ice-cream maker needed. By roasting the strawberries the flavour becomes more intense; I have tried making it without roasting the strawberries and believe me it definitely makes a difference, so it is worth the effort!
*You can see the video of this dessert being made by clicking on this link to my Instagram Page
1kg strawberries, hulled and sliced (plus extra to serve – optional)
1 tablespoon white sugar
1 teaspoon vanilla extract
1 can (397g) condensed milk
500ml double cream
- Put the strawberries on a baking try lined with greaseproof paper. Sprinkle over the sugar and toss to combine, spreading them out in one layer. Place in a preheated oven, 160’c fan. Roast for 45 minutes, then stir and cook for a further 15 minutes.
- Remove from the oven and place the strawberries in a processor to blend until smooth. Leave to cool completely.
- Add the condensed milk and vanilla extract to the cooled strawberry mixture, beat with a handheld electric beater to aerate for about a minute.
- Place the cream in another bowl and beat into stiff peaks.
- Add a dollop of cream to the strawberry mixture, fold through and continue to gently add the remaining cream to combine.
- Tip the strawberry mixture into a container and cover with a lid. Freeze for 6-8 hours or overnight. The ice-cream will keep in the freezer for up to 3 months.
- Remove from the freezer 5-10 minutes before serving to soften.
Lemon Posset with Raspberries (Serves 4-6)
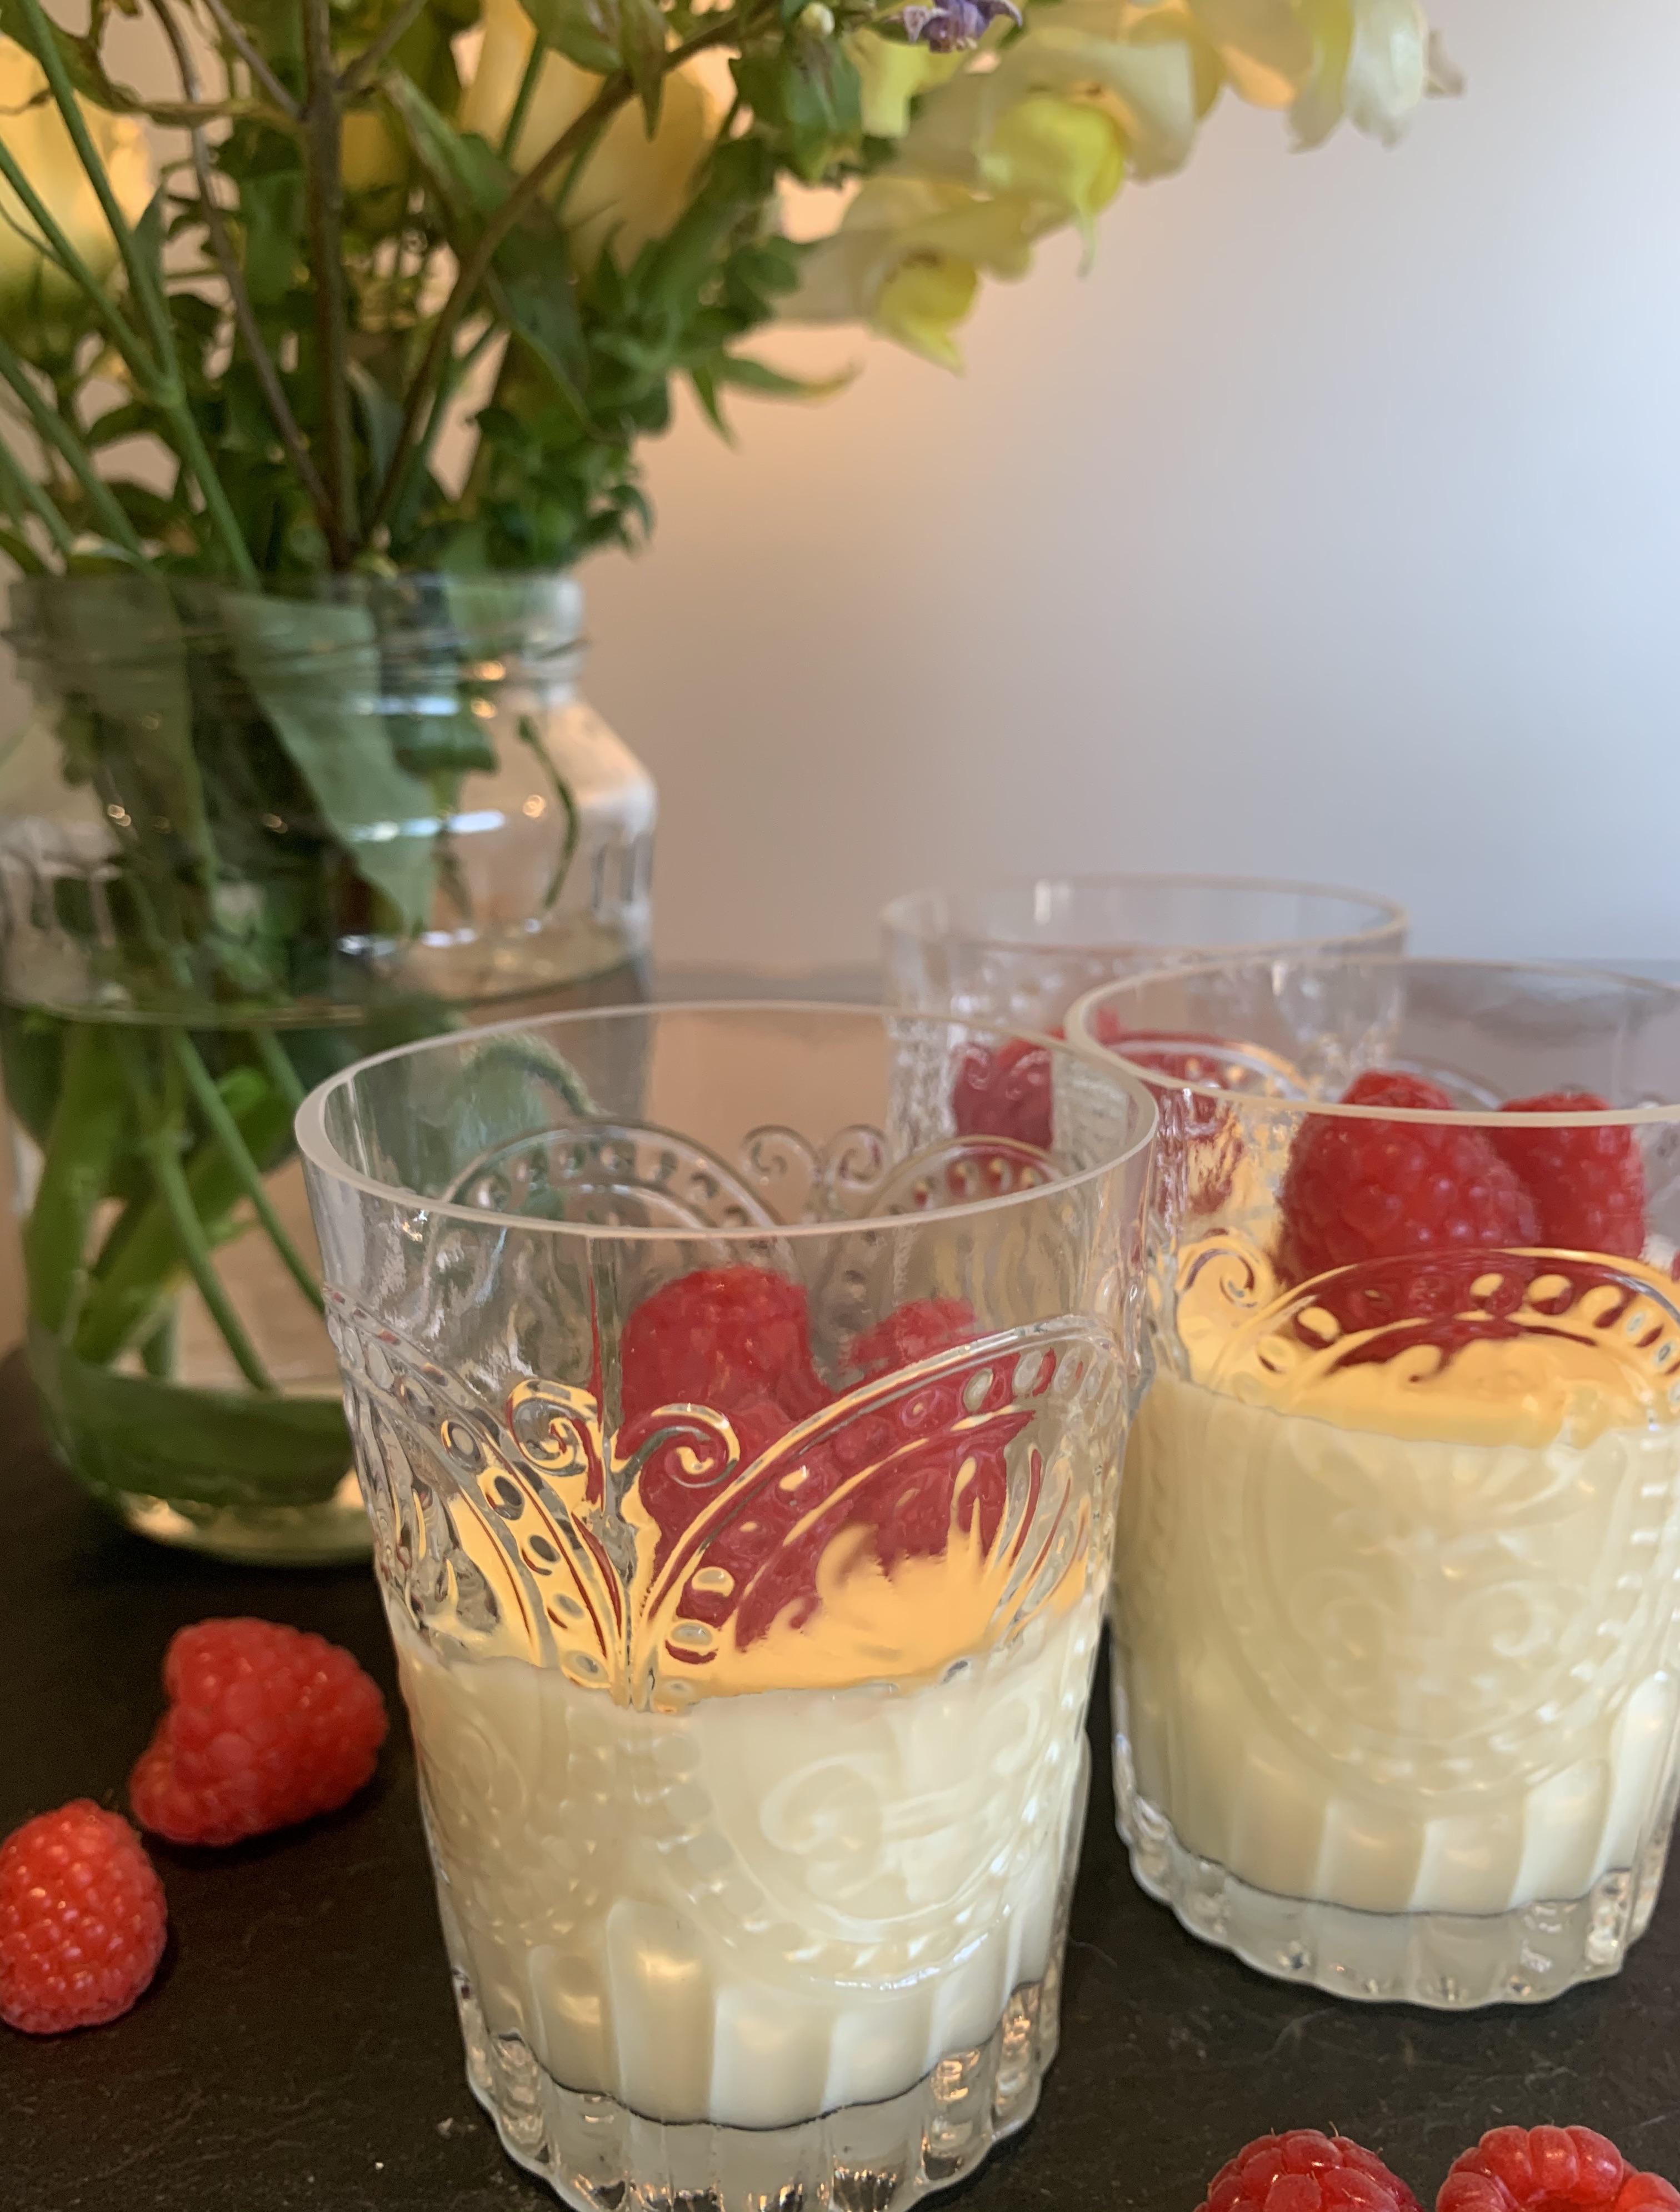
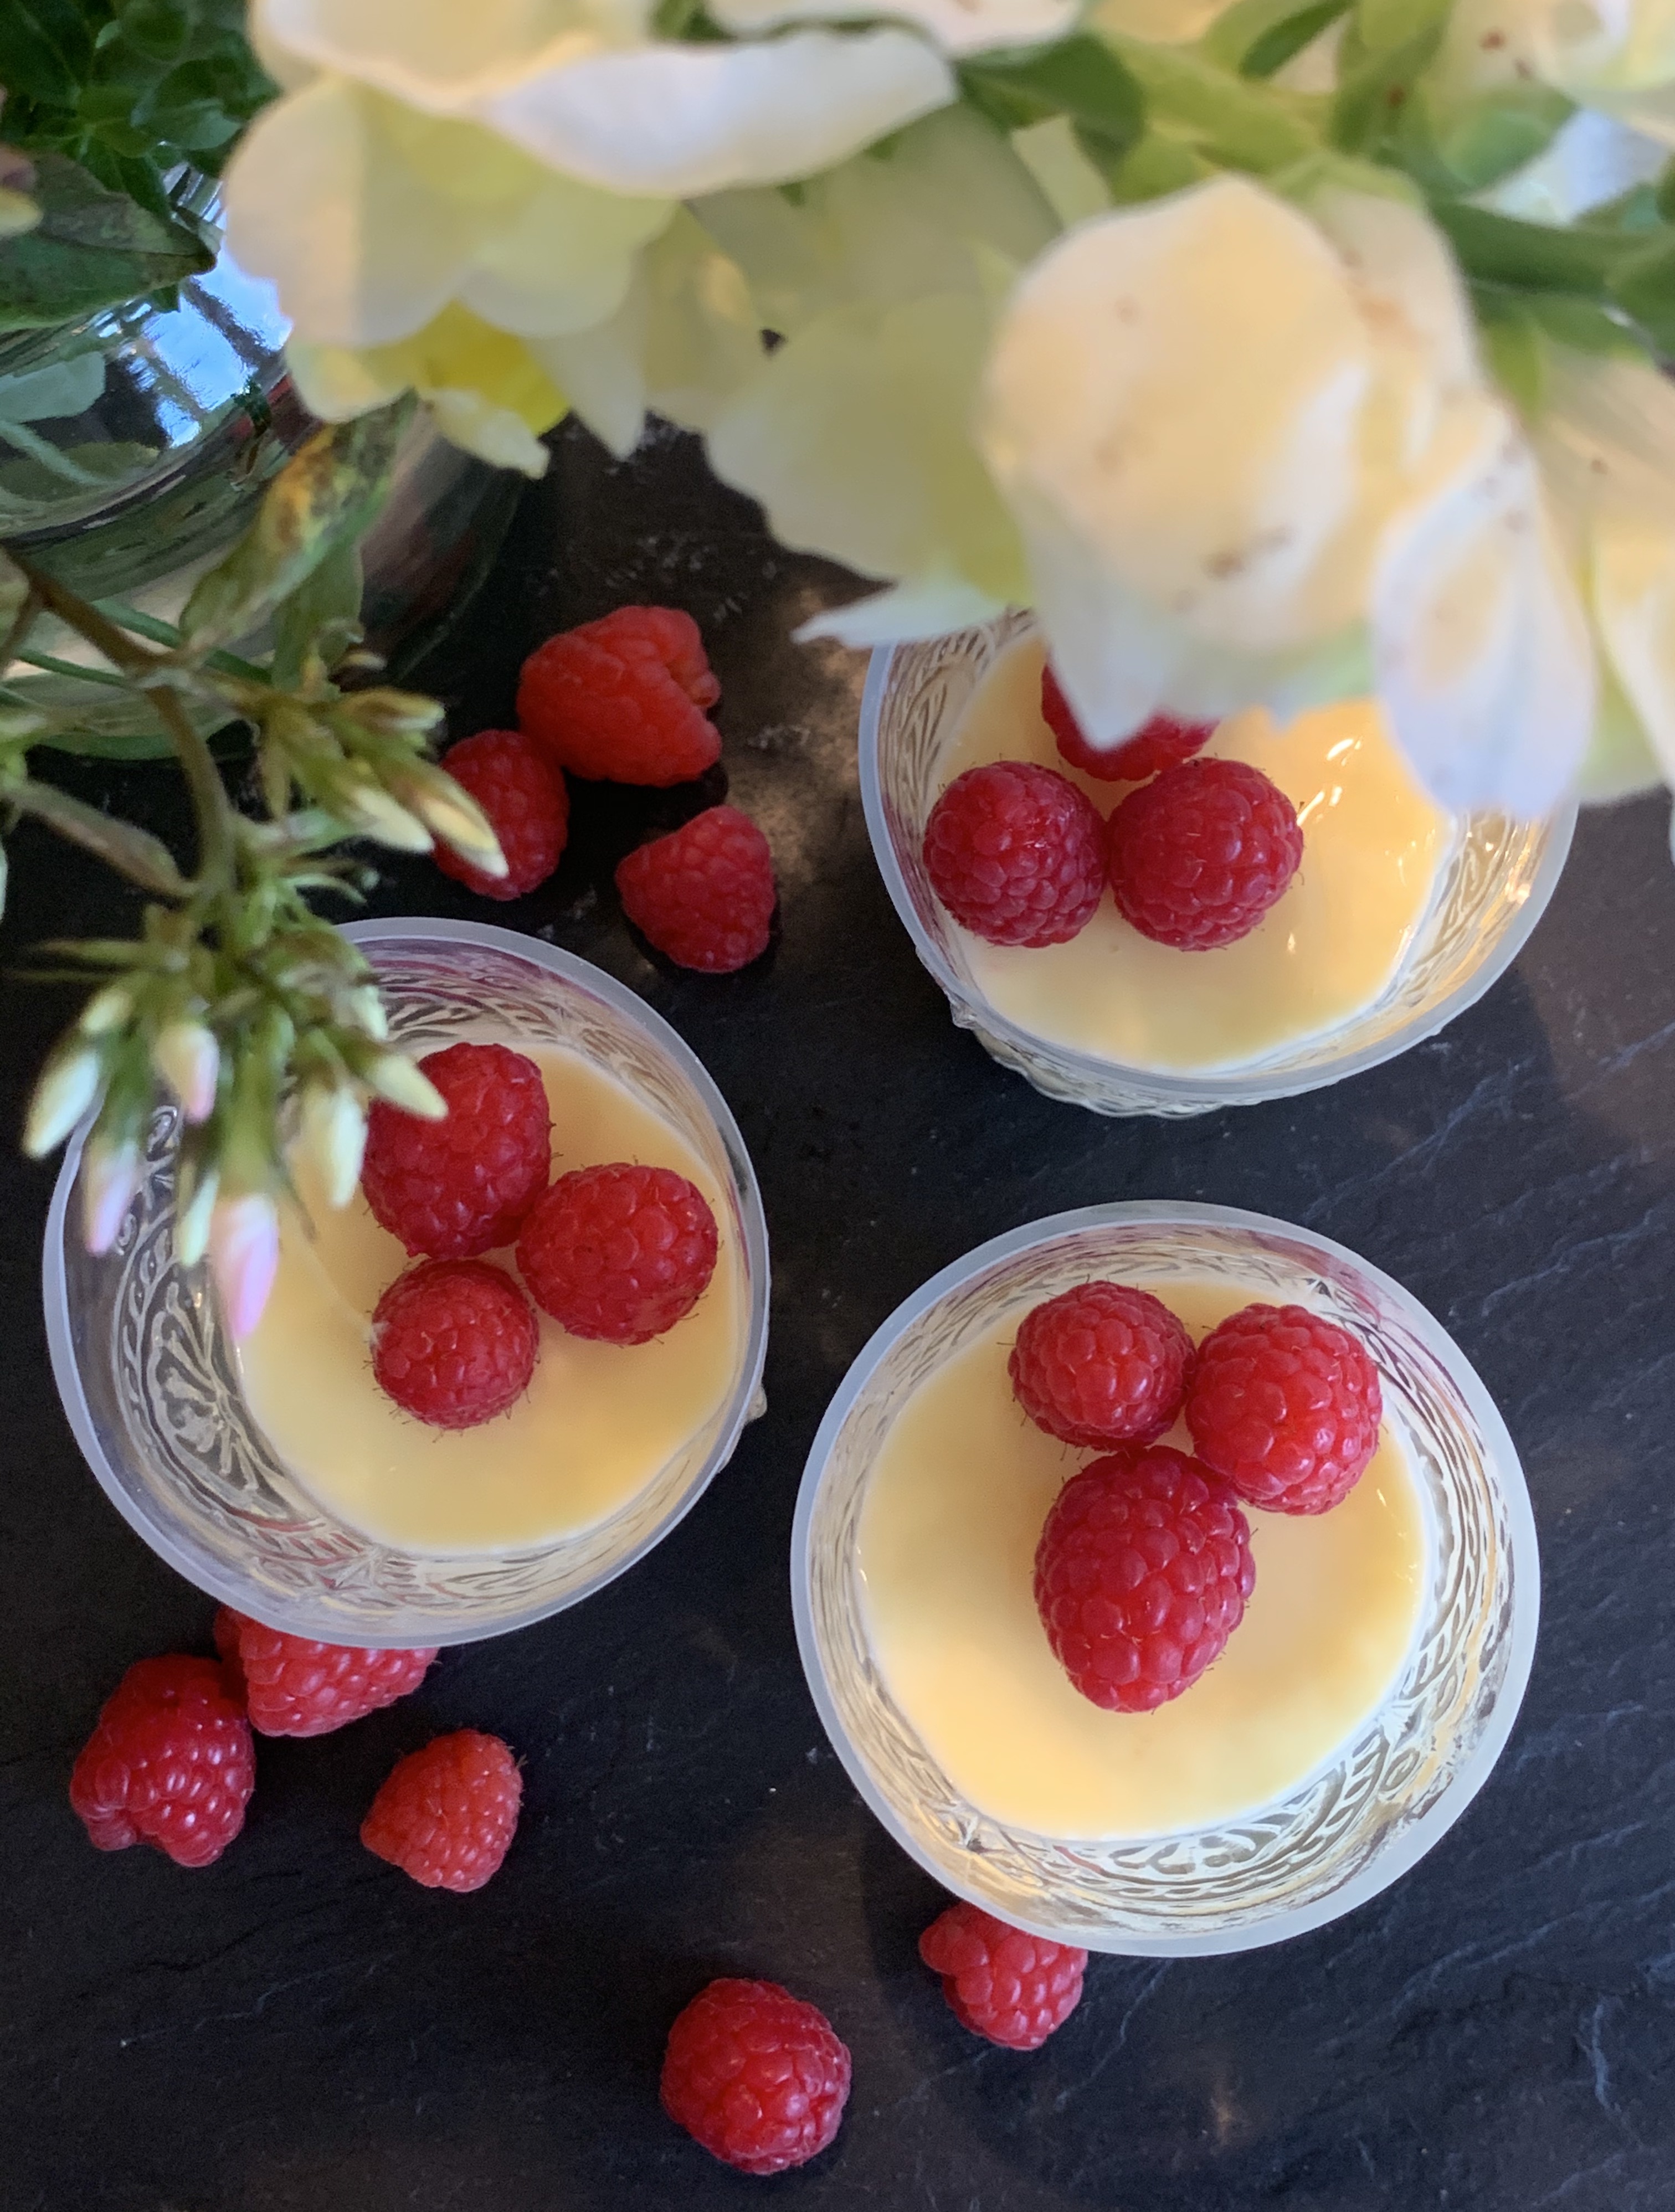
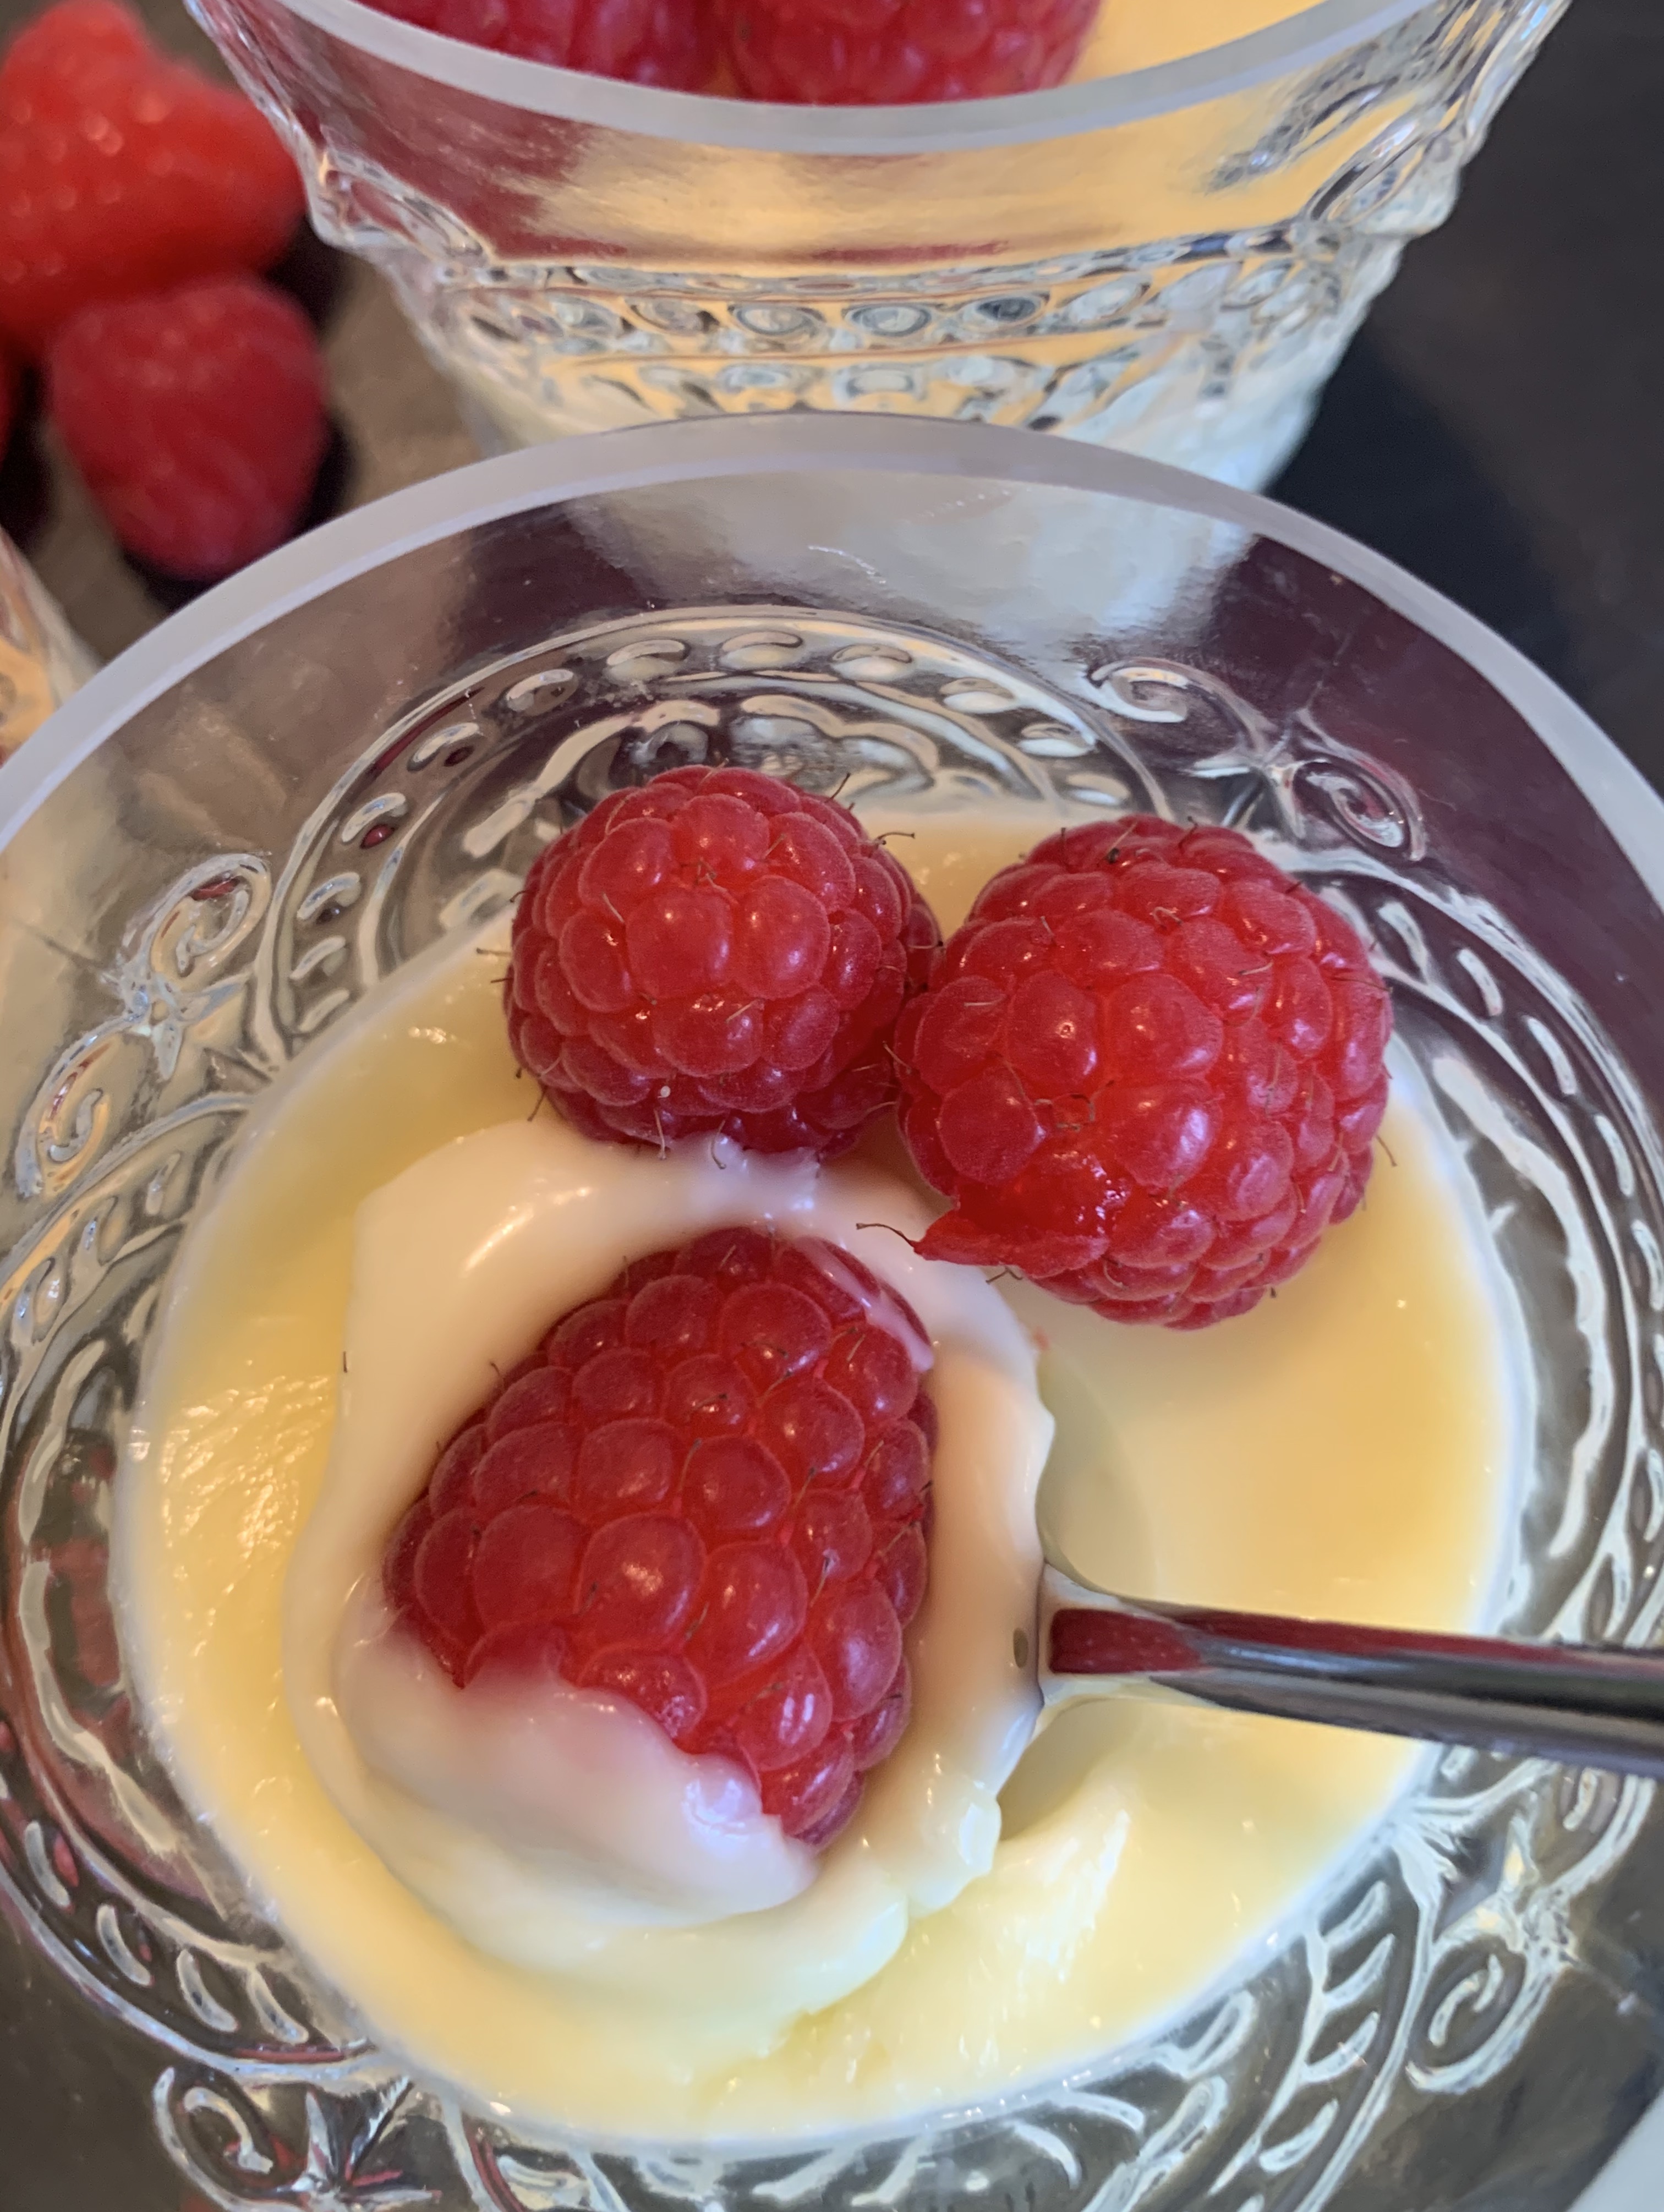
There are lots of slightly different variations of this simple, summer dessert; over the years I have tried a few and this is my favourite…
600ml double cream
150g caster sugar
Finely grated zest of 2 lemons
4 tablespoons of lemon juice (from above lemons)
Raspberries to serve
- Combine the cream, sugar and lemon zest in a small pan over a low heat. Stir constantly until the sugar is completely dissolved, when bubbles start to appear around the edges of the mixture continue to cook without stirring for 2 minutes – Do Not let the mixture come to a rolling boil!
- Remove the pan from the heat, stir in the lemon juice, then strain through a sieve into a jug.
- Pour into small dishes or glasses to serve. This is a rich dessert, so I would keep the portions on the small side.
- Cover each dish with cling film and refrigerate for at least two hours until set.
- Serve with raspberries.
Strawberry Eton Mess (Serves 4)

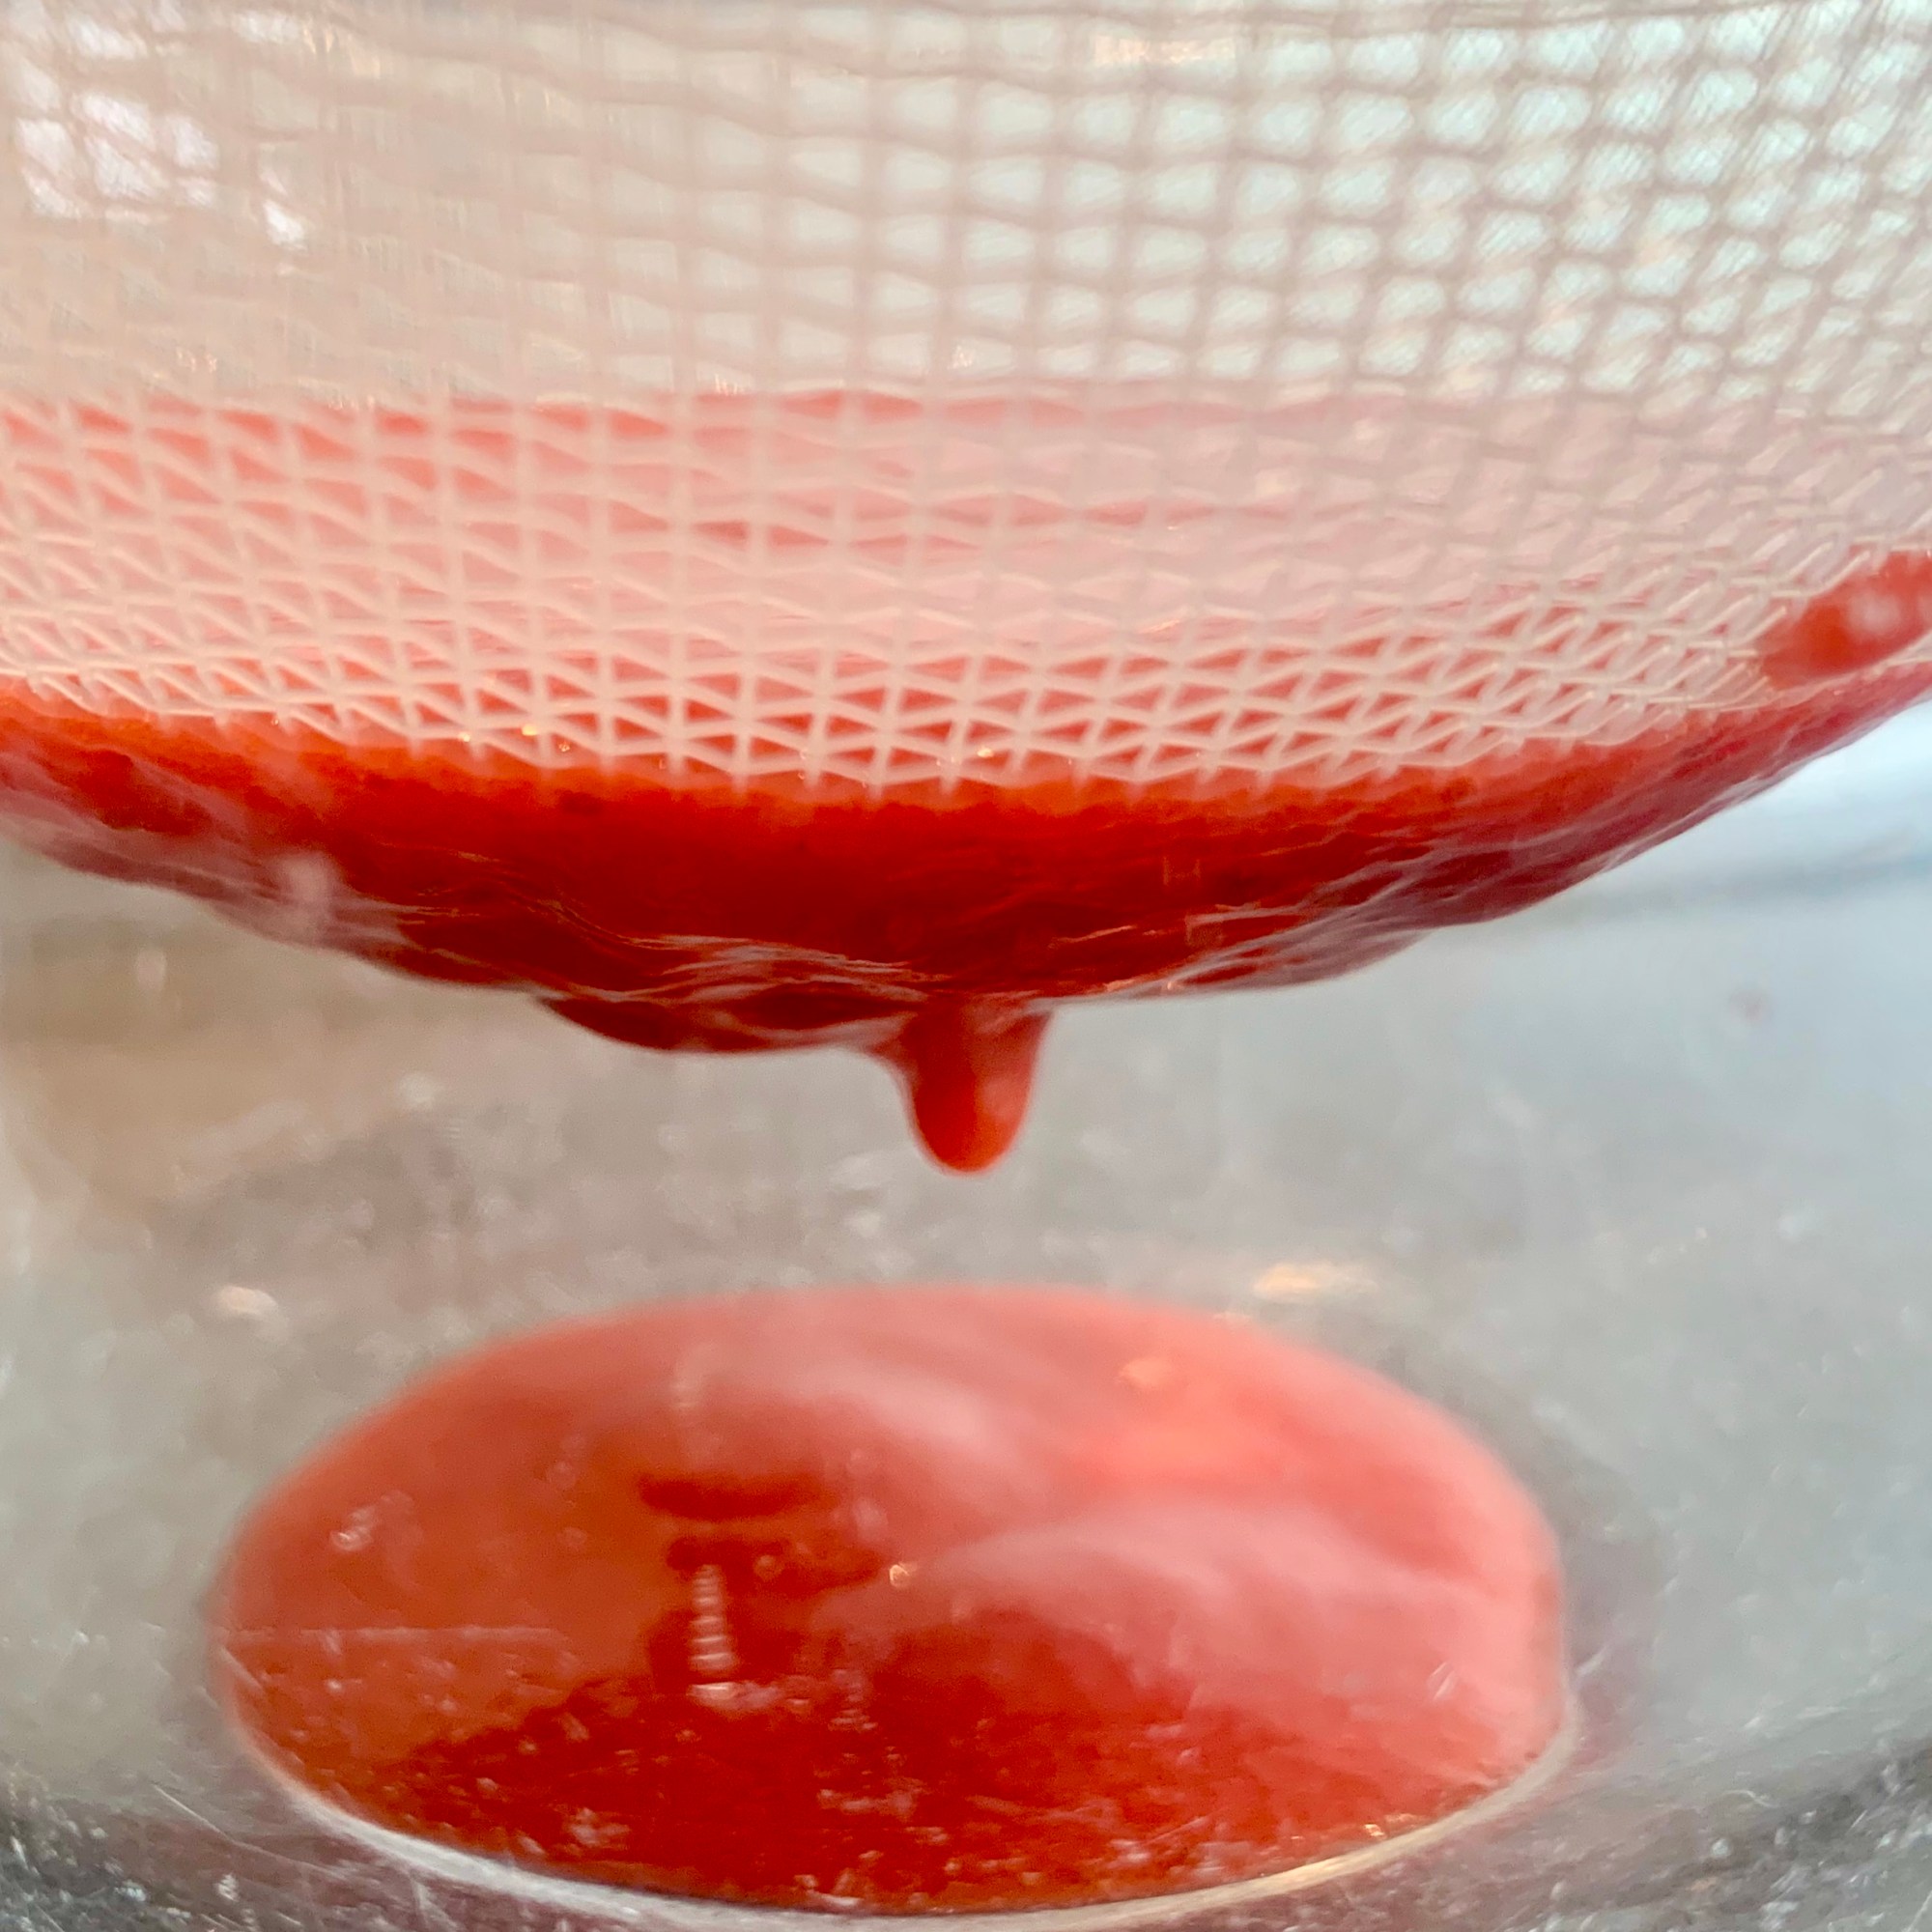
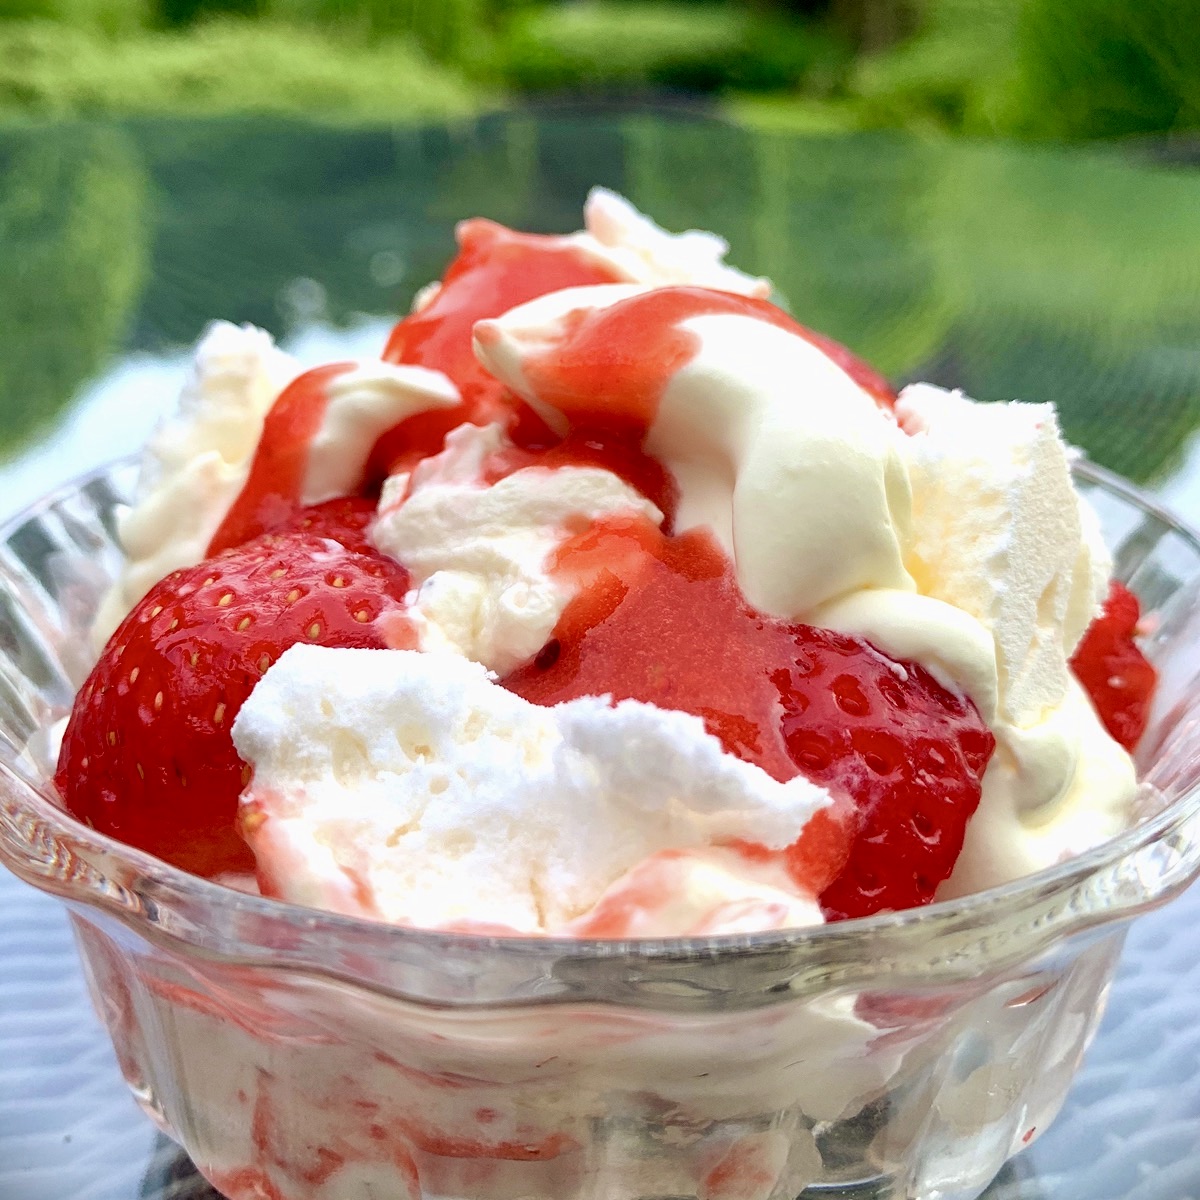
There are numerous recipes for Eton Mess, and I must admit to trying my fair share of them over the years!… I think this one has the perfect balance of ingredients. In my opinion, life is too short to be making meringue to be broken up for an Eton Mess, so for this recipe I recommend you use shop bought meringue; I particularly like the meringue nests by Waitrose, which are slightly chewy in the middle. It is important to assemble this dessert at the last minute as otherwise the meringue will go soggy in the cream. (I do have a fantastic recipe for meringue – if you’re not breaking them up – which I use for Pavlova…you can find the recipe above!)
450g strawberries, hulled
1 rounded tablespoon icing sugar
300ml double cream
4 meringue nests (see note above)
- Place half the strawberries in a blender with the icing sugar and whizz until puréed.
- Pass the purée through a sieve to remove the seeds.
- Whip up the cream until it is just floppy – not too stiff.
- Chop up the remaining strawberries and break up the meringues into roughly 1inch pieces.
- To assemble (see note above): in a bowl, gently mix the meringues and strawberries (reserve a few for decoration) into the cream and gently fold in about 2 tablespoons of the purée.
- Spoon the mixture into individual bowls, top with the reserved strawberries and pour over more of the purée.
- Serve straightaway!
Affogato
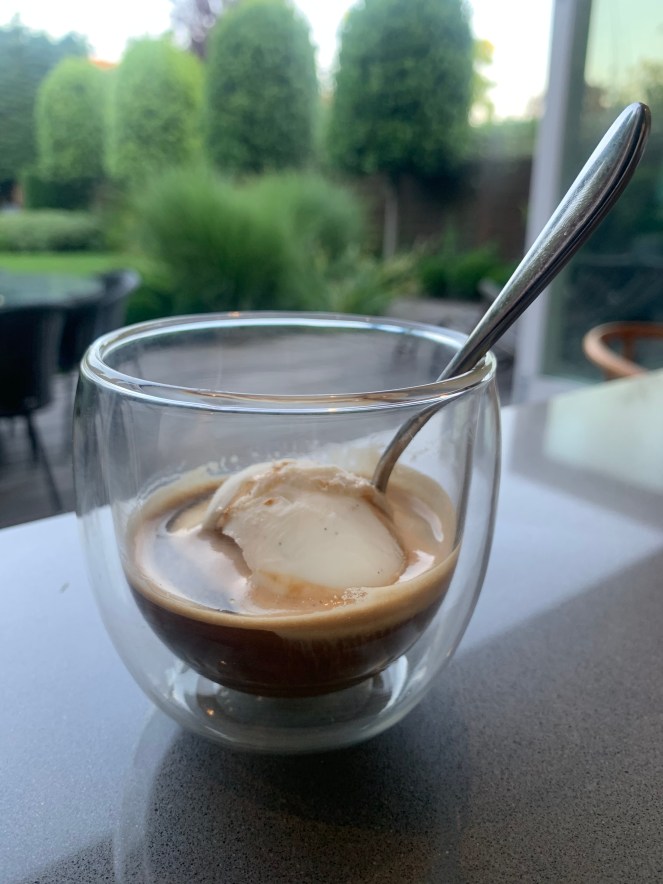
I am sure you all know the recipe for an affogato, but I think we often overlook its simplicity, and forget to make it (or rather I do!), so I thought I’d remind us all with the recipe. The word ‘affogato’ in Italian literally means ‘drowned’ and that is exactly what this recipe is – ice cream drowned in a shot of espresso coffee…
1 scoop of vanilla ice cream
1 shot of espresso coffee (hot!!)
- Place the scoop of ice cream in a small bowl or cup and pour over the hot shot of espresso coffee.
- That’s it!….The perfect pick me up!
